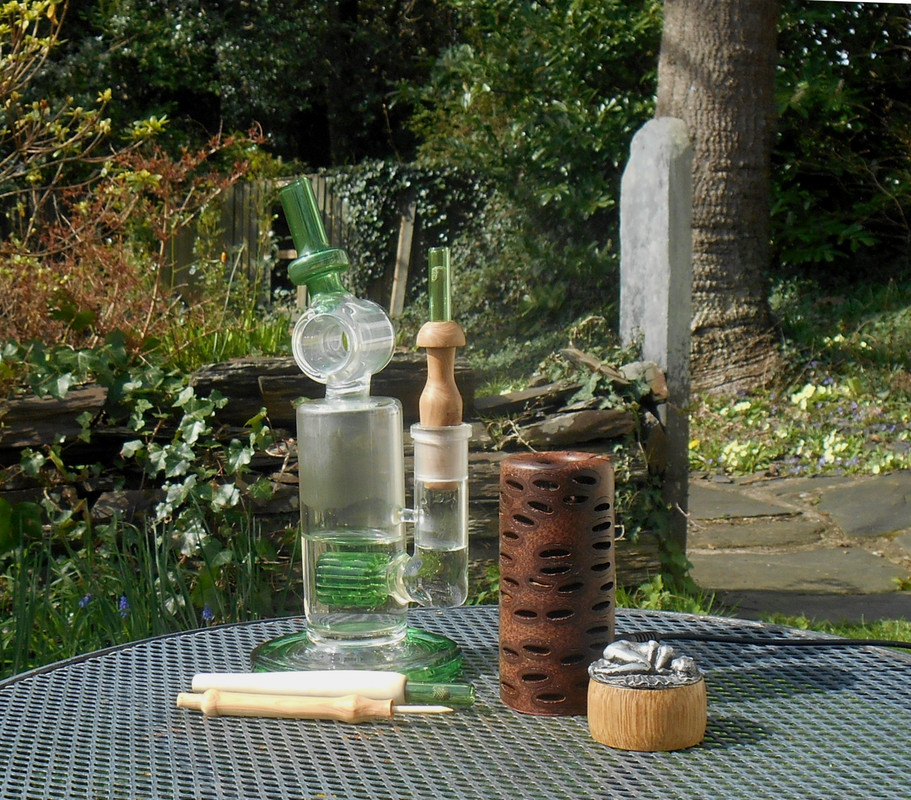
'The Misty Log' - DIY wooden Log Vaporizer

blokenoname

DIY Log Dabbler 😁πŸͺ΅πŸ’ͺπŸ’¨πŸ’¨πŸ’¨
If heater port and bowl are designed to fit each other (which they usually are with Log Vapes), there is no need to hold the Log with your hand, when you use it inverted on a bubbler :shrug:

It's just that most users like to spin the Log a bit on the bowl to get a more even heat distribution.
 

blokenoname

DIY Log Dabbler 😁πŸͺ΅πŸ’ͺπŸ’¨πŸ’¨πŸ’¨

brainiac

log wrangler
Nice work :tup: @Vaporooni
Very tidy construction and it certainly seems to get the job done. Be interesting to hear any build details if you want to share them. In particular, the glass arrangement looks interesting - and how is it secured into the body of the log?

Also, many thanks for the kind words :D
:peace:
 

Vaporooni

Well-Known Member
Accessory Maker
Here is my latest halo log half way taken apart. I use 16 gauge 316 SS wire in place of the insulated wires connected to the halogen bulb connector. I use a glass tube to separate the SS wires. I use a drilled out cork to hold the 18mm glass heater head I ordered from Arizer. I used a SS herb capsule to go over the 20 watt halogen bulb with a layer of rubies. And you can use any power supply you have to power your other log vapes. https://streamable.com/1df4cf
https://streamable.com/q4nlvx
 
Last edited:

brainiac

log wrangler
Thanks very much for sharing this @Vaporooni :tup:

So you've got two different versions here - how do their performances compare?
Clever use of the EQ heater cover and I see its cork base in there. Is it a friction fix holding the base inside the body of the log?
 
brainiac,

Vaporooni

Well-Known Member
Accessory Maker
Thanks very much for sharing this @Vaporooni :tup:

So you've got two different versions here - how do their performances compare?
Clever use of the EQ heater cover and I see its cork base in there. Is it a friction fix holding the base inside the body of the log?
No real comparison, Both perform the same vapor wise. The darker heater cover is just easier on the eyes. And the cork base is held in by friction. I never use anything toxic in my log vapes. One reason I use medical grade SS wires in place of the insulated wires. The medical grade SS wires are also covered in boro glass tubes and rubies and don't heat up. The heat stays right where the halogen bulb sits at the tip of the 18mm heater cover. Here are the sleeves I Use to hold my halogen wand. So if you want one made to order PM me. https://420eng.com/en/collections/heat-protection-sleeves
 
Last edited:

darkstar72

Well-Known Member
@blokenoname and @brainiac - I love this. How does @brainiac do the bottom / innards so it has a one piece outer shell? Can you sketch the a diagram of the insides? I'm assuming he uses a drill press to make the hole all the way through, then attachs the piece to a lathe chuck and then shapes the outer edge. That's my assumption. I see the wooden puck / cap on the bottom. How is that attached? Are cork rings used above that piece and how does the electrical receptor get flush to the wood? Maybe solder once all in place? Thanks a bunch.
 

blokenoname

DIY Log Dabbler 😁πŸͺ΅πŸ’ͺπŸ’¨πŸ’¨πŸ’¨
The holes are usually done last, with a Forstner bit either set into the tailstock of the lathe, or with a drill press.
Hole for the connector is threaded and the crown of the connector is a bit milled down, to be able to recess it.
The base plug also sits in a recess. The base gets usually sealed then, with a nice piece of leather glued on.

A67-C9437-5898-4-F72-B6-EC-B31-FD19-DD622.jpg


Here is Dave @underdog doing an Underdog body:

 
Last edited:

brainiac

log wrangler
More fruit of the lathe :)
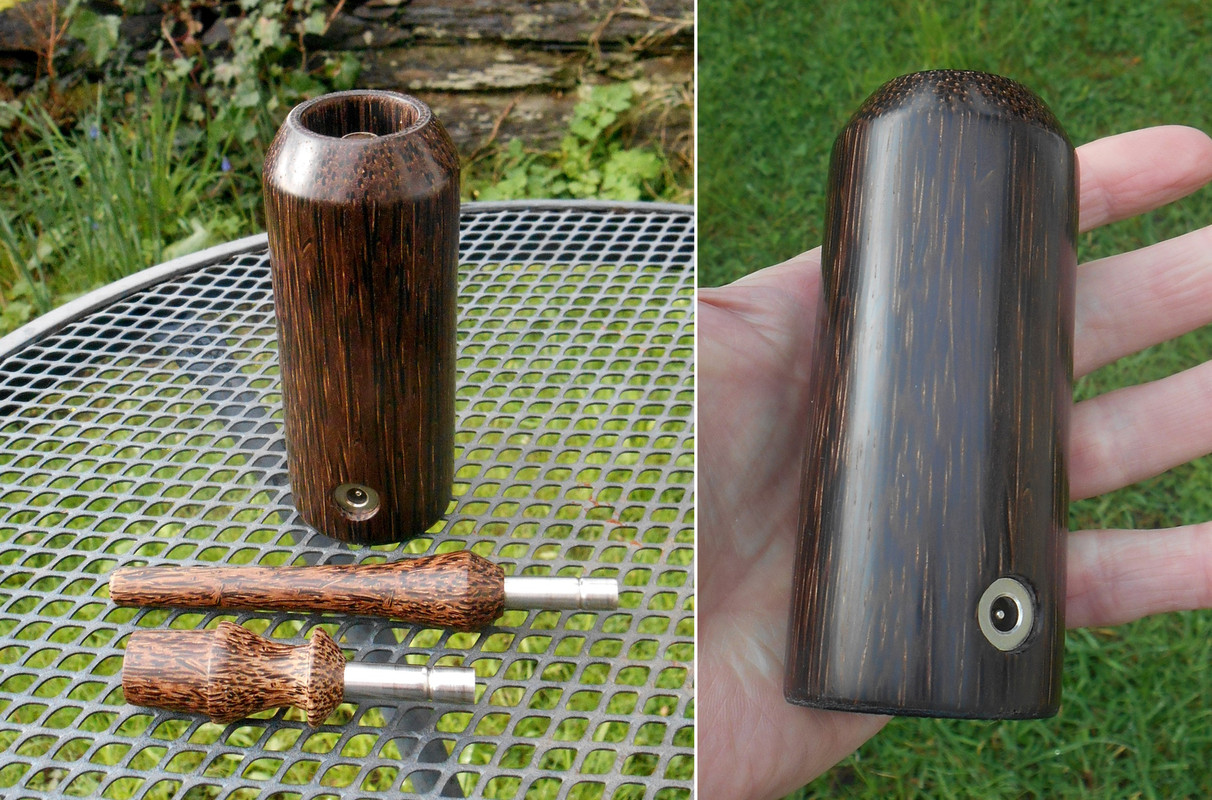
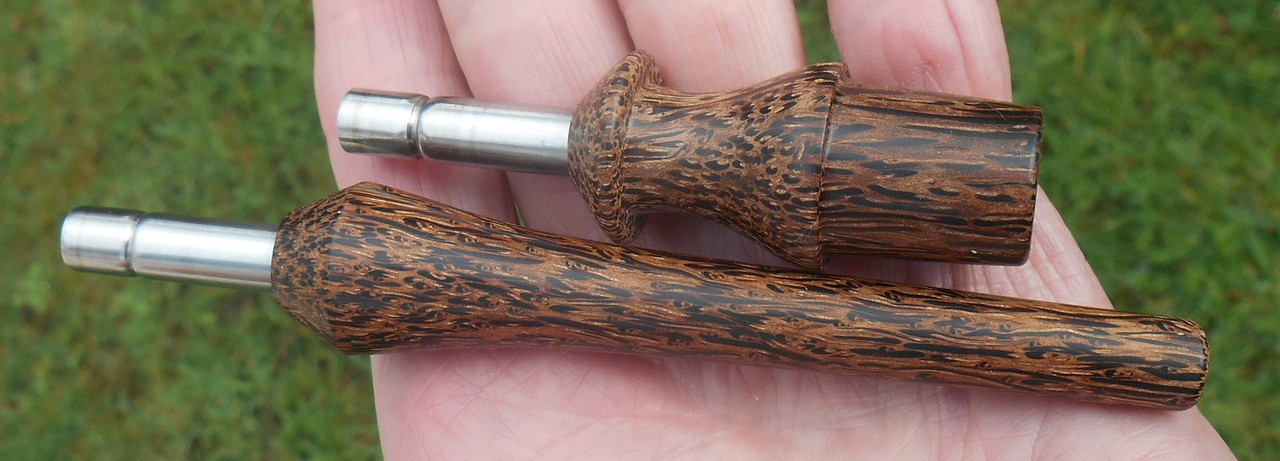
Here's an unusual one. I think Dave UD built a Black Palm log about 10 years ago but I can't find references to anything more recent. Technically, it's not wood - Black Palm is related to grasses and bamboo and it's also known as Palmyra Palm.

Palm-and-table.jpg

Not so easy to work but remarkably dense and heavy. This log weighs 180g or about 6.3oz and feels like a chunk of porcelain. I finished it off with Carnauba wax on the buffing wheel and it really shines.

BP-stem-Won-G.jpg


Bp-top.jpg

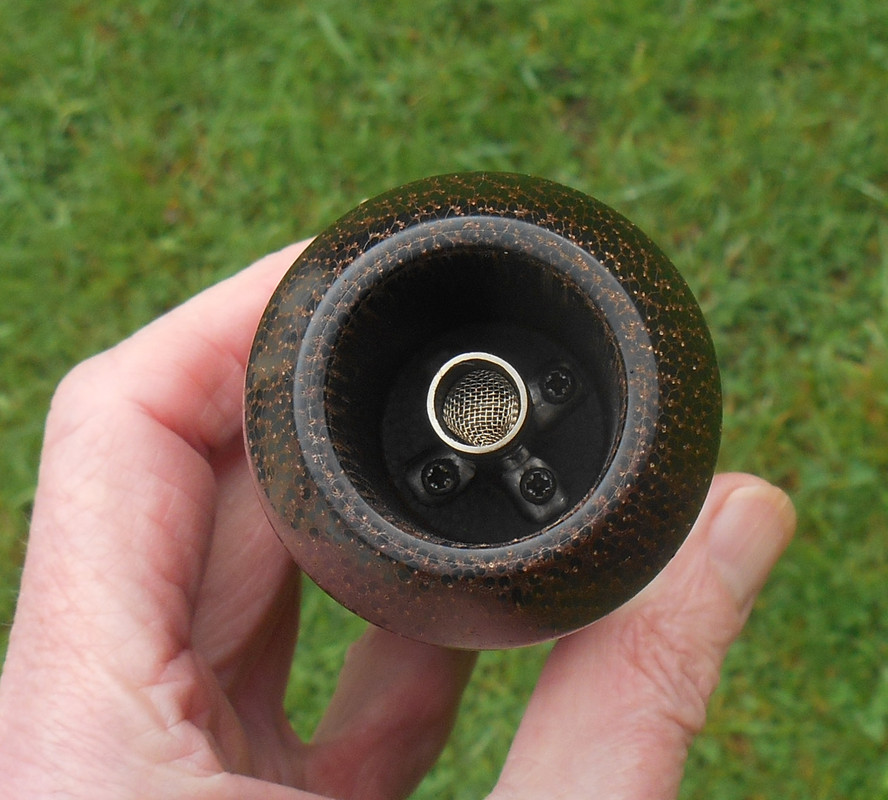
Stainless steel heater cover secured with four screws and housing a 95J20RE resistor (a beefier version of the 25J20RE). It brings home the clouds at around 10.5v or slightly less.

I've also been working on a Banksia Pod unit. Should have some decent pictures of it soon.

Good logging.
:peace:
 

blokenoname

DIY Log Dabbler 😁πŸͺ΅πŸ’ͺπŸ’¨πŸ’¨πŸ’¨
The Black Palm 🌴 πŸ΄β€β˜ οΈ is simply gorgeous!
Another well done job, mate! πŸ˜ŠπŸ‘ :nod:

But folks... just wait and see, what he's done with the Banksia Pod, when he's ready to post that 😈😈😈

Meanwhile, I asked @brainiac to turn me another Padauk body, specifically suited for setting in the glass & GTR style heater covers... and which quite unexpectedly (despite the holidays) already arrived today πŸ“¬πŸ“¦πŸ₯°
Big thanks, mate πŸ™

With a diameter ΓΈ of only 1.5", it's leaner and more lightweight than the 2,0" ΓΈ bodies (and as a result quite ideal for using the unit inverted on a bong or j hook), while sporting an extra deep heater well of 65mm depth, which allows me to make the 13mm/10mm OD/ID glass heater cover 60mm long. As the glass heater covers are set into a cork base, ye longer the heater cover, ye less heat it's conducting down to its base. Means the cork base is staying much cooler now and is so much better prevented from drying out and getting brittle over time πŸ‘
(In comparison, the heater well in the 2.0" ΓΈ bodies are only 45mm deep, taking a stainless steel or Ti heater cover of only 40mm length, which gets directly screwed unto the wooden base of the heater well).

So... after the Easter Bunny 🐰 brought its gifts early, I immediately set out to do some glass cutting, soldering and leather trimming 😎

These are the results 😁πŸͺ΅ πŸ’¨πŸ’¨πŸ’¨πŸ’ͺ


Now for some serious testing :science:
 

brainiac

log wrangler
You've done a excellent job on that GTR style Padauk @blokenoname :tup: glad I was able to help in a minor way. Must have a bash at one of those.

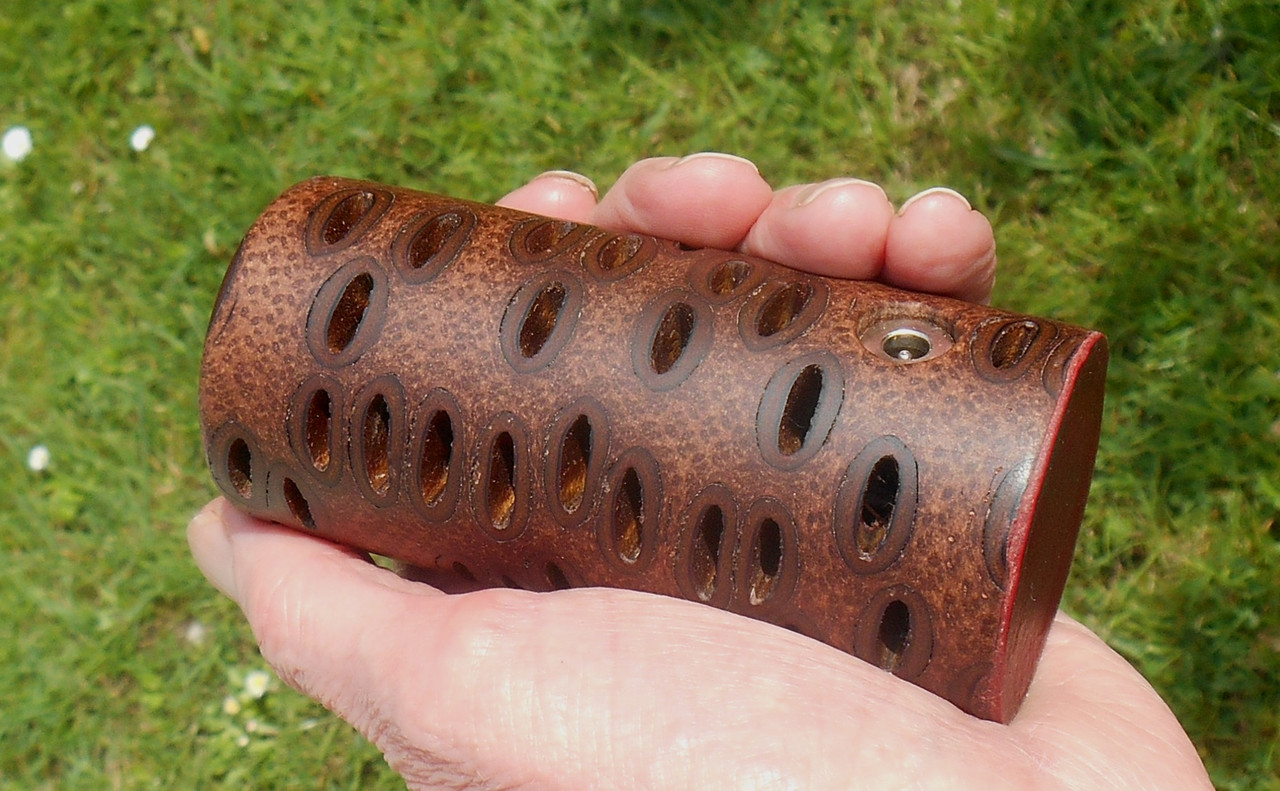
Here's the Banksia Pod log I mentioned:

Bank-hand.jpg

The great thing about DIY - as Blokenoname demonstrates above - is that you can build whatever you want. It's an elevated form of self-indulgence - not merely owning the log you want but more importantly, gaining the satisfaction of having built it.

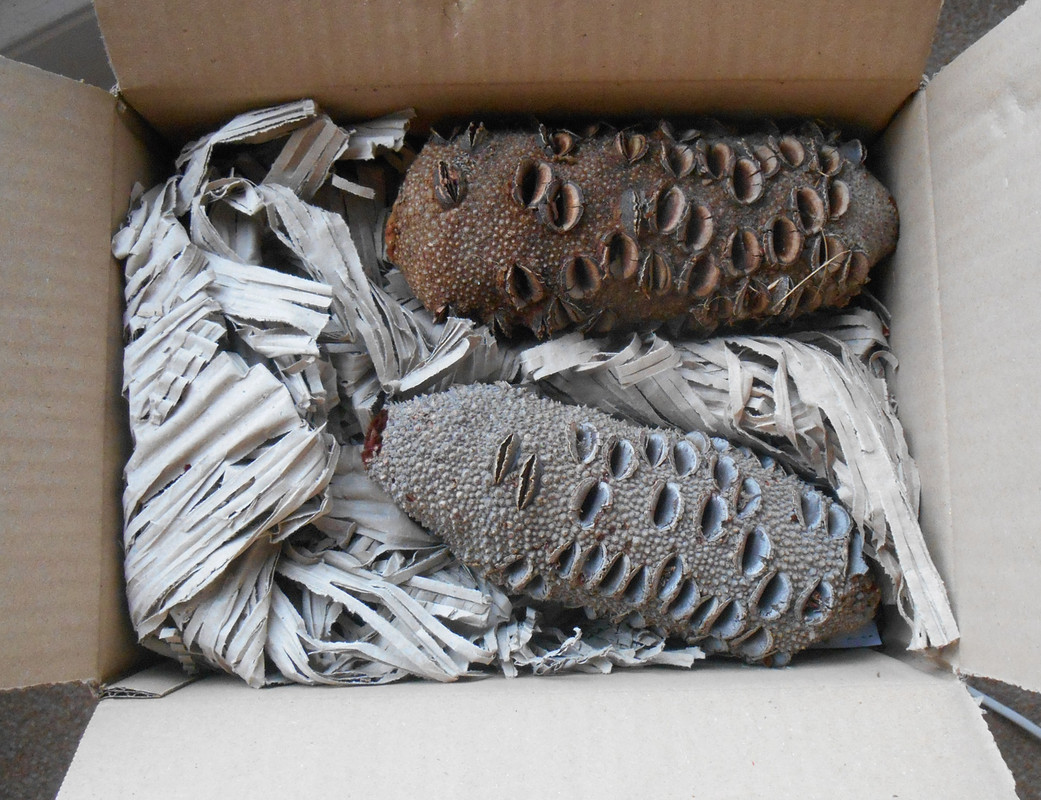
There's something especially exotic about a Banksia log and that became evident from the moment the pod was unboxed.

1-Bank-unbox-cs.jpg

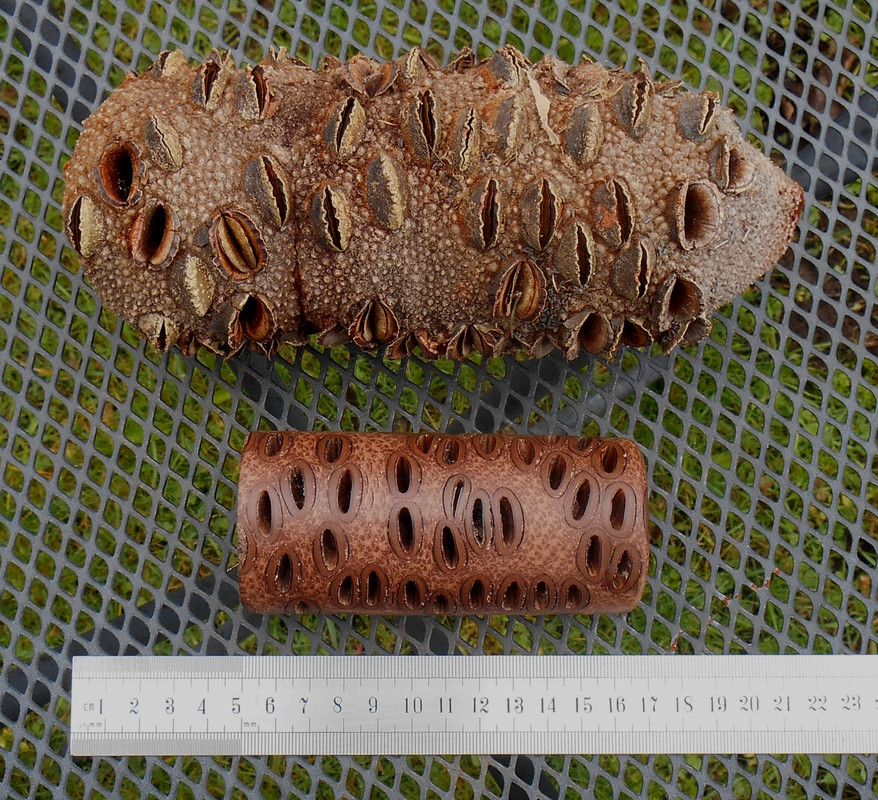
It's wood.. but somehow not wood. Put it on the lathe, switch on and the seed capsules fly out of those eyelets. There's some fluffy fibrous material to remove and some woody material too. Facemask and good ventilation highly recommended.

pod-and-log.jpg

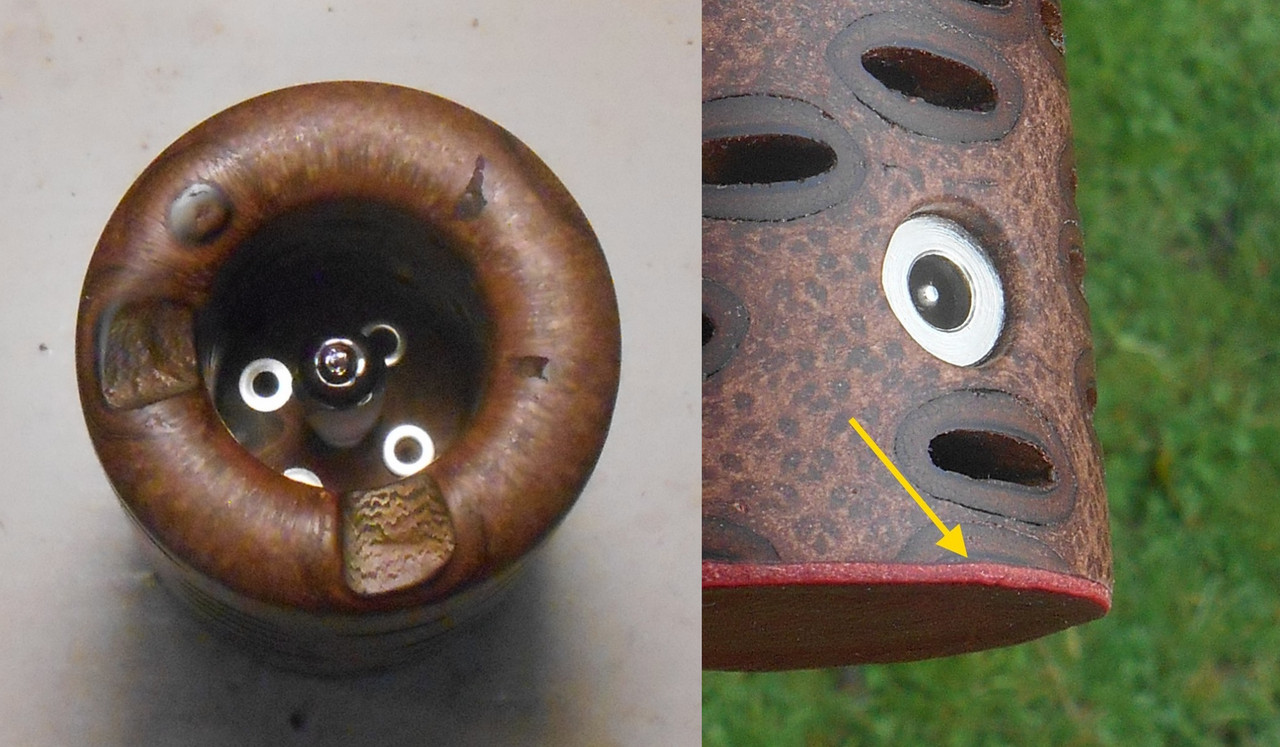
A few build details. Most of the work follows the standard pattern - take it to the round, drill base and heater wells, then through hole and connector hole, countersink connector hole. Then sand, sand, sand. The eyelets add a couple of minor complications. Where they intersect with the base they need to be filled in, otherwise the leather base covering will have nothing to adhere to. I did this by mixing Banksia dust from the lathe work with PVA into a paste and using that as a filler, then sanding to smooth when set. The other issue was that I usually place the centre of the connector hole 1.5cm above the base of the log. Here it had to be 2cm to avoid cutting through one of the eyelets.

3-Washers-and-fill.jpg

Left shows the heater well with IR halogen bulb in position and four washers over the heater cover screw guide holes. This ensures a little extra air inlet space and reduces heat transmission from the heater cover to the log. On the right the yellow arrow shows an infilled eyelet.

4-Bank-Tops-2.jpg

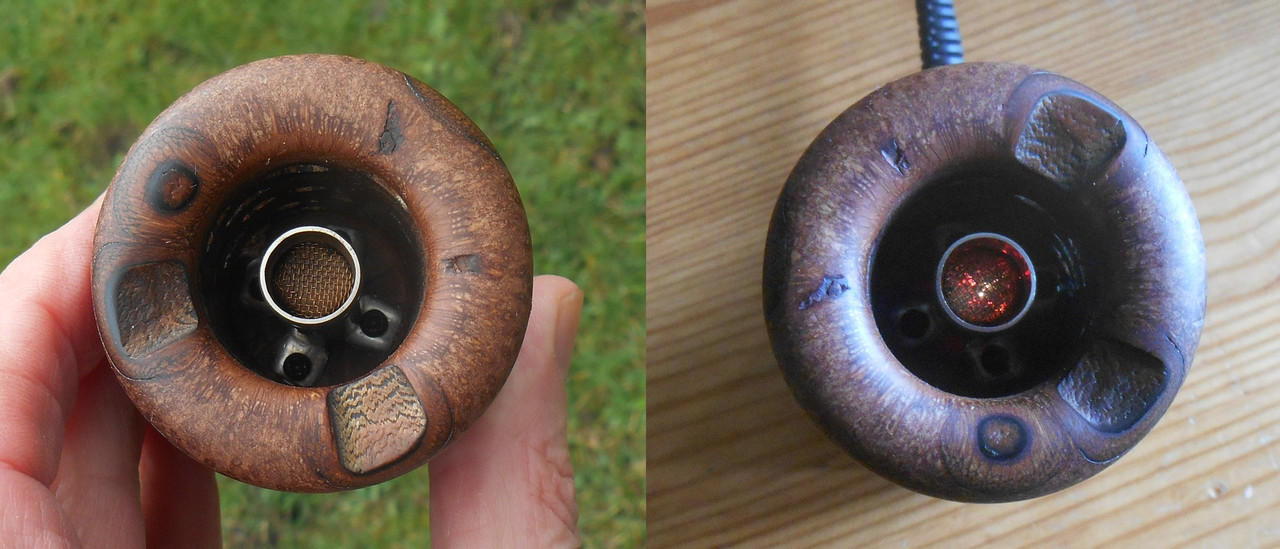
Completed unit. Notice I used anodized stainless steel screws to secure the heater cover. This makes them practically invisible in the eyelets. The warm red glow of the infra red bulb provides an additional bonus in a Banksia unit as it's visible not only from the top down...

5-Bank-Lights.jpg

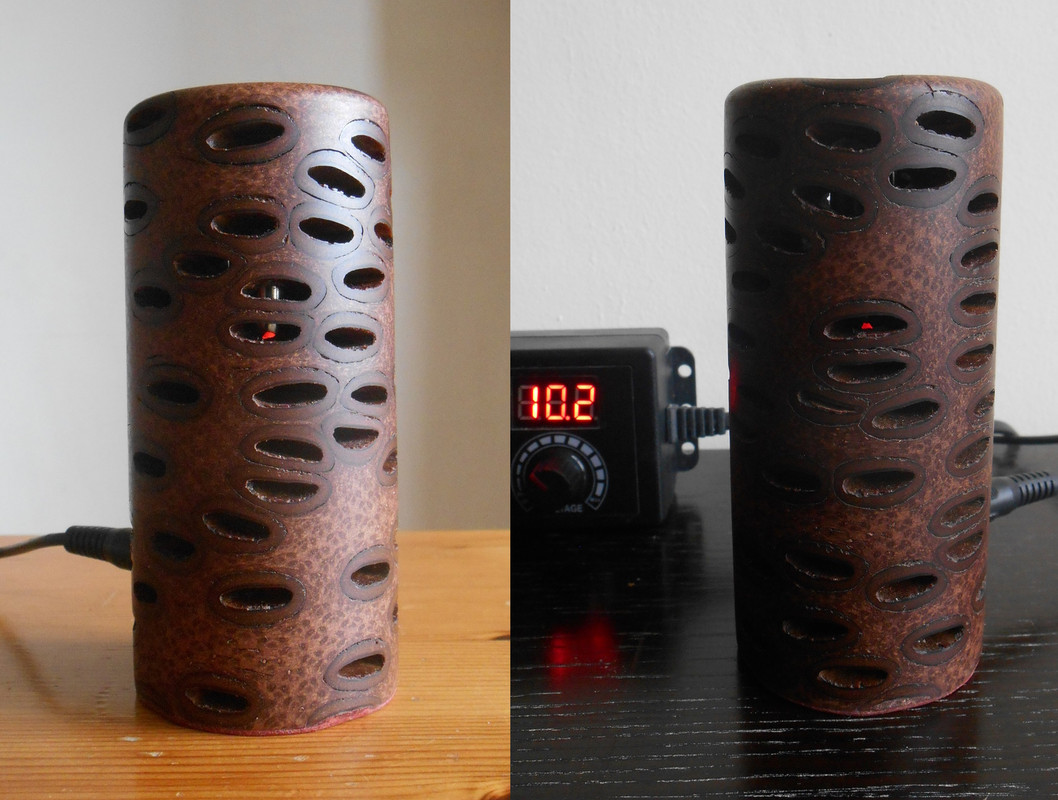
It's quite a subtle effect and difficult to capture on film but light escapes through the air inlets at the base of the heater cover and is occasionally visible through the eyelets.

I removed the minimum amount of pod on the lathe so it's a decent size: 11.2cm or 4.4" in height and 5.1cm or 2" in girth.

6-Bank-flowers.jpg

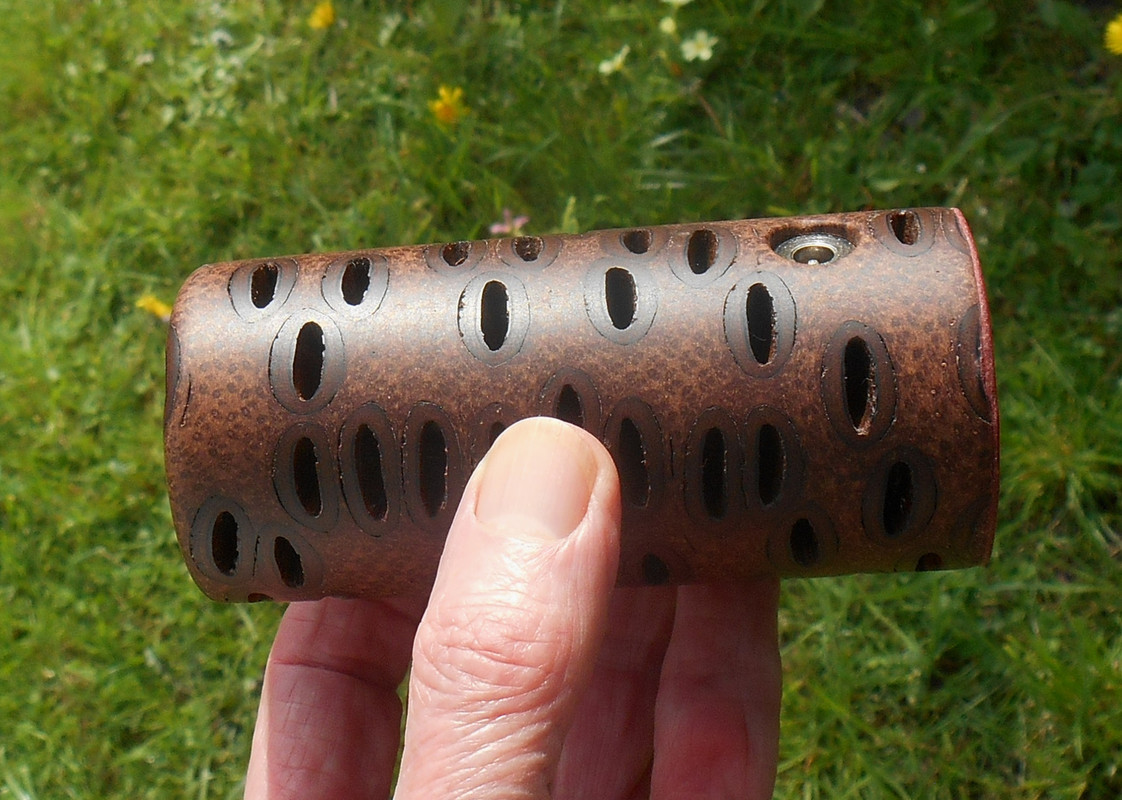
Works fine. Cooks herb a treat at between 10 and 10.5v which is good considering that due to those eyelets there's very little 'heat sink' effect.

So, utterly unique - both in appearance and tactile quality. My work on your planet is now complete :D

7-Al-fresco.jpg

Good logging.
:peace:


Abysmal Vapor

Supersniffer 2000 - robot fart detection device
You've done a excellent job on that GTR style Padauk @blokenoname :tup: glad I was able to help in a minor way. Must have a bash at one of those.

Here's the Banksia Pod log I mentioned:

Bank-hand.jpg

The great thing about DIY - as Blokenoname demonstrates above - is that you can build whatever you want. It's an elevated form of self-indulgence - not merely owning the log you want but more importantly, gaining the satisfaction of having built it.

There's something especially exotic about a Banksia log and that became evident from the moment the pod was unboxed.

1-Bank-unbox-cs.jpg

It's wood.. but somehow not wood. Put it on the lathe, switch on and the seed capsules fly out of those eyelets. There's some fluffy fibrous material to remove and some woody material too. Facemask and good ventilation highly recommended.

pod-and-log.jpg

A few build details. Most of the work follows the standard pattern - take it to the round, drill base and heater wells, then through hole and connector hole, countersink connector hole. Then sand, sand, sand. The eyelets add a couple of minor complications. Where they intersect with the base they need to be filled in, otherwise the leather base covering will have nothing to adhere to. I did this by mixing Banksia dust from the lathe work with PVA into a paste and using that as a filler, then sanding to smooth when set. The other issue was that I usually place the centre of the connector hole 1.5cm above the base of the log. Here it had to be 2cm to avoid cutting through one of the eyelets.

3-Washers-and-fill.jpg

Left shows the heater well with IR halogen bulb in position and four washers over the heater cover screw guide holes. This ensures a little extra air inlet space and reduces heat transmission from the heater cover to the log. On the right the yellow arrow shows an infilled eyelet.

4-Bank-Tops-2.jpg

Completed unit. Notice I used anodized stainless steel screws to secure the heater cover. This makes them practically invisible in the eyelets. The warm red glow of the infra red bulb provides an additional bonus in a Banksia unit as it's visible not only from the top down...

5-Bank-Lights.jpg

It's quite a subtle effect and difficult to capture on film but light escapes through the air inlets at the base of the heater cover and is occasionally visible through the eyelets.

I removed the minimum amount of pod on the lathe so it's a decent size: 11.2cm or 4.4" in height and 5.1cm or 2" in girth.

6-Bank-flowers.jpg

Works fine. Cooks herb a treat at between 10 and 10.5v which is good considering that due to those eyelets there's very little 'heat sink' effect.

So, utterly unique - both in appearance and tactile quality. My work on your planet is now complete :D

7-Al-fresco.jpg

Good logging.
:peace:


Amazing , i always wanted one of those logvapes, where did you bought the fruits from :D. I remeber there was a story about he Banskia man kidnapping children :D
 

Haze Mister

Verdant Bloomer
Manufacturer
More fruit of the lathe :)
Here's an unusual one. I think Dave UD built a Black Palm log about 10 years ago but I can't find references to anything more recent. Technically, it's not wood - Black Palm is related to grasses and bamboo and it's also known as Palmyra Palm.

Palm-and-table.jpg

Not so easy to work but remarkably dense and heavy. This log weighs 180g or about 6.3oz and feels like a chunk of porcelain. I finished it off with Carnauba wax on the buffing wheel and it really shines.

BP-stem-Won-G.jpg


Geez dude, you're on fire! those are stunning pieces!

Means the cork base is staying much cooler now and is so much better prevented from drying out and getting brittle over time
πŸ‘
I did treat a piece of cork sheet with silicone gel recently and it came out pretty good... :2c:
 

blokenoname

DIY Log Dabbler 😁πŸͺ΅πŸ’ͺπŸ’¨πŸ’¨πŸ’¨
Works fine. Cooks herb a treat at between 10 and 10.5v which is good considering that due to those eyelets there's very little 'heat sink' effect.

So, utterly unique - both in appearance and tactile quality. My work on your planet is now complete :D
Congratulations on the Banksia, mate πŸ˜ŠπŸ‘
This is one awesome looking Log πŸͺ΅ πŸ˜ƒπŸ’ͺ

So... another Zebrano πŸ¦“ πŸͺ΅ unit, I did for a friend 😊

This one has the ceramic 95J20RE resistor for a heater and can be run at a straight 12V directly from the power adapter without need for a vvps or buck convertor.

It features a 3/8" Ti heater cover, that's optimized for use with the larger 13mm/10mm OD/ID glass tips, that slip over the core.
Like the E-Nano, the heater and debris screen sit right at the very top of the heater cover, to be as close to the herb in the glass bowl as possible.

Comes with a fitting Zebrano dd stem & 14mm WonG, both sporting the above mentioned glass tips.


blokenoname

DIY Log Dabbler 😁πŸͺ΅πŸ’ͺπŸ’¨πŸ’¨πŸ’¨
Companion piece to the lean,13mm plain end glass core Padauk from two weeks ago, or so.
Big thx again @brainiac for the awesome πŸͺ΅ work πŸ˜ŠπŸ‘

Features a female 18mm ground glass socket for a heater cover. Leather cap needs still some sanding and maybe I'll reduce the air intake a wee bit.


Last edited:

blokenoname

DIY Log Dabbler 😁πŸͺ΅πŸ’ͺπŸ’¨πŸ’¨πŸ’¨
Spalted Tamarind GTR clone with 18.8mm female ground glass core 😊

Many thanks again to our Wood πŸ§™β€β™‚οΈ @brainiac (who's working on a really nice looking batch of direct draw stems turned from a variety of exotic woods right now, fitting both Log Vape & Dynavap tips BTW) for the superb woodworking πŸ₯°

This one became my favorite GoToRoaster pretty fast over the last couple of days (in combination with the awesome 18mm Wild Mango stem, he did for me a while ago). Performs perfectly nice at a mere 6.0W power output πŸ˜πŸ‘

Side note: Had to use a 10W cartridge heater for this unit now, as my standard 7.5W cartridge has some supply chain issues right now. Next batch needs another 2-3 weeks for delivery πŸ™„. So the voltage input needs to be reduced to about ~ 9.8V via a buck converter/vvps, to get the 6W heat output, I'm aiming for.


Top Bottom