TinyMight / TM 2

SquirrelMaster

Well-Known Member
SquirrelMaster - thanks for providing the information. I guess it's time to open an Instagram account.
As much as I despise Facebook, IG is a really good way to communicate with some so it's not a bad idea to have an account for that purpose.
Awesome info! I think most of us can agree we love this vape! I think the above info should help all feel good about their purchase and future of operations! We gotta get something positive out of this year.

thanks again @SquirrelMaster and btw I did do the Instagram thing but have had more luck lately with emails!?!?!?!
Whatever works right? I'm glad you've been having some communication and I hope your replacement gets to you quick.

Yup....it will not hurt any conductivity as the threading is not 100% coated for eternity. ;)
It will only help conductivity so it's not a bad idea if you go light like you say. Its definitely not an insulator, that's for sure.


Lost power the passed few days with my tinymight. Been seeming like my hits just weren't quite as big and after inspection of my avb it was noticeable lighter than it should be. My battery was at 2 so I swapped it out but the next bowl was the same! Thankfully I follow this thread and knew several things to try, first was cleaning the battery threads, I looked at them and they looked ok? But after the first wipe with a white eraser it was filthy! Went over with the eraser till it came out clean then aggressively ISO qtiping till the same. The next bowl was much better but still not as dark as it should be but I burned through 10 loads trying to diagnose and it was time for bed. Tried hitting it as hard as I can this morning and I got my black ring if I hit it till vapour stops so that last bowl after cleaning the threads might have just been me after so many? In any case I'm going to give the threads one more go and keep a eye on my avb for the next while. Hopefully I won't need to open it up but I'm confident I could if need be. Like I said I'm glad I follow this thread and know what to try, makes me think battery thread care instructions should be on those wooden planks, might save him a lot of headaches email wise.

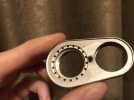
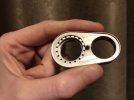
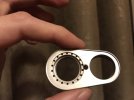
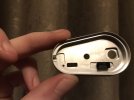
You got me all paranoid about the strip contact so I decided to just take top off and check. Even though everything I've read doesn't seem to difficult, any 5 year old can take something apart but getting it all back together and working is another story :rofl: But I'm glad I did because surely I would have lost power again. Undid the screw enough to get the top off and the first thing I did was look 👀 at the strip, it looked ok, had a slight dent in it and curved upwards towards the tip. Then out of the corner of my eye I saw something fall, it was a second o ring that sits on top of the glass sleeve, didn't know there was one and I almost didn't see it fall 😱 Talk about narrowly averting a total screw up putting it back together 😅 I picked it up and went to see where it fell from and that's when I saw it, a thick nasty film all over the underside of the top plate! My first thought was could this be dried on reclaim? I took a ISO qtip to it but nothing really came off, so I thought could this all be oxidization or machining residue from the cnc process? I got my pencil and wiped the contact, it came off jet black. I moved onto the rest of the lid and burned through the whole white eraser on my mechanical pencil and used a lot of elbow grease but I got it clean, the strip itself was clean. Now I have a half disassembled tinymight and I'm wondering if I should finish the job and remove the bottom plate and clean it? Just how difficult is that? All I have to do is completely remove the screw and it comes right off? Just be careful not to let the button fall out? Should I just do it or do I risk damaging the heater? Help me out tinymight thread 🙏
Your strip sounds like it's making good contact if it looks dented (like mine does). The only other thing I'll add is something Tinymight mentioned to me in our conversation yesterday that I had not yet mentioned here. I asked if there was a specific torque rating for the main screw and was told they generally tighten them with a handheld screwdriver as tight as they can. Because it's threading into aluminum I wouldn't go completely crazy but mine is fairly cranked down. Also on most devices there is a small indent on the bottom side of the top plate where the metal strip sits. They've found that this can potentially cause issues so they've eliminated the indent moving forward and now align the strip so it doesn't sit in that channel.

Did you happen to take a picture of the area you cleaned? Unless it was making contact it shouldn't impact performance but it doesn't hurt to give it a scrub like you did. That's an unfortunate side effect of using bare aluminum, oxidization will occur if exposed to the air.

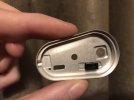
If you checked the strip for good contact, cleaned the battery compartment and lid threads and cleaned the battery lid underside the only other spot (iirc) is the tabs on the circuit board that make contact with the bottom plate. The tabs themselves are plated in gold I believe but the bottom lid where they touch could be an issue. As much of a pain as it is I'd recommend cleaning one area at a time and reassembling to see which area specifically is causing issues. It would make it easier in the future if you (or others) have issues again but it is a bit of a pain so I understand if everything gets cleaned all in one shot.

Oh yeah you gotta watch that sneaky o-ring in the top lid. The new ones are grey but I nearly lost my clear ring when I disassembled many months ago.

I purposely stopped cleaning the underside of my battery lid to see if I can replicate the problems some are having. I may take it a step further and store the device with the battery removed and cap off to let every bit of change happen.
 

Bad Dog

Yeah I pissed on the rug...... so what
the plate should be slightly secured by the USB port. just push it slightly through the usb.
Thanks immensely for that tip, I could have broken something trying to force it.

The bottom plate wasn't anywhere as near as bad as the top film wise but still dirty and so were the contacts on the psb. Gave everything a thorough cleaning and that was the easy part, now to correctly reassemble. My first attempt was a failure and I knew it right away, my battery lid was screwing a extra 1/4 turn but I wanted to see if it was heating so I tried a bowl, zero vapour. When I took the stem out I saw that the top plate wasn't seated on the wood, loosened the screw and pushed it down and retightened........ fingers crossed tried a bowl. At first I thought all my efforts were all in vien because vapour stopped before the end of my draw, then I exhaled and the cloud was massive! I pulled the stem and I blackened the entire top! Success!!!!! And before you think I'm crazy no I don't really want black avb I just like to know my tinymight has the power ⚡🔥 It was all very easy thanks to the information in this thread and a little help of course
 

SquirrelMaster

Well-Known Member
Thanks immensely for that tip, I could have broken something trying to force it.

The bottom plate wasn't anywhere as near as bad as the top film wise but still dirty and so were the contacts on the psb. Gave everything a thorough cleaning and that was the easy part, now to correctly reassemble. My first attempt was a failure and I knew it right away, my battery lid was screwing a extra 1/4 turn but I wanted to see if it was heating so I tried a bowl, zero vapour. When I took the stem out I saw that the top plate wasn't seated on the wood, loosened the screw and pushed it down and retightened........ fingers crossed tried a bowl. At first I thought all my efforts were all in vien because vapour stopped before the end of my draw, then I exhaled and the cloud was massive! I pulled the stem and I blackened the entire top! Success!!!!! And before you think I'm crazy no I don't really want black avb I just like to know my tinymight has the power ⚡🔥 It was all very easy thanks to the information in this thread and a little help of course
I'm glad it's working again! Do you have a guess as to which specific area may have been the cause? It seemed better after you cleaned the bottom plate right?
 
SquirrelMaster,

Bad Dog

Yeah I pissed on the rug...... so what
Do you have a guess as to which specific area may have been the cause? It seemed better after you cleaned the bottom plate right?
Yes I may even have more power than when I first got it. The top plate was the worst, I wish I took a picture after cleaning half to show you guys but I didn't have the forethought unfortunately. It was a dark grey and very dull, spotted in places. I'm not the heaviest user having as few as 3 stems or up to 10, only packing .05 and crushing it in one hit at 10 on the dial so a battery can easily last me a few days. I actually think I need to dial back a bit now it's so powerful, maybe 9 or less. Now I have to relearn the vape....... let the honeymoon continue! Perhaps I should disassemble my second tinymight and clean it too 🤔

I got started and it was dirty too but not as bad as my first.

dirty
433A3E34-9AD2-4D01-BD6A-29D1FC12A49D.jpeg
Clean streak
AA524041-199D-4723-8616-8115D41DA154.jpeg
Clean 🧼
A5BCFD89-603C-423E-8F1B-7B33E106A872.jpeg
Bottom plate dirty
B9F1EF13-4936-403B-A651-972BCB0A8D07.jpeg
Clean
B8EBFD3E-BFB7-4176-8FEB-FE6AADDB1ED5.jpeg
 

Vaporific

All who wander are not lost...
Thanks for the info & pics! I never noticed that channel in the top plate for the strip. Now I understand the reason behind this. Not that I’m anxious to disassemble mine (a second time) - yet. TBD. I want to do more low, sub-5 temp loads to see if I produce any vapor. Not much at that level these days with my Tinymight. Above 5.5 seems to work best as of late. More testing to come...:peace:
 
Vaporific,
  • Like
Reactions: Bad Dog

Bad Dog

Yeah I pissed on the rug...... so what
I'm doing some testing myself now that I unwrapped the present and I did check to make sure it worked again but that is all the testing that unit gets for now but I did take the steel sleeve out to test and play with and so far my results were interesting. First I tried my typical one hitter to see if there's any changes in the avb? Nope and it was barely warm to the touch immediately after..... not a proper test, needs to be a full load and fuck it it's a Friday and I got nothing more important to do than walk the dog so why the hell not lol and after having one load in each these are my preliminary thoughts. Faster vapour with the aluminum but bigger clouds from the steel once it does heat up. My tinymight was noticeably warmer after the load with the steel and I think I prefer the flavour, it's not super noticeable like finding more terpenes that weren't there before but more a change in the vapour signature the aluminum has a certain astringency that the steel doesn't and I like it. I'm still testing and will post again after trying it some more but I'm finding it quite interesting so far.
 

Bad Dog

Yeah I pissed on the rug...... so what
Spent the day testing the metal sleeves and I think I'm going to stand by original assessment. And my tinymight is running quite a bit hotter since cleaning, I'm now maxing out at 7 1/2 rather then 10. I could almost tune it down if it's a 3 setting movement lol but I like having that potential horsepower.


I want to do more low, sub-5 temp loads to see if I produce any vapor. Not much at that level these days with my Tinymight. Above 5.5 seems to work best as of late. More testing to come...:peace:
Cleaning mine really upped the performance, I really recommend using a white artist eraser to easily see when discoloured. Cheap pink erasers can leave behind residue if they are firm a waxy but I avoid all pink erasers for that reason for my drawings. Crack it open and make her shine ✨ I get vapour at 3, maybe lower !
 

Momor

Well-Known Member
I could almost tune it down if it's a 3 setting movement lol but I like having that potential horsepower.
I think my post about calibration may have been a little bit misundertood, at least probably not detailed anough. What i wanted to point out is that the process alows you to tune up or down your TM by full steps (and not 0.3 or 0;5 for exemple) until +/- 3 steps. That means you can calibrate it by +/-1, +/-2 or +/-3 steps compared to what it is now.
In your case, if you would like to, you could tune it down by lets say 2 steps and that sould give you what you get now at 7.5 but at 9.5 on the dial (letting you a bit of room in case you'd need more power).
 

Bad Dog

Yeah I pissed on the rug...... so what
I think my post about calibration may have been a little bit misundertood, at least probably not detailed anough. What i wanted to point out is that the process alows you to tune up or down your TM by full steps (and not 0.3 or 0;5 for exemple) until +/- 3 steps. That means you can calibrate it by +/-1, +/-2 or +/-3 steps compared to what it is now.
In your case, if you would like to, you could tune it down by lets say 2 steps and that sould give you what you get now at 7.5 but at 9.5 on the dial (letting you a bit of room in case you'd need more power).
Very good to know 👍 Before I do anything I want to play around with changing my technique, rather then trying to crush it in one draw I'm going to try shorter hits and see if/when I char the load and see what the higher temp effects are like. Can't resist a opportunity to try something new.

Edit: does seem a little strange to start at 3 lol

Edit edit: should also say that the tinymight body temperature difference between the aluminum and steel wasn't as pronounced once I found my new max temperature.
 
Last edited:
Bad Dog,
  • Like
Reactions: Momor

SquirrelMaster

Well-Known Member
Thanks for the info & pics! I never noticed that channel in the top plate for the strip. Now I understand the reason behind this. Not that I’m anxious to disassemble mine (a second time) - yet. TBD. I want to do more low, sub-5 temp loads to see if I produce any vapor. Not much at that level these days with my Tinymight. Above 5.5 seems to work best as of late. More testing to come...:peace:

Do not use the channel for the strip. That is what it was intended for but it can cause more harm than good.
 
SquirrelMaster,
  • Like
Reactions: Vaporware

Bad Dog

Yeah I pissed on the rug...... so what
Also on most devices there is a small indent on the bottom side of the top plate where the metal strip sits. They've found that this can potentially cause issues so they've eliminated the indent moving forward and now align the strip so it doesn't sit in that channel.
Do not use the channel for the strip. That is what it was intended for but it can cause more harm than good.
So you're saying it's possible to move the strip orientation with dislodging or affecting the heater? At least so its not fully in the channel? Monkeying with the delicate workings of the heater makes me nervous 😬 Both of mine seem to make good contact in the channel so I think I'll leave them there for now, I've had enough adventures in tinymight repair for right now.

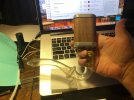
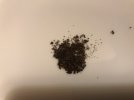
On the high temp front it's a rousing success :D Taste isn’t as good as temp stepping from down low but it's not bad and the effects are pretty stellar. I get 3 nice little rips and very even brown fully extracted avb with a mid session stir.
2E285071-BE31-4EF3-B1E5-4B35CB7A4216.jpeg
On a slightly comical note who here thinks their tinymight sounds like a tiny Tibetan throat singer? Mine is named Tow Tow he’s cool 😎
 

BestBuds

The Dude
An update on my end. My tracking says it should be delivered by this upcoming Monday. Keep in mind I'm in N.E. with a massive shi...snow storm headed our way tonight.
My replacement arrived this morning! I'm glad that's over! Good luck for all those who need CS. On the up side they gave me 2 cooling units, 2 shorties stems along with a few capsules and a stepped wpa. All in all a few nice accessories in acknowledgement of poor CS. I still think this one of the best portables and I don't hesitate to put it at the #1 spot for a pocketable vape in my collection. But with that recommendation comes with the disclaimer of poor CS. If he can fix the customer service he has guaranteed success.
 

SquirrelMaster

Well-Known Member
So you're saying it's possible to move the strip orientation with dislodging or affecting the heater? At least so its not fully in the channel? Monkeying with the delicate workings of the heater makes me nervous 😬 Both of mine seem to make good contact in the channel so I think I'll leave them there for now, I've had enough adventures in tinymight repair for right now.

I'd have to pull mine apart again but I thought I remember the strip on mine having a little bit of play. If it's working fine I'd leave it, just something to remember if you or anyone else is having issues in the future.
 

Abysmal Vapor

Supersniffer 2000 - robot fart detection device
I'd have to pull mine apart again but I thought I remember the strip on mine having a little bit of play. If it's working fine I'd leave it, just something to remember if you or anyone else is having issues in the future.
I have bent mine in rainbow shape with the help of a toothpick. Contact is great.
Do the early units also have the calibration features.
I did 5 x 3 clicks on zero ,then dialed to 5 press 3 times and it enters operation mode. I dont see any light changing when rotating the dial. In fact i have never seen the led having any other color than red,so i guess it might be a feature that came in later ?
 
Abysmal Vapor,

Marlox

Well-Known Member
Maybe the "channel" for the strip is made to smooth the glas-bead-blasted surface and thereby create a good and plane contact-surface for the strip.
 

Vaporware

Well-Known Member
I’m glad to see people narrowing down the cause of some of the performance issues and getting them fixed without having to send them off!

At first I was only looking at the battery cover and wasn’t aware of some of the internal contacts, but I’m not surprised a lot of the performance problems turned out to be similar issues.

I don’t know enough to recommend using contact grease or anything on these, but I think it is worth having someone ask support about that. If there’s a way to keep the contacts clean and functioning well for longer, it could help a lot of users and cut down on RMA requests so maybe they could keep up better. :)
 
Vaporware,
  • Like
Reactions: Tweakz

RustyOldNail

SEARCH for the treasure...
I’m glad to see people narrowing down the cause of some of the performance issues and getting them fixed without having to send them off!

At first I was only looking at the battery cover and wasn’t aware of some of the internal contacts, but I’m not surprised a lot of the performance problems turned out to be similar issues.

I don’t know enough to recommend using contact grease or anything on these, but I think it is worth having someone ask support about that. If there’s a way to keep the contacts clean and functioning well for longer, it could help a lot of users and cut down on RMA requests so maybe they could keep up better. :)

If and when I have to open it up, I’ll apply NYGOL 760G (Dielectric, non-conductive), same as I used on the battery cap threads.
 

mc

Well-Known Member
Are there instructions anywhere on putting it back together? I had to take it apart because the screen dropped into it and now I can't get it back together..
 
mc,

Siebter

Less soul, more mind
Do the early units also have the calibration features.
I did 5 x 3 clicks on zero ,then dialed to 5 press 3 times and it enters operation mode. I dont see any light changing when rotating the dial. In fact i have never seen the led having any other color than red,so i guess it might be a feature that came in later ?

I haven't recalibrated my (1st gen) TM, but I'm pretty sure it is capable of that. The multicolor LED was indeed introduced in later iterations.
 
Last edited:

Q_

Well-Known Member
I use the second stealth mode where there's no LED and leave it in on-demand mode 24/7. (I find the blinking LED un-mellow.) Charge overnight.

I find I get more even abv when using the dosing cap. I flip it around once but don't stir. If not using the cap, it helps to use a wooden stem rather than glass since the glass draws a lot of heat away from the outer ring of herb.

Also I get better results by not drawing too slowly. Otherwise the air has cooled a bit by the time it gets to the top of the load causing the herb near the heater to roast darker. A long medium-strong seems to effectively up the temp. I usually stay in the 3 to 5 range now and never stir.
 
Top Bottom