'The Misty Log' - DIY wooden Log Vaporizer

brainiac

log wrangler
Hmm.. so you'd need a log with a heater cover/core diameter with either a 12mm external diameter so that the stem could go over the heater cover or with a 14mm internal diameter so that the stem could go into the heater cover. So to get this to work you'd have to buy a length of stainless steel tubing with an internal diameter that will fit the Arizer stem and then build a log to take it. The cost of doing this would almost certainly outweigh the cost of buying two sets of stems - not to mention the work involved.

My advice would be just to settle for two sets of stems, however, if there is some workaround on this the guy who'd know is @blokenoname but he's taking a break atm. I'll pm him anyway and hope for a response.
 

newSSE

New Member
Thanks so much for the reply. It just feels silly to have two sets of nearly identical but slightly different glass stems, but what you're saying makes sense. I've been playing around with the idea of building a vape for a while and this seemed like a good opportunity - but you're right in time at least it will outweigh everything and possibly in material cost as well. I'll think about it I guess, and hit up my wood-electronic friend to see what he thinks.

How long has it taken you ents to get a first prototype together and how many prototypes did it take for you to be satisfied? Approximate cost if that's at all something you can estimate?

edit: an Enano would be at the lowest price point 240$ CAD pre-tax without a WPA or extra stems, so it seems like a pretty decent budget to build/rebuild a couple options if I can reuse some parts between prototypes. Every other log I think would have to be imported at a higher cost. Woodscents is 400$ CAD.
 
Last edited:
newSSE,
  • Like
Reactions: cosimo

CanikUser19

Trenchtown Rock
Thanks so much for the reply. It just feels silly to have two sets of nearly identical but slightly different glass stems, but what you're saying makes sense. I've been playing around with the idea of building a vape for a while and this seemed like a good opportunity - but you're right in time at least it will outweigh everything and possibly in material cost as well. I'll think about it I guess, and hit up my wood-electronic friend to see what he thinks.

How long has it taken you ents to get a first prototype together and how many prototypes did it take for you to be satisfied? Approximate cost if that's at all something you can estimate?

edit: an Enano would be at the lowest price point 240$ CAD pre-tax without a WPA or extra stems, so it seems like a pretty decent budget to build/rebuild a couple options if I can reuse some parts between prototypes. Every other log I think would have to be imported at a higher cost. Woodscents is 400$ CAD.
Sent you a DM.
 
CanikUser19,
  • Like
Reactions: newSSE

darkstar72

Well-Known Member
@newSSE Alan with Heat Island makes a log vape with 7/16" heater cover that he says works well with the arizer stems. The problem I see is that the airizer is more conduction and a log is more convection. So you may end up enjoying the convention high more and may also want a j-hook to cool the hotter vapor from the log. Logs are easy to build and fun. Not very expensive but the tooling adds up. I found a drill press on Craig's list for $25. I used wood from Bell Forest, recommend their cherry 1 3/4" dowel (a 12" long dowel makes three logs) and a 1 1/8 firstner bit for the well. Good luck.
Also Alan sells square logs for around $100 or $125. Definitely get a wpa. Email him asking if he has any square ones with the 7/16" heater on hand / in stock (custom work may be what he prefers to do). It may take a week or more for the reply but the guy's work is good. I think a log is a solid cannabis tool that works well and doesn't break easy. Reach out to him or build your own.
To answer your questions: first one worked. Maybe $200-250 in tools. Cost per log and wpa I build is around $25-30. Have made a handful and loaned one to a friend in hopes he'd offer $20-30 but he never used it. I have a heat island log and copied it. The maker has been transparent on the HI thread with images and such on how a lot of it works. I prefer using the ones I have made, identical innards. For me the original style logs have a 3/8" heater cover which mates with an herb bowl that goes over or inside the heater cover. The bowls that slide in are excellent at being efficient (conserving herb / getting high with less).
 
Last edited:

newSSE

New Member
Thanks so much @darkstar72! I didn't realize the HI have a size that should fit with the Arizer stems, that's awesome. I'll reach out to Alan through the address on his website.

Your response* is also encouraging in terms of building my own! Will definitely have a look at the Bell Forest. I am kind of tempted to try making my own now, but it depends on if a career change I'm trying to do works out so that I can have more free time to do the project. Fingers crossed! Maybe I'll try to do one regardless.

For liking the convection more, you mean it would be a problem because I would start liking the Arizer less? :p

Thanks again for responding!
 
Last edited:

darkstar72

Well-Known Member
For liking the convection more, you mean it would be a problem because I would start liking the Arizer less?
Yeah, you may like it less. I had a solo 2 but sold it. I prefer the log but that's a preference. We're all different. I did try the log with a 10 or 12" glass tube / stem recently but I prefer the dhgate dimpled jhook a lot more for the cooling it provides.
 
darkstar72,
  • Like
Reactions: cosimo

newSSE

New Member
Yeah, you may like it less. I had a solo 2 but sold it. I prefer the log but that's a preference. We're all different. I did try the log with a 10 or 12" glass tube / stem recently but I prefer the dhgate dimpled jhook a lot more for the cooling it provides.

Yeah makes sense. I had an LSV and before I cracked the ceramic heater it was definitely a harder hitter than the Arizer. Got the Arizer Air SE as a good quality budget vape for on the go cause I have to use outside due to my current living situation. With my anticipated career change, I'll be able to have a desktop again but I think log would be better to keep my tolerance down cause the LSV bowl was quite big. I anticipate being pretty happy with a log, I've been wanting one for years!
 

brainiac

log wrangler
My wood supplier recently got in some stock of Leopardwood so thought I'd see if it would suit a log. Here's the result.

Leopard-on-table.jpg
Leopard-side-2.jpg


The 'leopard' patterning is mainly on two sides but the whole log is very attractive. Note the jack connector flush with the side. The vase style shape - waisted near the top and slightly cut in at the base - worked out well, I think, and fits very comfortably in the hand.

Leopard-top-2-sharp.jpg
Leopard-top-sharp.jpg


Really lovely endgrain. This one is another of my IR halogen units. The image on the right shows a gentle, warm red glow shining through 5 folded layers of #200 ss mesh sandwiched between two debris screens. Heat up time is about 3 minutes. The heater covers I make myself but it's not my favourite part of the build. I'd buy them in if I could find a supplier.

Leopardwood-and-stem-on-slate.jpg
Leopard-and-stem-on-table.jpg


Made a matching stem for it. It has a brown glass tip but I'm not sure I'd recommend glass tips for general use as they're prone to breaking when removed from the stem for cleaning. Also the screen is held in place by friction alone and needs frequent readjustment. I don't mind having to do that but some people would find it a faff.

Leopard-base.jpg

Leather base cover of a similar hue to the wood and the overall effect is very pleasing.

There's also a Camelthorn unit in the works which should be finished soon.
Good logging all.
:peace:
 

coolbreeze

Well-Known Member
My wood supplier recently got in some stock of Leopardwood so thought I'd see if it would suit a log. Here's the result.

Leopard-on-table.jpg
Leopard-side-2.jpg


The 'leopard' patterning is mainly on two sides but the whole log is very attractive. Note the jack connector flush with the side. The vase style shape - waisted near the top and slightly cut in at the base - worked out well, I think, and fits very comfortably in the hand.

Leopard-top-2-sharp.jpg
Leopard-top-sharp.jpg


Really lovely endgrain. This one is another of my IR halogen units. The image on the right shows a gentle, warm red glow shining through 5 folded layers of #200 ss mesh sandwiched between two debris screens. Heat up time is about 3 minutes. The heater covers I make myself but it's not my favourite part of the build. I'd buy them in if I could find a supplier.

Leopardwood-and-stem-on-slate.jpg
Leopard-and-stem-on-table.jpg


Made a matching stem for it. It has a brown glass tip but I'm not sure I'd recommend glass tips for general use as they're prone to breaking when removed from the stem for cleaning. Also the screen is held in place by friction alone and needs frequent readjustment. I don't mind having to do that but some people would find it a faff.

Leopard-base.jpg

Leather base cover of a similar hue to the wood and the overall effect is very pleasing.

There's also a Camelthorn unit in the works which should be finished soon.
Good logging all.
:peace:
That is amazing. Seriously one of the nicest logs I've seen.
 

darkstar72

Well-Known Member
@brainiac: beautiful wood turning and log building. What diameter heater cover did you use or do you prefer?

I recently built one with the 7/16โ€ heater cover (drill press, no lathe). The prior ones built were with a 3/8โ€ traditional cover size. On the 7/16โ€ cover I did the five basket screens โ€œfinsโ€ over the 24w/30v cartridge like Alan chose to. It works phenomenally well. With a paper tube/roasting chamber going inside the heater cover, the herb load is still small at about 04 grams but the air flow is more open.

Pure convection, heats up in minutes, more powerful and better tasting than my portables. Such a simple and effective design. Thanks to all who have refined and described how these are built (Alan, blokenoname, brainiac, and others).
 

brainiac

log wrangler
Many thanks @darkstar72. You're doing well to build logs with a drill press. That's how I drill heater/base wells on the Rustics and it's no easy task getting them perfectly central to the log. I collected some pieces of local oak recently that are suitable for Rustics and they'll have to be drilled out with the press but most of my builds these days are done on the lathe.

The heater cover on this leopardwood unit - and all my halogen builds - has an OD of 12mm which is pretty close to your 7/16". The ID is 11mm and takes a stem/wpa with a 10mm OD tip.

The cartride 'fins' you mention are an idea that @Alan (HI) came up with - https://fuckcombustion.com/threads/the-hi.4693/post-1560695
They provide a number of advantages including keeping the cartridge central in the heater cover, 'tumbling' the air as it rises through the heater cover and thus reducing the risk of hotspots and also they prevent the dreaded cartridge rattle.

:peace:
 

karotene

Well-Known Member
These works of art remind me of a quote by this guy in chat, years back.

"I make my DIY like my girlfriend. Ugly - so it won't get stolen." - McReef
 
karotene,
  • Haha
Reactions: Flow

Lennon

Well-Known Member
Hello everyone, first I apologize because I am using a translator. I have a vape that I made quite a while ago but it turns out that the pipe has rusted or corroded and gives an appearance that I don't like, it doesn't change the flavor at all, I would like to know if the pipe can be changed for copper or aluminum because the Glass seems fragile to me if it is thin.
 
Lennon,

brainiac

log wrangler
Hi Lennon.

Copper will oxidise over time forming a green patina called verdigris and so is not ideal. Aluminium has been linked to some health issues and so is probably best avoided,

It's not entirely clear what you mean by pipe. Perhaps if you could post a picture of the vape you made it migh be easier to advise you. And in any case, we'd be interested to see what your DIY vape looks like.

Glass comes in a number of thicknesess and you might well find something that will work. Check out glass drinking straws online. For the metals, stainless steel or titanium are usually regarded as the standard. Stainless steel pipe is fairly easy to source online in almost any diameter and thickness that you might need.

Hope that helps a bit. Get back to us with a picture of your vape if we can help some more.

:peace:
 

darkstar72

Well-Known Member
@Lennon - Good to see another person building their own log vapes. I've built a few that are based off of Alan's HI with the 7/16" diameter heater cover. Not sure about the rust but I'd suggest maybe using stainless steel if you're going to rebuild it. Best of luck and glad you like the efficiency.
 

blokenoname

DIY Log Dabbler ๐Ÿ˜๐Ÿชต๐Ÿ’ช๐Ÿ’จ๐Ÿ’จ๐Ÿ’จ
Hi ๐Ÿ˜โœŒ๏ธ

Long time, no see... literally! ๐Ÿ˜ Was diagnosed with cataract in both eyes last year, and ended up not even being able to tell, how many fingers ๐Ÿ–๏ธ๐Ÿšซ the doc held up in front of me.
Fcking terrifying experience, I can tell you! ๐Ÿ˜ซ

Well, took some time, but I eventually managed to get me two brand new lenses implanted... and are seeing ๐Ÿ‘€ 'things' now, I probably haven't been able to see for years, without actually noticing ๐Ÿ˜ฎ๐Ÿคฆโ€โ™‚๏ธ

Reading back through the thread now and seeing some amazing DIY log making here from you fellows, while I was away. Good work, folks! Keep it up! ๐Ÿ˜ƒ๐Ÿ‘๐Ÿชต ๐Ÿ’ช๐Ÿ’จ๐Ÿ’จ๐Ÿ’จ

In other news... Dave @underdog was so kind, to share some of his alpha heater cores with @brainiac and me, so that I'm eager now to test one of them out in a Misty DIY setup. For the time being though, I'm still lacking a fitting body, to install the huge 1/2" alpha core into, as it's base plate is 1.5" wide. Much too large for the heater well of any of my existing log bodies.

So... how to rig up an experimentell body on the fly!? ๐Ÿค”
I remembered an Idea from @Alan, he posted a while back, where he used a heavy duty cardboard tube, to make a log body from. So I worked my way back through the HI thread, to find the details of how Alan did the base for it. Basically, he just uses a thick wooden puck to install the heater cover and cartridge on and that also holds the connector. He just drills a hole into the side of the puck to hold the connector and then a second, larger hole from the top of the puck's center for the cartridge to slip through, that connects to the hole from the side in a right angle. Just like he does for the base for his Square HI, only round: ๐Ÿ‘‡
IMG-6683.jpg


Once he's soldered the cartridge heater in, the heater cover goes on top and gets screwed into place. Done!
You now have a very compact little vape, that you can simply slip into any round casing/sleeve, that you like. Be it a heavy duty cardboard tube, a bamboo sleeve, or even a turned wooden blank, that gets completely drilled through with the forstner bit... as long as the OD of the wooden base puck fits the ID of the tube.
The sleeve then just needs a hole in its side at the exact hight, where the connector sitting in the base puck comes to rest later on. Apart from the friction fit, the inserted jack holds the base puck firmly in place then.
Genius simple idea ๐Ÿ’ก๐Ÿ˜Š๐Ÿ‘

One of Alan's bamboo HIs with his round wooden base puck inserted: ๐Ÿ‘‡ (click to expand)
Thanks so much for the kind words and posting the video and photos 
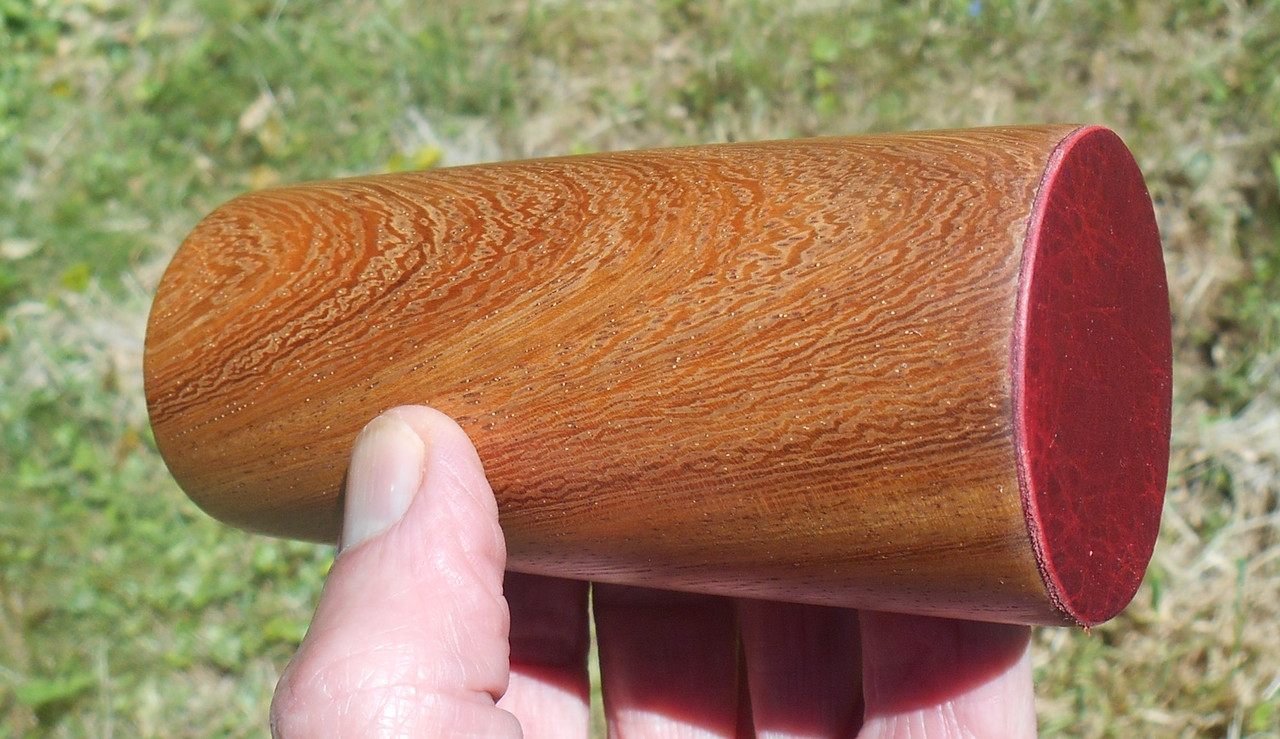
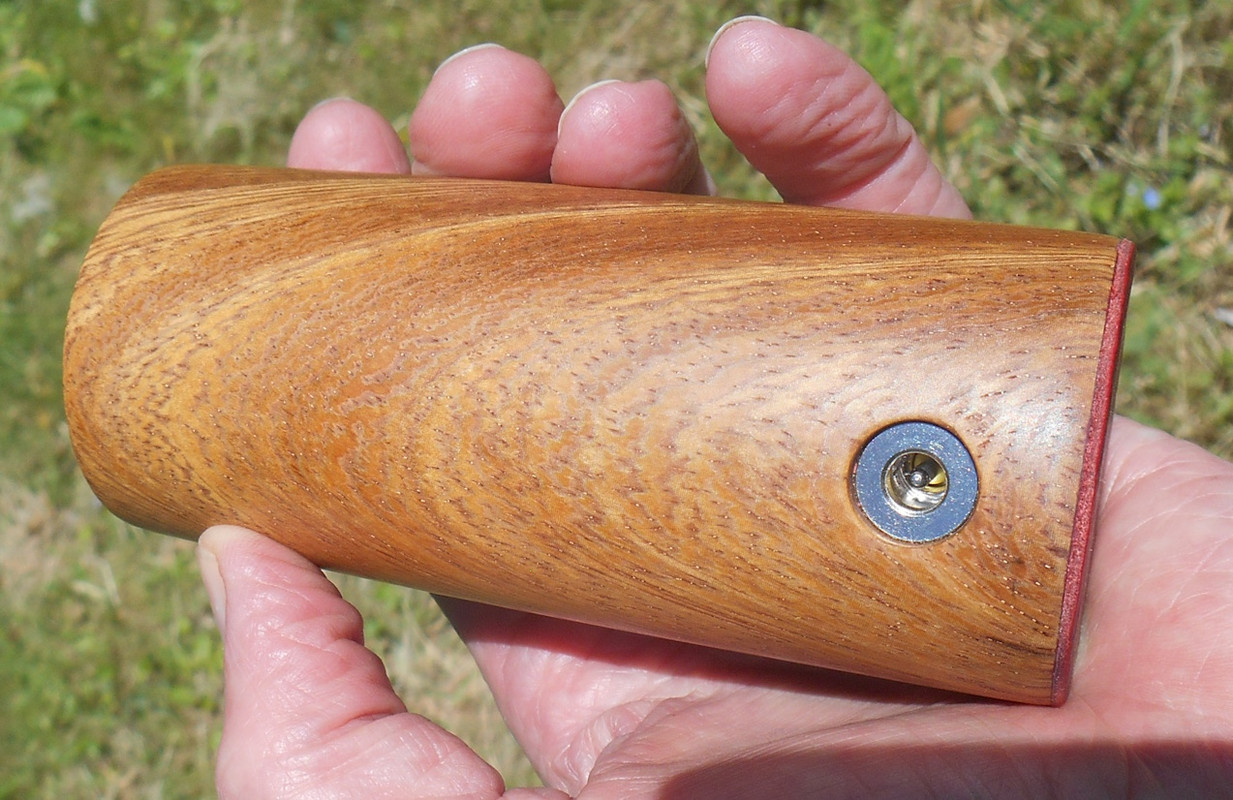
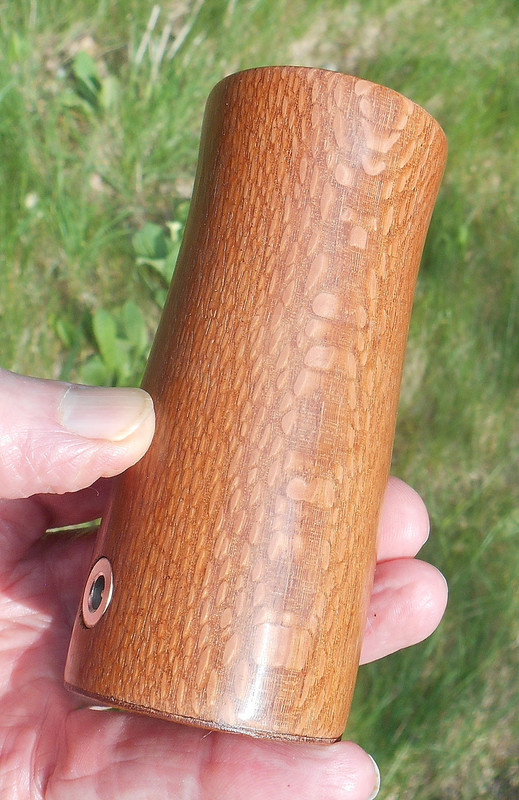
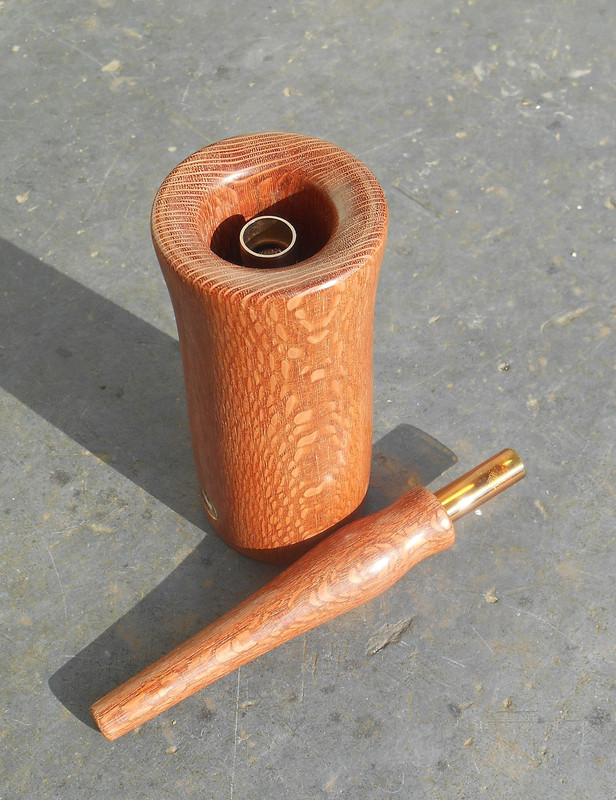
@Vitolo Glad the testing is going well. The heavy duty cardboard HI is based on the concept I had for a toilet paper tube HI, where a puck shaped wood base slides into the tube. The power plug extends through a hole in the cardboard tube to the power socket mounted inside the wood puck. I have started to use the same technique for bamboo HIโ€™s. Here is how they look.
716bamboohi.jpeg

716bamboohibottom.jpeg

I bore a hole into the bottom to allow the wood puck to slide in. The ss heater cover attaches to the wood puck using two ss screws, so it will never become loose and rattle. Since the wood helps to stabilize the shape of the bamboo and there is no stress from a power socket in the bamboo, there should be a low chance of cracking. The old method involved shaping a cork ring to the proper size and shape to fit inside the bamboo. I can use this new method for glass heater covers since the hole bored in the bamboo is the same size as the cork ring and the wood puck holds the cork ring in place. My limitation on bamboo size was 1.5โ€ ID, since that is the largest cork rings I can find. Now I can attach the cork ring to the wood puck base if the ID is larger than 1.5โ€. Have some cool looking larger size bamboo that I can now use. This same assembly method can be applied to any wood shell, so there is continuous wood from top to bottom.
@Razhumikin Glad you are happy with your holly wood HI. So many different ways to roast.
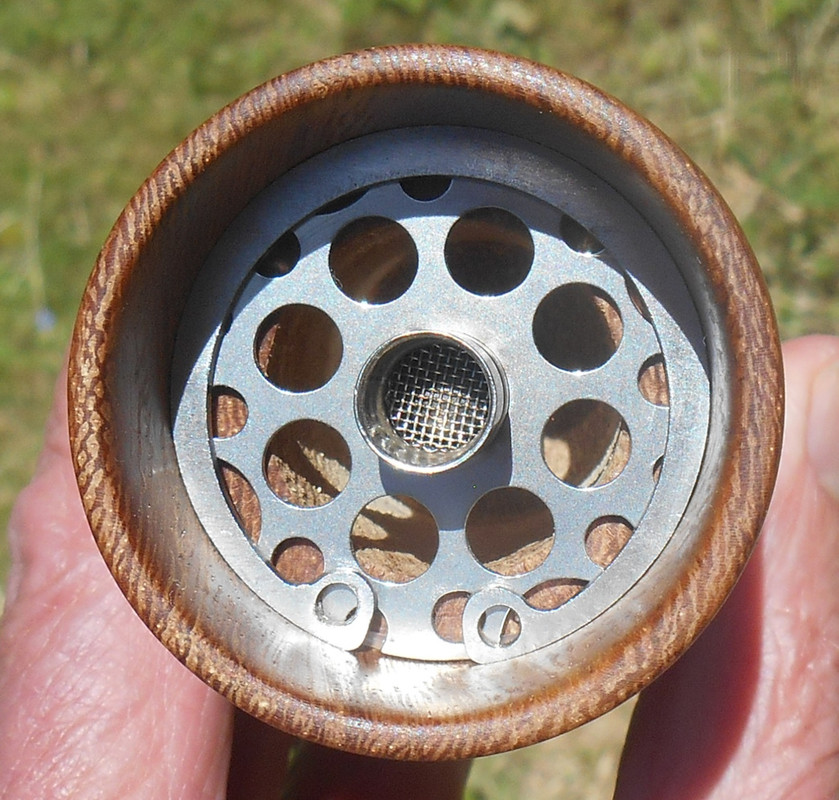
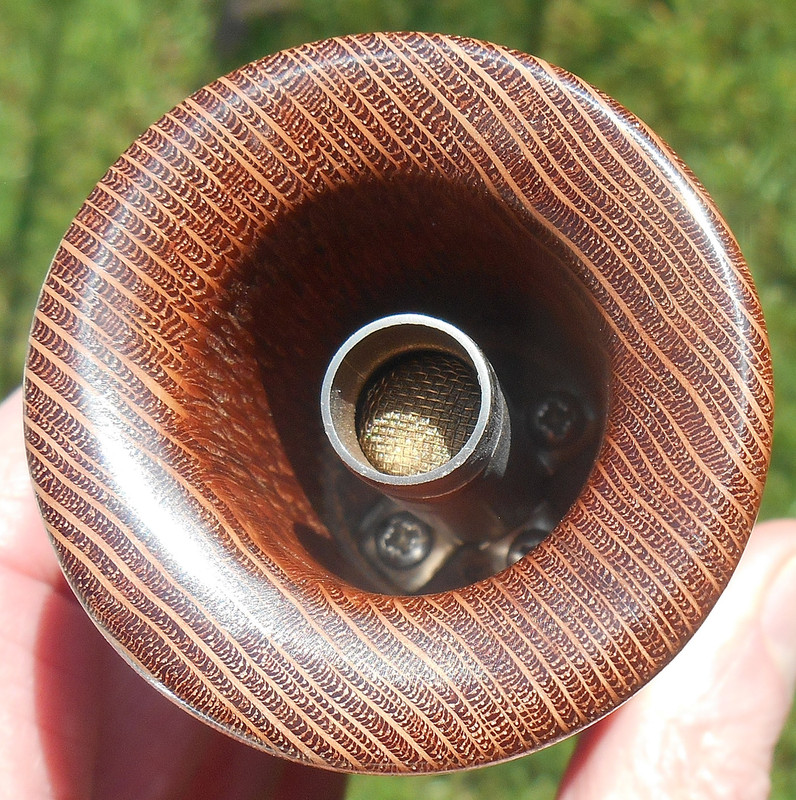
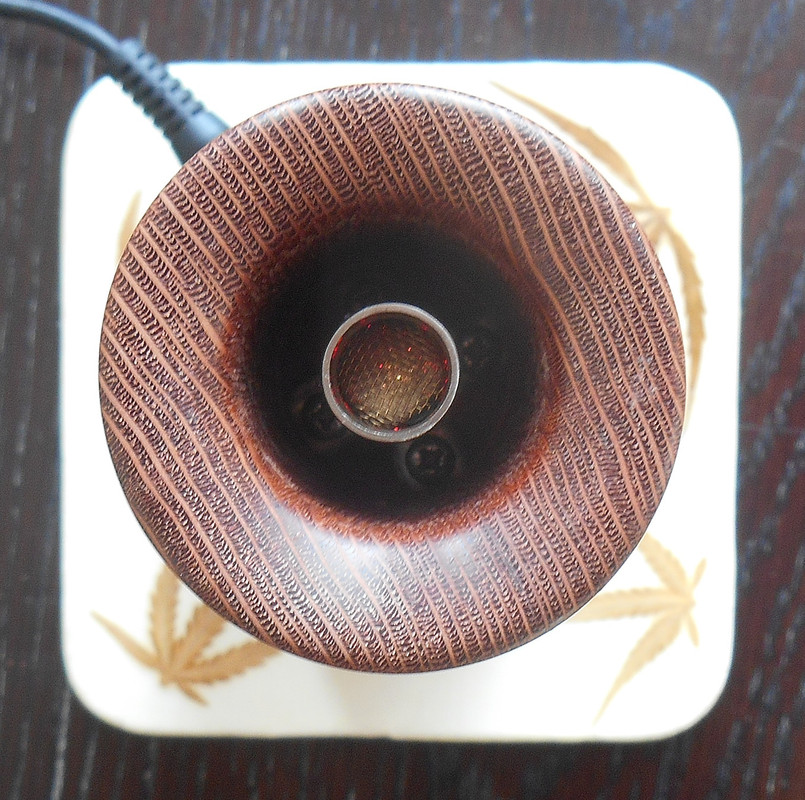
@GoldenBud Thanks for posting the videos. I generally never clean my heater cover unless some oil drips down inside. Have had some units back in for repair that had the air intake slits clogged with debris, so there are times when it is nice to take them apart. It is more of a challenge taking apart those units using a ss cartridge heater w/ screen fins. The fins can get caught on the air intake slits and come off the heater. They arenโ€™t really meant to be taken apart, but can come apart for repairs as needed.
Have really been enjoying paper roasting tubes with the HI.
https://fuckcombustion.com/threads/paper-roasting-tubes.51923/
The screen stays so clean and I just make a new tube when the old one gets dirty. Will never shatter when dropped.
Received some watt meters, but still need to modify them with the 5.5mm x 2.1mm socket and jack.

The heavy duty cardboard tube I had already lying around. It has a 50mm inner diameter and the walls are 1.5mm thick. Just needs to be cut down to the ideal length of a log body. Then I ordered some ready made wooden 50mm OD pucks from Amazon, but as they are only 10mm thick, I will simply screw one on top of another to get the right thickness for drilling the hole for the connector, using two 20mm M2 wood screws to hold them together. These two screws (together with two tiny washers) will later on then also hold the Alpha Core base plate.

IMG-6316.jpg


Making the wooden base from two parts, makes it also easier for me to solder the cartridge in, because I can simply unscrew both parts and take the top off to do the soldering, after I've drilled the holes for the connector and the heater. Once the heater is soldered to the connector, the top part goes back on and gets screwed down together with the heater cover and washers ๐Ÿ˜Š
As the 1.5" alpha core's heater tube has also a quite large inner diameter of ~11.x mm, I'll have to use a ss fine mesh poncho around the cartridge, to keep it snugly in place and provide a more evenly heat distribution.

At least, that's the plan for tomorrow or Sunday ๐Ÿ˜
 
Last edited:

brainiac

log wrangler
Excellent work @blokenoname
Great news about your eyesight and great to have your ingenious DIY posts back on the thread again - welcome back!

And I'd like to join blokenoname in offering huge thanks to Dave @underdog for supplying the cores - we'll put 'em to good use.

Here's my first log built with a UD core. This one's a top plate SC3 core fitted with a cartridge heater.

mango-sc3-core.jpg


Mango-SC3-core-for-FC-2.jpg


Dave-core-Mango-connector.jpg

The 40w cartridge vapes herb easily at 10v so there's plenty of top end for concentrates.

Up til now I've been building my own heater covers. They work fine but they're time consuming and hard work to make with hand tools. Also, a DIY heater cover can never look quite as professional as one that's laser cut and machine made - so thanks again Dave.

Working on a camelthorn unit atm.
 
Top Bottom