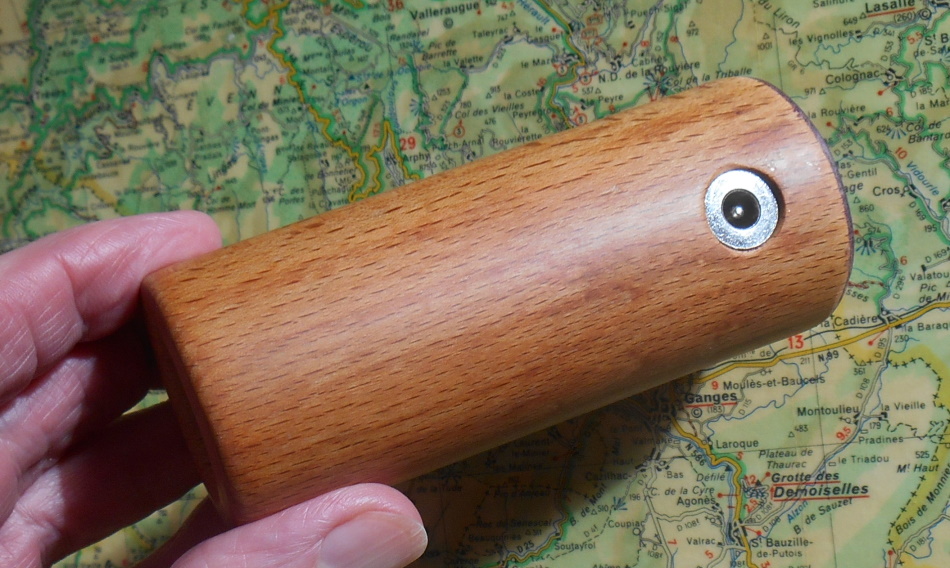
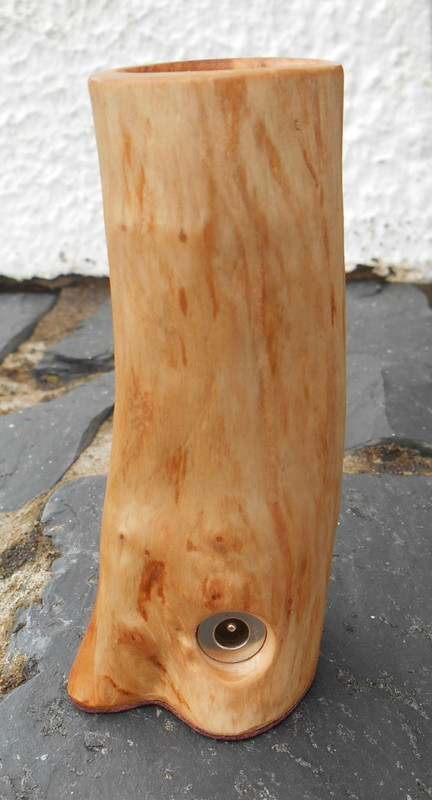
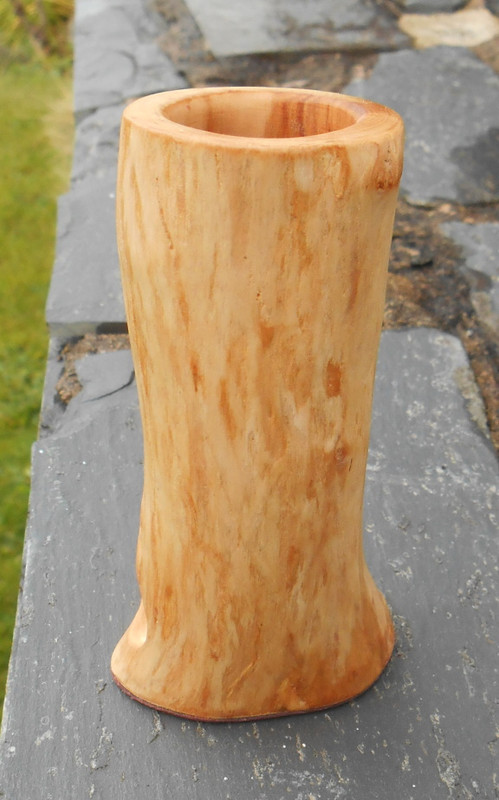
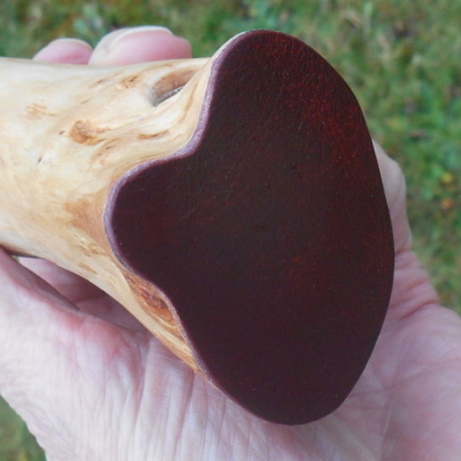
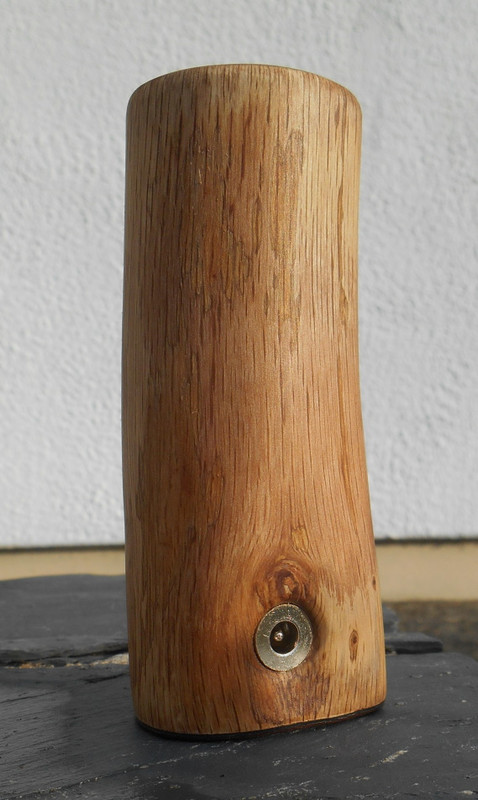
'The Misty Log' - DIY wooden Log Vaporizer

blokenoname

DIY Log Dabbler 😁πŸͺ΅πŸ’ͺπŸ’¨πŸ’¨πŸ’¨
@GI

Yes. A dimmer or buck converter will be most effective for fine tuning in the upper reaches of the voltage scale only (i.e. between 10v and 12v), as we usually aim to use a heater that produces the ideal heat/wattage output at 12v to begin with. Back in the days, the first & 2nd generation resistor based Log vapes (Eterra, AromaZap, Purple Days etc.) were all designed to be used w/out an additional temp control device in mind. Just plug the bugger in, wait for it to heat up and vape away.

Of course equal results can be achieved by simply varying the distance of the heater from the debris screen within the heater post itself. The further it is situated away from the screen (and thereby the load), the lower the heat output will be, that hits the load (and vice versa). It's just not variable then. That's the way I reconfigured Alan's Square HI, when I replaced its original resistor heater with a 10w halo heater, which is now situated relatively low within the heater post, a good deal away from the screen, so that I can use it w/out a dimmer and not burning the load.
Of course, micro managing temps can also and additionally be accomplished in such a setup by simply varying how far you insert a tip into the heater port, while taking hits. And also by varying draw speed.

Slide tip/bowl into core vs. slide over:

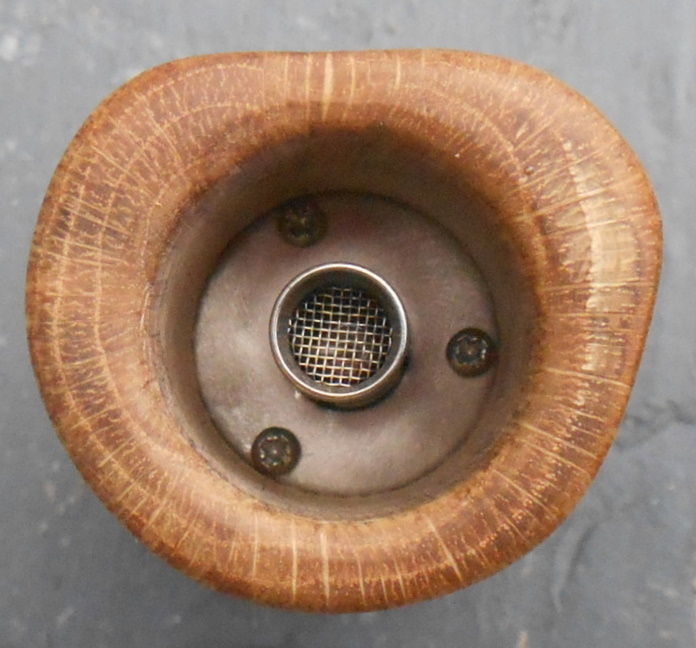
That's not a big difference, as long as you construct the heater post accordingly. For slide in use, the debris screen and heater have to be recessed of course. For slide over use, the screen and the heater below it are best placed right at the very top of the heater post, as can be seen in the E-Nano, that uses slide over bowls exclusively. Otherwise you have to compensate in voltage/wattage for the distance, that a recessed heater/screen adds to the mix, when using a slide over tip with this setup to achieve equal results.
Personally I like the slide in setup better, as it's more convenient and tidy filling the bowl then, which you'll fill right up to the top, whereas with slide over tips you've to fill only about 1/2 to 2/3 the way, leaving enough space for the heater post to enter the tip/bowl. But that's just personal preference.

For dense & heavy hits, the bowl section of a steel tip should ideally be of the same length, the tip then enters into the heater port to achieve the best mix of heat transfer by convection and conduction combined. I usually make the bowl s/thing between 7mm and 10mm long in a tip. Pretty much like in the Vapcaps, actually.
Making it much longer, you'll indeed get problems for the heat to reach all the way through to the end of the bowl then.

But a Log is more or less meant as a one hitter anyway, at least when using it with a bong. You take one big & dense toke from that bong and when you want more, just fill another bowl.
I've experimented with larger OTS glass bowls that can hold 1/2 a g or more and 20w heaters in my 'Bud Eater' designs, but for me this always ends up with me taking a big first hit... and then setting the device aside to come back to it later in the day, then stir again, take the next hit, set it aside again and so on, till the load's finally finished after several hours.
So... for my needs, the small sized bowl of a Log vape tip clearly wins over stirring and multiple reheating πŸ˜‰

Have a nice WE all πŸ˜ŠπŸ‘‹
 
Last edited:

GI

Well-Known Member
Thanks, very good explanation as always, i keep all these hint when start another log, i would like to give them to a friends that combust and never tried to vaporize, and have a real feedback, so i try to do something very simple and look good. Have a nice day
 

blokenoname

DIY Log Dabbler 😁πŸͺ΅πŸ’ͺπŸ’¨πŸ’¨πŸ’¨
As even good old Germany's in lockdown again now, there's a lot of time for getting some logging done and I started out with reworking some pieces πŸ˜ƒβ˜οΈ

The through hole in this sapele well's bottom became so large over time, you could easily fly the Enterprise through, due to earlier experimenting with a bottom loading halo heater and the remaining rim so riddled with screw holes, that I've foregone the screws altogether here and it's core is just held by the washer and circlip now.
Rather a combination of washers actually, to raise up the whole affair a bit (as it's core was a bit on the shorter side) and also reducing heat transfer to the wood, by inserting a Teflon washer first, before putting the other washer, the cover proper and then the top washer and circlip into place.
Not a fit solution, clearly, to give to friends or potential customers (as it might rattle loose), but as this one's strictly for my own amusement, I couldn't be bothered 😁
Just love that short body with it's artfully recessed plug, that also came out of another accident.


Another mate returned one of the earliest ash wood betas, that also got a new core now (properly screwed in) πŸ€—


Here's a walnut body that I had discarded earlier, due to a badly centered 25mm d heater well. Reworked that now with a 26mm Forstner bit and it's pretty much centered now πŸ€—
Still need to make the core, but as that involves some hammering and noisy Dremel cutting, I'll do that tomorrow: Sunday, holiday, neighbors... you know. πŸ˜‰πŸ€·β€β™‚οΈ


Have a nice Sunday all and stay safe πŸ€—
 

blokenoname

DIY Log Dabbler 😁πŸͺ΅πŸ’ͺπŸ’¨πŸ’¨πŸ’¨
As only recently someone asked for the construction schematics of the Misty, I'll also put them up here again:

This is one of my most simple arrangements and goes without a single drop of solder or insulation. The heater cartridge gets just crimped onto the plug with butt splices for this version.
The heating tube is mechanically fastened to the M8 washer, by filing down its base a bit for a length of about 5mm, so it passes through the slightly smaller hole in the washer. The protruding part of the tube is then simply hammered flat.

Part list (should all be available at Amazon):

a) Suitable wooden body. I used a mahogany-sapele handrail of 4cm diameter. Heater well is 30mm diameter. The base well has a 25mm diameter. The through hole connecing both sections is about 12mm. Depth of heater well is 5cm. Base well is 2,5cm. Overall length of the body is 9cm.
b) 24v/30w Reprap heater cartridge (ceramics with stainless steel mantle) for 3D printer hot end.
d) DC female barrel plug 5,5 x 2,1mm with soldering lug (metal)
e) Thin walled stainless steel tubing OD/ID 3/8"/5/16" or 9mm/8mm.
f) M8 washer with 25mm outer diameter for the heater cover's base
g) 2 small butt splices
h) 2 screws
i) M13 washer with 25mm diameter for covering the nut that comes with the DC plug and will serve as a threading for the heater and goes into the base well.
j) #25 or #26 circlip to hold nut and M13 washer in place
k) 20mm hammered screen, formed into a basket
l) 12v/1A DC Power Supply with 5,5 x 2,1mm barrel plug (male)
m) DC extension cord with a 90Β° 5,5 x 2,1mm plug (male)

Optional: M10 washer with 30mm diameter and #30 circlip for covering the screws holding the heater cover at the bottom of the heater well (see last post above for illustration).

You'll at least need a drill press, Forstner bits, Dremel or steel saw, big diamond coated steel file, tube cutter and common household stuff like screwdriver, hammer, sandpaper, needle nose pliers etc.


.


Edit: Forgot the Stems πŸ˜‰
For the steel tips, I use 8mm OD ss tubing; the stems are made from wooden cigarette holders. For the glass stems and GonGs I use standard 14,5/23 male ground glass joint lab glass

 
Last edited:

f2j

Chaque jour est une chance
Hey @blokenoname Thank you so much for sharing all that information. I ordered a few items needed on Ali (circlips, DC plug, heating cartridge etc..) and will try to make one when I receive everything. Did you find stainless steel butt splices (if that even exists) ?
 

blokenoname

DIY Log Dabbler 😁πŸͺ΅πŸ’ͺπŸ’¨πŸ’¨πŸ’¨
Did you find stainless steel butt splices (if that even exists) ?
Nope. I just use regular butt splices, which should be of no great concern, as long, as they're situated below the air intake slits in the heater cover and so do not enter into the direct air flow.
Gimme a holler, when you happen to find some πŸ˜‰

Alternatively, you might try to make some yourself from stainless steel foil maybe?
 

f2j

Chaque jour est une chance
Sure i'll keep searching for a solution in stainless steel (even though the regular should not be a concern, I'd be more confident). As soon as I find something i'll let you know.

Last question, you mentioned a 24V heating cartridge but a 12V power supply, is this intended ?

Thanks again for sharing your findings !

Edit : What do you think of these SS zip ties https://www.amazon.com/dp/B07KC62QY7/ref=twister_B07KC1X7ZR?_encoding=UTF8&psc=1 (the smallest ones). I imagine the wire is noded to the hole in the "tongue" and then the SS zip tie is over and crimped/crushed to secure
 
Last edited:

f2j

Chaque jour est une chance
Ok great thank you for your reply ! (see my previous post I edited it) ;) I think I'll purchase severall different cartidges to play a little bit.
 

blokenoname

DIY Log Dabbler 😁πŸͺ΅πŸ’ͺπŸ’¨πŸ’¨πŸ’¨
Certainly worth a try, those zip ties.

Really no need to try different cartridges. 7.5w output is the perfect fit for a core of this size and the corresponding air volume, passing over the heater.

Also... it's still a 30w cartridge πŸ˜‰. So all you need to do if you crave more wattage/power from it, is getting a larger power supply (up to 24v) and use a buck converter to regulate the voltage input (and thereby the temperature).
 

GI

Well-Known Member
I would like to try the cartridge version, it's different from halogen ? i think not, heat is heat or you find difference ?
I like the halogen light effect but it's also more work to tap the light from eyes and find good g4 connector, i think the cartridge more easy, and is more durable ? i don't think that halogen bulb last longer right ?
 

f2j

Chaque jour est une chance
I've not yet experimented with cartridges but I imagine the main difference in performance would be "inertia". This is only an assumption, but with halogen, when you draw air through the tube, there might be a big decrease in temperature due to the air flowing. With the cartridge, I imagine the solid body and metal casing would do a better job at conserving heat at all time. Therefore less temperature variation during draws.

Whoever tried/experimented both could confirm or deny ?
 

blokenoname

DIY Log Dabbler 😁πŸͺ΅πŸ’ͺπŸ’¨πŸ’¨πŸ’¨
Whoever tried/experimented both could confirm or deny ?
Apart from the fact, that you need a slightly larger diameter heater cover (11mm OD/10mm ID) for the halogen bulb to fit, there's really no noticeable difference in terms of heat retention. You're heating up a quite small load here, i.e. what usually fits into a Dynavap bowl max, and you usually kill that within one big toke through the bubbler. Once you've finished and have set the bong down, both type of heaters will be back on temp again and ready for your next session. It's more the heater cover, that retains most of the heat between hits here.

Also, the bulb I use is 10w and so is more powerful than the 7,5w cartridge with 12v applied. With a relatively short heater cover fitting the above Misty model (4,5cm length), you'll need a buck converter or dimmer anyway, to reduce the voltage to about 10,5v-11v, to not combust, while the 7,5w cartridge usually can be used without a buck.

@GI
Yes. The cartridges are usually more durabel than a bulb. Also, the bulb is better suited for a body with the DC connector located at its side, not screwed in from the base, as in this Misty version. And then there's the problem with the quality of insulation of the G4 socket's wiring warring considerably, though @Alan came up with a method there, to replace the leads completely. Should also be in this thread, a few pages back, IIRC.

Personally, I consider my Halo Misty version more as a proof of concept thingie anyway. Doesn't see much actual use here, though it works completely fine πŸ˜ƒ
 
Last edited:

blokenoname

DIY Log Dabbler 😁πŸͺ΅πŸ’ͺπŸ’¨πŸ’¨πŸ’¨
Hi @surfer, that looks great πŸ˜ƒπŸ‘
Would you like to elucidate a bit on the innards of your build? From the light emitting from the heater well, I'd assume you used a glass heater cover with a 14mm or 18mm female joint there? Joint size is always a bit hard to determine from a pic alone.
What's the wattage and size of the bulb powering it?

Meanwhile @f2j was so kind, to produce some gorgeous 3D schematics and renderings of the Misty's body with the base loading & user serviceable heater, I described in post #1004 above:

General body design:
Length: 9cm
Width: 4cm
Heater well width: 30mm
Heater well depth: 50mm
Base well width: 25mm
Base well depth: 25mm
Through hole width: 12mm

Open-Source-Vaporizer-v10.png


The 25mm M8 washer serving as the heater cover's base has two notches for the screws, fastening it to the base of the heater well. If you wanna hide those, simply put a 30mm M10 washer on top of that and use a #30 ss circlip to fasten. @f2j just approximated that a bit in this rendering here, as it should be self evident from my description, that it's two washers on top of each other then and not one.

The full metal DC jack comes with a 15mm OD hexagonal nut, that we'll use for a threading for the heater/jack itself. You can also make a very shallow recess (1-2mm max) at the bottom of the 25mm base well, to take in the nut, if you've a 15mm Forstner bit at hand. But note, that the M13 washer that goes on top must still exert some pressure onto the nut, to hold it firmly in place, as otherwise it will simply rotate with the jack, when you try to screw that in later on ☝️. So this is just optional.

I also suggest to use a #26 circlip (one size larger than the 25mm opening, it's meant for) to guarantee a really firm fit for the washer/nut arrangement. The larger clip might not go in all the way with the circlip pliers alone, so you'll probably have to use a d ~25mm dowel (or s/thing else fitting) and a hammer, to help it a bit on its way. After that, it sits really really snug πŸ˜‰

Open-Source-Vaporizer-v17b.png


Here are @f2j 's beautiful 3D renderings πŸ€—:

c2450d3b-4db5-4fbd-bd0c-39b01076a635.jpg


26edb0fa-da32-46b1-955e-f36406a6743e.jpg


And here's two pics from a real life Misty Ash unit, that's also seen some use 😁☝️

39-E4-A067-174-C-48-EE-B0-DE-5-E5-F3485324-C.jpg


EBC92778-D65-B-4-B4-B-B486-7557-B271-F39-F.jpg


Many thanks again at @fj2 πŸ˜ŠπŸ™
 
Last edited:

brainiac

log wrangler
Been spending a bit more quality time in the log lab here at Chateau Brainiac. This one's the second unit made from a rolling pin. Charity shop rolling pins are an easy and cheap source of log blanks.

Roll-pin-2.jpg


Highlight of the recent output is this European walnut unit. It's from a branch that was trimmed during routine maintainance last year.

Wal-AC-front-2.jpg
Wal-AC-back-1.jpg

Walnut-AC-base-4.jpg
Wal-AC-top-4.jpg


Lots of great quirky shapes for the hand and eye to get to learn. Growth rings visible in that fourth shot. It also shows the heater cover. It's one of several generously given to me by Dave @underdog (cheers, mate :cheers:). I'm no great fan of making heater covers so being able to just pick one off the shelf and drop it in makes the entire job so much easier. There's also a rustic oak in the works - I'll post it on here soon.

@surfer That's a highly original build you have there. Like bloke, I'm looking forward to learning more about the construction details.
You might like @Squonk 's work.

@f2j Great work :tup:. Perfect accompaniment to bloke's written build description.
 

f2j

Chaque jour est une chance
I'm glad you like it and hope it will be helpful (actually it helped me figuring out how to build my own misty).
I love the beechwood you have, is it leather that you put at the bottom ?
I also like the natural shape of your european walnut log, that's funny because I intend to cut a branch too in january, I have a european walnut in my garden that needs maintenance. But it will take a few years to dry.

After I made the 3D renderings, I tried to shape a body for a Misty log vape (still waiting on most of the hardware). I only had salvaged construction wood (probably pine or something like that), and the results are quite catastrophic (see picture) ^^ Despite all the care I took while boring on the drill press, the 25 and 30mm holes are off centered. Plus I don't have a forstner bit for the 12mm hole but a flat bit, which doesn't cut but snatches wood.
The result is that quite ugly thing
foto2.jpg

I think I'll have to make a template for drilling perfectly centered or wait for receiving my MT2 drill bit chuck for the wood lathe.

When I have found a process that works for me, I'll have these pieces to transform into misty log vapes :)
A friend of mine kindly donated them to me, they are fully dry with no cracks. There are 2 apple tree pieces, 2 boxwood pieces, and also hazel tree.
foto.jpg
 

blokenoname

DIY Log Dabbler 😁πŸͺ΅πŸ’ͺπŸ’¨πŸ’¨πŸ’¨
@brainiac

Lovely work on the European walnut πŸ˜ŠπŸ‘
And with Dave's @underdog heater cover, it looks even twice as good :nod:

It really would be a nice thing, having the covers readily available to pick up 'off the shelf'. I can see that πŸ˜ƒ.
Got quite some routine building them myself by now, but despite of that, I still always manage to somehow cut myself up with the steel, when I make a new one and so there is always some loud swearing and upset for me neighbors involved πŸ˜‚

@f2j
Oh well... yep! The bloody centering thing 😝. Don't fret, as this seems a quite common problem, when using a drill press and not a lathe. The drill bit will eventually follow the grain of the wood, despite best efforts to mark the center and adjusting the drill press carefully.
When you look hard at my own Misty pics here, you'll notice, that they're also nearly always a bit off center, despite my best efforts.
So I learned to live with that fact, as long, as they're within a reasonable range of 'offcenteredness', so to say πŸ˜‰. One can mask that a bit though, when beveling or rounding off the top later on, so that it isn't quite so visible.

That's the really nice thing with the Rustics, btw: No need for centering there πŸ€—
 

surfer

Well-Known Member
Finally found time to finish this log, I've been having problems with the heater scorching the wood.

After having racked my brains as to why it was doing this I remembered the arizer cyclone bowl was not for this job,

So I replaced it with a DDave one and bingo we have liftoff :smug:


Here's a parts list and log dimensions

Log...

Overall height 125mm

Heater well depth 65mm

Heater well opening 55mm

--------------------------------

Heater 12v halogen bulb

Bulb 20w

Heater tube length 40mm

Heater tube diameter 15mm

Base washer 35mm

DDave 18/18 fittings


I've built this from parts I had hanging about as I like to buy broken and cheap vapes from Evilbay.
 
Last edited:

f2j

Chaque jour est une chance
Hey, thank you for sharing your "make".
May I ask how you managed to fix the halogen ceramic support ? Did you just insert it in a 8mm hole (maybe over the stainless steel washer?) It would be great to have pictures illustrating that.
My main concern with that part would be the heat transfered to the wood by the ceramic support if directly inserted ?
 
f2j,

surfer

Well-Known Member
Hey, thank you for sharing your "make".
May I ask how you managed to fix the halogen ceramic support ? Did you just insert it in a 8mm hole (maybe over the stainless steel washer?) It would be great to have pictures illustrating that.
My main concern with that part would be the heat transfered to the wood by the ceramic support if directly inserted ?

I thought this was my problem at first with the wood charring but my base washer wasn't thick enuff,

The ceramic bulb mount was ok but I may just pop some spacers under the screws that hold it down.

'll take more pics when I get chance.
 

brainiac

log wrangler
I love the beechwood you have, is it leather that you put at the bottom ?
You mean the rolling pin unit? (don't think it's beech, possibly sapele). Yes, it is leather. It's cut from a 2nd hand wallet I bought in a bric-a-brac shop. Seemed appropriate being as the rolling pin came from a charity shop. Interestingly, the wallet is stamped with the name and logo of the hotel Im Weissen RΓΆssl. It was the setting for a kitch comedy musical romance film made in 1960 and is a film to be avoided at all costs, I'm told.
Good luck with the tree branch and those blanks and keep us updated on the lathe work.

@surfer very tidy job on that halo unit :tup: Looking forward to those additional pix.

Here's that Rustic oak I mentioned. Found on a log pile in a neighbour's garden (he said it was OK to take it). Some tannins from the bark seem to have leeched into the wood giving it multiple shades of brown. The concave section near the base was the natural place to set the jack connector. Base leather is oxblood offcut bought online. Heater well placed for best symmetry. One of Dave's heater covers down there keeping it all looking like a proper log :).

R-Oak-2-top.jpg

Rustic-Oak-front-1.jpg


This one's fitted with the stalwart ohmite 25J20RE resistor.
Working fine, I'm glad to report :science:. It's currently cooking up this season's Cream Caramel a treat.
 
Top Bottom