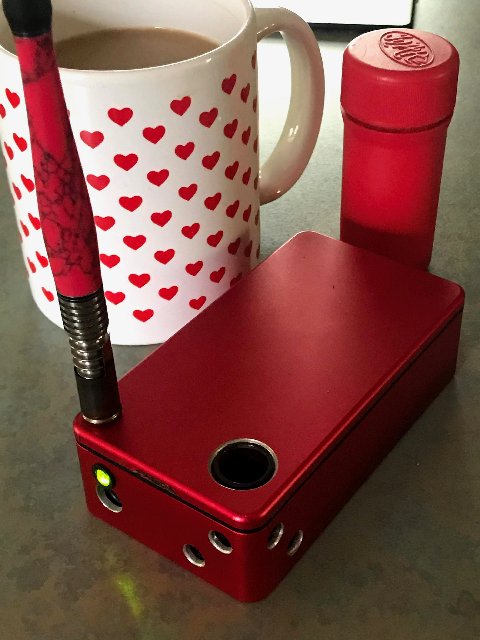
I hope everyone's week is going well. Here are a few Fluxer updates to share:
Flix:
Cases and switches: On Monday I paid the invoice for the first order of Flix cases and switches, so stuff
is happening.

I'm told the cases have been machined and are being anodized this week, and will be shipping very soon - maybe by Monday. I also discussed ordering a second batch with my manufacturer and what the turnaround time would be, etc. and got some reasonable answers, so I guess we'll see how it goes if/when it comes to that...
Variable voltage PSUs: I'm still waiting for my first order of variable voltage PSUs to arrive, and will post an update after they get here. The first few were due here a few days ago but aren't here yet, so I'm hopeful those will get here soon. :/
Web store: I'm currently building it, and will have more info on it next week.

I have a few other details I am still finalizing, including the coil standard size I'll be posting those details soon.
 Behind the scenes, making the Flux Deluxe and the Flix:
As most of you know, I make my own sub-assemblies myself, in my shop. It lets me keep a close eye on quality, plus it's the cheapest way to get these specialized items made.
My coil assemblies, which are central to every heater i make, are good examples of this. They consist of two parts, the insert and the coil, and I make each of those parts in my shop in a series of steps. The final assembly may look like a simple item made from a piece of cut glass and a length of wire, but each of those pieces requires
multiple,
separate steps to make.
Making the inserts: A few weeks ago I posted a video of my process for making glass and carbon fiber inserts for the coils, as that's an important and time consuming task. At one point in time I looked into outsourcing this step, but it was just too expensive to have these inserts made for me in the quantities and sizes I want. Instead of outsourcing them, I've worked on refining my manufacturing process for making these inserts until the process became something I could do repeatedly and efficiently. Please watch that video if you haven't seen it, as you may find it to be informative.
Making the coils: I posted a new video today (linked below) that shows you the other half of the coil assembly process, which is
winding the coil and prepping the ends so it can be soldered to the circuit board. This used to be my most hands-on process: I'd clamp one end of the wire to a rod, then wind the spool around the rod until i had formed a coil. I'd then cut the wire, unclamp and remove it from the rod, wrap it around the appropriate glass insert, trim the ends to length, and finally strip the enamel insulation from the wire so I could solder it (Note: magnet wire is a pure copper wire covered in a hard enamel coating for insulation, and this covering needs to be removed by abrasion or heat to enable to one to solder the wire.)
Anyway, I gave that process a good, long look and tried to figure out some ways to improve it, and found some good ones. The video below shows what I've come up with, and I'm very happy with both the process and the results it produces. So happy, in fact, that I made a little video of it so you can check it out, too:
Let me know what you think.
Cheers, and thanks for your support!

 ve:
ve:


 I'm told the cases have been machined and are being anodized this week, and will be shipping very soon - maybe by Monday. I also discussed ordering a second batch with my manufacturer and what the turnaround time would be, etc. and got some reasonable answers, so I guess we'll see how it goes if/when it comes to that...

 I've been scraping mine wishing for a tin-pot. Always fun to take a factory tour


