Arizer Solo

ilovebOObs

can i stick my male joint in there?
hey guys!

I had to get really vaked to write my humble opinion on my recently acquired Solo. :lol:
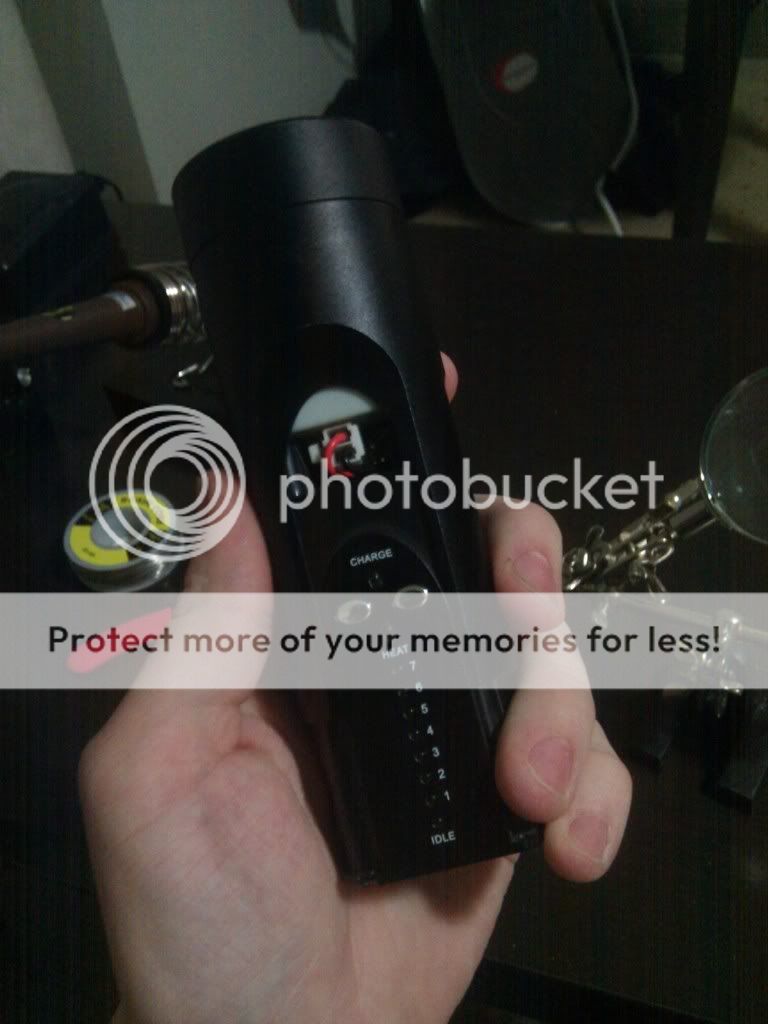
Although the Solo that came to my hands is an m105 and not the newer 107 it does a far far better job than my old PAMFLB at getting me medicated blazing fast and the taste is like nothing I had experienced before with either the box, the vapor genie or the lotus!
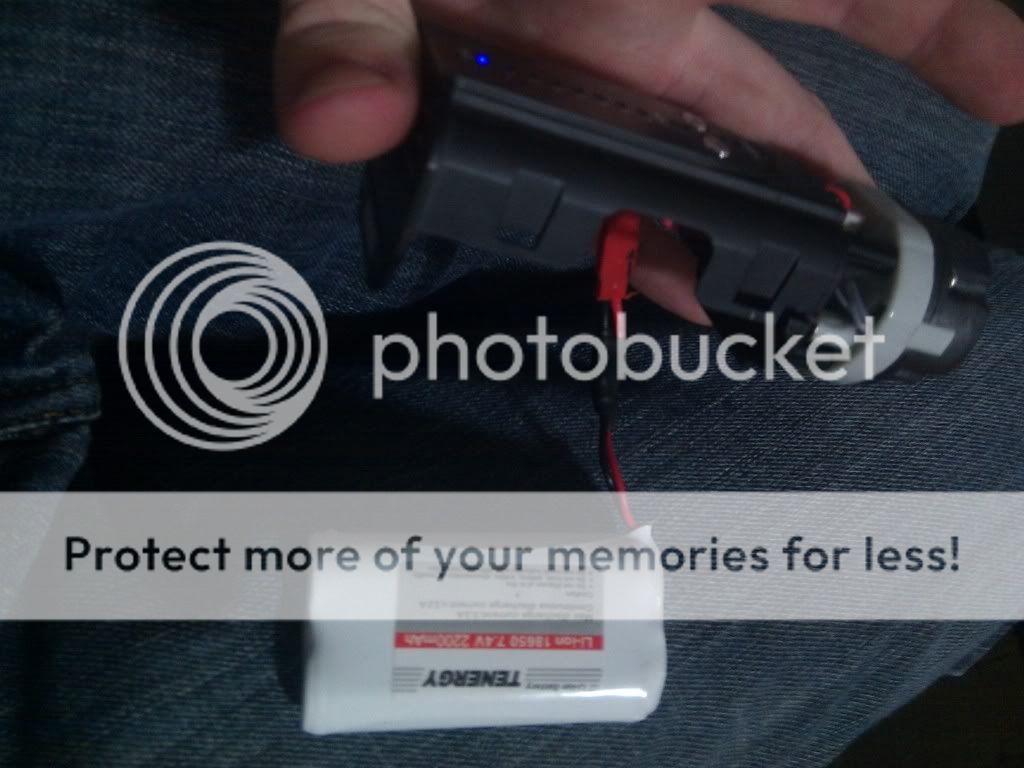
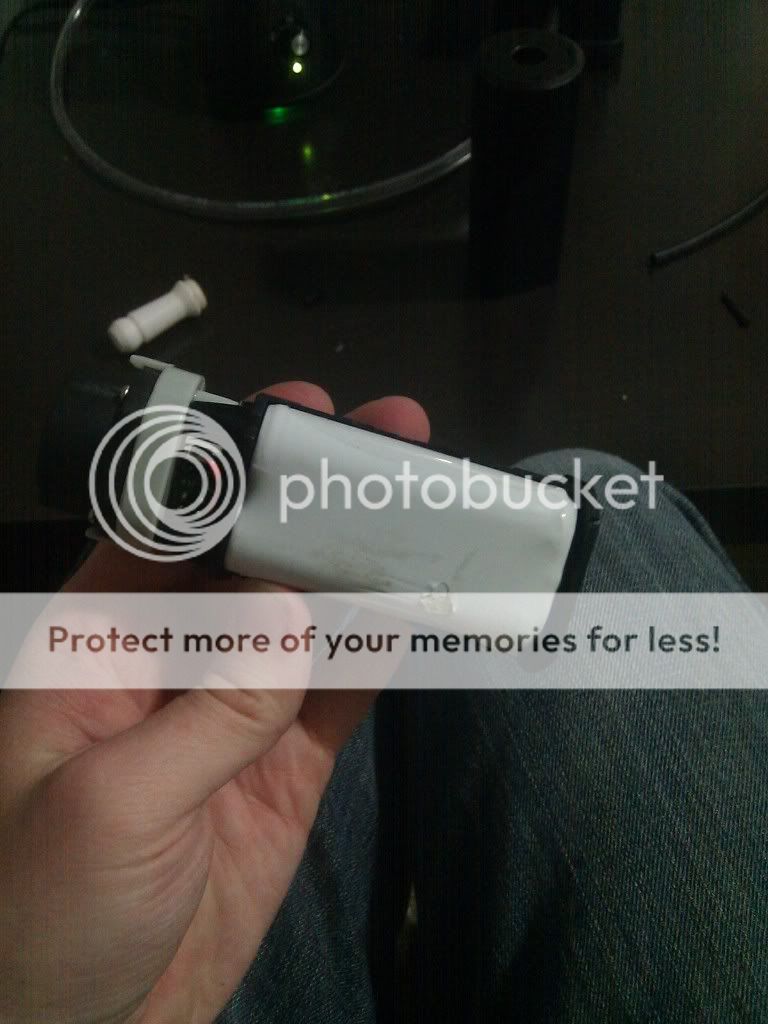
Although I sometimes like to suck on the Solo slowly and at lower temperatures to get the subtle tastes, the preferred way is hitting it hard at 7 for 4-5 big hits and that's usually enough for the next two hours. I think I also save a lot of battery like that and the taste is of the fullest spectrum possible (at least the first three hits)! Today I even made a small jar bubbler due to a zero budget for a decent glass, and the hits now are even bigger and smoother! Had three lightly packed bowls to test the airflow and now I am flying high with the eagles! :party: I have used an old jar, I made two holes on the plastic cap, one for the straight Solo stem with a LB battery ring attached for sealing and another for a small silicon whip. Tightened the cap a lot and the airflow is very restricted like the native Solo but it hits great especially if you move the stem around a little!

http://www.flickr.com/photos/57144240@N03/6857382880/
http://www.flickr.com/photos/57144240@N03/6857382874/
http://www.flickr.com/photos/57144240@N03/6857382868/

Next round I am putting ice inside, :rofl:!!!

Even tested the Solo on a bicycle ride around the nearby lake the other day and it was a much simpler, smoother and more effective outdoor experience than any with other vapes. Everything around the waist and off we go!

http://www.flickr.com/photos/57144240@N03/6857488462/

Super excited with the investment and a big thanks to Puffitup who have already sent me an m107 upon request as a replacement. Best portable vaporiser right now!!! End of discussion!

hahah nice setup, i love it :) maybe add a carb to the bong for easy clearing.

Question: A new "Latest Model" solo is around 162 from all the Amazon dealers. With free prime shipping no less.

Why should I not do this? Anyone with bad experiences or coupons for a source they think is more reliable?

Thanks.

planetvape and puffitup have coupons for FC memeber which makes the price more reasonable plus i know planetvape gave you some extra stuff like an extra stem, a grinder and a couple of the stem caps which makes up a bit of the cost too. i gotta say i love the volcano grinder that planetvape gave you, that thing does a better job then my space case, i love it.
 
ilovebOObs,

natural farmer

Well-Known Member
I just tilt the Solo forward and it clears! haha! And the airflow is better now that I don't use a screen or cotton. The particles go in the water! It hits greater now!!!
 
natural farmer,
  • Like
Reactions: ilovebOObs

SnidelyWhiplash

Well-Known Member
I found the
ArizerSolo90
coupon for puffitup... but although it says 90 off, it takes 40 off, making the price 189.

Still a reasonable price, but the question is, what about amazon is unreasonable making it undesirable to have faster shipping and a additional 30 dollars off?
 
SnidelyWhiplash,

ilovebOObs

can i stick my male joint in there?
I found the
ArizerSolo90
coupon for puffitup... but although it says 90 off, it takes 40 off, making the price 189.

Still a reasonable price, but the question is, what about amazon is unreasonable making it undesirable to have faster shipping and a additional 30 dollars off?

the main difference for me is the level of service you get when you have a problem with your product. i bought from amazon before when i had an issue they made deal with arizer directly when my product was only 1 week old. with planetvape and puffitup, they actually bend over backwards to make you happy :) .
 

VaphingApe415

Well-Known Member
Got my shipping conformation for my solo replacement from Arizer...Super juiced to get back into blowing some bomb; been in the concentrate realm for a minute...Other than the latch being a little sticky, those with vapecases; Yay or nay? Will the AC adapter and charger fit together in the case?
 
VaphingApe415,

u bwade wunner

Well-Known Member
2012032116111554.jpg


Bocote stem

20120321161044553.jpg


20120321161020989.jpg


capturedimage.png


here is the new solo stem from Eds TNT.way to go Ed Exotic wood Stainless steel bowl and stainless mesh screen

what do u think?

for me it will be perfect no breakages and the beautiful wood speaks for itself.sure to look nice in a black unit.I ve ordered a cocobolo already.will review when i receive it
 

natural farmer

Well-Known Member
Great for outdoors to avoid accidents but I guess you forget reclaiming. I would gladly use them on my bicycle rides though as I did with his wooden LB stems!
The SS part of the stem looks thicker than the glass bowl of the original stem. It seems it could block airflow from the 4 smal holes...
 
natural farmer,

jambandphan03

in flavor country
I would also be interested in a wood/ss stem is that a prototype, or is there a place to get them now?
 
jambandphan03,

u bwade wunner

Well-Known Member
@ stu :lol: I agree

or is there a place to get them now?

www.edstnt.com/

Here is Eds post:

http://fuckcombustion.com/threads/eds-tnt-wooden-vapor-tubes-vapor-stems.3342/page-34#post-203463

If the stem is changed it will be down to comment raised on the solo thread.I think vapor will run quite nice through it.

it will also work i imagine with Alans Hi Vape too.the internal bowl size on the wooden stem is 11mm and the external dimensions of the heat port on the Hi is 10mm.Double Bonus.

no idea on price give Ed a shout on his page.

The 14mm bowl size of the stem should be a nice fit in the solo heater too.

It would be neat if the mouthpiece of the stem could be mated into a 14mm gong wpipe. if you wanna water vape at a friends place but dont wanna carry multiple stems on the go.

oh and I ve nothing to do with Ed.he was kind enough to make it and I like nice looking wood
 
u bwade wunner,

ilovebOObs

can i stick my male joint in there?
Bocote stem


here is the new solo stem from Eds TNT.way to go Ed Exotic wood Stainless steel bowl and stainless mesh screen

what do u think?

for me it will be perfect no breakages and the beautiful wood speaks for itself.sure to look nice in a black unit.I ve ordered a cocobolo already.will review when i receive it

how does fit on the solo, loose or tight? and how does it it? looks really nice.
 
ilovebOObs,

u bwade wunner

Well-Known Member
how do you reclaim/ keep the inside of the wooden stem clean? better ask Ed that here or read through his thread and enjoy wood love

http://fuckcombustion.com/threads/eds-tnt-wooden-vapor-tubes-vapor-stems.3342/page-34#post-203463

how does fit on the solo
The stainless bowl is a copy of the glass bowl.its 14mm od so should fit pretty firm.

Sir Boobsguyver do you think the SS bowl needs vents or slits on the bottom edge of the bowl for better air circulation/vape production? Have you found noticeable better vapor production after you ve altered and then tested the bowls on you re glass stems?
 
u bwade wunner,

Ed's TnT

Woodsman
Manufacturer
Wow, really getting alota emails bout these Solo Tubes, thanks so much for you alls enthusiasm! They are not available for sale just yet. Hogleg was kind enough to get an Arizer out to me for me to eye ball and make 100% sure the right dimensions and also performance. Ok so here are some specs. With the glass I am working with the OD is 14.55mm the SS is 14.23mm OD, glass bowl is 11.65mm ID and 10mm depth, SS bowl is 9.52mm ID which has a wide taper for a slightly wider opening which should not hinder the air flow from the unit 15mm bowl depth, glass over all length is 4 1/2" and the wood is 4 3/16". The draw hole through the entire wood is 1/4" and the glass is rather large just at almost 1/2". Mine has the SS screen mesh which allows for plenty of airflow, not 4 small holes. In my hand the two are damn near identical in size, I really feel like these are gonna work as is, may not need any mods of any sort. I have tot take the kids to school this morning and am eager to spin another when I get back. Wanna make a badass cocobolo tube! The wood themselves should be able to be removed so the SS can be cleaned and soaked. The wood should never be soaked, I suggest dipping a pipe cleaner in ISO shaking the excess off and then pushing through the tube, really never had anyone with a great need to soak the wooden tubes for the Zap I also make. Pricing will be comparable to the Zap tubes I also make. Wanna wait to get the unit before putting a price on em and making them available for sale. I am really excited about making a new product and these do seem to be popular already. Thanks again for the interest!
 

Kuroth1

Get your Freak on....
Just wanted to report back now that I have had a few chances to use it, LOVE my new Solo..

Got the 107 Silver from Planet Vape.. Great people to do Buz with.. No bad smells or anything.. Perfect..

Yes the draw is a little stiff but having been using a MFLB for about 2 years the draw on my Solo seems like a piece of cake... LOL So I guess it all depends on what your use to..

Anyway what I have tried with Herb is I start at 4 and get around 4 really nice big hits.. Then I put it to 7 and get about 3 - 4 more big hits...


I think I will be using the Solo for a long time to come.. Its so easy to use...
 

ilovebOObs

can i stick my male joint in there?
how do you reclaim/ keep the inside of the wooden stem clean? better ask Ed that here or read through his thread and enjoy wood love

http://fuckcombustion.com/threads/eds-tnt-wooden-vapor-tubes-vapor-stems.3342/page-34#post-203463

The stainless bowl is a copy of the glass bowl.its 14mm od so should fit pretty firm.

Sir Boobsguyver do you think the SS bowl needs vents or slits on the bottom edge of the bowl for better air circulation/vape production? Have you found noticeable better vapor production after you ve altered and then tested the bowls on you re glass stems?

my glass bowls are hitting like champs now, vapor production was really good too. getting used to my new solo, been switching it up. i'm starting at 3 now and ending at 5. i really want to get a 2nd opinion on my stem mod. man that wood stem looks so awesome and can be used on the HI too, thats pure win for me.
 

sessnet

Noob Saibot
i really want to get a 2nd opinion on my stem mod.

Hey boobs - send me the stem, and some of that purple you had - and I'll test it for you.

Seriously, I just got a small torch and want to try your trick on one of the extra stems I have...but if I ruin it - that's like $20+ down the drain...also, I've never mess with glass before so it would be unwise for me to make this my first try at glass.

I bought a disk from tintest, and would like to use that as my solution for the drag problem. I should have it sometime next week, since it got sent to the wrong place by mistake!
 

steven22

Well-Known Member
Noticed a weird issue.... since I got my replacement vape , I havnt touched my old ceramic that was chipping...only been about 2 weeks..

anyways, today i decided to check the old one to compare but it wont turn on anymore...pretty much dead.

I tried plugging it in to charge thinking it was just a dead battery, but it doesnt even charge properly. all the yellow lights light up to #7, then the charging light blinks green and red nothing else happens, I left it like that over night and still nothing. as soon as I unplug it goes flat.

any ideas?...I tried to unscrew it and this units case is really stuck on the solo, it wont budge or slide off at all.
 
steven22,

Kuroth1

Get your Freak on....
So, the parts came in, and I've replaced the battery in my solo. I noticed the improvement the very next day, usually I turn on my solo at my desk and go downstairs to go outside for a 'smoke'. Usually my solo would just be getting to temp 2 by the time I was outside. I was at level 4 before I even got out of the elevator. I get about two extra cycles with the new battery as well.

Now for the con, the battery pack I received was about 5mm larger than the one that was in the solo originally. I didn't even notice the change in size when I tested the batteries to make sure they would fit before I started the swap. While this may not seem like a huge issue, it is, because the extra 5mm pushes the housing upwards ever so slightly which causes the heating element to not properly align with the hole on the cap. I've used a dremel to widen my cap's opening but it is still pretty tight up there. I would run it without the cap but the stems are just so loose that walking or moving around with a stem isn't much of an option and you need two hands to ensure the stem dosen't stick to my lips and pull the stem out.

If you are interested in making this swap yourself, please, please, PLEASE put alot of careful thought and consideration in doing this. If you don't know how to solder or are unfamiliar with batteries in general there are alot of things that you can do wrong which will render your solo unusable. As with any online tutorial I am not responsible for the condition your solo comes out of this transfer in.

Now to brass tacks;

IMG_20120318_210045.jpg


This is what you are going to need if your doing things my way. Left to right we have a Sautering Iron, Rosin Core Sauter, Wire Crimpers, the Arizer solo, heat shrink tubing (hard to see), the replacement pack and a fine tipped phillips screwdriver. The Solder Caddy in the middle is optional, but makes the rather difficult task of soldering two wires togther possible. Your not going to need MFLB batteries or a CVault label. I don't know why those were there.

The first thing to do is to remove the four screws from the bottom of the solo. These screws have a very fine receptacle, so you need a really tiny one, or an eyeglass screwdriver. Afterwards, the sheath slides right off:

IMG_20120318_210116.jpg


There's a plastic cover held in place by four tabs. I used to have a really hard time getting this off untill I realized that you can slide a credit card or razorblade in to the tab like a shim and twisting lightly. Taking it off reveals the battery:

IMG_20120318_210132.jpg


The battery is held in place by a JST brand RCY connector. These are standard to the electronics industry and if you have access to a really good hobby store they are almost certain to have them. Unfortunately, I could not for the life of me get these ordered in an amount less than 100 dollars so I went with direct soldering. If you can get these, USE THEM, they will make things so much easier. But they pull right apart easy and revealing the circuit board:

IMG_20120318_210202.jpg


The battery that you are getting to replace the solo's stock battery needs to be a lithium polymer pack. This pack is consists of two 18650 cells at 3.2 volts double teamed to output 7.4 volts at once. The stock battery in your solo is 2200mah. I know alot about batteries, and I have chosen a 2200mah pack to replace it with as well. There are many, many pack suppliers who will claim things like 2800 or 3000 or even 3500 mah on their batteries, and I will tell you straight up they are either bold face lying and selling a 2200 as a higher capacity cell, or are running the batteries so far outside of their safety threshold its like trying to nascar in a nissan.

Comparison shot:

IMG_20120318_210218.jpg


It is important to make the cut giving as much free wire as you can towards the JST connector, this gives us the change to cut off a little bit to try again if we make a mistake sautering. But don't cut it all the way down or we will have to much wiring to put back into the solo. This is where I cut it. Also be warned unless you do them 1 by 1 there is going to be a huge flash of sparks when you cut the wires.

IMG_20120318_210300.jpg


Cut the wires on the battery down to about an inch, and turn on your sauter gun. It works best to interleave the wires before you solder to make a good connection. As well, I added a small bit of heat shrink tubing to the battery wire, this will protect the soldered wires from coming in contact with each other or the metal wall of the unit which would have a disastrous effect on your solo. Ready the wires for soldering and lets go! If you don't have a solder caddy, then crimp the leads a little longer and try wrapping them around each other to keep them in place.

IMG_20120318_210808.jpg


I have no pictures of the soldering process because, obviously, I needed my hands for that. But if you need tips on how to solder, you should NOT be doing this. After soldering and shrink wrap:

IMG_20120318_213543.jpg

IMG_20120318_213605.jpg

IMG_20120318_213713.jpg


And there you have it! A solo that is going to perform just like it did when it came out of the box. Again, please don't do this unless you know what your doing. If you have any questions ask away and I'll answer as I can.

Have fun and happy vaping!


CentiZen How long did you batty last before you had to change it??? And how much use??
 
Kuroth1,

steven22

Well-Known Member
Noticed a weird issue.... since I got my replacement vape , I havnt touched my old ceramic that was chipping...only been about 2 weeks..

anyways, today i decided to check the old one to compare but it wont turn on anymore...pretty much dead.

I tried plugging it in to charge thinking it was just a dead battery, but it doesnt even charge properly. all the yellow lights light up to #7, then the charging light blinks green and red nothing else happens, I left it like that over night and still nothing. as soon as I unplug it goes flat.

any ideas?...I tried to unscrew it and this units case is really stuck on the solo, it wont budge or slide off at all.

EDIT, I have been able to open the unit, and I noticed something surprising.

There is glue all over the inside of the metal casing. This was the reason my unit was stuck. I had to put a really large amount of pressure and it finally gave. I looked inside and its residue of a light blue glue. this is a M103 unit, M107 has no glue. nor does another M104 that I used. those 2 opened very easily.

the M103 also doesnt stink. Im still up for suggestions on how to fix this dead M103 that I have

Thank you
 
steven22,
Took a trip next door with the solo today. I was over there last night doing bong hits and noticed that my solo stem might fit into the downstem on the neighbors piece, so we had to give it a try. Success! Got pretty ripped with my 105 on 7, we were getting clouds but we def weren't able to milk that bitch up like some of you guys in your vids. Kinda disappointing. Thinking bout selling my 105 now and ordering a 107.

Also realized some reg bong hits every now and then aren't so bad. I got really ripped last night compared to when I vape. Kinda miss that old heavy stone.
 
E.F.Searles,

stickstones

Vapor concierge
^^^
yupyup...going out for some ssv wand hash to burn in a bong right now. It's a good shakeup and keeps the tolerance from going up so quickly.
 
stickstones,

CentiZen

Evil Genius in Training
Accessory Maker

Oh I've followed the Arizer Solo since it's introduction and this is one of the original SS units, an M102. I got it as soon as it came out and it has been my primary vaporizer ever since. I would estimate I run it through anywhere from 3 - 7 times daily, each session being about 15 minutes long. This thing has gone through so much use it is not even funny, and more a testament to the incredible longevity the unit is designed for. I don't remember exactly when I bought it but it but I think I've had it about a year or so and I've used it every single day.
 
CentiZen,
Top Bottom