Arizer Solo

Kuroth1

Get your Freak on....
you have it backwards. you stem is so tight its not going all the way in that why you think its loose. surprised your it working at all that way.... it will work way better once you insert the stem fully....

no your stem is tight like its supposed to be..... you are not inserting it all the way.....

dont just jam it in there... it takes a little finesse.

heat the solo up and roll the stem gently like you see in the video below.... about 2:10 into the video


Stuff like this is covered in the vaporpedia entry for the solo in my sig. good place to look if you are a new solo owner.


Wow... I see now.. Wish I had know this sooner.. LOL I was on 7 and not even getting any Visible vape.. Could not figure out what was wrong and REALLY bummed that I thought I would have to hold the Stem All the time..

Thanks very much for this video...

Arizer should really include something in the documentation about this.. I think it was on Amazon where some buyers blasted the Solo because of this very issue.. Call me dumb but being as the stem is glass I was afraid to push on it at all...
 
Kuroth1,
  • Like
Reactions: cycleb

Pcpvapors

Well-Known Member
When charging I get a flickering light which then goes solid at level 3 but then no flickering at level 4. What's the normal indicator wen charging for you guys? My charge light still blinks green I'm just slightly confused.
 
Pcpvapors,

Kuroth1

Get your Freak on....
When charging I get a flickering light which then goes solid at level 3 but then no flickering at level 4. What's the normal indicator wen charging for you guys? My charge light still blinks green I'm just slightly confused.


When charging my Green light blinks on and off.. When it goes solid green you are done charging.. That is my understanding..
 
Kuroth1,

cycleb

Well-Known Member
Wow... I see now.. Wish I had know this sooner.. LOL I was on 7 and not even getting any Visible vape.. Could not figure out what was wrong and REALLY bummed that I thought I would have to hold the Stem All the time..

Thanks very much for this video...

Arizer should really include something in the documentation about this.. I think it was on Amazon where some buyers blasted the Solo because of this very issue.. Call me dumb but being as the stem is glass I was afraid to push on it at all...
Well, hopefully you kept your ABV. ;-{)
 
cycleb,

sessnet

Noob Saibot
When charging I get a flickering light which then goes solid at level 3 but then no flickering at level 4. What's the normal indicator wen charging for you guys? My charge light still blinks green I'm just slightly confused.

It will flicker in between numbers...or it's just some sort of special effect. There's nothing wrong with it that way, I guess, since mine does that too.
 
sessnet,

Frederick McGuire

Aggressively Loungey
Well, After far too long, Here it is!
The Video of The Duo
Its not the best lighting to see the exhales, but I'm planning on re-shooting a better one.

Edit:
The solo with the cap on is my M102 Ceramic, The one without is my M105 SS.
Any hits before the video pans up are with both at 4, any hits after that are with both at 7.
I was editing down a 9 min video, so quite a few hits got trimmed out.
 
Frederick McGuire,
  • Like
Reactions: ilovebOObs

Pcpvapors

Well-Known Member
Just goofy to me that it stopped at 3, oh well it fully charged so as they say if it ain't broke dont fix it
 
Pcpvapors,

sessnet

Noob Saibot
Well, After far too long, Here it is!
The Video of The Duo
Its not the best lighting to see the exhales, but I'm planning on re-shooting a better one.

Crazy man! Looks like a wishbone :) Is that the Mobius Reti bubbler? Is that your favorite one?

EDit: I see it in your sig, and at the end of the video. I was considering the Reti one since it's one of the only bubblers left on ALT...but I opted for something else which I will get tomorrow. Also, you inspired me to order the Y connect, which I did earlier today!
 
sessnet,

Frederick McGuire

Aggressively Loungey
Yep, its a reti.
It's the "clear" model of the bubbler, so the base is hollow and holds water.The ion just has a Cylindrical can with a solid foot.
Its hard to pick favorites. I love the LW that I used in the vid, But I also Love the Reti (also used in the Vid), and I've got a matrix on the way (:D)

For my next vid I'm gonna see how many different pieces I can cram into 1 vid :lol:
Maybe 6? lol
 
Frederick McGuire,

Stu

Maconheiro
Staff member
I want to see someone go for the triple. :brow: I'll call ALT to see if they have any adapters in stock.
 
Stu,

natural farmer

Well-Known Member
Well, After far too long, Here it is!
The Video of The Duo
Its not the best lighting to see the exhales, but I'm planning on re-shooting a better one.

Edit:
The solo with the cap on is my M102 Ceramic, The one without is my M105 SS.
Any hits before the video pans up are with both at 4, any hits after that are with both at 7.
I was editing down a 9 min video, so quite a few hits got trimmed out.

They look like monster hits No matter what the lighting is like!!!
 
natural farmer,

Frederick McGuire

Aggressively Loungey
Haha, I actually edited out a bit of myself coughing after that last one.
@stu, if I had a 3rd solo I'd invest in another y adapter. :lol:
Anyone want to send me a solo? :lol:
 
Frederick McGuire,

Frederick McGuire

Aggressively Loungey
:rofl:
OK, I'll take another one for the team, send me 2 solos :lol:

I was going through my camera and found this vid I shot of the solo going through my SYN mini-beaker:
 
Frederick McGuire,
  • Like
Reactions: ilovebOObs

CentiZen

Evil Genius in Training
Accessory Maker
So, the parts came in, and I've replaced the battery in my solo. I noticed the improvement the very next day, usually I turn on my solo at my desk and go downstairs to go outside for a 'smoke'. Usually my solo would just be getting to temp 2 by the time I was outside. I was at level 4 before I even got out of the elevator. I get about two extra cycles with the new battery as well.

Now for the con, the battery pack I received was about 5mm larger than the one that was in the solo originally. I didn't even notice the change in size when I tested the batteries to make sure they would fit before I started the swap. While this may not seem like a huge issue, it is, because the extra 5mm pushes the housing upwards ever so slightly which causes the heating element to not properly align with the hole on the cap. I've used a dremel to widen my cap's opening but it is still pretty tight up there. I would run it without the cap but the stems are just so loose that walking or moving around with a stem isn't much of an option and you need two hands to ensure the stem dosen't stick to my lips and pull the stem out.

If you are interested in making this swap yourself, please, please, PLEASE put alot of careful thought and consideration in doing this. If you don't know how to solder or are unfamiliar with batteries in general there are alot of things that you can do wrong which will render your solo unusable. As with any online tutorial I am not responsible for the condition your solo comes out of this transfer in.

Now to brass tacks;

IMG_20120318_210045.jpg


This is what you are going to need if your doing things my way. Left to right we have a Sautering Iron, Rosin Core Sauter, Wire Crimpers, the Arizer solo, heat shrink tubing (hard to see), the replacement pack and a fine tipped phillips screwdriver. The Solder Caddy in the middle is optional, but makes the rather difficult task of soldering two wires togther possible. Your not going to need MFLB batteries or a CVault label. I don't know why those were there.

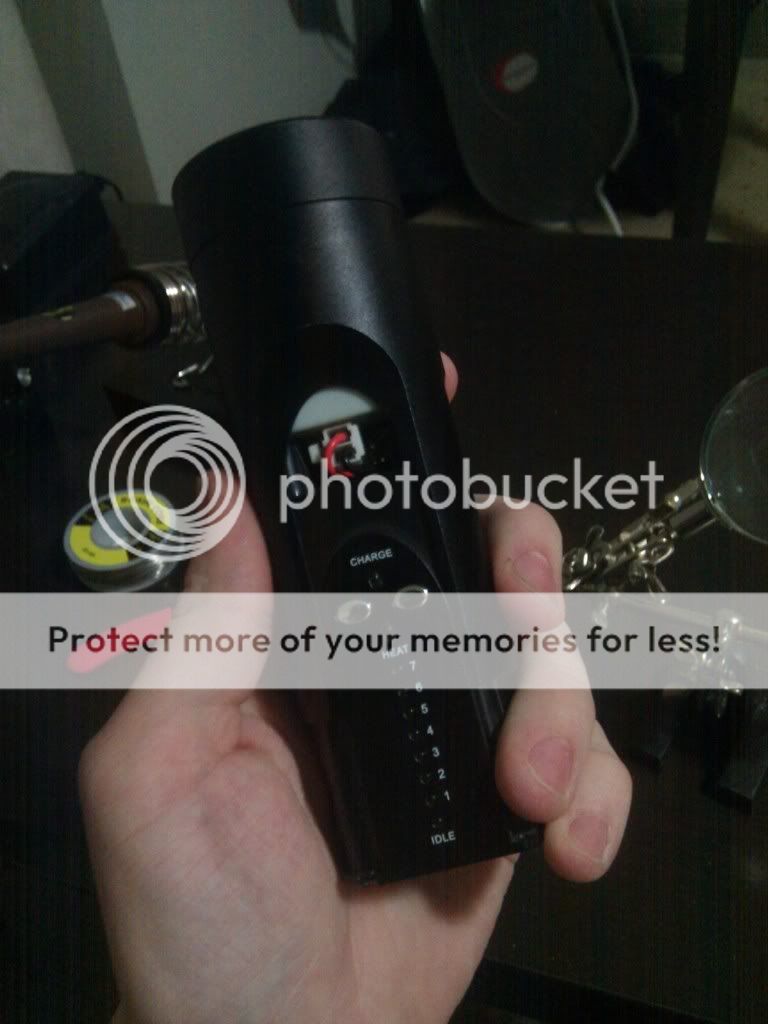
The first thing to do is to remove the four screws from the bottom of the solo. These screws have a very fine receptacle, so you need a really tiny one, or an eyeglass screwdriver. Afterwards, the sheath slides right off:

IMG_20120318_210116.jpg


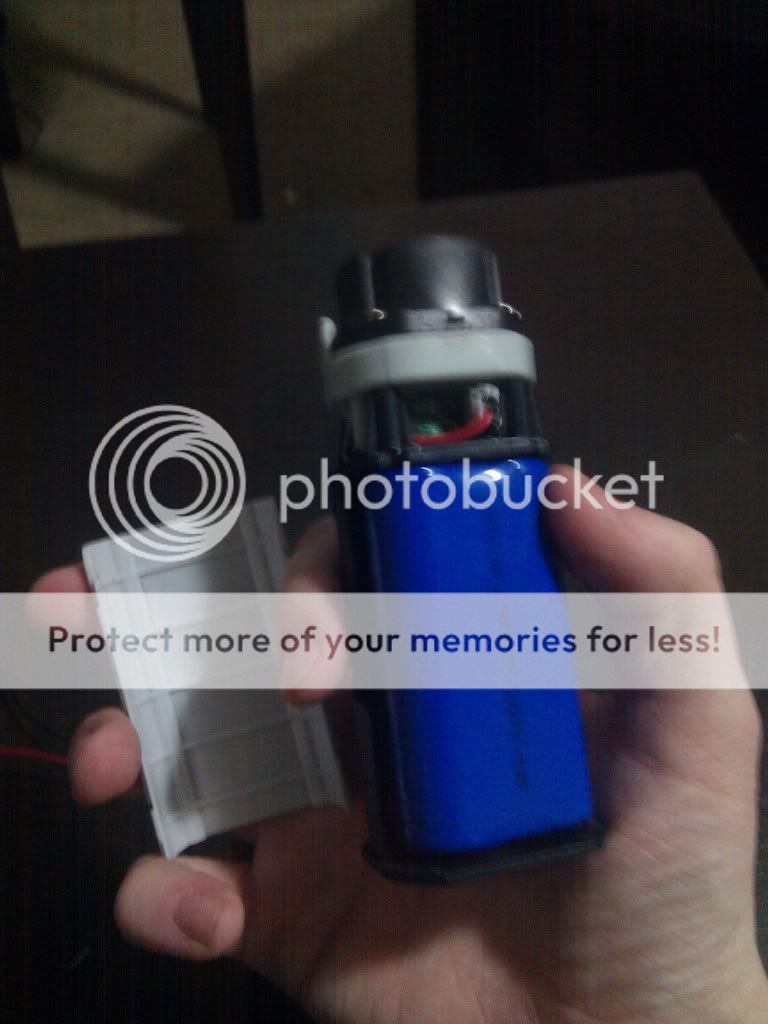
There's a plastic cover held in place by four tabs. I used to have a really hard time getting this off untill I realized that you can slide a credit card or razorblade in to the tab like a shim and twisting lightly. Taking it off reveals the battery:

IMG_20120318_210132.jpg


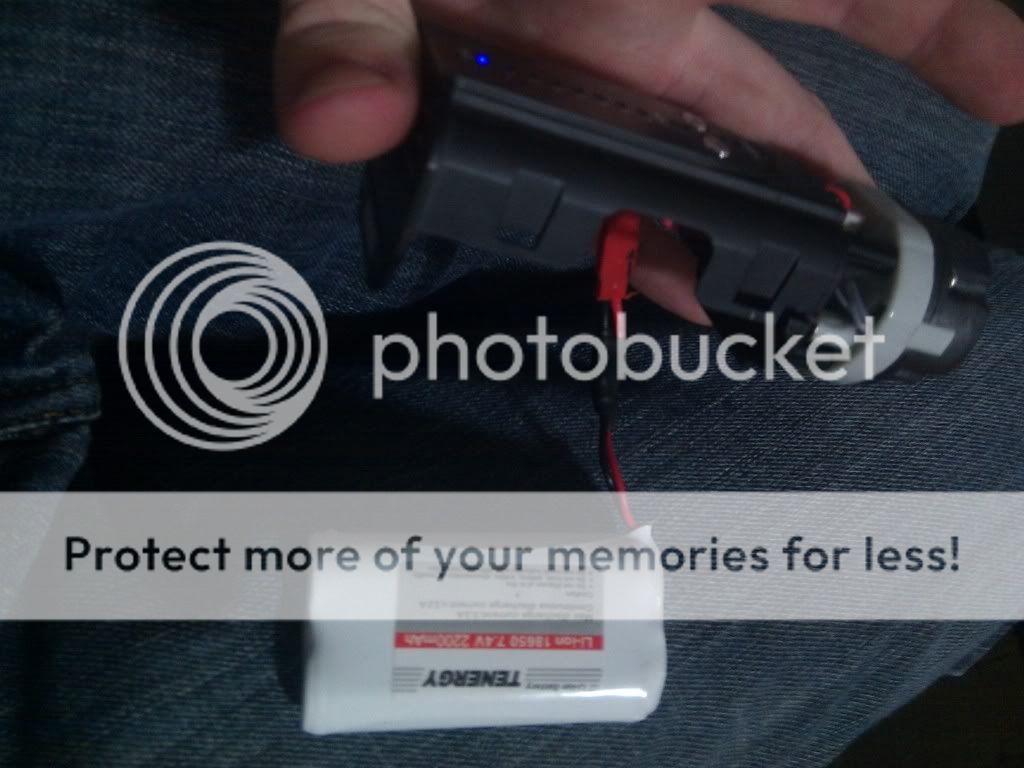
The battery is held in place by a JST brand RCY connector. These are standard to the electronics industry and if you have access to a really good hobby store they are almost certain to have them. Unfortunately, I could not for the life of me get these ordered in an amount less than 100 dollars so I went with direct soldering. If you can get these, USE THEM, they will make things so much easier. But they pull right apart easy and revealing the circuit board:

IMG_20120318_210202.jpg


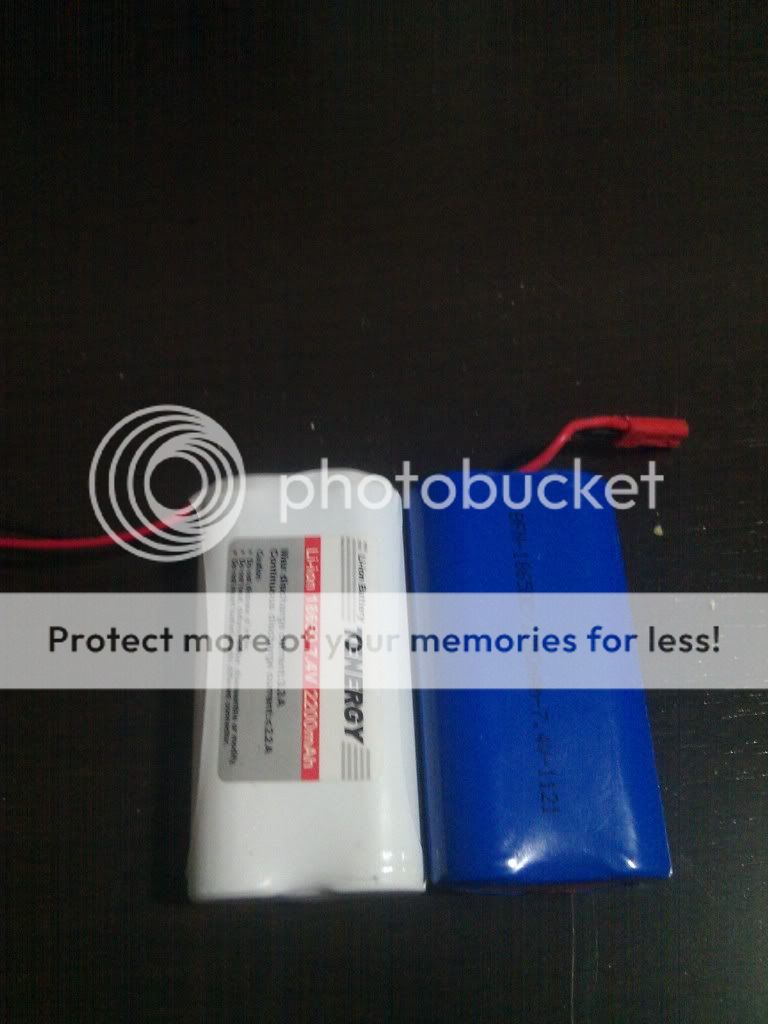
The battery that you are getting to replace the solo's stock battery needs to be a lithium polymer pack. This pack is consists of two 18650 cells at 3.2 volts double teamed to output 7.4 volts at once. The stock battery in your solo is 2200mah. I know alot about batteries, and I have chosen a 2200mah pack to replace it with as well. There are many, many pack suppliers who will claim things like 2800 or 3000 or even 3500 mah on their batteries, and I will tell you straight up they are either bold face lying and selling a 2200 as a higher capacity cell, or are running the batteries so far outside of their safety threshold its like trying to nascar in a nissan.
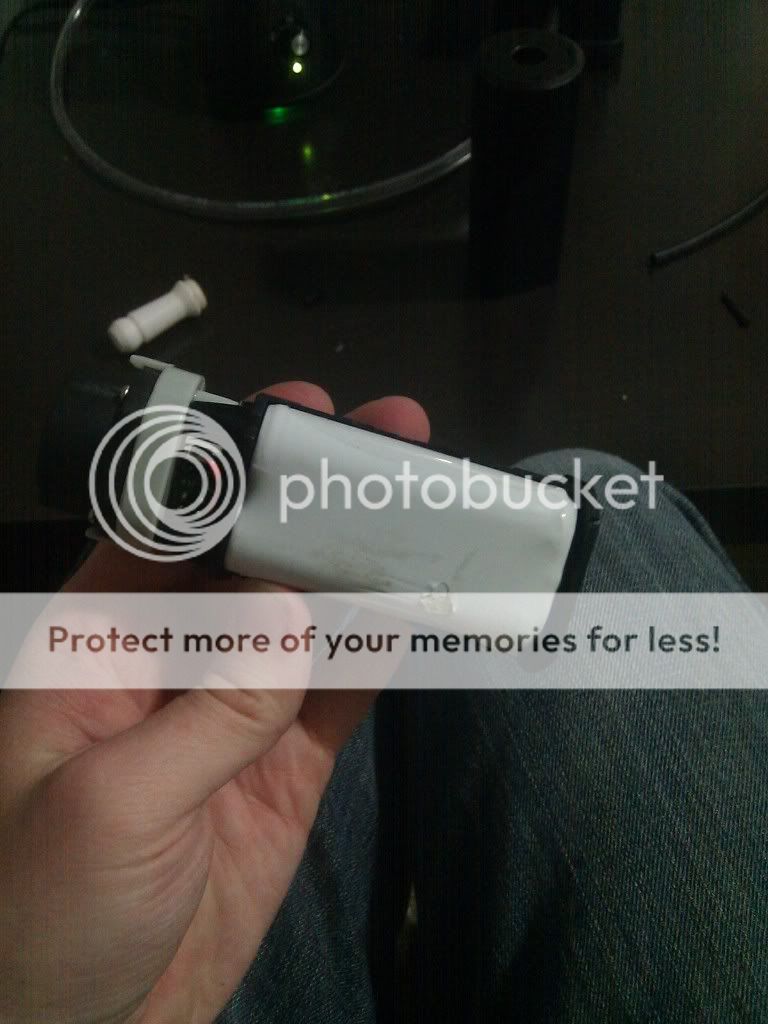
Comparison shot:

IMG_20120318_210218.jpg


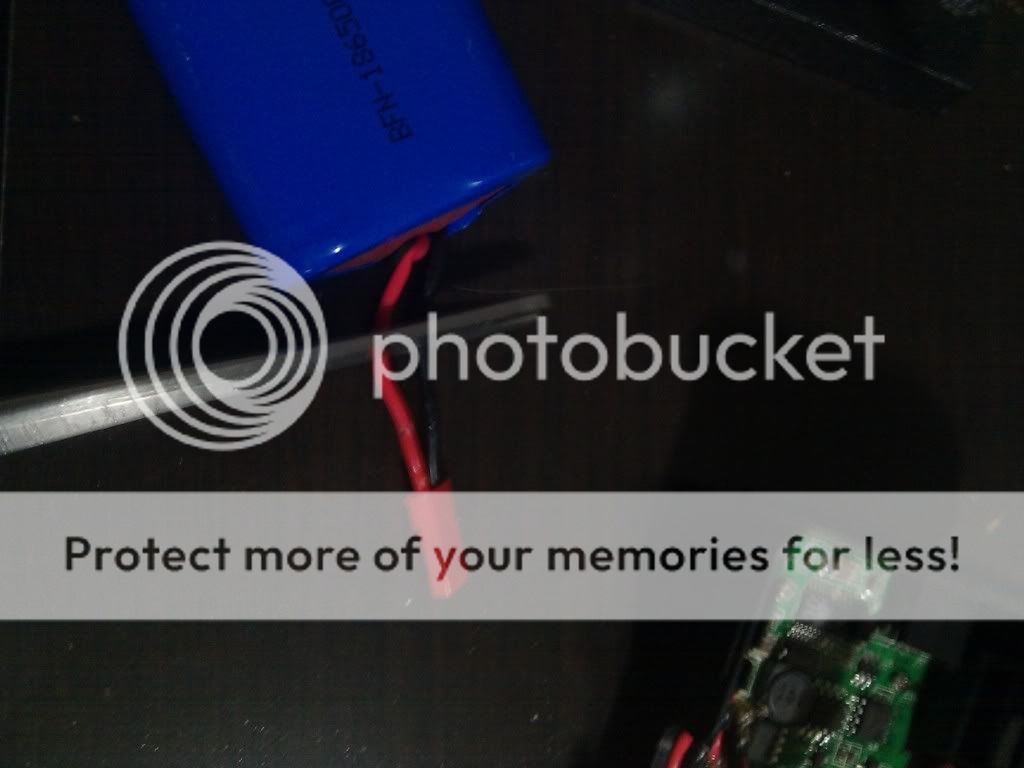
It is important to make the cut giving as much free wire as you can towards the JST connector, this gives us the change to cut off a little bit to try again if we make a mistake sautering. But don't cut it all the way down or we will have to much wiring to put back into the solo. This is where I cut it. Also be warned unless you do them 1 by 1 there is going to be a huge flash of sparks when you cut the wires.

IMG_20120318_210300.jpg


Cut the wires on the battery down to about an inch, and turn on your sauter gun. It works best to interleave the wires before you solder to make a good connection. As well, I added a small bit of heat shrink tubing to the battery wire, this will protect the soldered wires from coming in contact with each other or the metal wall of the unit which would have a disastrous effect on your solo. Ready the wires for soldering and lets go! If you don't have a solder caddy, then crimp the leads a little longer and try wrapping them around each other to keep them in place.

IMG_20120318_210808.jpg


I have no pictures of the soldering process because, obviously, I needed my hands for that. But if you need tips on how to solder, you should NOT be doing this. After soldering and shrink wrap:

IMG_20120318_213543.jpg

IMG_20120318_213605.jpg

IMG_20120318_213713.jpg


And there you have it! A solo that is going to perform just like it did when it came out of the box. Again, please don't do this unless you know what your doing. If you have any questions ask away and I'll answer as I can.

Have fun and happy vaping!
 

vape4life

Banned for life
for those with an m106/m107 with the newer teflon rings, do they move at all? I noticed a teeny gap about 1/3rd around the ring where abv was getting into and wasn't sure, so I removed the cap and pressed it upside down on to a flat hard surface (table). It did flatten out a bit but still not "flush" like most of it. I'm being pretty anal, but just wondering. The stems fit much tighter after I do this as well which is a nice added bonus to kind of "reset" the ring after it's been used a bit. I swear it felt like it was new I had to push pretty hard to puncture it through. Or is this ring supposed to be "fixed" and maybe glued or adhered to the stainless steel bowl so it's always flush all around?
 
vape4life,

ilovebOObs

can i stick my male joint in there?
you can take it off, just unscrew the cap off then take off those 4 screws on top.
 
ilovebOObs,

hogleg

Well-Known Member
for those with an m106/m107 with the newer teflon rings, do they move at all? I noticed a teeny gap about 1/3rd around the ring where abv was getting into and wasn't sure, so I removed the cap and pressed it upside down on to a flat hard surface (table). It did flatten out a bit but still not "flush" like most of it. I'm being pretty anal, but just wondering. The stems fit much tighter after I do this as well which is a nice added bonus to kind of "reset" the ring after it's been used a bit. I swear it felt like it was new I had to push pretty hard to puncture it through. Or is this ring supposed to be "fixed" and maybe glued or adhered to the stainless steel bowl so it's always flush all around?
this is what adding an o ring does it keeps the stock ring flush
 
hogleg,

natural farmer

Well-Known Member
hey guys!

I had to get really vaked to write my humble opinion on my recently acquired Solo. :lol:
Although the Solo that came to my hands is an m105 and not the newer 107 it does a far far better job than my old PAMFLB at getting me medicated blazing fast and the taste is like nothing I had experienced before with either the box, the vapor genie or the lotus!
Although I sometimes like to suck on the Solo slowly and at lower temperatures to get the subtle tastes, the preferred way is hitting it hard at 7 for 4-5 big hits and that's usually enough for the next two hours. I think I also save a lot of battery like that and the taste is of the fullest spectrum possible (at least the first three hits)! Today I even made a small jar bubbler due to a zero budget for a decent glass, and the hits now are even bigger and smoother! Had three lightly packed bowls to test the airflow and now I am flying high with the eagles! :party: I have used an old jar, I made two holes on the plastic cap, one for the straight Solo stem with a LB battery ring attached for sealing and another for a small silicon whip. Tightened the cap a lot and the airflow is very restricted like the native Solo but it hits great especially if you move the stem around a little!

http://www.flickr.com/photos/57144240@N03/6857382880/
http://www.flickr.com/photos/57144240@N03/6857382874/
http://www.flickr.com/photos/57144240@N03/6857382868/

Next round I am putting ice inside, :rofl:!!!

Even tested the Solo on a bicycle ride around the nearby lake the other day and it was a much simpler, smoother and more effective outdoor experience than any with other vapes. Everything around the waist and off we go!

http://www.flickr.com/photos/57144240@N03/6857488462/

Super excited with the investment and a big thanks to Puffitup who have already sent me an m107 upon request as a replacement. Best portable vaporiser right now!!! End of discussion!
 

SnidelyWhiplash

Well-Known Member
Question: A new "Latest Model" solo is around 162 from all the Amazon dealers. With free prime shipping no less.

Why should I not do this? Anyone with bad experiences or coupons for a source they think is more reliable?

Thanks.
 
SnidelyWhiplash,

Gonzo

Slightly Stoopid
IME just about any of the reputable dealers will match an offer. Never hurts to ask.

*Edit*
Depending on where you are I would contact Planetvape or PuffItUp and see what they can do for you.
 
Gonzo,
Top Bottom