-
SCAM WARNING! See how this scam works in Classifieds.
You are using an out of date browser. It may not display this or other websites correctly.
You should upgrade or use an alternative browser.
You should upgrade or use an alternative browser.
TinyMight / TM 2
- Thread starter kuzko
- Start date
no dremel needed
It stays always inside the TM as the original one
You asked for pictures .. ok...take:

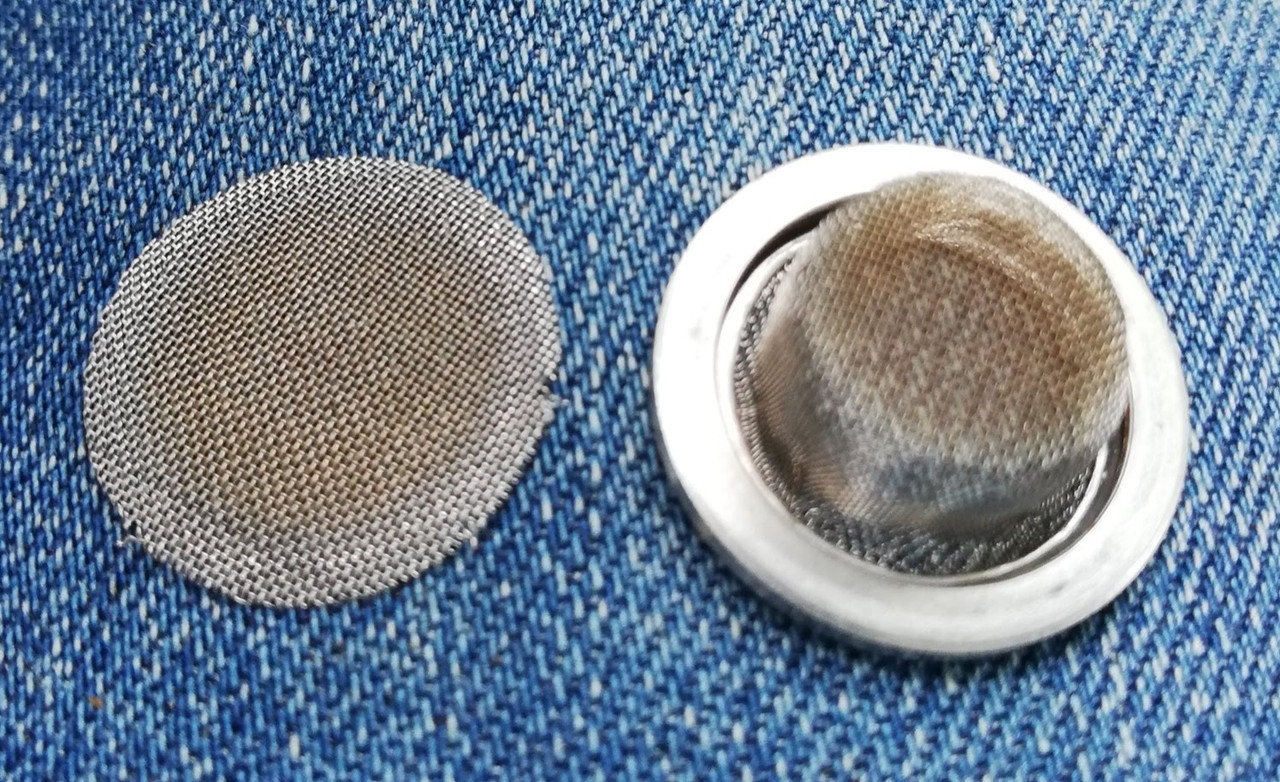
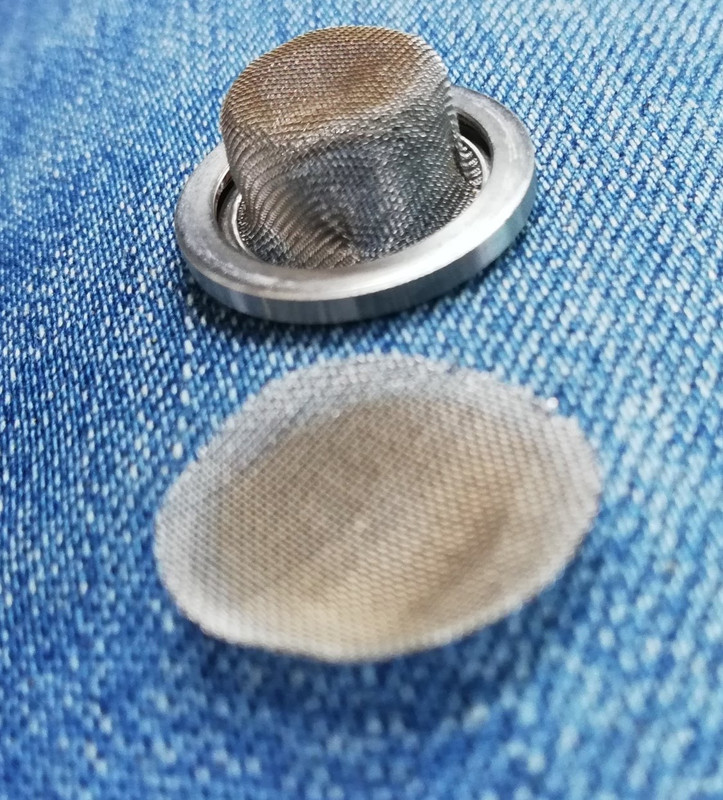
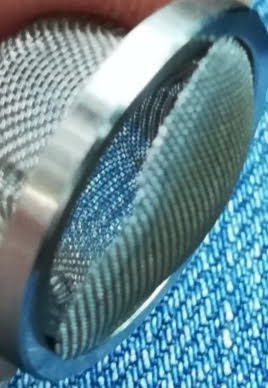
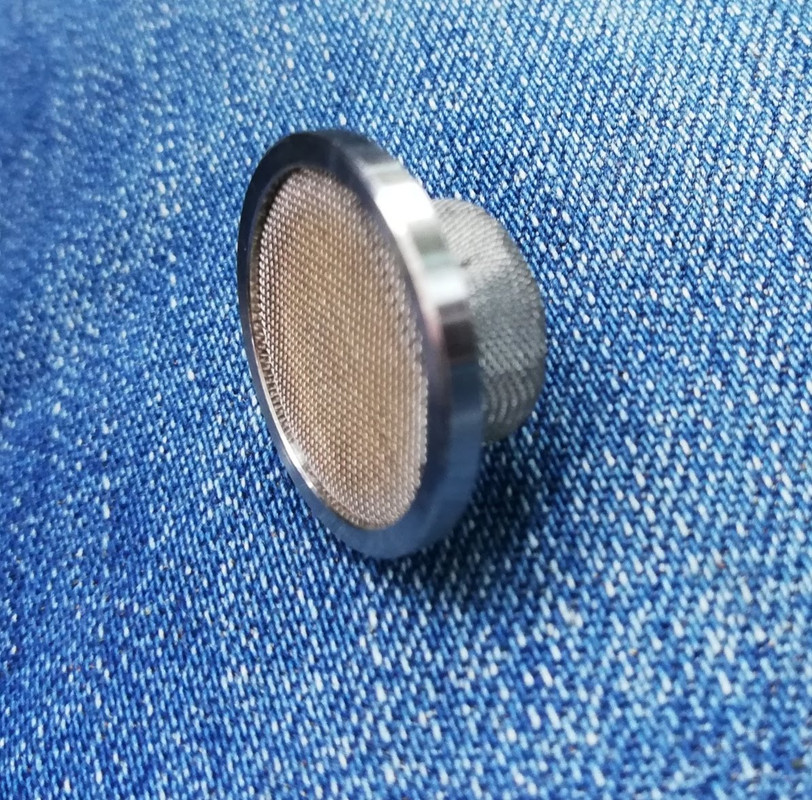

Nice, good thing I had an extra basket screen from my Arizer EQ. So much better than how I was using a domed screen in between the bud and mesh screen in the unit.
Anybody use any tool to open that battery door? I cannot make it that tight using only my thumb so I've been using a coin, but I noticed it's already scratching it up a fair bit. Now I've been looking around the house to see if there is something plastic or wooden that I can use instead that wouldn't be a hassle to keep with me when I bring my TM out.
Vaporific
All who wander are not lost...
 You all rock! Thanks for all the Tinymight tips and info. This vape is awesome and this forum and contributors/community is awesome too. It’s been that kind of day already, even for a Saturday. And yeah, I’ve already used my Tinymight today.
 Great weekend to all!
tokenknifeguy
Well-Known Member
Here is a prototype of a leather tube sleeve for on the carry protection. The top is exposed but should be enough to protect. This was just some scrap piece, which is why there are marks on it but I've already got several more stylish designs in mind. This was just a basic build to see how it does.
Also here is a leather carry pouch I'm working on for the TM. Big enough to hold the TM, an extra battery or two and a small container of herb. Not sure which is going to be the best way to hold the TM in there, standing up or laying down. Both work well so far.


Also here is a leather carry pouch I'm working on for the TM. Big enough to hold the TM, an extra battery or two and a small container of herb. Not sure which is going to be the best way to hold the TM in there, standing up or laying down. Both work well so far.


Cannabliss*420
Well-Known Member
tokenknifeguy
Well-Known Member
Damn that set up looks cold as fuck! You probably won't even feel it (thats not what she said).
Vaporific
All who wander are not lost...
Either I’m not using my Tinymight optimally OR I love it so much though I’m not over-using it OR I need to clean the stem and Cooling Unit more often. I’m noticing some droplets of reclaim between the CU and the stem while I’m sitting in my yard after some outdoor chores. I hadn’t really given too much thought to it after I soaked both for the first time a couple of weeks ago after having the TM for about 6-7 weeks. I may need more frequent cleanings. My range is 5.5-8 and usually average just inside that. While I don’t measure my load sizes are moderate and usually not as deep as the width of the stem; I start a fresh bowl at lower temp, take 2-3 draws, turn off and then repeat, maybe an extra draw to get full extraction at higher temp to finish the load. Any thoughts?
I’m now wondering if I should have ordered a second cooling unit, lol.
I’m now wondering if I should have ordered a second cooling unit, lol.

Either I’m not using my Tinymight optimally OR I love it so much though I’m not over-using it OR I need to clean the stem and Cooling Unit more often. I’m noticing some droplets of reclaim between the CU and the stem while I’m sitting in my yard after some outdoor chores. I hadn’t really given too much thought to it after I soaked both for the first time a couple of weeks ago after having the TM for about 6-7 weeks. I may need more frequent cleanings. My range is 5.5-8 and usually average just inside that. While I don’t measure my load sizes are moderate and usually not as deep as the width of the stem; I start a fresh bowl at lower temp, take 2-3 draws, turn off and then repeat, maybe an extra draw to get full extraction at higher temp to finish the load. Any thoughts?
I’m now wondering if I should have ordered a second cooling unit, lol.
oh yes you need a second CU at least. i cleaned my CU today first time after using it 3 days. the unit the screen and the glass tube were so dirty that must be cleaned. i vape about 7 sessions a day and cooling unit for me must be cleaned all 3 days. i am lucky to have 2. the glass tube must be cleaned or changed to new one about one day because it is soo dirty.
after cleaning CU today i must say it is not so easy to clean.
After 2 hours of exposure I saw that I had to dismantle it and have to clean
it with Q Tips. the CU is not easy to clean, but it is worth it to work very well with vaping. I will order at least 2 CUs that I don't have to clean as often.
When I was finished I noticed that it was not yet 100% clean, but no matter what, it gets dirty again.
Edit:
after cleaning with Iso 99% I asked myself whether it is ok to rinse the CU briefly with water, not that there is rust on the screw or threaded rod, for example. but I did it
oh and I had to twist apart the CU so that it gets really clean at all
Last edited:
GoldenBud
Well-Known Member
PlentyMight.
tokenknifeguy
Well-Known Member
I'm not 100% certain but I'm pretty sure that he is using stainless steel nuts and washers for the cooling unit. I don't think you have to worry about rust unless you leave it sitting in water for a long time. Rinsing it off should be no problem. When I clean my weed stuff, I use the ISO to get most of it off, then run hot water over it to get the rest. Usually get 95%+ of it.oh yes you need a second CU at least. i cleaned my CU today first time after using it 3 days. the unit the screen and the glass tube were so dirty that must be cleaned. i vape about 7 sessions a day and cooling unit for me must be cleaned all 3 days. i am lucky to have 2. the glass tube must be cleaned or changed to new one about one day because it is soo dirty.
after cleaning CU today i must say it is not so easy to clean.
After 2 hours of exposure I saw that I had to dismantle it and have to clean
it with Q Tips. the CU is not easy to clean, but it is worth it to work very well with vaping. I will order at least 2 CUs that I don't have to clean as often.
When I was finished I noticed that it was not yet 100% clean, but no matter what, it gets dirty again.
Edit:
after cleaning with Iso 99% I asked myself whether it is ok to rinse the CU briefly with water, not that there is rust on the screw or threaded rod, for example. but I did it
oh and I had to twist apart the CU so that it gets really clean at all
Also, I love how you can break everything down yourself and work on the unit if need too. I ended up pressing the screen down too far, like someone mentioned early and was able to take it apart and fix the problem. LOVE how you can do this and looks to be true for almost every part of the unit. I'm just not sure I got it put back 100% how it was, but it still working good so far. Plus it was good to see the quality parts used to build it. I was also worried about the rattling sound from the fire button, but once breaking it down, I see that there is nothing to worry about.
Summer
Long Island, NY
@Cannabliss*420, not having a TM yet so relying solely on pics, is that "4" CUs you have in your stem? 


Siebter
Less soul, more mind
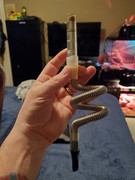
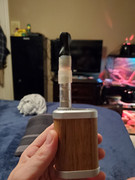
@Summer – No, the pic shows two stacked cooling units, each consisting of two segments screwed together by a long bolt.
Cooling overkill nonetheless. :-)
Yeah, I'm actually quite sure that rinsing it with hot water after soaking it in iso is kind of finalizing the whole cleaning process, as it washes off the resin saturated iso I guess. I do blow out the remaining water droplets and let it dry for a few minutes before using it again, I don't think rust will ever be an issue.
Cooling overkill nonetheless. :-)
I'm not 100% certain but I'm pretty sure that he is using stainless steel nuts and washers for the cooling unit. I don't think you have to worry about rust unless you leave it sitting in water for a long time. Rinsing it off should be no problem.
Yeah, I'm actually quite sure that rinsing it with hot water after soaking it in iso is kind of finalizing the whole cleaning process, as it washes off the resin saturated iso I guess. I do blow out the remaining water droplets and let it dry for a few minutes before using it again, I don't think rust will ever be an issue.
SquirrelMaster
Well-Known Member
Cannabliss*420
Well-Known Member
Yes@Cannabliss*420, not having a TM yet so relying solely on pics, is that "4" CUs you have in your stem?

Brewervapesalot
Well-Known Member
@Summer – No, the pic shows two stacked cooling units, each consisting of two segments screwed together by a long bolt.
Cooling overkill nonetheless. :-)
Yeah, I'm actually quite sure that rinsing it with hot water after soaking it in iso is kind of finalizing the whole cleaning process, as it washes off the resin saturated iso I guess. I do blow out the remaining water droplets and let it dry for a few minutes before using it again, I don't think rust will ever be an issue.
Water is 100% fine. The best stainless is 316, some times comes as 304 (the higher number is better quality both both are good and fine with water) and cheap Chinese shit can be so bad that its actually magnetic...
The CU's are not labeled, but appear to be 316 if I was to guess.
The only time I've ever had rust issues with stainless (and I've brewed beer with stainless for 20 plus years, cleaning it thousands of times with thousands of gallons of water) is if you elect to clean some stuck on whatever with a metal (even stainless) brillo/cleaning pad.
Never do that. Only use plastic scrubber pads if necessary. Rubbing metal on stainless will actually exchange the two metals to the degree rust WILL RESULT (easy to google).
Dont do that and stainless is very tolerant to water and chemicals (alcohol, high ph, acid sanitizers, cleaning products without chlorine or bleach).
Side note, bleach or chlorine exposure can pit stainless . So if, say in Chicago or another big city when they chlorinate heavy (like once a year or so), it wouldnt hurt to avoid that water for extended lengths of time.
Last edited:
Cannabliss*420
Well-Known Member
Don't knock it until you try it. Keeps it cool and no lost in flavor or air flow. You lose taste with water and air flow with glass beads, so this works great and the plenty mouth piece is very comfortable to draw from.Water is 100% fine. The best stainless is 316, some times comes as 304 (the higher number is better quality both both are good and fine with water) and cheap Chinese shit can be so bad that its actually magnetic...
The only time I've ever had rust issues with stainless (and I've brewed beer with stainless for 20 plus years, cleaning it thousands of times) is if you elect to clean some stuck on whatever with a metal (even stainless) brillo/cleaning pad.
Never do that. Only use plastic scrubber pads if necessary. Rubbing metal on stainless will actually exchange the two metals to the degree rust WILL RESULT.
Dont do that and stainless is very tolerant to water and chemicals.
Side note, bleach or chlorine exposure can pit stainless . So if, say in Chicago or another big city when they chlorinate heavy (like once a year or so), it wouldnt hurt to avoid that water for extended lengths of time.
Brewervapesalot
Well-Known Member
Don't knock it until you try it. Keeps it cool and no lost in flavor or air flow. You lose taste with water and air flow with glass beads, so this works great and the plenty mouth piece is very comfortable to draw from.
I did not knock anything. I was talking about rust and stainless steel....
(In fact, when I want a lot of cooling I put about 50 times as much stainless in the freezer and run my vape through that. Evo is awesome for it... minty cold vapor. Haven't tried it with tiny might yet...
https://ibb.co/p0mjhHc)
Last edited:
karec
Well-Known Member
oh yes you need a second CU at least. i cleaned my CU today first time after using it 3 days. the unit the screen and the glass tube were so dirty that must be cleaned. i vape about 7 sessions a day and cooling unit for me must be cleaned all 3 days. i am lucky to have 2. the glass tube must be cleaned or changed to new one about one day because it is soo dirty.
after cleaning CU today i must say it is not so easy to clean.
After 2 hours of exposure I saw that I had to dismantle it and have to clean
it with Q Tips. the CU is not easy to clean, but it is worth it to work very well with vaping. I will order at least 2 CUs that I don't have to clean as often.
When I was finished I noticed that it was not yet 100% clean, but no matter what, it gets dirty again.
Edit:
after cleaning with Iso 99% I asked myself whether it is ok to rinse the CU briefly with water, not that there is rust on the screw or threaded rod, for example. but I did it
oh and I had to twist apart the CU so that it gets really clean at all
Im sorryi keep reading posts about cleaning problems.... i simply dont understand what the fuzz about....

Here is how i do it, maybe not the easiest method but its not a problem is just an hassle....
So best time to do it is after a sesh or when the stem is warm
1- take the CU out
2- remove the orings & dismantle the CU by turning them loose
3- separate the washers, bolts and remove the CU screen
4- put inside some ISO or related for 10m (except the orings just dip in ISO and clean them)
5- brush any residue away
6- rinse with hot water and dry
7- assemble
Yes the stem and CU gets dirty really easy, i also like everything cleaned and hate to see the stem all dirty, i only have 1 CU and i clean it every 4/5 days.
Usually i stir before the last 2 draws, with the pick tool i push the CU inside the stem so i have plenty of space to stir without dropping any greens out and because of this my stem & CU get residue between them on the bottom part of the CU, but just by exposing the bottom part i can give a quick clean (without any solvent) and its good to go.
Hope this help
Cheers

LabPong
Well-Known Member
Don't knock it until you try it. Keeps it cool and no lost in flavor or air flow. You lose taste with water and air flow with glass beads, so this works great and the plenty mouth piece is very comfortable to draw from.
The opposite is true for me.....water brings out the real taste of the flower....when I dont use it or a rig...it all tastes like very harsh popcorn vapor....
Dayseed
Well-Known Member
I’d like to start by saying how great it is to finally join the forum. FC has been on my radar for a few years but I’ve steered clear out of fear of developing VAS. I really should have bitten the bullet a long time ago because the forum seems to be a really friendly community with a huge amount of useful information and helpful tips.
This thread in particular has been an invaluable resource when it comes to considering my next vape. There really isn’t much reliable info on the TM outside FC.
After reading through this topic I have a couple of questions that I don’t think anyone has covered.
Firstly I would be interested in hearing how the TM compares to the Solo. The Solo MK1 has served me well for a good few years and since I haven’t used any other vapes it’s my only frame of reference. I appreciate that they are apples and oranges when it comes to performance, but it would be useful to know how different the user experience is.
It would also be really helpful to hear from any TM users who suffer from asthma. Ordinarily my asthma is very mild and I’ve never experienced any problems whilst vaping (even taking bigger hits using the Solo with a water piece). However I’m concerned that the TM could be too much for my lungs when used on-demand at higher temperatures.
Last edited:
It would also be really helpful to hear from any TM users who suffer from asthma. Ordinarily my asthma is very mild and I’ve never experienced any problems whilst vaping (even taking bigger hits using the Solo with a water piece). However I’m concerned that the TM could be too much for my lungs when used on-demand at higher temperatures.[/QUOTE said:So for me it is that since I have the TM for 5 days I have to cough more than with the Migthy for example and have more mucus in the throat at night. So for the neck the Mighty was better. But it's worth it to me because the TM are stronger in the effect. it's not that extreme either, but I clearly notice it. .
sanchezman
Commander in Kief
I had a chance to try making some cork stoppers in preparation for my TM's arrival.
Lacking a dremel, I tried to hollow out the corks entirely with my drill. I started with a pilot hole using a 1/4" bit, then widened it with a 3/8" bit, and finally followed up with a 1/2" bit.


One problem I had while doing this was that the 1/2" bit and the cork do not play well together. The smaller sized drill bits made relatively clean holes, but the 1/2" one would begin tearing chunks of cork out if I wasn't careful:

I had originally figured that a 5/8" bit would drill a pretty good approximation of the mouthpiece diameter, but I didn't actually check to see if I owned a 5/8" bit. I'm not sure how well a bit that large would actually work on the corks, since it would hollow out so much that I think the cork might lose structure and just be torn to pieces. Then again, I'm not much of a handyman, so perhaps someone with better technique could pull it off.
A 1/2" doesn't create a large enough hole on its own, and I found that trying to force my RBT stems (which I'm using to estimate the TM mouthpiece size) into the 1/2" hole would just destroy the corks. I needed something to widen the hole a little more.
I tried using the drill to widen the hole I'd made by swirling it around the edges of the 1/2" hole. I found that this would either tear out more chunks of cork, or not really widen the hole at all. Luckily, I found a little hand-file in my toolbox whose width is almost perfectly the same as the RBT stem diameter.

(You can see my various mistakes on the top right)
I gently forced the file into the 1/2" hole and then used it to sand the hole until it was wide enough. Not only did this make the hole wide enough to fit the RBT stems, but it also cleaned up the chunky edges from the 1/2" bit and smoothed out the inside.
In the end, I got 4 usable corks and botched maybe 11. I think I can get a better success rate now that I know what to do.

This was actually not such a complicated process. I'm not a DIY-oriented person at all, and this was about 40 minutes of experimentation. I think these corks might work well to protect the stem in my pocket, but I'd hesitate to use one to hold a loaded stem outside the TM. The bottom of the hole in each cork is not flush, nor is it smoothed by the file. I think the ground bud might easily come loose and fall into the cork if not packed correctly. Maybe that's something to work on today...
Lacking a dremel, I tried to hollow out the corks entirely with my drill. I started with a pilot hole using a 1/4" bit, then widened it with a 3/8" bit, and finally followed up with a 1/2" bit.


One problem I had while doing this was that the 1/2" bit and the cork do not play well together. The smaller sized drill bits made relatively clean holes, but the 1/2" one would begin tearing chunks of cork out if I wasn't careful:

I had originally figured that a 5/8" bit would drill a pretty good approximation of the mouthpiece diameter, but I didn't actually check to see if I owned a 5/8" bit.
 I'm not sure how well a bit that large would actually work on the corks, since it would hollow out so much that I think the cork might lose structure and just be torn to pieces. Then again, I'm not much of a handyman, so perhaps someone with better technique could pull it off.
A 1/2" doesn't create a large enough hole on its own, and I found that trying to force my RBT stems (which I'm using to estimate the TM mouthpiece size) into the 1/2" hole would just destroy the corks. I needed something to widen the hole a little more.
I tried using the drill to widen the hole I'd made by swirling it around the edges of the 1/2" hole. I found that this would either tear out more chunks of cork, or not really widen the hole at all. Luckily, I found a little hand-file in my toolbox whose width is almost perfectly the same as the RBT stem diameter.

(You can see my various mistakes on the top right)
I gently forced the file into the 1/2" hole and then used it to sand the hole until it was wide enough. Not only did this make the hole wide enough to fit the RBT stems, but it also cleaned up the chunky edges from the 1/2" bit and smoothed out the inside.
In the end, I got 4 usable corks and botched maybe 11. I think I can get a better success rate now that I know what to do.

This was actually not such a complicated process. I'm not a DIY-oriented person at all, and this was about 40 minutes of experimentation. I think these corks might work well to protect the stem in my pocket, but I'd hesitate to use one to hold a loaded stem outside the TM. The bottom of the hole in each cork is not flush, nor is it smoothed by the file. I think the ground bud might easily come loose and fall into the cork if not packed correctly. Maybe that's something to work on today...
Vaporific
All who wander are not lost...
Thank you. I found yesterday what appear to be the same size corks on Amazon and planned to do the same as you since I don’t own a dremel, and just use progressively larger drill bits. I don’t own a round file however and may want to get one to finish off the process - or buy a dremel if the cost is negligible. I guess one more thing to add to the Depot list, lol.I had a chance to try making some cork stoppers in preparation for my TM's arrival.
Lacking a dremel, I tried to hollow out the corks entirely with my drill. I started with a pilot hole using a 1/4" bit, then widened it with a 3/8" bit, and finally followed up with a 1/2" bit.


One problem I had while doing this was that the 1/2" bit and the cork do not play well together. The smaller sized drill bits made relatively clean holes, but the 1/2" one would begin tearing chunks of cork out if I wasn't careful:

I had originally figured that a 5/8" bit would drill a pretty good approximation of the mouthpiece diameter, but I didn't actually check to see if I owned a 5/8" bit.I'm not sure how well a bit that large would actually work on the corks, since it would hollow out so much that I think the cork might lose structure and just be torn to pieces. Then again, I'm not much of a handyman, so perhaps someone with better technique could pull it off.
A 1/2" doesn't create a large enough hole on its own, and I found that trying to force my RBT stems (which I'm using to estimate the TM mouthpiece size) into the 1/2" hole would just destroy the corks. I needed something to widen the hole a little more.
I tried using the drill to widen the hole I'd made by swirling it around the edges of the 1/2" hole. I found that this would either tear out more chunks of cork, or not really widen the hole at all. Luckily, I found a little hand-file in my toolbox whose width is almost perfectly the same as the RBT stem diameter.

(You can see my various mistakes on the top right)
I gently forced the file into the 1/2" hole and then used it to sand the hole until it was wide enough. Not only did this make the hole wide enough to fit the RBT stems, but it also cleaned up the chunky edges from the 1/2" bit and smoothed out the inside.
In the end, I got 4 usable corks and botched maybe 11. I think I can get a better success rate now that I know what to do.

This was actually not such a complicated process. I'm not a DIY-oriented person at all, and this was about 40 minutes of experimentation. I think these corks might work well to protect the stem in my pocket, but I'd hesitate to use one to hold a loaded stem outside the TM. The bottom of the hole in each cork is not flush, nor is it smoothed by the file. I think the ground bud might easily come loose and fall into the cork if not packed correctly. Maybe that's something to work on today...
I do believe it’s time for a stem and CU cleaning from some of the comments above and perhaps more frequently too. I’d like to avoid taking apart the CU and I let the whole things sans orings soak in ISO last time for a while with a hot water rinse and air dry. I’m running low on ISO though. Perhaps I’ll whip up a small PBW batch for just the stem; I’ve never used PBW before and got it months ago. It’s gonna be a fun and productive Sunday with a bike ride thrown in.


