The Screwball by Vapvana

AndyO

Well-Known Member
It has less gems but it actually performs better imo than the original direct intake head that had 750g of gems. I think the way the air comes in helps it heat more effectively and I think it helps vape the sides more evenly.

Interesting to read your thoughts on that.

While I was keen on more bowl options, I haven't even really considered the new head/housing. For me the Screwball is perfect as is, I don't see any need whatsoever to change it.
 

LotV

Well-Known Member
Does anyone have the microdose bowl that they can compare to the full size?

Here is a quick focus stack for you:

sbbs.jpg


Do you want any other angles or perhaps some measurements?
 

ewtwolf

Member
Here is a quick focus stack for you:

sbbs.jpg


Do you want any other angles or perhaps some measurements?
What’s the one with the wider circular holed screen? Assuming the micro dose bowl is the thicker walled one, if so that’s awesome for heat soaking!
 
ewtwolf,

Pcloudy

Well-Known Member
Awesome, ordered! Had no idea these were on presale. Bargain for the bundle too . Anyone recommend a decent handle set for both the bowl and head? I assume the Ed’s TNT stuff for PID Coil and Shovelhead handles work ok? Tho I don’t need them made from wood, just something that doesn’t look like a prison yard shiv handle. And a matching set with the bowl would be nice.
I went with a dfreeze set. Matching coil and bowl handle. He has some in stock usually and can do custom orders as well. He also has a screwball so is able to test fit everything before sending.
I really like the new housing and just ordered the updated bowl. Ill have a whole separate ball vape minus the balls when its all said and done.
 

coolbreeze

Well-Known Member
w00t! Thank you Cal!

I recieved a couple prototype bowls with my new heater chamber. I'm not sure how close they are to the release version but if they're like these, they are fantastic! So far I've only used the Micro bowl and I think it's gonna be my new go-to. I really enjoy the OG half-bowl but the micro offers refinements and options: the smaller floor and tapered walls keep the herb bed in the focus of heat no matter the depth; a screen-covering is now a more normal small, flavorful dose; and full, it's a meaningful but not overwhelming amount. The taper creates thicker walls allowing for more heat buildup so conduction works well. I will continue to use the OG half-bowl (as well as the new regular bowl at the full setting) but this really brings additional dosing flexibility. Very nice work. Also with the new head, great airflow and I think I may have turned it down some!
IMG-8492.jpg
 

Choker

Well-Known Member
can someone help me with my new screwball.
I have it running a few temps to start with but am not seeing the same results I see others having.

I have tried a few temps but seem to only get nice rips at 280c after heat soaking with flower for 20-30secs.

I have tried heat soaking the bowl without herb but doesn’t work as well.

I also held the handle close to my hand at 280c it felt warm but not hot, is it supposed to feel really hot?

Just not sure my temps are accurate, or it’s my technique.

I am finding my dynavaps are getting bigger clouds with same flower.

May be user error.
My handle was also scratched on the titanium when I opened it? Maybe it was already opened somewhere?
 

coolbreeze

Well-Known Member
can someone help me with my new screwball.
I have it running a few temps to start with but am not seeing the same results I see others having.

I have tried a few temps but seem to only get nice rips at 280c after heat soaking with flower for 20-30secs.

I have tried heat soaking the bowl without herb but doesn’t work as well.

I also held the handle close to my hand at 280c it felt warm but not hot, is it supposed to feel really hot?

Just not sure my temps are accurate, or it’s my technique.

I am finding my dynavaps are getting bigger clouds with same flower.

May be user error.
My handle was also scratched on the titanium when I opened it? Maybe it was already opened somewhere?
Are you letting it heat up first?
 
coolbreeze,

Choker

Well-Known Member
Are you letting it heat up first?
I have pre soaked the empty bowl for about a minute, then loaded the bowl and hit it straight away I didn’t get large hits.
Now I have found I get a decent result if I preload the herb and soak it then for 30secs (on a cold bowl) then start to hit it, I get 2 decent hits this way. This is at 280c

Could be user error but I thought I’d get bigger hits at lower temps. I’m just using the half bowl setting.

I understand all vapes take a learning curve though.
 
Choker,

Rodney

Well-Known Member
I have pre soaked the empty bowl for about a minute, then loaded the bowl and hit it straight away I didn’t get large hits.
Now I have found I get a decent result if I preload the herb and soak it then for 30secs (on a cold bowl) then start to hit it, I get 2 decent hits this way. This is at 280c

Could be user error but I thought I’d get bigger hits at lower temps. I’m just using the half bowl setting.

I understand all vapes take a learning curve though.

how long are you letting the coil heat up after the PID gets to max temperature?
 

coolbreeze

Well-Known Member
how long are you letting the coil heat up after the PID gets to max temperature?
This is what I was getting at. If you let the Screwball pre-warm on the stand for 10 mins or so after you turn it on you should get very different results. After 20 mins or so your (whichever ballvape or anti-ballvape) will be at cruising speed. You can get good results before these times usually, but this is kind of rule of thumb for me.
 
Last edited:

Choker

Well-Known Member
This is what I was getting at. If you let the Screwball pre-warm on the stand for 10 mins or so after you turn it on you should get very different results. After 20 mins or so your (whichever ballvape or anti-ballvape) will be at cruising speed. You can get good results before these times usually, but this is kind of rule of thumb for me.
Ok I have not really checked about this I’ll try it. I do let it sit for a few minutes but maybe not 10 so I’ll try that and see if it’s different. Thanks hey!
 

AndyO

Well-Known Member
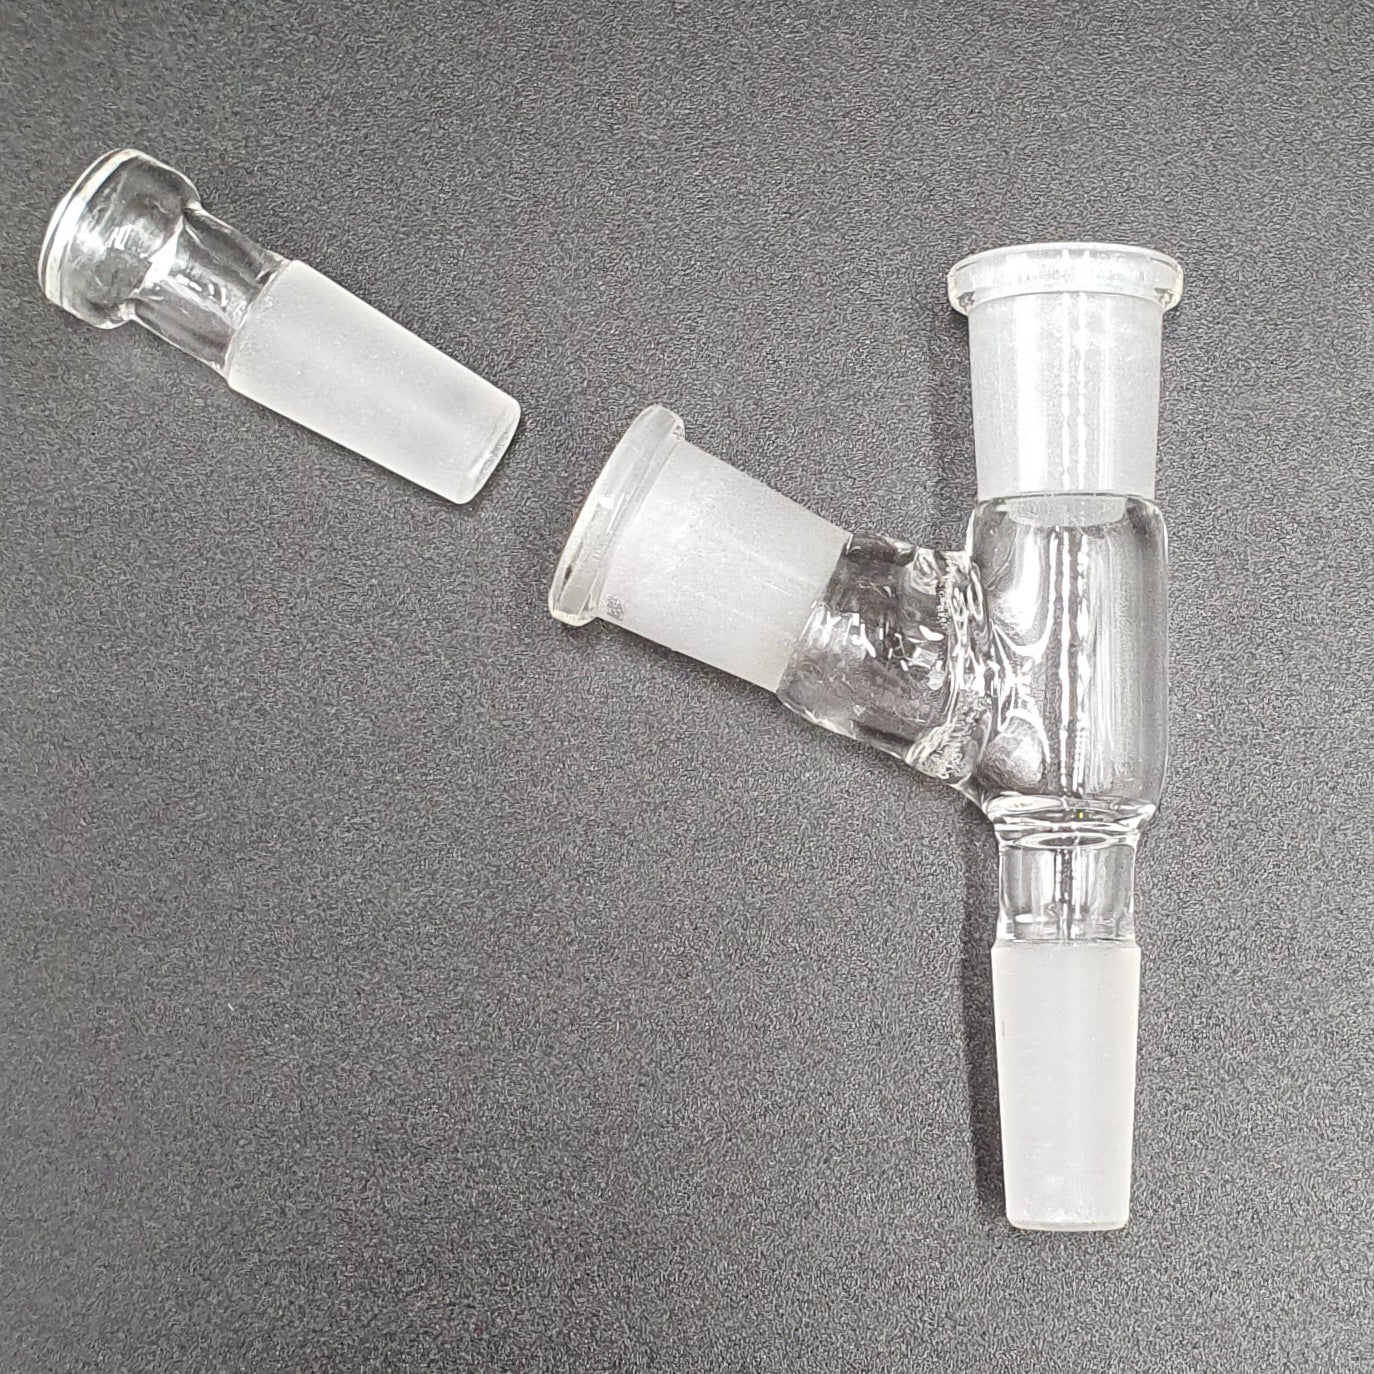
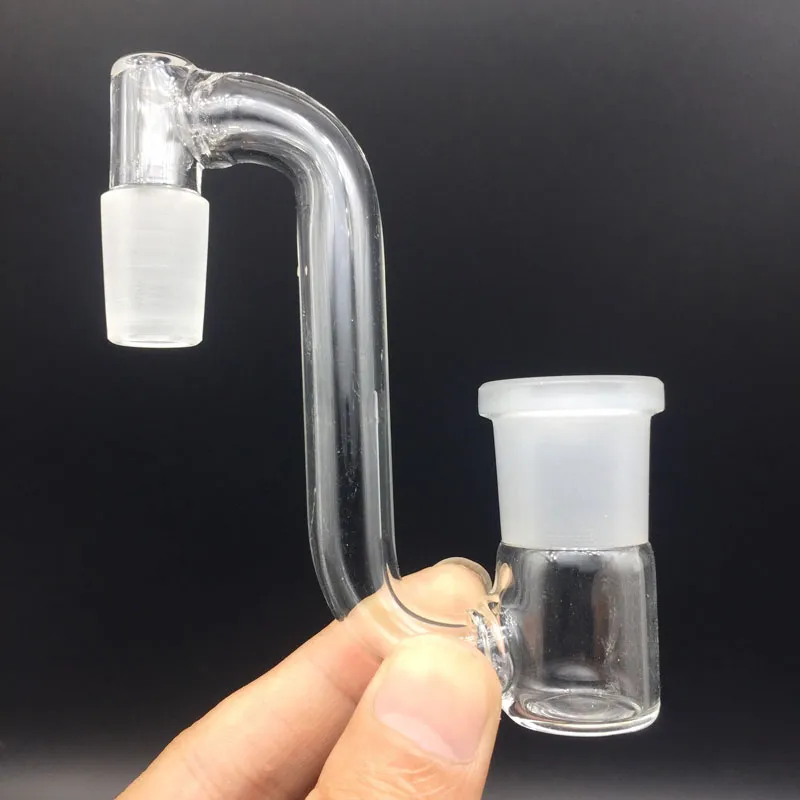
So guys to use this with my 14mm bubbler I will need this?


I'd suggest you're much better off with a pass through adapter that lets you clear the bong without having to move the coil or the bowl.

I couldn't find one on vapefiend, but rvs in the UK have it?


(Obviously you want an 18mm - 14mm)
 

coolbreeze

Well-Known Member
So guys to use this with my 14mm bubbler I will need this?

@Rodney that will work, but a dropdown adapter will also keep a lot of the goo out of your bong, making it much easier to clean.
There's an 14mm male to 18mm female one listed here, it's what you'd need.
rBVaJFjHZZuAVa74AADvF_ixHgE905.jpg

 
Last edited:

LotV

Well-Known Member
screwball-microdose-bowl-top.jpg


I feel like the microdose bowl really leans into the low temp flower dab concept with the smaller, tapered design focusing the air path and stabilizing temperatures with the extra ~4.5mm of titanium surrounding the bowl towards the screen; I dropped PID temp down to 435F/224C (330F/166C measured at the top of the original housing) to get the vapor I was looking for and was pleased with the flavorful and uniform extraction when paired with CC mini influx.

screwball-microdose-avb.jpg


The only drawback of the original bowl, thermal binding, is now solved via a system of o-rings and glass stems, possibly at the cost of torchability:

screwball-microdose-bowl-bottom.jpg

screwball-bowl-oring.jpg

screwball-glass-stems-bottom.jpg

screwball-glass-stems-top.jpg


I reached out to Cal regarding the o-rings and found out they are Viton, 28mm OD / 22mm ID, max temp 450F/232C, soakable in ISO. I really like this new system but there are a couple of things I feel could improve the user experience. I've been using a needle to remove the o-rings leading to some minor damage; perhaps a milled channel could allow something like a needle to get behind the o-ring more easily. Also, if some o-ring lubricant were included in the kit, it would be a really nice touch; I've been using the one included in a Dynavap maintenance kit and it's made quite a difference:

dynavap-oring-grease.jpg


The handle is the same as before and really holds up well against heat; perhaps something themed in the future?:

screwball-handle.jpg


Using the same system as the microdose bowl, the full size bowl still performs wonderfully, especially at the top screen setting:

screwball-fullsize-bowl-top.jpg

screwball-fullsize-bowl-bottom.jpg


Here is a size comparison vs the original bowl:

screwball-bowl-comparison.jpg


Regarding pre-soak: At 435F/224C, a 15 second pre-soak heated up the bowl to about 200F/93C and a 2 minute pre-soak got it up to 290F. I'll have to play around with temperatures a bit but and also see what's possible with a torch :science: The new bowls are a really solid iteration and I see some more great things out on the horizon for Vapvana via their IG! Thank you, Cal!

Non sequitur: check out the sharp edges on the CT scoop 💀

crossing-scoop-edges.jpg
 

Bababouy

Well-Known Member
I
screwball-microdose-bowl-top.jpg


I feel like the microdose bowl really leans into the low temp flower dab concept with the smaller, tapered design focusing the air path and stabilizing temperatures with the extra ~4.5mm of titanium surrounding the bowl towards the screen; I dropped PID temp down to 435F/224C (330F/166C measured at the top of the original housing) to get the vapor I was looking for and was pleased with the flavorful and uniform extraction when paired with CC mini influx.

screwball-microdose-avb.jpg


The only drawback of the original bowl, thermal binding, is now solved via a system of o-rings and glass stems, possibly at the cost of torchability:

screwball-microdose-bowl-bottom.jpg

screwball-bowl-oring.jpg

screwball-glass-stems-bottom.jpg

screwball-glass-stems-top.jpg


I reached out to Cal regarding the o-rings and found out they are Viton, 28mm OD / 22mm ID, max temp 450F/232C, soakable in ISO. I really like this new system but there are a couple of things I feel could improve the user experience. I've been using a needle to remove the o-rings leading to some minor damage; perhaps a milled channel could allow something like a needle to get behind the o-ring more easily. Also, if some o-ring lubricant were included in the kit, it would be a really nice touch; I've been using the one included in a Dynavap maintenance kit and it's made quite a difference:

dynavap-oring-grease.jpg


The handle is the same as before and really holds up well against heat; perhaps something themed in the future?:

screwball-handle.jpg


Using the same system as the microdose bowl, the full size bowl still performs wonderfully, especially at the top screen setting:

screwball-fullsize-bowl-top.jpg

screwball-fullsize-bowl-bottom.jpg


Here is a size comparison vs the original bowl:

screwball-bowl-comparison.jpg


Regarding pre-soak: At 435F/224C, a 15 second pre-soak heated up the bowl to about 200F/93C and a 2 minute pre-soak got it up to 290F. I'll have to play around with temperatures a bit but and also see what's possible with a torch :science: The new bowls are a really solid iteration and I see some more great things out on the horizon for Vapvana via their IG! Thank you, Cal!

Non sequitur: check out the sharp edges on the CT scoop 💀

crossing-scoop-edges.jpg
Hey LotV, can you explain your torching ritual for the older bowls? I did a search and didn't find any explantions pop up. Are you simply torching them to get similar effects to a coil heated bowl?

Interesting on the scoop edges, I've handled about 5 of them from different batches/sources and none of mine have been sharp enough to cause damage.

Regarding orings, I wonder if utilizing a dental tool would help prevent damage, I have one with flat ends that do not have a point that I will have to try.

The microbowl has been the clear winner for me so far, been using it daily and really enjoying it. One of the first things I did as well was use it on a 10mm piece and my Mini Influx. The glass joints have eliminated my biggest gripe (besides wires) from the Screwball.
 

LotV

Well-Known Member
explain your torching ritual for the older bowls?

OG bowl + thick SS screen w/ larger holes, bottom screen position, torched with a Blazer Big Buddy and temp measured with dipwand. I'm dumping the material with the CT scoop causing vapor production on impact, and consuming immediately. The screen can be dumped out along with the duff which is really convenient.

Interesting on the scoop edges, I've handled about 5 of them from different batches/sources and none of mine have been sharp enough to cause damage.

I foolishly swiped a finger in there and felt skin catch lol... No issues with this scoop otherwise; I love it!

Regarding orings, I wonder if utilizing a dental tool would help prevent damage, I have one with flat ends that do not have a point that I will have to try.

I really like this idea; I'll have to hunt down something similar, thanks!. Btw, If a tool like that were included in the kit, would nice--anything to make maintenance easier.

The microbowl has been the clear winner for me so far, been using it daily and really enjoying it. One of the first things I did as well was use it on a 10mm piece and my Mini Influx. The glass joints have eliminated my biggest gripe (besides wires) from the Screwball.

Same! It's my unheated go-to now. Btw, what I like best about the mini influx is how easy it is to clean/maintain <3
 
Just got my updated housing, how do I stretch the coil? Can’t find a video or anything anywhere. I’m using a screwdriver to try and seperate the coils but not making much progress.

Edit- Got the original housing off but now need to put the gems

Edit- Got the gems in but they rattle around in there, is it suppose to be like that?

I’m an idiot and was trying to unwind the coil before I unscrewed the top and tip the gems out, now I have to try and tighten the coil again to get it as snug as as it was before….. motherfucker haha
 
Last edited:
Has anyone had to tighten their coils and if so how did you do it? I feel like I’ve seen someone do it on here but I can’t remember. My Screwball is still working but there’s gaps between the coils so it’s a little loose and moves when I put the head onto the bowl, I also have to turn the temps up a bit now too so hope I didn’t screw (haha) myself
 
Slimjob Dopamine,

coolbreeze

Well-Known Member
Has anyone had to tighten their coils and if so how did you do it? I feel like I’ve seen someone do it on here but I can’t remember. My Screwball is still working but there’s gaps between the coils so it’s a little loose and moves when I put the head onto the bowl, I also have to turn the temps up a bit now too so hope I didn’t screw (haha) myself
Take a pliers, wrap the tips in a little masking or electrical tape to avoid scratches, remove the coil from the heater, Now take the pliers and just start working on the coils, turning them inward to tighten. You'll probably have to go around each wrap of the coil in 3 or 4 places turning it inward toward the center of the coil. It'll be a little challenging to get it all neat again but you can probably get a tighter fit at least. To stretch it to cover the the gem chamber, you would insert a tape-covered flathead screwdriver between each coil in several places, giving the screwdriver a slight turn at each insertion point to gently push the coils apart just a bit, working your way around the entire length of the coil. When you go to put the coil back on you can judge whether it's tight an d long enough, etc. You may have t slightly compress the coil by hand to get the top screwed back on completely, but when you let go it should cover the entire length of the heater chamber and the bowl-covering area with little or no ability to turn the head by hand.

Heat up and go to town. It should perform much better and be able to conduct heat to the bowl as well.

Sweet thanks for the reply, I actually started doing exactly what you said and got it to fit better, not as snug as I’d liked but it’s working better, I didn’t think to put tape on my pliers though so I did get a bit of scratches but it’s still working fine just looks a little rough, I will try and tighten it again with the tape like you said because I can still move/rotate the head/coil around the housing if I try to.
 

coolbreeze

Well-Known Member
Sweet thanks for the reply, I actually started doing exactly what you said and got it to fit better, not as snug as I’d liked but it’s working better, I didn’t think to put tape on my pliers though so I did get a bit of scratches but it’s still working fine just looks a little rough, I will try and tighten it again with the tape like you said because I can still move/rotate the head/coil around the housing if I try to.
Nice, man. Glad you have it working better. Not sure how much the scratches matter per se but rather that working on the coil could damage it if something happens to the sensor. Sometimes you gotta, though, but normal care should keep it safe.

How do you like the updates?
 
Top Bottom