'The Misty Log' - DIY wooden Log Vaporizer

brainiac

log wrangler
Did you just put the Sinolec in the hole in the wood or fix it again? it gets hot, the wood changes and it could loosen. I noticed clearly with my 230V element.

Checked it for you today. Removed the heater cover... no significant heat stress on the wood (oak) and the bulb holder is still secure. Used the opportunity to tidy up the visual appearance of the heater well base with a 0.3mm ss disc.

The 2 amp sockets should be fine if you're using a 12v DC power supply but what type of heater are you using ? Does it need 230 volts :\?

Btw, don't sweat the plums :). They can be sorted out later. Building a working unit is the main objective.
 

Duck

Active Member
Thanks alot!

I have ordered halogen 12V 10 W - 35 W.
I have to adapt the 35W to G4 socket.

max is 13mm of the herb chamber planned.


This should then become the final, now critical with the tool.


This is the 230V Heater Test .... but I still lack a lot about my idea of the final one. I still need a glassblower that would do it ...

230V is the maximum of the heating element, which creates a continuous temperature of 1100 degrees and 1300 degrees for a short time.


blokenoname

DIY Log Dabbler 😁πŸͺ΅πŸ’ͺπŸ’¨πŸ’¨πŸ’¨
@Duck
Looks good so far ;) :tup:
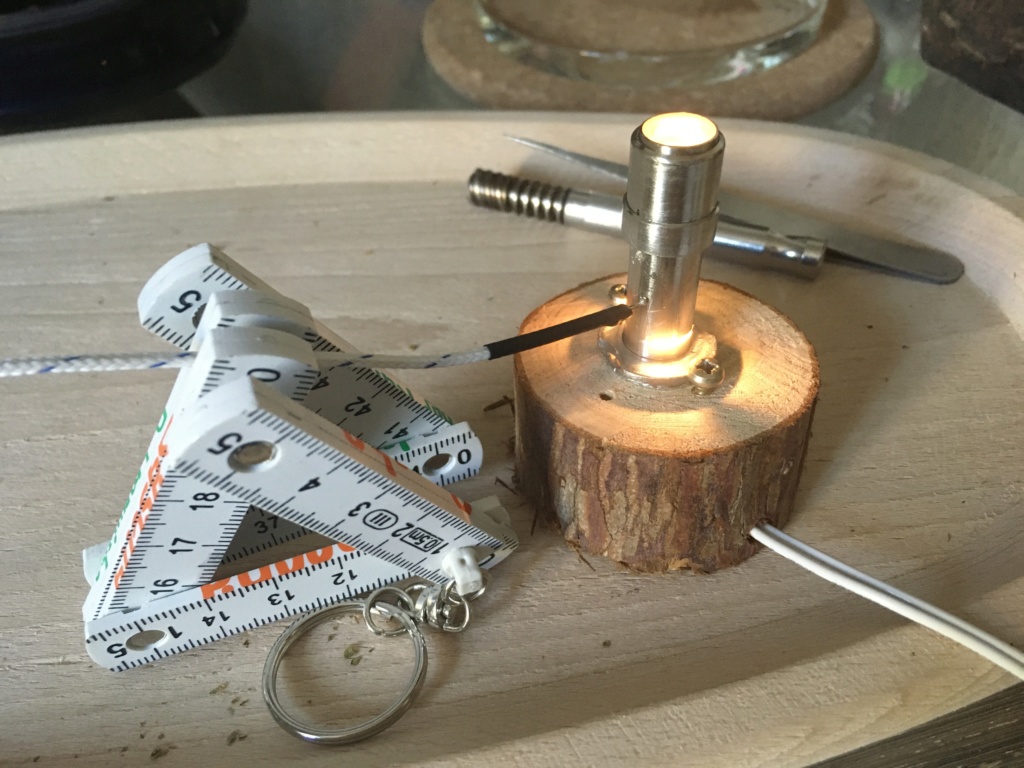
None of my standard 12v DC heaters draws much more than an Amp. So 2A max is ok for the heater cartridges I use for the Misty Logs.

@all

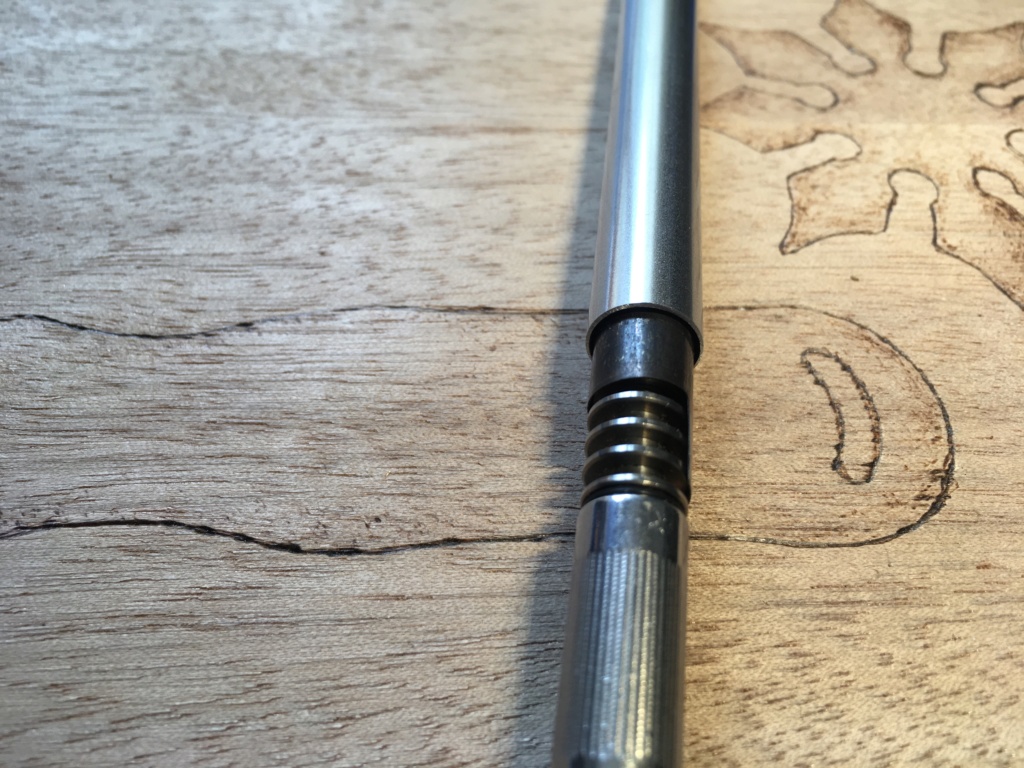
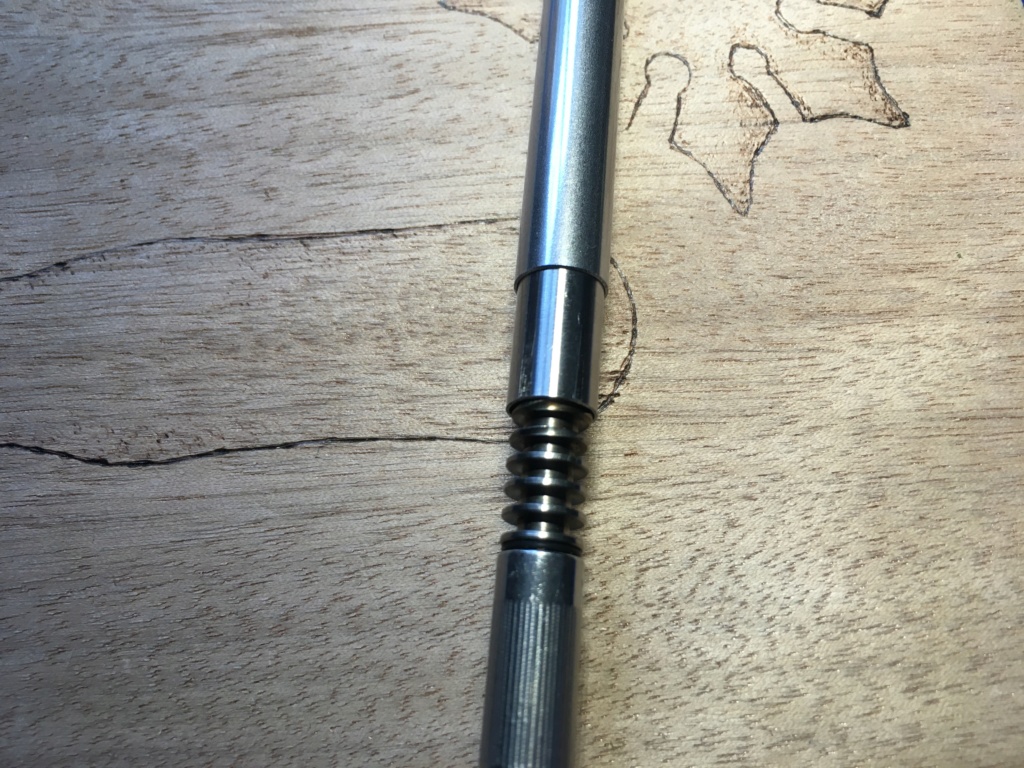
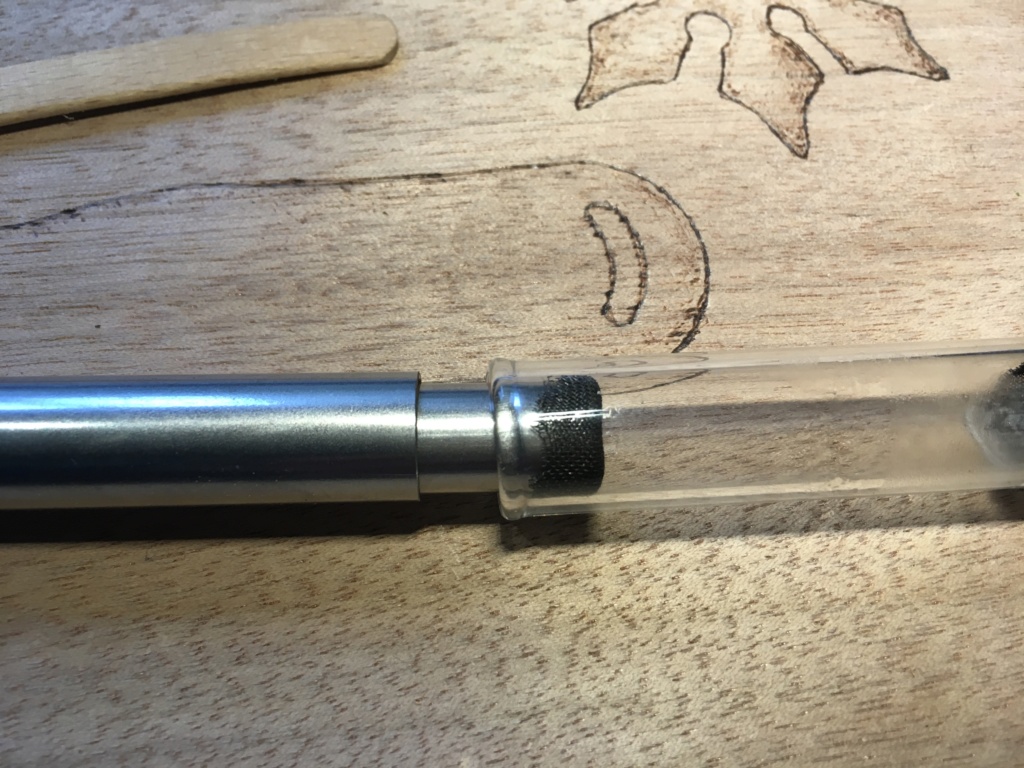
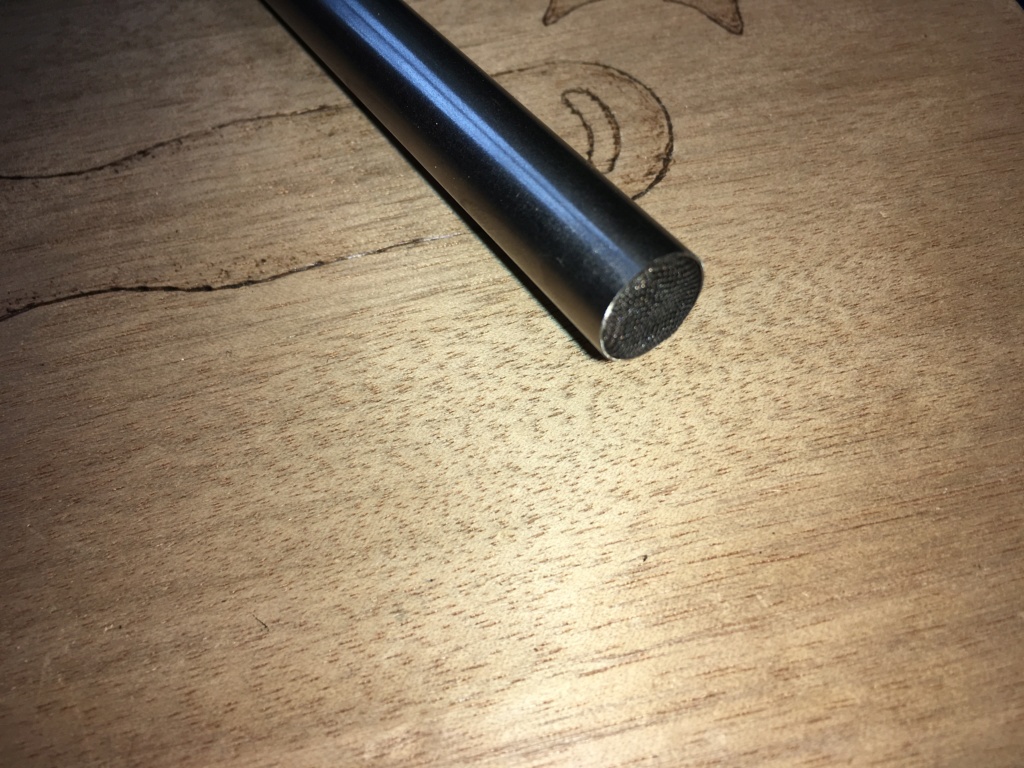
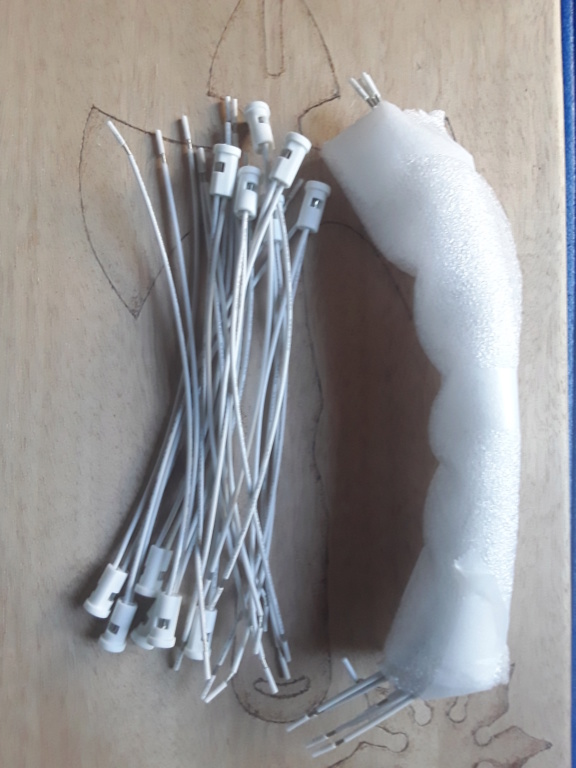
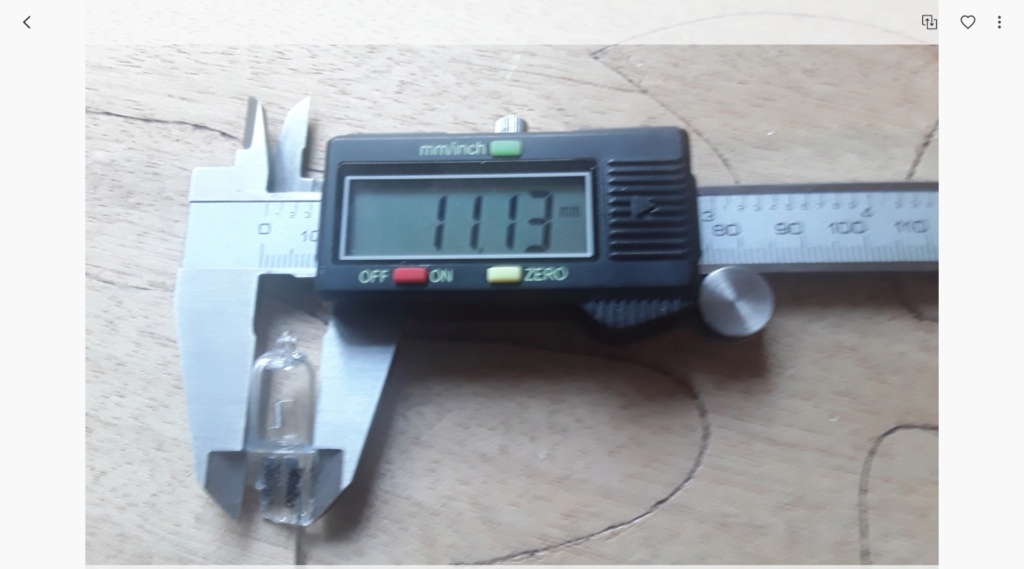
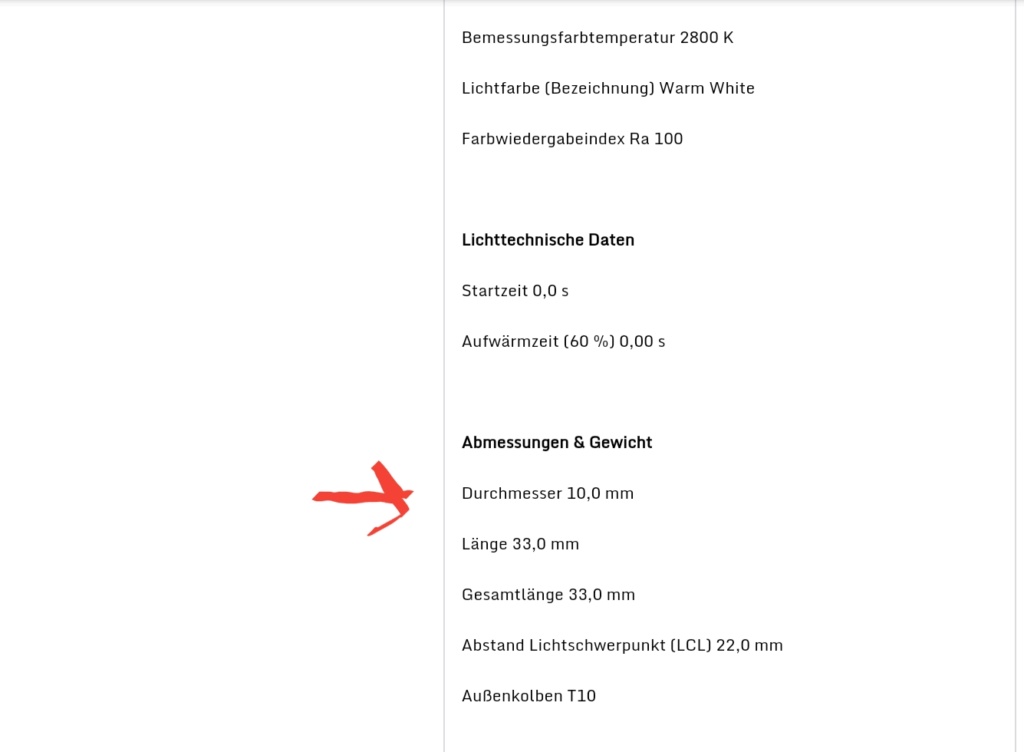
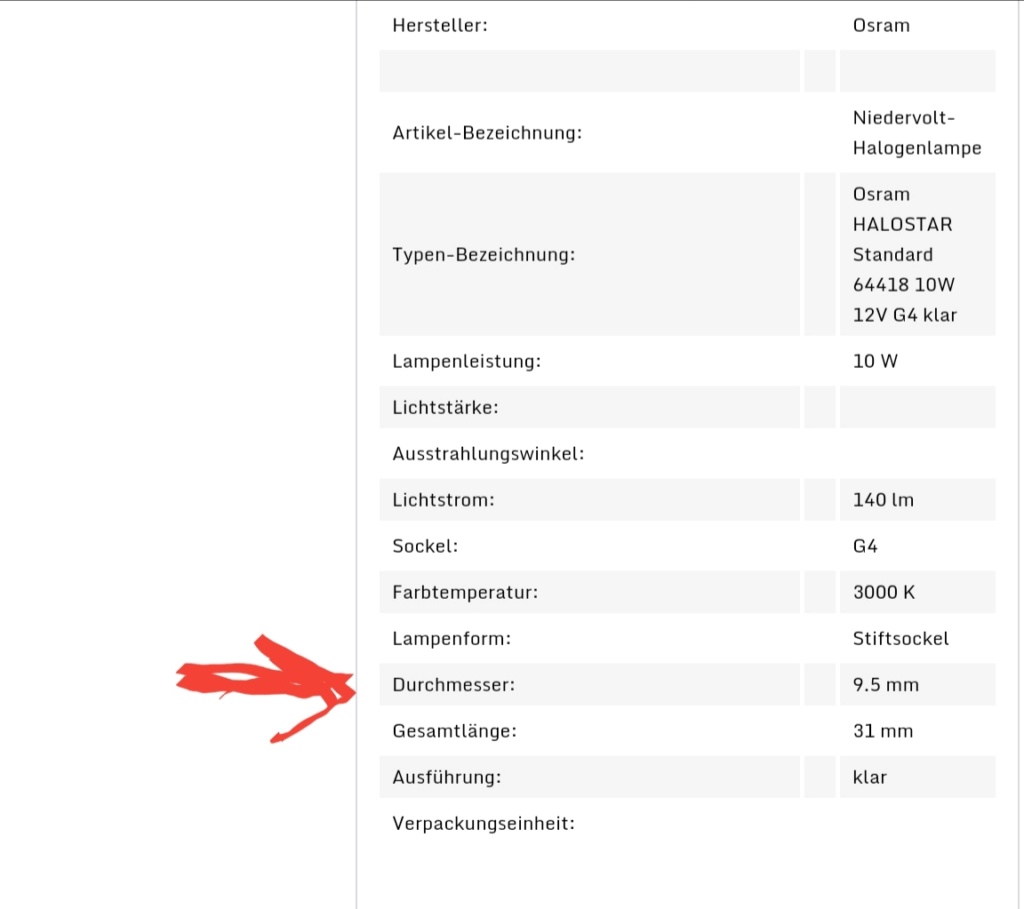
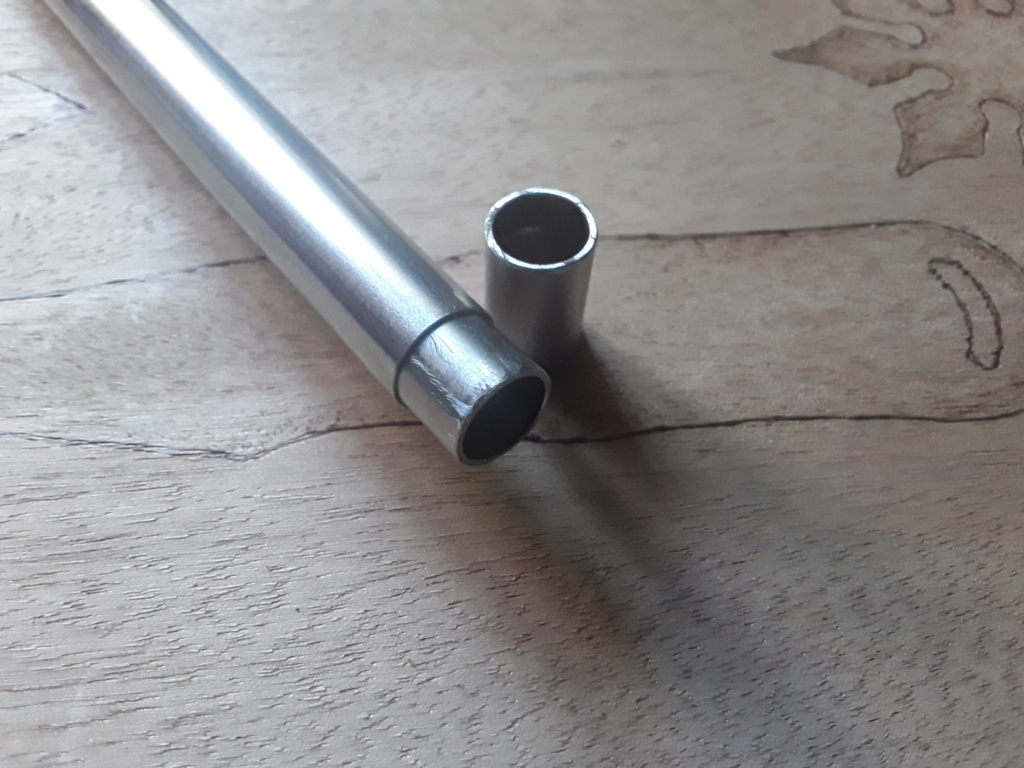
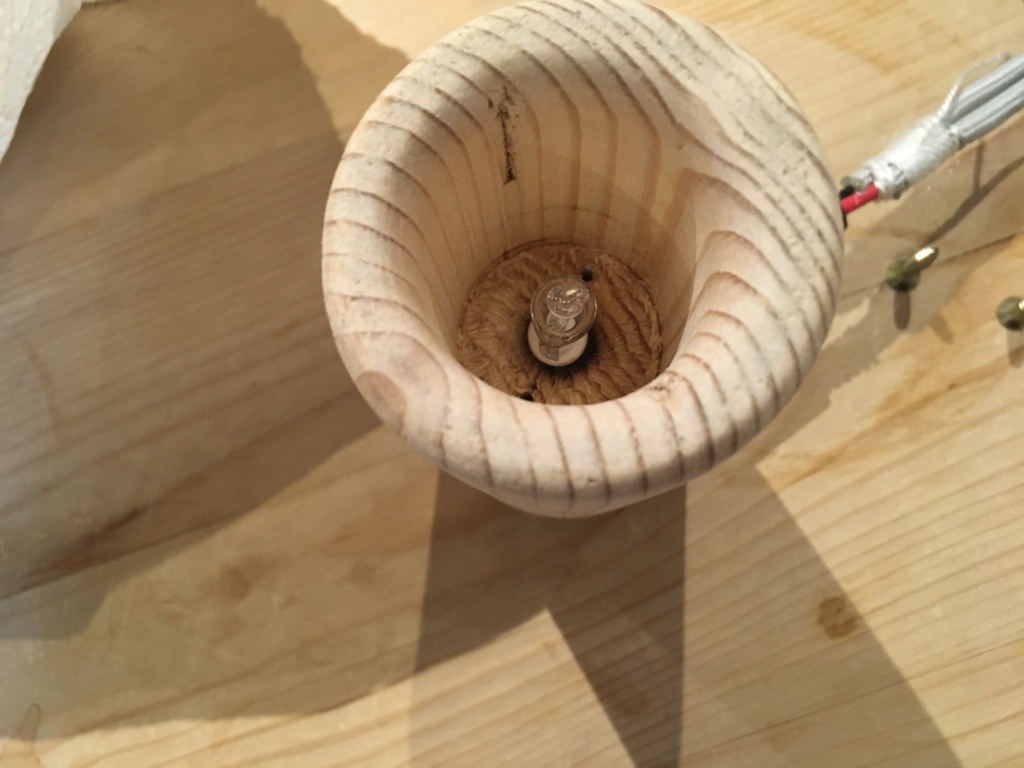
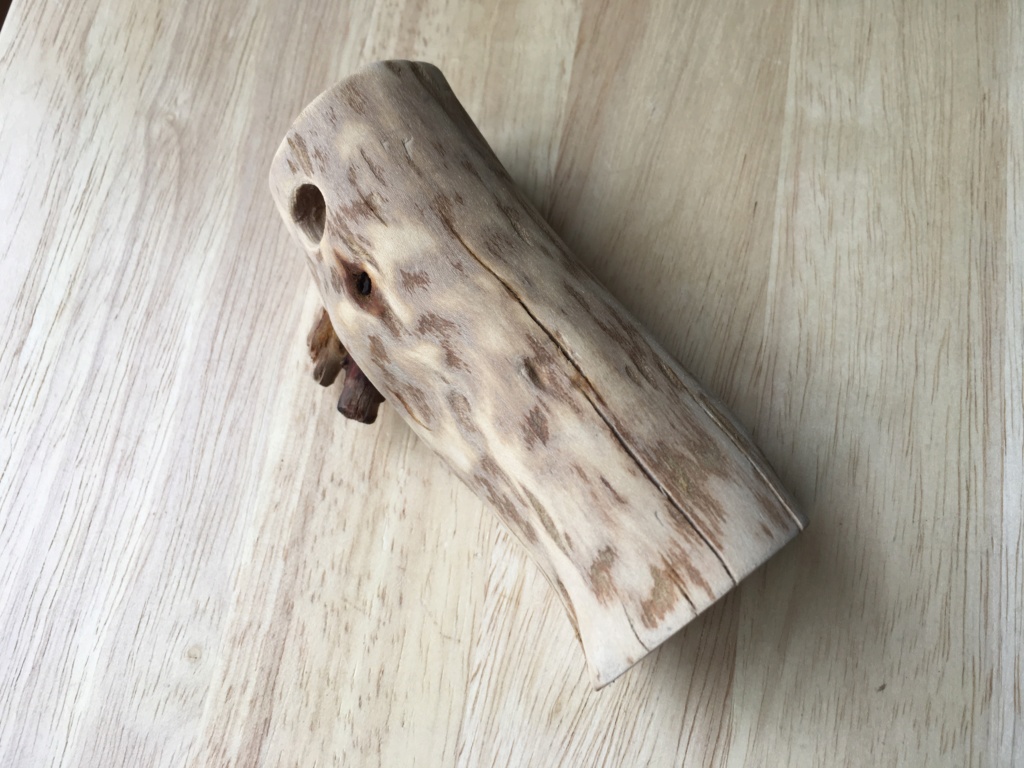
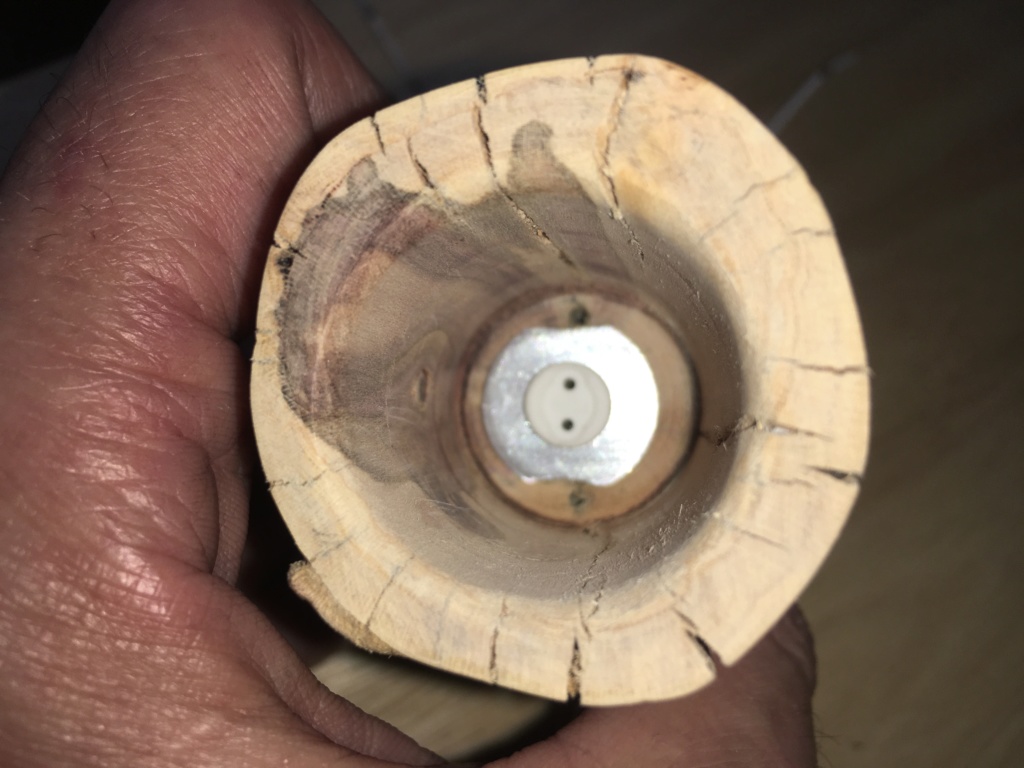
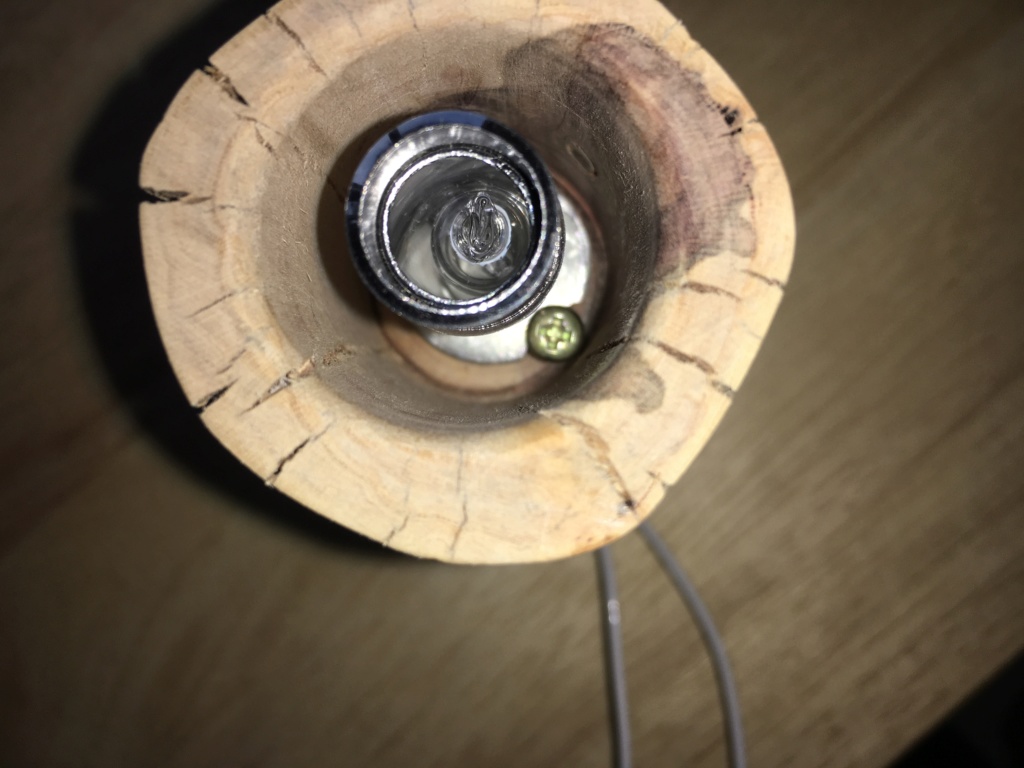
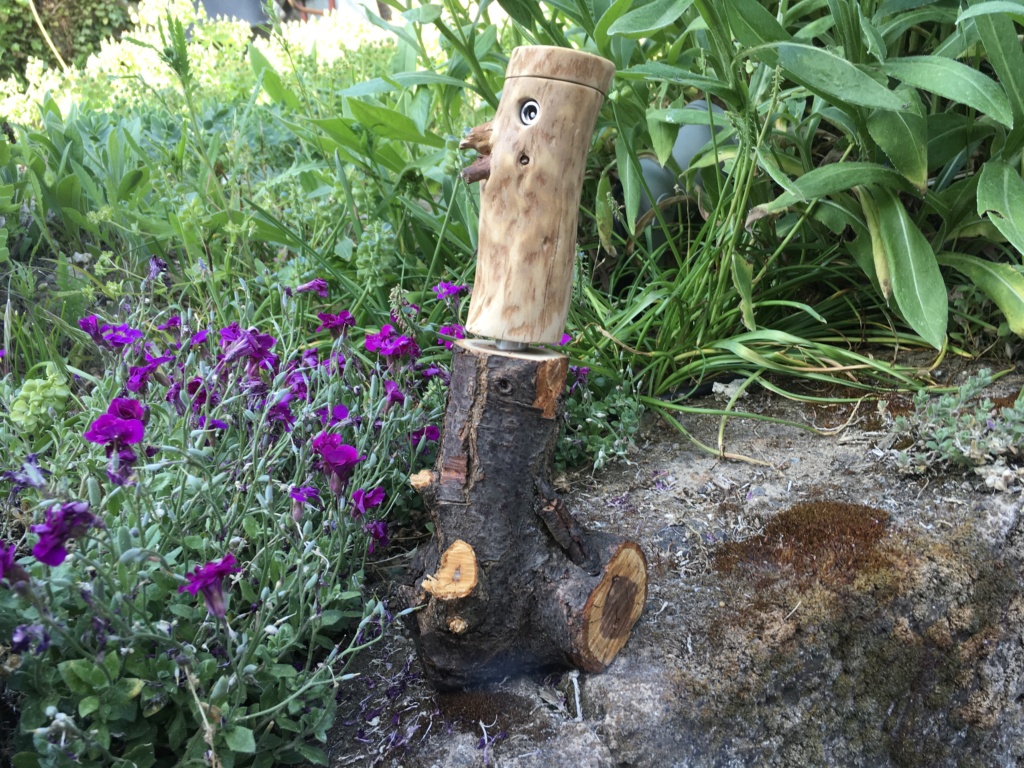
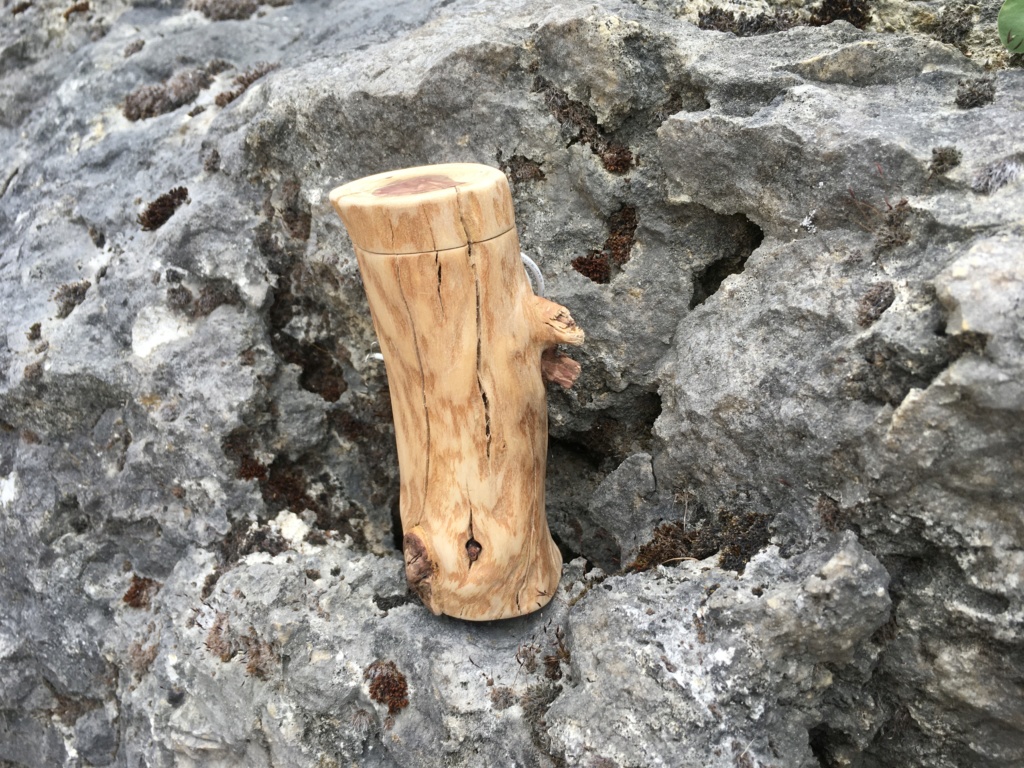
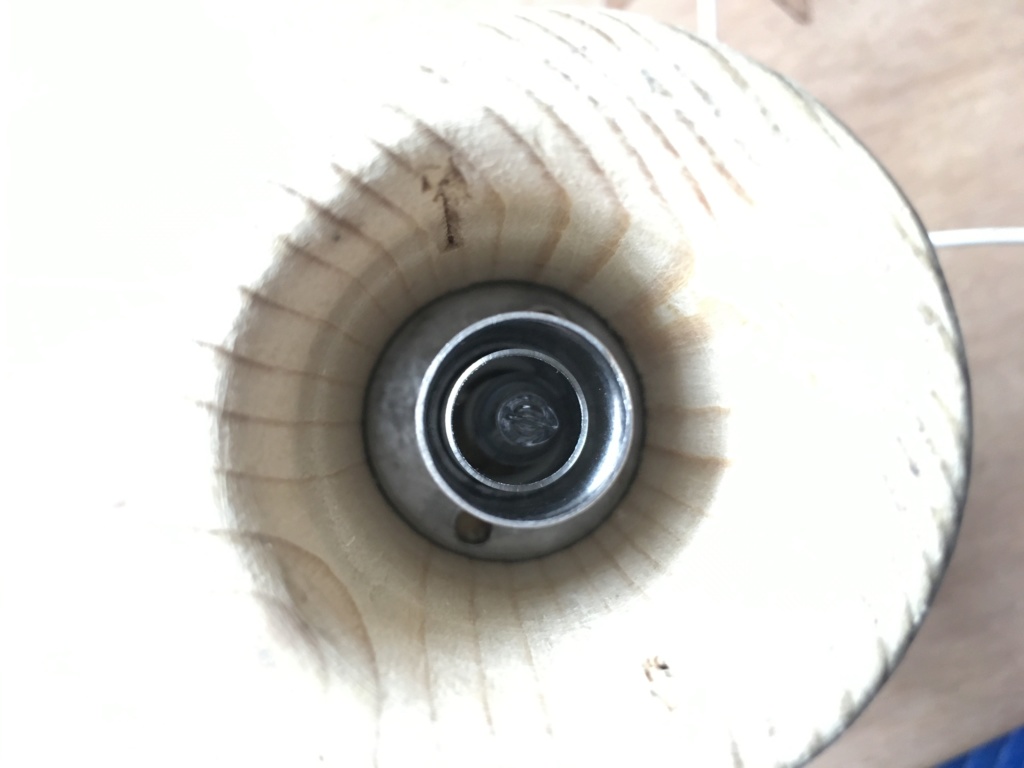
Tested out the larger diameter (11mm OD/10mm ID) heater cover, I usually use with the halo heater bulb, for use with the 10w cartridge heater today.
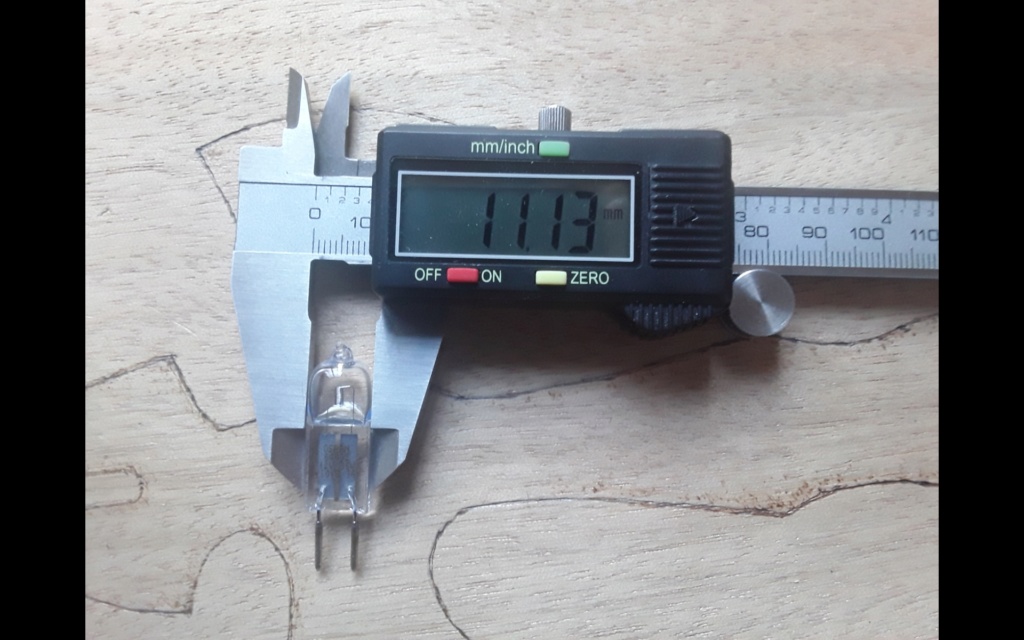
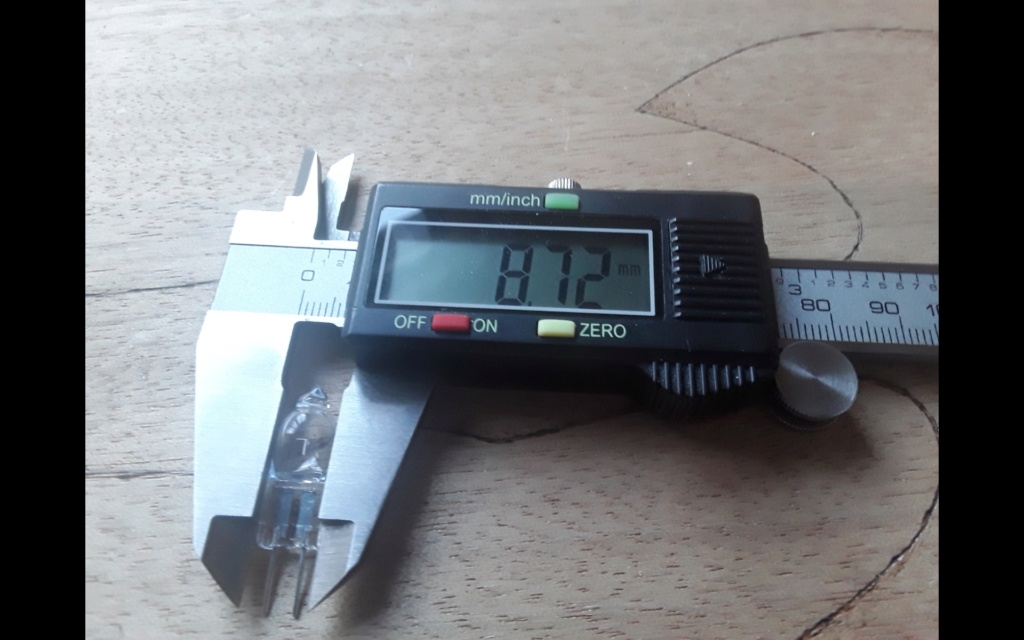
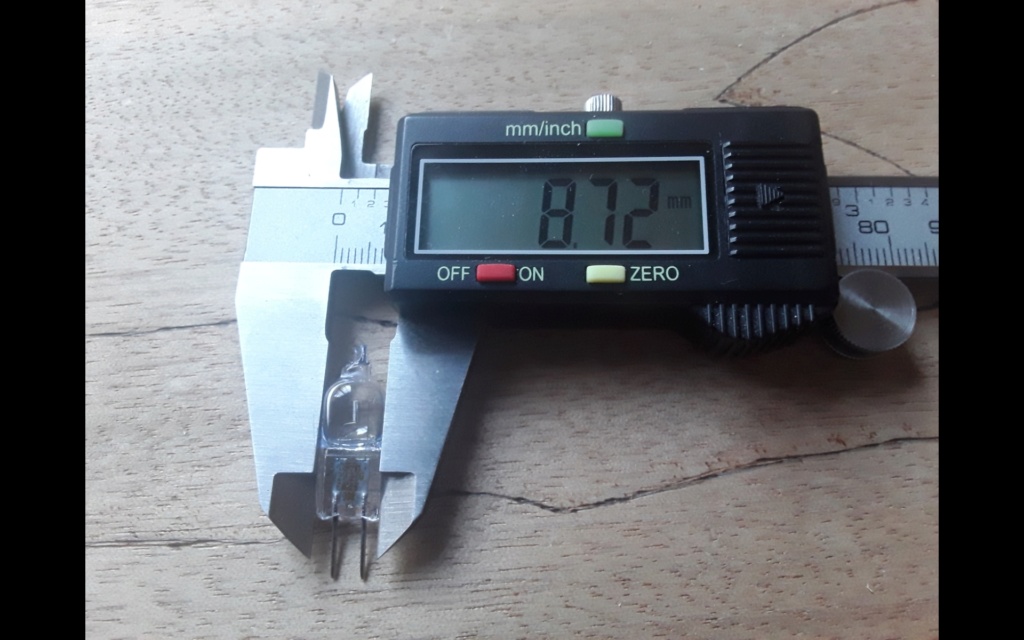
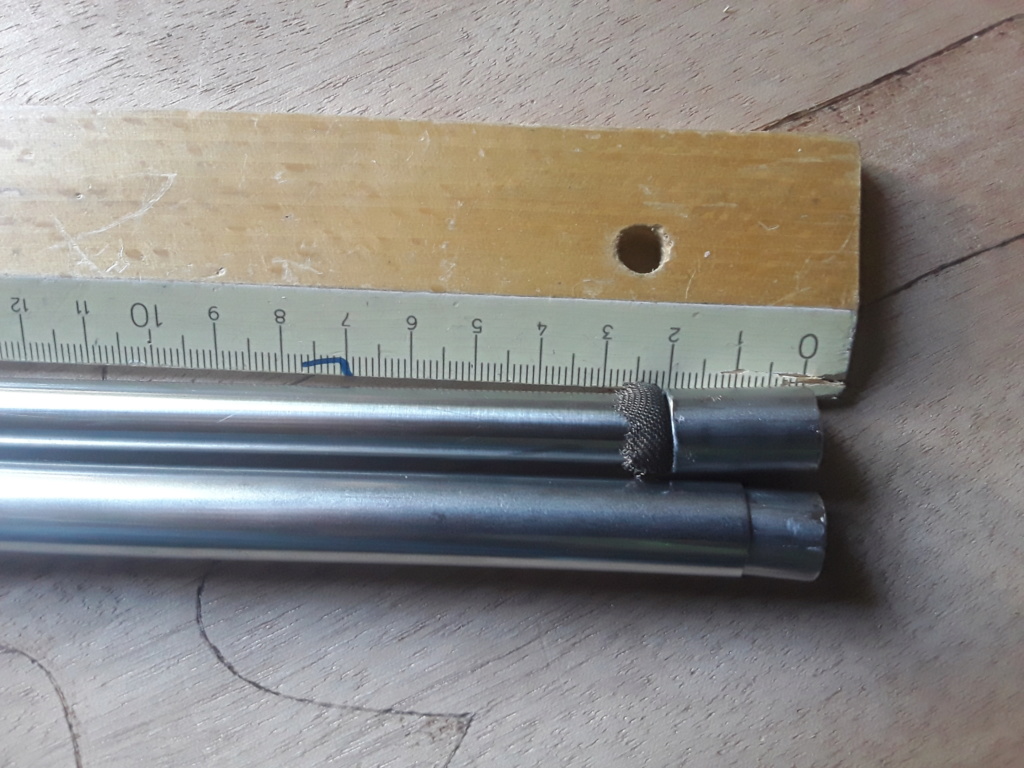
Tried that earlier on already, but with the resistor and the less powerful 7.5w cartridge heater, and the results were rather meager back then, as the 10mm ID air path proved a bit on the wide side for the small diameter heaters, wich measure only 6mm in width. With the more powerful 10w heater now, it works rather well now, as it uses less volts to provide more heat :nod: :rockon:
... with the nice side effect, that at least with this specific unit, you can now run it straight from the wall at 12v w/o need for vvps or dimmer. Bloody perfect :D

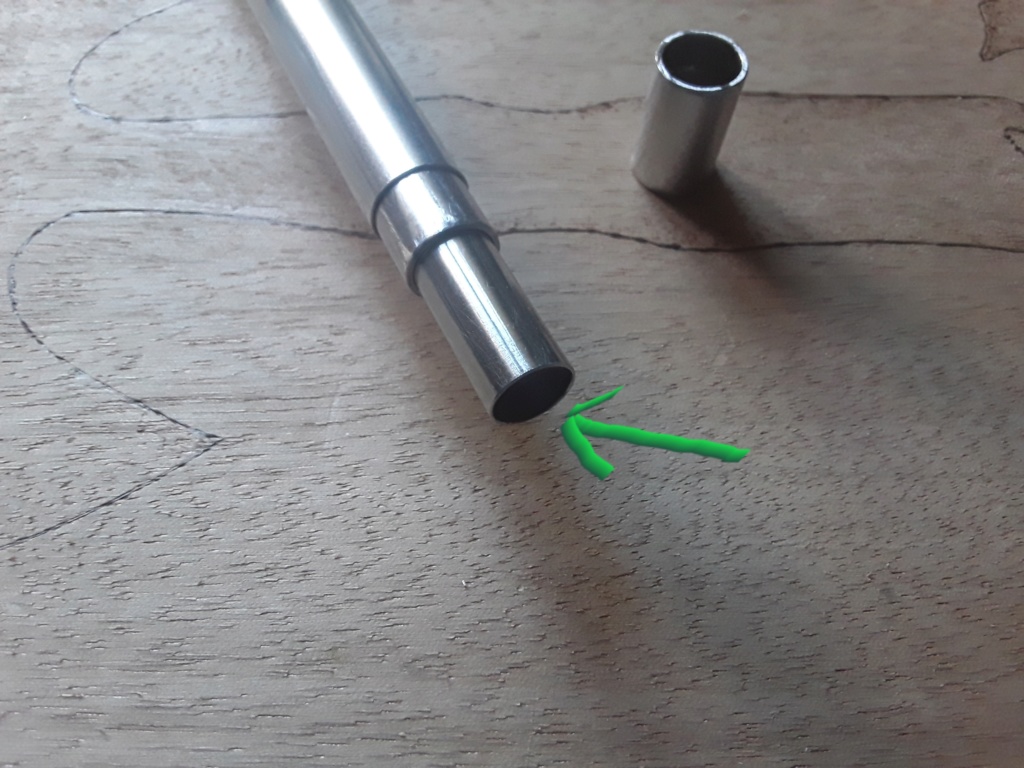
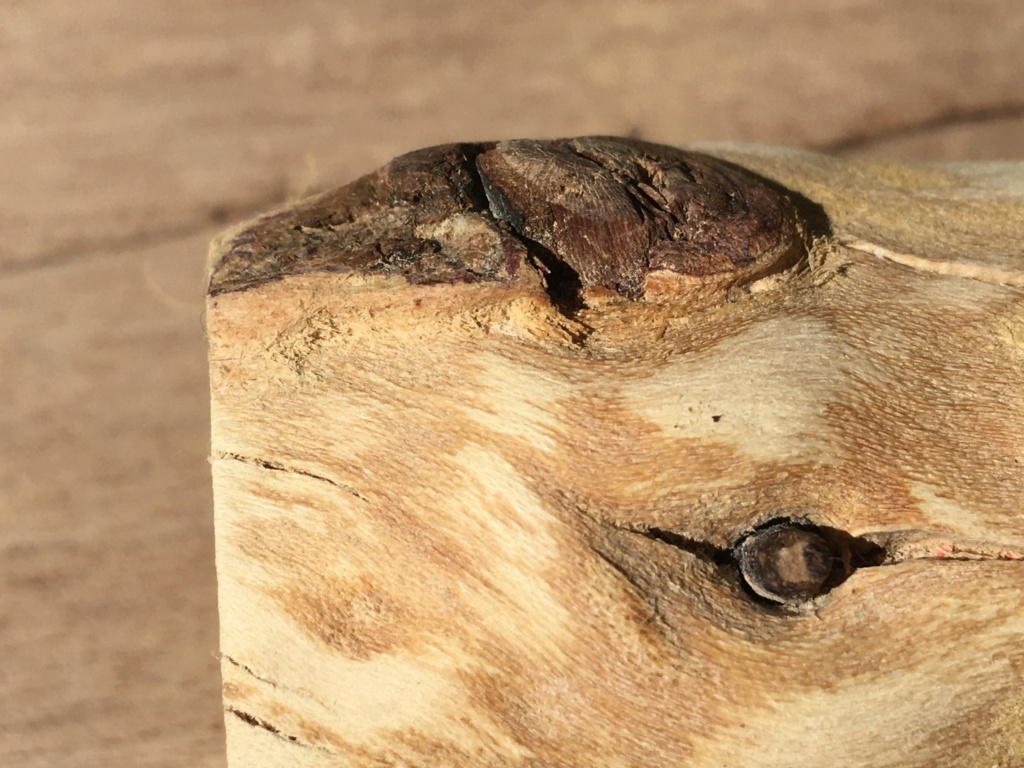
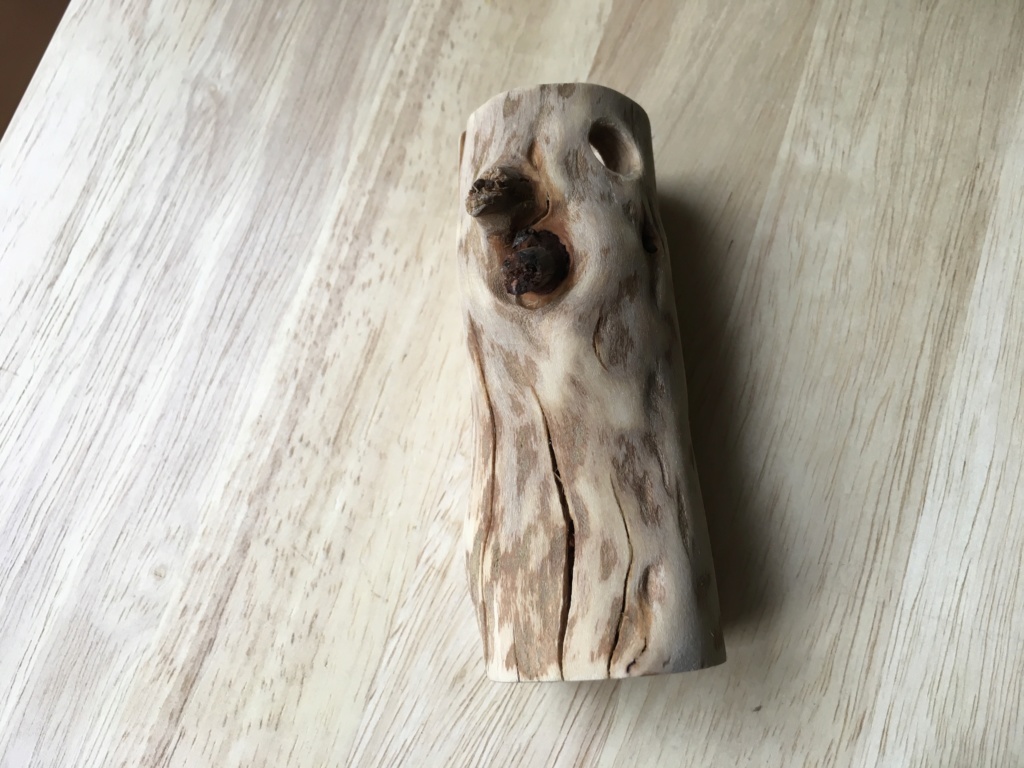
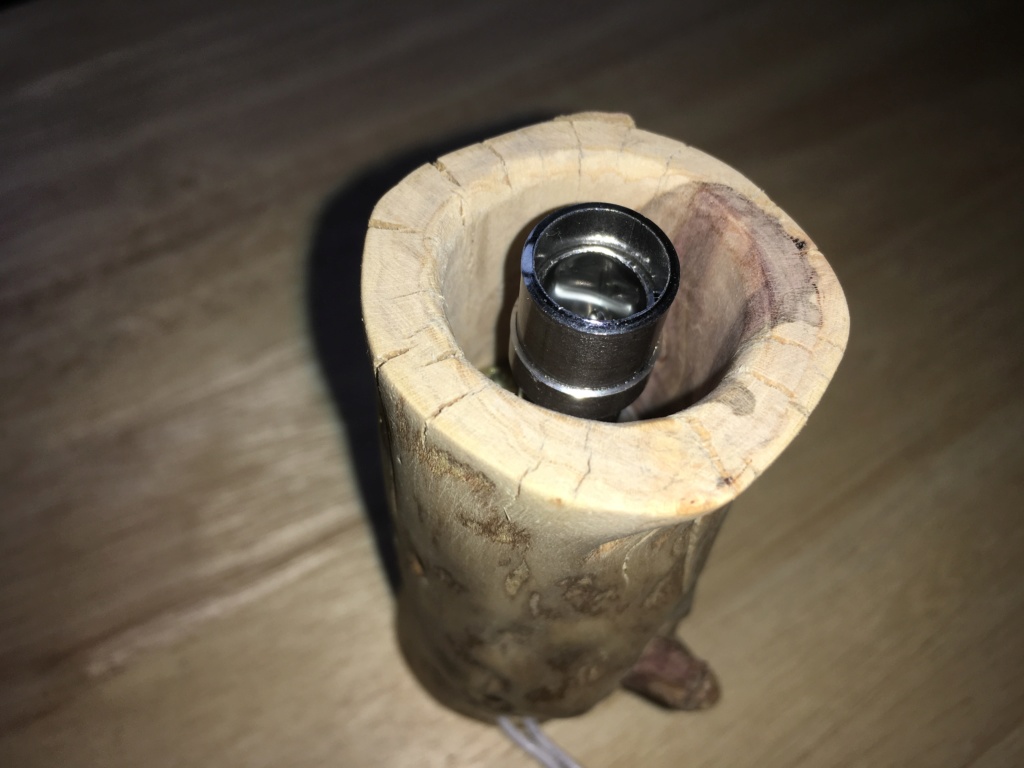
So this one fits the Vapcap tips for sliding into the core again and accepts the Arizer Air/Solo glass tubing and GonGs for sliding over the core... which was rather the whole point of the endeavor.
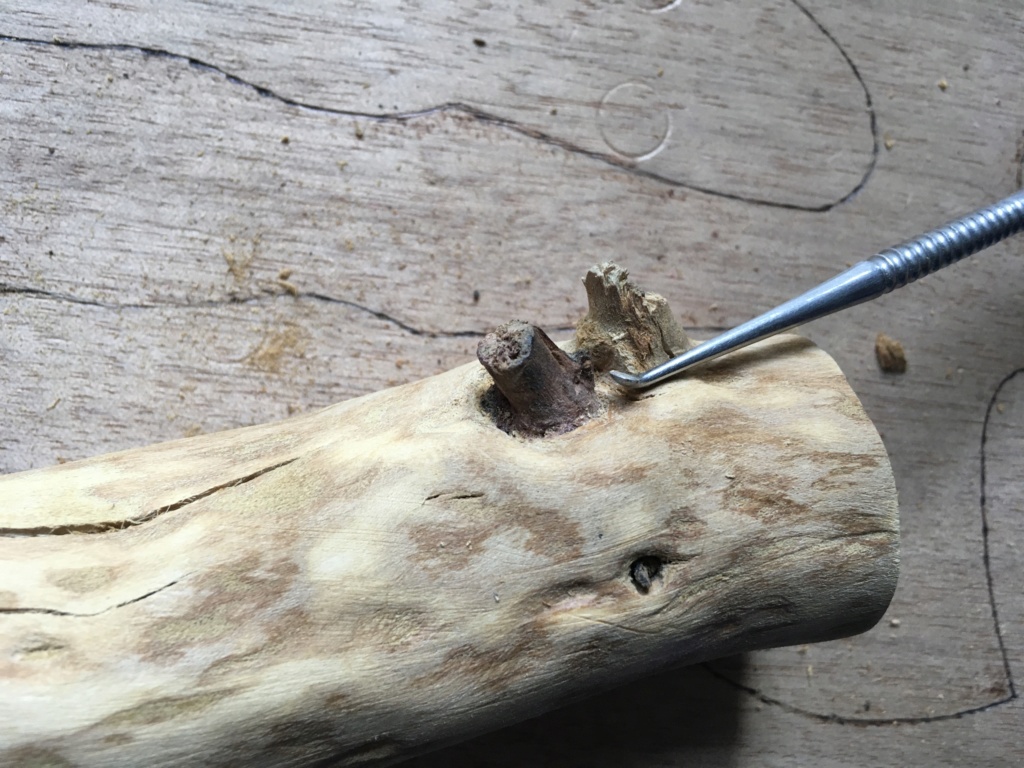
Though I still love my recreation of the WS heater cover (2nd pic; to the right of the log), which allows the Vapcap to lock on to the heater cover rather than slipping in, the tip wouldn't stick, so that usage was always a two handed affair. Now laziness won and you can stick the tip into the heater port now, where it'll stay ;)


Have a nice Sunday afternoon :)
 

Duck

Active Member
Maybe it helps a beginner. I have to reschedule something.

Data sheet diameter ....

Osram 64432
GY6.35


I was hoping for this, ok without the type number. so keep looking.
the top is thinner and longer.


Osram 64425
G4


Osram 64418
G4
the top is thinner


Last edited:

Duck

Active Member
Hi!
I need your assessment.
@blokenoname already told me that the pipe is 4.5 cm long.
I suspect this length changes depending on the structure and use?
I had to reschedule something and that came out.
I put in a 14 x 0.5 tube, a 13 x 1.0 tube of 1 cm in length. I have to secure this upwards and make it a bit smoother.
It must remain removable because of the sieves.


The 13 x 1 tube only serves to secure the 11 x 0.5 tube in which the lamp is located.


At the other end I drive the 13 x 1.0 tube, 2 cm long, 1 cm firmly into the 14 tube. I leave the other cm out. it serves as a guide into the chamber and inside as a stop for the sieves.
the G4 socket is not in the tubes.
what do you all mean ?
what total length would you choose? I
can variably lower the herb in the chamber.
Thank you so much!


blokenoname

DIY Log Dabbler 😁πŸͺ΅πŸ’ͺπŸ’¨πŸ’¨πŸ’¨
@Duck
The length of the Misty's heater cover is dependent upon the depths of the heater well, I drill into the blank, which is of course dependent on the length of the whole blank. I use a 10cm x 4 cm piece of handrail for making the bodies. The heater well goes through 1/2 the length of the body, i.e. it's 5cm deep. Heater cover is 4,5cm then, so that the top of the heater cover is about 0,5cm recessed below the wooden rim, to avoid accidentally touching it while using the Log.

As I don't know the dimensions of the body you're planning to use, your necessities may differ there. Note, that the further the load is away from the heater, the more energy is needed to heat it up sufficiently. Within my heater covers, the bulb is usually about a cm away from the load. The cartridge heater sits only 1/2 cm away.
 
Last edited:

Duck

Active Member
thank you!
is my first, up to the top edge of the herb it is now 3 cm, top edge lamp. I hope he can do that. I have documented everything, but did not want to flood the topic here with pictures .....? I put it in a video ... I still have to solder the cable, socket and G4. Even if it is too long, I think I'll get it even shorter. Be curious, I hope you like it ...
 

blokenoname

DIY Log Dabbler 😁πŸͺ΅πŸ’ͺπŸ’¨πŸ’¨πŸ’¨
Hi folks

This is a continuation of the 'The Misty Log -DIY wooden vaporizer' thread from the old pages of fuckcombustion.com.
'The Misty Log' - DIY wooden Log Vaporizer

We'll move over and integrate more info from the old thread later on, but for now, a short introduction should suffice:

The Misty Log is a DIY project, I started back in 2018 at FC when realizing, how hard Log vapes were to purchase outside the US and especially for EU customers. So... If you can't buy it, build it... was the name of the game then :D

In technical design, the Misty Log of today follows broadly the outline of Alan Gray's terrific HI/Heat Island Log but also takes inspiration from classics, like the Eterra, Purple Days and Rick's Aroma/Myrtle/RockZap line, but also from other contemporary Logs, like Dave's famous Underdog Log, Ed's stylish Woodscents Log and Andy's all time classic E-Nano Log :)

For now, I leave you with some pics of my most recent units, while waiting for the crowd to move over from our sinking original FC Titanic. Enjoy :)

F9680AFA-D500-437C-8EAD-4716B2961EF1.jpeg
BA9C6454-1E82-438E-874B-91FCDA236A48.jpeg77B7CF94-7264-40FE-9AE9-7CFAE179F17C.jpeg45DD478F-ECCE-415B-9AE5-841735A91B11.jpegFDBBFCE7-CA64-49BE-9C80-7D5E7469C214.jpeg306932AB-80D5-40D4-A593-D61EBB076014.jpeg8FCF9AC9-5942-4329-99C1-F70185FE0828.jpeg970F353F-F1EB-4150-8A44-C19818593E7D.jpeg920AB8DB-B7C1-4AF3-8C86-01C7452D86CB.jpegD58C6BF4-1EAF-4C89-AFD8-BE5F517F7C5A.jpeg
 
Last edited:

blokenoname

DIY Log Dabbler 😁πŸͺ΅πŸ’ͺπŸ’¨πŸ’¨πŸ’¨
Bit of Square HI (Toasty Top/Alan Gray) modding 😁
Exchanged the 20 Ohm Resistor for a 10w halogen bulb πŸ’‘

CFBDDC84-51CE-4C6C-9744-C61D76EB24C7.jpeg
As I was already at it, I also widened the 3/8" inner diameter of the heater cover to a straight 10mm, to allow Vapcap tips sliding in.
Also used a Vapcap screen between two basket screens to serve as a debris screen and dimming down the glare a bit.
0EF880ED-E465-4894-81A0-AA387D164000.jpeg
1D1974A8-0E76-4D25-B528-DAFF10A41BE4.jpeg
6ECA14FF-34F0-4DC8-A69A-5E2B4EC77E8E.jpeg
 
Top Bottom