The Mighty/Mighty+ by Storz & Bickel

ETNAMAKER

Well-Known Member
Accessory Maker
wow thats absolutely gorgeous

makes me want to buy a cheap OG mighty to do it for myself
Thanks you are very kind :)

It makes me happy to know that some devices that have become unusable can go back to doing their job, my Mighty is now over 6 years old I think but it still works great!

It would be great to find a solution for LCDs as well :(
 

ETNAMAKER

Well-Known Member
Accessory Maker
That’s amazing work!! I can’t wait to see what it looks like complete with unit. Perhaps a wooden mouth piece to put it all together?
Thanks, I'm glad you like it

I'd like to build something also to replace the CU, maybe to connect a glass WPA. Making a real wooden cooling unit doesn't seem like a great idea to me.
Here is a photo of the installed device


blackstone

Well-Known Member
Anyone tried the SS or Titatnium dosing capules that are available and can be used to microdose as the bottom can be set in different levels like dynavap for example? ......
........Would love to be able to set a significant smaller load than the current capsules offer

I was really going to try one of maybe the Ti, ss, or the gold plated capsules this BF sale, but one turn off is that I think I read here that one of them wouldn't allow the CU to tighten fully, or it was a squeeze to close it.
That was a while back and the fit might be better now or in other versions.
But in the end I just got another 40 regular ones!
Here is a post I put up before with some pics of homemade pads for capsules, the related conversation can be found on page 651 here with multiple other people offering ideas too.
I still always use these pads and like them a lot. When I torch them now and then the smell is unbelievable and nice!
I use an extractor fan but am scared about the smell travelling!
The thought of emailing S&B to ask them for a tidy, standard half dose capsule solution did cross my mind, maybe I'll even do it one day!
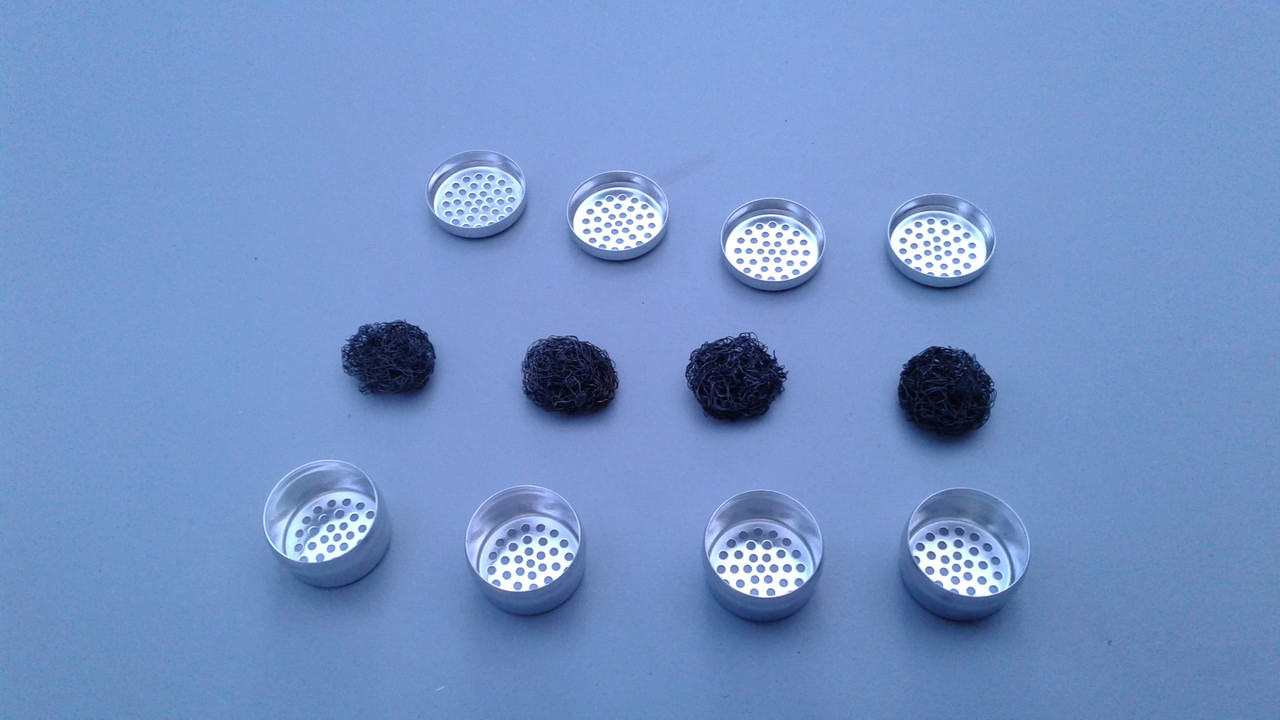
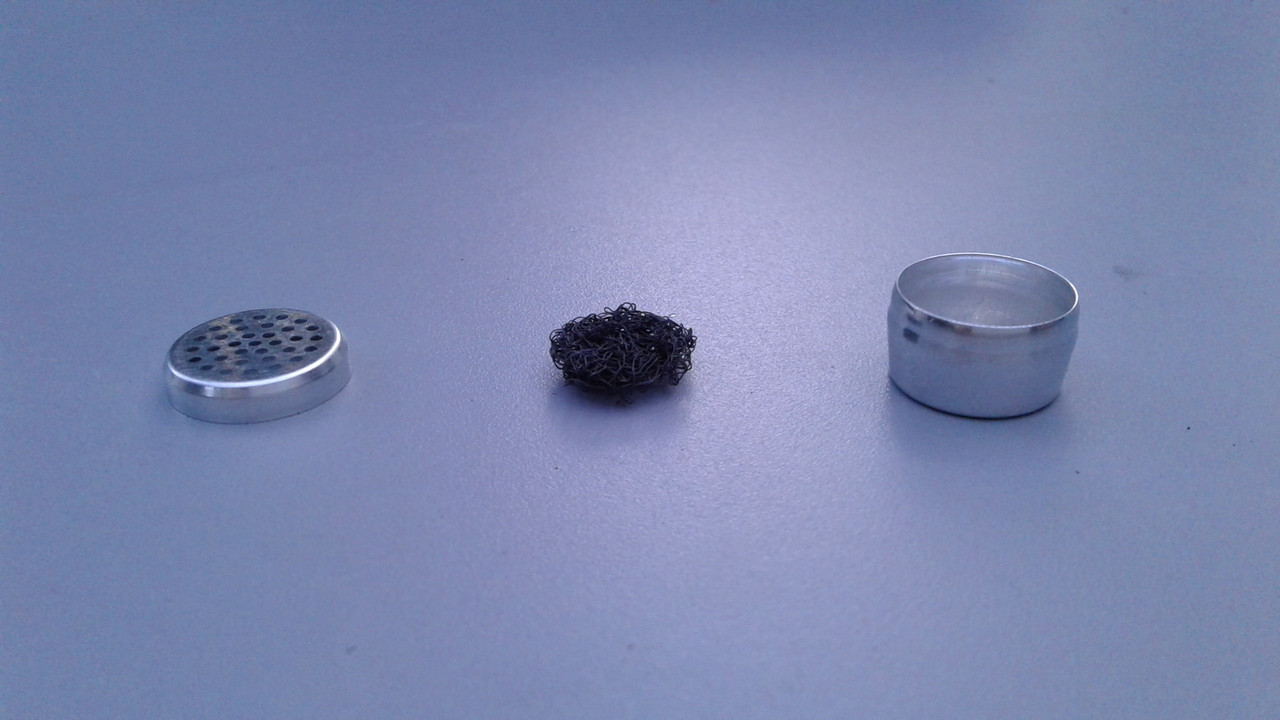
Sorry for the delay there, I got a couple of pictures to show my little capsule pads. I have four so I can fill a caddy.
20211005-185450.jpg

Just unravel any other pad they sell and I cut them with a good scissors. Make sure you shake away any loose wire clippings remaining after cutting and expect to get stabbed once or twice as you shape them again.
I torch them to clean that's why they turned dark, and I place them on top of a partial load in the capsule.
I can then use no screen at all in the cooling unit and just mop that upper area with cotton once in a while between cleanings.
They're great for shorter sessions with 2-4 puffs on each temperature step, or for vaping small loads very quickly at high temperature in the portables and in the Volcano Hybrid too.
Apparently the pads for the Firefly vapes are a similar dimension to this not 100% sure of that though.

20211005-185559.jpg

The stock capsule pads are too thick and difficult to get in and out. I've thought about asking the company to make smaller pads or capsules that hold less.
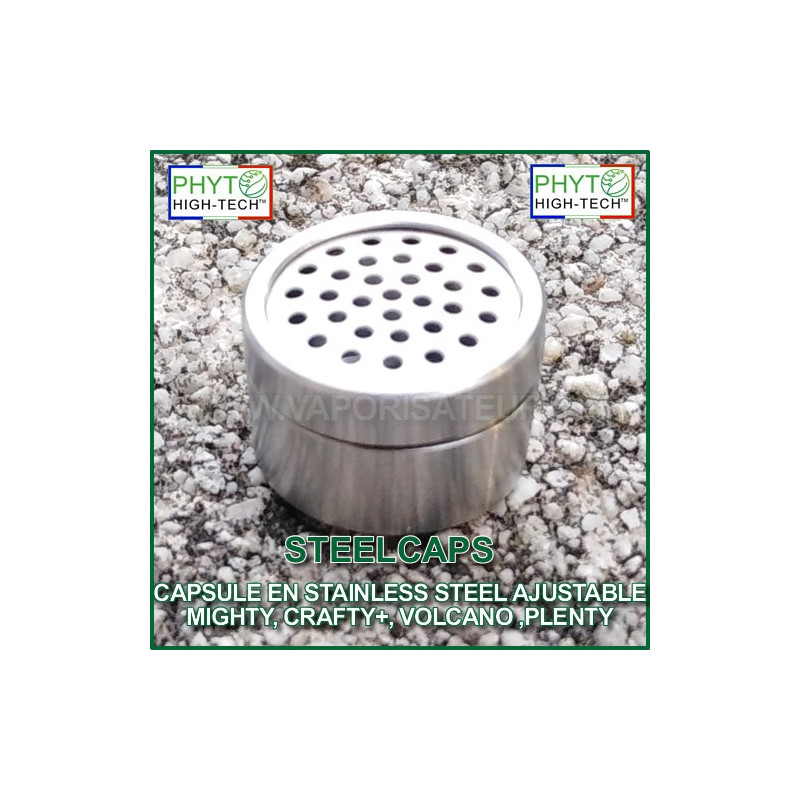
The stainless steel capsules that somebody, @vapeape77 I think, ordered a few pages back have an adjustable floor height so you can change the capacity, that might be a thing if it works well!

These,

Hi! My name is Luca, I'm an Italian woodworker, and obviously a big Mighty enthusiast!
About two years ago I started making some prototypes to test the possibility of making a replacement wooden case for the Mighty. FC was one of the first places where I shared this idea and I'm pleased to update you and show you the final results of my work now that I've started selling my first cases after long tests and many difficulties to face.

Wooden cases are ONLY compatible with MightyOG (not Mighty+). They are made of solid wood, sapele mahogany and Italian olive wood. It is a wooden body replacing the original plastic one, to install it it will be necessary to disassemble the vaporizer. I made some modifications to the original design, it has a flat bottom, I tried to reinforce the top mount for the CU, I added some extra screws to prevent the top from opening. The cases are made with CNC and finished for hours by hand, I used only food grade finishes (NO RESIN,NO STABILIZED WOOD or other synthetic products).
If you want to take a look you can find them on Etsy, they are currently only available for the EU but will soon be available to be shipped to the rest of the world as well.
I want to thank everyone for the support and appreciation received in the past, this has motivated me so much to pursue my passion and complete my little project. Here are a couple of photos, if you are curious about some more details I will be happy to answer all your questions, have a good day!


Wow. Congratulations!
The possibilities now are endless for any OG Mighty.
 
blackstone,
  • Like
Reactions: BigJr48

RAG

Well-Known Member
I was really going to try one of maybe the Ti, ss, or the gold plated capsules this BF sale, but one turn off is that I think I read here that one of them wouldn't allow the CU to tighten fully, or it was a squeeze to close it.
That was a while back and the fit might be better now or in other versions.
But in the end I just got another 40 regular ones!
Here is a post I put up before with some pics of homemade pads for capsules, the related conversation can be found on page 651 here with multiple other people offering ideas too.
I still always use these pads and like them a lot. When I torch them now and then the smell is unbelievable and nice!
I use an extractor fan but am scared about the smell travelling!
The thought of emailing S&B to ask them for a tidy, standard half dose capsule solution did cross my mind, maybe I'll even do it one day!


Wow. Congratulations!
The possibilities now are endless for any OG Mighty.
I have SS, Ti and Gold capsule arriving today, was too curious not to test them out. Will let you know the outcome. Me and the GF probably go trough 40 capsules in around 2-3 months. Yes we re-use them, but only until they start deforming or lossing color.
 

tdriver

Well-Known Member
Hi! My name is Luca, I'm an Italian woodworker, and obviously a big Mighty enthusiast!
About two years ago I started making some prototypes to test the possibility of making a replacement wooden case for the Mighty. FC was one of the first places where I shared this idea and I'm pleased to update you and show you the final results of my work now that I've started selling my first cases after long tests and many difficulties to face.

Wooden cases are ONLY compatible with MightyOG (not Mighty+). They are made of solid wood, sapele mahogany and Italian olive wood. It is a wooden body replacing the original plastic one, to install it it will be necessary to disassemble the vaporizer. I made some modifications to the original design, it has a flat bottom, I tried to reinforce the top mount for the CU, I added some extra screws to prevent the top from opening. The cases are made with CNC and finished for hours by hand, I used only food grade finishes (NO RESIN,NO STABILIZED WOOD or other synthetic products).
If you want to take a look you can find them on Etsy, they are currently only available for the EU but will soon be available to be shipped to the rest of the world as well.
I want to thank everyone for the support and appreciation received in the past, this has motivated me so much to pursue my passion and complete my little project. Here are a couple of photos, if you are curious about some more details I will be happy to answer all your questions, have a good day!


is there a link or something I can't find it anywhere on etsy. (I'm in Europe)
 
tdriver,

RAG

Well-Known Member
Tried the SS capsule so far, fits great in the mighty. Love the extra conduction it seems to create and seems to retain the heat a lot better, getting bigger clouds at lower temps. Plus the extra perk that you can turn it off and get several good pulls before the heat disappears, with the Aluminum caps you can only take 1-3 good pulls before the heat disappears. Works great with Hash, Ice, Rosin and extracts overall either in just degummed hemp fiber or sandwiched between some green.

The only complaint I’ve got is that it’s a punched SS screen in the bottom so the capsule isn’t a a single piece but in reality 4 separate pieces.
 

CharSadehBeast

Well-Known Member
Got my Mighty+ about 2 weeks ago and overall it's been a decent experience but I'm not blown away given the price point ($315 shipped during BF sale). I had a Pax and Solo 5+ years ago and just returning to the vaping world.

First week I only used the dosing caps and the first 3-4 sessions I was pleased, good size clouds, but after, the vapor quality became significantly less using the same bud. Now I'm packing the ceramic bowl full and getting decent vapor again but I prefer the caps as they are better for keeping the device cleaner longer. I opened up the CU after 6-7 sessions but didn't clean it as it didn't appear to need it. How often are you guys cleaning it?

I do appreciate the quality of materials and construction which was the main reason I chose it. I've tried 2 strains and the sativa did not vape well from the beginning but Wedding Cake was been giving me decent clouds from the beginning in the cap and now without it. Maybe after trying a bunch of other strains my opinion may improve over time(?).

Ordering a grinder right now, been using my hands to break the bud apart. What are some must have accessories? Stand, extra dosing capsules, extra O-rings, extra cooling unit?
 

vapviking

Old & In the Way
Welcome to the Mighty club!
Moisture content of your bud affects (especially initially) cloudage. If too moist then the vape is working to dry it before making the kind of vapor we want.
Btw, visible clouds are not the only, nor are they always the true indicator of vapor production, but that's a bit of a finer point.

You have a lot of "getting familiar" to do, it can be a fun part of the vaping experience. Don't pack too loose, whether in chamber or caps, make it just snug but not tight. A grinder may even things out in terms of production, but finger broken nugs work in Mighty just fine.

I would have a stand and likely a wpa, but that could be down the road a bit. Wpa to let you add additional cooling like a dry glass piece or a bubbler.
The S&B filling aid works very well, idr if they pack one in with the vape now?
Hope you at least got the S&B brush with Mighty? That's a classic, imo.
At some point you will need screens and o-rings, it may be a while, but better to have spares on hand?

Cleaning frequency will follow use and your preference.

Try some temp stepping, vape a bowl in stages going from lower to higher. Better flavor at the low end, heavier effect at the back end.

Enjoy!

Edit/add
@CharSadehBeast it occurs to me that you may have an air leak in the cooling unit (you said you had opened it up). Little blue o- ring near the locking post can get boogered up...
To check for leak, remove it from device and block the screen with your thumb as you draw air on the mp. You should meet resistance.
 
Last edited:

Dr. G

Vapman Collector*Vapman Beta Tester
They made a very nice case for the Mighty and Crafty go to the website and check it out...I just got mine for the Mighty Plus and Crafty Plus...now, I can take them on trips. Cool.
 
Last edited:
Dr. G,
  • Like
Reactions: BigJr48

Dr. G

Vapman Collector*Vapman Beta Tester
Good morning guys! I wanted to share another little creation, I still have to test it but I'm quite satisfied with the result, sorry for the low quality of the photos.


Now I'm ready to enjoy my first completely plastic-free session with the Mighty! I'll let you know :D
That is really beautiful...I am totally impressed. Also, I am wondering why they did not do that to begin with! LOL....
 

ETNAMAKER

Well-Known Member
Accessory Maker
That is really beautiful...I am totally impressed. Also, I am wondering why they did not do that to begin with! LOL....
Thank you so much, receiving your support and appreciation for my work motivates me so much to keep creating new things! I suppose S&B has bet everything on creating a device that is completely suitable for medical use. In fact, it has obtained some certifications that practically no device has and for this reason it is truly unique. At the same time it works great and the quality is very high so I would say that they have focused less on the design of their products. The Plenty really looks like a power tool :lol: Also I think it would have been really difficult to make all these pieces in wood, it's a long process full of drawbacks, the price would have risen a lot.
 

Dr. G

Vapman Collector*Vapman Beta Tester
Thank you so much, receiving your support and appreciation for my work motivates me so much to keep creating new things! I suppose S&B has bet everything on creating a device that is completely suitable for medical use. In fact, it has obtained some certifications that practically no device has and for this reason it is truly unique. At the same time it works great and the quality is very high so I would say that they have focused less on the design of their products. The Plenty really looks like a power tool :lol: Also I think it would have been really difficult to make all these pieces in wood, it's a long process full of drawbacks, the price would have risen a lot.
...well, it's evident that you have amazing talent. I think its a beautiful piece...you have the talent. Have you tried making your own design from scratch? Afterall that is how S and B started out...yes, they are an outstanding company. Everything is done with quality in mind. I have all of their products including the defunct Plenty. I use it every now and then...it is quite powerful.
 

vapviking

Old & In the Way
I have all of their products including the defunct Plenty.
Not sure what you mean? Plenty is still being made and sold, no?
 

Dr. G

Vapman Collector*Vapman Beta Tester
Not sure what you mean? Plenty is still being made and sold, no?
Yes...I love it. But, everyone seems to review it like its just an eye sore...anyway, I wanted to let everyone know that Simrell now has a mouth piece for the Mighty Plus...take a look at https://simrellcollection.com/


Dr. G,
  • Like
Reactions: Jill NYC

MDHI

Active Member
I was just wondering if anyone has chipping issues around the bowl with their Mighty+?

My mighty OG became almost unless after 2 years of heavy use
 
MDHI,

LakeLikeAnOcean

New Member
Hi everyone! I’m new to dry herb vaping and thinking about picking up a Mighty+. From everything I’ve read the device looks perfect, but I keep seeing conflicting reports as to whether it has an isolated airpath. Is there any substance to the rumor that air can flow through the charging port? That is the only thing giving me pause, and the internet seems 50/50 on whether the Mighty+ is truly isolated or not.
 
LakeLikeAnOcean,

vapviking

Old & In the Way
Hi everyone! I’m new to dry herb vaping and thinking about picking up a Mighty+. From everything I’ve read the device looks perfect, but I keep seeing conflicting reports as to whether it has an isolated airpath. Is there any substance to the rumor that air can flow through the charging port? That is the only thing giving me pause, and the internet seems 50/50 on whether the Mighty+ is truly isolated or not.
Welcome to FC.
Mighty is a solid choice, imo, out of a field of many these days. Lots of us here have more than one kind/brand of vape, as you will see. As I said Mighty is a great starting point.

(VAS= Vape Aquisition Syndrome)

I think the airpath is separated from, but not totally sealed off from the electronics.
I opened one up, there are photos in my post below.
In 3rd and 4th photo,
At the bottom of the heater tube you can see some lint clogging the air intake (too many times in my dusty pockets over 4-1/2 yrs!).
The inlets in the body are immediately under that , adjacent, and below that is a plastic housing- horizontal member- that forms the divider. There's a slot for wires to pass through (back in photo 2). You can see that some resin has collected on wires below, but only a small amount compared to above.
So I say separated while not sealed with a gasket. I make assumption that Mighty+ is the same configuration.
I also think that, while drawing, air will come in from a least-resistance path, which in this case is the one right next to the heater tube inlet.
I have zero concerns about airpath/electronics in Mighty.
Dis-Assembly & Battery Replacement, Mighty (#MY0234XX, circa 10/2015)
-- New batteries, internal cleaning (June 17, 2020)

As I mentioned a couple posts up, the batteries came from @JCat , though idk the spec, they are either 3,000 or maybe 3120 mAh versus 2700’s that came out. His thread for replacement battery, instructions, video, discussion etc.:
Custom Crafty Battery Packs for Easy Replacement

Separately, there’s a pretty good Youtube (below) of a battery job on a Mighty, very helpful; there don’t seem to be many around.
I cannot vouch for the safety of the soldering practices in this video (I just don’t know enough about it).
He also did not point out the bottom latch clearly.
To open the case he used a 1.5 mm hex driver. I believe the 1.5 mm is probably correct, but I could not get mine to fit. I used a 1/16” hex driver instead. It worked fine right up to the end; on re-tightening the last bit I probably did some damage to the screw. I hope I don’t need to open the case ever again.
The Youtube does show the tabs and slots at the top clearly and how to slide the case open.

I hope I’m not too imprecise or redundant in my descriptions below. I was not intending a full-blown instructional-type guide, just some of my experience.

I exposed the screw holes with a sharp knife:


View attachment 1242

The two halves of the case interlock at three points, two at the top and one at the bottom. After removing the two case screws, remove the orange poker and under it is the tab to push. It is visible in next photo. Push in on tab and pry the halves apart slightly at the bottom seam using a screwdriver or poker. This took a minute or two; stubborn parts after years together.

Do not pull the halves more than about ½” apart at bottom -- they are attached by tabs at the top that can easily break. The Youtube shows these steps clearly.
You can see the 4 top tabs hanging down from the top edge in next photo. They fit into slots on the other half.

Slide the back cover up so it’s tabs clear their matching slots on the housing front cover. This also took some gentle persuasion. I did break both slots at the top, but one end of each did not break off, so I was able to re-assemble “okay” when the time came. Phew.
I now understand the reason some Mighty's seem to "come apart at the seam" along the top. The slots are not much sturdier than the little railings that break so easily near the chamber sides. The tabs you see here are stronger than the slots into which they fit.

View attachment 1251

Next are existing internals. There is debris at the entry to the air path, seen in next two photos:

View attachment 1257

View attachment 1243

And next shows the air path entry hole, cleared but not yet cleaned. It’s the crescent shaped hole at the bottom of the plastic case that holds the heater and its' housing, the heater's temp sensor and the chamber.

View attachment 1244

The plastic housing and metal insert that holds the heater and chamber. The insert is shown again in the photo that follows this one.

View attachment 1245

Next photo is the insert assembly that houses the heater and the air path and has the chamber fastened to it.

The round hole centered at the bottom is where the heater tube inserts, and the semi-circular hole is the air intake.

The heater itself is a tube-like stick, seen on the mat in the background of the photo below. I did not get a photo of the heater’s temp sensor.

Note the black o-ring (was originally blue, silicone) around the outside of the chamber. I should have measured this, it should be s.o.p. to replace this as part of this procedure; maybe a guess of size can be made based on the chamber it encircles. The ring broke into 3 pieces and I did not have a match, but I did fashion one from some high temp silicone tubing and was able to move forward. Unfortunately, no pics of that either.

I soaked the metal insert (all aluminum?) in iso alcohol for about 90 minutes. You can’t see light through this tube; there is some sort of baffle at the top just below chamber holes, that prevents seeing anything inside the tubes. It would be fascinating to see the insides! I could not ascertain if or where the two paths might join together; didn’t spend much time exploring that.

View attachment 1247

Next are two pics of the new batteries.
@JCat soldered the leads on, added the proper plugs and wrapped all. Nicely done!
I swapped the temp. sensors on to them from the old batteries, and I also peeled/stuck some end covers from the old to the new. There was also a bumper stuck on top end of each battery, for snug fit.

View attachment 1248

View attachment 1249

All back in place in next photo. On the left-hand battery I did have to move the temp sensor a little to the right before the cover would fit on. It is a fussy fit, all the stuff in there!

View attachment 1250

As I mentioned, the two slots at top of case broke partially during opening, though they are holding well enough on assembly.
I also had to fashion an o-ring to replace the brittle one.
In the end, it all snapped together and looks just fine.
I replaced all the other seals, the chamber screen and the mouthpiece stem. I leave c/u screen off lately.

I admit that I wanted the chamber to look clean, so I used a very fine sandpaper on the aluminum chamber walls, just enough to clean it up. I’m sure this has created some fine scratches that will just trap gunk sooner, but I have been trying to use capsules a lot lately and using them keeps the bowl cleaner. I don't recommend the sandpaper treatment, btw. To the bowl, that is...

The draw is marginally better, I believe mainly due to the removal of lint/debris from the entrance to the airway. Deep cleaning (iso soaking) the air path had to help on some level as well.

The Mighty, when fully charged now heats in 1 minute, 15 seconds (29C to 180C). I believe this is faster than when new!
I've now got the "20% more battery power" Mighty.


Long may it run!
With a little luck, I won't need a Mighty+!

Thanks again @JCat for taking the initiative, and to @SquirrelMaster and @Stu for teaching me how to do photos here.
I've learned that 10 pix per post is the limit, good thing that's all I had...
 

LakeLikeAnOcean

New Member
Welcome to FC.
Mighty is a solid choice, imo, out of a field of many these days. Lots of us here have more than one kind/brand of vape, as you will see. As I said Mighty is a great starting point.

(VAS= Vape Aquisition Syndrome)

I think the airpath is separated from, but not totally sealed off from the electronics.
I opened one up, there are photos in my post below.
In 3rd and 4th photo,
At the bottom of the heater tube you can see some lint clogging the air intake (too many times in my dusty pockets over 4-1/2 yrs!).
The inlets in the body are immediately under that , adjacent, and below that is a plastic housing- horizontal member- that forms the divider. There's a slot for wires to pass through (back in photo 2). You can see that some resin has collected on wires below, but only a small amount compared to above.
So I say separated while not sealed with a gasket. I make assumption that Mighty+ is the same configuration.
I also think that, while drawing, air will come in from a least-resistance path, which in this case is the one right next to the heater tube inlet.
I have zero concerns about airpath/electronics in Mighty.
Holy ****, thank you for posting such a detailed answer! Health concerns are one of the factors that drew me to the Mighty+ (and what convinced me to switch from combustion in the first place!) so a full teardown like that is exactly what I was looking for.

If it’s not too off topic, are there any other vapes (S&B or otherwise) that you’d recommend to someone just starting out with dry herb? You mentioned the Mighty was one of many solid starting choices, but I usually see it described as the best (at least in terms of safety and functionality among portables).
 
LakeLikeAnOcean,
Top Bottom