Discontinued The Grasshopper

MoltenTiger

Well-Known Member
How does it heat up? Is it ceramic?
Not a ceramic, metal (I think some particular stainless steel compound)
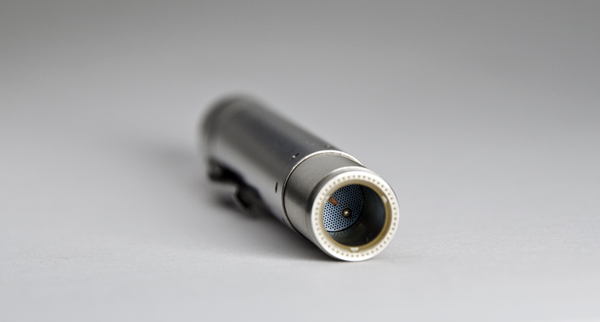
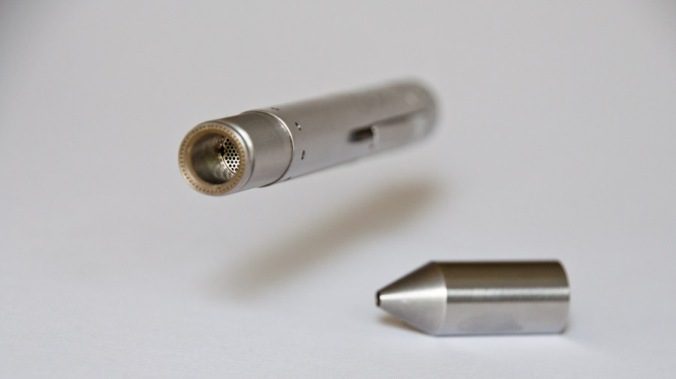
It's a 3D-printed/laser-sintered metal heat exchanger produced in a previously unobtainable geometry, allowing for the efficient energy transfer from air to herb.
It behaves like a ceramic, kind of. The metal heater acts as a resistor due to high current passing through it, causing eddy currents in its constituents molecular structures to form some kind of friction causing energy in the form of heat.
The heat it reaches is selected by an algorithm of energy pulses by adjusting the back end, and it only heats up to the temperature the herb is intended to arrive at (hence no combustion).
Pretty marvellous, all things considered.

This should be fact checked, but I think the gist is accurate

grasshopper-heating-element.png
 
Last edited:

Baron23

Well-Known Member
We have already seen the number of warranty requests drop significantly since implementing the new test machine, and we anticipate those numbers to continue to decrease. Even though we have more Grasshoppers in the wild than ever before, the warranty numbers are rapidly decreasing!

Well, I'm glad to see that they at least are acknowledging their QA and RMA issue which is not true of all vape manufacturers. So, kudos for that.

wrt to automated testing equipment (ATE) and burn-in (the pre-ship 2000 on/off cycles):

The ATE should hopefully dramatically increase consistency and throughput of manufacturing. I believe that they will still need to fault isolate and determine root cause of returned failures and feed that back into their ATE design...all ATE does is test selected metrics against a selected criteria. Results need to be evaluated in a feedback loop with ATE tweaking but I view this as a very good thing.

The burn-in - also a well accepted method of eliminating infant mortality. They are doing it on a full assembly, which is fine, but if they don't clear their problems up they may want to push burn-in further back in the production cycle (i.e. to their suppliers) as its cheaper and easier to find and fix faults earlier in the process. If all they are doing is cycling the unit on/off that's better than nothing but they may want to consider some kind of stress (environmental, running it on 5, whatever) to help drive out early failures. It would benefit them from a financial and PR point of view to drive these failures out before they are visible to their customers.

Just my never humble opinion! LOL They seem to be doing some very right stuff to improve, but the proof is in the reliability and durability of shipped units so we will see.

Cheers
 

AJS

Calm Consistency
What bubbler is that? It looks like the one you get with the Pinnacle Pro.

Also what are you using to pack the GH?
It comes with DDaves Kit for the Milaana. It's intended to be used dry to maintain flavor and reduce harshness, but using it as the item it is, a bubbler, is very fun with the GH, as the vapor cooling is instant in a tiny package.

He's warned me multiple times against using it over electronics, but, hey, Watcha gunna do. I hope I don't learn my lesson the hard way, and that everything works out.

In the end, I won't be using it for that purpose very often, but it's exciting knowing that I can. I've always wanted a little water tool like this, and it works better than I imagine. Putting it on the GH make you feel like you're just pulling on a low powered conduction vape and then BAM, it hits you before you even had time to click off your unit. That's why I didn't clear the load for longer on my second hit, my lungs were ready to burst before I even clicked it off hahaha.

"Hey man, I don't think it's worki.. *boom*"

To load, I use @Ratchett 's Doob Toobs from Delta3DStudios.com.

They're smell proof, and normally I can load faster, but the grinder I've been using makes it coarser (been loving it), and so I need to tap the sides more during loading to get everything to settle as far down as possible. With fine herb, it just pours right in.

My Doob tubes are no longer smell proof, I think because I have small chunks in the crevice of the lid which may impact the seal. They're still plenty enough for my needs, and they're always in my eGo case anyways.
 
Last edited:

GreenHopper

20 going on 60
"Hey man, I don't think it's worki.. *boom*

Yeh I've been using the GrassHopper through an MFLB Orbiter for a few weeks and your description is bang on!:nod:

In an instant you go from thinking there is no vapor in your lungs and then the next moment you are scrabbling for the clicker and hoping you can clear the bowl.

To help with comparisons:

Strain: Blue Cheese
Grind: Medium
H: Dry (almost crumbly)
Temp: 5
Glass: MFLB Orbiter
Chamber: 2/3 side tapped but no tamping
Hit: First of the evening

Result: I forgot what I was doing for about 5min during the editing of this post
 
Last edited:

CapitalFlower

Well-Known Member
It can be purchased HERE for 8.29. I'd say it's way better because of it's non spill design.

Thanks, it looks neat but I've already got the Pinnacle Pro water tool so not sure if it's worth it.

Is the 10mm or 14mm better for the hopper?

Also quick question, how long are you guys waiting for a return? Like if you send your hopper in cos it's stopped working, how long before you get it back?
 
Last edited:
CapitalFlower,
  • Like
Reactions: Hjalmark

vapviking

Old & In the Way
Thanks, it looks neat but I've already got the Pinnacle Pro water tool so not sure if it's worth it.

Is the 10mm or 14mm better for the hopper?

Also quick question, how long are you guys waiting for a return? Like if you send your hopper in cos it's stopped working, how long before you get it back?
14mm for the Hopper. This fits for native or for silicone mp.
I realized that I was not getting great seal with either of those ways on Pinnacle water piece (knockoff) nor on my nice5 14/18mm glass adapter from Oregon Glass (use that on a different glass piece). So I tried one of these:

http://delta3dstudios.com/nearly-universal-vape-to-waterpipe-adapter-large/

I'm very, very pleased with this adapter, fits great on Hopper and is both 14 and 18mm male.

Warranty for Hopper has been very easy in my cases. Online claim form, you describe the behavior (light patterns, etc.) and often the reply will be three days max., usually less: often they will tell you that they are sending a new part (Body) and you should return the old one after receiving the new one. Mine claims have usually taken about a week + or - to have working Hopper in hand. (in US) There are some times they ask you to return the whole thing, with charger and battery, and this will obviously add some time.
 

AJS

Calm Consistency
Two things ...
Lot of people have mentioned spinning their backed dial to combat hot backend.
My dial is normally very smooth. When I twist it back and forth over and over, it gets harder to twist, until it makes almost like a squeak. This is when I get a not so hot backend. So when it's "tighter" is when it tends to work better. Not sure why. Maybe I need to get some compressed air to shoot in there when that "tightness" comes.

Second thing. I've heard people mention removing the backend when twisting the dial. Do they mean twisting, as in, the method above ... Or do they mean twisting in the sense of just turning your dial to set temperatures..? I'm not too fond of the idea of taking my backend off whenever I want to change temps haha. Someone clarify please.
 

moondog

It's an obsession but it's pleasin'
Two things ...
Lot of people have mentioned spinning their backed dial to combat hot backend.
My dial is normally very smooth. When I twist it back and forth over and over, it gets harder to twist, until it makes almost like a squeak. This is when I get a not so hot backend. So when it's "tighter" is when it tends to work better. Not sure why. Maybe I need to get some compressed air to shoot in there when that "tightness" comes.

Second thing. I've heard people mention removing the backend when twisting the dial. Do they mean twisting, as in, the method above ... Or do they mean twisting in the sense of just turning your dial to set temperatures..? I'm not too fond of the idea of taking my backend off whenever I want to change temps haha. Someone clarify please.
I don't think people mean you need to remove the backend whenever you change temps. It's only when you are applying the remedial rapid back-and-forth twisting that you want to remove it.

Someone who has actually done this <vigorously knocking on wood> can confirm.
 

GreenHopper

20 going on 60
I don't think people mean you need to remove the backend whenever you change temps. It's only when you are applying the remedial rapid back-and-forth twisting that you want to remove it.

Someone who has actually done this <vigorously knocking on wood> can confirm.

Yeh I believe if you are going to twist your temp dial multiple times in a row to attempt a hot backend resolution then you should remove it from the body.

When you twist the temp dial it twists the backend gold contact and thus the battery too.

There was concern that the twisting of the positive end of the battery against the body's gold contact may wear out the gold plating.

The Grasshopper post #11436
 

JoeMama

Well-Known Member
Two things ...
Lot of people have mentioned spinning their backed dial to combat hot backend.
My dial is normally very smooth. When I twist it back and forth over and over, it gets harder to twist, until it makes almost like a squeak. This is when I get a not so hot backend. So when it's "tighter" is when it tends to work better. Not sure why. Maybe I need to get some compressed air to shoot in there when that "tightness" comes.

Second thing. I've heard people mention removing the backend when twisting the dial. Do they mean twisting, as in, the method above ... Or do they mean twisting in the sense of just turning your dial to set temperatures..? I'm not too fond of the idea of taking my backend off whenever I want to change temps haha. Someone clarify please.

As what prior responses say, twisting with backend off only for remedying a hot back end.

Though, I have a question here... Blowing compressed air to shoot in... where?! That little tiny narrow separation between the temp dial and the stationary part of the backend? I don't think air will even try to get in there without being vented away aerodynamically around it. Some have mentioned "dental floss", but I haven't found floss that is fine enough (and UNwaxed) to try and fit in there.

EDIT: FURTHER REGARDING THE FEEDER
Few days ago, I said I'd try and figure out the Feeder a bit better and report back...
http://fuckcombustion.com/threads/the-grasshopper.18482/page-522#post-1042522

In that post I mentioned that I had to really intend to over-shake the feeder to get an over-sized hopper load. That load consistently measured 0.17 to 0.19 grams, which I consider an oversized load (I don't necessarily believe that's a bad thing, for this reason that I'll describe at bottom).

Having taken a better look inside the mechanism, and seeing that the bolt-action "trench" wasn't obstructed (as I'd thought it was), the only shaking necessary is purely in the up/down direction.
I had been shaking it at different angles, errantly visualizing something like a simple "maze" that the herb had to get through to the trench. I was wrong, bigly.

So, rather than intentionally over-shaking the feeder in the unlocked position (ie, just before actually plunging the herb into the hopper chamber) , I do the over-shaking in the locked position. This is the no-mercy shake, and it's intended to wake up each little grain of herb so it's as fluffy as possible inside the feeder.

I attach the Hopper, unlock the feeder, and then use either three or four strictly-up/down shakes OR a few solid two-finger taps on the top of the feeder (imparting downward motion to the contents, not the feeder itself, of course).

Bing bing bing, boing boing boing, and it's a nice 0.07-0.13g load.

I stated above I'd explain why I don't think a 0.18g load isn't necessarily a bad thing. So...

If I place 0.18g in the hopper using the funnel method, by poking (not tamping) down the material gently and evenly, my sense is that the herb is not smashing up against the oven screen in such a way as to cause some passage of material onto the heater element. Yes, it's overfilled in my opinion, but I suppose it would be just fine. I think I'd waste weed though, not enough airflow to evenly cook.

OK, I'm done. Thanks for dealing with my inanely overthunk analysis.:sherlock:
 
Last edited:

vapeOR

Well-Known Member
As what prior responses say, twisting with backend off only for remedying a hot back end.

Though, I have a question here... Blowing compressed air to shoot in... where?! That little tiny narrow separation between the temp dial and the stationary part of the backend? I don't think air will even try to get in there without being vented away aerodynamically around it. Some have mentioned "dental floss", but I haven't found floss that is fine enough (and UNwaxed) to try and fit in there.

How about some sewing thread?
 
vapeOR,

AJS

Calm Consistency
Though, I have a question here... Blowing compressed air to shoot in... where?! That little tiny narrow separation between the temp dial and the stationary part of the backend? I don't think air will even try to get in there without being vented away aerodynamically around it. Some have mentioned "dental floss", but I haven't found floss that is fine enough (and UNwaxed) to try and fit in ther
Ohhh okay. I thought I saw a post where u twist, blow, twist blow, in order to remove any debris. Hmmmm. Guess I was mistaken haha.
 

BuzzDanklin

Well-Known Member
@MoltenTiger This is the photo of my first hopper version (right) and my second version (left) I believe the one you linked a page back is the 2nd version or potentially the third. Unfortunately I had a crummy camera back then so I am not sure if it will help you at all.
TAz0VuI.jpg
 
Last edited:

MoltenTiger

Well-Known Member
@MoltenTiger This is the photo of my first hopper version (right) and my second version (left) I believe the one you linked a page back is the 2nd version or potentially the third, as my inside screen was silver not near as blue. Unfortunately I had a crummy camera back then so I am not sure if it will help you at all.
TAz0VuI.jpg
Cheers mate :)

I was going to ask you, when you were at HL and they were talking about a screen that you could scratch but not mark, were they referring to the honeycomb silver screen or the blue heater cap?
I guess the blue finish is some kind of hardened/anodised finish, or something.

Did you take the pic in my previous post? (I did search for "vaporizerwizard grasshopper" and scrolled) it's a quality shot :)
The other one in the series of the newer screen is also easy on the eyes
vapes-for-reviews-1120-edit.jpg

Just a casual bit of levitating wonder
 

BuzzDanklin

Well-Known Member
@MoltenTiger I actually did not take that previous photo you linked, that one you linked was taken by Justin at radvaperreviews, and I agree its a good shot, actually one of the ones that made me realize it was time to save up for a better camera haha.

As far as screens, the new one they were referring to was the honeycomb one inside the mouthpiece. Originally they had a much different and more finicky screen that needed cleaned much more often, and it was easier to mess up by poking at it during cleaning.
 

MoltenTiger

Well-Known Member
@MoltenTiger I actually did not take that previous photo you linked, that one you linked was taken by Justin at radvaperreviews, and I agree its a good shot, actually one of the ones that made me realize it was time to save up for a better camera haha.

As far as screens, the new one they were referring to was the honeycomb one inside the mouthpiece. Originally they had a much different and more finicky screen that needed cleaned much more often, and it was easier to mess up by poking at it during cleaning.
Ah okay, I knew you had taken one of the blueness so I was trying to hunt it down.
Well I'm glad on the better camera, I remember back in the day I fell asleep after watching your just released slick 4K review in all its glory, before being woken by the post guy with my Vapefiend order. Was a surreal time indeed and I've been elevated ever since (well, just about :p).
Your review/coverage sold me on this pen and I'm pretty stoked with how it all panned out, so cheers for your efforts.

I thought that was the case with the screen, and they are pretty impressive with avoiding gunk build up. I have been using hoppers nearly all year and I reckon I've only cleaned them 4 or 5 times
 

vapviking

Old & In the Way
I believe fuschia or purple to be more correct than pink as there's no green LED, though hot pink and fuschia are practically synonymous, so you know, no need for an argument there :ko:
The devices I work with have green and red LEDs, which when combined makes an orange. It's a little trippy, like the colour yellow on an LCD. Some newer devices we have in development have RGBs, which are snazzy but without good diffusion through a light pipe the colour mixes aren't amazing.
Anyways,
https://www.reddit.com/r/GrassHopperVape/comments/52i09v/solid_purple_lights_of_death/?
There's been a few cases of purple lights and it seems to usually require a replacement body via warranty..
The new Ti body that I recently got is the one doing the pink lights. But it stopped that behavior after a 24 time-out I had put it in for mis-behaving. It was also not able to charge a battery, though it did make vapor.
After this rest period, and I really don't precisely remember my gyrations but I'm certain I spun things and twisted things back/forth, cleaned threads, etc -- last night I filled it, clicked on and lights went normal red to blue, nice vapor, all good!
Except that red lights can come on kinda randomly (even a tap on the table did it!) when unit is clicked off! Not only when replacing battery, that little red flutter, but when I turn temp selector back/forth the lights flicker. The other interesting thing is that it will now charge a battery, when before it would not.
So, today I'm going to try some gymnastics with my other 'currently working' hopper, swapping parts, etc.
I think this time I'm encountering more than one of the "240" things that can go wrong!
 
Top Bottom