Phase3 Vaporizers

invertedisdead

PHASE3
Manufacturer
Some people appear to have backed out so there may be an available spot or two left from this batch, feel free to drop me a PM if you want to reserve one.

I was planning on ordering a pretty big batch immediately following this one, but now I’m not so sure the demand is there, again.

☔☔☔☔☔

Old 1.7 vid featuring Larry Fisherman in case you forgot what we’re working with.


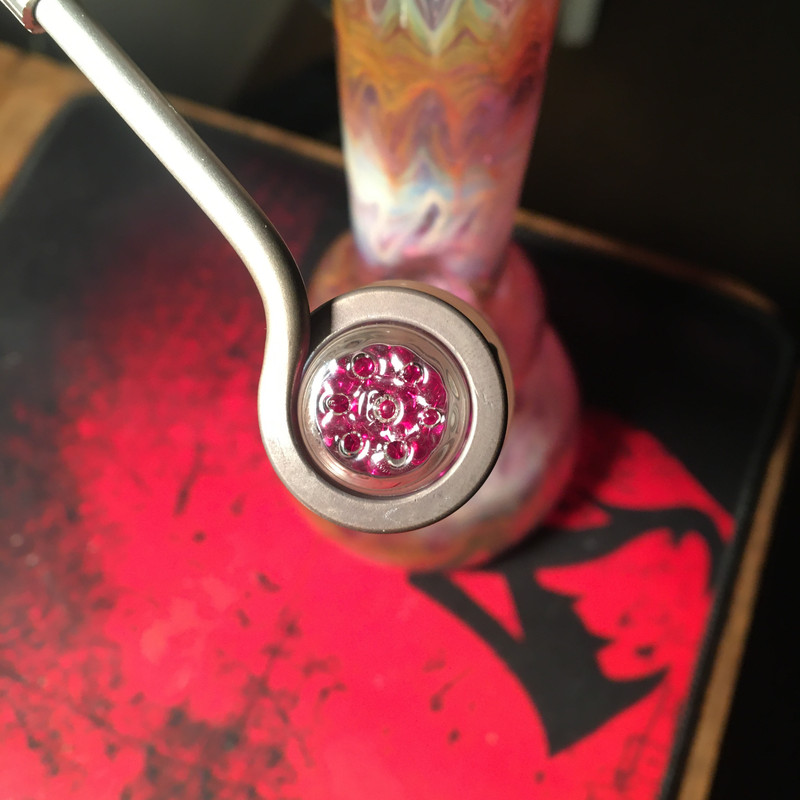
QU4D CORE V2 on the drawing board this week getting a total aesthetic makeover.... with hundreds of vaporizing concepts written down it’s possible that I may just start building small, limited run batches of my ideas/concepts/prototypes and my peers can check them out if anything interests them. Probably start a small website where you can peruse or place an order from a small lot of custom designed therapeutic products.

Got some emails and PMs to get back to today which I’m planning on taking care of, hope everyone is having a positive morning.

:leaf:
 

madhockeydad

Art is beauty
Hi

I like the idea of small custom runs especially if you want to continue innovating. That makes a huge amount of sense and allows us a easy way to buy in too. You could take pre-orders and payment up front like Cloud Connisouer is doing with the Halo and Atlas so you could better predict some demand too. Also with a website it's easier to possibly advertise using Instagram etc.

I'd sign up for an email list and continue to follow and buy at least some of the versions. I already pinged you about what I want from this order. We are all excited this is getting close.

D
 

invertedisdead

PHASE3
Manufacturer
Sorry, I’ve been a little busy with unrelated stuff this week.

Just got the parts in and built one - here’s the very first rip on the new 1.7, haven’t dialed anything in, not sure I need to!


8918-E0-BC-6485-4848-95-BE-BEC9-B6-F37935.jpg


invertedisdead

PHASE3
Manufacturer
Hey gang, sorry for the short message last night, I pretty much expected to fall asleep after that one. I decided I wanted to give everything a good look over before sending out any invoices, just to make sure everything is up to par. To be honest I also wanted to put a little time on one just to give a brief check of the integrity of the components.

That said, I was gonna send these empty
housings out by themselves, but when assembling it last night and testing out a few options; I decided that I really do want to send these out with the double screen configuration I’ve been using in these to lock the beads in. That’s the same setup that went out on the previous 1.7 trial run.

Basically the domed bottom screen seems much more snug and secure when it has the flat top screen to hold it in tension; rather than just the glass sidewalls, and rather than just the rounded contact area of the smooth beads themselves. I do feel this produces a more secure and safe fastening mechanism based on my experiments throughout various iterations.

D89-B1-ED2-CB72-4282-ADD0-B6-A3-B277-BC1-C.jpg


I have plenty of the 3/4” in stock but it will be a couple day for more 15MM screens to land. If you’ve already got some or don’t care I’d be happy to send them out without, but I want everything to be as secure as it can be. I hope everyone is okay with this! Also kind of hoping my pearls might show up to send some housings out loaded and ready to rip.

Appreciate your cooperation and understanding! I got some PMs to respond to but I’m running out the door right now to help a friend out today, so I will get back to those as soon as I can!

Thanks all!
 

Zuhdj

Charles Mingus
out of curiosity, how would this vape compare to the baller b2? my roommate has a b2 and, as far as i can tell, this is a more efficient vape that provides thicker, more potent vapor with less material than the b2. Any thoughts here?
 

Vaporware

Well-Known Member
@David Root Are you saying the B1 is better than the InV 1.7? You haven’t posted here before so I’m guessing you don’t have one yet…? :hmm:

If you do, please share some more thoughts on the differences!

CH makes some great stuff for sure, but taking almost all of the metal out of the housing should have some positive effects in my opinion. I’m not sure which one would put our bigger clouds, but if the InV 1 tastes better and/or is smoother I’ll consider it an upgrade.

I’m curious to see some detailed comparisons too @Zuhdj ! :)
 

madhockeydad

Art is beauty
In the DIY space there has been an explosion of ideas recently. Our friend #invertedisdead is being acknowledged now as having had some fundamental ideas. Another member # secreagent has pioneered the use of ceramic tig welding nozzles and this Ti alternative.
 

invertedisdead

PHASE3
Manufacturer
Screens are out for delivery! 📦

I’ll probably be sending out PMs later today to get them squared away for mailing out.

Thanks for your support!

More 1.7 housings on the way 🚀

I’m happy with how these came out. @Cheebsy called it “a scalpel” and I think that’s a pretty great description.

I received a great PM asking about what other stuff is needed for a ready to rip experience.

In addition to the 1.7 glass housing you will need:

- 3MM or 4MM Ruby or Sapphire pearls
- 16MM XLR Coil + a compatible PID controller
- 19/22 or 19/26 glass adapter, with the other end matching your preferred glass size. Most of my glass here is 14mm, so I’m using a 19/22 to 14/20 lab glass adapter.
- an “injector” stand; I’m using a spare 19/22 glass adapter as a stand; and there are a few options out there already from different retailers which would be perfectly suitable. Ideally in the near future, I might be able to offer my own stand (or maybe a collaboration) to offer with these.

*Loaded (filled) housings (TBA) will not need any additional sapphire or ruby pearls, but this first batch is just the empty housings and retaining screens, intended as mostly a DIY / Open Source + type experience for now.

It would be nice to offer some coil matched units that just need to be plugged in to a controller, but investing in the electronics takes away from being able to invest in my other design ideas, so I’m not sure I’ll offer more than the loaded housings for a while, if at all. There are others who can probably add more value in that regard.

I consider this one finished, so the only
goal left is to make them available to as many who are ready to Get Inverted 🙃🙃🙃

Thanks for giving me an opportunity
 

invertedisdead

PHASE3
Manufacturer
Howdy team!

I assembled all the screen setups and ISO dipped everything last night for a thorough air dry. Domestic traveling 1.7s should be going out today! And possibly international ones as well, but I like to do those all together as I have to adjust some settings on the label printer to do the customs form.

Thanks a lot for your support :wave:

Stay Inverted! 🙃🙃🙃
 

invertedisdead

PHASE3
Manufacturer
Heads up: for anyone wondering about a bead count for the 1.7 we're looking at 80-90 3MM beads, or 35-40 4MM.

I was going to send these out with the bottom screens fastened in after test fitting everything last night, but I decided to take them out for shipping as to simplify the install for everyone receiving housings.

To pop the domed screen out, you just go in at the bottom of the joint with a pair of angled tweezers, once one corner comes out you can grab it with the tweezers. And for the flat retaining screen, you can either use tweezers from the bottom, or poke it out from the top with a long skinny stir tool through one of the air holes to dislodge it.

I ISO dunked everything last night, but since I had the screens installed I noticed a couple Q tip fibers inside some of them, so feel free to give everything a rinse when you receive if you'd like. Unless you wear gloves your finger oils and prints will get all over everything anyways when assembling and fitting the coil. Not a big deal IMHO, you can just do a burn off (which you'll want to do anyways, especially if using a brand new coil), but if you would like to clean the entire filled housing after assembling, you can rinse the whole thing in ISO. Just be sure that if the gems are wet and you power on the device that you keep the temperatures moderate, around 200-300F for 5-10 minutes to dry everything out inside before going to vaping temperatures. This is just to prevent any possible thermal shock of any of the components. With a dry housing assembly there is zero issue of thermal shock, so it's only something to keep in mind if you're really anxious to fire this up and want to do more cleaning than a burn off.

The video posted above is a good resource for coil fitment, definitely make sure the first time you power it up that you do everything over a solid surface and at a low height off your work surface to confirm the fitment, the first heat up is always the most important. Keep in mind that the coil will expand at vaping temperatures, so it needs to be snug enough at ambient room temperatures to compensate for that. If on your first fitment you get everything up to temp, and the coil slides right off the glass heater, just power everything down and wait for it all to cool down to room temperature before trying to adjust the fitment again. You can't really fix the fit while everything is hot, and while it can be tempting to coax a quick test hit out of it while warm, you don't want anything slipping out of the coil, so it is best to just shut the power down and try again.

Overall these parts seem pretty durable so far, for what they are (Knock On Glass)
I did notice a little bit of minor haziness in the glass in a few spots on some of the housings, and a couple tool marks from the hand working process; but nothing visible when coiled up and running, or which would affect the performance or structural integrity negatively in any way.

The two with the most haziness I may just hang on too, to offer as a discounted replacement if anyone breaks one.

Thanks a lot for your interest and support!
 
Top Bottom