Vapman

vapman

Well-Known Member
Manufacturer
Funny you mention the logo since I use my Vapman with the logo in my Station setup. I’m not sure it is intentional but when the logo is facing towards me it inserts into the Station perfectly without having to line things up and rotate it. Not a huge deal but it certainly helps matters when I’m on a third fill up!😁

That is pure coincidence.:) I agree, vapman doesn't need branding, it's shape is the brand.

vapman
 

Gourmet

Well-Known Member
Does anyone know if the new design is still compatible with the old station?
I assume so, although I have not yet had the opportunity to test it.

As far as I know, both the pan and the 3 air tubes are identical, only the inner hole diameter, where the pan is mounted, has been enlarged, similar to the new Basic. And they fit into the station without any problems, the light barrier also works perfectly.

I can't imagine it any other way, because it wouldn't fit the Vapman logic. :D

But let's wait for René's answer before we blindly believe my assumptions. ;)
 

vapman

Well-Known Member
Manufacturer
This is correct, the new design will be compatible with the old station. As @Gourmet already mentioned, the components of the new design remain the same. There is only one small technical alteration. The distance between the base of the mid-section and the steel pins will be 1mm longer. This won't be a problem as mid-sections for the old design will still be available!:)


vapman
 

Ramahs

Fucking Combustion (mostly) Since February 2017
I picked up this Blackwood Vapman stem from @Ed's TnT recently. It fits a 10mm GonG at the mouth-end, and I have several small 10mm glass pieces I can use with it. I like this stem! The length feels good when using natively, and I like the lip-feel of the 10mm tapered end so much better than that ring at the end of the original plastic stem. I also like that "hourglass" shape:

qo-Cv8u-LPTt-Gd-RS-YGAq-Ccw-thumb-1948.jpg
 
Last edited:

passenger

is this thing on?
Hello everyone! Greetings!
I love this forum and learned a lot so far. I would like to thank you all for your contribution! You made my first vapman days easier :love:
I made a small guide about repairing your vapman lighter if your piezo igniter(spark maker) is not working.
It was so sad and frustrating when my lighter stopped working even though i had a spare one :cuss:
So let's dig in:
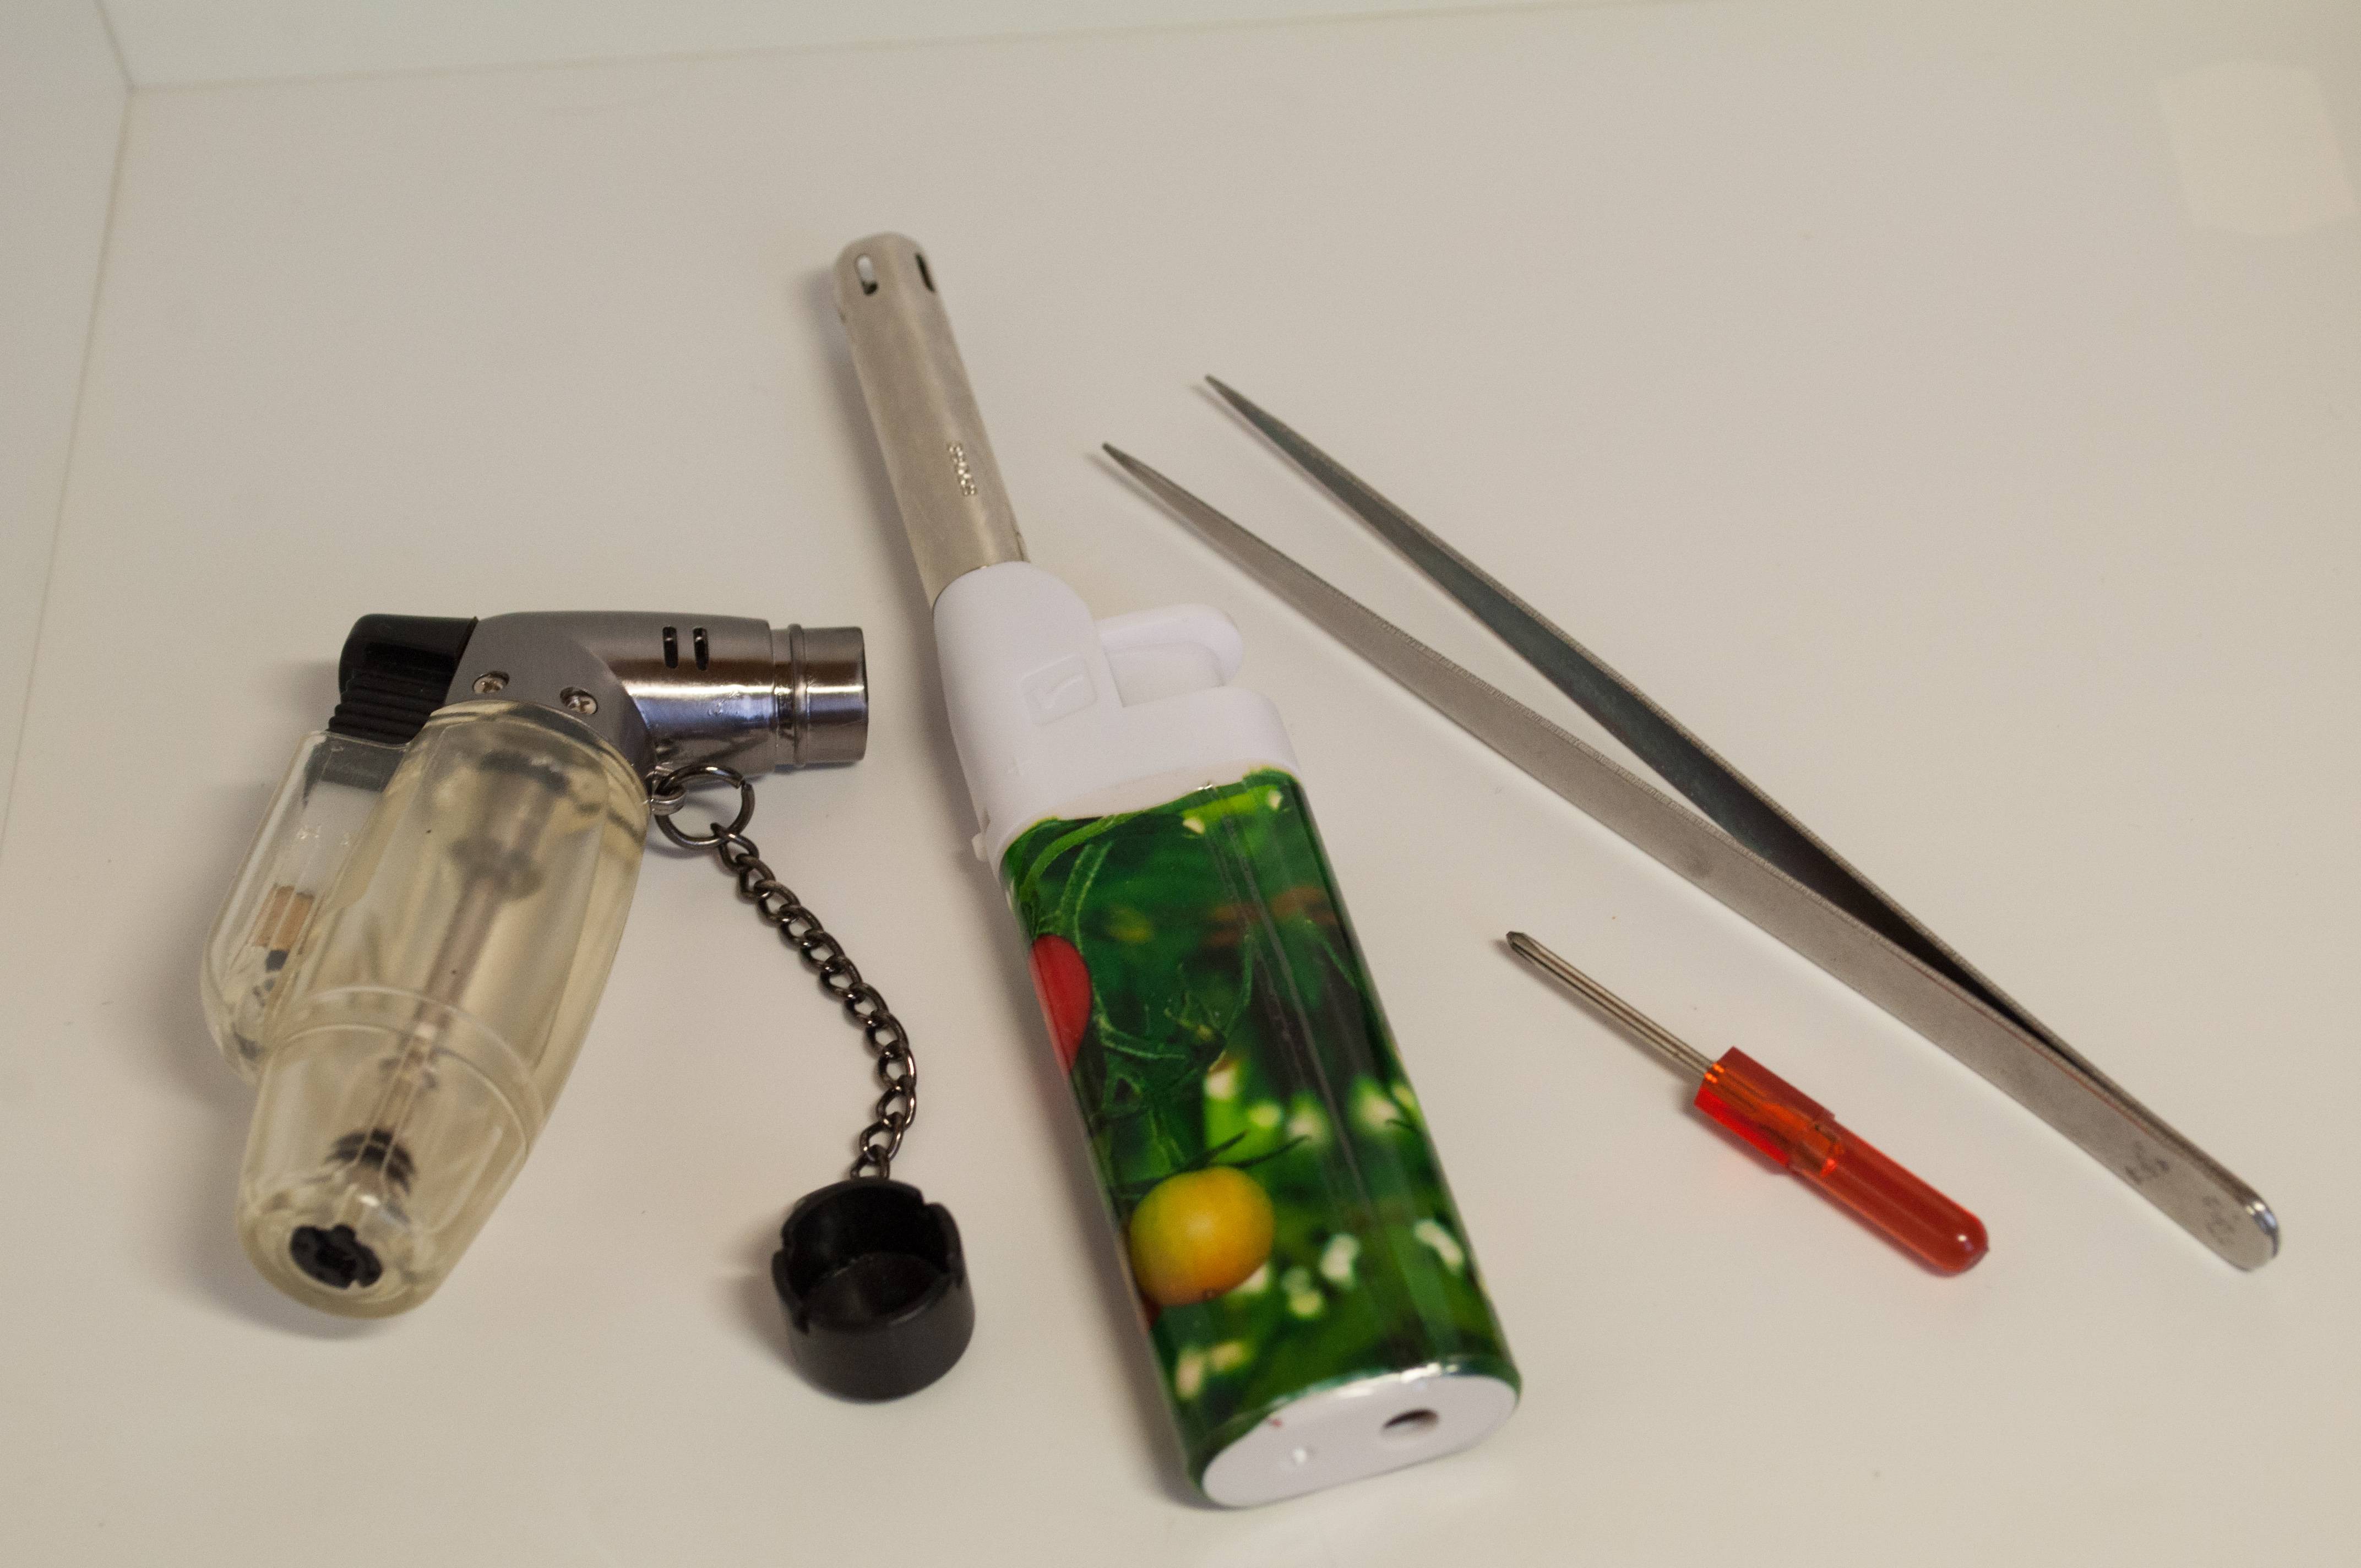
We only need a cheap lighter with long stem to take the new piezo system from,the small screwdriver your vapman comes with and a pair of tweezers:
BGJ4btZ.jpg

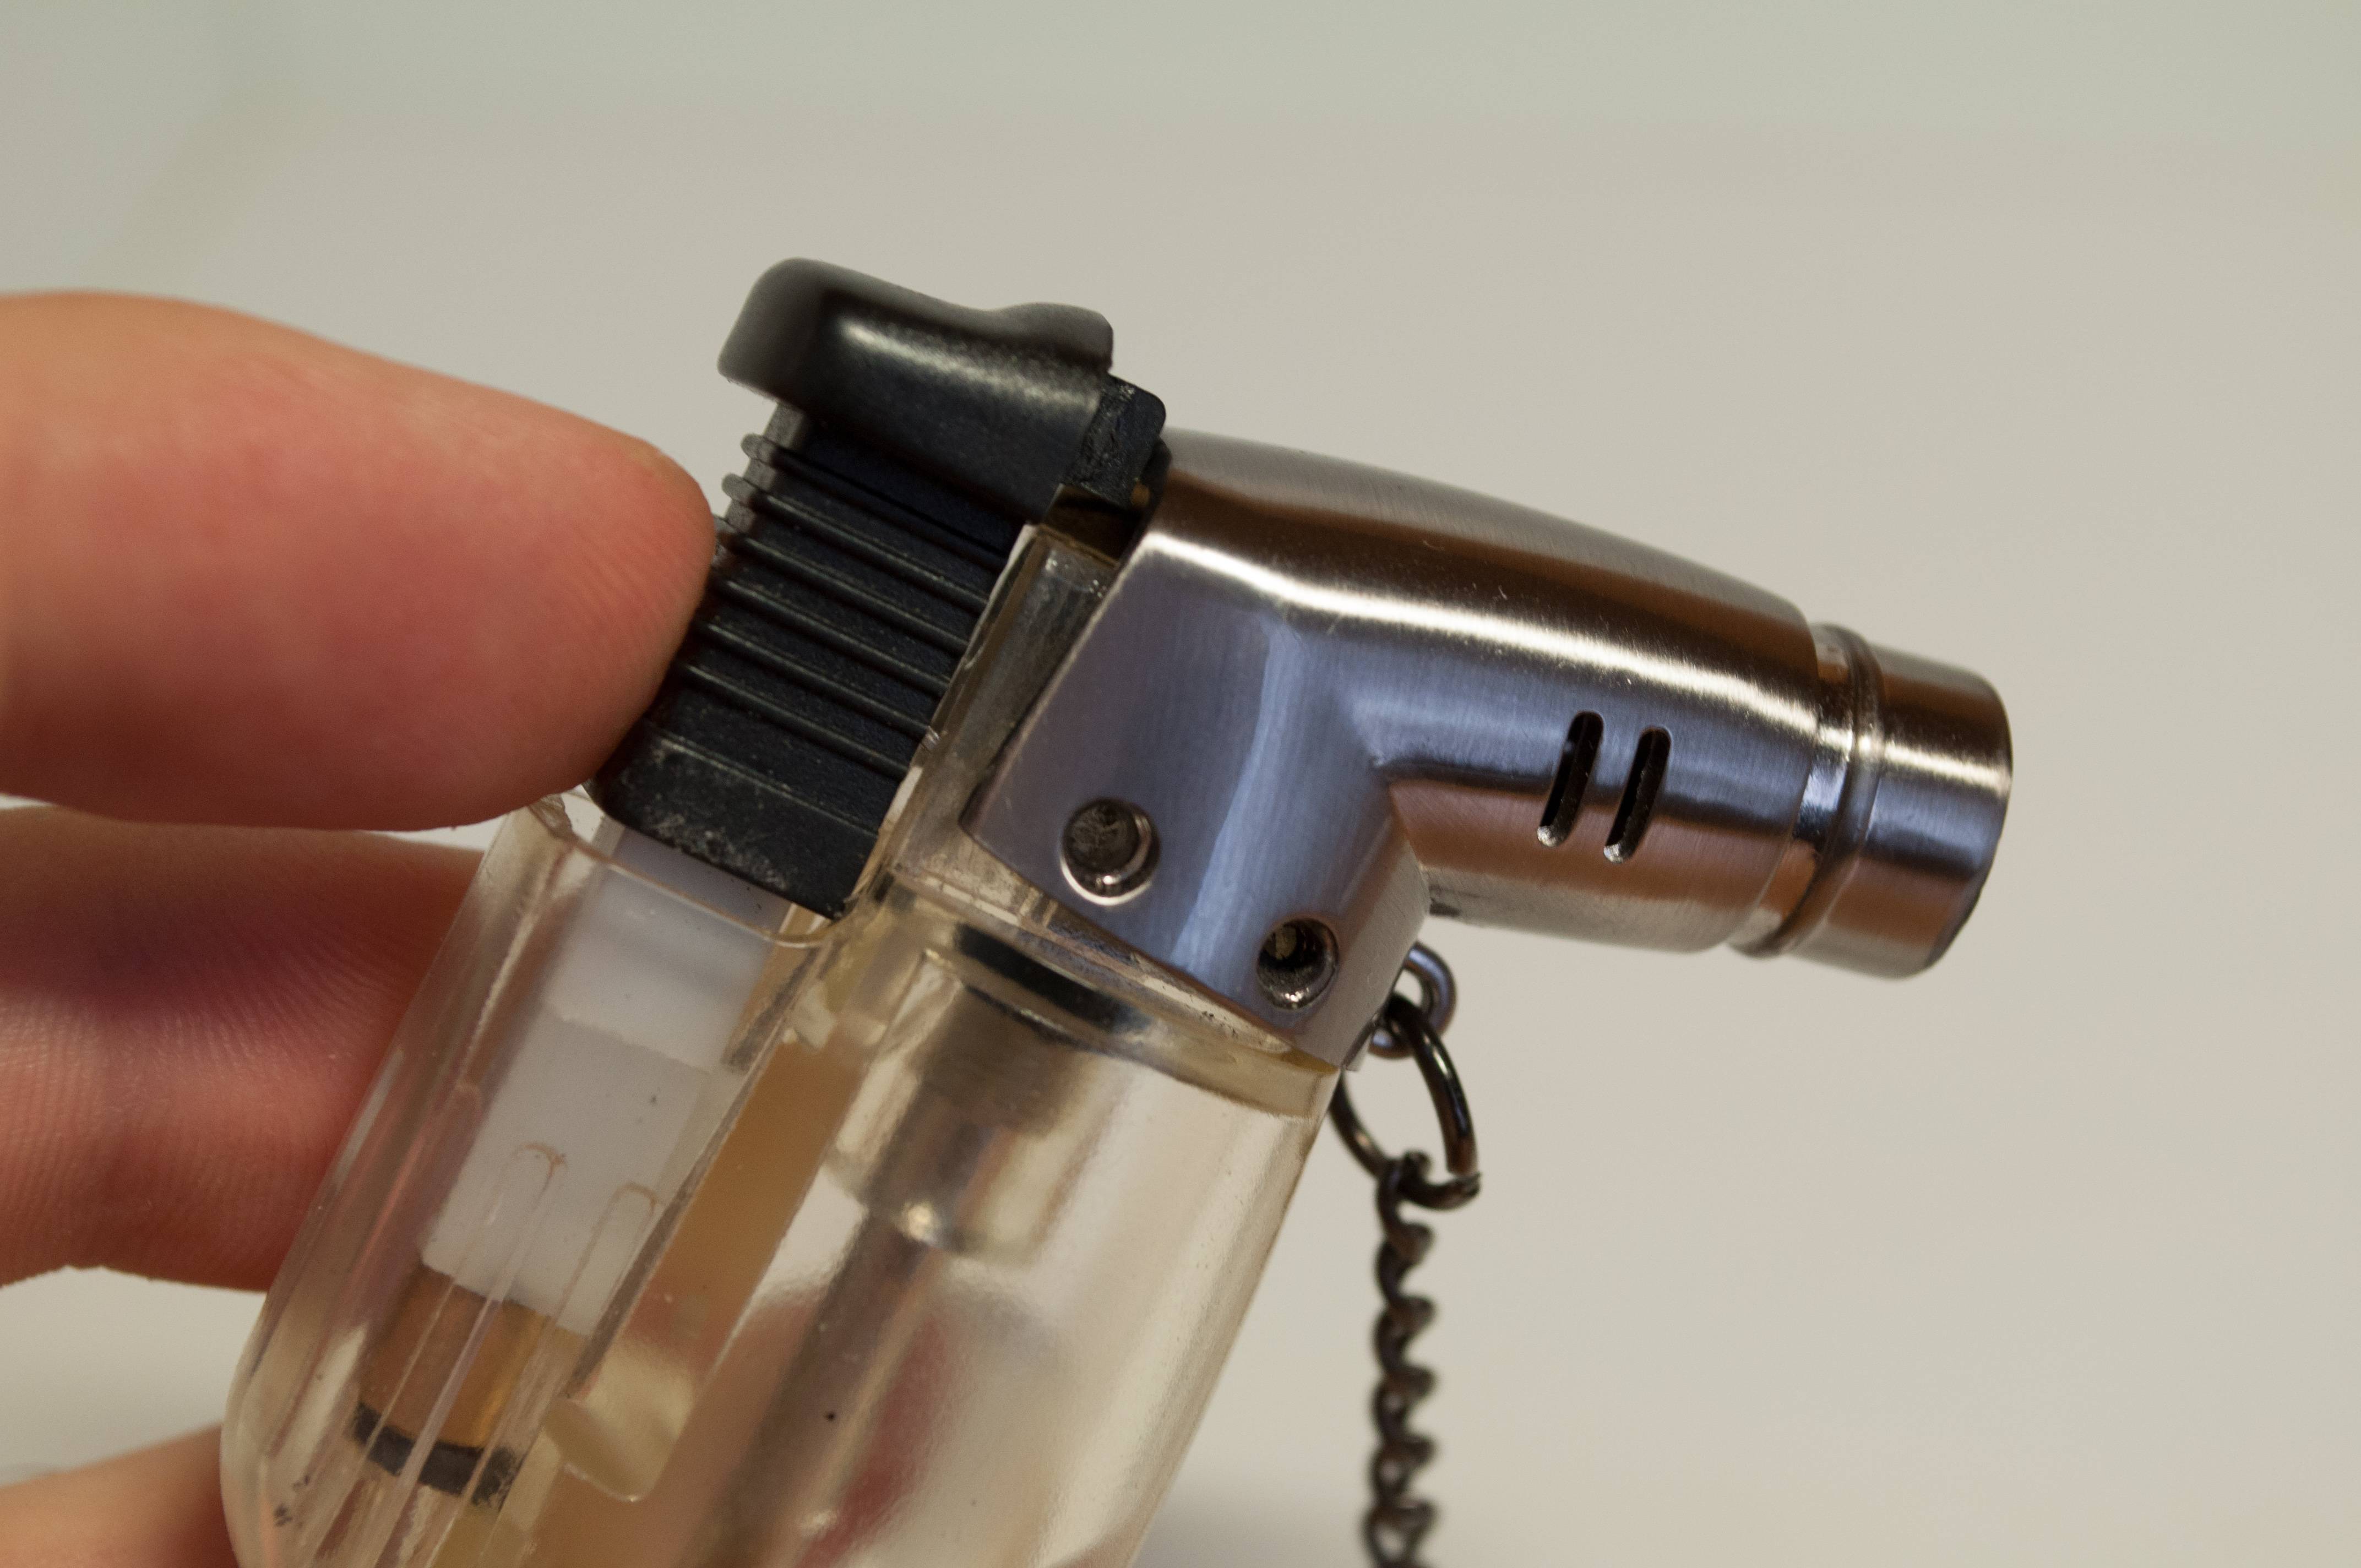
Let's start by disassembling the vapman lighter.Take off the 4 screws securing the metal top part to the bottom plastic tank.You need to pull down the metal part a little bit in the front so the button can be released upwards:
oL3pyw7.jpg

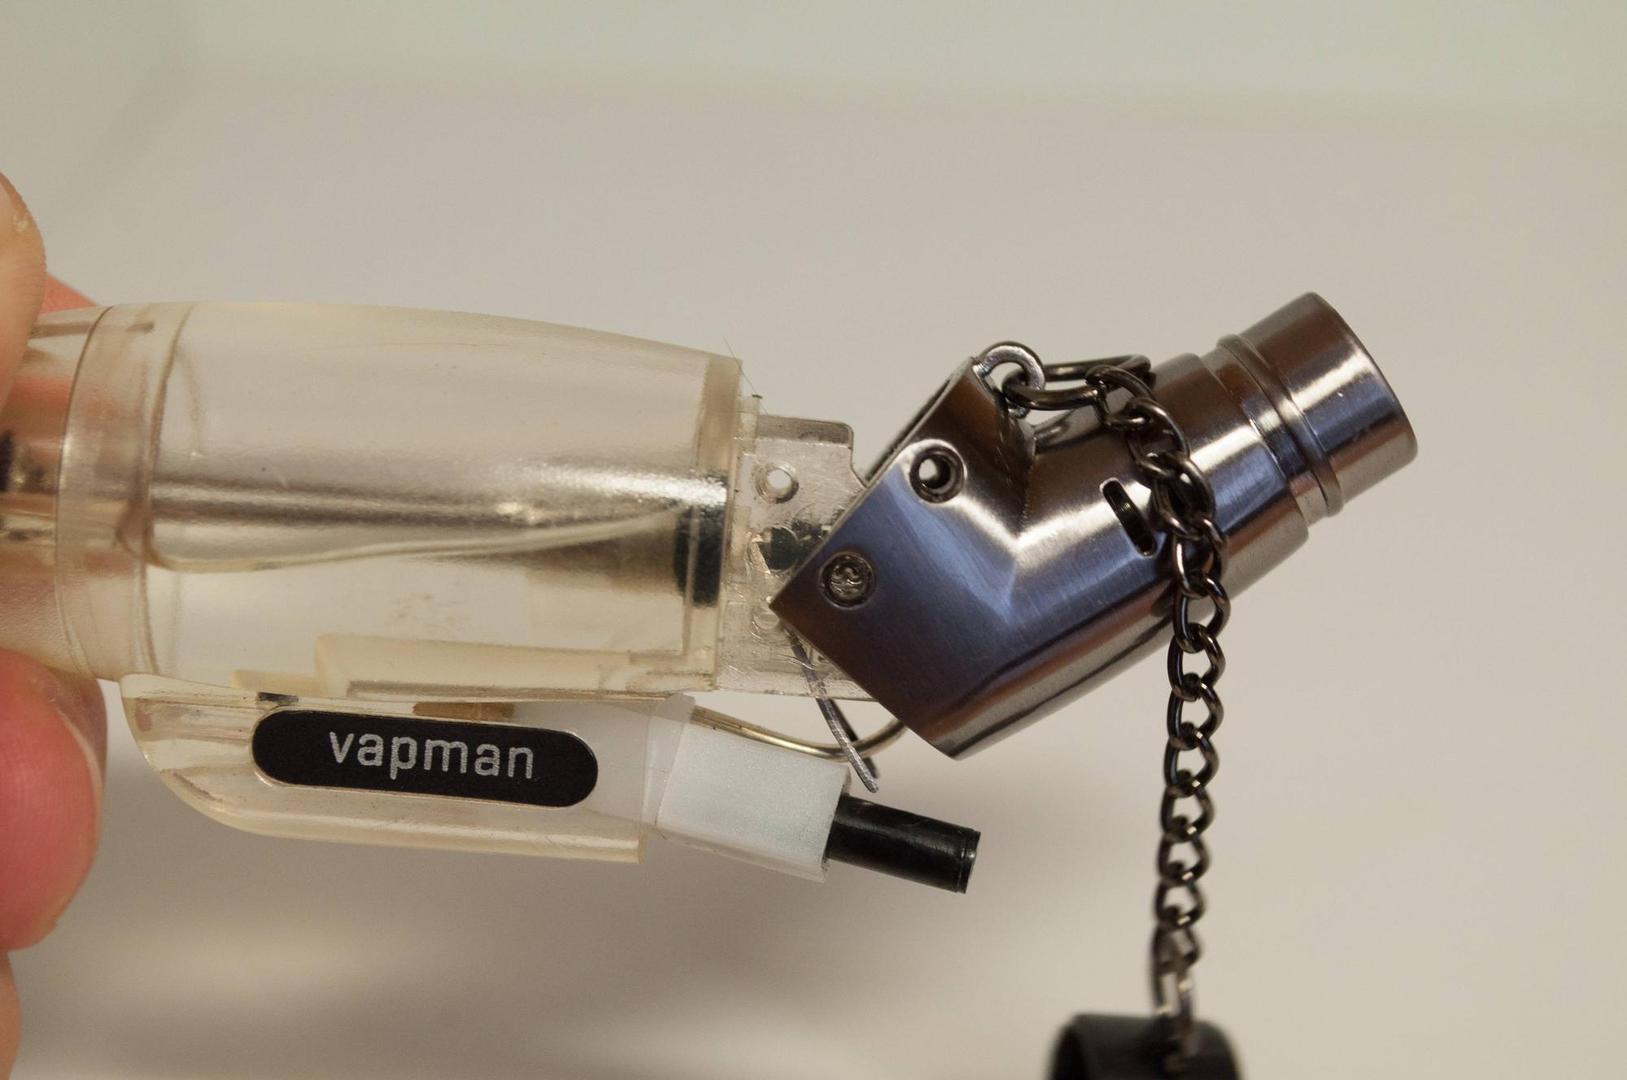
Remove the button and the small metal part on the top of the piezo igniter then lift up the metal head part so you have access to remove the black tube that feeds your nozzle with butane. Make it like this:
7XIFixd.jpg

With your tweezers remove gently the black tube from bottom tank part.Then remove the piezo from the housing.Just be careful not to lose the black spacer that is under the piezo igniter,you need that.Then separate the metal head from the plastic tank just by pulling them apart. Now your lighter is in two pieces:
r7vyr2m.jpg

Pull the piezo system to remove the cable from the metal head(if it doesn't get out it's because the cable at the end is bend up so pull harder or make it straight if you want to be gentle).
Now we need to work on the cheap lighter to take out the new piezo system with it's long cable.It's the one we will use to replace the broken one.Very easy procedure depending on the lighter.And you also experience the fun of braking/taking apart stuff :p You just need one lighter with a slightly big cable so you can put it all back easier(barbeque/fireplace lighter).
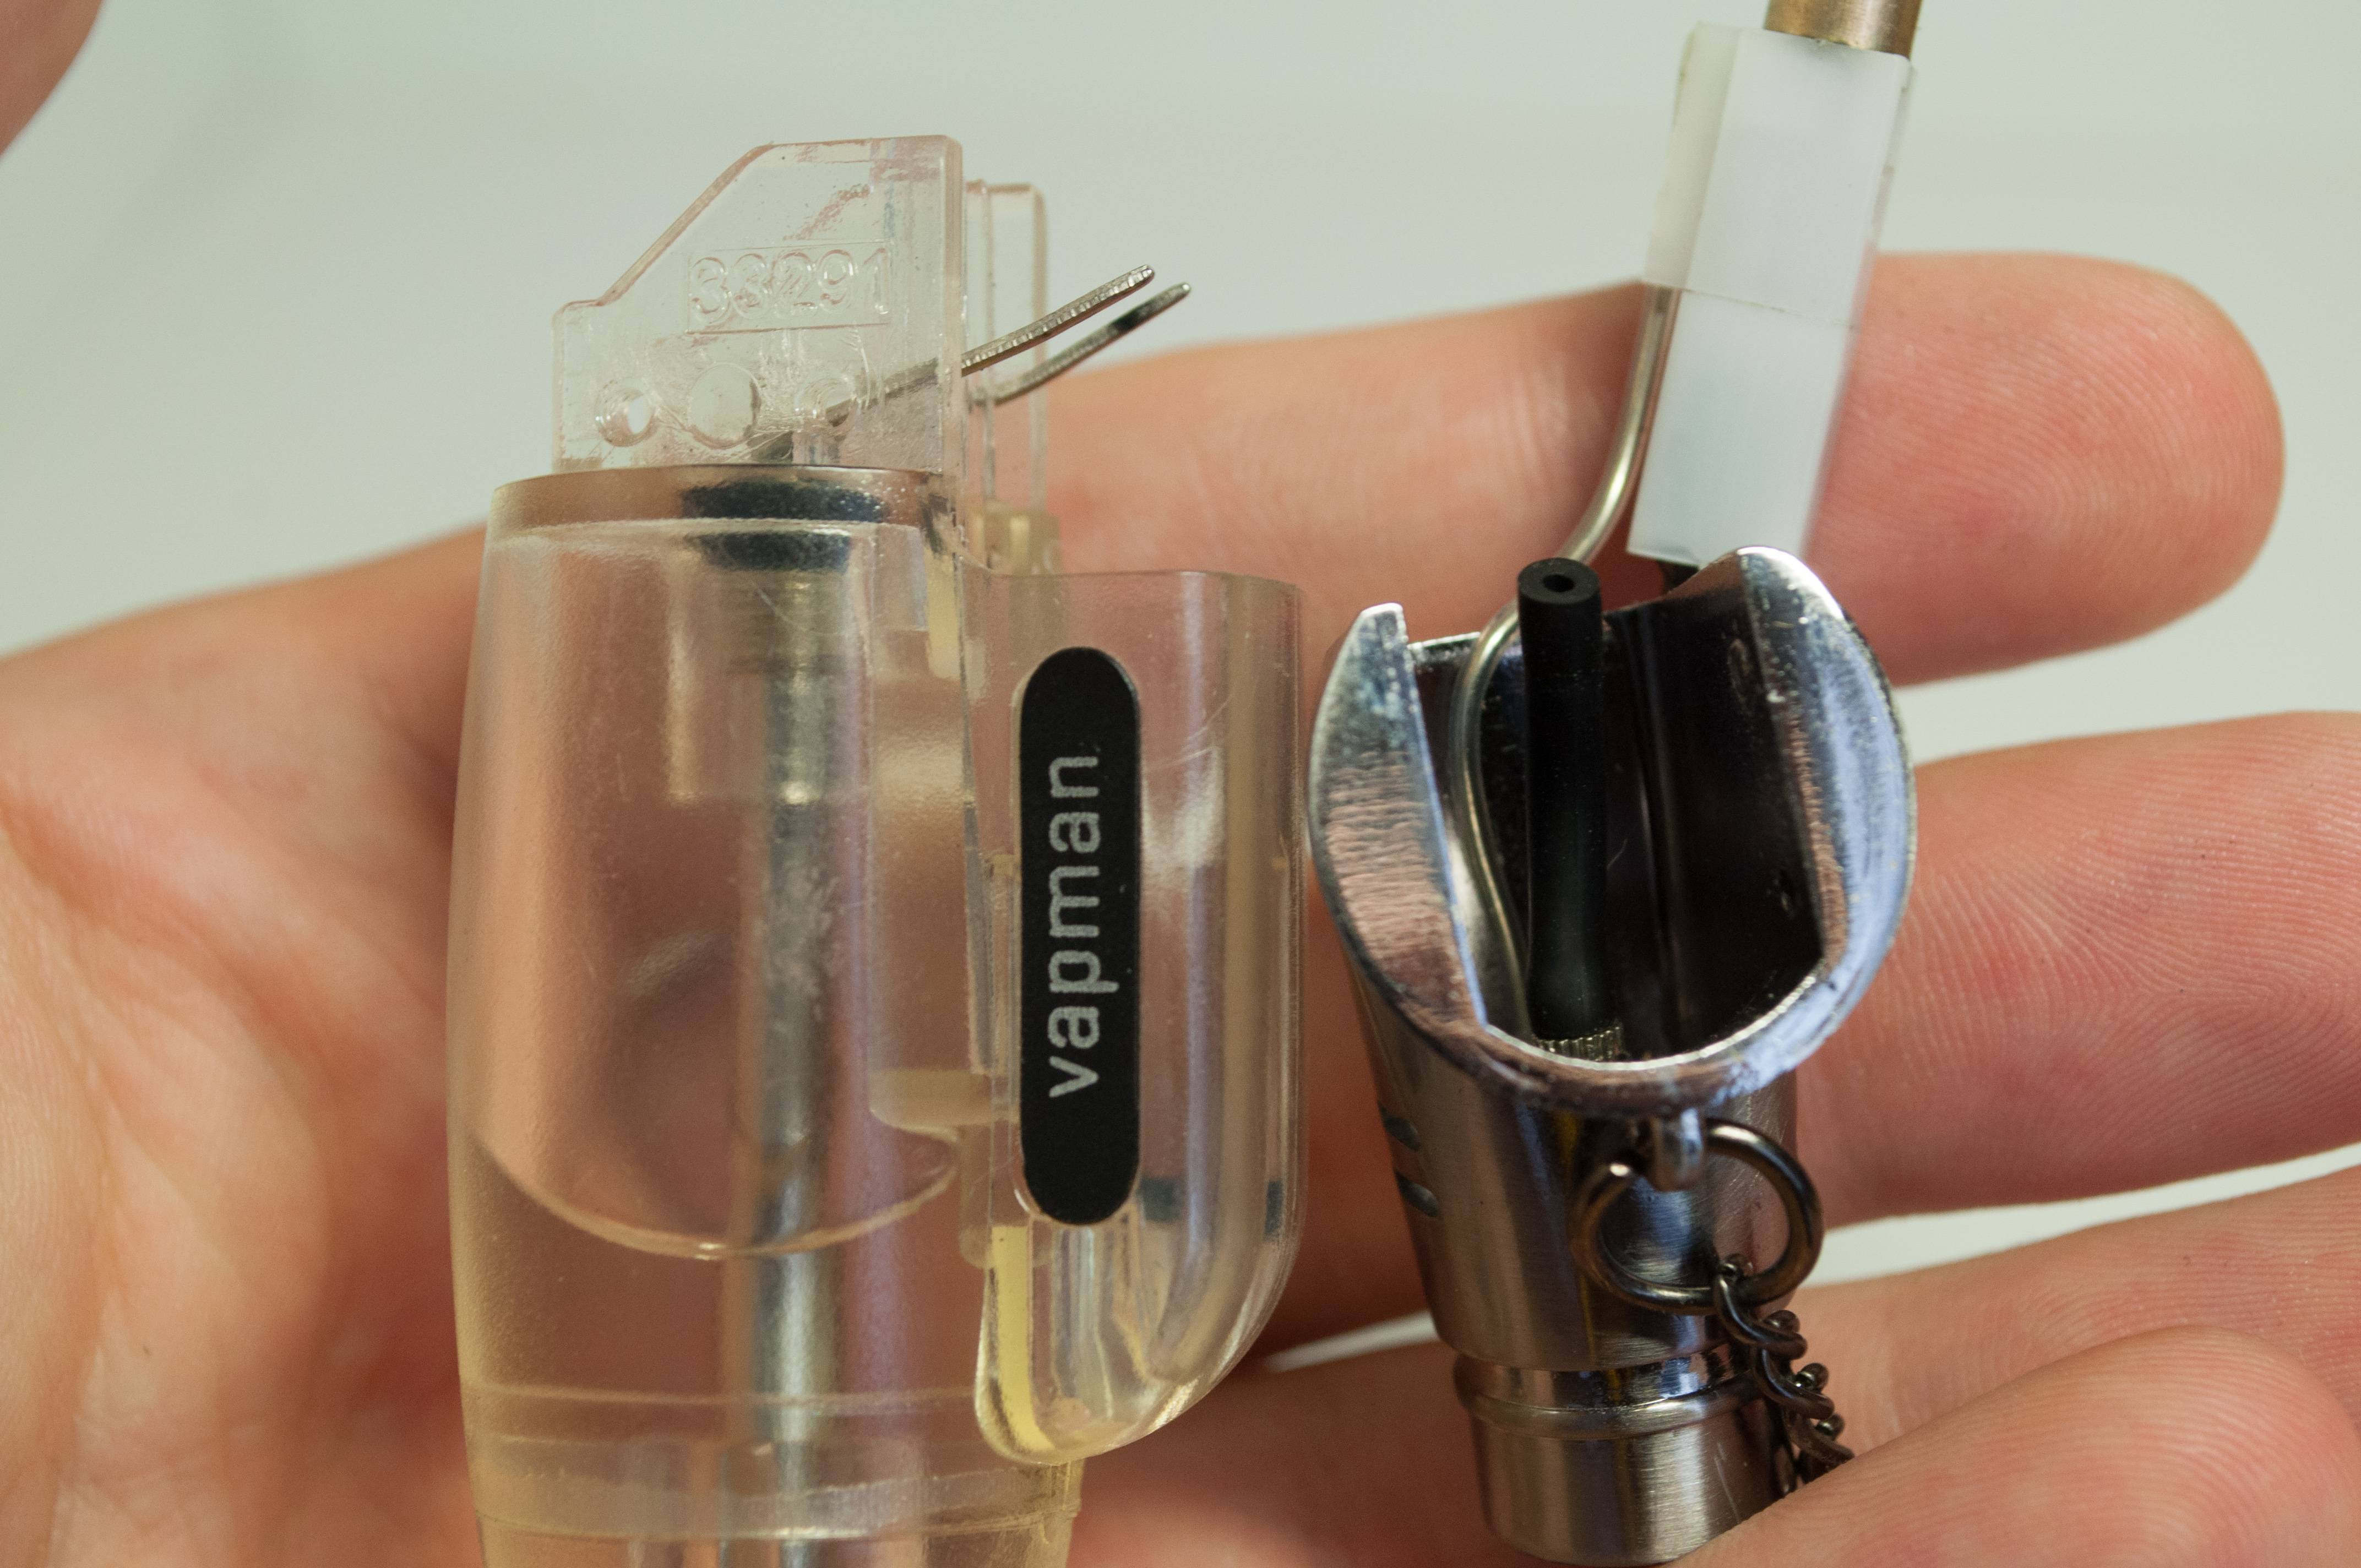
Put the piezo igniters side by side to check that the full length of the new piezo system matches the original one(not the cable,the housing)and make adjustments if needed using spacers(the one i got has the same length):
ibGREe3.jpg

So now only the assembly is left.Get the wire of the piezo through the nozzle of the lighter and bend it down like the original one giving you the spark close to the center.Also be aware of the length of the metal end of the cable.In the blue wire it is very long as you can see above so i cut it because the spark was going to the metal head(housing):
B2sZmrH.jpg

Put the metal head on the bottom/tank part like in the picture underneath so you can put back the black tube carefully with your tweezers(it is the only important part for your safety,be sure that the black tube is fitted all the way in on both sides so you don't have the chance of leaking butane):
oE66ith.jpg

Put the metal head in place to the bottom part. Put the piezo igniter in it's housing. Fold your extra wire around if needed or if it's really big and you wanna do a professional repair cut it shorter.Now you need to make sure your spark is going in the right place.Look the lighter from the front side and make sure the metal part isn't to long and it is long enough to almost go to the center,you don't want it to be touching,just floating around the middle.You want the spark going in the center.You need to make sure you have fire before you put it all back and now it's the time.Use your tweezers to bend/move around your cable end until it works.
Now pull the metal head a little bit in front again so you can put back the button and don't forget the small metal part going on top of the piezo(without it you might be having problems):
Zpvew12.jpg

Put the four screws back and you are ready. That's it! Your vapman lighter is new again and ready for fun use :) ;)
Now i feel my vapman lighter is for a lifetime!:love: So get your broken lighter from drawer and give it a go.

The white piezo ingiter you see underneath is already repaired once and it's the original one.
The original piezo after a month of use just stopped clicking(making sound),i was pressing it to the end and nothing was happening. So i have a fix for that too.
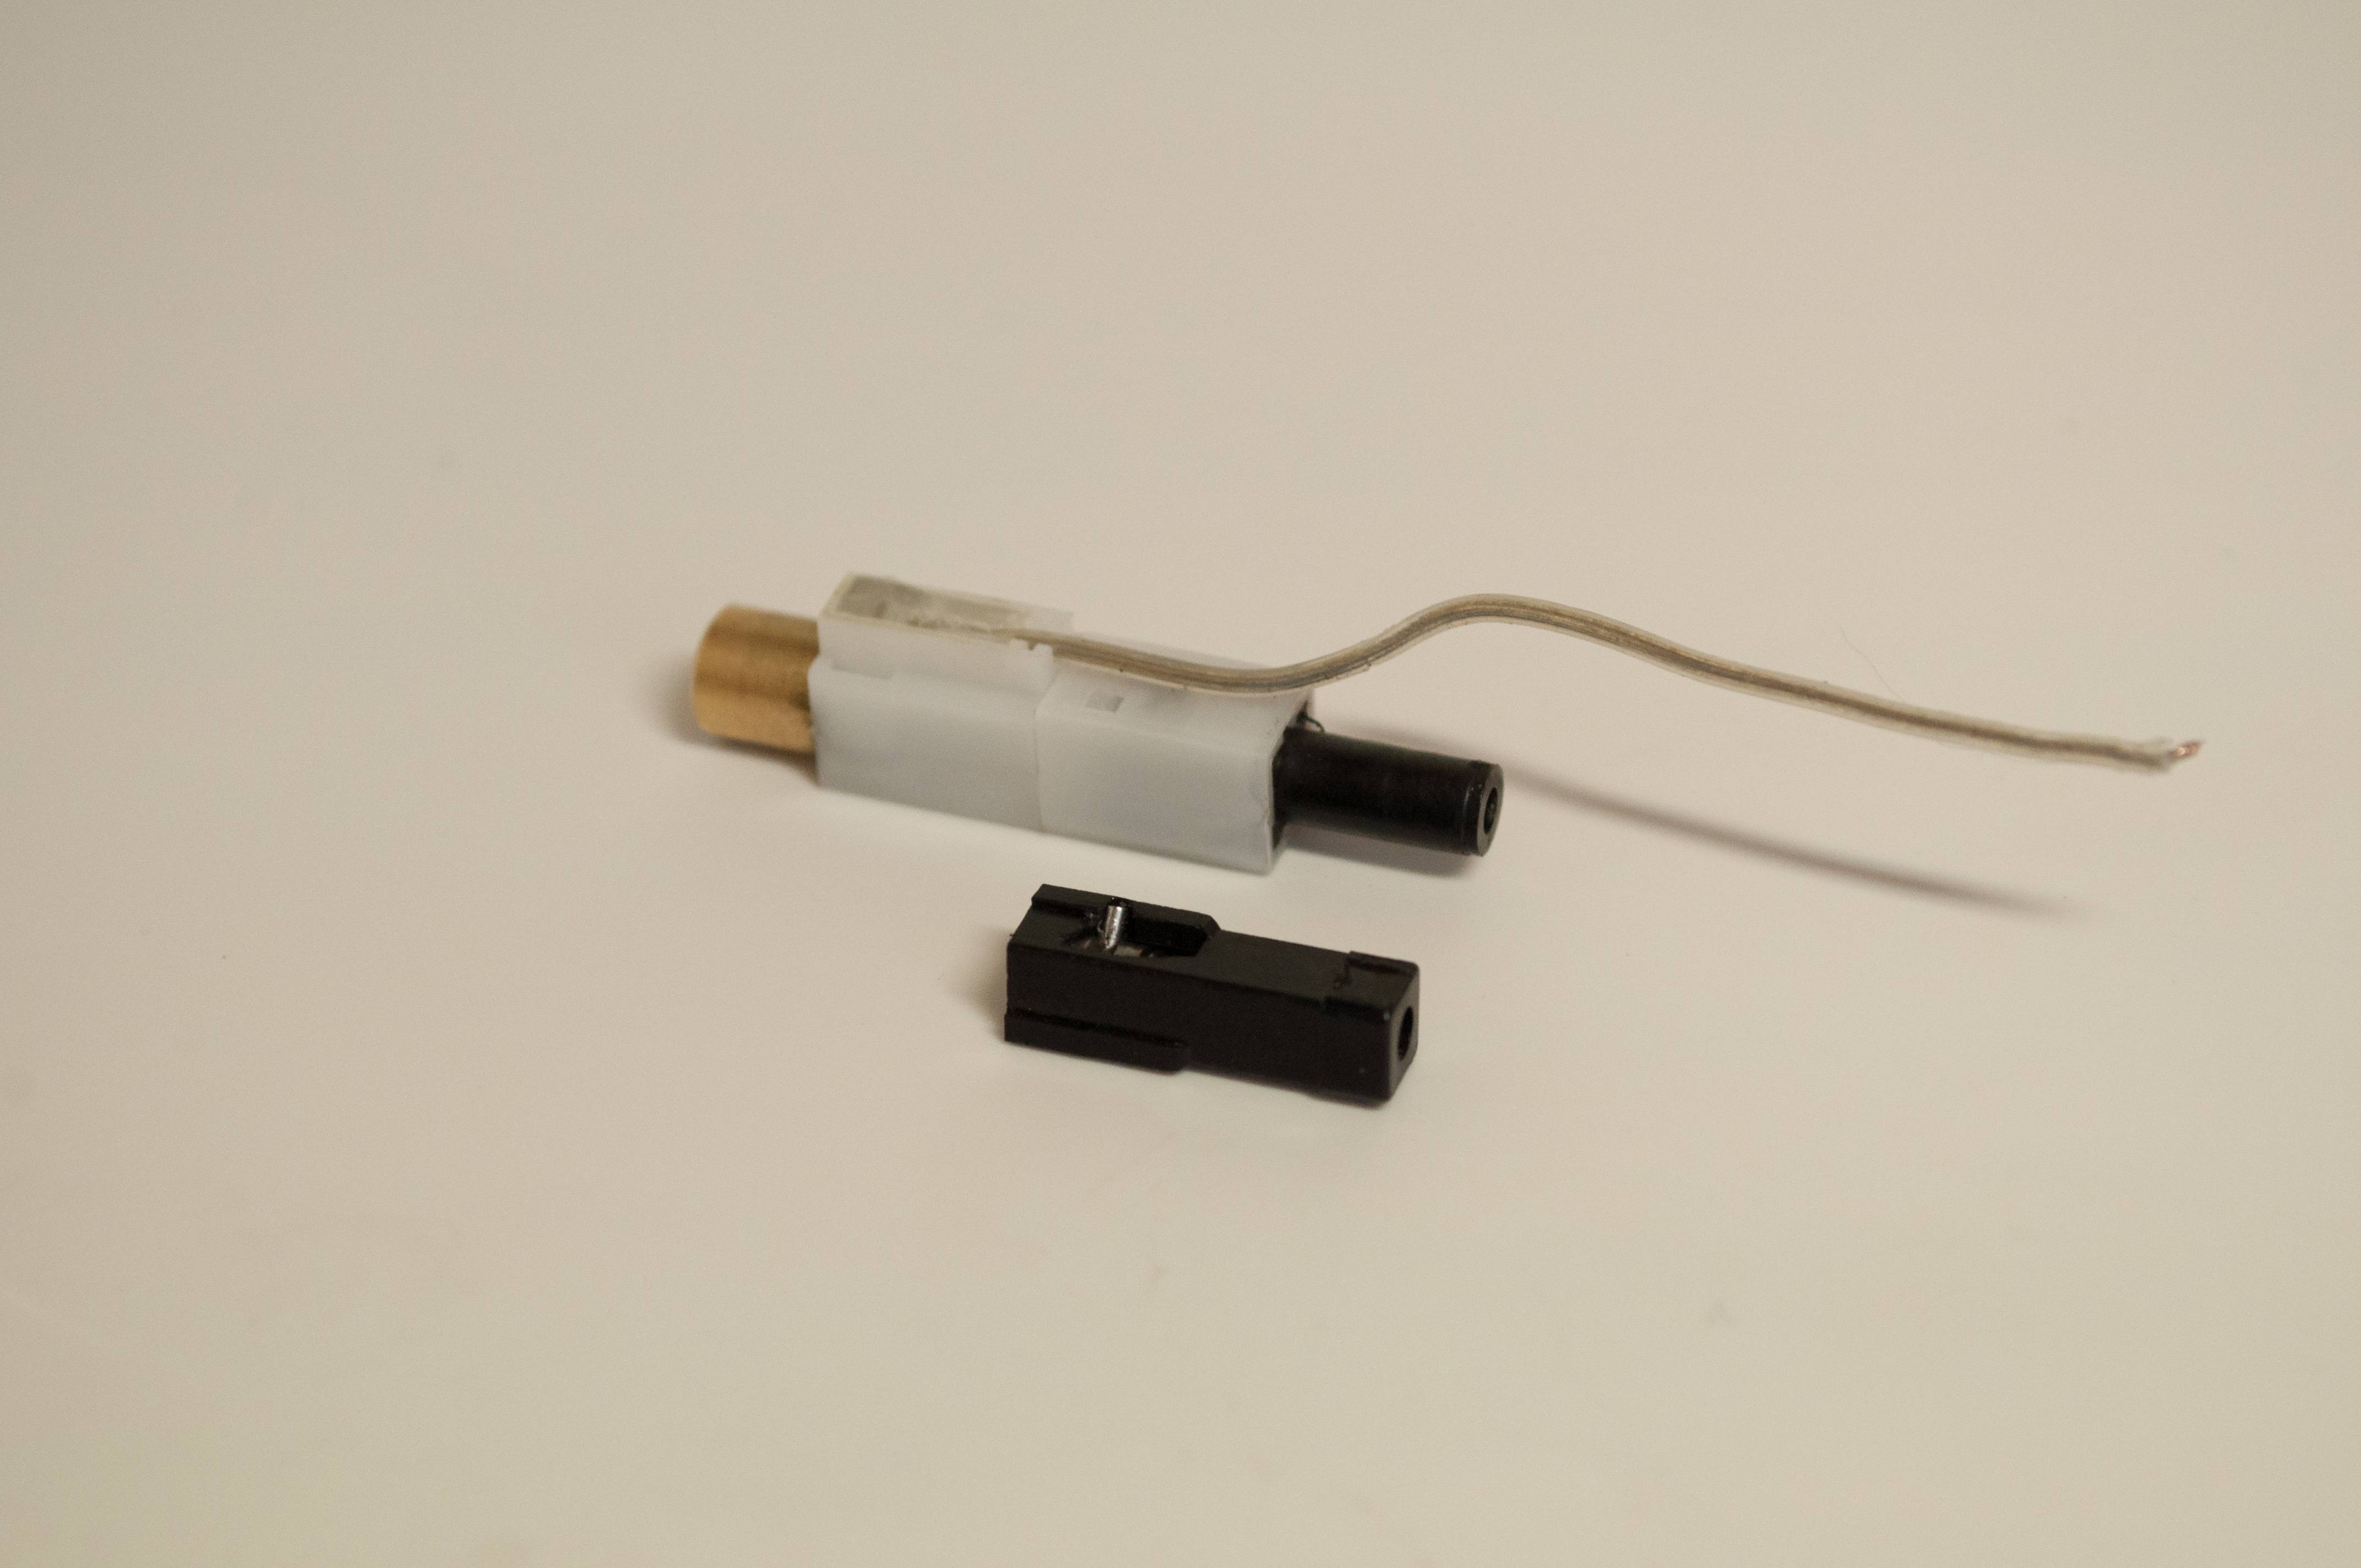
You need to take apart your igniter(two parts)by pushing in the two small buttons on the sides and pulling it out the same time,probably with the help of a friend because it's difficult with only two hands. Now just replace the top part,the hammer part(on the picture underneath it is the black part) with one from another igniter. I don't really know if all igniters have interchangeable hammer parts but for me it worked with the first one i tried :
rw1UJw4.jpg

As you can see i found one with a round end and it worked just fine!
Of course it's easier to just replace the whole thing but you have the ability to fix a non clicking piezo also.
After that repair my lighter wasn't firing up every time because i couldn't pull the cable to go close to the center so i didn't have good spark every time.I had fire every two or three clicks and that's why you read this now. With the new piezo my lighter is working flawlessly! :tup: I just had to go and find a long cheap lighter.
Long live and vape on!! :rockon::peace:
You just saved my ass. Grateful. I wouldn't be able to medicate right now for hours otherwise - this is an excellent post, vapelander.
 

StringTheorista

Well-Known Member
I picked up this Blackwood Vapman stem from @Ed's TnT recently. It fits a 10mm GonG at the mouth-end, and I have several small 10mm glass pieces I can use with it. I like this stem! The length feels good when using natively, and I like the lip-feel of the 10mm tapered end so much better than that ring at the end of the original plastic stem. I also like that "hourglass" shape:
Was this a special order? Don’t see any vapman accessories on his site…
 

Ramahs

Fucking Combustion (mostly) Since February 2017
Was this a special order? Don’t see any vapman accessories on his site…

Yeah. I emailed @Ed's TnT directly. He said that he hadn't made any Vapman stems in a while, but gave me a choice from a few woods he had available at the moment.

I suggest messaging him if you are interested. He does great work and I've had nothing but good experiences with every interaction I've had with him. He's one of the makers here that I HIGHLY suggest supporting.
 

Squidge

Butane powered
Hi all,

Long time lurker wading my way through the thread (now on page 260). I've just ordered my first* Vapman; a classic walnut. (*'cos I'm sure there'll be more)

I currently have three Vapcaps (M19, M20, and Omnivap) and even though I have battery mods for nic juice, I prefer butane heated devices for flower. Odd.

Thank you all for the entertaining and informative thread, it's seriously useful. Though, one thing I'm still not sure of... Do you use the outer or inner flame to touch the crucible with? I'm thinking outer but want to be sure.

TIA,
Squidge
 

Woodisgood

Well-Known Member
Hi all,

Long time lurker wading my way through the thread (now on page 260). I've just ordered my first* Vapman; a classic walnut. (*'cos I'm sure there'll be more)

I currently have three Vapcaps (M19, M20, and Omnivap) and even though I have battery mods for nic juice, I prefer butane heated devices for flower. Odd.

Thank you all for the entertaining and informative thread, it's seriously useful. Though, one thing I'm still not sure of... Do you use the outer or inner flame to touch the crucible with? I'm thinking outer but want to be sure.

TIA,
Squidge
I use the inner part of a fairly small flame.
 

OF

Well-Known Member
I use the inner part of a fairly small flame.
That's what I do as well. And keep it moving. It's important to be consistent as you learn,, since you must establish a pattern so you can use time (longer heat from a cold start).

The only other advice is to not be too shy with the heat, combustion is to be avoided, but it's not fatal. Explore?

Best wishes.

OF
 

Ramahs

Fucking Combustion (mostly) Since February 2017
Hi all,

Long time lurker wading my way through the thread (now on page 260). I've just ordered my first* Vapman; a classic walnut. (*'cos I'm sure there'll be more)

I currently have three Vapcaps (M19, M20, and Omnivap) and even though I have battery mods for nic juice, I prefer butane heated devices for flower. Odd.

Thank you all for the entertaining and informative thread, it's seriously useful. Though, one thing I'm still not sure of... Do you use the outer or inner flame to touch the crucible with? I'm thinking outer but want to be sure.

TIA,
Squidge

I use the outer. I've had a problem with burning my shit when I use the inner.
 
Top Bottom