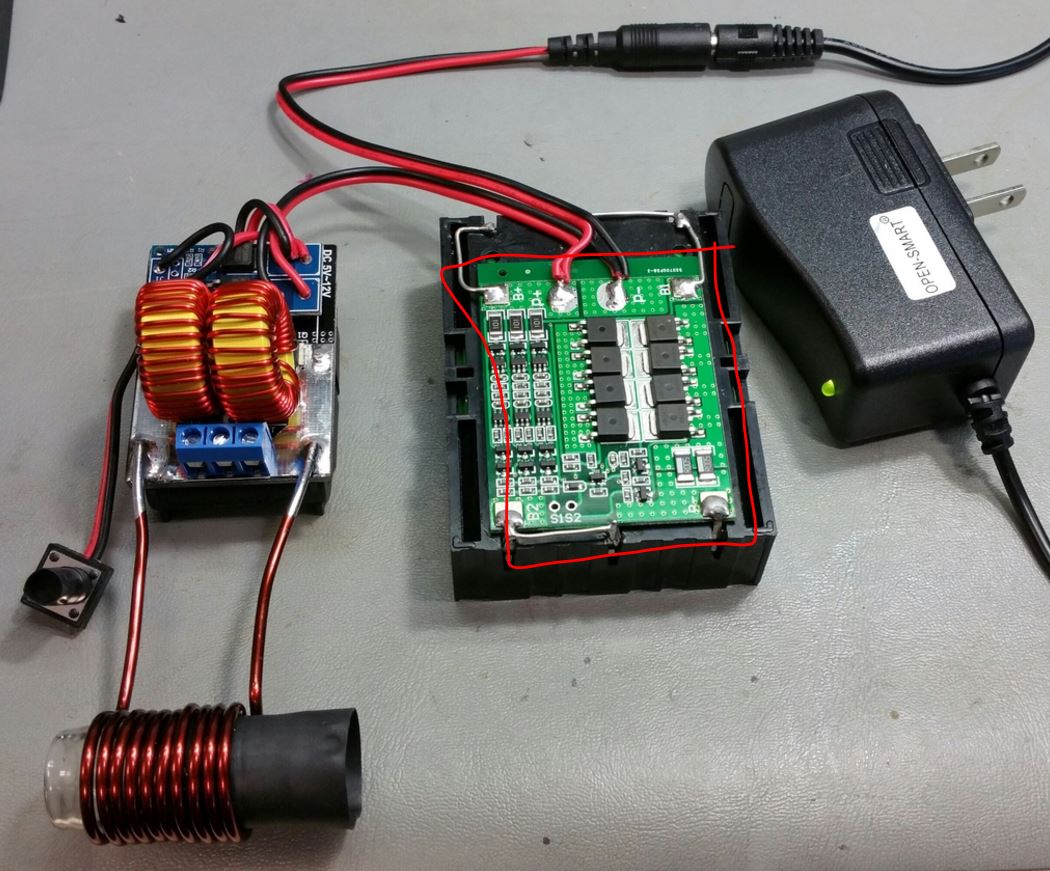
VapCap Induction Heater for Desktop and in Car Use

Pipes

Addicted DIY Enthusiast
Accessory Maker
Short Portside Update.

Ironing out a couple details but everything is on order. Enclosures have shipped.
I decided a master power switch was needed on the Portside as a safety measure. The reason is for a scenario where the tactile switch gets stuck in an "on" state. Not a huge chance of this but if it did, the device would run until batteries died or something fails. Either way, would be lots of smoke.
Not needed for other models as can either pull plug or batteries out. Folks making their own boxes should keep this in mind. Switches are on order as well.

Also, want an illuminated light to show when the heater is on. Have some 4mm clear fiber cord on order as hoping to guide some of the existing LED light up to the glass tube. Or if that fails, just run an LED up to the rim of glass.

So have a couple weeks to continue testing....:ko:
 
Last edited:

GreenHopper

20 going on 60
Short Portside Update.

Ironing out a couple details but everything is on order. Enclosures have shipped.
I decided a master power switch was needed on the Portside as a safety measure. The reason is for a scenario where the tactile switch gets stuck in an "on" state. Not a huge change of this but if it did, the device would run until batteries died or something fails. Either way, would be lots of smoke.
Not needed for other models as can either pull plug or batteries out. Folks making their own boxes should keep this in mind. Switches are on order as well.

Also, want an illuminated light to show when the heater is on. Have some 4mm clear fiber cord on order as hoping to guide some of the existing LED light up to the glass tube. Or if that fails, just run an LED up to the rim of glass.

So have a couple weeks to continue testing....:ko:

Thanks for the update buddy.

I'm glad you are going to integrate a kill switch, this seems like a smart move to me.

I'm also liking the LED when in use indicator as well.

Great work! :nod:
 

hardboiledfrog

tinkerer
It oscillates! :)

When with my current limited 5A supply which goes down to 9.5V (~47W), first click is just under 10s, second clicks in about 4. It's controlled by a MCU which can also read temperature via IR. PWM works well so I can reduce idle current to almost nothing, though PWM driving circuit doesn't work too well when PS voltage drops (with vc in). I still have lots to do.. (buck booster for parts of circuit?). still waiting for some battery parts.

Experimented with coils a little and also settled on one with double winding. Got lots more wire to play with :)

More info to come..

Edit: This thing rocks. Thanks @Pipes for inspiration, I've needed incentive to build something for a while and when it's THC related I'm all in :D

from scratch! nice build! :tup::clap:
are you controlling temperature with the nano? are you using PID? if so which one?
is there any charring of the work coil from the double windings?

you really need a good high current power supply for ZVS drivers or they will lock up and die.
lithium batteries work great. LiPo has greater energy density but LiFe are much safer, they don't burst into flames if shorted.
 

u bwade wunner

Well-Known Member
Thanks @GreenHopper .here it is at night after i fitted an led to the glass tube.

14j9i0g.jpg
 

rz

Well-Known Member
from scratch! nice build! :tup::clap:
are you controlling temperature with the nano? are you using PID? if so which one?
is there any charring of the work coil from the double windings?

you really need a good high current power supply for ZVS drivers or they will lock up and die.
lithium batteries work great. LiPo has greater energy density but LiFe are much safer, they don't burst into flames if shorted.

Tnx. I was over-due on a little project. I'm a hardware guy in a software company so I neeeeeeed to build stuff to keep myself sane..

Was playing with PWM over the weekend and it was working really well though I blew some P-chans. I've got some higher rated ones to play with still. Ultimately, I don't really need PWM since I'm not trying to maintain a certain temp, just get to it.

The IR temp sensor works under the work coil, though it's field of view is wide enough that it has to be really close to the tip. When it's too close, it gets hot pretty quickly from induction! When it's got a little distance, I was getting stray IR readings from the glass tube I've got in the work coil. I was searching for a glass tube, then my friend dropped her Arizer Air mouth-piece, the one with the screw terminal, which is a PERFECT fit for the VC. I worked on the tube a bit and its now like a cup with a hole at the bottom, about the same size as the IR sensor, but I need to enlarge the hole a bit more and somehow shield the IR so I get reading from just the VC tip and not the glass.

I'm actually using a teensy LC - I've grown very fond of the teensy boards, way more powerful than arduinos.

Not doing PIR - probably won't since I want to reach a temp and not maintain one.

Work coil hasn't charred. I did however reduce the work capacitor to 330nF, which reduced the current under load to just shy of 5A @ 12v (same coil was giving me 5A@9v) so I could use my PSU. I've received the BMS board (not the holders yet, lego to the rescue) so I'll soon work on increasing power again.

I'm currently pondering power management. I've got a little buck converter to drop to 5v. I was considering interfacing with it's enable pin, and having the MCU keep itself on once powered up. I don't trust the little buck too much though, so I'll probably use another P-chan to power a linear regulator. P-chan will be pulled up to VBatt (~12v), and have a push-button pull the gate down and turn on the 5v regulator, then the MCU can hold the p-chans gate down through an NPN. I also may try source a lower Iq regulator and play with the MCU's sleep modes and keep the 5V rail active the whole time. Even if I can get 5v idle current down to 5mA it'll be able to sleep for over 2 weeks..

Also pondering safety, like what if the P-chan misbehaves, will it latch on? This thing will definitely need a toggle switch :p

Design is still WIP, so.. any ideas? :) I'm all for over-engineering this thing..

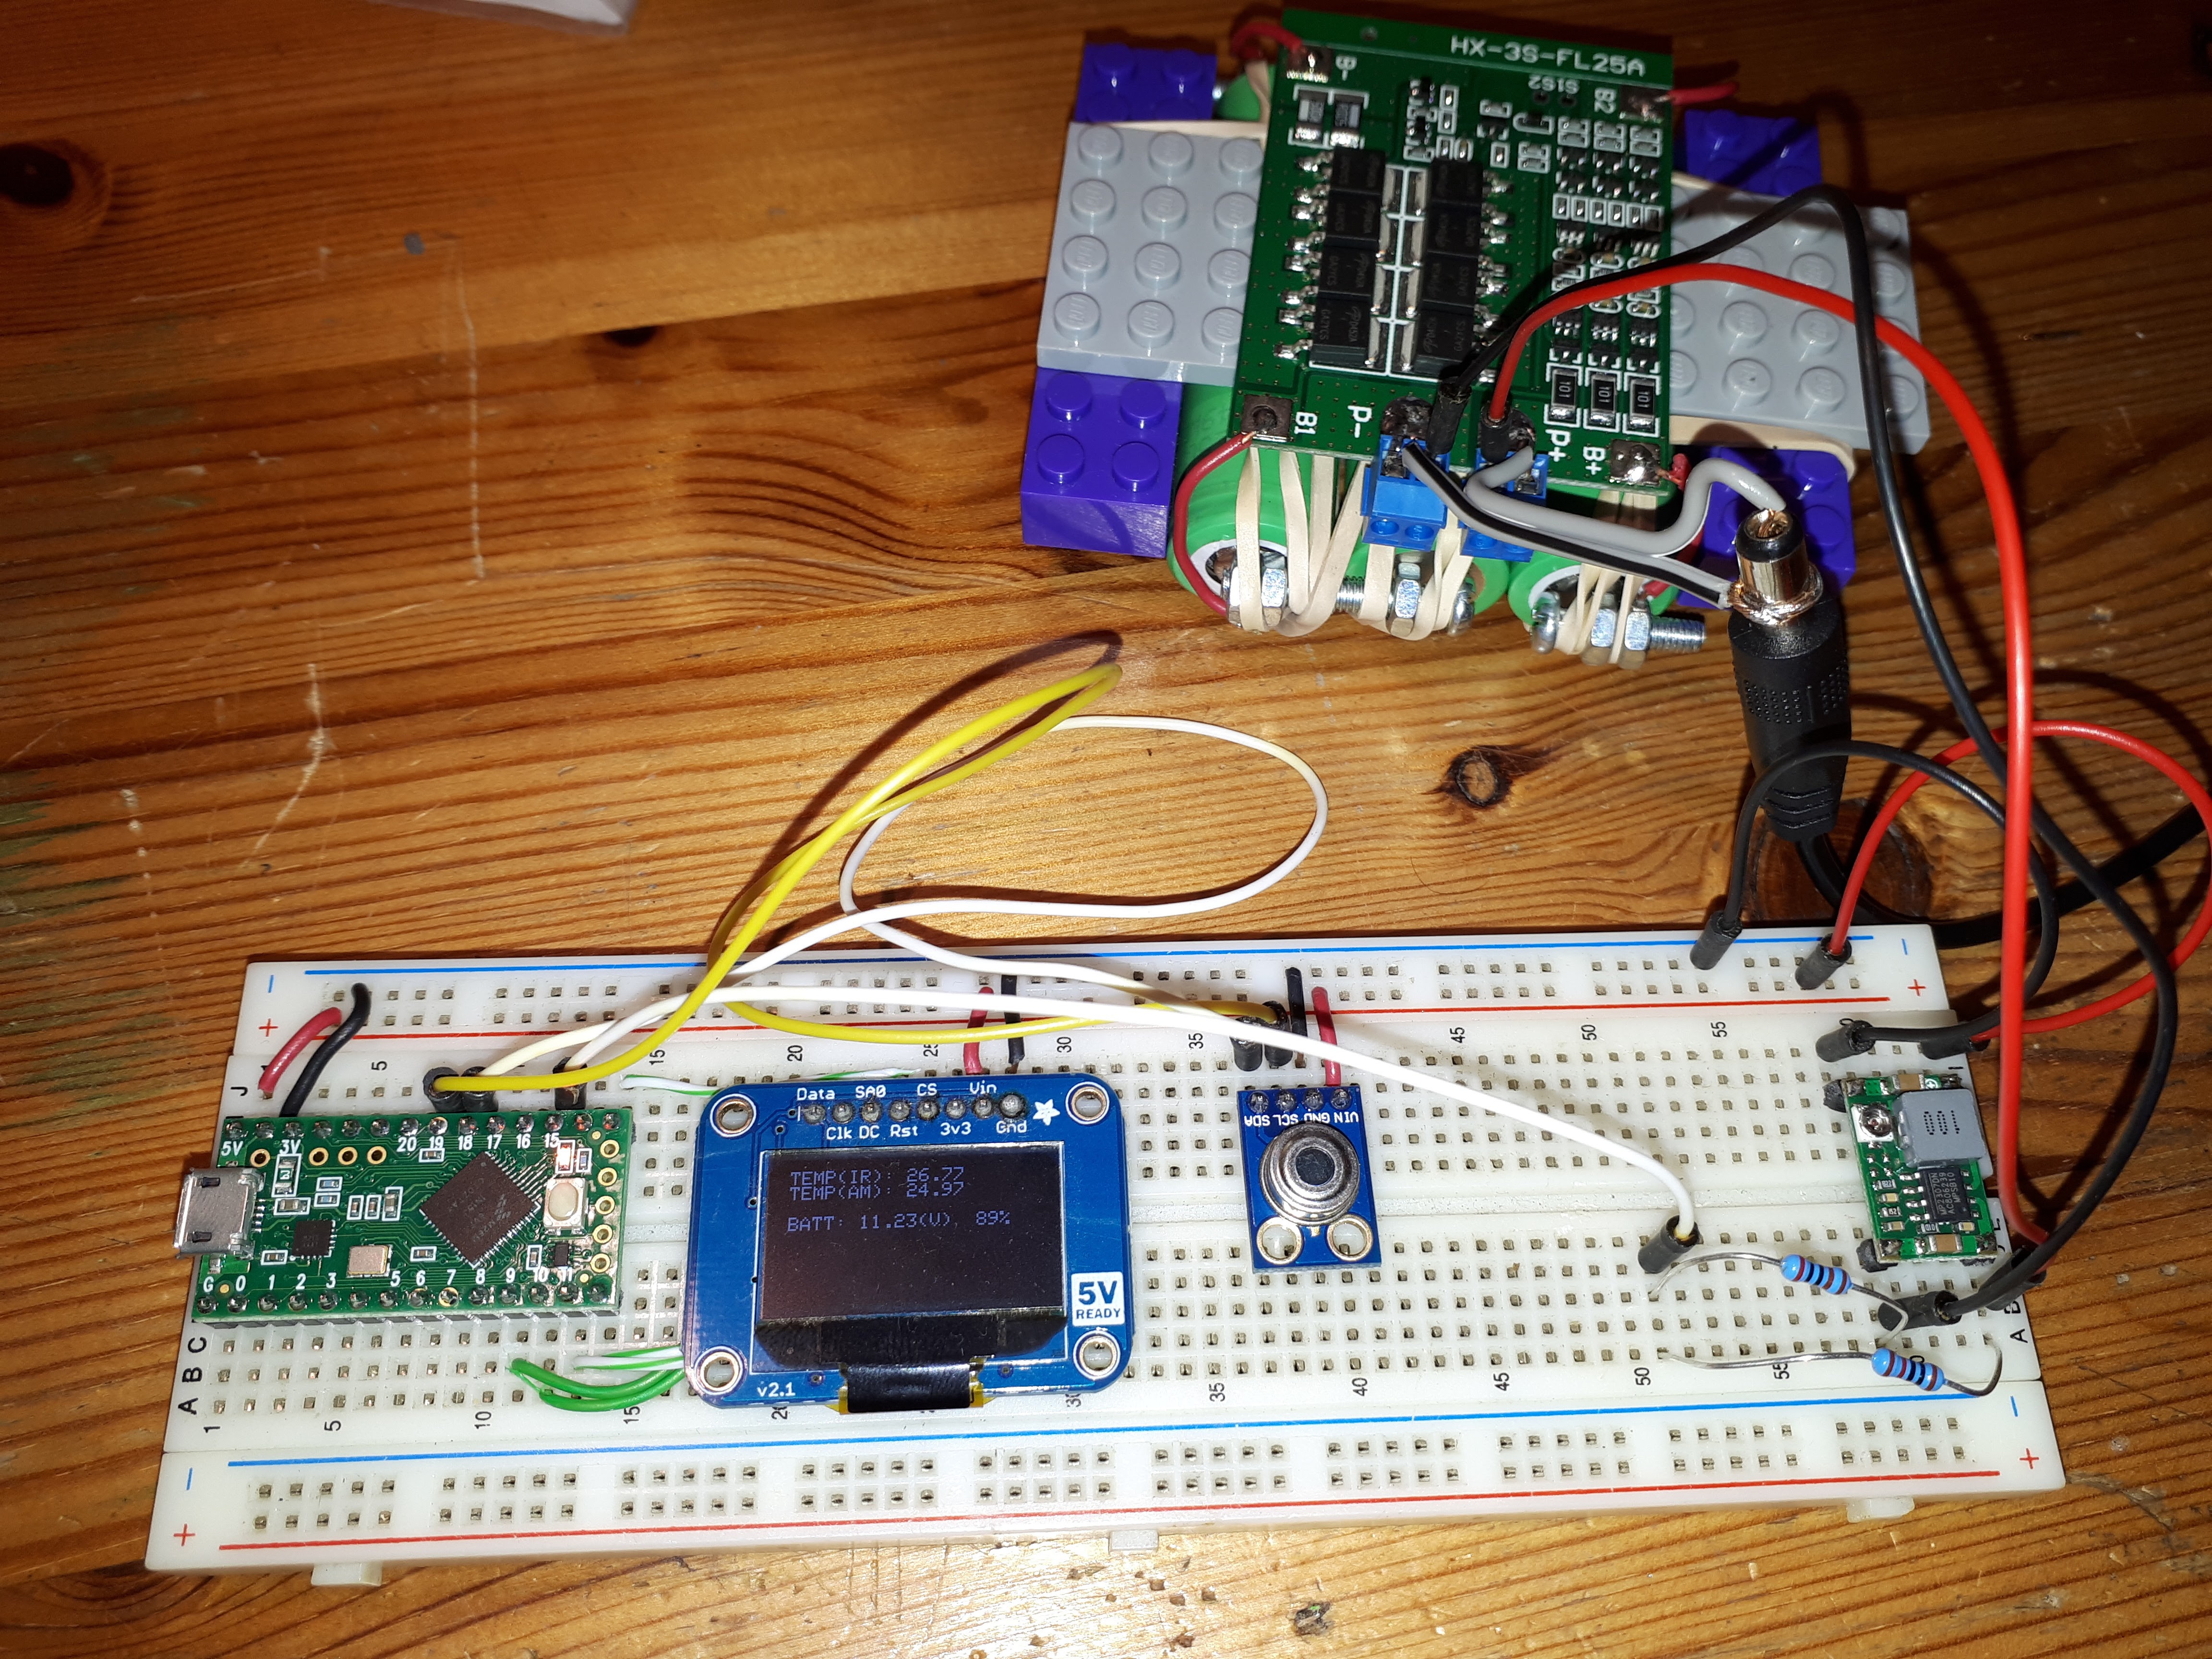
Here's the latest pic with the battery hooked up. Should have the holder soon so I didn't want to do anything permanent.

mfy1tQB.jpg
 
Last edited:

Mr. Me2

Well-Known Member
Tnx. I was over-due on a little project. I'm a hardware guy in a software company so I neeeeeeed to build stuff to keep myself sane..

Was playing with PWM over the weekend and it was working really well though I blew some P-chans. I've got some higher rated ones to play with still. Ultimately, I don't really need PWM since I'm not trying to maintain a certain temp, just get to it.

The IR temp sensor works under the work coil, though it's field of view is wide enough that it has to be really close to the tip. When it's too close, it gets hot pretty quickly from induction! When it's got a little distance, I was getting stray IR readings from the glass tube I've got in the work coil. I was searching for a glass tube, then my friend dropped her Arizer Air mouth-piece, the one with the screw terminal, which is a PERFECT fit for the VC. I worked on the tube a bit and its now like a cup with a hole at the bottom, about the same size as the IR sensor, but I need to enlarge the hole a bit more and somehow shield the IR so I get reading from just the VC tip and not the glass.

I'm actually using a teensy LC - I've grown very fond of the teensy boards, way more powerful than arduinos.

Not doing PIR - probably won't since I want to reach a temp and not maintain one.

Work coil hasn't charred. I did however reduce the work capacitor to 330nF, which reduced the current under load to just shy of 5A @ 12v (same coil was giving me 5A@9v) so I could use my PSU. I've received the BMS board (not the holders yet, lego to the rescue) so I'll soon work on increasing power again.

I'm currently pondering power management. I've got a little buck converter to drop to 5v. I was considering interfacing with it's enable pin, and having the MCU keep itself on once powered up. I don't trust the little buck too much though, so I'll probably use another P-chan to power a linear regulator. P-chan will be pulled up to VBatt (~12v), and have a push-button pull the gate down and turn on the 5v regulator, then the MCU can hold the p-chans gate down through an NPN. I also may try source a lower Iq regulator and play with the MCU's sleep modes and keep the 5V rail active the whole time. Even if I can get 5v idle current down to 5mA it'll be able to sleep for over 2 weeks..

Also pondering safety, like what if the P-chan misbehaves, will it latch on? This thing will definitely need a toggle switch :p

Design is still WIP, so.. any ideas? :) I'm all for over-engineering this thing..

Here's the latest pic with the battery hooked up. Should have the holder soon so I didn't want to do anything permanent.

mfy1tQB.jpg
Boy... I wish I understood what you were describing. I'm just not a tech guy. But I DO appreciate it!
 

hardboiledfrog

tinkerer
Tnx. I was over-due on a little project. I'm a hardware guy in a software company so I neeeeeeed to build stuff to keep myself sane..

Was playing with PWM over the weekend and it was working really well though I blew some P-chans. I've got some higher rated ones to play with still. Ultimately, I don't really need PWM since I'm not trying to maintain a certain temp, just get to it.

The IR temp sensor works under the work coil, though it's field of view is wide enough that it has to be really close to the tip. When it's too close, it gets hot pretty quickly from induction! When it's got a little distance, I was getting stray IR readings from the glass tube I've got in the work coil. I was searching for a glass tube, then my friend dropped her Arizer Air mouth-piece, the one with the screw terminal, which is a PERFECT fit for the VC. I worked on the tube a bit and its now like a cup with a hole at the bottom, about the same size as the IR sensor, but I need to enlarge the hole a bit more and somehow shield the IR so I get reading from just the VC tip and not the glass.

I'm actually using a teensy LC - I've grown very fond of the teensy boards, way more powerful than arduinos.

Not doing PIR - probably won't since I want to reach a temp and not maintain one.

Work coil hasn't charred. I did however reduce the work capacitor to 330nF, which reduced the current under load to just shy of 5A @ 12v (same coil was giving me 5A@9v) so I could use my PSU. I've received the BMS board (not the holders yet, lego to the rescue) so I'll soon work on increasing power again.

I'm currently pondering power management. I've got a little buck converter to drop to 5v. I was considering interfacing with it's enable pin, and having the MCU keep itself on once powered up. I don't trust the little buck too much though, so I'll probably use another P-chan to power a linear regulator. P-chan will be pulled up to VBatt (~12v), and have a push-button pull the gate down and turn on the 5v regulator, then the MCU can hold the p-chans gate down through an NPN. I also may try source a lower Iq regulator and play with the MCU's sleep modes and keep the 5V rail active the whole time. Even if I can get 5v idle current down to 5mA it'll be able to sleep for over 2 weeks..

Also pondering safety, like what if the P-chan misbehaves, will it latch on? This thing will definitely need a toggle switch :p

Design is still WIP, so.. any ideas? :) I'm all for over-engineering this thing..

Here's the latest pic with the battery hooked up. Should have the holder soon so I didn't want to do anything permanent.

mfy1tQB.jpg

yeah, I'm a hardware guy too, I have no formal software education, just what I taught myself.

I think I have the same PIR sensor, I had the same issues and set it aside. :shrug:
I know they make a version of the chip with a narrow FOV but I haven't seen it offered on a breakout board anywhere. besides for control circuitry I just feel better having a more reliable feedback from a simple thermocouple.

a 5A current draw should get you some pretty good battery life. I would definitely use a main switch and a fuse also.

if you want to use a pcb for the ZVS and try surface mount components there's some Kicad files for one on my ZVS driver github. the board is a nice compact 2" diameter.

sounds like the teensy is basically loafing and needs something else to do. :)
maybe you could use a microphone to detect the VC click (or a combustion sensor for over temp conditons :doh::lol:) and turn off the heat. :science:
 

Pipes

Addicted DIY Enthusiast
Accessory Maker
Tnx. I was over-due on a little project. I'm a hardware guy in a software company so I neeeeeeed to build stuff to keep myself sane..

Was playing with PWM over the weekend and it was working really well though I blew some P-chans. I've got some higher rated ones to play with still. Ultimately, I don't really need PWM since I'm not trying to maintain a certain temp, just get to it.

The IR temp sensor works under the work coil, though it's field of view is wide enough that it has to be really close to the tip. When it's too close, it gets hot pretty quickly from induction! When it's got a little distance, I was getting stray IR readings from the glass tube I've got in the work coil. I was searching for a glass tube, then my friend dropped her Arizer Air mouth-piece, the one with the screw terminal, which is a PERFECT fit for the VC. I worked on the tube a bit and its now like a cup with a hole at the bottom, about the same size as the IR sensor, but I need to enlarge the hole a bit more and somehow shield the IR so I get reading from just the VC tip and not the glass.

I'm actually using a teensy LC - I've grown very fond of the teensy boards, way more powerful than arduinos.

Not doing PIR - probably won't since I want to reach a temp and not maintain one.

Work coil hasn't charred. I did however reduce the work capacitor to 330nF, which reduced the current under load to just shy of 5A @ 12v (same coil was giving me 5A@9v) so I could use my PSU. I've received the BMS board (not the holders yet, lego to the rescue) so I'll soon work on increasing power again.

I'm currently pondering power management. I've got a little buck converter to drop to 5v. I was considering interfacing with it's enable pin, and having the MCU keep itself on once powered up. I don't trust the little buck too much though, so I'll probably use another P-chan to power a linear regulator. P-chan will be pulled up to VBatt (~12v), and have a push-button pull the gate down and turn on the 5v regulator, then the MCU can hold the p-chans gate down through an NPN. I also may try source a lower Iq regulator and play with the MCU's sleep modes and keep the 5V rail active the whole time. Even if I can get 5v idle current down to 5mA it'll be able to sleep for over 2 weeks..

Also pondering safety, like what if the P-chan misbehaves, will it latch on? This thing will definitely need a toggle switch :p

Design is still WIP, so.. any ideas? :) I'm all for over-engineering this thing..

Here's the latest pic with the battery hooked up. Should have the holder soon so I didn't want to do anything permanent.

mfy1tQB.jpg
You got me thinking about this. Seems the problem is getting a line of sight to use the IR sensor. I also think it will need to be calibrated to get real numbers as well.
So, why not use a different input to your teensy board. Thinking some nickle or titanium heating wire. Run a loop up a side of coil and it should get hot along with the target. Therefore, changing it's resistance. Could use a similar algorithm the ecig TC mods use. Should be able to calibrate to get some reasonable temperature control. At least a cold-hot range.
Not convinced there's a need for this complexity but love the fun thinking. I see over engineering all the time. A simple RC delay timer with 2-3 discreet components would make me happy. But again, is more of a "nice to try" type deal.
If you are going to have a 5 volt regulator, why not add a USB port or two. Gives the unit a disguise and alternative purpose.
It's actually a 12 volt power bank as it is. This would be the current excuse for it's existence, if asked.
This could be a fun game!! WTG... I like it. :clap:
 

rz

Well-Known Member
Haven't had much time to play..... but, I've been playing all the time I've had! :D

'little' update..

I enlarged the hole at the bottom of the glass cup/tube and keep a little distance between it and the IR temp sensor, and it WORKS! :) Sensor still warms up a little and needs permanent mounting to keep alignment. Would aquarium silicone work?

@hardboiledfrog thanks for bringing PID up! Your builds are super impressive. I Implemented basic PID library and its awesome! :D So much tweaking to do still, but it works REALLY well already. We all know how to manipulate heating to change tip temp @ click, but with thermal feedback the click isn't as important and you can get the whole tip to a set temp. I need to slow down the heating a bit (no 'race' to first click), cause this thing can be more powerful than a quad-torch, so PID should help avoid combustion!! :D

I also want to experiment with higher capacitance to increase tank freq and reduce heat penetration. May be able to heat just the cap to keep higher convection/conduction.

Problem is, I can't always test on an empty vapcap :D :D :D :D, and....

Popped my last P-chan MOSFET. Whoops. Sensitive buggers. So I'm PWM switching with an N. I don't like that it has to be pulled high to stay off but it works for now and I'll keep it until I finish fiddling with the circuit and start putting stuff on perfboard.

Getting some ultra-low quiescent current LDO regulators for 5V. Should be able to stand-by for a few weeks if not turned off by the switch. I'll get an assortment of fuses (resettable 10A slow blow may do?) and some new P-channs.

Last time I checked, oscillation was at about 160Khz and dropped by about 10Khz with work piece in. I also see frequency drift as work piece heats up! This is awesome actually, cause if I add a feedback coil and somehow count the zero crosses during the PWM's on time (or stop and sample every now and then), I could use the frequency as a setpoint and feedback for PID instead of temperature! No need for the IR sensor at all :D This would also be great for object detection so I could force a safe start up procedure.

I'm sure I'm forgetting something... anyway.. (again, it's hard to test with an empty vapcap!:brow:)

So much to play with.. so little time... but I'm loving this forum.. the things a bunch of stoned builders, woodworkers, tin can hackers, engineers and the happy guinea pigs can come up with.. So, thanks @Pipes for getting this InductaCap started!

:worms:but now, here's a question.. how much extra would you guys pay to put a microcontroller and OLED display on the portside 2.0? The one with the USB charger on it..:rofl: Officer, It's just a 12v socket splitter :D
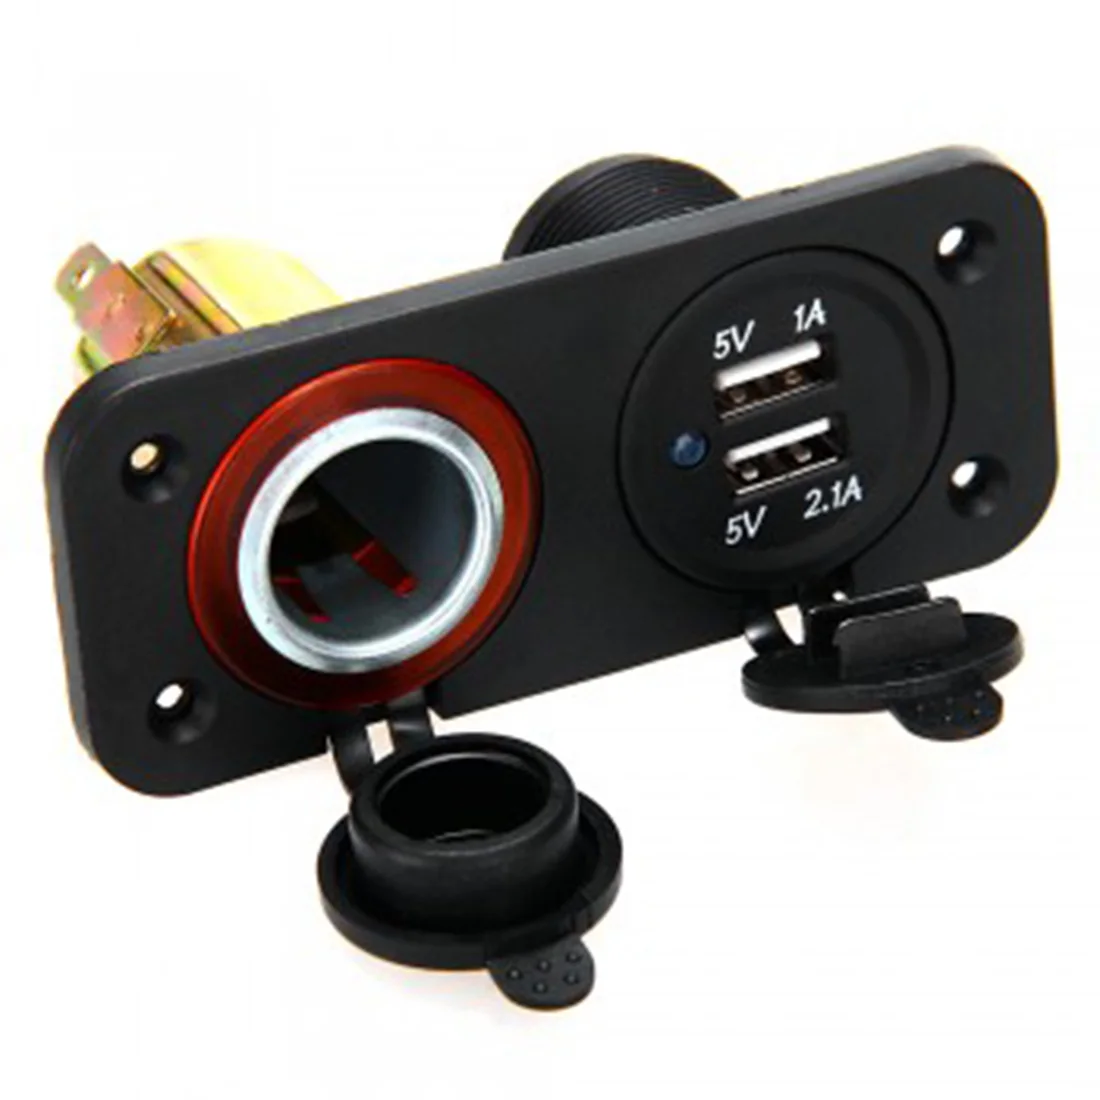
Auto-font-b-Car-b-font-Cigarette-Lighter-font-b-Socket-b-font-Splitter-12V-2.jpg

s-l1600.jpg
 
Last edited:

hardboiledfrog

tinkerer
@hardboiledfrog thanks for bringing PID up! Your builds are super impressive. I Implemented basic PID library and its awesome! :D So much tweaking to do still, but it works REALLY well already. We all know how to manipulate heating to change tip temp @ click, but with thermal feedback the click isn't as important and you can get the whole tip to a set temp. I need to slow down the heating a bit (no 'race' to first click), cause this thing can be more powerful than a quad-torch, so PID should help avoid combustion!! :D

thanks for the kind words and you're welcome, always glad to assist. :)
I started with the basic PID library too but ran into an intermittent bug where the PID would run at a 10 degree F offset from setpoint. I'm not sure if it was my implementation or not but I switched to the ArduPID library and the bug went away. I think it controls better also, I can hold temp within a degree or two consistently. :tup:
 

GreenHopper

20 going on 60
how much extra would you guys pay to put a microcontroller and OLED display on the portside 2.0?

I don't really know if I'm being honest. It would be quite good to see the battery level, and fine tuning temps would be cool.

If I didn't already have a PortSide on order I'd definitely be willing to shell out extra for the upgrade.

Could it be added as an aftermarket upgrade?
 

Jah1975

Well-Known Member
Yes, that is the equivalent car charger for a 3 cell pack. :tup:
Wouldn't there be issues with not charging all three cells ffully? I know a lot of 3 cell ecig mods recommend external charging because of charge balance and sagging issues? Maybe it doesn't apply here due to low current?
 

KeroZen

Chronic vapaholic
Usually it's your BMS that handles the balancing. But indeed these simple brick chargers have absolutely no clue what's happening inside the pack. They just follow the CC/CV procedure as if the pack was a single big cell.

Note: you could use protected cells in place (i.e. each with its own individual BMS) but those are harder to find in high discharge versions (although I do remember seeing a protected 25R offer once, dunno if it was bogus or not)
 

Pipes

Addicted DIY Enthusiast
Accessory Maker
It's true, most BMS boards do not have battery balancing but this board does. In fact, it will fail to work if batteries are not closely balanced.
The problem with protected cells is the physical length will not fit the heavy duty holder. It was my initial though, and even bought a whack of the spring type holders, but they proved not be up to the task. The springs would get hot and slowly start to collapse after a few uses.
 

Jah1975

Well-Known Member
Hopefully I didn't muddy any waters speaking so far out of my range of knowledge 8).
On another note, is there a list for the Ports? It may have been very obvious and I missed it, will reread 8)
 

GreenHopper

20 going on 60
Hopefully I didn't muddy any waters speaking so far out of my range of knowledge 8).
On another note, is there a list for the Ports? It may have been very obvious and I missed it, will reread 8)

I feel like I'm getting a better education in this thread than I ever got from my school days. Don't think you muddied anything, was a fair question. Glad @Pipes was able to clarify as I'm also just trying to keep up with these guys, most of the time I'm more like :hmm::shrug:.
 

danald2000

Well-Known Member
These batteries are in parallel correct? Could one use lower rated batteries in series to increase constant amp output? Also you mentioned earlier in the thread (I believe) a target of 16 amps. Why do you recommend the Sony vtc4 with its 30amp rating and relatively low mah. Why not something like the lghe2 with a 20 amp rating or even cheaper 10a batteries in series. It seems to me that if you mainly use the heater when it is plugged in you wouldn't need a a high mah rating. So why not use 3 cheaper cells rated at 7-10 amps with respectable mah?

Thanks pipes for all your knowledge and effort and ingenuity!
 
danald2000,

Pipes

Addicted DIY Enthusiast
Accessory Maker
Thanks. No, they are in series to get up around the 12 volt mark. A 20 amp battery would be fine as well. I just like the VT4s as can get reasonably cheap and from my experience, very reliable and consistent performance.
Mooch's Blog has good information regarding batteries. His link to battery recommendations is good for reference.
:tup:

image-jpeg.600623
 

Sketch420

Well-Known Member
Cheap batteries = waste of $.

You need some head room when using batteries like this. Listen to Mooch, he is wise and knows exactly what he is talking about. It's like constantly running your car close to redline and expecting the engine to last. Have you ever seen a moron have an ecig explode? Those were almost all cheap batteries. Only trust reputable dealers as well. When used correctly a good set of batteries will last you a year+ of heavy use.

Hg2 are decent batteries. Check some imren 3500 mAh battery, it's 30amp also. Stay away from efest and all's well. Happy vaping!
 
Top Bottom