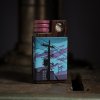
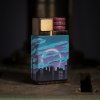
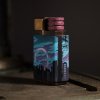
The Nomad From Morwood

Xclerk

The Universe is our endless supply
Just under A week into my having my Nomad and im in love. Not only can I not stop finding little nuances I like but its checking all my boxes for a portable and stay home vape. I was actually super impressed how well it handles on a water piece with Eds stem. Surprisingly only needed the low heater too. I think the wood stems take a little less to heat especially w a slightly narrower bowl. Having 2 heater options is great tho. Been using the high w the mistvape cooling stem. They pair quite nicely. I have tried the stock stems with and without the wood rings and was pretty impressed w how much more even the bowl finished. Still have lots of learning to do but so far this thing is perfect and I didnt even mention any of how it looks. Thats a whole other post. Super impressed w the vapor but the quality of the craftsmanship and finish has blown me away.
 

Dan Morrison

Well-Known Member
Manufacturer
Thanks for the reports @Xclerk ! 🍻

I've been exploring alternative stem loading methods... trying to figure out if there is a one-size-fits all approach. And currently this is my go-to setup.

It's a bamboo (could be wood as well) stem with SS screen and chamber ring to make the bowl smaller. I use it both with the insert in and out, depending on load size. I don't cap it with a top screen, I use the in-body screen, and tamp the material slightly so it doesn't fall out.

This is the same setup as the glass stem with wood insert, and performs pretty much the same.

DSCF0484.jpg

Here's the in-body screen installed. I've actually got two installed to add more air diffusion/restriction. Not sure what I think about using two screens yet..

DSCF0481.jpg

Some beauty shots of my Nomad II after 8 months of use... And a hand for scale shot.

DSCF0472.jpg

DSCF0467.jpg

DSCF0476.jpg
 

Ramahs

Fucking Combustion (mostly) Since February 2017
Soooo pretty :ove:


This is a Great question. I think some bamboo stems would really complete the overall natural look to my Nomad.


I don't know if it would look good on mine or not, but I've already broken two out of the four glass stems I purchased with my nomad, so I should probable get at least one wood stem....just in case that trend continues!
 
Last edited:

Dan Morrison

Well-Known Member
Manufacturer
Are these bamboo stems available for purchase now, @Dan Morrison?

The issue with bamboo is that I need to use pieces that are almost exactly the correct outside diameter. Bamboo supply is very limited in Canada at the best of times, forget about covid times. I'd like to work on sourcing some hand selected and sized bamboo from China... but it'll take some time, currently it's sort of a back burner project.

But, I think hardwood will work equally well. I am working through some different versions right now...

I sent out an early wood stem to @Jill NYC , and she mentioned that the basket screens I use for my glass stems were not staying in place in the wood stem. So I'd definitely like to remedy that in future iterations. I think the cherry burl I used was too hard for the screen edges to dig in and grab the wood like it does in the slightly softer bamboo..

I like the chamber size adjustments that basket screens allow... but my screens are relatively shallow, so there isn't much sidewall area to grab the inner walls of the wood stems. So I am thinking that I need to adjust my basket size for deeper baskets... they won't cock sideways in the stem, and should slide with a little more friction. I think these will work nicely in the glass stems as well. Dave sent me a few of his deeper baskets... and I like em!

________________________

Here's a new sleeve, fresh off the desk. I thought I'd share some process photos as well...

DSCF0500.jpg

DSCF0503.jpg

DSCF0497.jpg
DSCF0407.jpg

DSCF0477.jpg

DSCF0414.jpg

DSCF0491.jpg
 
Last edited:

Ramahs

Fucking Combustion (mostly) Since February 2017
I was right to buy two extra glass stems (total of 4 received with my Nomad), because I've already broken two stems.

The first one I just knocked off a counter when I was half-awake. It happens. That's why I ordered a couple extras, ya know?

The second one happened a couple days ago, and was a bit more impressive. I have a pelican case for my Nomad and accessories.
The case had been sitting on my kitchen counter for a bit, and I was cleaning up, so I grabbed it by the handle to pick it up and take it to the cabinet in the back where it belongs.

Well, that Pelican case was empty aside for one glass stem. Also, I didn't realize that the latches weren't locked.
So, the lid flopped open when I picked it up by the handle, and then the yank that happened when it hit the stop that limits how far the lid can open. At that point I watched that stem get launched like a fucking missile across the room and into the wall at the other side, then it bounced back onto the floor and shattered. Shit....I'm a dumbass. lol :bang:

Oh well. Is what it is. I should buy more stems :thinker:
 

SloJimFizz

Unknown Member
:mmmm:
That is beautiful Dan. Your hand painted sleeves are mini art pieces. I'd have to have a pair of vaping gloves to use some of those.

4 glass stems was a good idea @Ramahs
The two I had lasted a long time, but it was just a matter of time till my fumbleitis kicked in.
Awesome Nomads @VAPEHUNTER , @Nomad #111 & @Xclerk (guessing that's yours in your avatar.)
Got a new travel case for my Nomad. Holds it nicely with a separate pocket for batteries and second heater plus it attaches to the Blaster Belt easily.
Liking the look of the NewFC, looking forward to this thread growing with the rest of the Nomads getting completed and the incoming Nomad II's.

20200518-180410.jpg


20200518-180532.jpg
 

Dan Morrison

Well-Known Member
Manufacturer
I've been developing an updated version of my usage tutorial guide... as I think my original one could be simplified quite a bit. And I'm just wondering if anyone out there has any ideas about what they would like to see included.

Specifically, I'm trying to come up with a way to give people a place to start that will give guaranteed success. This is especially true for people who don't have any experience with unregulated convection.

I think that following a timed sequence, while counting in your head, is a pretty good way to standardize things. For example. With a fresh battery and the standard (low) heater my inhale sequence goes like this:

Button ON...1...2...3...4...5..Start Inhale..6...7...8...9...10...11...12...13...14...Button OFF...15...16...17...18...Stop Inhaling............exhale.

So long as I follow this sequence, I get very consistent results. And if, for example, a user were to follow these steps and they get little or no vapor, I know that likely the issue is draw speed is too fast. And if they report scorching the material, I know they're draw speed is too slow.

This can also be used for the high heater, but with modified timing.

I find that for subsequent draws, the above formula can be modified to add a couple seconds to either the pre-heat time or the draw length time to achieve consistent results on the second, third, fourth...etc.. draw.

The idea here is to eliminate any chaotic variables that I can, so that first time users can quickly dial their inhale speed. Once they get a sense of what it's suppose to feel like, it's easy to branch out from there and augment your technique to achieve different results.

Thoughts?

__________________________


In other news, I'm ordering a ton of textile samples for the final Nomad II case prototype. The design is pretty much finished, but now I am finding that perfect fabric to use. I've got on order a bunch of nice organic textiles.. and raw natural dye ingredients. Nothing is finalized yet, but I'm hoping to offer a handful of colours all hand dyed in house from plant sources. The current front runners for the colours are; Mustards/yellows, Greens, indigo, greys, natural/cream, rust. The indigo and rust colours will come from the two Japanese dye techniques of using real indigo dye vats, and kakishibu (persimmon tannin).

These cases will be slightly padded, but not too much. Still able to fit into a pocket, but just enough protection to make you feel good about tossing it into a backpack.

The design takes a lot of inspiration from the Japanese shifuku, which is a fabric case used to store various tea ware. Here is a poetic article explaining the philosophy behind the shifuku, White Dew

Louise_Cort_V40.N1(04).jpg

The fabric case on the left is what we're lookin' at.

I also like the idea of using a braided cord in some way for the closure... it's reliable, long lasting, replaceable, and won't scratch anything. The other cool thing is that this cord can be adorned by beads or accessories. Glass beads from artists in the cannabis community could be neat, tiny wood storage containers...

In the tea world, there are little objects called tea pets. Here is a tea pet...

tea-shark-tea-pet-2-5-800x533.jpg

Tea pets are little fun creatures to put on your tea table while drinking tea.

I was imagining something like little carved wooden creatures that could be strung onto the case cord. Vape pets. They'd be like little guardians bringing good vibes to your sesh, hah.
 

SquirrelMaster

Well-Known Member
@Dan Morrison
The case sounds very cool, something different which I would expect no less from your great mind. Would the case fit anything besides the Nomad or is that TBD?

I was wondering what these little vapes pets you were when you were talking about them on your Instagram (IIRC). I love the idea! As always I look forward to more news on both.
 

Vapor_Eyes

taste buds
@Dan Morrison: I like the idea of a simplified usage tutorial. I think a basic sequence or formula for success like you listed would be perfect. I would also like to see some simple tips for those new to this style of vaporizer. For example, “if your material is too light use a longer preheat or slower draw speed”. Maybe some notes on grind consistency and how tightly packed your material should be for ideal extraction. I wouldn’t want to see it get too long or complicated, I think the sequence plus a few tips would be good.
 

Mr. Me2

Well-Known Member
I've been developing an updated version of my usage tutorial guide... as I think my original one could be simplified quite a bit. And I'm just wondering if anyone out there has any ideas about what they would like to see included.

Specifically, I'm trying to come up with a way to give people a place to start that will give guaranteed success. This is especially true for people who don't have any experience with unregulated convection.

I think that following a timed sequence, while counting in your head, is a pretty good way to standardize things. For example. With a fresh battery and the standard (low) heater my inhale sequence goes like this:

Button ON...1...2...3...4...5..Start Inhale..6...7...8...9...10...11...12...13...14...Button OFF...15...16...17...18...Stop Inhaling............exhale.

So long as I follow this sequence, I get very consistent results. And if, for example, a user were to follow these steps and they get little or no vapor, I know that likely the issue is draw speed is too fast. And if they report scorching the material, I know they're draw speed is too slow.

This can also be used for the high heater, but with modified timing.

I find that for subsequent draws, the above formula can be modified to add a couple seconds to either the pre-heat time or the draw length time to achieve consistent results on the second, third, fourth...etc.. draw.

The idea here is to eliminate any chaotic variables that I can, so that first time users can quickly dial their inhale speed. Once they get a sense of what it's suppose to feel like, it's easy to branch out from there and augment your technique to achieve different results.

Thoughts?

__________________________


In other news, I'm ordering a ton of textile samples for the final Nomad II case prototype. The design is pretty much finished, but now I am finding that perfect fabric to use. I've got on order a bunch of nice organic textiles.. and raw natural dye ingredients. Nothing is finalized yet, but I'm hoping to offer a handful of colours all hand dyed in house from plant sources. The current front runners for the colours are; Mustards/yellows, Greens, indigo, greys, natural/cream, rust. The indigo and rust colours will come from the two Japanese dye techniques of using real indigo dye vats, and kakishibu (persimmon tannin).

These cases will be slightly padded, but not too much. Still able to fit into a pocket, but just enough protection to make you feel good about tossing it into a backpack.

The design takes a lot of inspiration from the Japanese shifuku, which is a fabric case used to store various tea ware. Here is a poetic article explaining the philosophy behind the shifuku, White Dew

View attachment 835

The fabric case on the left is what we're lookin' at.

I also like the idea of using a braided cord in some way for the closure... it's reliable, long lasting, replaceable, and won't scratch anything. The other cool thing is that this cord can be adorned by beads or accessories. Glass beads from artists in the cannabis community could be neat, tiny wood storage containers...

In the tea world, there are little objects called tea pets. Here is a tea pet...

View attachment 843

Tea pets are little fun creatures to put on your tea table while drinking tea.

I was imagining something like little carved wooden creatures that could be strung onto the case cord. Vape pets. They'd be like little guardians bringing good vibes to your sesh, hah.
Should I ask that your tutorial include loading techniques? And cleaning/maintenance?

And endless compliments to you and the unbelievable high quality of your work.
 

flammy

Well-Known Member
I've been developing an updated version of my usage tutorial guide... as I think my original one could be simplified quite a bit. And I'm just wondering if anyone out there has any ideas about what they would like to see included.

Specifically, I'm trying to come up with a way to give people a place to start that will give guaranteed success. This is especially true for people who don't have any experience with unregulated convection.

I think that following a timed sequence, while counting in your head, is a pretty good way to standardize things. For example. With a fresh battery and the standard (low) heater my inhale sequence goes like this:

Button ON...1...2...3...4...5..Start Inhale..6...7...8...9...10...11...12...13...14...Button OFF...15...16...17...18...Stop Inhaling............exhale.

So long as I follow this sequence, I get very consistent results. And if, for example, a user were to follow these steps and they get little or no vapor, I know that likely the issue is draw speed is too fast. And if they report scorching the material, I know they're draw speed is too slow.

This can also be used for the high heater, but with modified timing.

I find that for subsequent draws, the above formula can be modified to add a couple seconds to either the pre-heat time or the draw length time to achieve consistent results on the second, third, fourth...etc.. draw.

The idea here is to eliminate any chaotic variables that I can, so that first time users can quickly dial their inhale speed. Once they get a sense of what it's suppose to feel like, it's easy to branch out from there and augment your technique to achieve different results.

Thoughts?

__________________________


In other news, I'm ordering a ton of textile samples for the final Nomad II case prototype. The design is pretty much finished, but now I am finding that perfect fabric to use. I've got on order a bunch of nice organic textiles.. and raw natural dye ingredients. Nothing is finalized yet, but I'm hoping to offer a handful of colours all hand dyed in house from plant sources. The current front runners for the colours are; Mustards/yellows, Greens, indigo, greys, natural/cream, rust. The indigo and rust colours will come from the two Japanese dye techniques of using real indigo dye vats, and kakishibu (persimmon tannin).

These cases will be slightly padded, but not too much. Still able to fit into a pocket, but just enough protection to make you feel good about tossing it into a backpack.

The design takes a lot of inspiration from the Japanese shifuku, which is a fabric case used to store various tea ware. Here is a poetic article explaining the philosophy behind the shifuku, White Dew

View attachment 835

The fabric case on the left is what we're lookin' at.

I also like the idea of using a braided cord in some way for the closure... it's reliable, long lasting, replaceable, and won't scratch anything. The other cool thing is that this cord can be adorned by beads or accessories. Glass beads from artists in the cannabis community could be neat, tiny wood storage containers...

In the tea world, there are little objects called tea pets. Here is a tea pet...

View attachment 843

Tea pets are little fun creatures to put on your tea table while drinking tea.

I was imagining something like little carved wooden creatures that could be strung onto the case cord. Vape pets. They'd be like little guardians bringing good vibes to your sesh, hah.

Lovely work as usual, Dan. I think a tutorial could be helpful as well but I'll say that you really don't need to know much more than what has already outlined as it relates to heater priming. With the low heater, it simply needs to be primed from cold start and in my experience, 5 seconds (+/-) is a good duration. As noted, that duration will need to be adjusted after usage to account for battery drain. This said, if you are doing back to back hits, you might actually want to decrease the priming time to account for the fact that the heater is already a little warmed up.

I have 3 unregulated devices (Nomad,Lil Bud, Millaana2...and this doesn't count the other devices that I use unregulated such as the Splinter and LBE) and the Nomad is by far the easiest to use and master with consistent results (meaning even vaping of the bowl and no scorching). Combustion on the low heater takes some real effort to achieve and even if it does happen, it really only takes some minor adjustments to mitigate. It might sound counterintuitive but if you have a fresh battery, heater has been primed appropriately and you're still not getting very much vapor, its likely that you're draw speed is too high. The low heater requires an extremely slow draw speed and by far the slowest that I employ for any of my devices.

Here is Dan's existing quick guide for the Nomad:


Here is Dan's cleaning tutorial for the Nomad:


Really happy to hear that some new owners are enjoying their new Nomads. Its plain as day to see that these are beautiful devices but for the uninitiated, it's good to also know that the Nomad is truly a brilliant device to use. Really excited to see the remainder of batch 4. Truly stunning custom paint work.
 

hoyo77

Well-Known Member
@
Holy shit, that last one is beautiful!

Yes that one is mine! @Dan Morrison took what i wanted and turned it into a beauty. He took everything i wanted and turned it into a masterpiece on that sleeve design!! My Morrison collectionis growing, it will look nice next to my Okin and i cannot wait till its my turn on the NOMADII
 

SloJimFizz

Unknown Member
@Dan Morrison I'm definately on board for the shifuku with a vape pet or two dangling from its cord.
That's a good starting point on draw technique, especially the 5 second warm up. @Flammy brings up some good points about variables like battery life and already heated unit vs cold unit.
When I draw, I add little pauses in my pull here and there to let the heater stay ahead of me while riding the button the whole time except the last seconds of intake. By the end of the draw it's like taking a lot of little sips to equal one large draw.
Little cigar style puffs can really get the low heat heater going as well when im cloud chasing or im tryna rush a toke. Careful with that kinda draw though, can combust with low heater if battery is fresh.
I load my Nomad stem like a Solo Stem. One screen in stem, light tamp with pinky, no inner body screen.
Beautiful Nomad @hoyo77 :luv:
 

EmDeemo

ACCOUNT INACTIVE
The issue with bamboo is that I need to use pieces that are almost exactly the correct outside diameter. Bamboo supply is very limited in Canada at the best of times, forget about covid times. I'd like to work on sourcing some hand selected and sized bamboo from China... but it'll take some time, currently it's sort of a back burner project.

But, I think hardwood will work equally well. I am working through some different versions right now...

I sent out an early wood stem to @Jill NYC , and she mentioned that the basket screens I use for my glass stems were not staying in place in the wood stem. So I'd definitely like to remedy that in future iterations. I think the cherry burl I used was too hard for the screen edges to dig in and grab the wood like it does in the slightly softer bamboo..

I like the chamber size adjustments that basket screens allow... but my screens are relatively shallow, so there isn't much sidewall area to grab the inner walls of the wood stems. So I am thinking that I need to adjust my basket size for deeper baskets... they won't cock sideways in the stem, and should slide with a little more friction. I think these will work nicely in the glass stems as well. Dave sent me a few of his deeper baskets... and I like em!

________________________

Here's a new sleeve, fresh off the desk. I thought I'd share some process photos as well...

View attachment 498

View attachment 497

View attachment 499
View attachment 492

View attachment 494

View attachment 493

View attachment 495

Works of art doesnt seem to do this justice.

I am deeply impressed.
 
Top Bottom