hoyo77
Well-Known Member
@Dan Morrison lolololololol....damn. Upon my 4th look at my Nomad, I just noticed the yin/yang symbol. Duuuuuuuuuude, fucking impressive!!

@Dan Morrison lolololololol....damn. Upon my 4th look at my Nomad, I just noticed the yin/yang symbol. Duuuuuuuuuude, fucking impressive!!
In my defense i was vaping grand daddy purple mixed with moon rock and sipping bourbon all day today!!HAHA! dude that's so funny.


I've been developing an updated version of my usage tutorial guide... as I think my original one could be simplified quite a bit. And I'm just wondering if anyone out there has any ideas about what they would like to see included.
Specifically, I'm trying to come up with a way to give people a place to start that will give guaranteed success. This is especially true for people who don't have any experience with unregulated convection.
I think that following a timed sequence, while counting in your head, is a pretty good way to standardize things. For example. With a fresh battery and the standard (low) heater my inhale sequence goes like this:
Button ON...1...2...3...4...5..Start Inhale..6...7...8...9...10...11...12...13...14...Button OFF...15...16...17...18...Stop Inhaling............exhale.
So long as I follow this sequence, I get very consistent results. And if, for example, a user were to follow these steps and they get little or no vapor, I know that likely the issue is draw speed is too fast. And if they report scorching the material, I know they're draw speed is too slow.
This can also be used for the high heater, but with modified timing.
I find that for subsequent draws, the above formula can be modified to add a couple seconds to either the pre-heat time or the draw length time to achieve consistent results on the second, third, fourth...etc.. draw.
The idea here is to eliminate any chaotic variables that I can, so that first time users can quickly dial their inhale speed. Once they get a sense of what it's suppose to feel like, it's easy to branch out from there and augment your technique to achieve different results.
Thoughts?
__________________________
In other news, I'm ordering a ton of textile samples for the final Nomad II case prototype. The design is pretty much finished, but now I am finding that perfect fabric to use. I've got on order a bunch of nice organic textiles.. and raw natural dye ingredients. Nothing is finalized yet, but I'm hoping to offer a handful of colours all hand dyed in house from plant sources. The current front runners for the colours are; Mustards/yellows, Greens, indigo, greys, natural/cream, rust. The indigo and rust colours will come from the two Japanese dye techniques of using real indigo dye vats, and kakishibu (persimmon tannin).
These cases will be slightly padded, but not too much. Still able to fit into a pocket, but just enough protection to make you feel good about tossing it into a backpack.
The design takes a lot of inspiration from the Japanese shifuku, which is a fabric case used to store various tea ware. Here is a poetic article explaining the philosophy behind the shifuku, White Dew
View attachment 835
The fabric case on the left is what we're lookin' at.
I also like the idea of using a braided cord in some way for the closure... it's reliable, long lasting, replaceable, and won't scratch anything. The other cool thing is that this cord can be adorned by beads or accessories. Glass beads from artists in the cannabis community could be neat, tiny wood storage containers...
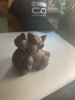
In the tea world, there are little objects called tea pets. Here is a tea pet...
View attachment 843
Tea pets are little fun creatures to put on your tea table while drinking tea.
I was imagining something like little carved wooden creatures that could be strung onto the case cord. Vape pets. They'd be like little guardians bringing good vibes to your sesh, hah.
very cool. That tea pet is nice. Here’s my setup. Can’t wait for my name to come up on the waitlistI've been developing an updated version of my usage tutorial guide... as I think my original one could be simplified quite a bit. And I'm just wondering if anyone out there has any ideas about what they would like to see included.
Specifically, I'm trying to come up with a way to give people a place to start that will give guaranteed success. This is especially true for people who don't have any experience with unregulated convection.
I think that following a timed sequence, while counting in your head, is a pretty good way to standardize things. For example. With a fresh battery and the standard (low) heater my inhale sequence goes like this:
Button ON...1...2...3...4...5..Start Inhale..6...7...8...9...10...11...12...13...14...Button OFF...15...16...17...18...Stop Inhaling............exhale.
So long as I follow this sequence, I get very consistent results. And if, for example, a user were to follow these steps and they get little or no vapor, I know that likely the issue is draw speed is too fast. And if they report scorching the material, I know they're draw speed is too slow.
This can also be used for the high heater, but with modified timing.
I find that for subsequent draws, the above formula can be modified to add a couple seconds to either the pre-heat time or the draw length time to achieve consistent results on the second, third, fourth...etc.. draw.
The idea here is to eliminate any chaotic variables that I can, so that first time users can quickly dial their inhale speed. Once they get a sense of what it's suppose to feel like, it's easy to branch out from there and augment your technique to achieve different results.
Thoughts?
__________________________
In other news, I'm ordering a ton of textile samples for the final Nomad II case prototype. The design is pretty much finished, but now I am finding that perfect fabric to use. I've got on order a bunch of nice organic textiles.. and raw natural dye ingredients. Nothing is finalized yet, but I'm hoping to offer a handful of colours all hand dyed in house from plant sources. The current front runners for the colours are; Mustards/yellows, Greens, indigo, greys, natural/cream, rust. The indigo and rust colours will come from the two Japanese dye techniques of using real indigo dye vats, and kakishibu (persimmon tannin).
These cases will be slightly padded, but not too much. Still able to fit into a pocket, but just enough protection to make you feel good about tossing it into a backpack.
The design takes a lot of inspiration from the Japanese shifuku, which is a fabric case used to store various tea ware. Here is a poetic article explaining the philosophy behind the shifuku, White Dew
View attachment 835
The fabric case on the left is what we're lookin' at.
I also like the idea of using a braided cord in some way for the closure... it's reliable, long lasting, replaceable, and won't scratch anything. The other cool thing is that this cord can be adorned by beads or accessories. Glass beads from artists in the cannabis community could be neat, tiny wood storage containers...
In the tea world, there are little objects called tea pets. Here is a tea pet...
View attachment 843
Tea pets are little fun creatures to put on your tea table while drinking tea.
I was imagining something like little carved wooden creatures that could be strung onto the case cord. Vape pets. They'd be like little guardians bringing good vibes to your sesh, hah.
Whoops my pet is cut off in that photo. Better onevery cool. That tea pet is nice. Here’s my setup. Can’t wait for my name to come up on the waitlist
 . San Francisco skyline with some floating peyotes and a sweet color wave ripple/fade!
@
Yes that one is mine! @Dan Morrison took what i wanted and turned it into a beauty. He took everything i wanted and turned it into a masterpiece on that sleeve design!! My Morrison collectionis growing, it will look nice next to my Okin and i cannot wait till its my turn on the NOMADII
")


O...M...G@hazeyp000 Cool tea pet! That's a nice setup you've got there.
Here's a new sleeve fresh off of the painting desk. This one is done in the Studio Ghibli art style, borrowing scenes from one of my favourite movies, Nausicaä of the Valley of the Wind...
View attachment 1066View attachment 1067View attachment 1068View attachment 1069View attachment 1070View attachment 1071View attachment 1072View attachment 1073
this is simply stunning @Dan Morrison@hazeyp000 Cool tea pet! That's a nice setup you've got there.
Here's a new sleeve fresh off of the painting desk. This one is done in the Studio Ghibli art style, borrowing scenes from one of my favourite movies, Nausicaä of the Valley of the Wind...
View attachment 1066View attachment 1067View attachment 1068View attachment 1069View attachment 1070View attachment 1071View attachment 1072View attachment 1073

borrowing scenes from one of my favourite movies, Nausicaä of the Valley of the Wind
") I know of Studio Ghibli and a couple of their films, but this nomad cover has inspired me to get up to speed. I'll probably start with Spirited Away tonight.
I know of Studio Ghibli and a couple of their films, but this nomad cover has inspired me to get up to speed. I'll probably start with Spirited Away tonight..jpeg")


I'm not sure I understand this right but it sure looks nice. Do you pack the stem and use this like a cap to contain the load? or does this little guy get loaded like a dosing capsule?
Thanks for clearing that up for me, this is exactly how I like to use stems on other devices.You pack the cap like a capsule. I tamp the load so it doesnt fall out, and find no need to stir, so it requires no screen to cap the chamber. When the stem is inserted, a screen inside the body seals the chamber so no bits fall out and onto the heater.
Fuck yeah, me too!I am so excited for the Nomad II’s!
Here's the latest wood stem prototype.
This wood stem is made from lightly spalted apple wood. I'm not too sure what woods I'll be able to use quite yet, but I'm working through that now.
The chamber is made from briar burl, very durable, high heat resistance, very neutral taste. A tiny groove is cut into the bottom face of the chamber, where a screen has been press fit. This tiny groove has a little lip that prevents the screen from popping out.
The chamber has a nice smooth fit in the stem, not too tight, not too loose. One of the main hurdles of this design is using woods that are matched well, and where both are perfectly stable so that they'll always have that perfect fit.
I use an in-body screen inside the Nomad, so that when the stem is inserted it seals the chamber against that screen. No more fiddling with screens in the stem, or needing to put a dome screen on top of your loaded chamber.
The one obvious difference between this design and my stock glass stem is that there is no way to adjust the depth of the chamber. I used to feel like this was an important aspect of the design to keep... but over time I've come to realize that I pretty much never adjust the chamber size... but rather keep it at an optimal depth for best performance. I've tried to figure out what the optimal chamber size is, and this is that size here... I think the user friendliness of this design is worth the loss of that feature.
fyi, this design is not compatible with glass stems, because glass is not produced in the tolerance range needed to make these snug fitting chambers.
View attachment 1160View attachment 1159View attachment 1158View attachment 1157View attachment 1156