'The Misty Log' - DIY wooden Log Vaporizer

brainiac

log wrangler
Yea, I'll certainly use the higher temp solder.
Anything that adds to safety and durability has got to be better.

Heater position is straightforward and single 9mm tube is likewise.
Thanks on that :tup:

I'm still scouring the internet for suitable ss tubing. Very little 9mm out there.
There's plenty of 10mm with ID 8mm, tho. Think it might do?
 

blokenoname

DIY Log Dabbler 😁🪵💪💨💨💨
Nah! You don't want to deal with 1mm thick ss tubing. You can bash peoples heads in with those rods. That's too thick even for the small tube cutter to deal with, which is made for less hard metals and thin walled ss tubing, which means a wall thickness < 1 mm.

Maybe you've more luck looking for 3/8" tubing with an ID of around 5/16", which is what all the US log makers use.
 

FlyHi

Member
Well hey ya bloke and hey ya all, it has been way too long. Since I got half of the bits and pieces together that I need. :nod:
I was stopped at a dead point not finding ss or tinned copper wire that is thick enough around here. wanting to get into getting something done(started) after so long.

What do you think tinned copper wire .71mm is way thin?
What about enamel copper 1mm thoughts any good if I clean off where I need to soil Dee first?
Would it be any issue with the enamel coating?

Next step finding ss Pipes seeing you talked about them. I had brought one tube locally but can’t find a next size up or down to match. not getting far with what is around:doh:
Bloke bud you got some lovely pieces of ;pd; there hope to get a ;pd; soon close but very frustrating with missing important pieces. Any help would be much appreciate. Til then :tup:
 

brainiac

log wrangler
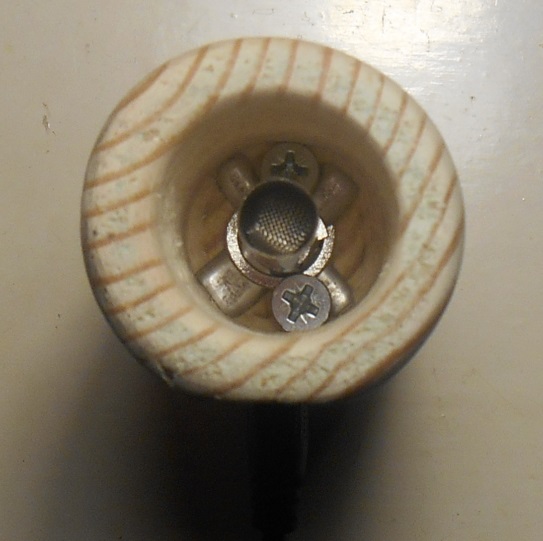
Got the heater cover finished today which meant that all components were ready for
final assembly into a working log.

firstfull.jpg


That washer down there came with the jack plug connector. I put it in the vice and squashed
it to a better size. Not the most elegant example of craftmanship I know, but that heater cover
is definitely secure.

working-1.jpg


Should mention first that I've used the lower temperature solder on the resistor extension wires.
This means that it's only a test unit and not even a beta. I'll disassemble it in a day or two.
I now have the correct solder for use on future units.
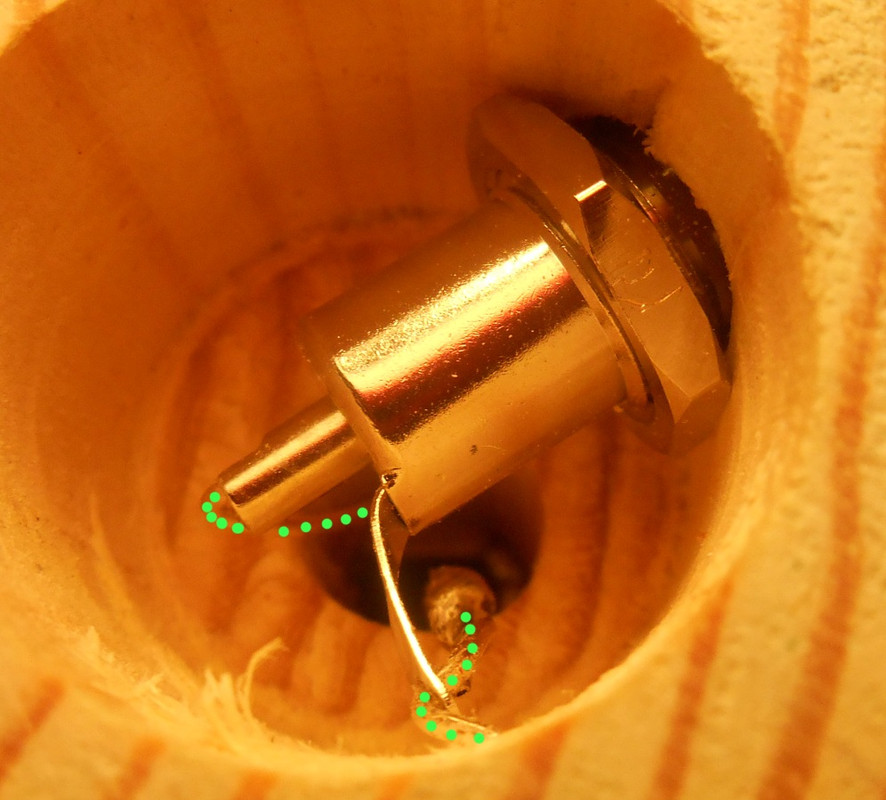
The other point is that I've not soldered the wires to the jackplug connector. One wire is threaded thro
the terminal with the eye-hole and the other is just slotted into the receiver. Again, a very temporary arrangement - but good enough for testing.

first-wiring.jpg


Not a great picture so the green dots show the heater wires
I've got a 'rustic' blank drilled out and ready to go but thought I'd try things out on the handrail
blank first. Glad I did, too. Learned a lot - ofc there's plenty more to learn.
And that's the way I like it :)

E2A: it's been running OK for five hours now.
 
Last edited:

FlyHi

Member
Great work brainiac :tup:good to see yet another log birthed from this thread:D. Bloke mate your making all this possible:clap:, bloody fantastic on ya for your time and effort :D

Ok As for the wire you showed me @brainiac is it ok that it is jewellery wire and not conduction wire or am I missing the point and you can use it as a conductor seeing you have a working log there :lol: :hmm: ;pd;
So I done a bit of research and correct me I f I’m wrong. The enamel on the enamel copper wire may crack at high temps, I think it would be unsafe if so. What do you think? There is always a possibility I could take the coating off all the wire as I would need to strip the part where I need to soldier but again I’m not sure how safe this would still be :hmm:. Thoughts pls?
I have also found bare copper available local, would this be any good? Or can I literally buy jewellery wire and I will be fine with using this?
Originally I was trying to find stainless steel wire locally and funny no one could help me around here. Then again issues finding tinned copper wire, best I could find is 0.71mm. Do you think this will do or is it way too thin?
Never knew it would be so hard to source products especially locally. I’ve spent hrs looking, going places and calling place that I have had no help.
So I have made a wood body, I have the cartridge, jack, connectors, lead free soldering wire and got me soldering station too, brought one main ss pipe 16mm (may not work with this, not sure too big).
Not sure if I’m forgetting anything else.
I’ve been working on a budget and hoping to find the missing items really hoping to start production soon for my ;pd;
This has been a big learning curve for me. Thankx bloke for all of this:nod:
 

blokenoname

DIY Log Dabbler 😁🪵💪💨💨💨
@FlyHi
I also use silver plated copper wire (0,8mm) here for the Misty logs, as it combines the high electrical conductivity of copper with the silver's higher resistance to heat and corrosion, which makes it ideal for the application at hand. Tinned copper wire was only something I tried out temporarily after switching from ss wiring, which always posed a problem for soldering, due to the high temps needed for stainless.

Silver plated copper wire is frequently used in HF applications, BTW. Not only for jewelry. But yes, you can use the jewelry wire there.

https://www.elektrisola.com/conductor-materials/plated-wires/silver-plated-copper.html

You can also go for plain copper wire, but then you've to deal with corrosion issues over time. Enamel plated copper poses the problem of the enamel cracking and splintering off, due to the flexibility of the wire and the enamel plating layer being too thin to deal with the heat.

@brainiac
Congratulations, that looks really great for a first attempt :nod: :clap:
Don't worry too much about the 'craftsmanship' for the moment, as that will come with time and the routine, you'll develop. No one's expected to get it perfect the first time ;)
What counts, is that it works :tup:
Once you made it work as expected, you've time for refinement.

Why did you use the spring clip from the DC jack for a washer there? Didn't the 25mm M8 body washer fit? I've come across some of those, that seemed a fraction of a mm larger than a straight 25mm and wouldn't fit nicely into the 25mm heater well and some sanding was needed. But the ones I usually use do fit quite nice without additional sanding. Should have been some of those in the package I've sent you.

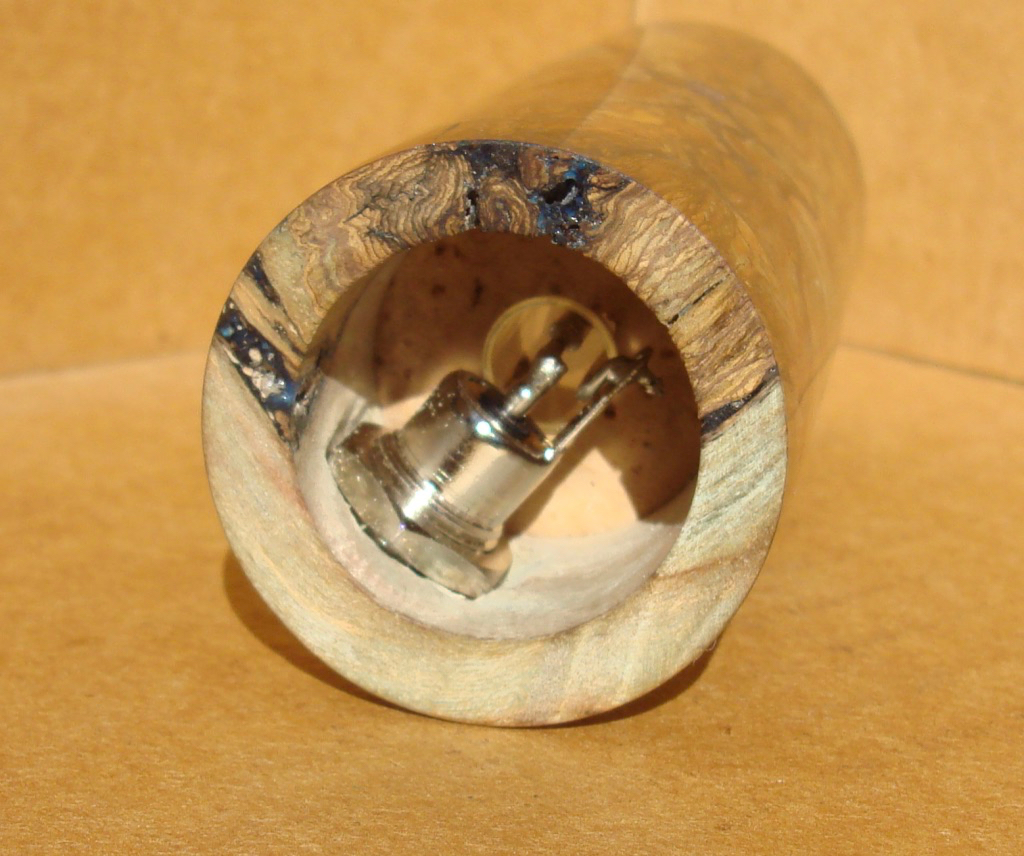
BTW... this pic here from @Alan 's HI thread shows quite nicely, how he arranged the wires for soldering in a glass heater cover HI:

ssmhibottom.jpg
 
Last edited:

brainiac

log wrangler
@brainiac - i cant wait to start seeing pictures of your logs!
Getting close to a viable unit now, mate :tup:
And none of it would have been possible without this thread :nod::clap::)

@FlyHi
I've got several pages of A4 covered in notes and sketches to help with this process of log construction.
Nearly all of it taken from this thread. Pretty much everything you need to know has already been covered back there 'somewhere'. Heater cover construction, for example, you'll find on p4 #98, p5 #101 and p14 #333 (and elsewhere too).
And yes, finding the right ss tubing is a bit tricky. I think your 16mm might be too big. 9 or 10mm with a thin wall would be better.

@blokenoname
Thanks for the kind words and encouragement.
Yes, plenty of time for refinement - and plenty of room for it too :lol:
I'm using the 9mm tubing so those M8s would need drilling out. I'm really not keen on doing that on a regular basis. Even with a drill press it doesn't feel safe :o (perhaps I'm overly risk-averse). Pity they don't make an M9 x 25mm. Original plan was to cover the screws with a washer and hold the washer in place with a clipring but it's still going to be difficult to get the ringclip down the 5cm into the heater well when the bore is only 25mm. Just not enough room for the pilers with the heater cover in place so I'd have to bash it down the final 1-2 cm.
And I'll be happy if I can get my soldering looking as neat and tidy as Alan's in that pic there :nod:.
 

blokenoname

DIY Log Dabbler 😁🪵💪💨💨💨
It's fine with the drill press. You just need a good 9mm drill bit for metal and bigger clip ring pliers. Mine are quite heavy/solid and have 'noses', that are 5cm long, so they fit neatly between hc and wall even with a 25mm diameter bore :)

qq8fhd.jpg


Also, a machine vice comes in handy, with a vertical and a horizontal recess at the inside of its jaws, to hold washers or tubing secure, while you're drilling. Otherwise there's always the risk, that you send the washer to be drilled flying. These little machine vices are also quite inexpensive.

2udw50g.jpg
 
Last edited:

brainiac

log wrangler
Thx bloke.
Ordered myself a decent set of circlip pliers and will just have to man-up about the drilling :uhoh:

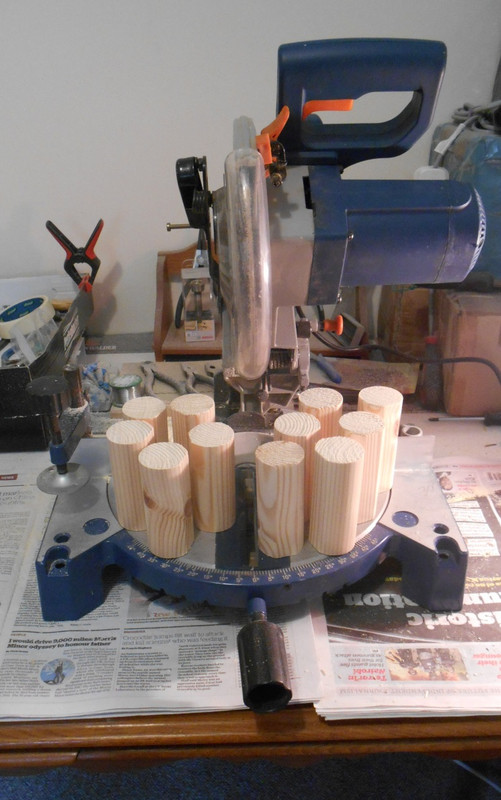
A very kind neighbour has loaned me his bench saw. I was having a lot of trouble getting a straight cut on the handrail so all my blanks were looking like mini towers of Pisa - even when I used a mitre. The bench saw solved all that. Tidy, straight and - critically - at right angles to the length. Fast, too.

So I now have 11 decent pine blanks.
Probably never use half that many but will drill them all out anyway, just for the practice :).

C'mon blanks - group photo :D

bench-saw.jpg


Pity that the handrail was chamfered, but they'll do for now.

Working on a 'rustic' unit this week :)
 

blokenoname

DIY Log Dabbler 😁🪵💪💨💨💨
It IS friggn' amazing, how all these little things (cutting at a right angle, centering the bore... etc.) one would never even waste a second thought about, can go so spectacularly wrong! :lol:

I get my blanks pre cut to 10cm length now, directly from the handrail shop :D
 

brainiac

log wrangler
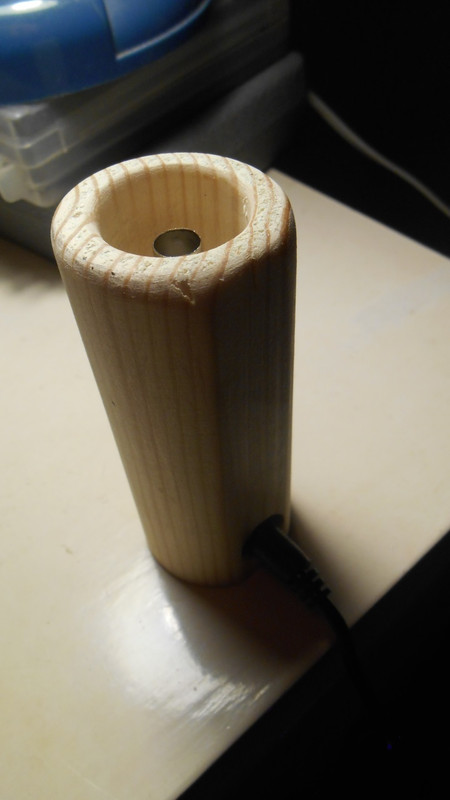
Got that 'rustic' finished a week ago and it's been my daily driver since then. Working fine so far :).
The main concern was that, once plugged in, the heater-accelerated drying might split the wood but
that would probably have happened by now if it was going to.

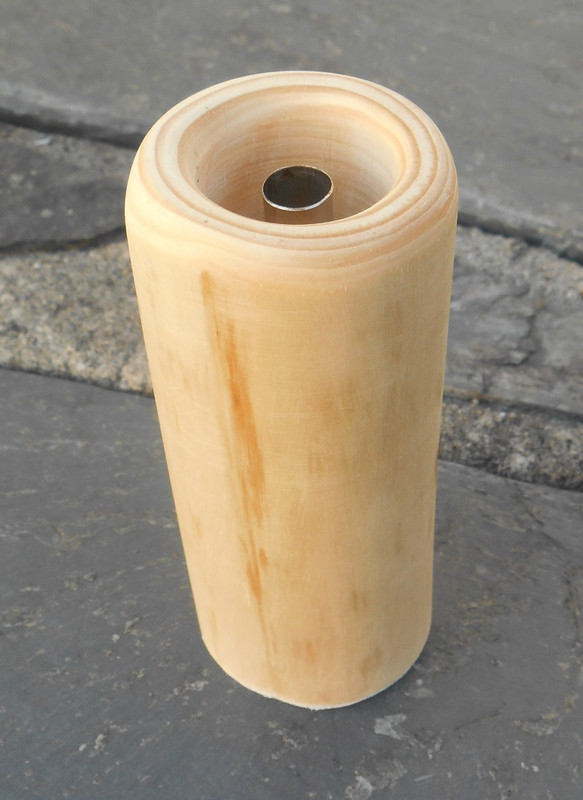
Niwlog1full.jpg


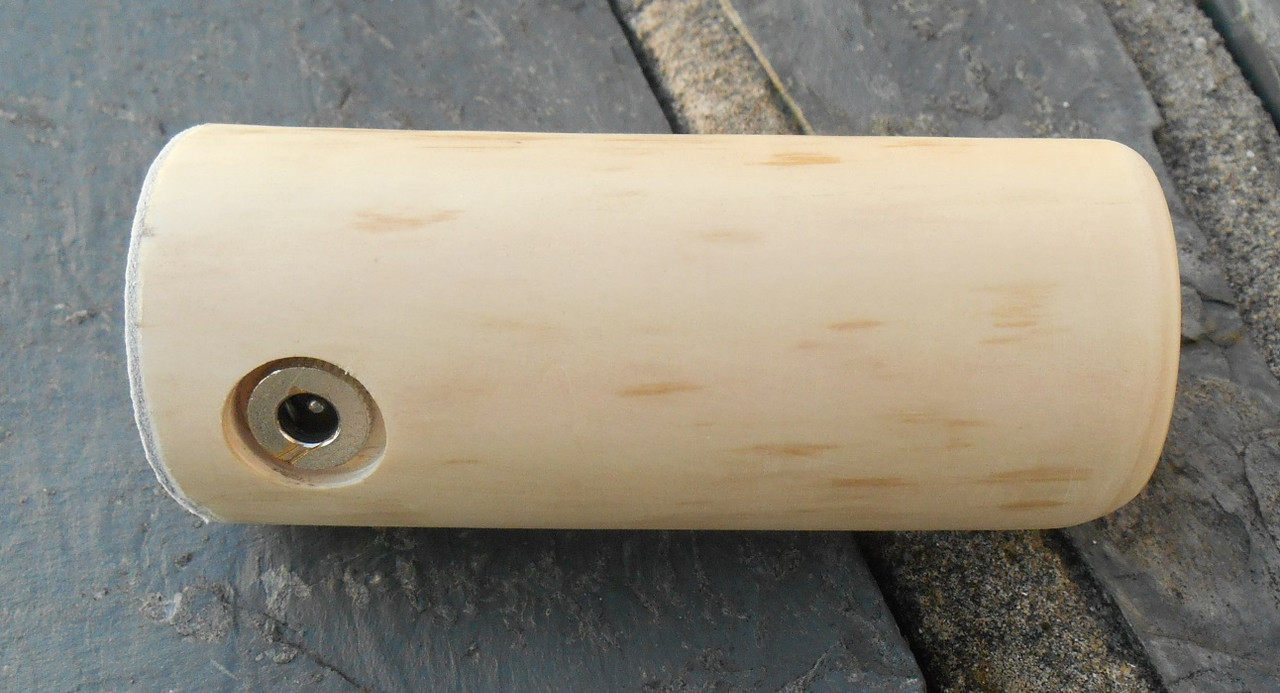
Unfortunately, you can't count all the growth rings now that the middle has been drilled out but I think there are eight. It tapers slightly towards the top as per it's place in the tree and the growth rings are wider on the western-facing side.

Niwlog-R1side.jpg


Those darker streaks are the remnants of the cambium layer. Could have sanded them out completely
but I think they add some lovely visual interest.

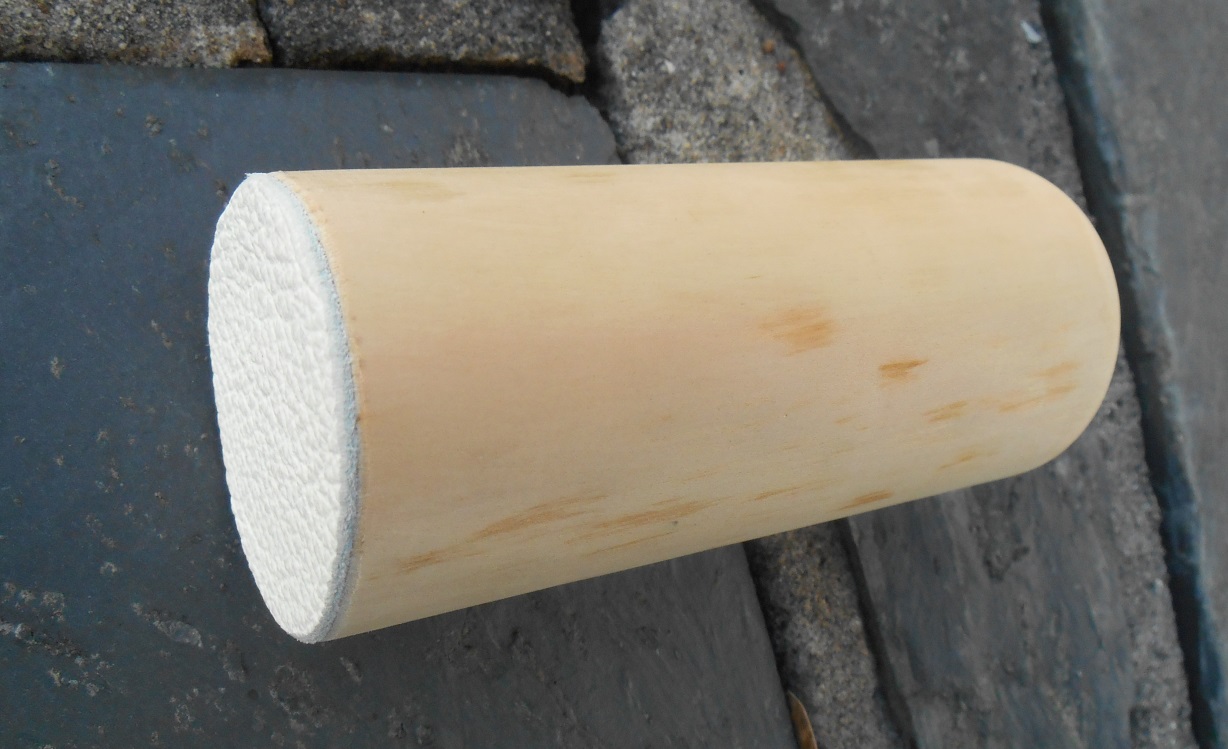
Niwlog1base.jpg


Finished off the job with some white leather. Still not entirely sure about that decision, tho.
Perhaps something slightly darker would be more sympathetic to the overall aesthetic?

Anyway, promised a friend that I'd build him a pine handrail Misty clone - so that's my next job :)

Thanks for all the help, bloke. Would never have got this far without you :nod::tup::clap:
 

blokenoname

DIY Log Dabbler 😁🪵💪💨💨💨
@brainiac

Your rustic log looks absolutely stunning :clap: :clap: :clap:
Really well done! :nod:

Isn't it a really great feeling, being able to build a functional vaporizer all by yourself!? :D
I just love it!

I think, the white leather bottom looks classy! Much better, then my early approach with the felt :nod:

And after a week of continuous use, I guess, it won't crack now. Though, I'm really no specialist there, as I've-never worked with relatively fresh wood myself here.

@Megaton

Have your new ss tips (3) ready and will post them tomorrow morning:nod:
Thanks for your patience.

@all

Sorry for not being able to attend more here at the moment, but after finally finishing my taxes, the job turned into a friggin' freak show recently, demanding lots of my time. If this goes on, I'm seriously considering opening up a store for tenant warfare, selling barbed wire, fences, baseball bats, knifes and maybe hand grenades :rofl: :mental:

But as carnival season is upon us by end of next week (which usually turns the whole region here into a bloody alcohol drenched freak show, BTW), I can close the business for a few days, taking a short holiday myself and so will have more time to get a bit more serious log work done ;)

Tonight, I'll load up my recent walnut Misty, brew a pot of nice tea and will settle in with an audiobook copy of Machen's The Great God Pan and Other Weird Tales, which seems just the right treat for a dark and rainy night like this :sherlock: :)

And then I've also yet to take a look at the BBC2 adaption of China Mieville's The City & The City, which I downloaded a couple of weeks ago already but simply found no time to watch! Loved the book! :)
 

Megaton

Well-Known Member
@blokenoname great! Thank you so much, looking forward to trying the tips with this walnut misty!

Only read the one book by Mielville (rail sea), but will have to go on the iplayer and check that out!

Here's to carnival season, and observing safely, from a distance, with a misty log in hand!
 
Megaton,

Vital

Well-Known Member
How about...
Manfred Mann - Blinded by the Light. 1977.
"I'll turn you on son, to something strong..."
Or anything by ELO ??

Picture quality is lacking, but the sound's there and it's live.


Want to see something funny? :lol:

These little guys clap in tempo. :clap::clap::clap::clap::clap::clap::clap::clap:

I hope you enjoy it!
 
Last edited:
Vital,
  • Like
Reactions: brainiac

Megaton

Well-Known Member
Off topic, but I have just received a notification that I have been a member here for a whole year now! Blimey how has time flown!

Started off with just a dynavap M (common story?) And now have reached my pinnacle with my Misty log on my desk.

Thanks in particular to @blokenoname , who I am glad to count as a real friend having met here, in this thread.

Here's to many more years of extremely scientific experimentation!

:science: :bowdown:;pd;
 

ubardog

Well-Known Member
Off topic, but I have just received a notification that I have been a member here for a whole year now! Blimey how has time flown!

Started off with just a dynavap M (common story?) And now have reached my pinnacle with my Misty log on my desk.

Thanks in particular to @blokenoname , who I am glad to count as a real friend having met here, in this thread.

Here's to many more years of extremely scientific experimentation!

:science: :bowdown:;pd;
:rockon::rockon::rockon::rockon::rockon::rockon::rockon::leaf:

Party time then! Happy FC-day
 
Top Bottom