The HighLighter (Glass-Core Open-Source Halogen Log) Kit Hosted by REFC Labs

RedEyeFlightControl

Inventor,Maker, Pro Nerd, Entgineer, GladScientist
Manufacturer
I couldn't do an pre-account set up either. So I just put an item in the basket, jumped thru all the hoops and I'm golden. Now I have an email that says I have an item in my basket which I will take care of Sunday 😉 . But really, Red needs to get that part fixed .
I'll check in with my POS provider. I am not happy this is an issue!

For those having issues, I'd advise ensuring your browser is up to date, or trying a different browser. Some companies aren't the best about honoring standards and this stuff does happen on occasion.
 

Shadooz

Well-Known Member
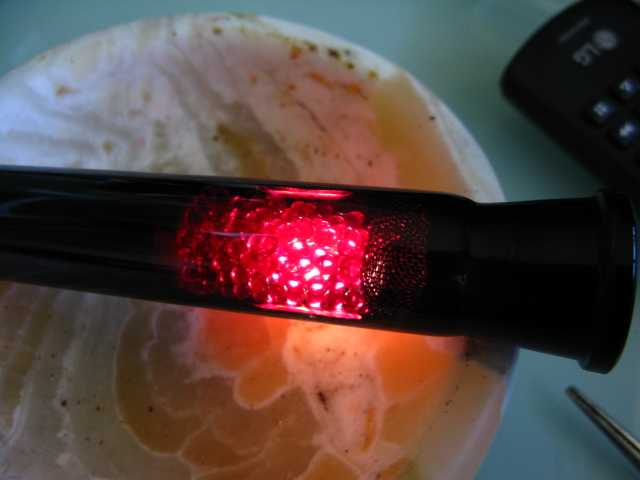
We tested 20, 35, and 50w variants. The 50watt excelled in every case. Running at our recommended 6.0-6.8v typically pulled about 2.6-7(ish)A and provided a nice steady 18ish watts on average, at about 40% duty on the bulb.

I have some ridiculous hours of runtime on my daily driver and it still has its first bulb I ever tested in it. I'll post as soon as it goes bad :)

Are u making the bulb ?

As halogens were chosen for tungsten containment. Where Joule effect is unwanted...

Have u thought of another gaz, better conductor. hydrogen would be the best, but will explode... :rofl:

However helium in a fat, good boro, increased surface bulb could be contain.
The gaz used in nuclear reactor..

And with a larger tungsten diameter. The thinness was chosen for its brightness, which is useless here..

Edit + :

Helium+xenon seems to have the best Thermoacoustics property (Prandtl number)

Tungsten can be substituted too
 
Last edited:

Shadooz

Well-Known Member
told us about special bulbs designed for increased IR generation. More heat, less light, I think that should be investigated.
IR is microwave like, radiant heating.
And so, get closer back to conduction.

I know them for a diffuse heating, never for a ~200C precise surface.
 

khelek41girl

Well-Known Member
Accessory Maker
That's the beauty of this setup! Bulbs are cheap enough that once you have the kit, you can try out whatever bulb works best for you. Will a third party bulb with a different internal gas be tested and proven to work? Not really, but you are welcome to give it a shot. Just know that when you deviate from the kit, you are taking responsibility for your own actions in a DIY manner that could have both positive or negative effects. Always practice safety, and be careful. We have tested a number of bulbs with this kit, and found which bulb seems to work best (based on our own experience) for this practical application.

If I had only one thing to say, I would say this...
Just try the stock kit first. Give it a shot just as it is, and you will be surprised at how effective it can be. I see lots of people in various threads here on FC wanting to improve and add on to vapes that have only just been released without even experiencing how amazing they can be right out of the box. Once you have experienced the HLT just as it is, you might find that no additional bulb research is necessary. And, if you decide its good but you want to see what other bulbs are out there, you're welcome to do so! Start with the kit though, and enjoy living on the moon!
 

RedEyeFlightControl

Inventor,Maker, Pro Nerd, Entgineer, GladScientist
Manufacturer
Are u making the bulb ?

As halogens were chosen for tungsten containment. Where Joule effect is unwanted...

Have u thought of another gaz, better conductor. hydrogen would be the best, but will explode... :rofl:

However helium in a fat, good boro, increased surface bulb could be contain.
The gaz used in nuclear reactor..

And with a larger tungsten diameter. The thinness was chosen for its brightness, which is useless here..

Edit + :

Helium+xenon seems to have the best Thermoacoustics property (Prandtl number)

Tungsten can be substituted too
Nope, I am purchasing pre-made bulbs. I don't think making custom bulbs for a 69$ kit is going to be worth the time, frankly. We wanted something cheap, easy, and ubiquitous, so we have not chosen to use custom or hard to find materials.

Yes I tried to point it out already. But the maker of the Venus and Apollo (and now TinyMight) once told us about special bulbs designed for increased IR generation. More heat, less light, I think that should be investigated.
These may work but may also add complexity, cost, and a redesign to a kit that is already fine-tuned. I'd be interested in checking one out for fun.

Anyone have one they want to send in for testing? :)

These are things we had difficulty adhering to as well - sticking with "stock" items in a custom vape made by a collective of modders and designers was a challenge! We had lots of neat ideas, most of which took us outside the scope of using easy to find, stock, commodity hardware. Many of these "custom" solutions were avoided to keep this kit as affordable and available as possible while still maintaining levels of performance we were satisfied with.
 

HighVapeEnthusiast

Well-Known Member
Shut up and take my money!!!:D:peace:

Edit: BTW. Created my Account without any issues!
Now I'm sitting here in front of the hole like Tom waiting for Jerry!;)

@RedEyeFlightControl :
The bulb socket also holds the glassballs in, right?
And if you pull the wire, it's easy to pull it out?

I really like it!
Nice Job for fair price!
Thnx!
 
Last edited:

RedEyeFlightControl

Inventor,Maker, Pro Nerd, Entgineer, GladScientist
Manufacturer
Shut up and take my money!!!:D:peace:

Edit: BTW. Created my Account without any issues!
Now I'm sitting here in front of the hole like Tom waiting for Jerry!;)

@RedEyeFlightControl :
The bulb socket also holds the glassballs in, right?
And if you pull the wire, it's easy to pull it out?

I really like it!
Nice Job for fair price!
Thnx!
The bulb socket also holds the glassballs in, right?
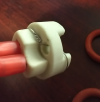
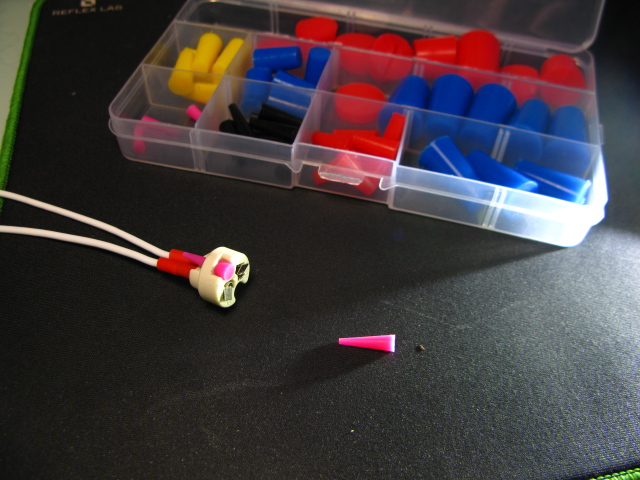
Yes, the bulb socket is the rear bead retainer (along with a small piece of ss heater wire to block the base's screw holes which are just over 3mm).
1625070611271.png

And if you pull the wire, it's easy to pull it out?
Yes, it's friction fit. You can pull the base back out by the wires. Breathing some humidity into the tube will make it slide right out (this is recommended for easy installation as well).

Thanks!
 

Shadooz

Well-Known Member
Nope, I am purchasing pre-made bulbs. I don't think making custom bulbs for a 69$ kit is going to be worth the time, frankly. We wanted something cheap, easy, and ubiquitous, so we have not chosen to use custom or hard to find materials.
Was attract by the "open-source" in the title...
Just shared how a concept could be pushed further if fully designed.
Not just assembled, for price optimisation.

As rubies or glass beads seems to be an efficient way for extraction. I just have to found a good way to keep and heat them now,...

Just know that when you deviate from the kit, you are taking responsibility for your own actions in a DIY manner that could have both positive or negative effects. Always practice safety, and be careful.

If i had time and money to do it myself..
Qwartz halogen bulb seems a cheap way, but nothing more
 

HighVapeEnthusiast

Well-Known Member
If i had time and money to do it myself..
Qwartz halogen bulb seems a cheap way, but nothing more
...sorry, but I really don't think so!
There are a lot of benefits for a lot of users to go ways like this in my opinions .
Bulbs are mostly clean sources without bad taste, it's approximately all Glas...🤷‍♂️
Also you can get spare parts where ever you are, you don't have to sent your device around the world.
I think, this is one of the projects, which I want to see growing!
Peace...:peace::wave:
 

oldfool

Well-Known Member
small piece of ss heater wire to block the base's screw holes
I used little silicone plugs.

IMG-2507.jpg
 

androponic

vaped.
I cut into the heater core for air intakes and sealed the bottom.
Don't think I like hot balls sitting on the silicone though, so I think I'll change to the wire.

IMG-2503.jpg
thats original thinking anyway! its going to be interesting to see how many build stock and roll with it and then see all of the stoner engineering kick in. nice!

also good that @RedEyeFlightControl is selling the parts individually too so if one messes up a part you dont have to buy a whole kit, makes for easier risk taking too
 

RedEyeFlightControl

Inventor,Maker, Pro Nerd, Entgineer, GladScientist
Manufacturer
Was attract by the "open-source" in the title...
Just shared how a concept could be pushed further if fully designed.
Not just assembled, for price optimisation.

As rubies or glass beads seems to be an efficient way for extraction. I just have to found a good way to keep and heat them now,...


If i had time and money to do it myself..
Qwartz halogen bulb seems a cheap way, but nothing more
Our main design goal was specifically avoiding custom parts, which adds cost, complexity, and reduces availability by a substantial margin. This is one of the things that sets this kit apart from other more proprietary solutions and we consider this a benefit. You are right, Quartz-Halogen is a cheap way! Inexpensive was also part of our goal. While very cost effective, I think it deserves a bit more credit for being one of the best tasting and cleanest heaters available. It also means the unit is serviceable with off-the-shelf parts.

I am a proponent of standards and modularity for a lot of reasons. The mantra behind this kit requires it. A big part of open source sharing is building on top of proven work. Most open source projects use other libraries and do not code from the ground up. Credit is given to the predecessors that got (them) us here. The HLT takes inspiration from predecessors like The Symphony and the G43.

nice idea but i think the wire serves a purpose of keeping the beads from falling through but also still allowing airflow.
Correct. This maximizes airflow by keeping the remaining open space as open as possible.

I cut into the heater core for air intakes and sealed the bottom.
Don't think I like hot balls sitting on the silicone though, so I think I'll change to the wire.

IMG-2503.jpg
How is this working so far? Quite curious as I suspect there is a "preheating" element as the air passes through the body of the core before reaching the diffuser. My gut says it's going to slightly reduce heat output and increase refractory period. Just a guess, though. Do tell!
 

RedEyeFlightControl

Inventor,Maker, Pro Nerd, Entgineer, GladScientist
Manufacturer
Works great. I am at a higher voltage 7.2-7.3, am I close to the danger zone?
I'm doing some more tinkering friday which should get the voltage down.
Will post results.
I metered current draw at about ~2.7a around 6.8v. Using this assumed-correct draw value, 2.7a*7.3v= 19.71 watts. So you're still around 40% provided the current draw is no higher. Which I'd suspect. Even the big desktops like the SSV / LSV / Dit that use ceramic elements use ~25watt elements so we know we're still on par with other formfactors. Even small, small tweaks in wattage produce big temp swings so I don't think you'd need to go much past 20w to reach pyrolysis or combustion. You are running about 1 watt higher than a naked stock core at 6.8v. These cores clock in around 17-18w nominal.

Do note there is also some variance in A) the filaments and B) the PSU. So our suggestion of ~6.5ish volts starting is just that, a suggestion.

I do not think you will be able to reach the halogen danger zone on this model without reaching combustion temps or temps hot enough to damage the o-rings. I've never actually combusted in any of my cores, so I honestly don't have a good answer for what it might be.
 

oldfool

Well-Known Member
You are running about 1 watt higher than a naked stock core at 6.8v.
I only had 6g of balls in it so I added another gram or two.
I'm down to 6.8V and hitting better than it was at 7.3.

Balls aren't loose like they were but I had to push the screen back
about 1/4" to fill some space. Couldn't get the bulb up any further.

Friday I'll put it in a heat shield.
 

RedEyeFlightControl

Inventor,Maker, Pro Nerd, Entgineer, GladScientist
Manufacturer
Just got mine. Silly question, but are there build instructions anywhere? I could probably figure it out from the parts and the photos I see here, but I'd prefer not to fuck it up lol
There are a few tutorials on YT that explain how to assemble it and what everything is. Panic and I have both made one. A few other users are in the process of putting some material together as well. It actually takes longer to watch the vid that it does to assemble.

At some point I do plan on putting together a document that shows each step - haven't gotten that far yet :)

I apologize in advance for my poor video skills, hahaha. To see the wire detail that isn't visible in the video because of my crap webcam, scroll up on this page to post 159.


SneakyLeek

Active Member
It doesn't appear that you ship to Australia on the website. Will there be plans to ship to there in the future, or will there be a list of the parts to purchase? I can source quite a few parts by pausing build log videos on the the parts list, but some elements I have not been able to find such as the heater wand.

I'm really excited about The Highlighter, so much so that I've been a lurker for a couple of years but waiting for this the last few weeks finally has got me to create an account.
 

RedEyeFlightControl

Inventor,Maker, Pro Nerd, Entgineer, GladScientist
Manufacturer
It doesn't appear that you ship to Australia on the website. Will there be plans to ship to there in the future, or will there be a list of the parts to purchase? I can source quite a few parts by pausing build log videos on the the parts list, but some elements I have not been able to find such as the heater wand.

I'm really excited about The Highlighter, so much so that I've been a lurker for a couple of years but waiting for this the last few weeks finally has got me to create an account.
I now ship to Australia :)

If I'm missing anyone please speak up. I did add France as well, since I recall someone requesting it this week.
 

SneakyLeek

Active Member
Thank you very much! I can see now on the site that you ship to Australia.

Now begins the waiting game for when they come back in stock. I'll be refreshing this page and the website a few times a day hoping that I'll be able to get one on the next drop.

Now I have to decide if I'll get the cheap $15 VVPS (shown on previous pages) or spend a bit extra to get a benchtop power supply (which I can use for other projects also as I do a bit of hobby projects and device repair - so will be useful in diagnosis).
 

AWistfulNihilist

Well-Known Member
There are a few tutorials on YT that explain how to assemble it and what everything is. Panic and I have both made one. A few other users are in the process of putting some material together as well. It actually takes longer to watch the vid that it does to assemble.

At some point I do plan on putting together a document that shows each step - haven't gotten that far yet :)

I apologize in advance for my poor video skills, hahaha. To see the wire detail that isn't visible in the video because of my crap webcam, scroll up on this page to post 159.


If you follow my guide please check out the timestamps in the description. They include some notes on building the unit in addition to regular time stampiness.
 
Top Bottom