Divine Tribe atty's

Steven

Well-Known Member
@Bad Ocelot @21stCenturyVape I couldn't agree more with all your points. The best way I have found to load the v3 medium and large donuts is to break off a bb sized chunk, the same size loads as a v2.5 and place it on the donut. Flash it with some power so that the chunk is stuck in place. Then, place the unit horizontal so u r facing the donut and flash power at it in very short pulses while rotating. This will let gravity slide the wax chunk accross the donut, coating it evenly. If done right no boiling will occur but I have messed up a few times.

I just started using the medium donut/cup Matt sent me for testing and my first impressions in it is pretty good so far. The medium cup actually lines flush with the outer housing so there are no gaps inside the housing/cup. The gap was a prone area for loaded wax to touch the walls, making it hard to vape it efficiently. I like the medium donut performance so far. I noticed the v3 works best once the posts are fully clogged with reclaim. The medium v3 needs less break in time due to smaller lead holes and a flush wall from cup to housing

I just started using it today, just got back from a Tahoe trip so more testing needed. I'm interested if the smaller lead holes will eliminate leakage altogether. We will see by the end of tm. I'm a heavy user. I'm actually curious how it looks now. Gonna have to take a peek when home

I also wanted adjustable air but that is easily achieved with a silicone band around the housing. I cover 90% of the air holes actually.

Haha I was going to add more to this but after seeing that cup...
 

Steven

Well-Known Member
Very rough draft


@fernand @Steven @Vape Donkey 650
at OF is this what you want? i can redraft let me know
14676760_628568027315425_8473451862001975296_n.jpg
OMG Matt I bow to you. Ask and you shall recieve guys. When will this bad boy be available. I'm salivating. Loading, efficiency, and leakage meters are shooting through the roof.
 

looney2nz

Research Geek, Mad Scientist
Very rough draft


@fernand @Steven @Vape Donkey 650
at OF is this what you want? i can redraft let me know
14676760_628568027315425_8473451862001975296_n.jpg

Is it just gilding the lily here to ask if it would be possible to use a concentrate pad to increase the surface area? 'course that would probably throw off all the other thermal/mass calculations, hmm? Just wonder if it would increase the smoothness and mitigate pooling somewhat?
 

PPN

Volute of Vapor
Is it just gilding the lily here to ask if it would be possible to use a concentrate pad to increase the surface area? 'course that would probably throw off all the other thermal/mass calculations, hmm? Just wonder if it would increase the smoothness and mitigate pooling somewhat?
Some guys use a sort of wick made of porous black ceramic... although I never tested this configuration.
 

clearlight

Well-Known Member
well.. I haven't whipped out any 2.5 bases since Wednesday or Thursday and what's toady Tuesday? So we're at a solid 5 days of 13mm v3 only. Just had to learn how to vape smaller amounts on it.

Specifically, what I'm doing differently is not worrying about cleaning the donut back to white in between loads. On 2.5s I'd get my 3 puffs out of a dab and then burn it back to white each and every time before reloading. On the 13mm donut, like someone else said, I could be getting my 3 puffs then about 15 wispy hits after that to get it back to white. That makes it kinda tedious to clean all the time. Instead I'm just reloading after the 2, 3 or 4 good puffs, depending on how big the load is. I just don't worry about the reclaim and let it build up and burn off w subsequent loads. Is it affecting the taste somewhat? Maybe, but not noticeably, at least not with the shit I'm vaping anyway. It's so pungent that the little wispy hits hide behind the taste of the fresh load so it hasn't bothered me yet. Maybe if all I had was a more delicate flavor it would bother me?

At first with this strategy I was alternating opposite sides of the donut. By the time the second load was vaped off, the other side of the donut from the first load was almost back to white again. So each time I'd drop the dab onto the white side, vape 2->4 puffs and repeat. After doing that all weekend though, there no longer is a white side— whole donut is black. Loading on top of a blackened donut negatively affected performance for me on the 2.5s— to an unacceptable degree, but with the 13mm donut, I'm not really noticing that.

I took the V3 to a gathering Friday night, loaded it big and passed it around with no instructions other than "Just ride the button." Everyone was impressed. Most of them vape G style pens or disposies so the 13mm donut was a big hit. It works better for a party than the 2.5 bc it starts producing massive vapor much more quickly and gets far more hits before needing a reload.

So thinkin I'm pretty done with the 2.5s, at least for now, but still excited to try the smaller donuts and the higher resistance donuts coming out for V3 and I suspect that once the dust settles, a 7 or 10mm donut on the v3 will end up being my daily.

There's only one thing I'm not liking as well about the V3 base:
I didn't initially think that the deep bowl would be difficult to load because it is also quite wide, but i found myself removing the ceramic piece that covers the base to load it both times.

Now I'm not removing anything to load, but I did have to change my work flow. I like to pre-roll balls of pull snap that I carry in a container and then reloading the 2.5 is as easy as pulling out a ball and stuffing it into the 2.5 base, maybe push down harder w thumb to squish it all the way down onto the donut. Boom, done. Well with the V3 when I try to drop a ball in there, it almost always gets stuck to the inside wall, not making it down to the donut. So in addition to my little container of pre-rolled balls I have to bring a dabber or other tool able to push the little ball down the wall and onto the donut. That's my only gripe.
 
There's only one thing I'm not liking as well about the V3 base:


Now I'm not removing anything to load, but I did have to change my work flow. I like to pre-roll balls of pull snap that I carry in a container and then reloading the 2.5 is as easy as pulling out a ball and stuffing it into the 2.5 base, maybe push down harder w thumb to squish it all the way down onto the donut. Boom, done. Well with the V3 when I try to drop a ball in there, it almost always gets stuck to the inside wall, not making it down to the donut. So in addition to my little container of pre-rolled balls I have to bring a dabber or other tool able to push the little ball down the wall and onto the donut. That's my only gripe.
This is the first time I've found one of these little silicone tipped dabbers to be useful. I actually have to carry both the tiny dabber and the tiny screwdriver, because twice now the base has come loose from the top being removed/replaced a number of times -- it's a pretty tight fit.
 

21stCenturyVape

Well-Known Member
Very rough draft


@fernand @Steven @Vape Donkey 650
at OF is this what you want? i can redraft let me know
14676760_628568027315425_8473451862001975296_n.jpg
Looks like a winner to me. Ready and waiting to order once available. Regarding loading difficulties, techniques involving dropping a chunk of concentrate down into the donut don't work with sappier concentrates. An alternative to building a loading tool into the bottom of the splashcup/mouthpiece would be to offer a separate ceramic loading tool that fits on the atomizer the same way the mouthpiece does. This would suspend the concentrate directly over the crucible/cup. The user would then fire the atomizer to get the concentrate to drip off the loading tool and onto the donut/cup. Remove the tool and replace it with the mouthpiece. Just an idea.
 
Last edited:

Steven

Well-Known Member
Generally I only get stable shatter but on cases with sappier wax, I use a small sharp pick tool a bit bigger than a sewing needle that is bent at 60 degrees at the tip. I just swirl some wax onto the needle, place the tool with wax on the donut and flash power until the wax melts off the tool. From there I do the rotate technique to spread the wax out. I don't know if anyone else does this but it's pretty easy for me. Having a small tool with the lowest surface area is best for this technique. My 2 cents
 

21stCenturyVape

Well-Known Member
Generally I only get stable shatter but on cases with sappier wax, I use a small sharp pick tool a bit bigger than a sewing needle that is bent at 60 degrees at the tip. I just swirl some wax onto the needle, place the tool with wax on the donut and flash power until the wax melts off the tool. From there I do the rotate technique to spread the wax out. I don't know if anyone else does this but it's pretty easy for me. Having a small tool with the lowest surface area is best for this technique. My 2 cents
I've tried the method you recommend with mixed results. You may have steadier hands than me, as about half the time I get a good deal of my sappier concentrate stuck to the side wall.
 

divinetribe

We are trying our hardest to become Medical Grade
Manufacturer
Paul at SZ took note of the crucible cup draft and has made me a autocad, at first he was trying to use a donut like plate in a ceramic cup, I said no, the whole cup has to be what heats mainly the bottom of the cup and sides if possible.. this can have no wire holes in it, it must be similar like the DC atomizer heated cup where the leads are at the bottom.

14591022_980172352105692_1468864341192212480_n.jpg
 

clearlight

Well-Known Member
Guess i should have checked the mailbox before my last post bc the 10mm was in there.

First off, the fact that the cup fits flush with the inside wall is a major improvement. It fits so well it would seem that the 10mm is the original intended size for the device and the 13mm is an expansion that gives you a bigger donut at the cost of introducing a gap.

Switching out the 13 I was surprised to see hardly any leakage under there, just about halfway down the rim all the way around and a little on the posts. Amazingly none going down the sides of either post and only couple droplets on the deck. Unlike my first and only other disassembly/cleaning when it was only a couple days old, I hadn't run that much through it by then and was just curious-- there was significant leakage down one post, and on one side it leaked down from the rim. This time I was really abusing it I thought, overloading it on purpose and passing it around at a party. Fuckin pretty much zero leakage in there. I didn't even keep it, it was nasty and hardly anything. But on installation of the 10mm, when the leads went into the posts, I could feel plenty of stickiness down there.

This 10mm is just under 0.7 ohm and I'm liking it at 25W. For scale, I like my 7mm at 15W and my 13mm at 35W. Been trying it at TCR 250 and in TC-Ni with great results. Kinda like it better in TC-Ni at lower temp setting. Then I can vape low and still burn back to white without ever switching modes. I'd already gone back to TC-Ni on the 13mm too for the same reason, broader range of temps in a single TC mode.

I've been on these same two flavors for over 5 weeks and swear to shit they never tasted so good as they do on this 10mm donut. And it stays nice n tidy inside, I feel like there's very little waste here. Not sure if it's the flush inner wall or some other reason that the unit is staying so much cleaner inside than with the 13mm donut? After this many loads w a 13, there would be way thicker film on the cylinder walls and splash cap.

10mm V3 is the absolute ticket. This is the vape I've been hunting all this time.
 

Vape Donkey 650

All vape, no smoke please.
Wow the new heated cup idea could be a game-changer! It could be leak-free, temp-controlled, fully rebuildable, fully-cleanable, and also, hopefully, high-airflow + high performance? :o There are a few cups or ceramic attys out there that have a couple of those details, but not all of those.

I didn't know your boy Paul over in Shenzhen was capable of making such novel new heaters and ceramics on demand to your specs! :rockon:

It just exists as an idea right now, but the one pitfall that might be possible with this design...is the airflow coming in at too high a level above the oil, so that the airflow goes more upwards when the user is drawing on the mouthpiece, rather than swirling the air towards the concentrates and making lots of vape. That is the benefit of bottom airflow, (though not bottom wire-lead holes) you are sure the airflow will pass over the bubbling oil.

I'd like to see fernand's opinion on this idea, since he is one of the few guys here who has actually got the crucible / insert thing to work, but he has also had a couple of phails along the way to get that concept to work. I think upper airflow coming in too high on the deep bowls was one problem he had...:uhh: so that's what I'm thinking here with the new heated cups
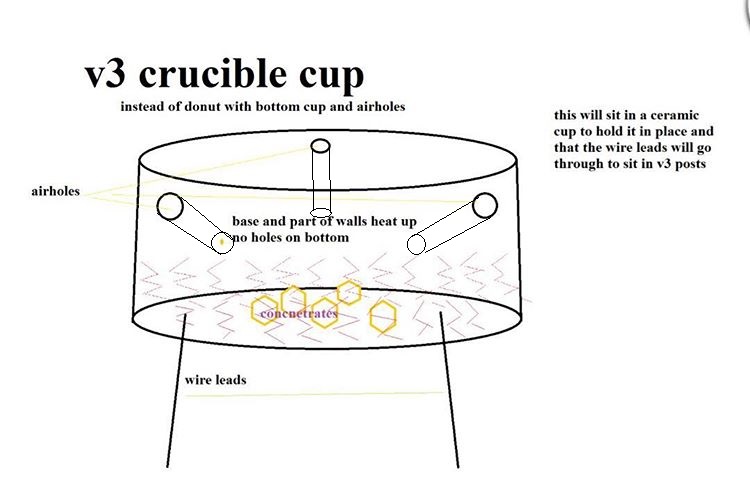
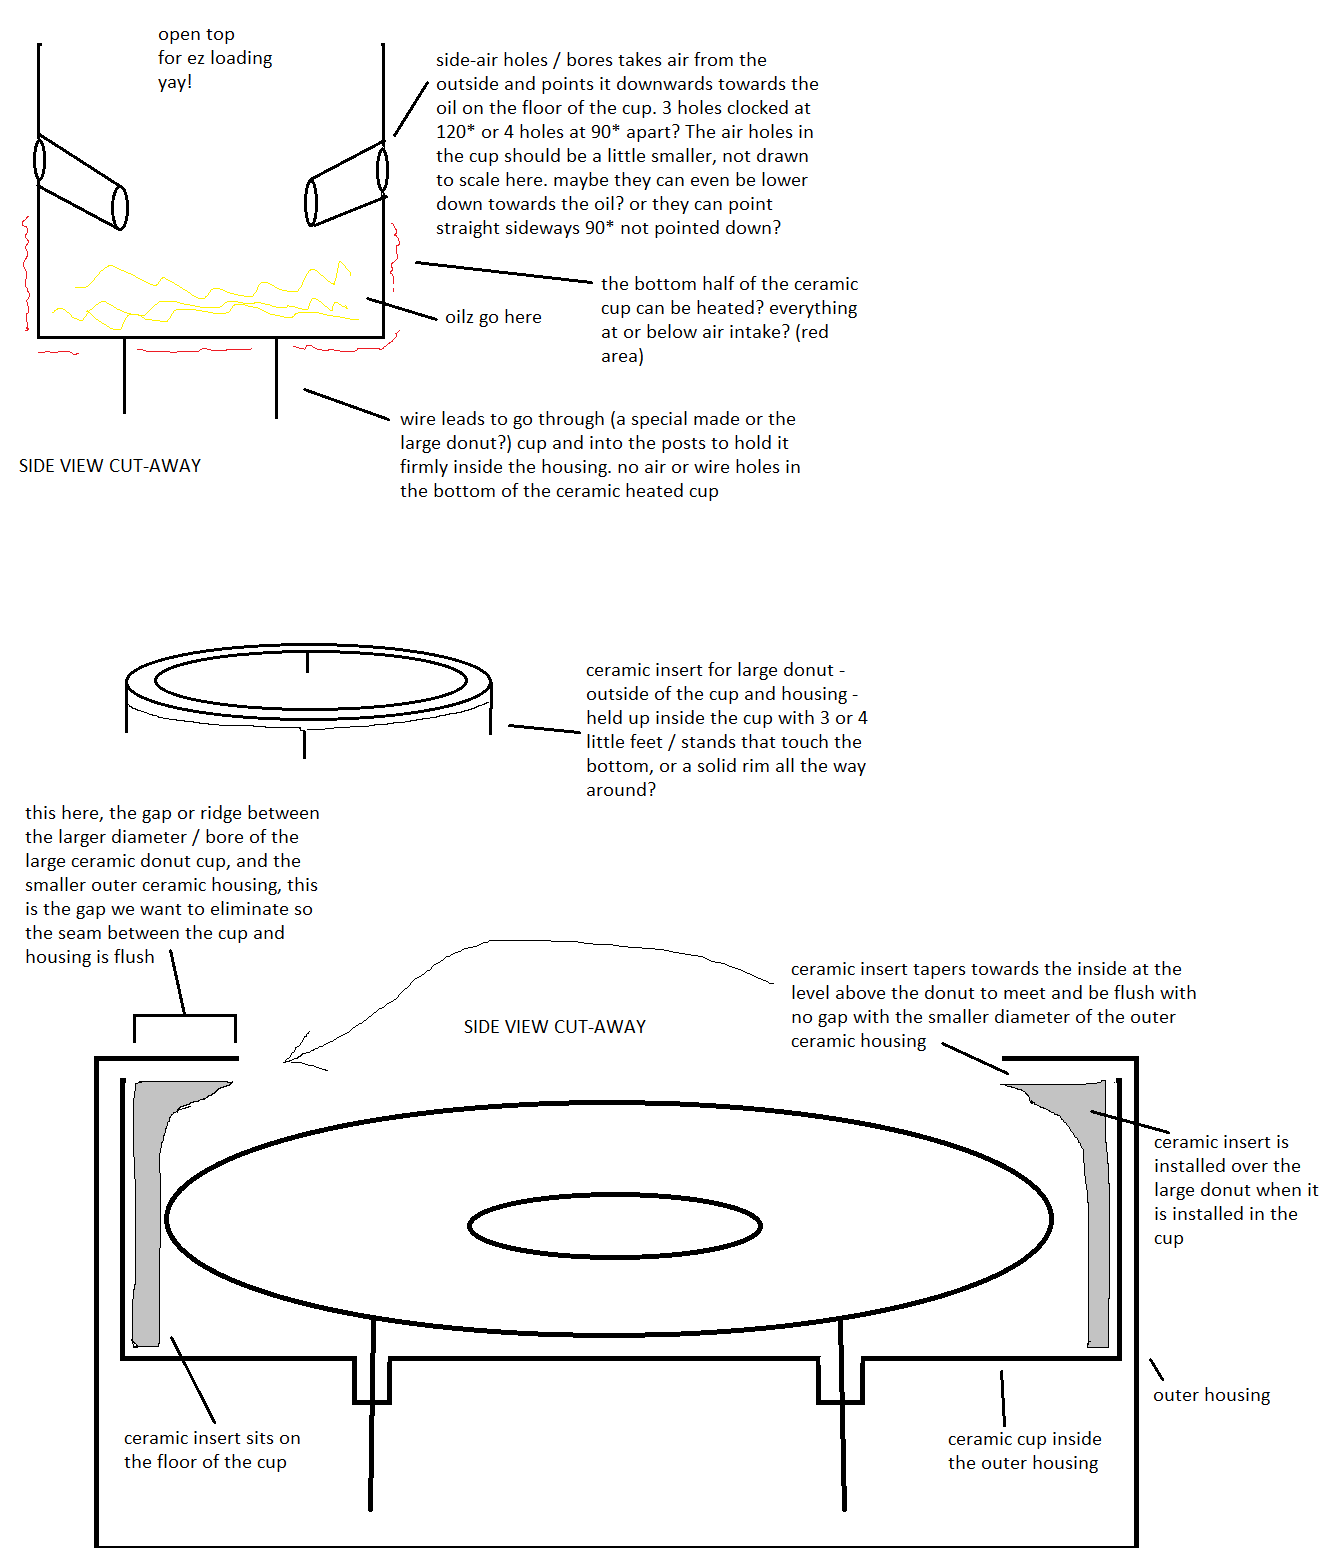
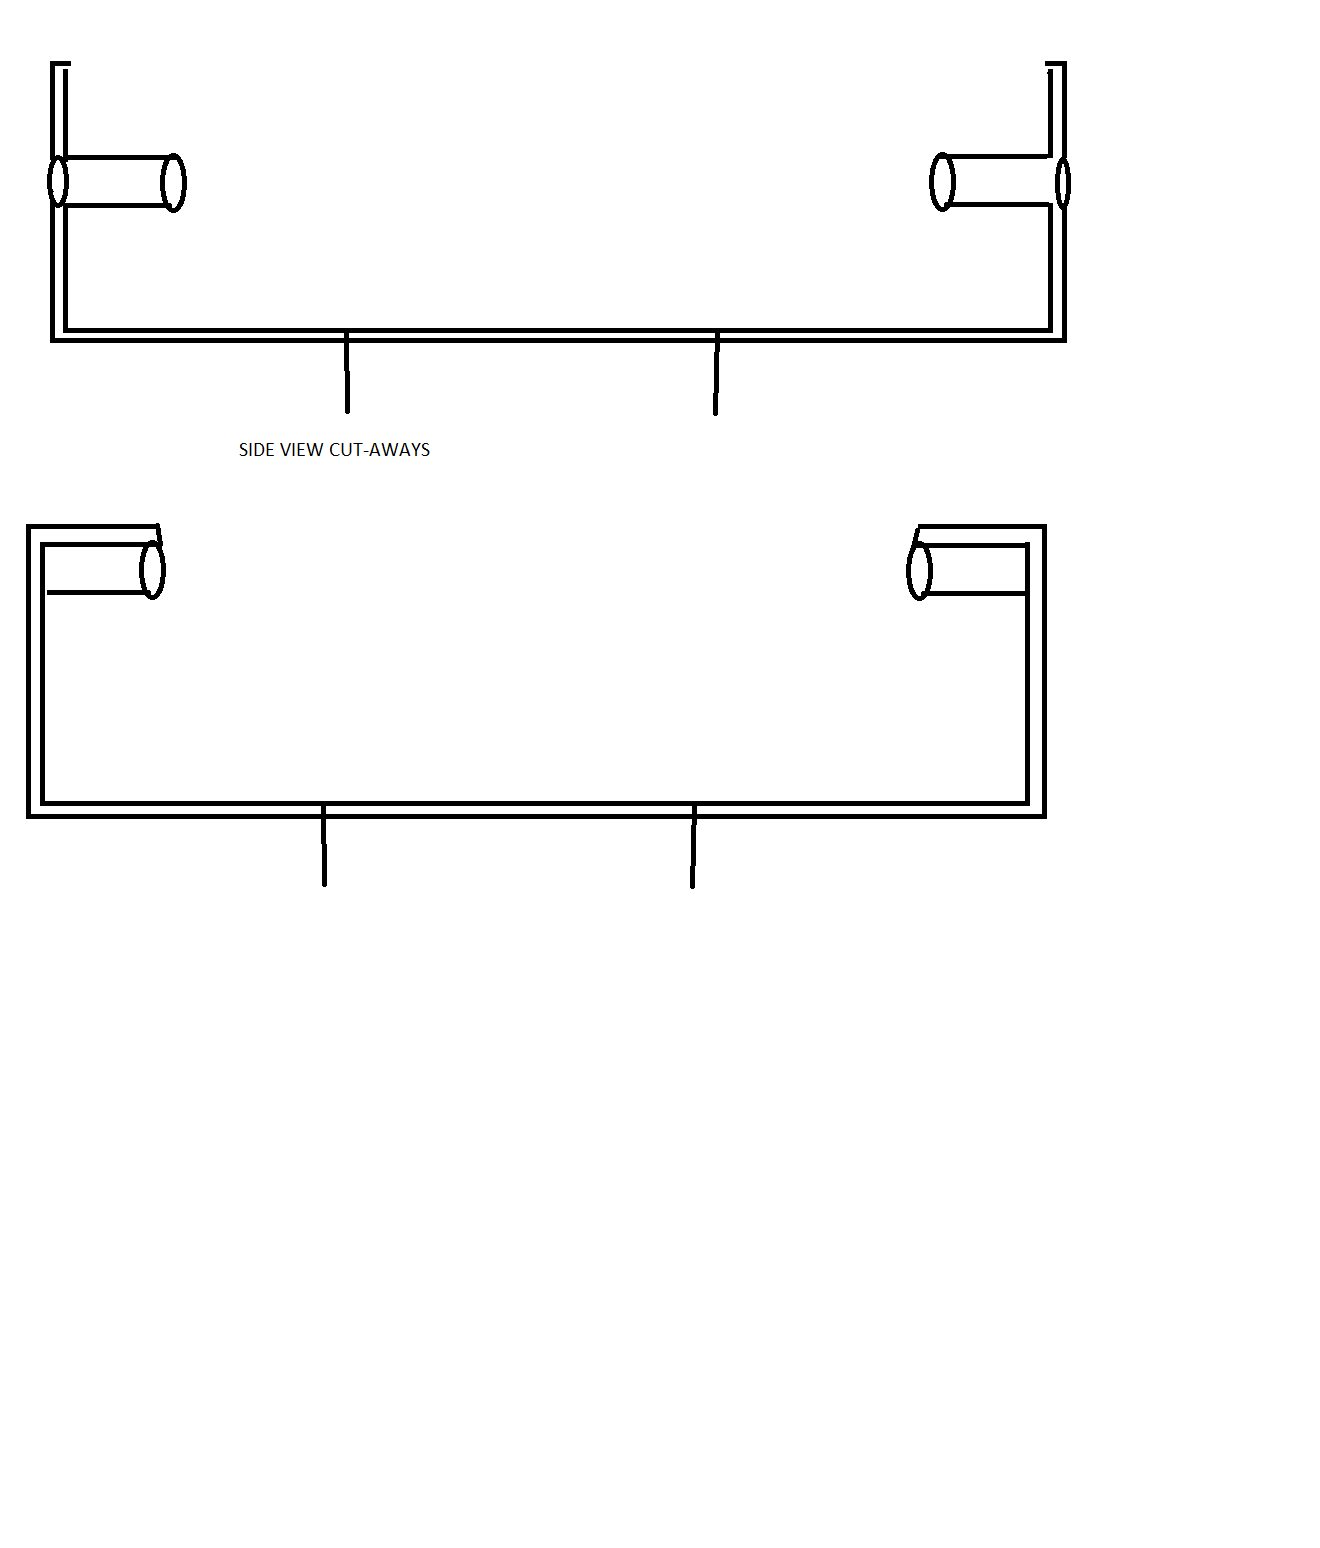
Since we're just throwing ideas around, here's my MS paint-cad design for one way we could solve that potential problem: air-flow posts / tunnels inside the cup to direct air towards the oil? If the air intakes are little tunnels, maybe it would be harder for it to leak. If we just have little holes near the top of the heated cup to provide the airflow, maybe they can be potential routes for oil leakage, as the oil splatters during vape usage? :huh:

9t7fBSf.jpg


nACavP8.jpg


Also, as has been noted with the gap or ridge with the large V3 donut cups, maybe we can make a ceramic insert to go over the donut and eliminate that gap? It would be like a donut shaped gasket that goes inside the cup, over the donut. I was thinking if you can make a new large cup for the large donut that has this ridge or gap eliminated already, like the medium sized cups, but if the large cup was like this, then it would be really hard to remove / install the large donut, so I think a removable insert / gasket is the best way to solve this problem if the large donut will still be a thing for us? I think that gap is the biggest flaw on the large v3 right now, which is a hard-to-scrape, reclaim accumulating area that is typically too far from the donut and too cool for oil sitting there to get vaped. :shrug:

and after i looked at this pics, and looking at some of my V3s and large cups, they aren't as deep as my or matt's drawings make them seem. Maybe the high placement of the airflow won't be an obstacle to lots of vape production like i think?

edit: so maybe something like this would be better? a little closer to the scale and shape that it would really be. we can make it with as many air flow holes around the top as we want. 3? 4? 6? 8 air holes? I think more numerous, small sized air holes would be better than fewer, large air holes because they will be less likely to get clogged and might provide a more even, swirling air vortex to toss air at that heated oil and make lots of vape, minimize cool spots :nod:

gyxLn9l.jpg
 
Last edited:

Vape Donkey 650

All vape, no smoke please.
@divinetribe, also, in your quest towards finding that ultimate TC mod that is relatively reliable, high-performance, and inexpensive, with TCR and good TC performance with all your products, both 18650, single, dual, and internal also? I would humbly nominate the evic basic and evic dual, or just to be safe the evic two mini

Several of us here are enjoying our tiny evic basics. The small 1500mah charge won't drive the big donut for a very long time, but for the small and medium it's not bad. As for the VTC dual, I haven't gotten one yet, (hard for me to justify yet-another mod purchase) but I think I would get this dual-cell evic if I sold a mod to a friend and got a new one. It being joyetech, running the same software, I would imagine it works just as well as their other mods. I like how you can choose between it being a single or double cell mod by switching the battery case. (sorry @OF, no running a single cell with the double-cell case and using the empty space as your stash spot on this one:bang:)

If you're interested in better mods, with completely customizable TCR curves, dna200 devices (and new dna75 devices too) come with software from evolv called escribe. It's a great software (I helped work on it in early stages, but I really believe it is great!). I believe it is Mac and PC compatible, but was originally PC only - I'm back to a custom OS now, that's why I sold off my dna200s. The software allows you to customize everything, even the screen layout. They are also great mod chips, and both dna200 and the new dna75 are supposed to work. I don't and haven't owned any of the dna75's, but I have had plenty of dna200 devices and loved them. My next purchase will be a dna75 - maybe we can start building our own TCR curves for the v3 (and v2.x's). That would be our best option, now that I think about it!

Is there anything to suggest a DNA device can do it better than the Joyetechs?

It comes down to tweaking the mod TCR for each specific donut assembly AND for a specific temp range, and then re-checking the temp. As long as that works, and our display matches the oil temp, say between 300 and 500 deg F, we're doing great.

I'm not sure what type of TCR curve the Joyetechs use, if any (it may be linear), but with the escribe software, DNA devices have a fully customizable curve, so there's that. Since we are talking a more complex heating element than a simple wire (regular "standard TCR curve" from the manufacturer is designed to work with a bare or wicked wire coil), a customizable curve would be super helpful here IMO, but it would be a TON of trial and error, since we are working with a nontraditional system here (more than just a coil). I think I'll grab a dna75 next and get to work!


I have been thinking about this too. For sure this chipset can do alot more than the joyetech firmware, but how much of it will actually help us get accurate repeatable precise TC on our donuts? I took a look at the escribe software manual, and it's loaded with tons of features, but many of them have nothing to do with controling your coils.

Why do all the DNA 75/200 mods have to be so large and brick shaped and most of them priced over $200? :o chepeast one i found is about 150

That is cool that we have a software developer here to rep the evolv software...maybe you could explain this to us? :)

The concept is becoming more popular. This vendor says these ceramic units cannot be used in TC mode. I've asked for details, we'll see what he says.

Probably kanthal wire if they tell you not to TC. Kanthal = do not want

Plus it seems matt is trying to one-up these fools with his ideas for the rebuildable, temp-controllable crucible cup :tup: this looks like a copy of w9's kiss attys


I would suggest building a loading tool onto the bottom of the mouthpiece/splashcup area that would basically suspend the oil right above the donut/cup. My 2 cents.

An alternative to building a loading tool into the bottom of the splashcup/mouthpiece would be to offer a separate ceramic loading tool that fits on the atomizer the same way the mouthpiece does. This would suspend the concentrate directly over the crucible/cup. The user would then fire the atomizer to get the concentrate to drip off the loading tool and onto the donut/cup. Remove the tool and replace it with the mouthpiece. Just an idea.

I like these ideas :tup:

I also wanted adjustable air but that is easily achieved with a silicone band around the housing. I cover 90% of the air holes actually.

Steve what kind of silicon band are you using for your air control strip?

Is it just gilding the lily here to ask if it would be possible to use a concentrate pad to increase the surface area? 'course that would probably throw off all the other thermal/mass calculations, hmm? Just wonder if it would increase the smoothness and mitigate pooling somewhat?

It might work, but it would be a reclaim nightmare. I've thought about using a little circle of readyXwick ceramic wick underneath my large donuts, a circle of the wick around the rim of the cup underneath the donut, since that seems to be where reclaim pools up. But it hasn't been enough of a problem for me to want to try this. could also put some of that wick or some steel wool rolled into a thin hoop / donut, placed on top of the ceramic donut, to plug that little gap in the cup / housing


Wow @Vape Donkey 650, I'm so happy to see your PASSION! I'm not saying this with any sort of irony. You really should just get a better IR thermometer, thirteen bucks!.

Yea, a passion for tasty, medical-grade, low-temp dabbing? And being able to do it cleanly in a device that's easy to maintain? yep. :nod: A better IR gun is on my amazon list to-buy list now, there's a few items i have for that type of shopping that i haven't done in a while :bang:

What I want the apparatus to do, is to allow the user to dial up say 380 degrees F, and have the stuff bubbling at about 380 degrees. Because the stuff that boils off below 380 has a more alerting effect and above 380 has a more sedating effect, based on trial and error. That's pretty basic, but a damned good start. At the very low temps below 350 it's a specific light effect that's different yet.

So we might want to be able to dial in exactly what we want at the moment, learn what strains and what temps do what, what's in tune with our personal endocannabinoid deficiencies. That's the reason for the interest in accurate reproducible temp and a delivery system like an interchangeable alumina cup with no mixing or goopy leaking. Make sense?

Unless you're just blasting it, how well it makes vapor is mostly just a matter of how air hits the bubbling oil.

Ok, now that you said that, I can see our goals for the TCR and temp control on our mods is slightly different. I just want my screen to display donut temps, you want your screen to actually display the temps of the oil. Trying to do that, involves many more variables, with how much oil / material (and what type?) is loaded on the donut and the airflow being 2 large complicating factors. And I figure you'd need to do some experimenting with a thermocouple getting readings in multiple spots on a donut or crucible fully loaded up with some sort of oil to accomplish what you want? :huh: not just an IR thermometer

I figure you'd end up with a much lower number on your screen than mine, to accomplish the same thing, if you could get it to be accurate, since the temp of your donut will be significantly hotter than your boiling oil to get it to vape.

And yea, i do wanna blast it and get as many of the active compounds out of my oil all at once, (not to be nit-picking them :p) in as few puffs as possible, with a small load on the large donut. Within reasonable temp levels, so it doesn't burn or come close to it, or degrade delicate compounds. I think the donut has to be around 400-430 to do that for me, so I leave out the THCv, CBC and quercetin (whatever that is) but I get almost all the rest
 
Last edited:

Vape Donkey 650

All vape, no smoke please.
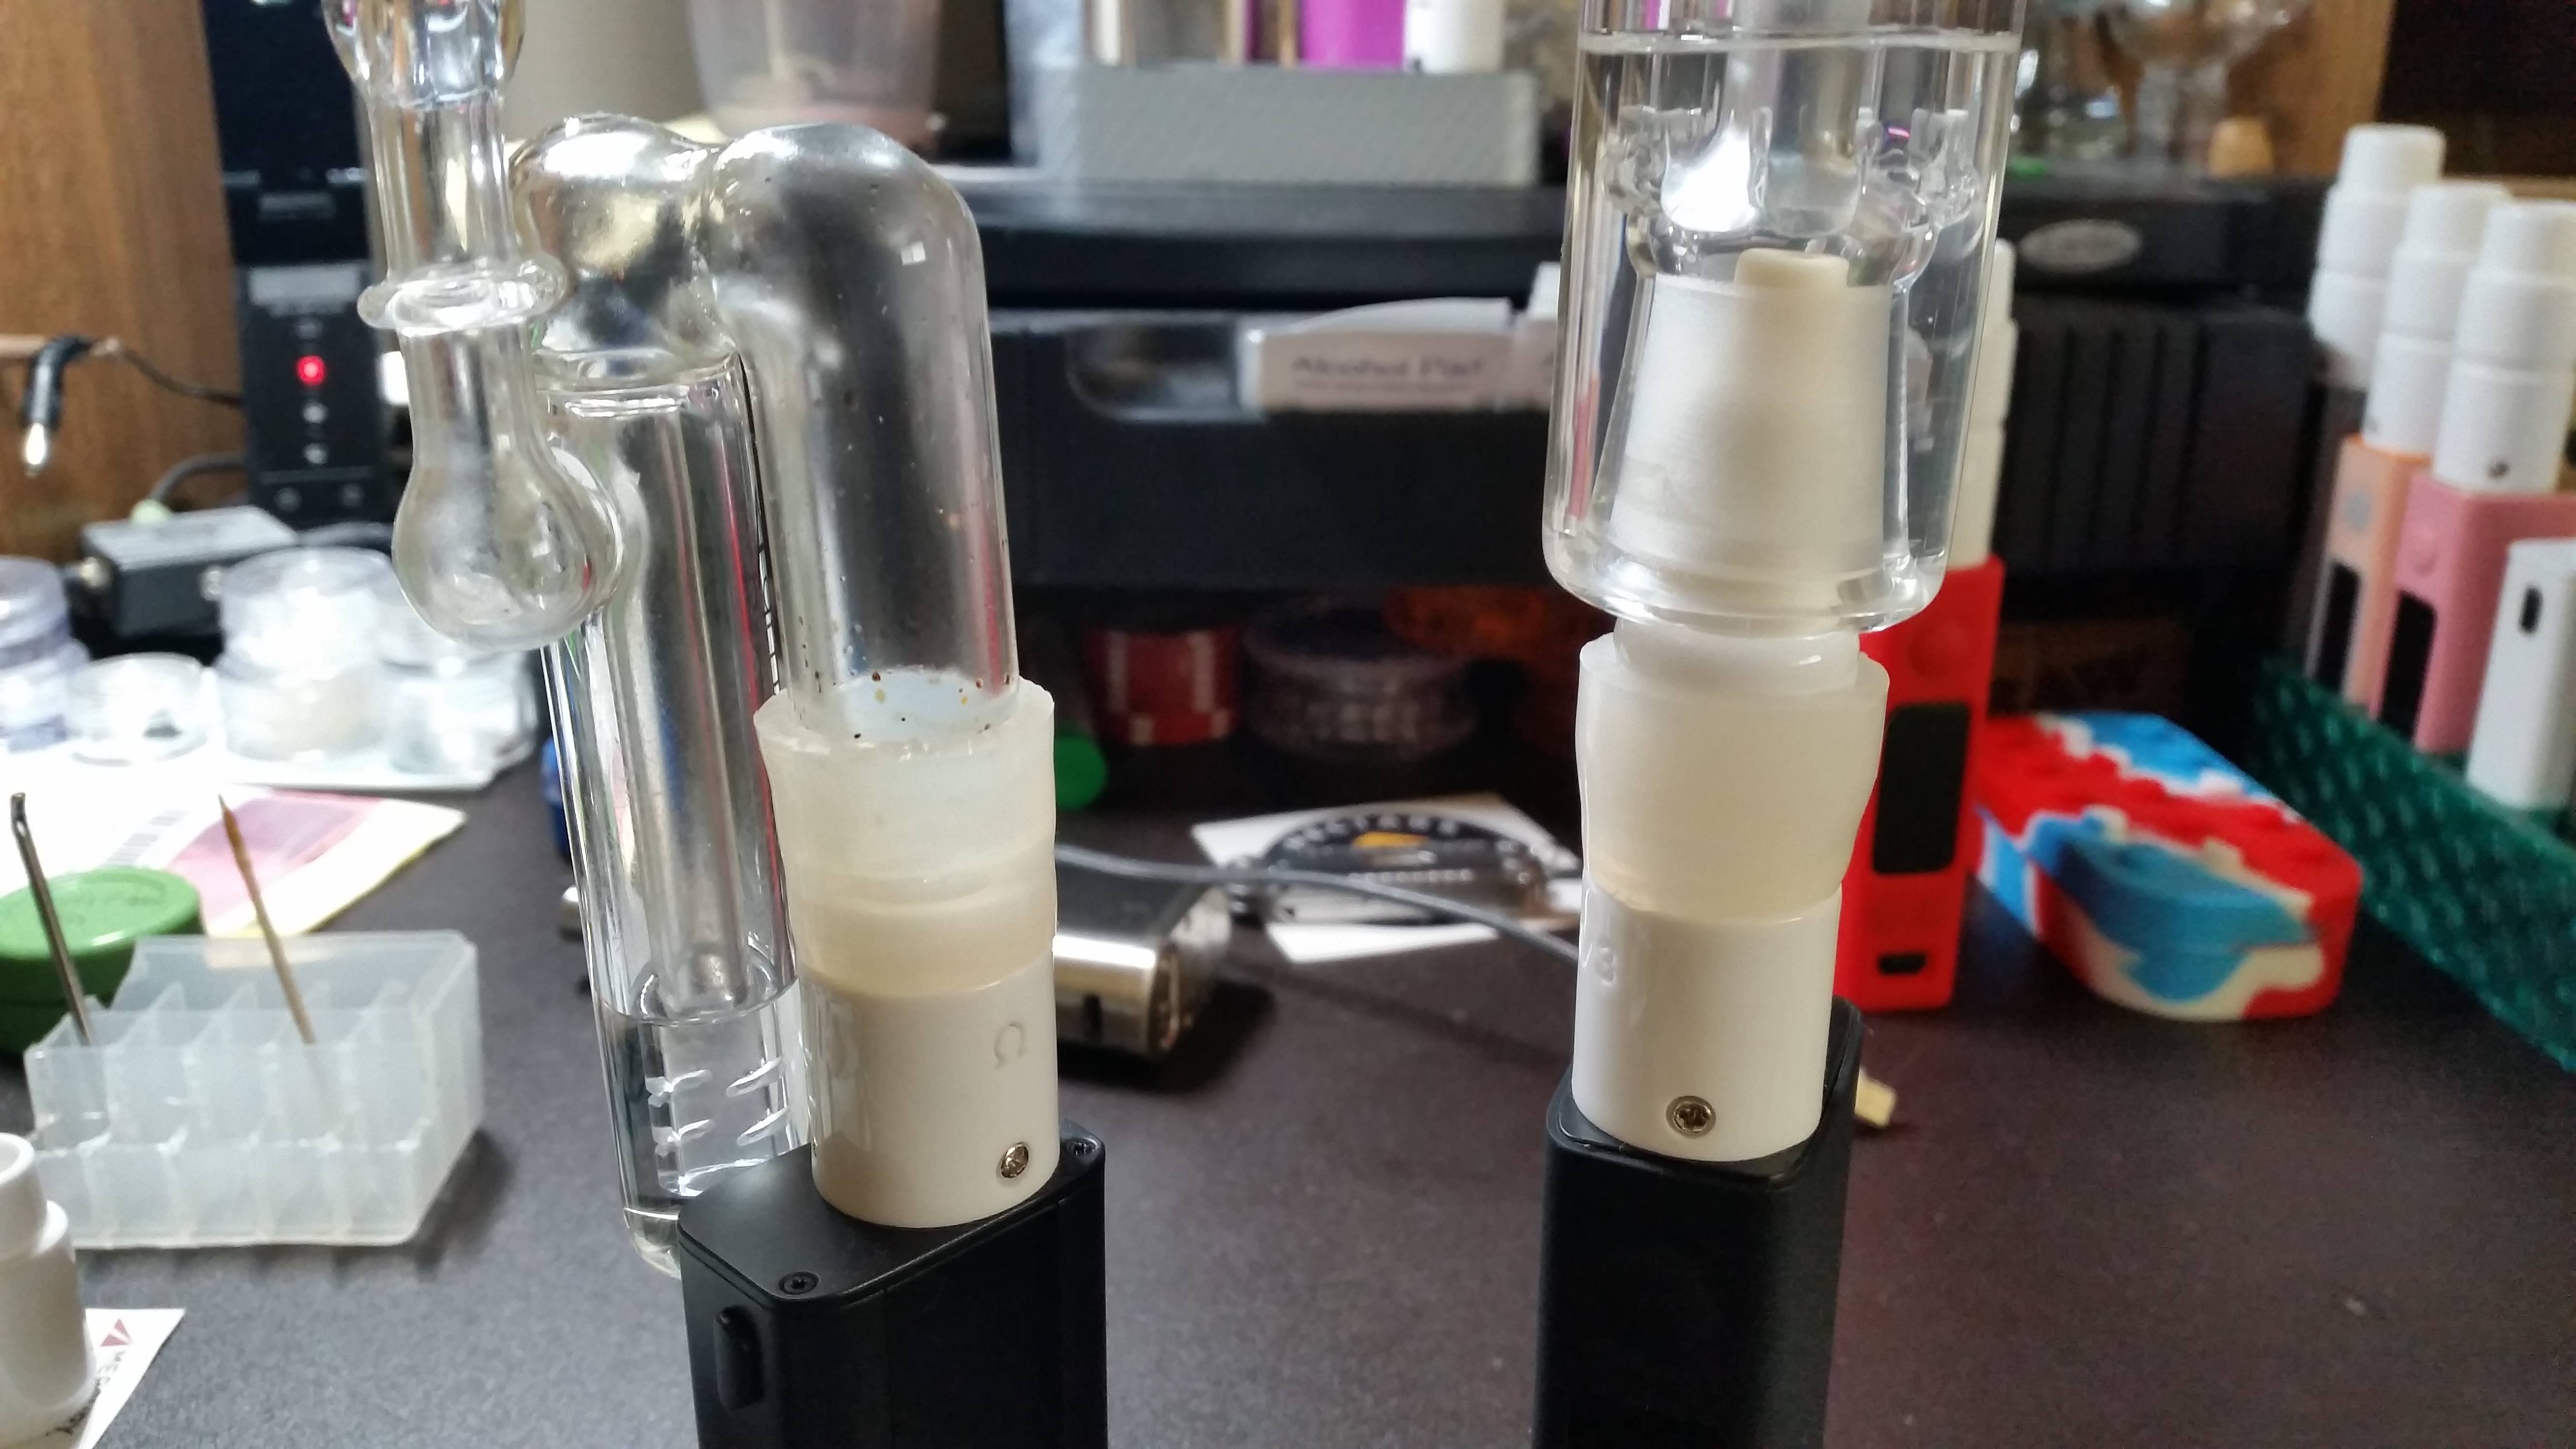
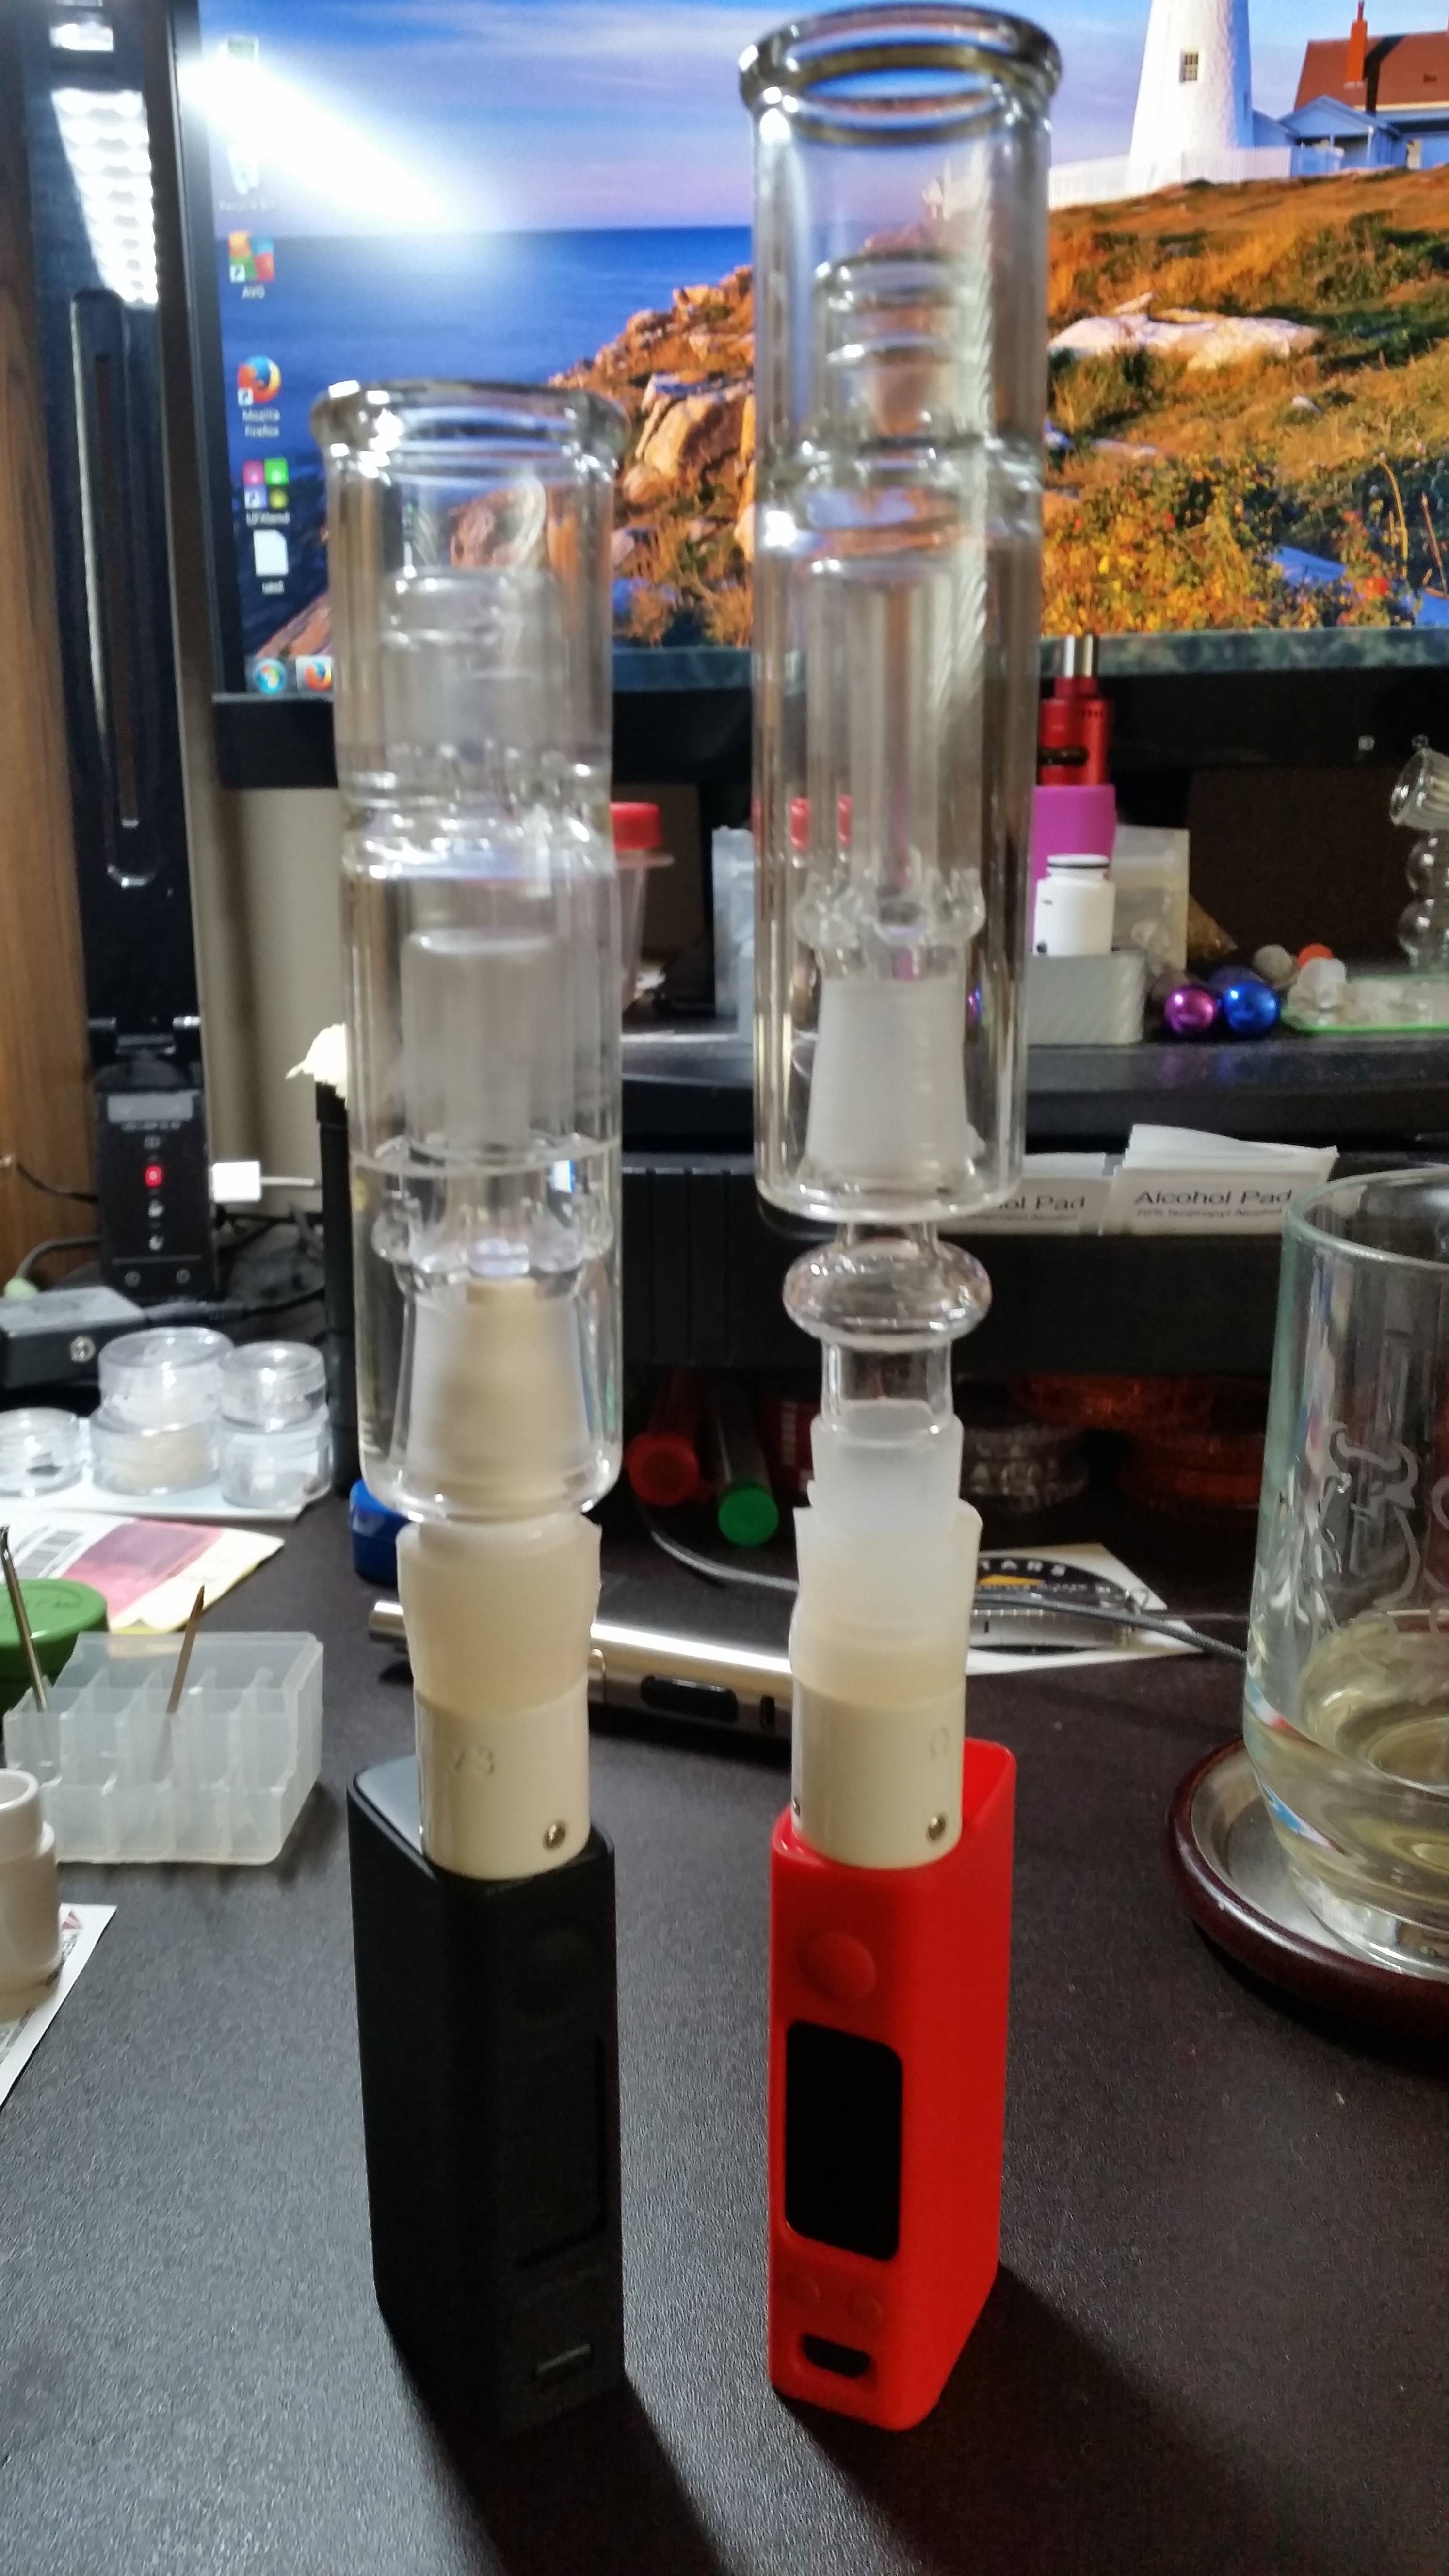
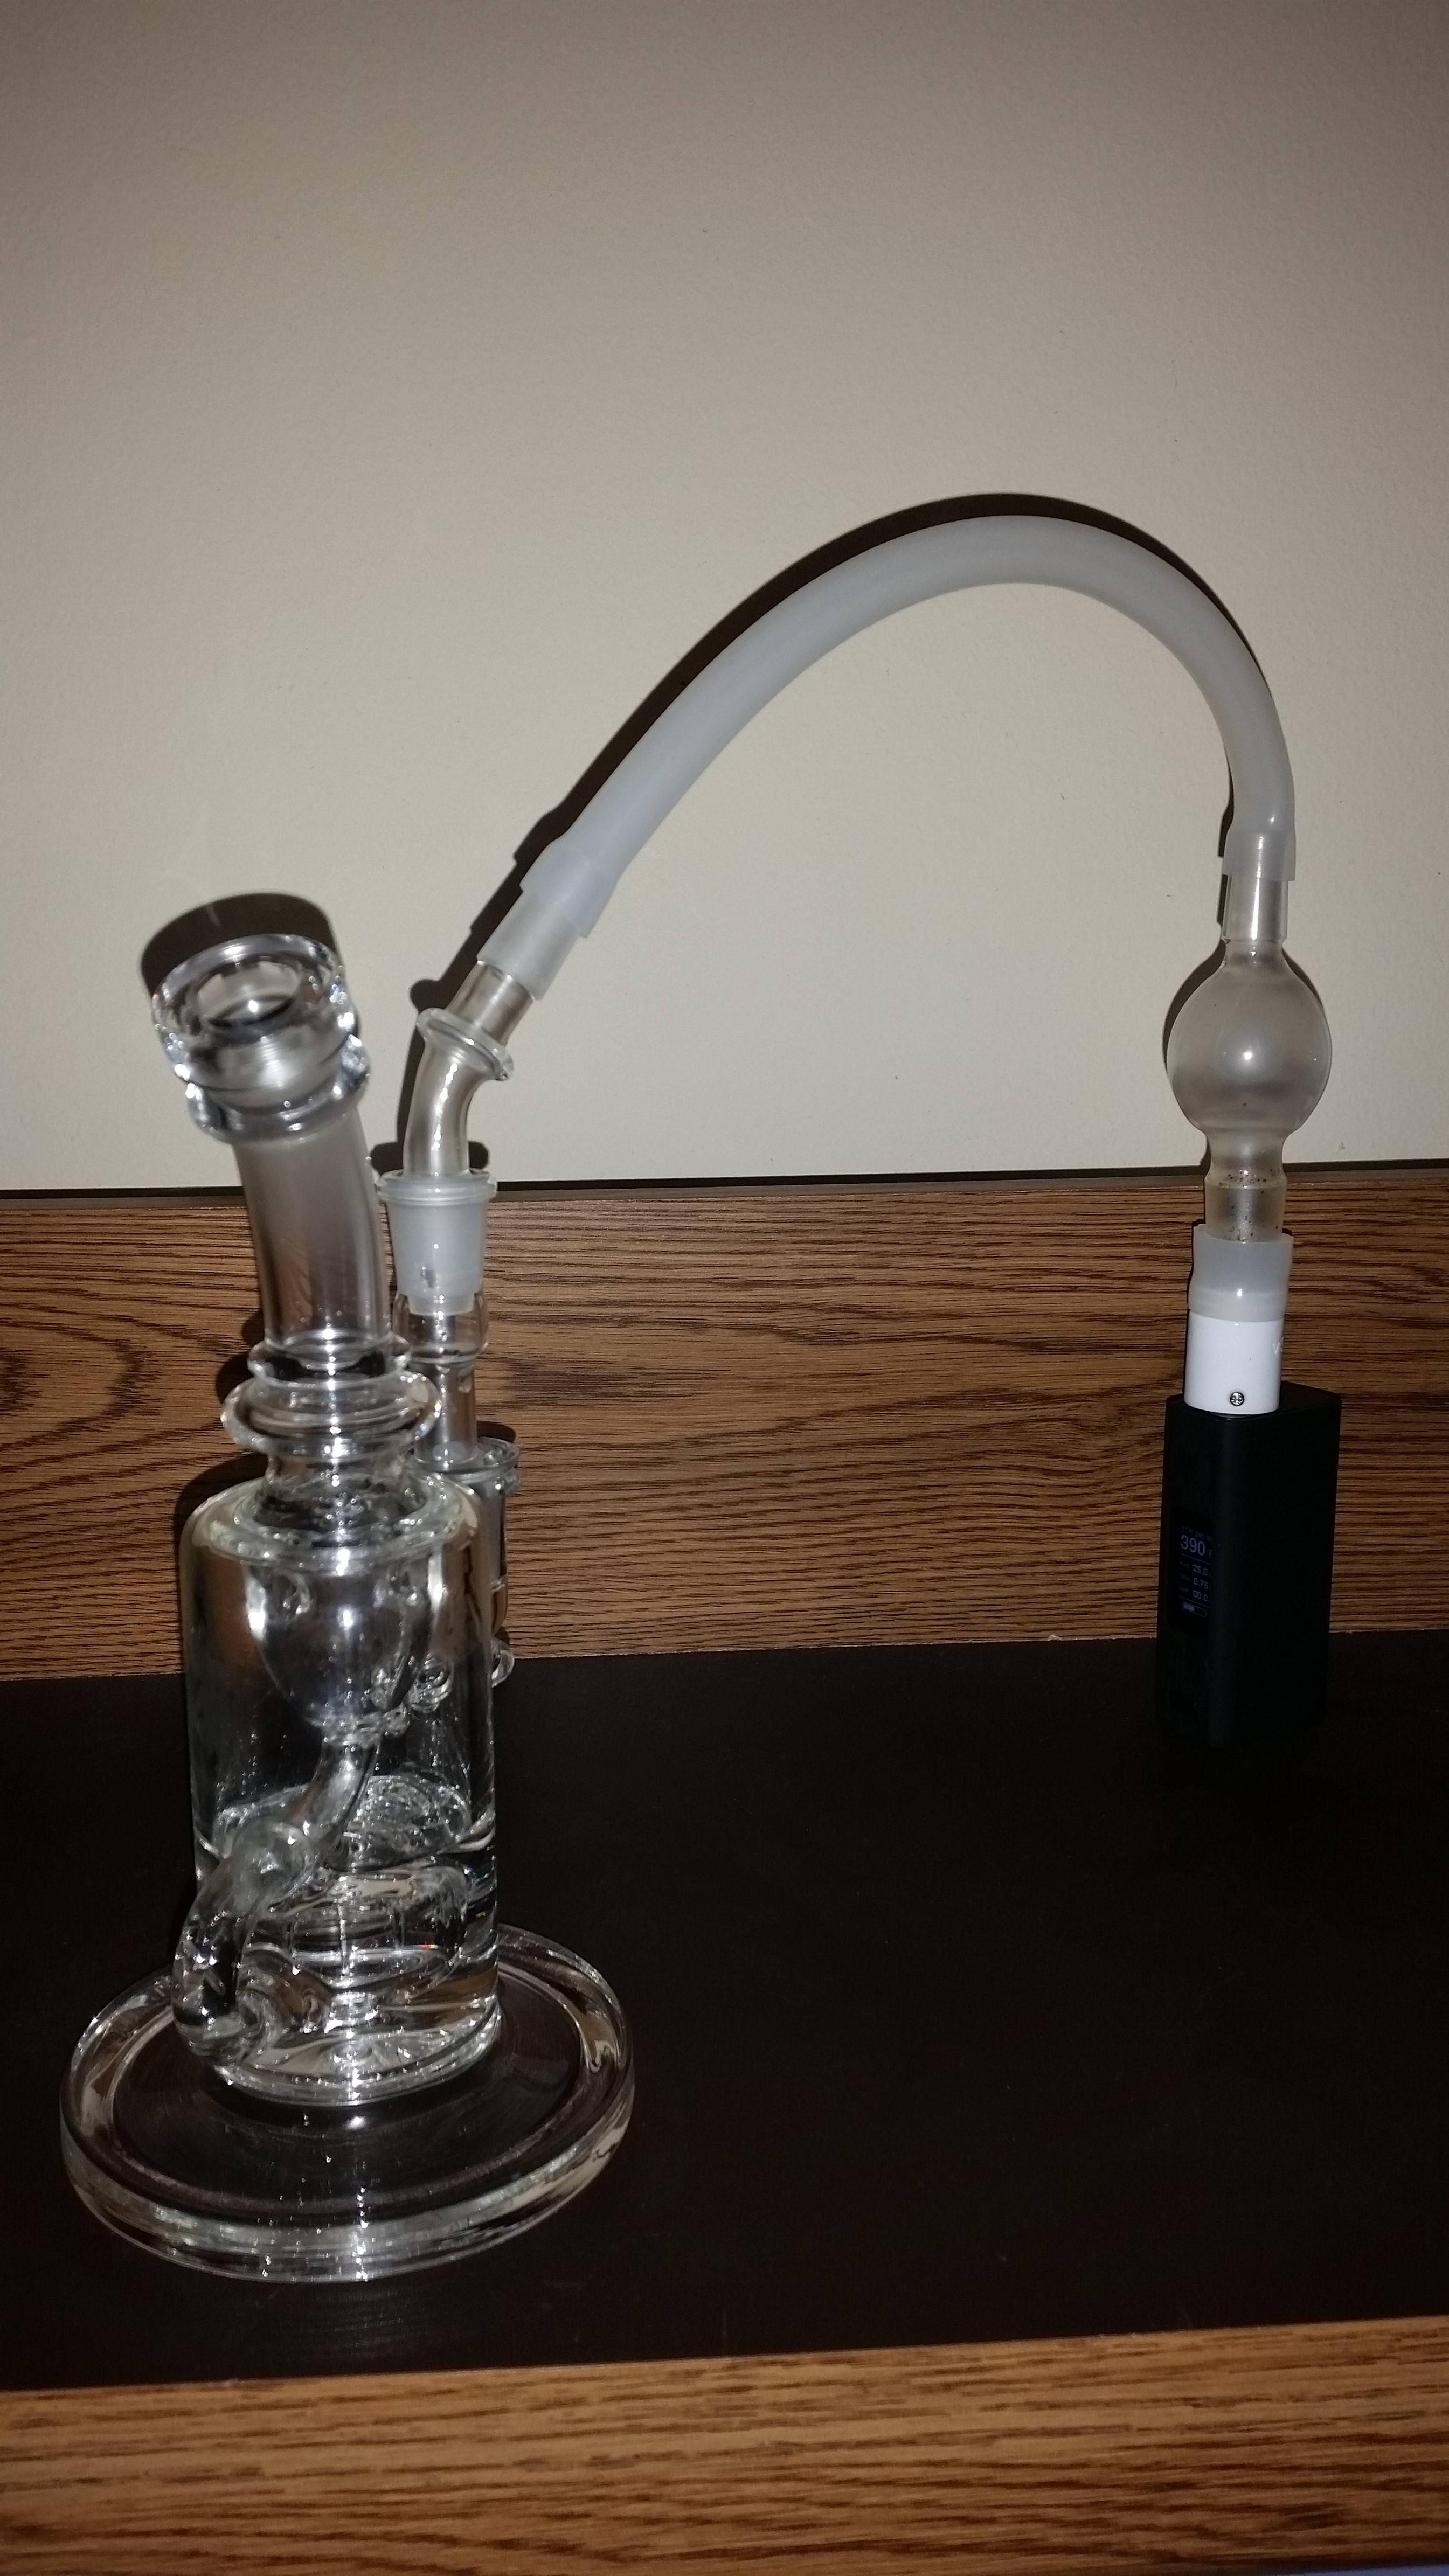
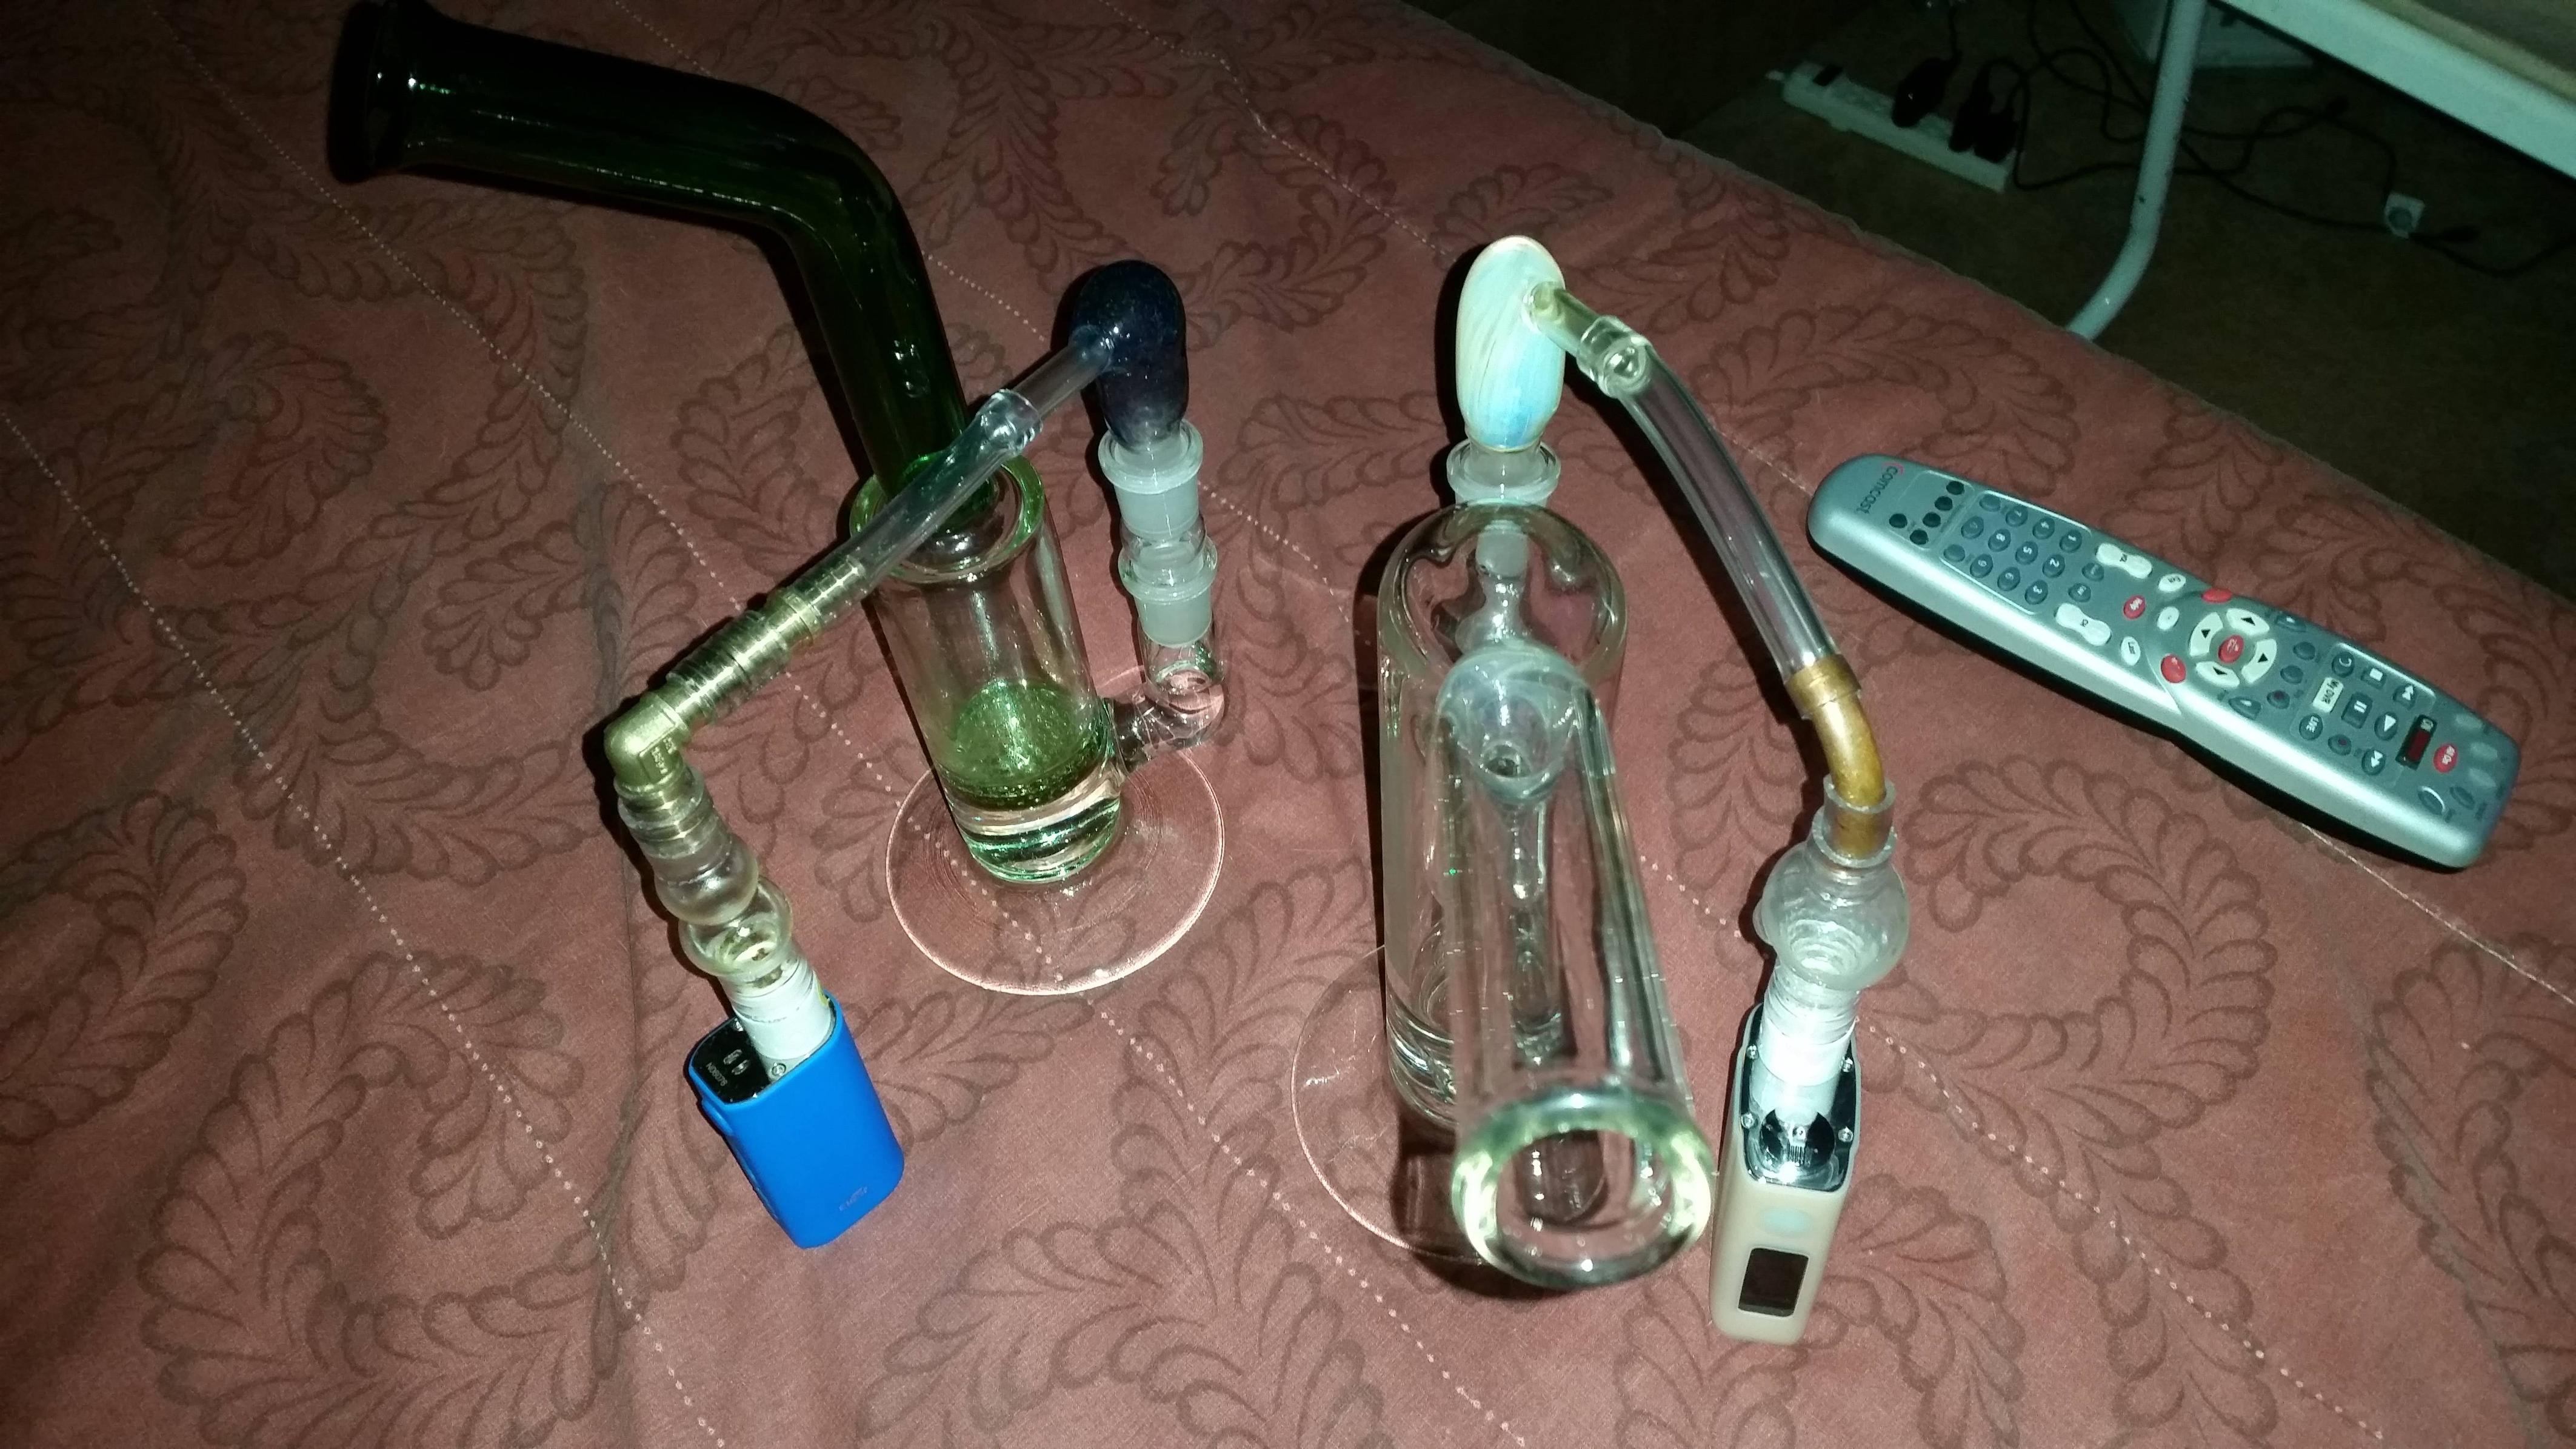
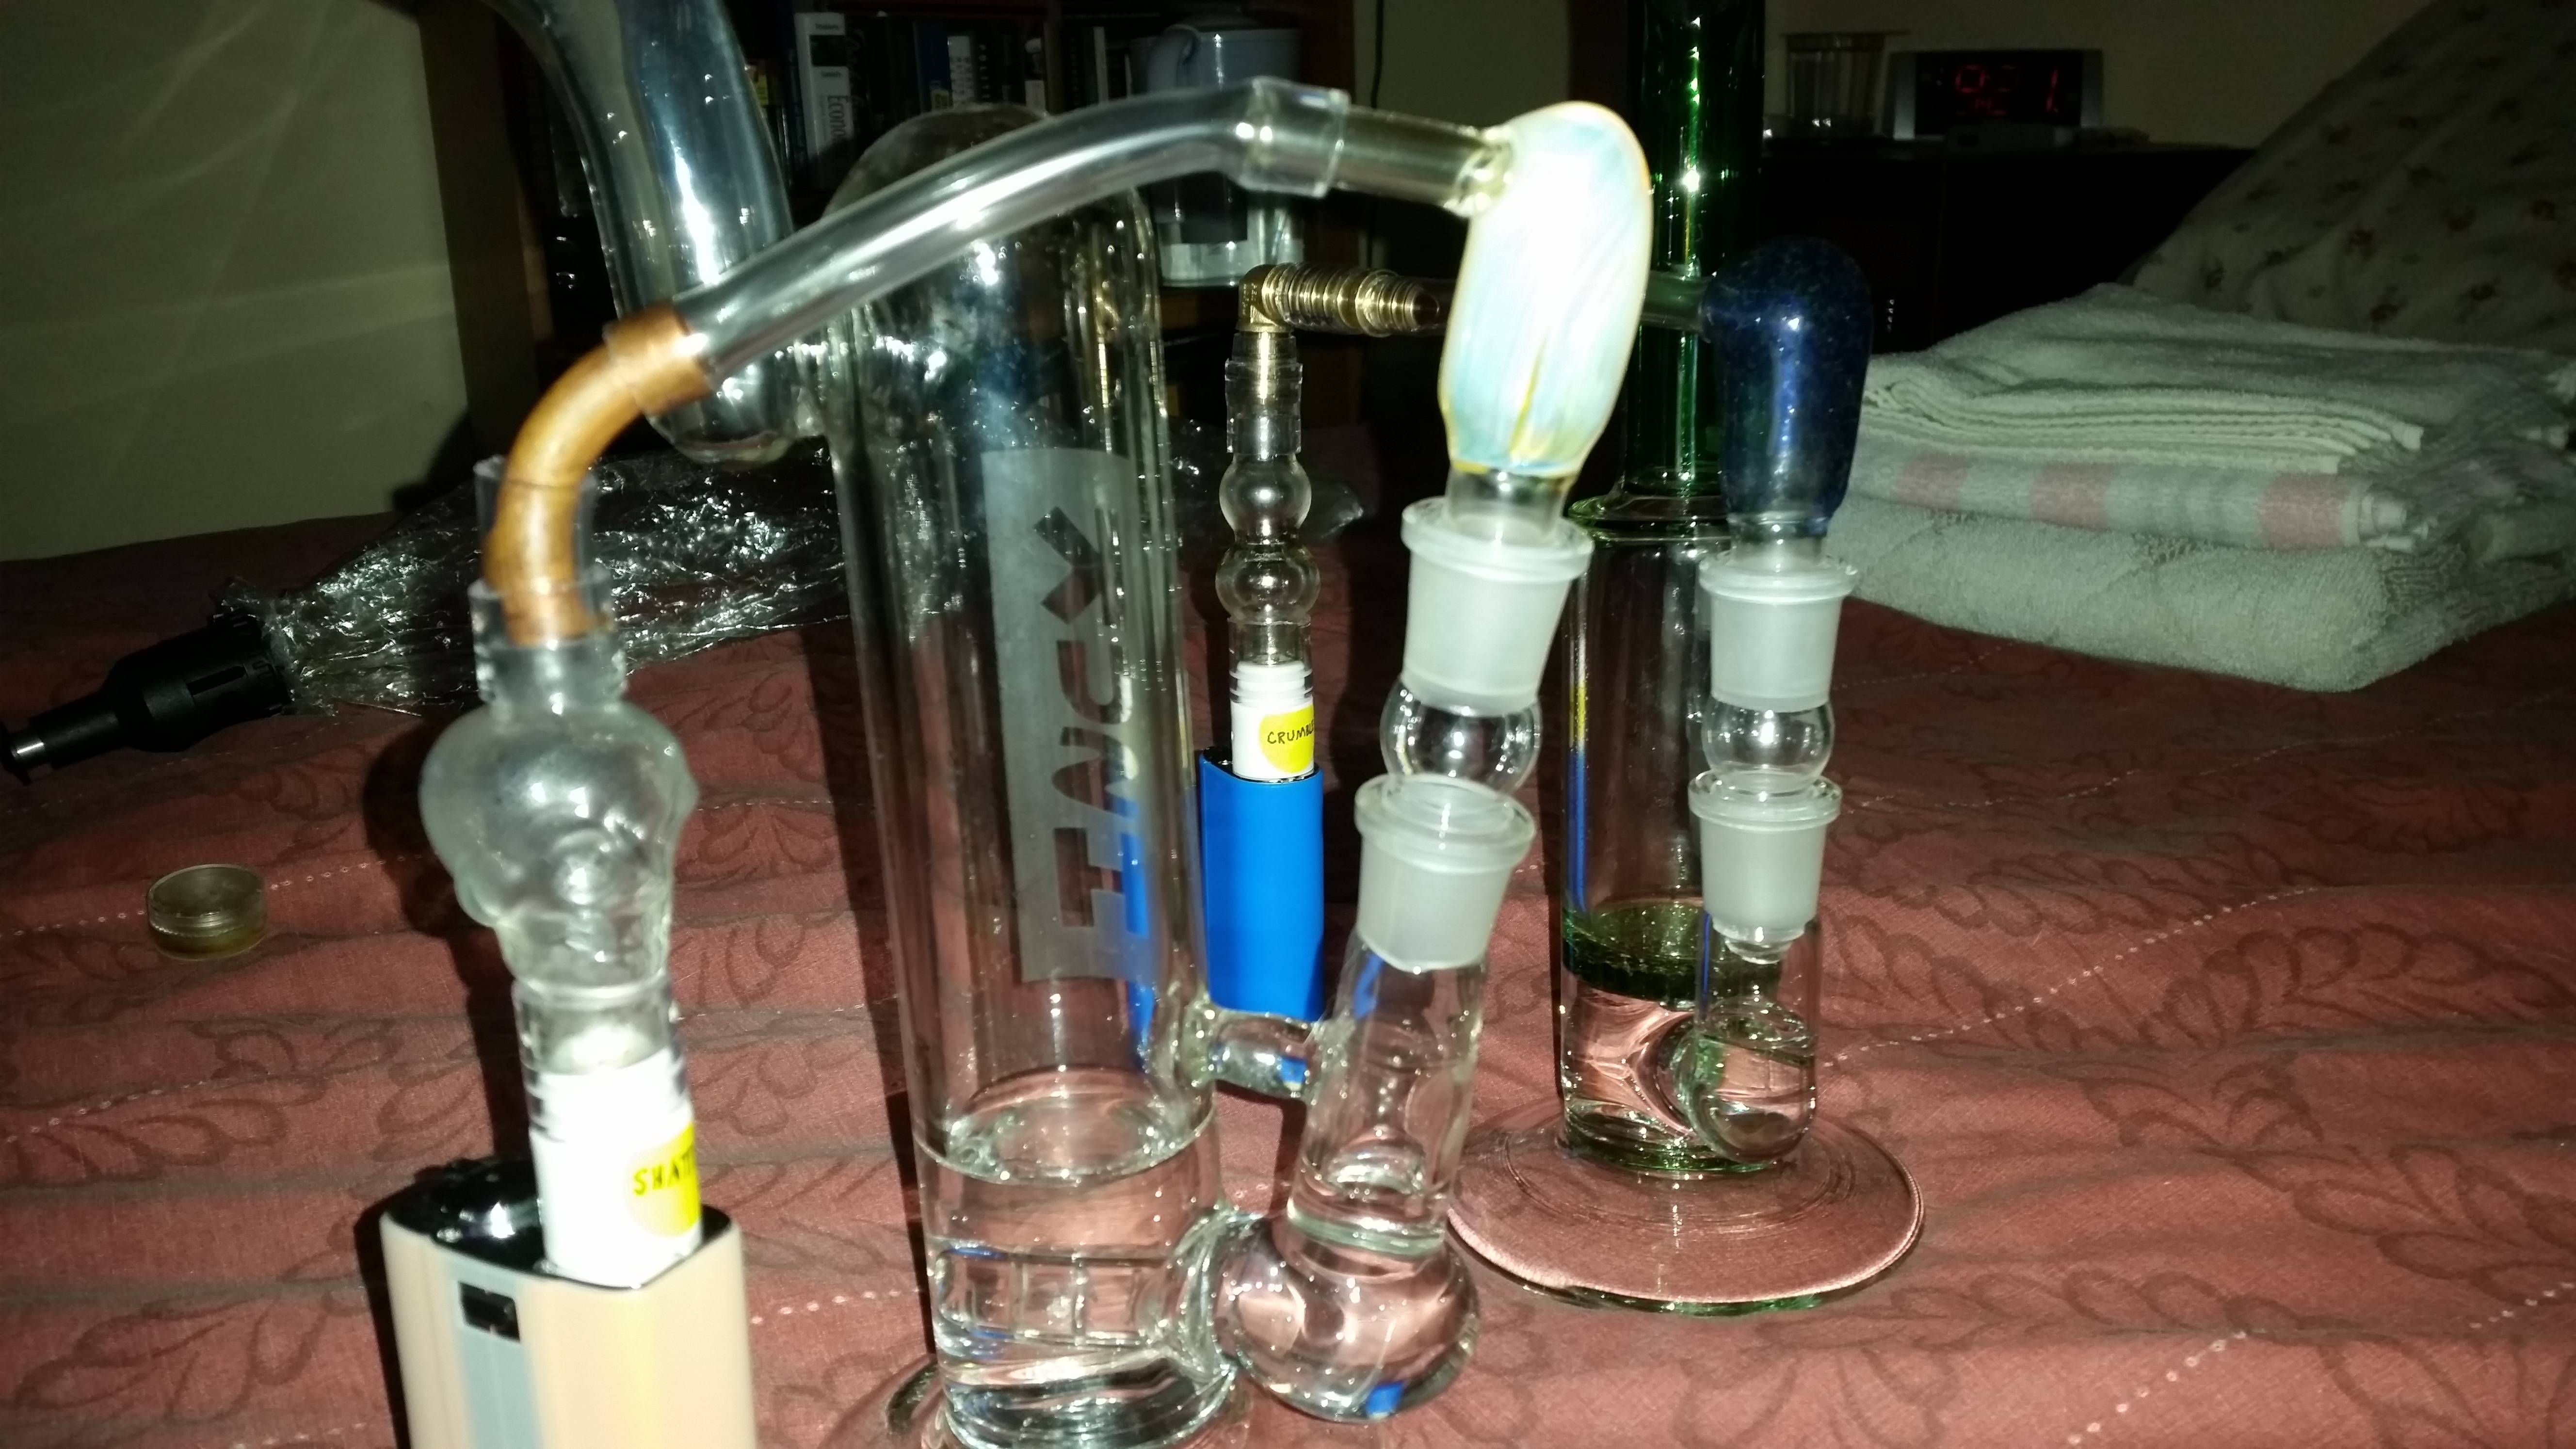
let me switch to compact bubblers and rig attachments for a minute...how are people connecting their v3s to their glass pieces of choice? Steve already showed us how he's doing it. Lucky for him, the V3 mouthpiece easily adapts to an 18mm female slot with a little silicon strip. that's great for 18mm hydratubes where the input is on the bottom. Some complications for smaller 14mm hydratubes then. :hmm:

this is my best solution so far for the PPWT: basically the same thing we were doing with the v2.5 cap stuffed inside the 14mm joint with the silicon atmos mouthpiece holding it snug inside there. Obviously, the v2.5 cap is too small to slide over the larger o-rings on the v3 base, but with alot of force and convincing, I was able to get my 1/2" silicon tubing to slide over the v2.5 cap, leaving a little overlap of that hose to connect over the v3 base. It's pretty firm and won't come off easily, you can pick it up from the top, but it does have a little bit of flex / wobble which I don't like. :( we can think of a better way to do this, c'mon guys :cuss:

bHfZFnR.jpg


close up of the connections

uf8izuF.jpg


As for the other little piece the aquamizer, that is completely unchanged from how I was using the v2.5 with it, using the same half inch silicon tubing that I'm using for everything these days. For both the aquamizer and PPWT, slipping the silicon tubing over the V3 base is a little harder than the v2.5 base with the bigger diameter, but i still git-er-dun. 9/16" hi-temp medical grade silicon hose (or tygon or PTFE?) would be better, but tubing of this grade / size seems to be made of unobtanium, so far as I've searched :shrug:

edit: this was my alternate idea for the PPWT: 14mm to 18mm M/M adapter with the half inch strip on the bottom. This works, but I don't like it for 2 reasons: the 14mm joint is not tight, so if you pick it up by the top, it comes apart as 2 pieces. Also, with this particular 14/18mm adapter, it makes the overall unit taller by about an inch, which I do not like. :( I could probably source a 14/18mm adapter that is a little shorter, more compact with less space in the middle, but it would still be a loose slip-on fit for the PWT and the 14mm adapter.

AP5op7K.jpg


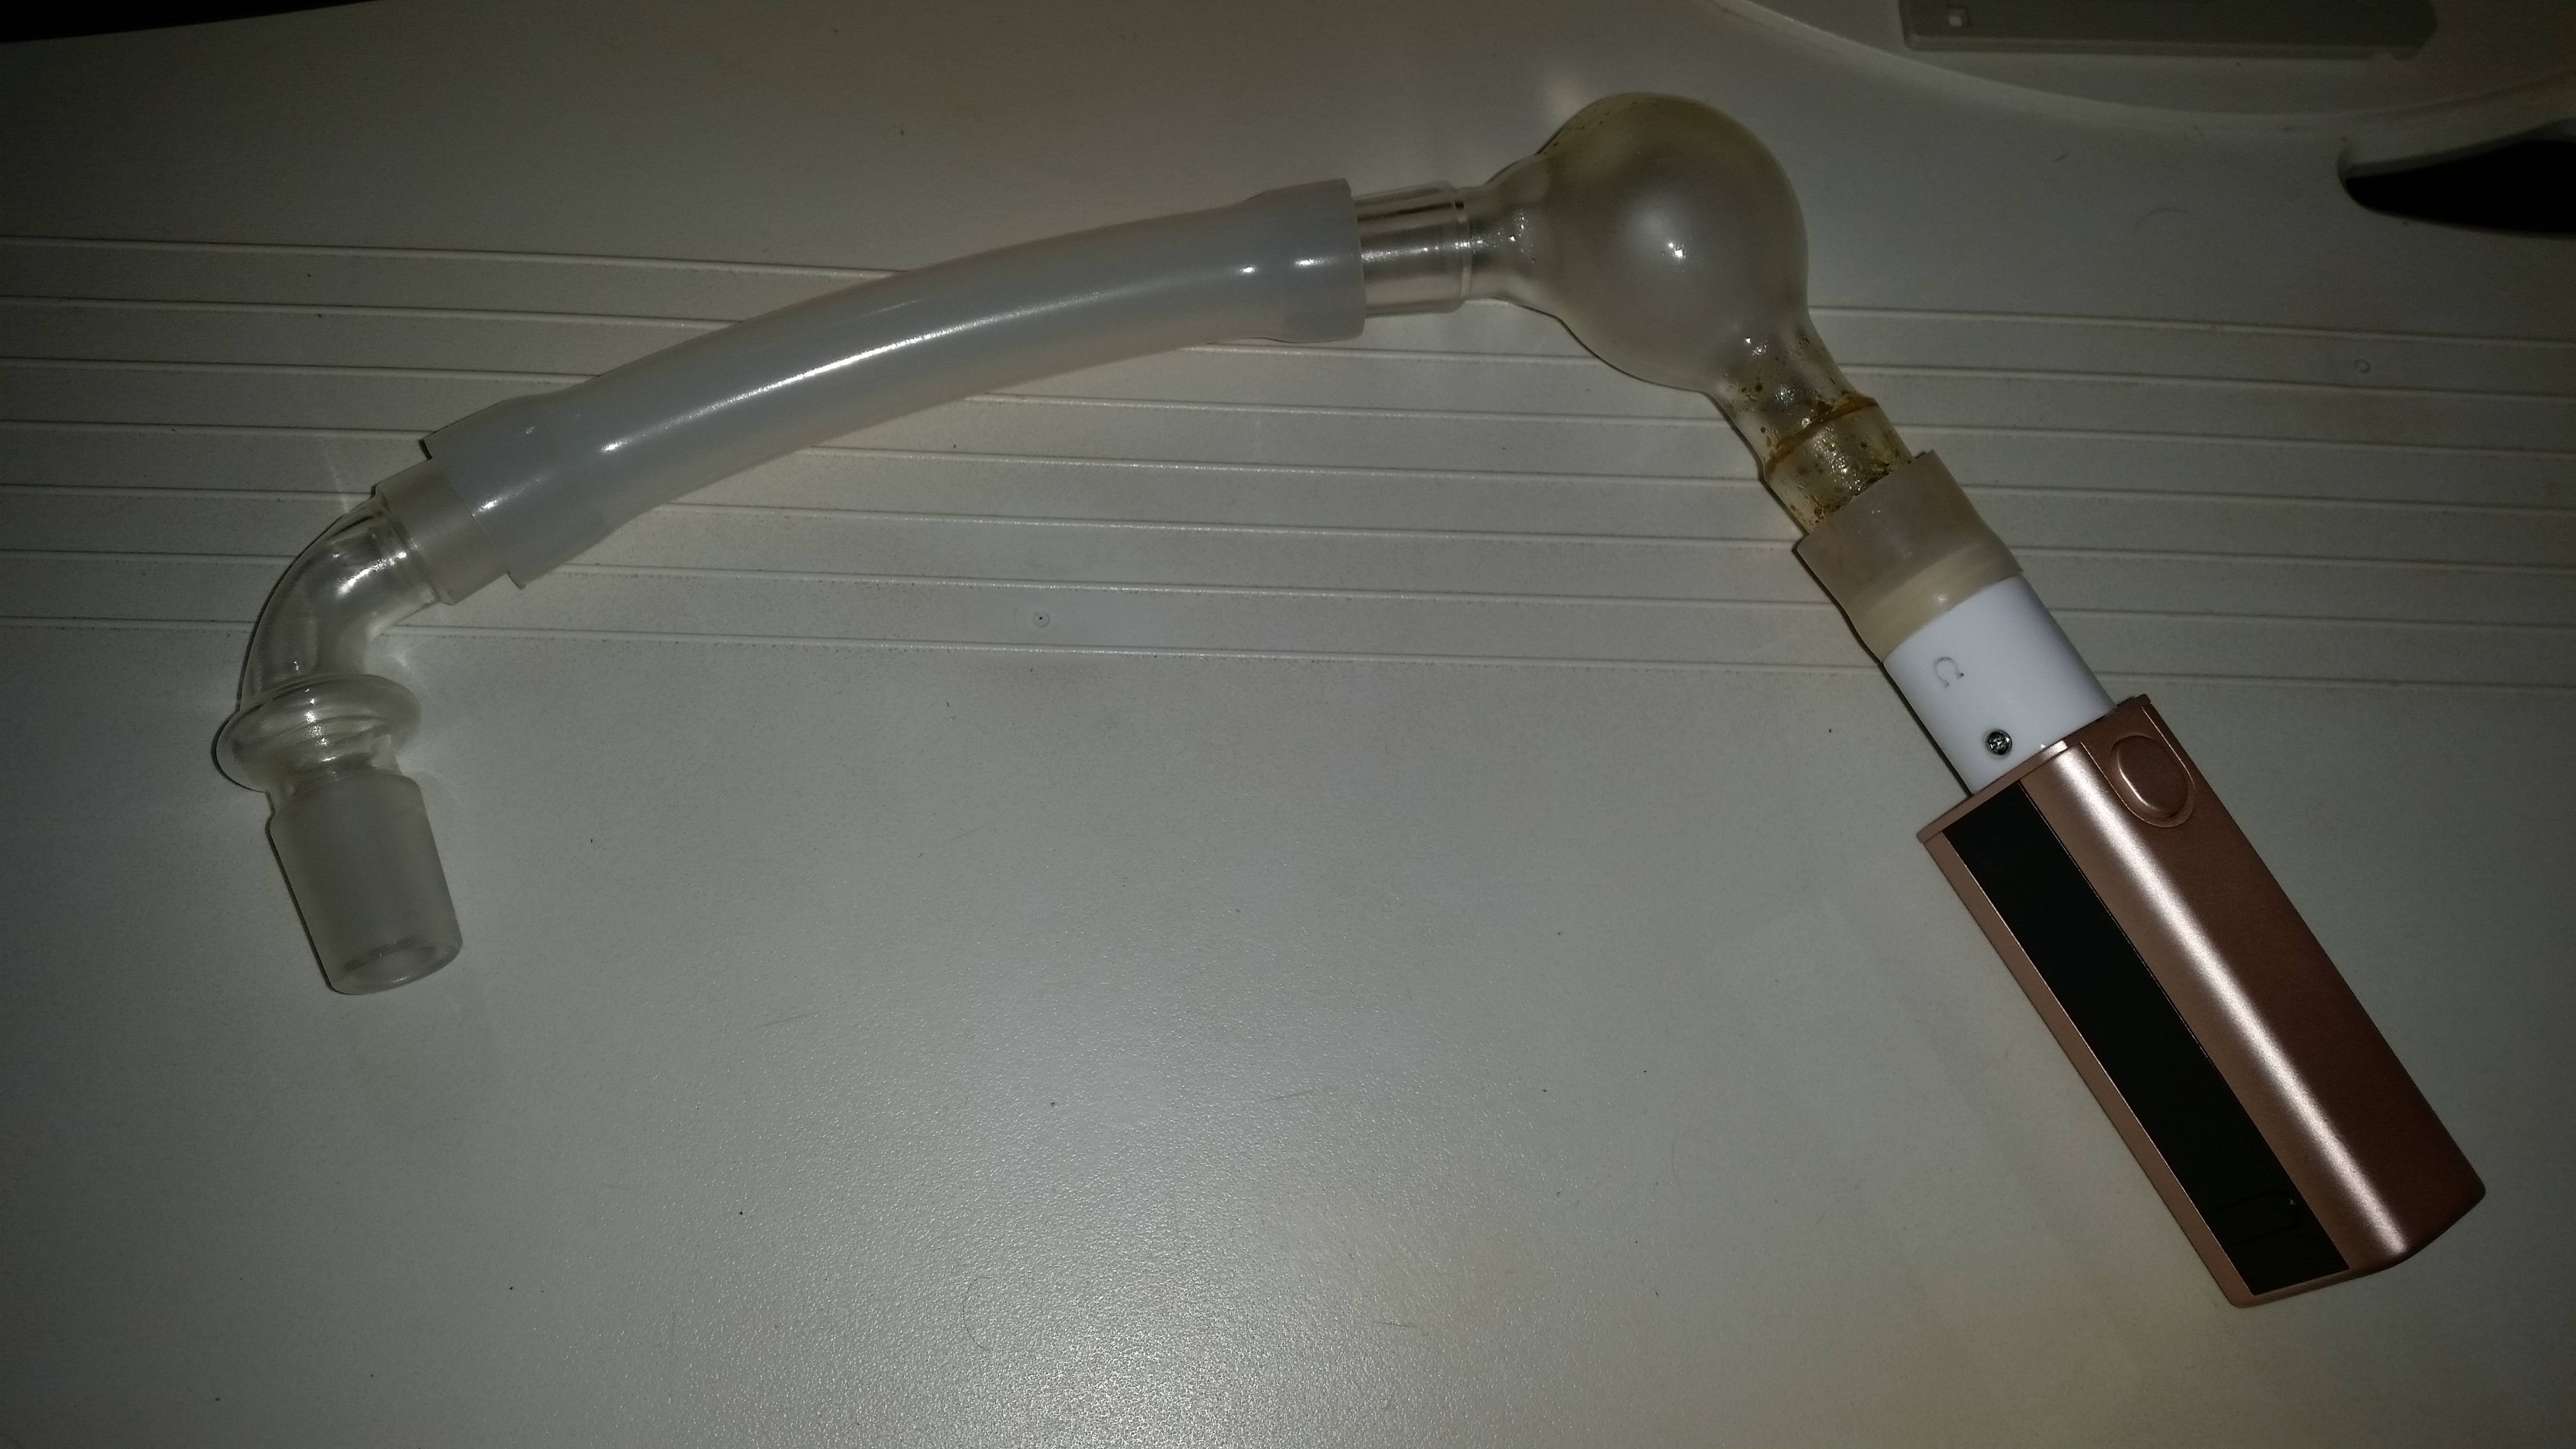
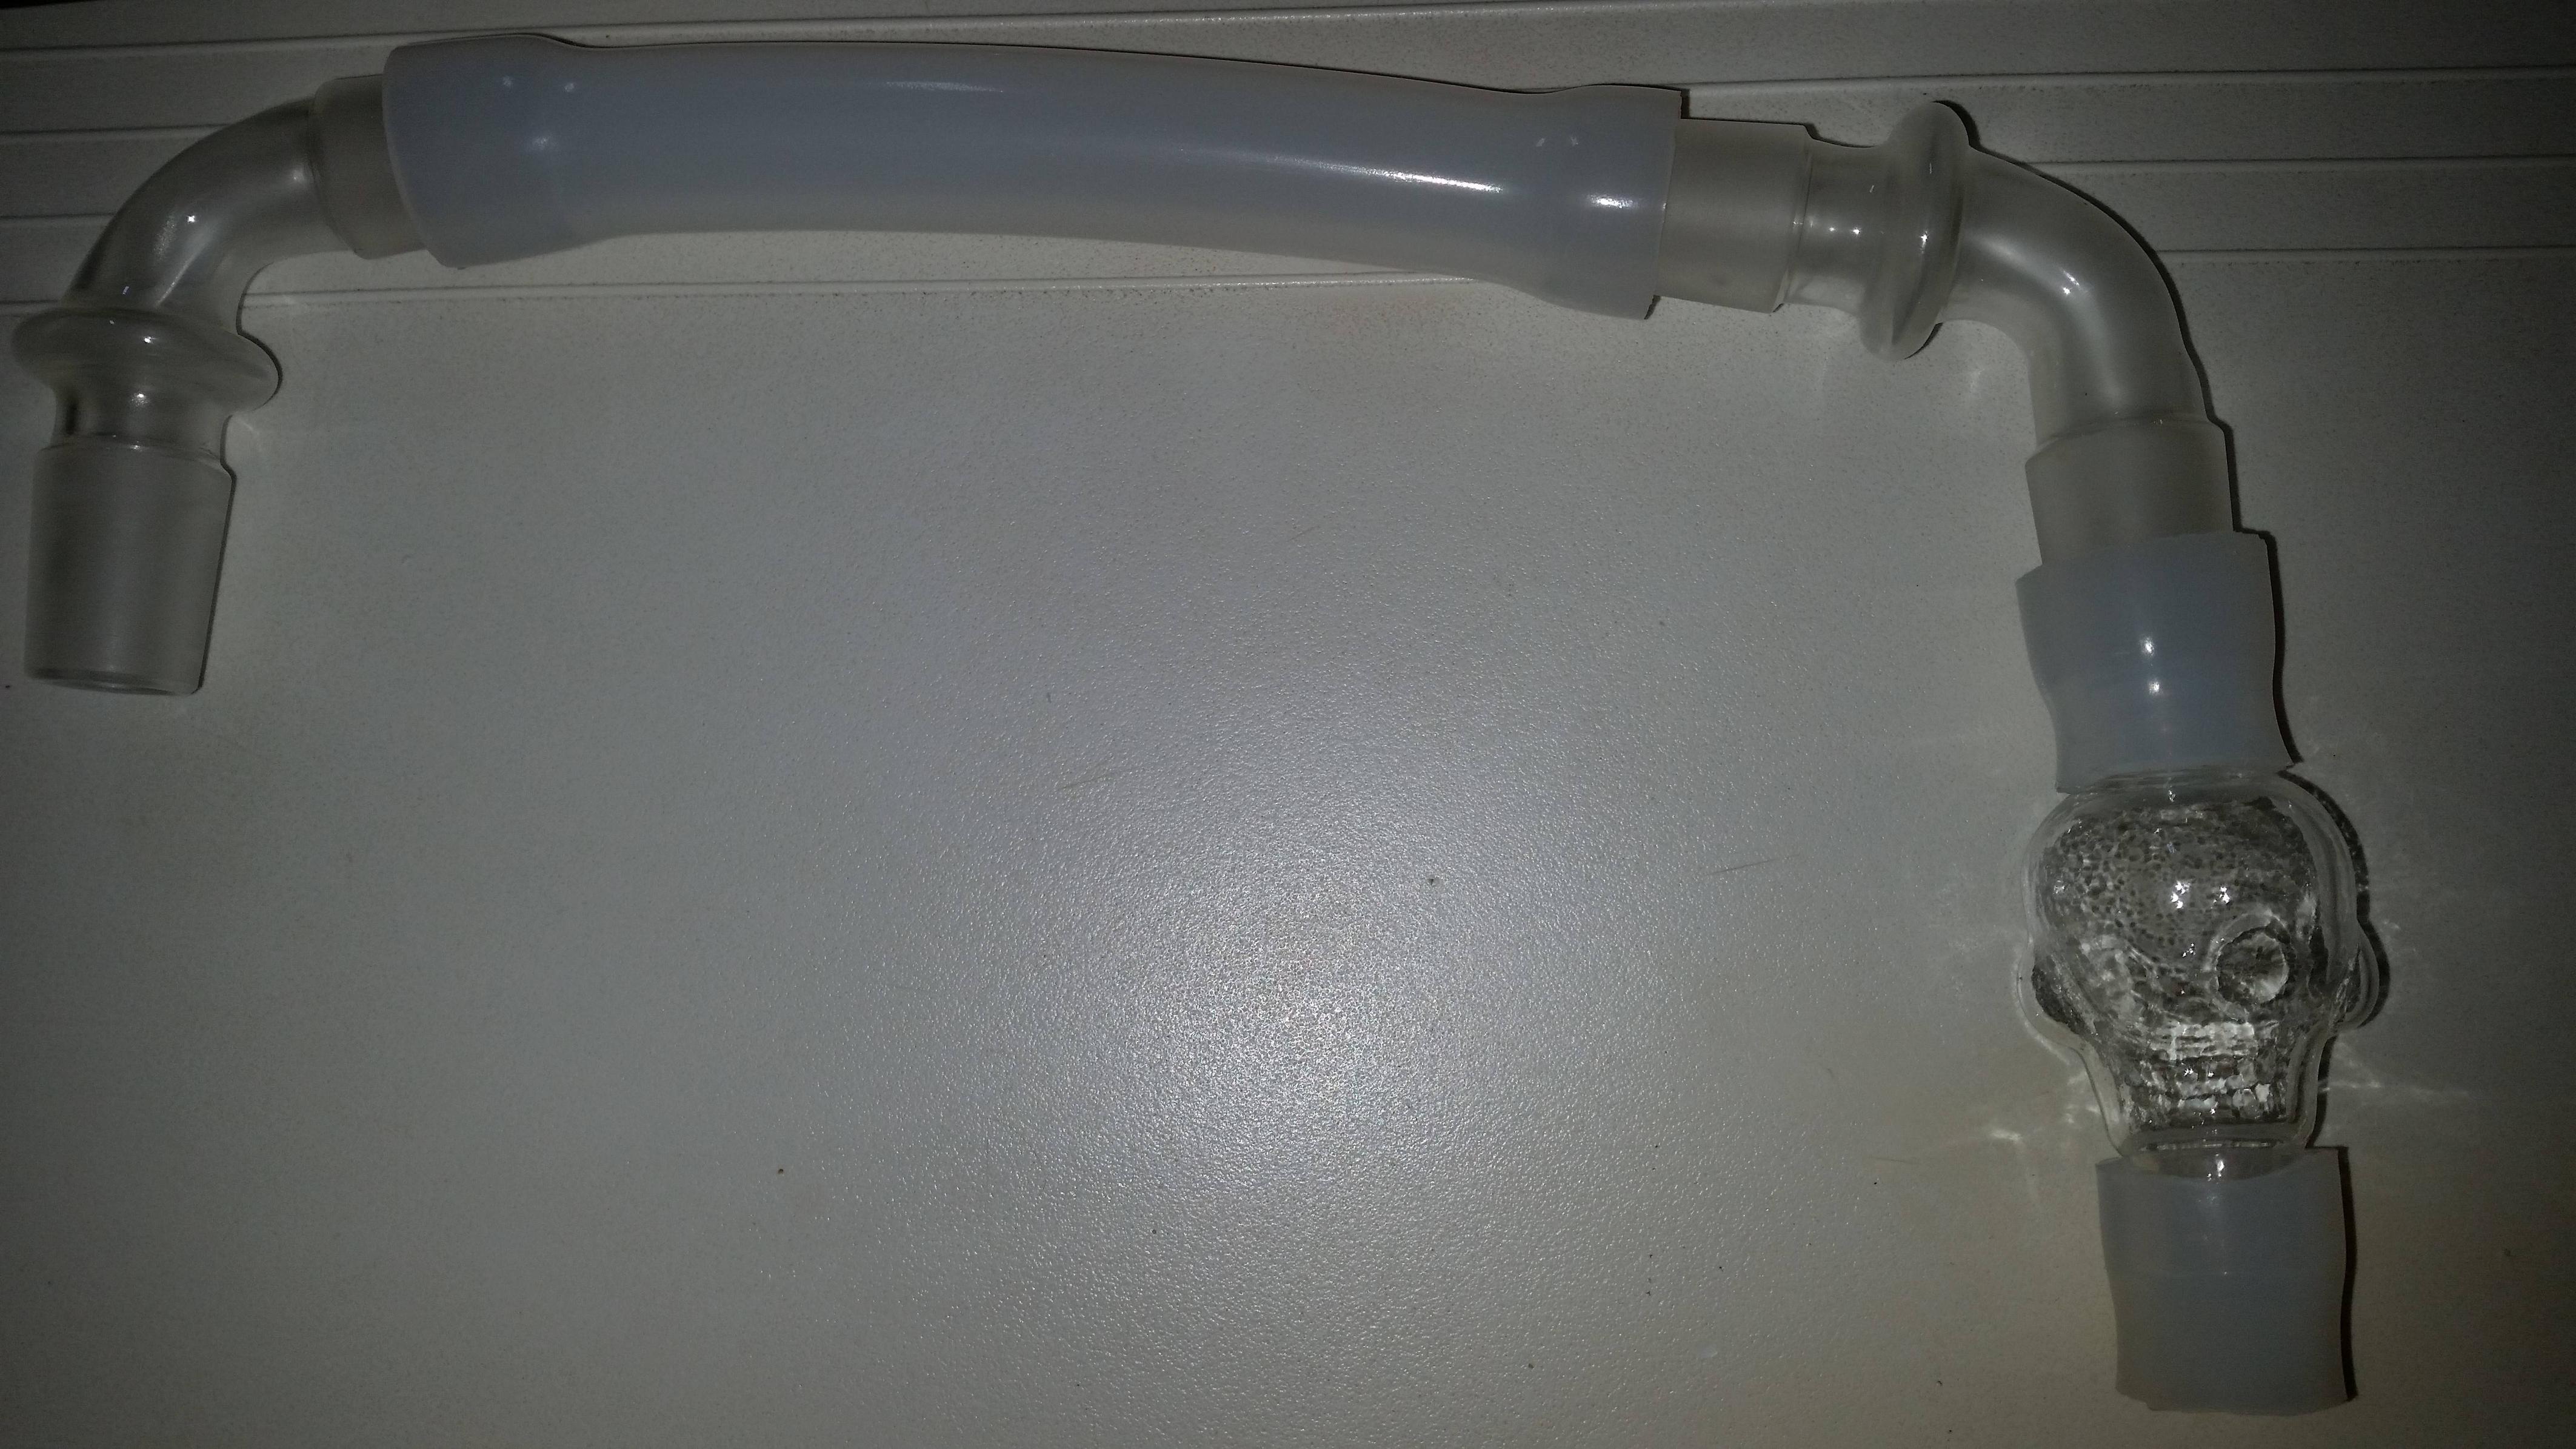
And since i'm talking tubing, this is a good time to show off my new, upgraded silicon-on-glass dab bulbs that I had Mike over @ Oregon Glass Blowers make for me, custom to my spec. I frikin love these bulbs :D :luv: They replaced my venerable old, skull glass globes that I have passed grams and grams worth of vapor through, for my viewing pleasure. Those old things worked, but I wanted a connector that is more streamlined with less connective parts, and that I do now have. As noted, the half inch silicon strips are very versatile as a connector for these type of things. I was using these bulbs for a few weeks with my v2.5s, and I was happy to see this setup works also with the v3.0 base, with just a little more careful wiggling and sliding

with my original, favorite rig, Dabby

kqSTOCS.jpg


and one on my co2 rig, Dabitha :luv:

DS0TPcG.jpg


also on my D-020 d9. Since this bong is legendary and widespread, I have chosen to name this Rig "Dio" to be close to it's original name, and for R.J. Dio (rip)
KnstkFG.jpg


and i had one made with a 14mm top for my 14mm rig with the skinnier 1/4" hose. This one is still "klein torus" because I haven't thought of a good name for this rig yet. no suggestions still? :huh:

3xdthNH.jpg


and a close-up of the silicon on glass adapter. an 18mm male-male angled adapter, my dab bulbs and 2 sections of 1/2" silicon tubing gits' er-dun. :clap:

DMyOrwt.jpg


as opposed to this, which I was using before

pBJWctH.jpg


more space on this post? How bout a blast from the past....throwback...wednesday? :D

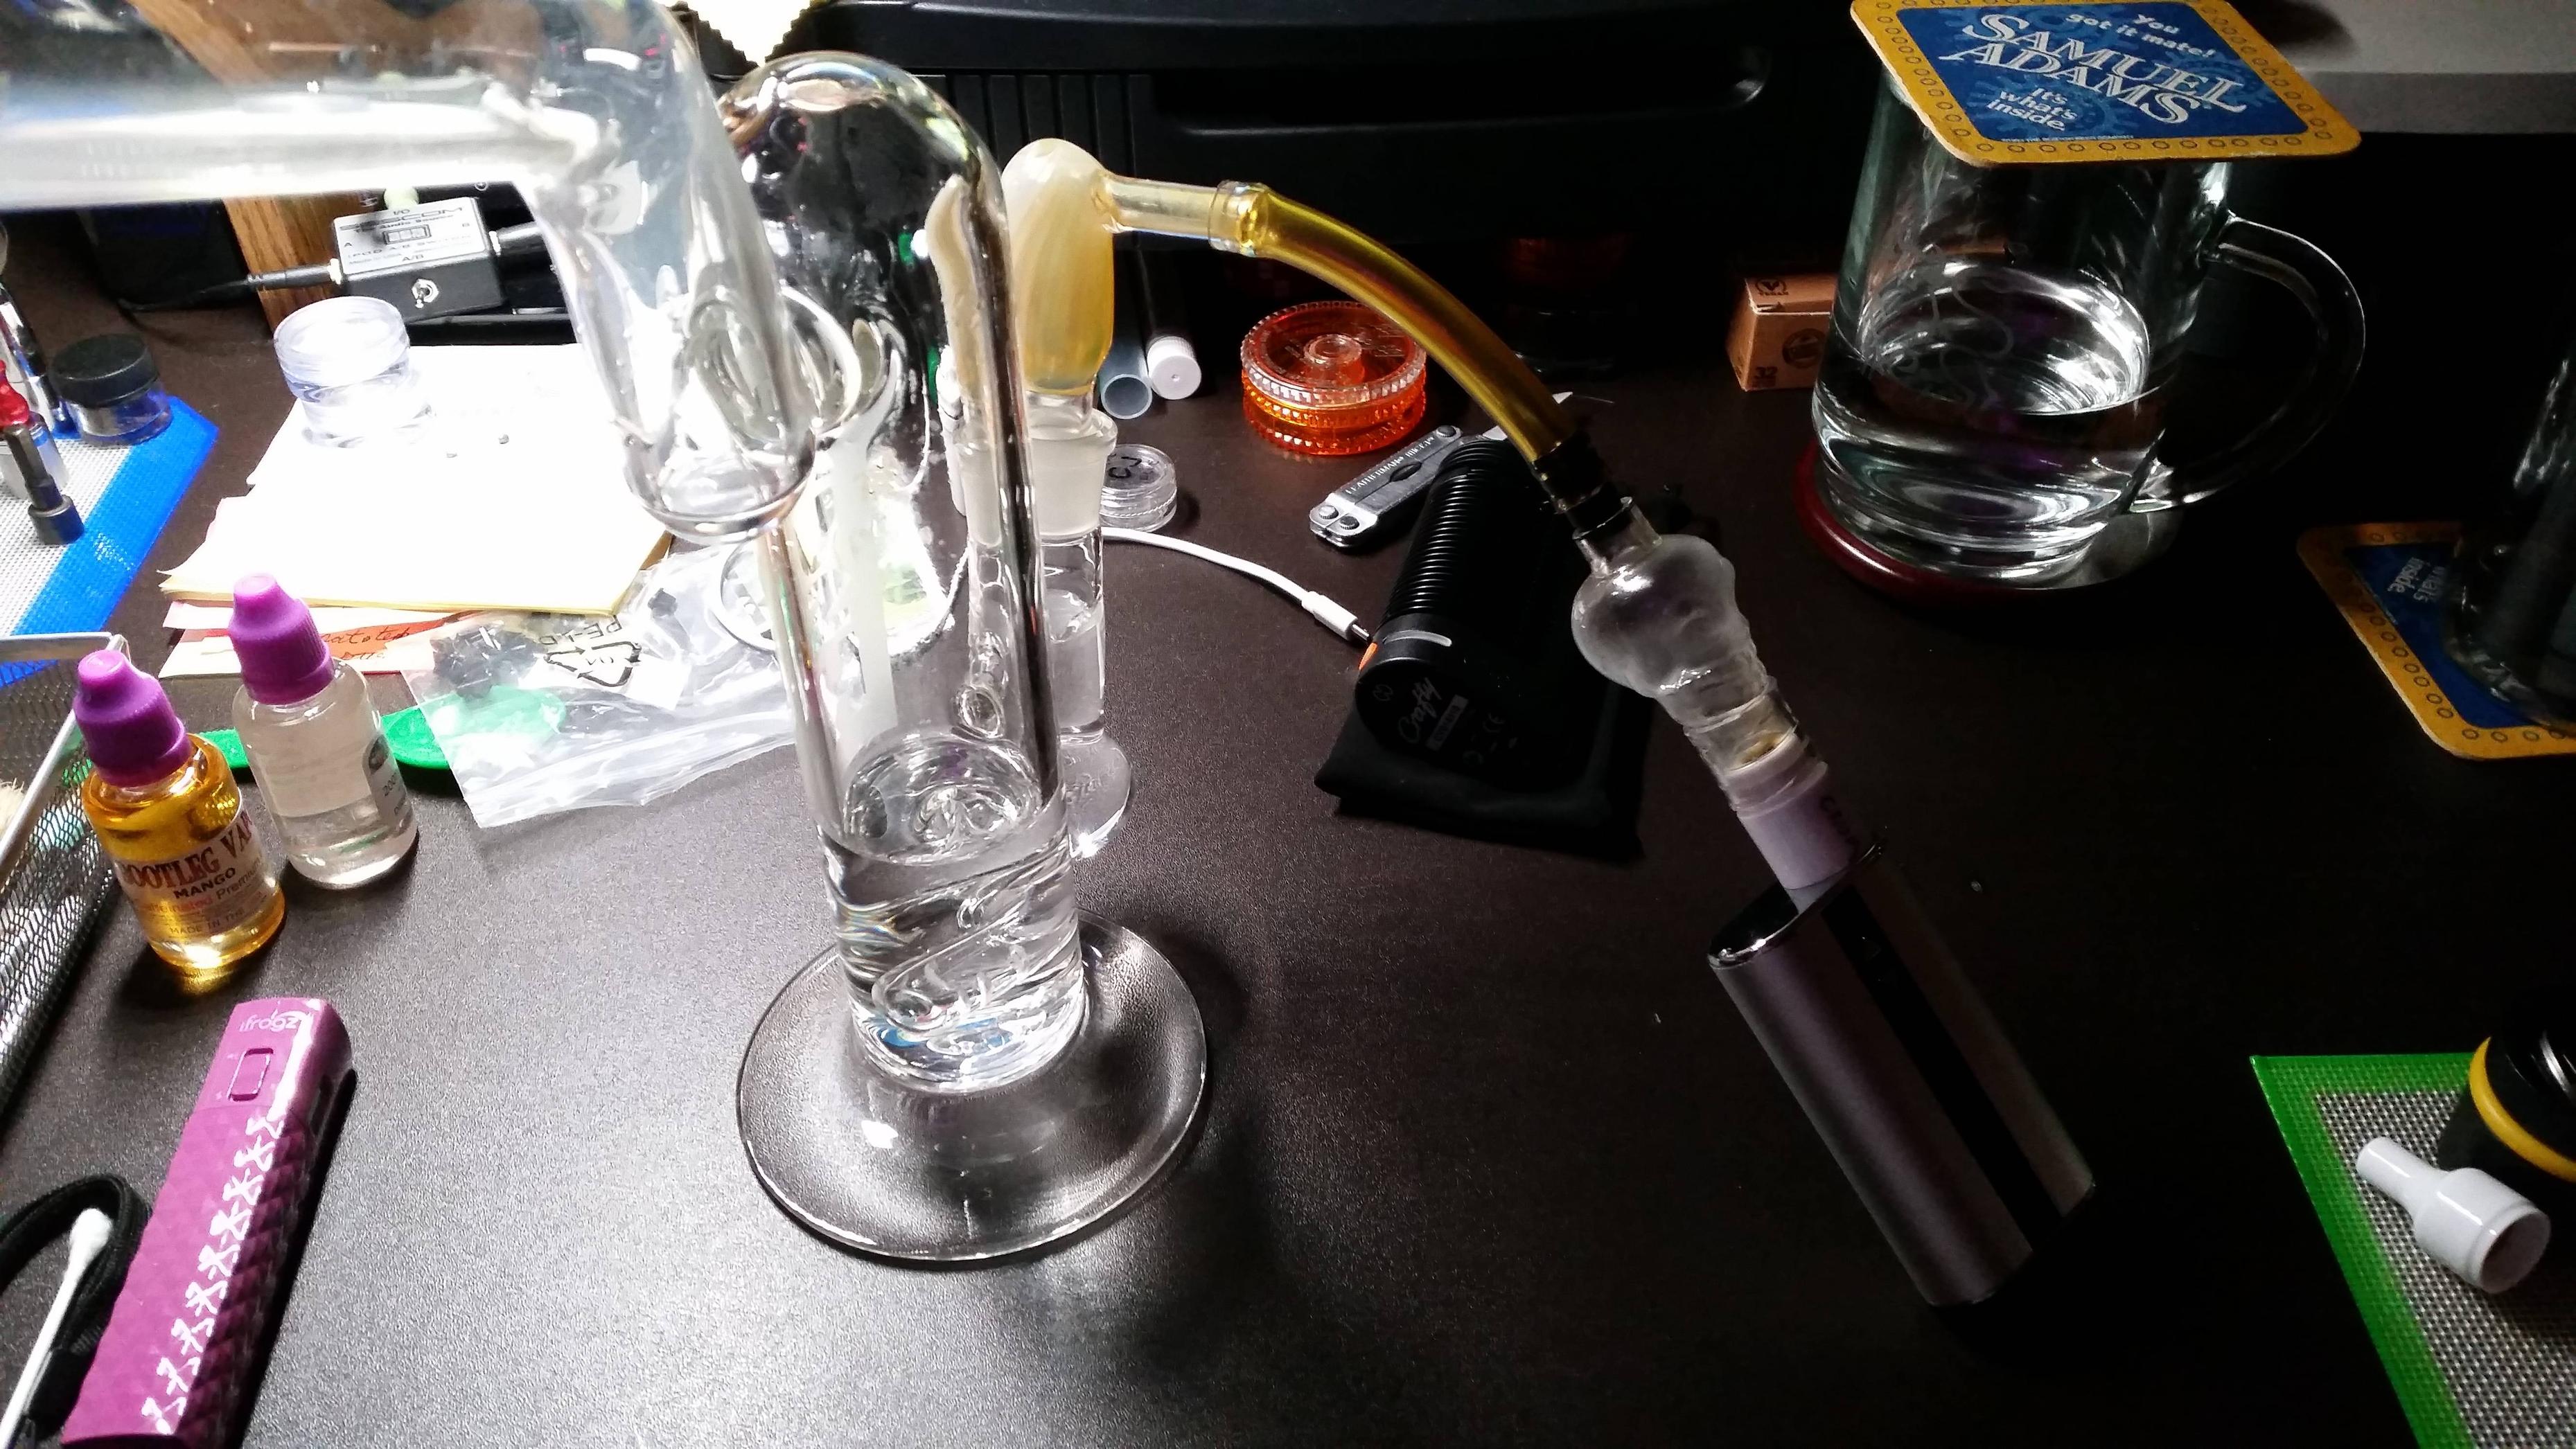
this is one of the first ways I was able to connect a v2.0 (not 2.5) DT atty to my rig. Non-TC mod, plastic mouthpiece on the skull, PVC tubing.....so not medical grade. Sigh....:(

JX5whC5.jpg


only weeks after i got that eleaf istick 50w, the first generation of cheap, chinese TC mods started to flood the market, and I wanted my glass globe adapters to stand up straight, so I did this

rfF5T0d.jpg


0IVlkkS.jpg


this vape stuff moves really fast.....i look back on this stuff (my own gear) with a sense of fond condescension... :evil:

I've come a long way since. That first pic of these 3 was only taken on 6/2015. :o It feels like I've been using the v2.0/2.5 atty for 2 years, but it's only been a little over a year :shrug:
 
Last edited:

fernand

Well-Known Member
WOW, go away for a couple of days and a million brain cells explode! I'm happy to report that the pessimistic doctrine about never ever ever ever ever re-growing neurons turns out to be inaccurate. GREAT GOING @Vape Donkey 650 !

@divinetribe thanks for the medium cup that came in the mail !

If the heater is integrated with a crucible like this , i.e. the heater is no longer a donut but rather a cup, then the leads come out the bottom fused into the ceramic, and that would make spatter the only possible source of leakage.

The 6.8 x 4 mm ceramic (alumina) cups I use in the e-bay V2-alikes are perfect in height for those bowls, as the air comes in right above the cup ledge, so @Vape Donkey 650 there were no problems with this, only when trying to use cups with the low air holes on the genuine V2, that cause the cups to rise and cool off.

Since the air holes in this proposed design are integral with the heater-crucible, the crucible itself, the walls, should be as high as possible, to keep the spatter inside. To use that lovely expression from math classes, the crucible walls ideally approach - as a limit - a tube that reaches all the way to the user's lips. There would then be zero leakage, and as long as the oil is never overheated, reclaiming would be simply a matter of warming the crucible-tube and letting oil flow back down. Until there is only dross left that can be burned off in wattage mode. Don't want goop build-up, as wife was ruefully saying, it could get everyone lined up against The Wall.

Of course, a long crucible-mouthpiece tube is impractical, but it's still important to make the crucible-heater as tall as possible within the housing to avoid seeping at a junction.

The cost of the (replaceable-as-a-whole) heater-cup would also be a concern, so we need a clever design of the junction to keep the crucible relatively small/low and still not offer leakage paths for spatter. A lip/overhang like @Vape Donkey 650 was showing ...

The air holes of course should point down, and I'd say pointing also consistently from left to right to push the formation of a counter-clockwise air vortex. I'm not sure if our friends in the Southern hemisphere will request a reverse vortex like for their toilet bowls ;-)

The ideal height of air holes above the floor of the crucible-heater would have to be modeled by some stoned Boeing aerodynamics mechanical engineer genius from Washington State. Or trial-and-errored. With a little care this all should contain the spatter and put and end to the gooping

As per the drawings I sent you, @divinetribe , I would love to see holes in the housing top to mate with ones in the housing base, like in many RDAs, so a user can select and adjust air inlets. Maybe for the next gen. As it is, an integral heater-cup solves a lot of problems. Looking forward to any prototypes.
 
Last edited:

PPN

Volute of Vapor
let me switch to compact bubblers and rig attachments for a minute...how are people connecting their v3s to their glass pieces of choice? Steve already showed us how he's doing it. Lucky for him, the V3 mouthpiece easily adapts to an 18mm female slot with a little silicon strip. that's great for 18mm hydratubes where the input is on the bottom. Some complications for smaller 14mm hydratubes then. :hmm:

this is my best solution so far for the PPWT: basically the same thing we were doing with the v2.5 cap stuffed inside the 14mm joint with the silicon atmos mouthpiece holding it snug inside there. Obviously, the v2.5 cap is too small to slide over the larger o-rings on the v3 base, but with alot of force and convincing, I was able to get my 1/2" silicon tubing to slide over the v2.5 cap, leaving a little overlap of that hose to connect over the v3 base. It's pretty firm and won't come off easily, you can pick it up from the top, but it does have a little bit of flex / wobble which I don't like. :( we can think of a better way to do this, c'mon guys :cuss:
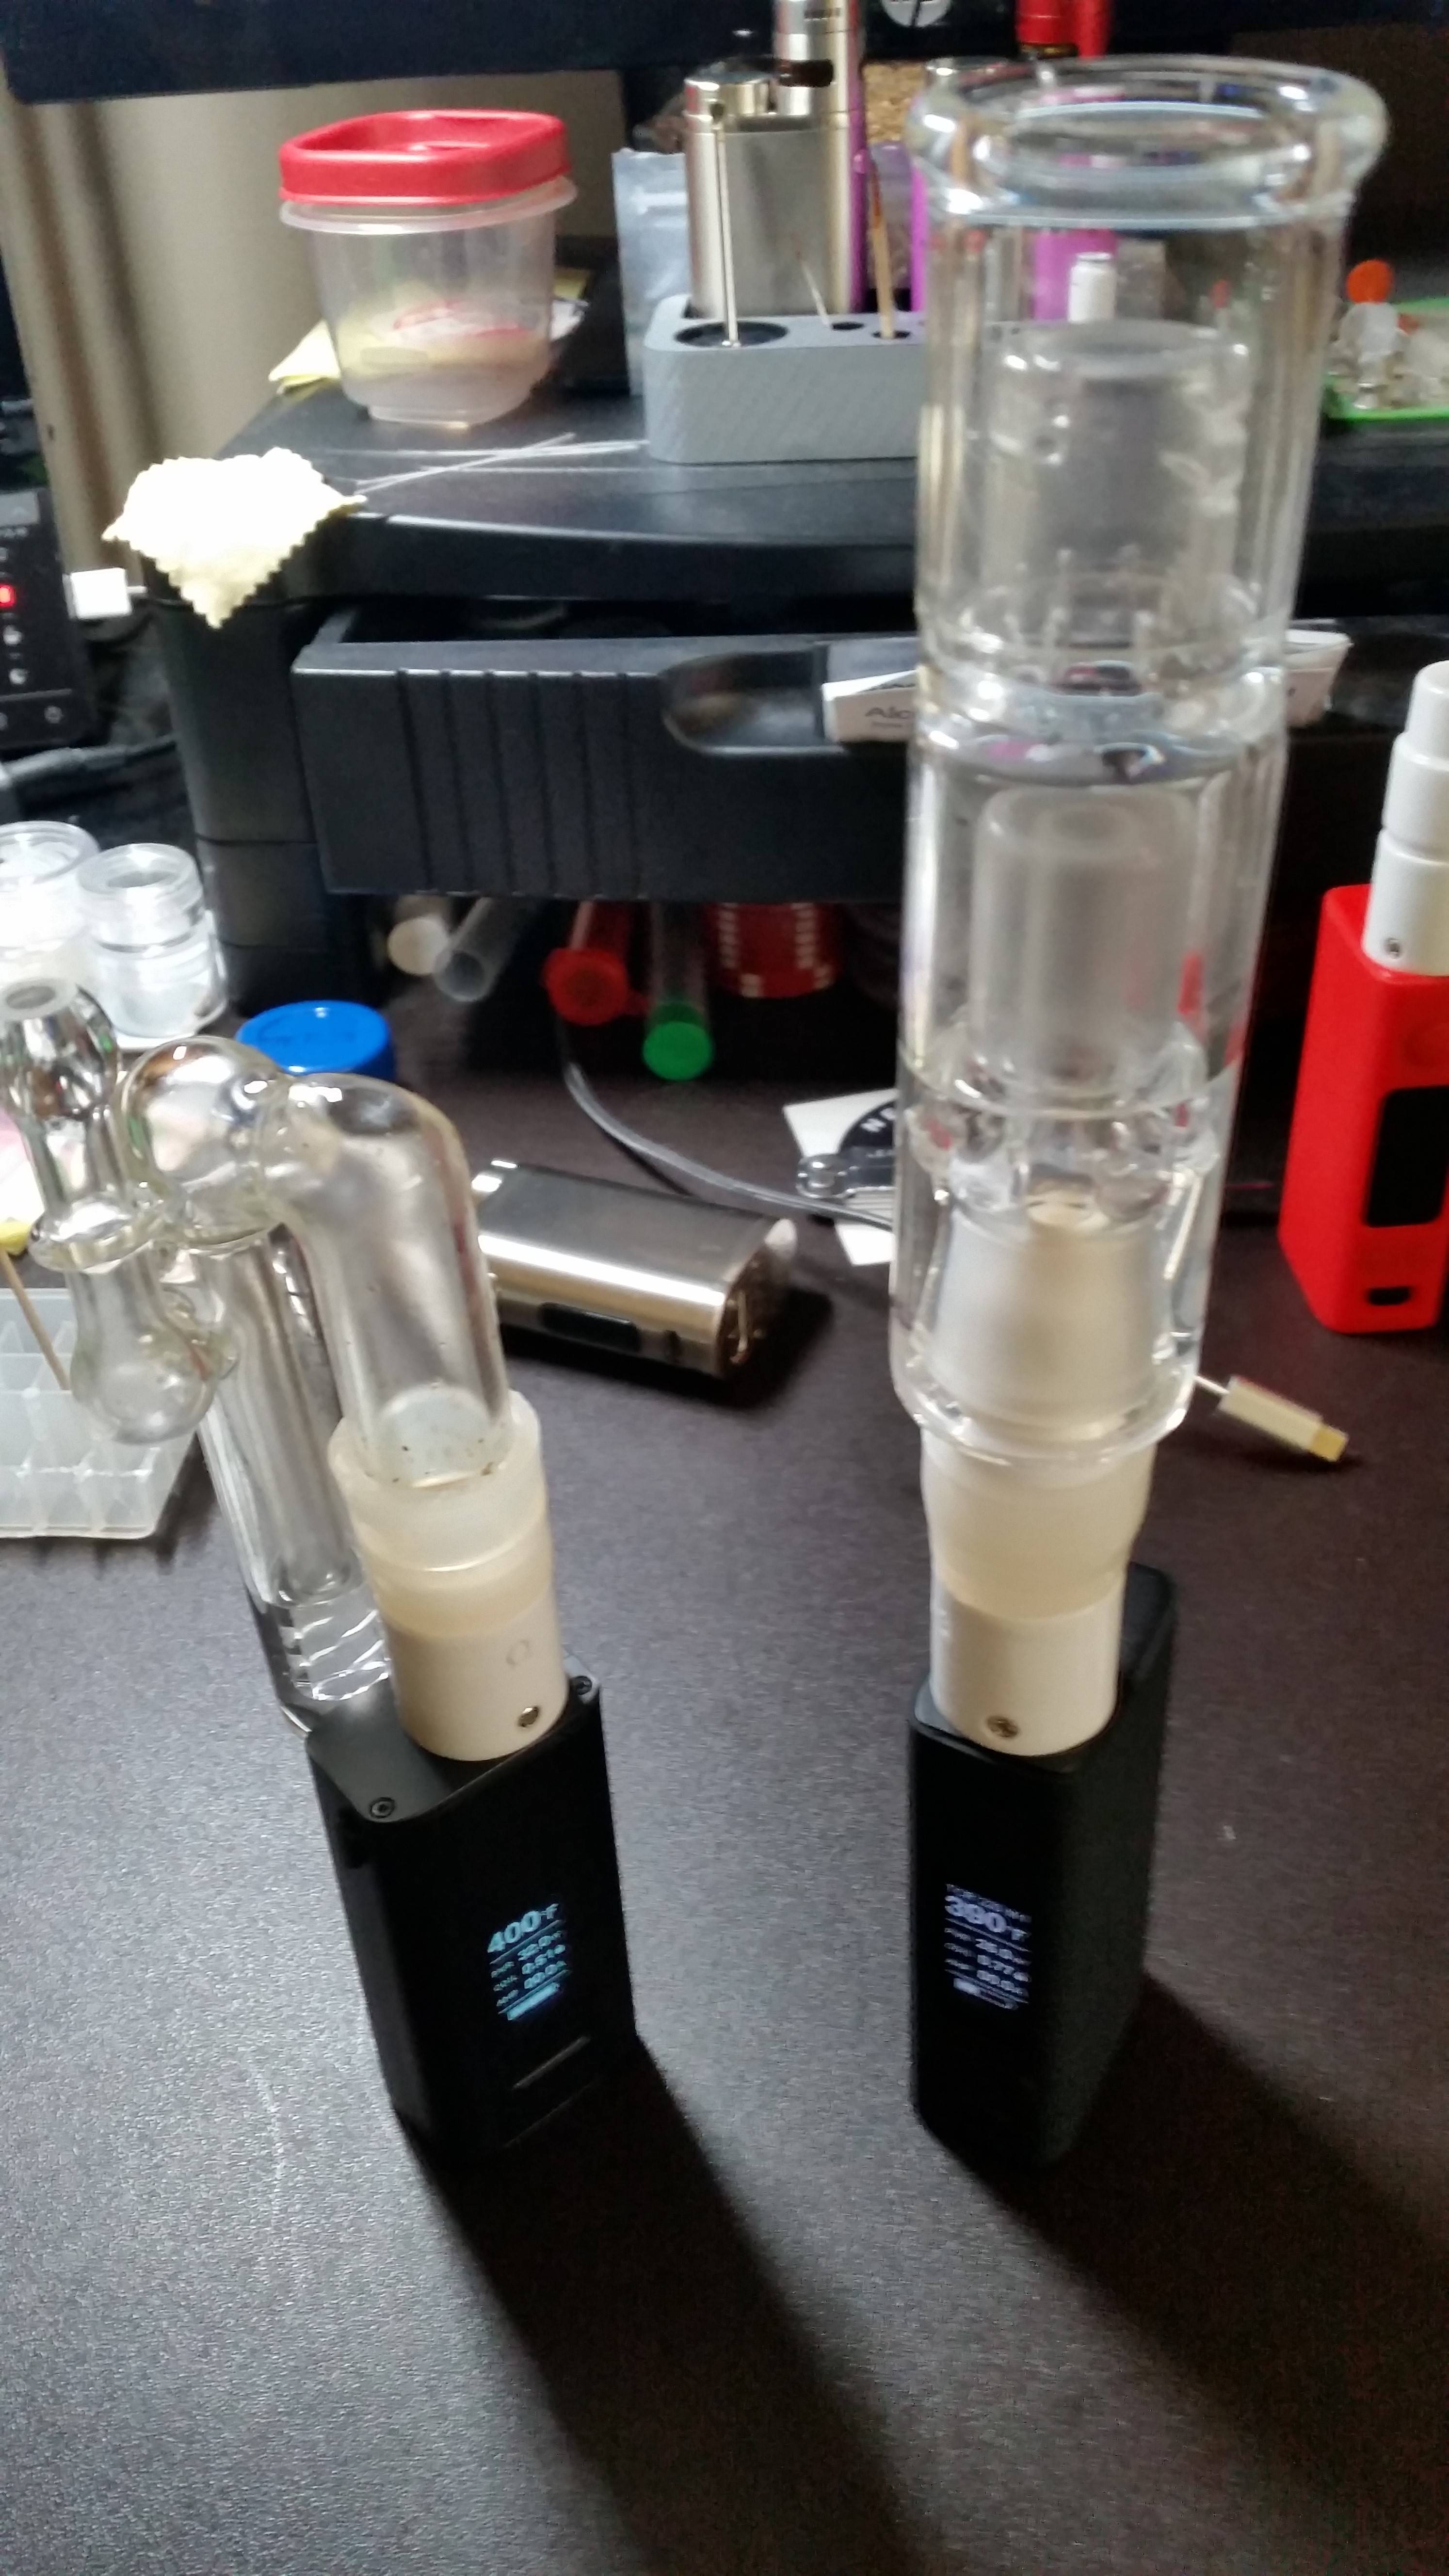
bHfZFnR.jpg


close up of the connections

uf8izuF.jpg


As for the other little piece the aquamizer, that is completely unchanged from how I was using the v2.5 with it, using the same half inch silicon tubing that I'm using for everything these days. For both the aquamizer and PPWT, slipping the silicon tubing over the V3 base is a little harder than the v2.5 base with the bigger diameter, but i still git-er-dun. 9/16" hi-temp medical grade silicon hose (or tygon or PTFE?) would be better, but tubing of this grade / size seems to be made of unobtanium, so far as I've searched :shrug:

edit: this was my alternate idea for the PPWT: 14mm to 18mm M/M adapter with the half inch strip on the bottom. This works, but I don't like it for 2 reasons: the 14mm joint is not tight, so if you pick it up by the top, it comes apart as 2 pieces. Also, with this particular 14/18mm adapter, it makes the overall unit taller by about an inch, which I do not like. :( I could probably source a 14/18mm adapter that is a little shorter, more compact with less space in the middle, but it would still be a loose slip-on fit for the PWT and the 14mm adapter.

AP5op7K.jpg


And since i'm talking tubing, this is a good time to show off my new, upgraded silicon-on-glass dab bulbs that I had Mike over @ Oregon Glass Blowers make for me, custom to my spec. I frikin love these bulbs :D :luv: They replaced my venerable old, skull glass globes that I have passed grams and grams worth of vapor through, for my viewing pleasure. Those old things worked, but I wanted a connector that is more streamlined with less connective parts, and that I do now have. As noted, the half inch silicon strips are very versatile as a connector for these type of things. I was using these bulbs for a few weeks with my v2.5s, and I was happy to see this setup works also with the v3.0 base, with just a little more careful wiggling and sliding
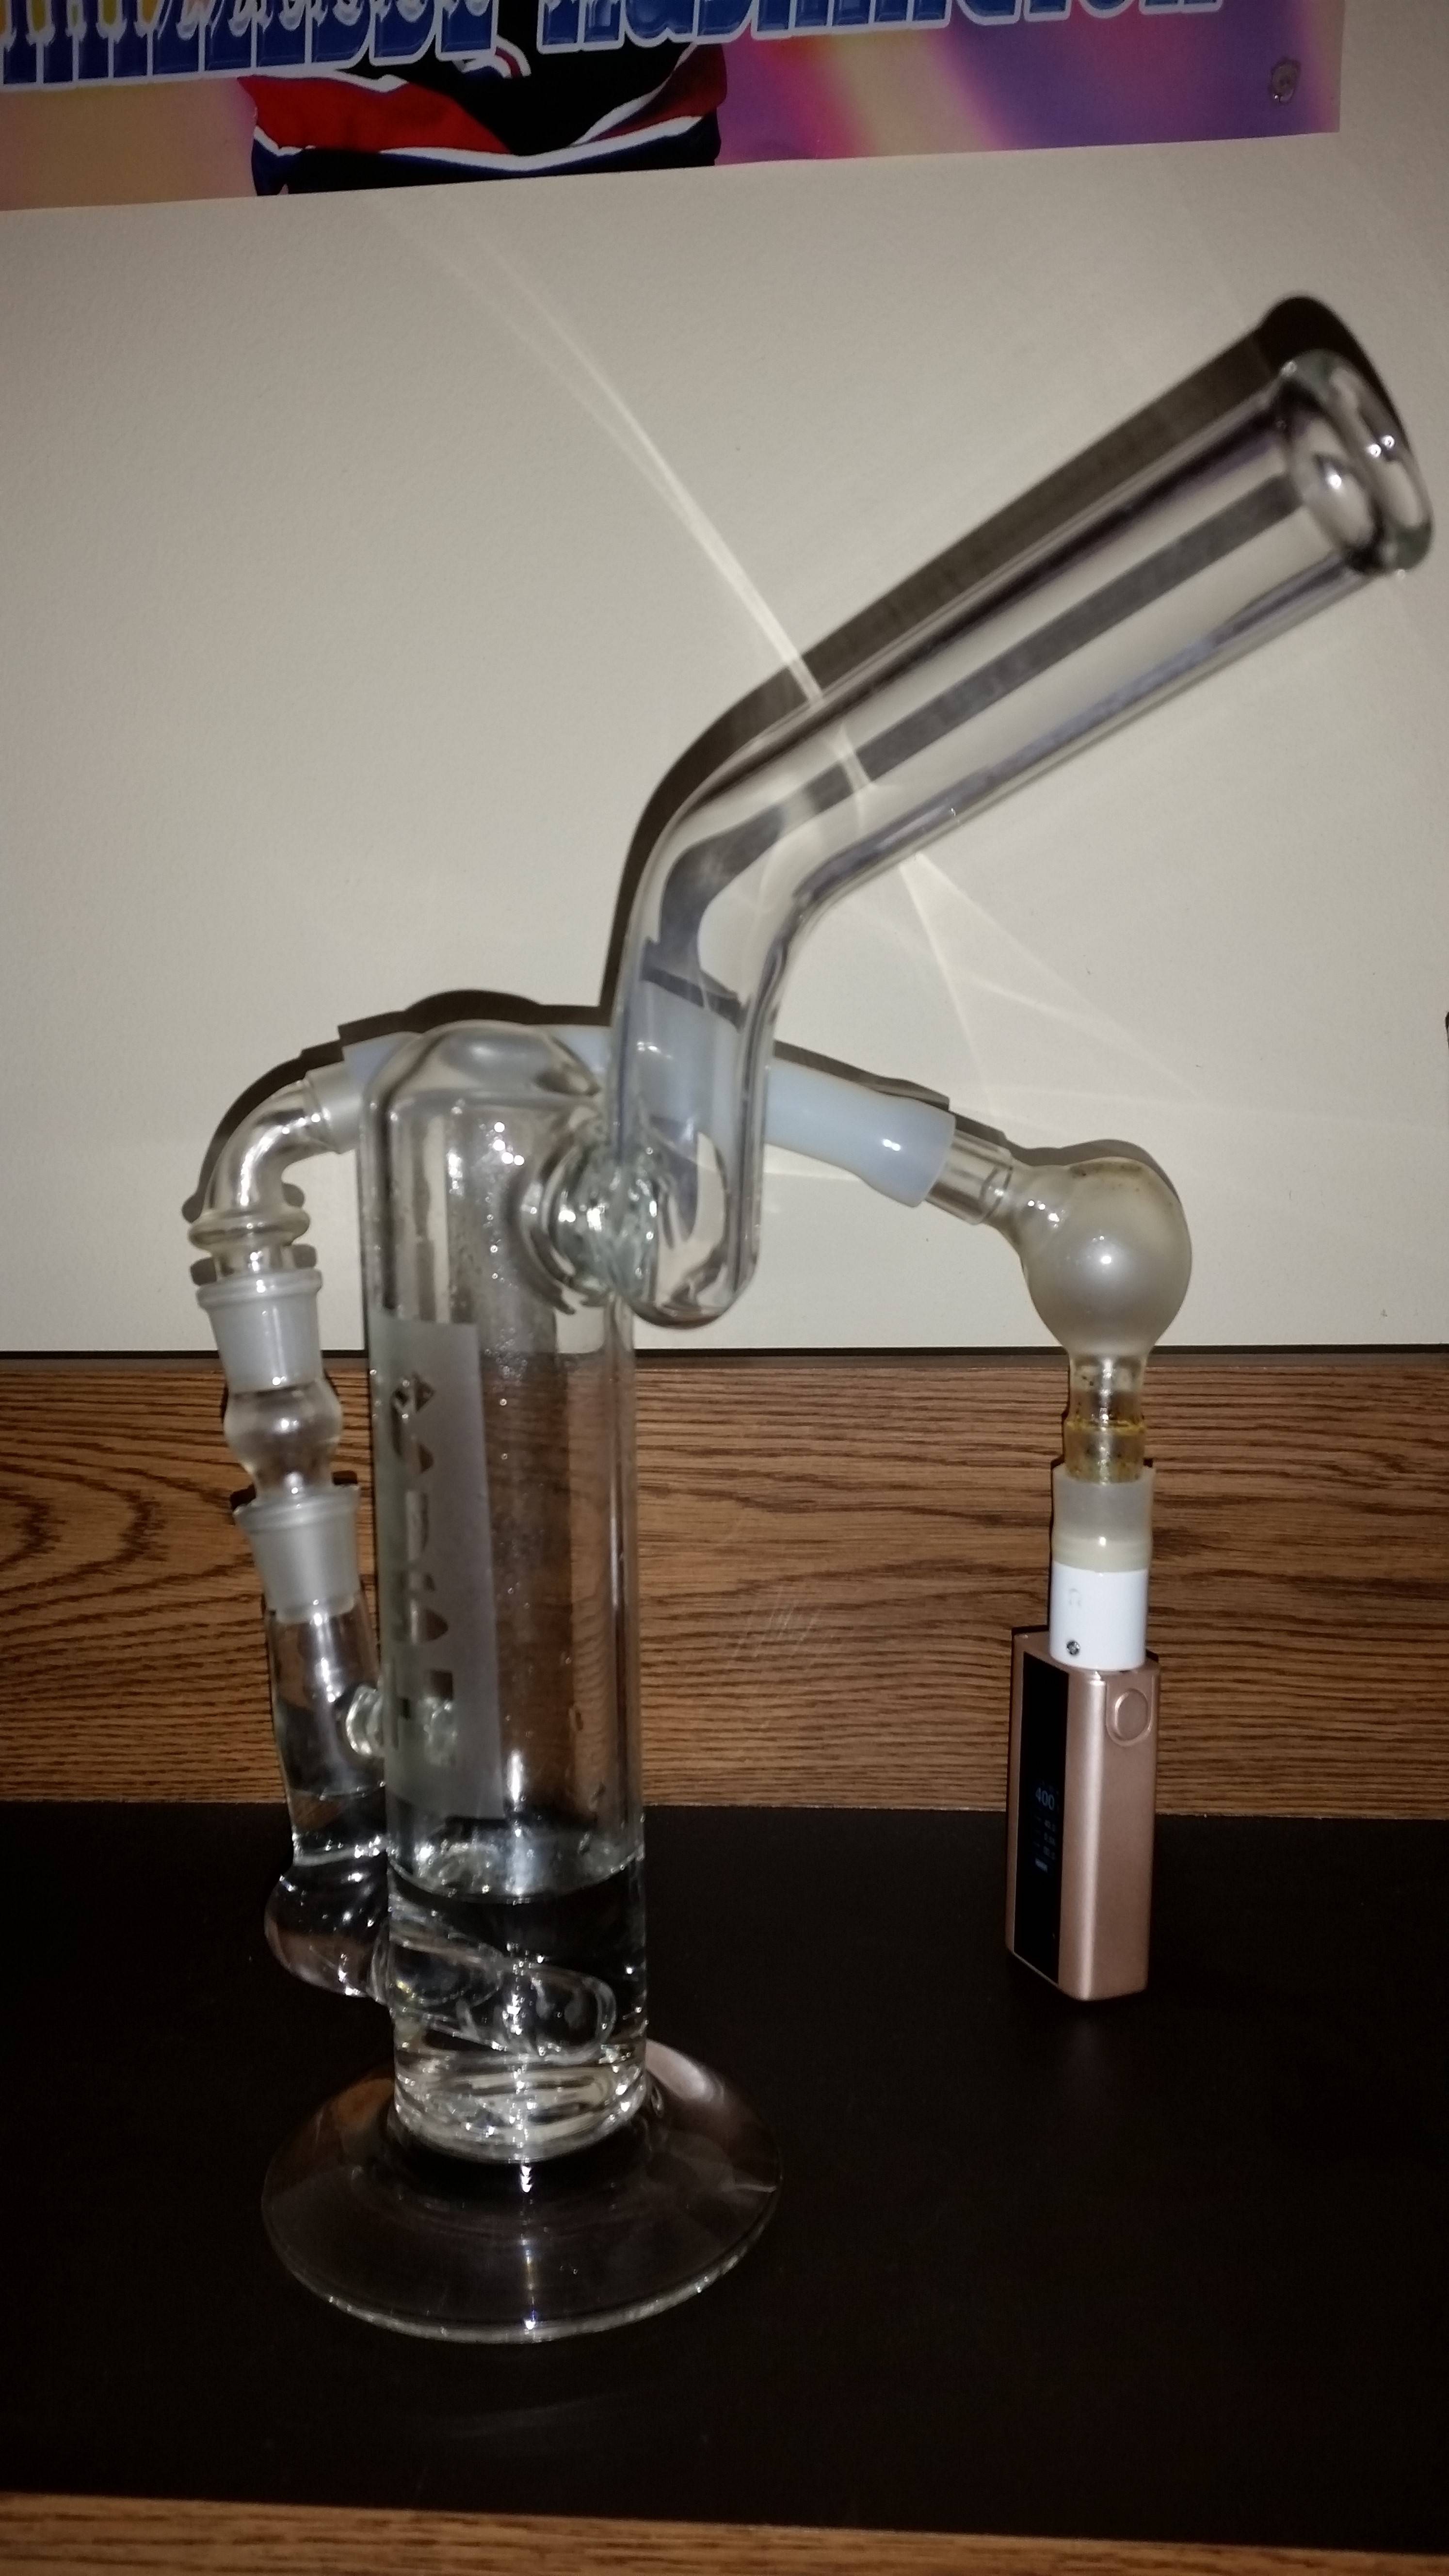
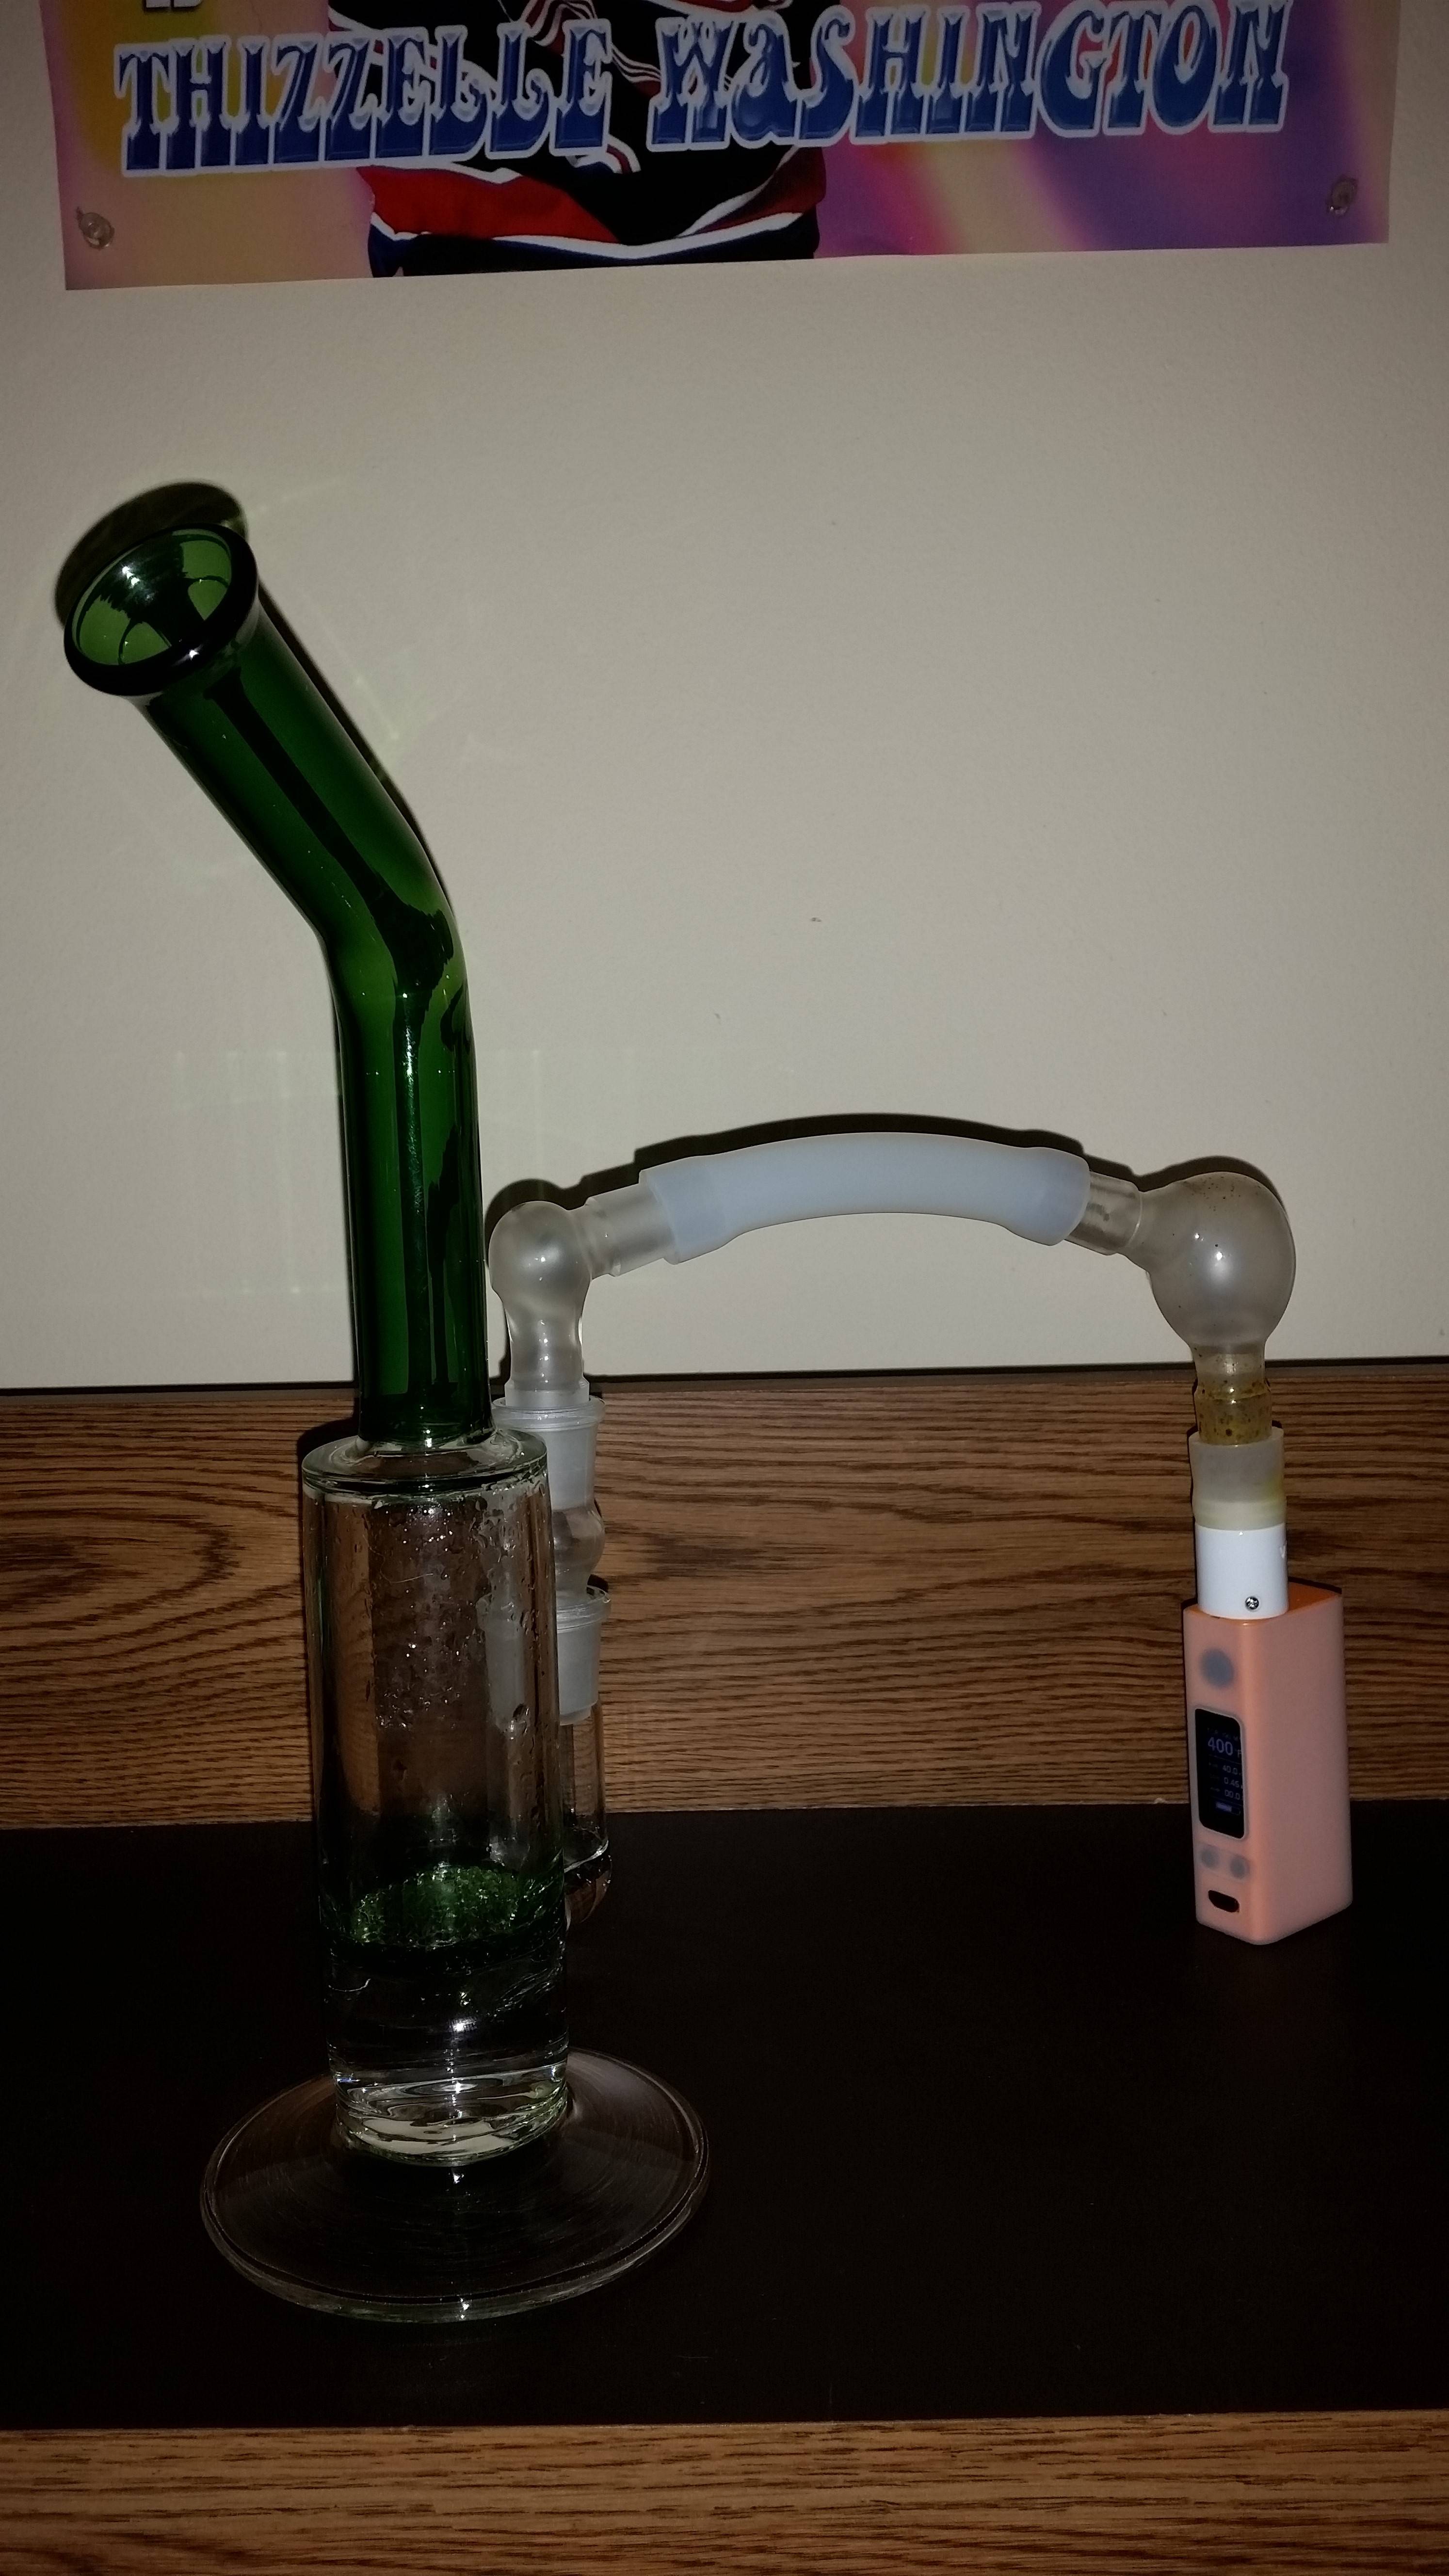
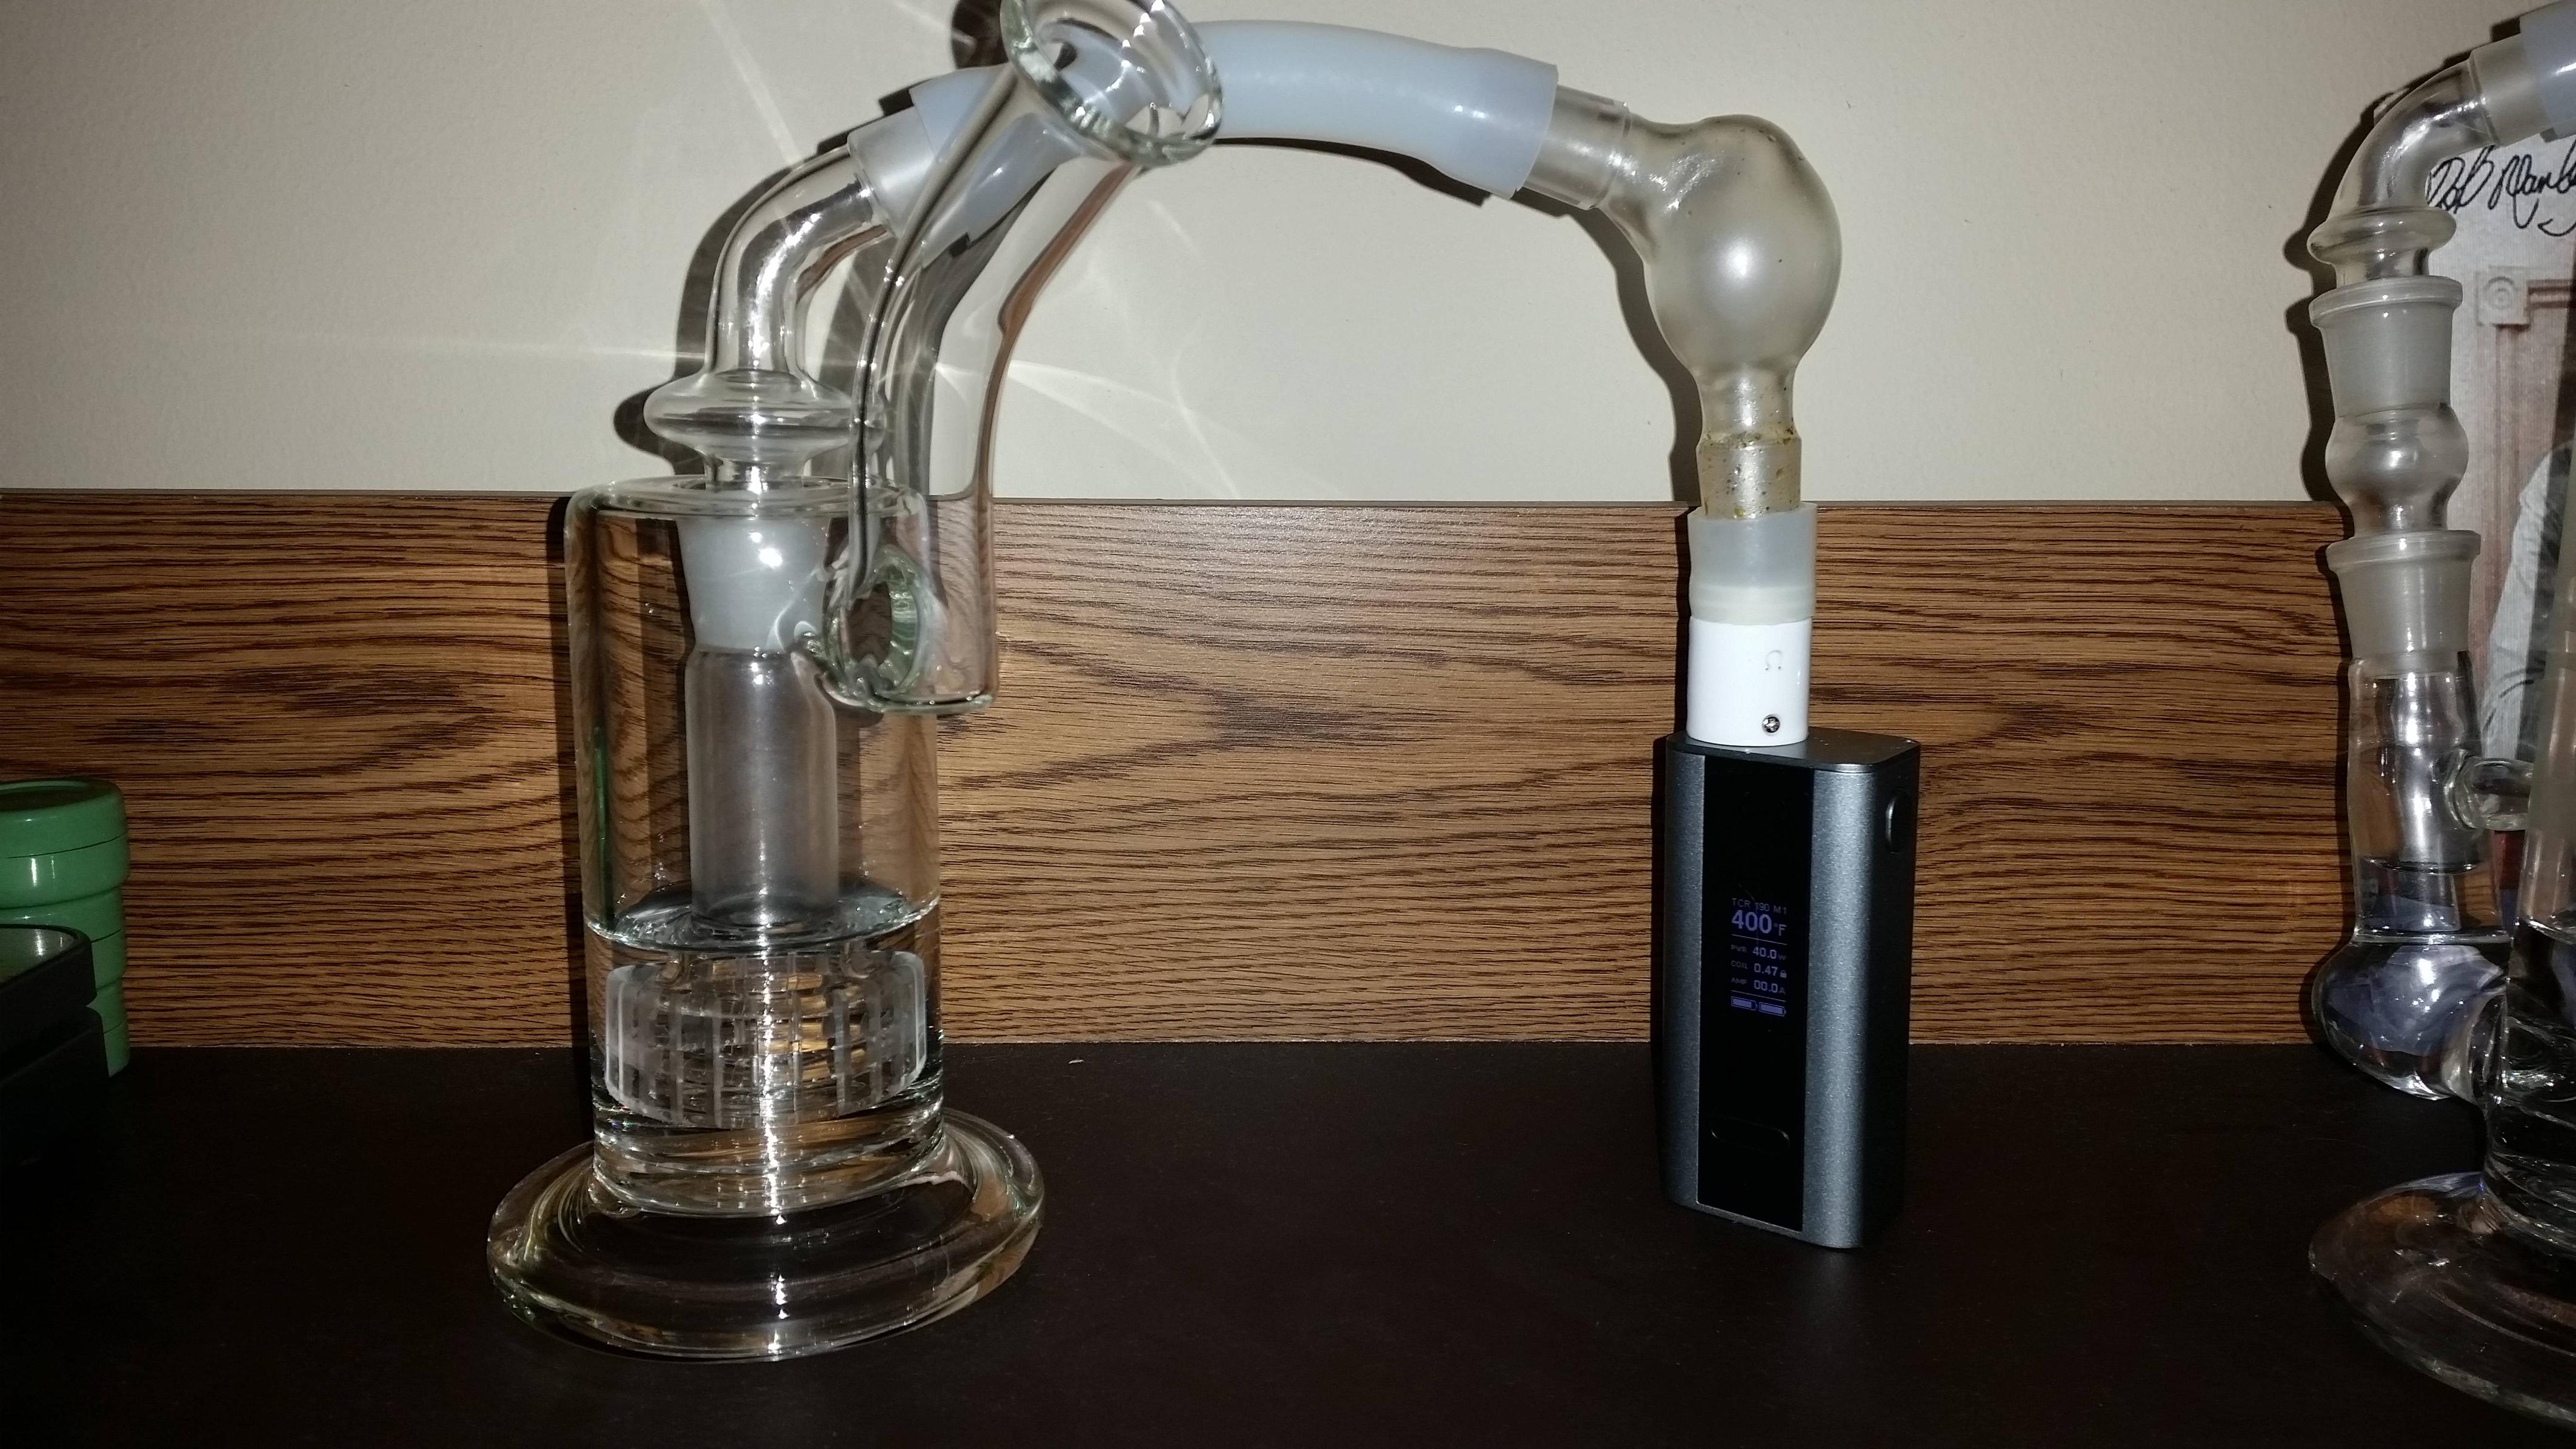
with my original, favorite rig, Dabby

kqSTOCS.jpg


and one on my co2 rig, Dabitha :luv:

DS0TPcG.jpg


also on my D-020 d9. Since this bong is legendary and widespread, I have chosen to name this Rig "Dio" to be close to it's original name, and for R.J. Dio (rip)
KnstkFG.jpg


and i had one made with a 14mm top for my 14mm rig with the skinnier 1/4" hose. This one is still "klein torus" because I haven't thought of a good name for this rig yet. no suggestions still? :huh:

3xdthNH.jpg


and a close-up of the silicon on glass adapter. an 18mm male-male angled adapter, my dab bulbs and 2 sections of 1/2" silicon tubing gits' er-dun. :clap:

DMyOrwt.jpg


as opposed to this, which I was using before

pBJWctH.jpg


more space on this post? How bout a blast from the past....throwback...wednesday? :D

this is one of the first ways I was able to connect a v2.0 (not 2.5) DT atty to my rig. Non-TC mod, plastic mouthpiece on the skull, PVC tubing.....so not medical grade. Sigh....:(

JX5whC5.jpg


only weeks after i got that eleaf istick 50w, the first generation of cheap, chinese TC mods started to flood the market, and I wanted my glass globe adapters to stand up straight, so I did this

rfF5T0d.jpg


0IVlkkS.jpg


this vape stuff moves really fast.....i look back on this stuff (my own gear) with a sense of fond condescension... :evil:

I've come a long way since. That first pic of these 3 was only taken on 6/2015. :o It feels like I've been using the v2.0/2.5 atty for 2 years, but it's only been a little over a year :shrug:
I can't believe you ordered, at least, 6 DT V3's and you get so many mods and waterpipes, some guys think that I'm crazy with all my vapes but I can see some are playing at a higher level than me..

I'm impressed Vape Donkey....totally!!
 

Steven

Well-Known Member
I've tried the method you recommend with mixed results. You may have steadier hands than me, as about half the time I get a good deal of my sappier concentrate stuck to the side wall.
I'm sorry things didn't work out. You are probably right about the steady hands thing. I've had much practice over the years. I can load this thing while driving actually. Not something I recommend but just saying it's possible with the right movements.
@Vape Donkey 650 I also like the tubing air hole idea. It does make manufacturing a bit more troublesome but I also wonder if it's even totally necessary. I would assume it is the best case scenario with the air tube but the sourcecapes 510 nail/bubbler combo is basically the same design but even without any air holes in the cup. The air basically just goes over and a bit into the cup but decent vapor is made. But those air tube a are probably best case scenario. As for the silicone band for the adjustable air hole, I used the disposable silicon mouth tips commonly used for vape pens. If you look back at the post I showed with the Hydratube, then you can see pix and an explanation what part I used. I also actually don't use the mouthpiece to connect to my Hydratubes. I broke my Recycler tube that way. Kinda my fault for poor cap coverage but I go straight from the base to hydratube now. Showed pics of that too
 

fernand

Well-Known Member
@Vape Donkey 650 is in a class of his own in terms of gear. And considering he evidently APPLIES all these, he's amazingly resilient. Like Bubbleman who puts away a few g's of bubble before yer very eyes and proceeds to deliver the most organized presentation. And not like my friend Bobby who crawled under a table at the Everett and Jones barBQ so people wouldn't be starin' at him ;-)
 

Vape Donkey 650

All vape, no smoke please.
Thnx guyz :D I think it is my lust for effective DT to dab rig hookups which originally brought me to join you all here. For sure there's guys that have much bigger, fancier, more expen$ive glass collections than I do, but I don't think they're using them with DT ceramic donuts :shrug:

And then there's guys who have huge collections of flower vapes, I see those guys on the the forums. There's even guys like that over in @France . ;)

I do like to think, imagine...that there is some other mad vape scientist / dab fiend hunched over quietly in his own dab lab, hard at work, playing around with his own collection of DT attys and TC mods, scouring the interwebs to source pieces to make his own elaborate connectors. He could be lurking now...reading this!!!.....:suspicious::hmm::o

come join us, you glass-on-ceramic enthusiasts

here's my best medicating of the evening... some gold drop sugar wax made from some "soul assassin og" ... i had promised more videos for you guys :bowdown:

i feel that i have the medium donuts dialed in pretty well to my tastes @ TCR 220, 32w for a quick warmup, and I can start at 380 or 390F for most materials for relatively light, tasty vapor, but lots of it still :brow: (lookit that dab bulb get chalky @ 0:34 sec I luvs it)


And a reclaim hit was maybe even bigger and still tasty. :p I think I blew the cloud better into the view of the camera as well


WOW, go away for a couple of days and a million brain cells explode! I'm happy to report that the pessimistic doctrine about never ever ever ever ever re-growing neurons turns out to be inaccurate. GREAT GOING @Vape Donkey 650 !

what r you saying man, that I am all dain-bramaged from smoking all those J's and blunts in my youth and then later huffing all that PVC gassing-off from my previous DT to rig setup? :suspicious: :mental: :D

@Vape Donkey 650 I also like the tubing air hole idea. It does make manufacturing a bit more troublesome but I also wonder if it's even totally necessary. I would assume it is the best case scenario with the air tube but the sourcecapes 510 nail/bubbler combo is basically the same design but even without any air holes in the cup. The air basically just goes over and a bit into the cup but decent vapor is made. But those air tube a are probably best case scenario. As for the silicone band for the adjustable air hole, I used the disposable silicon mouth tips commonly used for vape pens. If you look back at the post I showed with the Hydratube, then you can see pix and an explanation what part I used. I also actually don't use the mouthpiece to connect to my Hydratubes. I broke my Recycler tube that way. Kinda my fault for poor cap coverage but I go straight from the base to hydratube now. Showed pics of that too

Yea, little tubes or tunnels would be a best case scenario for directing airflow inside a heated crucible cup and reducing splatter, and i'm sure it would be harder to manufacture and test. I'm not sure if @Matt's guys can even make heaters like that, in that shape. Just spitballin' right now, let's see what sticks. :sherlock:

A design closer to what Matt posted up would probably work as well, but the vapor production might be impeded some? Dunno... it has to actually be made and tested first. :bang: Could that be months away? A year? This might be the v3.5 or even v4.0 if it comes to be reality :science: I'm still quite happy using and fine-tuning my new big and medium donuts for now :nod:

I'll have to check out those drip-tip mouthpiece silicon covers as your connective gasket for the V3 base. Do you know if the silicon on those is suitable for high heat? It can be hard to get that info from the vendors sometimes. If that allows you to slip the V3 base directly into a 18mm female and be snug and firm, I might be able to improve my current dab globes' connection...and i'm just getting started with em :mad:
 
Last edited:

looney2nz

Research Geek, Mad Scientist
@divinetribe, also, in your quest towards finding that ultimate TC mod that is relatively reliable, high-performance, and inexpensive, with TCR and good TC performance with all your products, both 18650, single, dual, and internal also? I would humbly nominate the evic basic and evic dual, or just to be safe the evic two mini

Several of us here are enjoying our tiny evic basics. The small 1500mah charge won't drive the big donut for a very long time, but for the small and medium it's not bad. As for the VTC dual, I haven't gotten one yet, (hard for me to justify yet-another mod purchase) but I think I would get this dual-cell evic if I sold a mod to a friend and got a new one. It being joyetech, running the same software, I would imagine it works just as well as their other mods. I like how you can choose between it being a single or double cell mod by switching the battery case. (sorry @OF, no running a single cell with the double-cell case and using the empty space as your stash spot on this one:bang:)


I have been thinking about this too. For sure this chipset can do alot more than the joyetech firmware, but how much of it will actually help us get accurate repeatable precise TC on our donuts? I took a look at the escribe software manual, and it's loaded with tons of features, but many of them have nothing to do with controling your coils.

Why do all the DNA 75/200 mods have to be so large and brick shaped and most of them priced over $200? :o chepeast one i found is about 150

That is cool that we have a software developer here to rep the evolv software...maybe you could explain this to us? :)


Probably kanthal wire if they tell you not to TC. Kanthal = do not want

Plus it seems matt is trying to one-up these fools with his ideas for the rebuildable, temp-controllable crucible cup :tup: this looks like a copy of w9's kiss attys


I like these ideas :tup:


Steve what kind of silicon band are you using for your air control strip?


It might work, but it would be a reclaim nightmare. I've thought about using a little circle of readyXwick ceramic wick underneath my large donuts, a circle of the wick around the rim of the cup underneath the donut, since that seems to be where reclaim pools up. But it hasn't been enough of a problem for me to want to try this. could also put some of that wick or some steel wool rolled into a thin hoop / donut, placed on top of the ceramic donut, to plug that little gap in the cup / housing


Yea, a passion for tasty, medical-grade, low-temp dabbing? And being able to do it cleanly in a device that's easy to maintain? yep. :nod: A better IR gun is on my amazon list to-buy list now, there's a few items i have for that type of shopping that i haven't done in a while :bang:


Ok, now that you said that, I can see our goals for the TCR and temp control on our mods is slightly different. I just want my screen to display donut temps, you want your screen to actually display the temps of the oil. Trying to do that, involves many more variables, with how much oil / material (and what type?) is loaded on the donut and the airflow being 2 large complicating factors. And I figure you'd need to do some experimenting with a thermocouple getting readings in multiple spots on a donut or crucible fully loaded up with some sort of oil to accomplish what you want? :huh: not just an IR thermometer

I figure you'd end up with a much lower number on your screen than mine, to accomplish the same thing, if you could get it to be accurate, since the temp of your donut will be significantly hotter than your boiling oil to get it to vape.

And yea, i do wanna blast it and get as many of the active compounds out of my oil all at once, (not to be nit-picking them :p) in as few puffs as possible, with a small load on the large donut. Within reasonable temp levels, so it doesn't burn or come close to it, or degrade delicate compounds. I think the donut has to be around 400-430 to do that for me, so I leave out the THCv, CBC and quercetin (whatever that is) but I get almost all the rest

quick thoughts (freshly baked): quercetin is a bioflavanoid if I recall correctly, related to vitamin C. I've been playing with my eVic VTwin Mini quite a bit, and run it up to 430 regularly. I got 2 of the big sony batteries and a separate charger, and have been swapping them in and out. With the v3, I'd definitely be thinking of getting the double battery housing, 'cause the 13mm chews through these pretty quick. How is the 10mm and 7mm in terms of battery life? From the early reports, it sounds like I should try both of these, but the 10mm is sounding like a winner. Who's tried the different cup variations?

as to using a pad or wick, I don't see why it should be a reclaim nightmare, it could very well make cleaning much easier... toss the pad in your ISO, put a new pad on, clean the old pad, lather, rinse, repeat :)
it should also eliminate the splatter issue! Curious who uses what in terms of thermal modeling and airflow (fluid dynamics) for these tools (please tell me someone is using this stuff!)... my initial instinct would be to focus the airflow towards the bottom to pick up the vapor off the pad with the suction of your mouth on the mouthpiece. I haven't used a wick, I take it these ceramic wicks are some porous variation? As long as they are inert and do the job :)

one of these days I'll have to get a new kind of thermometer... any recommendations from your Amazon explorations? I'll wager that the sensor in most smartphones could pull off an FLIR style readout... I wonder if anyone has done it yet. Then I'd have a better sense of how these TCR curves actually stack up with the different values. I'm currently running @ a TCR value of 180, I've also used 210 and 245... typically all around the 20-22W range.
 
Top Bottom