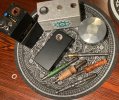
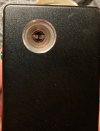
Fluxer Heaters, induction heaters for Dynavap

sesh732

Imaginable
@sesh732 - That is my favorite method. You might be able to dial PWM so you can keep up with Flite.
I might recommend burning off of the peek charge a little so you are in the more gentle part of the discharge curve when dialing in the perfect PWM
Yeah the ignore the click method really is on another level with this much power. I have to be reeeeal careful again!

Played with the pwm last night, one thought is this will make it super easy for friends who aren't used to the IH thing... Just tell them hold the button and count to 15 clicks or whatever depending on where you have the pwm dial.
 

The Stray Fox

Separated from the group
1BF7DC55-06D1-4CBA-8690-1A44F8388389.jpegFlite #50 has been here with me for a few days now. It’s the first time in a long while that my FlowerPot hasn’t been on in a couple days. I went with the coolest setting and I’m finding mouth to lung hits to be very pleasurable. It’s very tame. On my favorite cap (2018) it’s an 8-10 second for heat up. 3 rounds to clear it with medium brown avb. I can get it dark brown if I just hold 1-2 seconds past the click. This is pretty much the same experience I’ve come to enjoy with my OG Lucid Customs and Portside Mini IH.

I did have to use a riser to lift the cap off the bottom of the Flites heating chamber. Mr. C provides little discs for this though I was struggling to use them. I then tried cork but wasn’t happy. I finally settled on a piece of high temperature silicone tube that has an OD that matches the ID of the glass liner. It’s very section there and it was very easy to cut different thickness to experiment with. The ID of the silicone tube doesn’t allow the cap to touch bottom. Someone please let me know if this is a bad idea.
D9ED3F4A-2104-4E9A-8D6A-1CFDD7F8970B.jpeg
I’m very pleased and can’t wait to be a Flix owner too. The Flite is very nice. The case it comes with is very nice. The instructions are well done. Mr. C is a pleasure to work with. Well done:clap:
 

mr_cfromcali

Accessory Maker
Accessory Maker
Hi all,

OK, I think things are staged appropriately for going live in ~16 minutes, 10:00am my time? :)

I'll be posting:

Flix v1 @ $115 + shipping:
  • 2 Standard LEDs
  • 4 Green LEDs
  • 4 Rainbow (mixed) LEDs

Flix v2 @ $135 + shipping:
  • 9 Standard LEDs
  • 9 Green LEDs

Flite @ $220 + shipping:
  • 8 (1x each color, nominally, though you can change to any color I have in quantity, which is any color except hunter green or gold). Note: I do not have any more hunter green Flite cases at this time, nor do I have a guarantee of more. We'll need to see if the factory can deliver on this.
I added some pics and text to the Flix v2 page, still more to do, but I think I have the basics covered.

Flix v1 to v2 upgrade info: If you have a Flix v1 and want to upgrade to Flix v2, the upgrade cost is $60 + shipping. Add PWM for $30 more ($90 in total). This is not an option in the store, so contact me next week (please!) to arrange this.

Hopefully this is the major info.

Thanks!
 

mr_cfromcali

Accessory Maker
Accessory Maker
Adding this as a separate post so it gets seen: I will be adding items to the store in two passes, as the software requires me to save the inventory changes separately. I'll add the Flix first, then I'll add the Flite. Please refresh your browser to reload, if needed. Sorry for the fire drill!

Updated to add: OK, the products are live. Let me know if you have any issues or questions. Thank you for your support! :love::rockon::clap:
 
Last edited:

mr_cfromcali

Accessory Maker
Accessory Maker
A customer recently found this Flix-compatible adjustable PSU on Amazon (Prime), and I want to share the link:

SHNITPWR 4V - 12V Power Supply 10A 120W AC to DC Adapter DC 4V 4.5V 5V 6V 7V 8V 9V 10V 11V 12V Voltage Adjustable Universal Power Converter Transformer 100-240V AC In with 14 Tips & Polarity Converter by SNT-POWER, $30 via Amazon Prime: https://www.amazon.com/dp/B08N4FB7MF/ref=cm_sw_em_r_mt_dp_31SGTNKNGCDXANQ5PRC4?_encoding=UTF8&psc=1

61eVCSiclHL._AC_SL1000_.jpg


This appears to be the same PSU I was carrying in the fall, for the same $30 price I was selling them, and this one contains extra tip choices, too. Worth considering if you need a 10A PSU for your Flix.
 
Last edited:

sesh732

Imaginable
Label from the 2A charger mentioned a few pages back, next to the original 1A Flite charger. The only differences seem to be the amps rating and a thinner cord on the 2A. Any precautions I should be taking while using this quick charger? Any danger of overcharging, say if I don't get to it until it's been on green light/full for 20 minutes? I know not to charge unsupervised or overnight for this type of battery. Thanks!
https://flic.kr/p/2kB2RaD
 

mr_cfromcali

Accessory Maker
Accessory Maker
Label from the 2A charger mentioned a few pages back, next to the original 1A Flite charger. The only differences seem to be the amps rating and a thinner cord on the 2A. Any precautions I should be taking while using this quick charger? Any danger of overcharging, say if I don't get to it until it's been on green light/full for 20 minutes? I know not to charge unsupervised or overnight for this type of battery. Thanks!
https://flic.kr/p/2kB2RaD

I've been using this one for a few days and haven't noticed any issues, it seems to work fine and once charged, it switches over to trickle charge and can remainin that state indefinitely, AFAIK. I did not notice the batteries being any warmer than usual when it finished charging.

Overall - and despite having an external charger about 3 steps away - I've found this 2A charger w/the right tip to be a handy addition to my work bench, it keeps the test unit freshly charged.
 

Prophecy

Well-Known Member
Flite Nr.6 Gun Metal checking in with CaS and coolest coil position.
First I`m very impressed from it, very good build quality, and size factor feels very good in the hand.

After the initial charging I tested it with my OmniXL on half bowl setting and Captive Cap, it was a very good experience nice clouds on the first heatup and the another 2 where also good but the third was a little bit roasty.
Further testing is necessary, I think after the battery has lost some charge it should work perfectly then.

Thanks @mr_cfromcali and @TommyDee for this nice little device :tup:


mr_cfromcali

Accessory Maker
Accessory Maker
Glad it finally reached you, @Prophecy ! I'm glad you are happy with it, and I think after a few more sessions you will have it dialed in. I did make sure to set yours cooler, as a) I know you requested that, and b) you are quite far away from me, however you may be able to make it even less aggressive by pressing the lower loop of the coil lower, towards the PCB. If yours is cap-as-switch only, you can remove the entire PCB by hooking a paperclip or similar under the white rectangular relay in the rear, behind the batteries, and lifting up. Should only take a minute to adjust this, just remove the batteries first. ;)

Hope you have a great weekend testing it out!
 
Last edited:

mr_cfromcali

Accessory Maker
Accessory Maker
How warm does everyones chargers get?

Mine gets hot! I feel the need to unplug it to let it cool down before finishing the charge :shrug:

The charger gets hot? That doesn't sound right. :\ I have some errands I need to run now, but please send me an email and when I get back I'll see if we can figure out the issue.
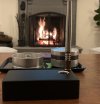
 

Zoltani

Well-Known Member
@mr_cfromcali what is the best solution to keep the magnets in the lid in place? loc tite?

I have on occasion had them stay on the base and today I popped it back in the lid backwards and was confused why the lid wouldn't close :doh:
 
Zoltani,

mr_cfromcali

Accessory Maker
Accessory Maker
Any chance of one that uses USB-C? I hate keeping up with extra cables.
Sorry, no USB-C for v1, but it’s on the list for v2.

As I posted a few days ago, I wanted to get this out the door as quickly as I could, once it was stable. I didn’t want to let the desire for a perfect device keep a very good device on the shelf.

I’ll see what I can do down the road to add it. Thanks.
 

mr_cfromcali

Accessory Maker
Accessory Maker
@mr_cfromcali what is the best solution to keep the magnets in the lid in place? loc tite?

I have on occasion had them stay on the base and today I popped it back in the lid backwards and was confused why the lid wouldn't close :doh:
Sorry. You can send it back and I can reglue it, if you want me to fix it - send me a PM or email and we’ll work out the details. But yes, Loctite is pretty good. I’ve been using another adhesive and it usually works well:

KISS Molecular Super Bond, Rigid & Flexible, Waterproof, 20 Grams, Clear Super Glue https://www.amazon.com/dp/B07KLDKZV...abc_C6BMDVM41NH2ZVY7SG2B?_encoding=UTF8&psc=1

Sorry this happened, but we can fix it.
 
Last edited:

Sn4Pz

Well-Known Member
Holy cow these battery sleds clamp down on the cell lol. Is there any technique for putting them back and as to not damage the wrapper?

Also, how much does everyones internals slide around? Mine doesn't normally but it was all over the place when I was applying pressure trying to get my batteries back in. I'm debating whether or not to buy some neoprene foam (think 1/32" thick) and line the top so it's less snappy when I put the lid onto the heater, but should I do under the PCB too? :shrug:

I don't know if the flite uses its casing as a heatsink... I don't want to prevent cooling if it is required.
 
Last edited:
Sn4Pz,

Prophecy

Well-Known Member
Glad it finally reached you, @Prophecy ! I'm glad you are happy with it, and I think after a few more sessions you will have it dialed in. I did make sure to set yours cooler, as a) I know you requested that, and b) you are quite far away from me, however you may be able to make it even less aggressive by pressing the lower loop of the coil lower, towards the PCB. If yours is cap-as-switch only, you can remove the entire PCB by hooking a paperclip or similar under the white rectangular relay in the rear, behind the batteries, and lifting up. Should only take a minute to adjust this, just remove the batteries first. ;)

Hope you have a great weekend testing it out!

I removed the PCB and could lower the coil a little bit more, after that on my first test bowl I was able do to 4 heating cycles without this light charred taste at the 3 and 4 heat up cycle.

Now with this setup it is perfect, have tested it also with an older hotter cap and it worked also perfectly.

At next is to play with the PWM function, but a question to this, when the dial is turned to clockwise on the let's say 25% duty cycle will it than heat it longer but also not so aggressive and visa versa when turned counter clockwise position? Or I misunderstood that?

EDIT: Another question will it harm or discharge the batteries when I leave the unit on when not in use?
 
Last edited:
Top Bottom