VapCap Induction Heater for Desktop and in Car Use

Herbonius

Well-Known Member
I've only been running it a day now but I feel compelled to show my new induction VapCap set up as it's easily been the best vaping experience I've ever had.

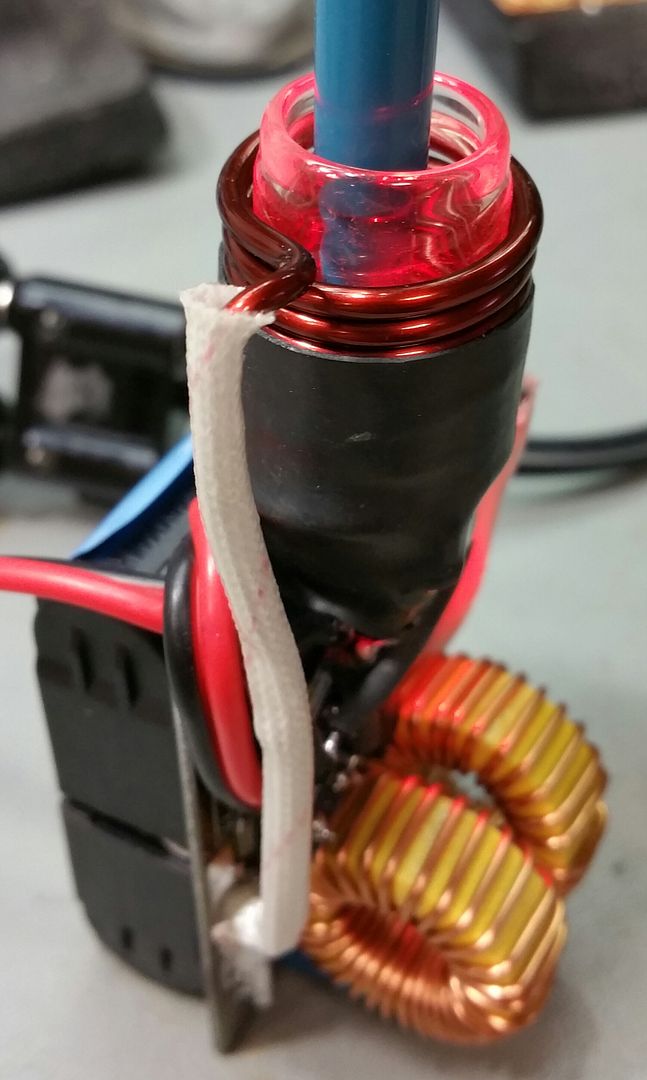
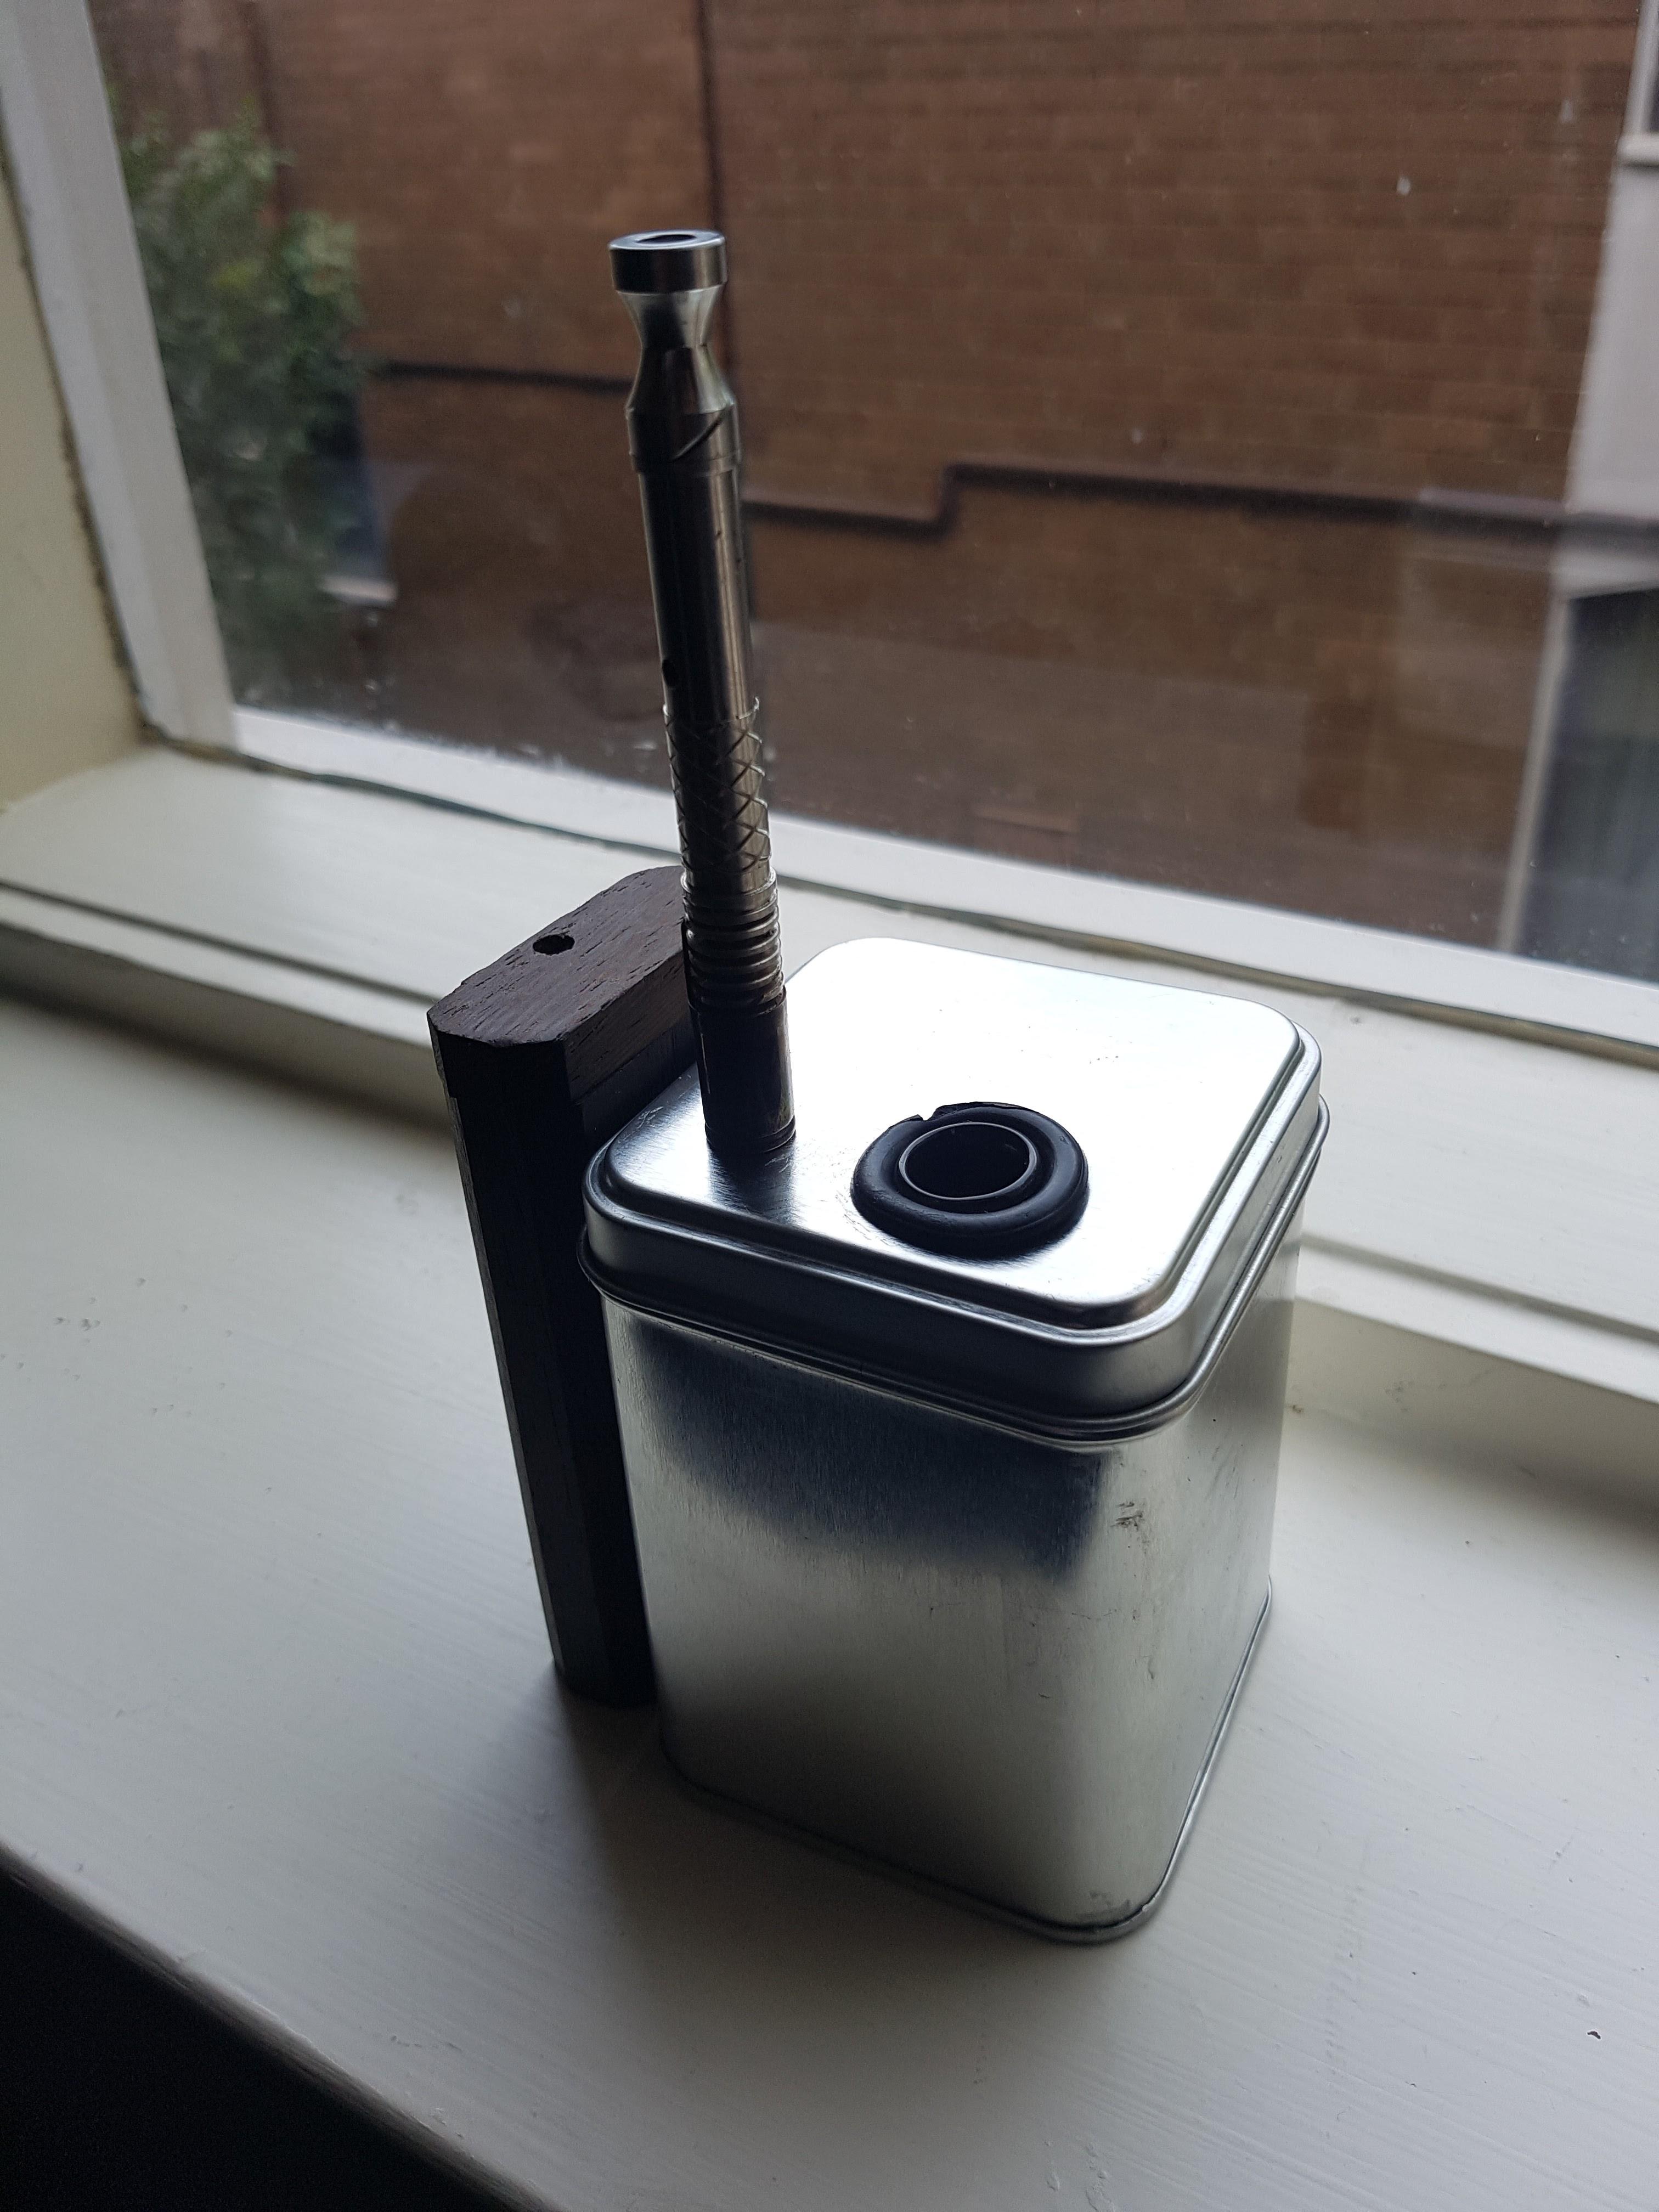
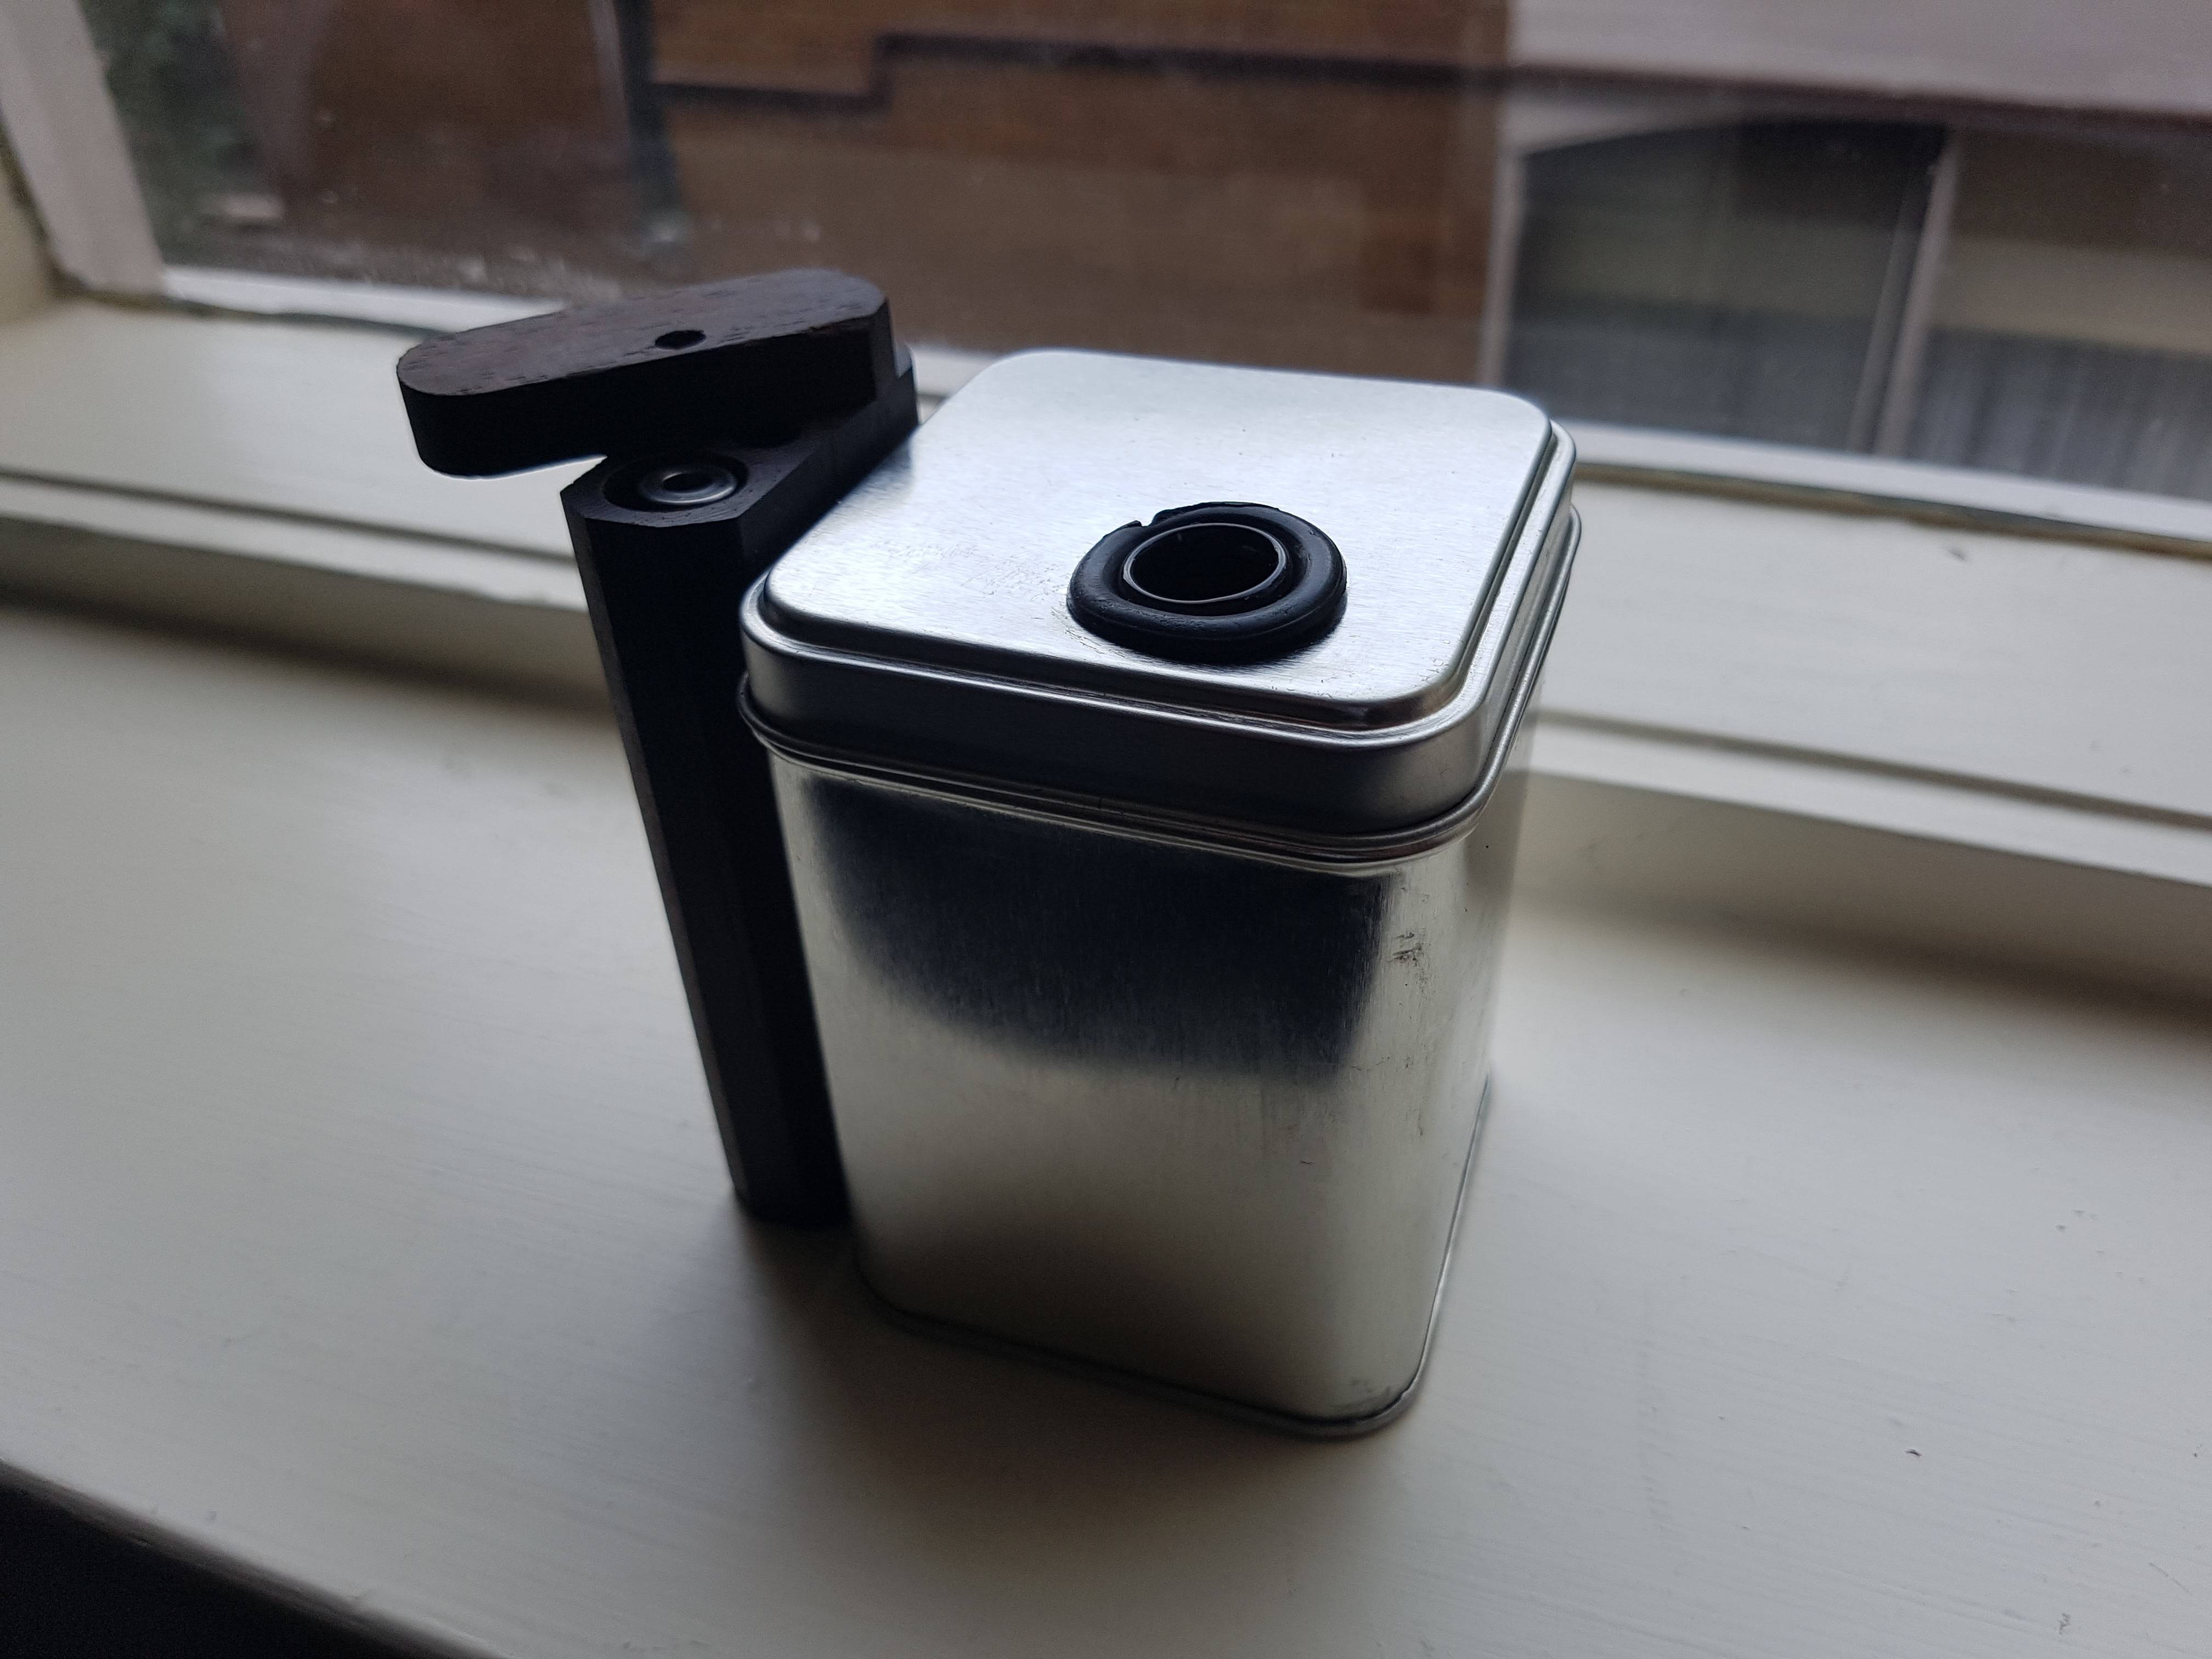
I recently purchased an induction heater from Pipes (skeletor format) and put it into an old tin I found that happened to be exactly the correct size for the heater. It has three 18650 batteries and by all reports should last at least 100+ sessions. This is obviously unheard of for a portable vape.

The heater heats the VapCap to click in 5 to 10 seconds (no spinning!) and the whole process is completely effortless. I just put my VapCap into the hole and wait for the click. It's actually a bit easier to hear the click now as I don't have to listen for it over the sounds of my butane lighter anymore.

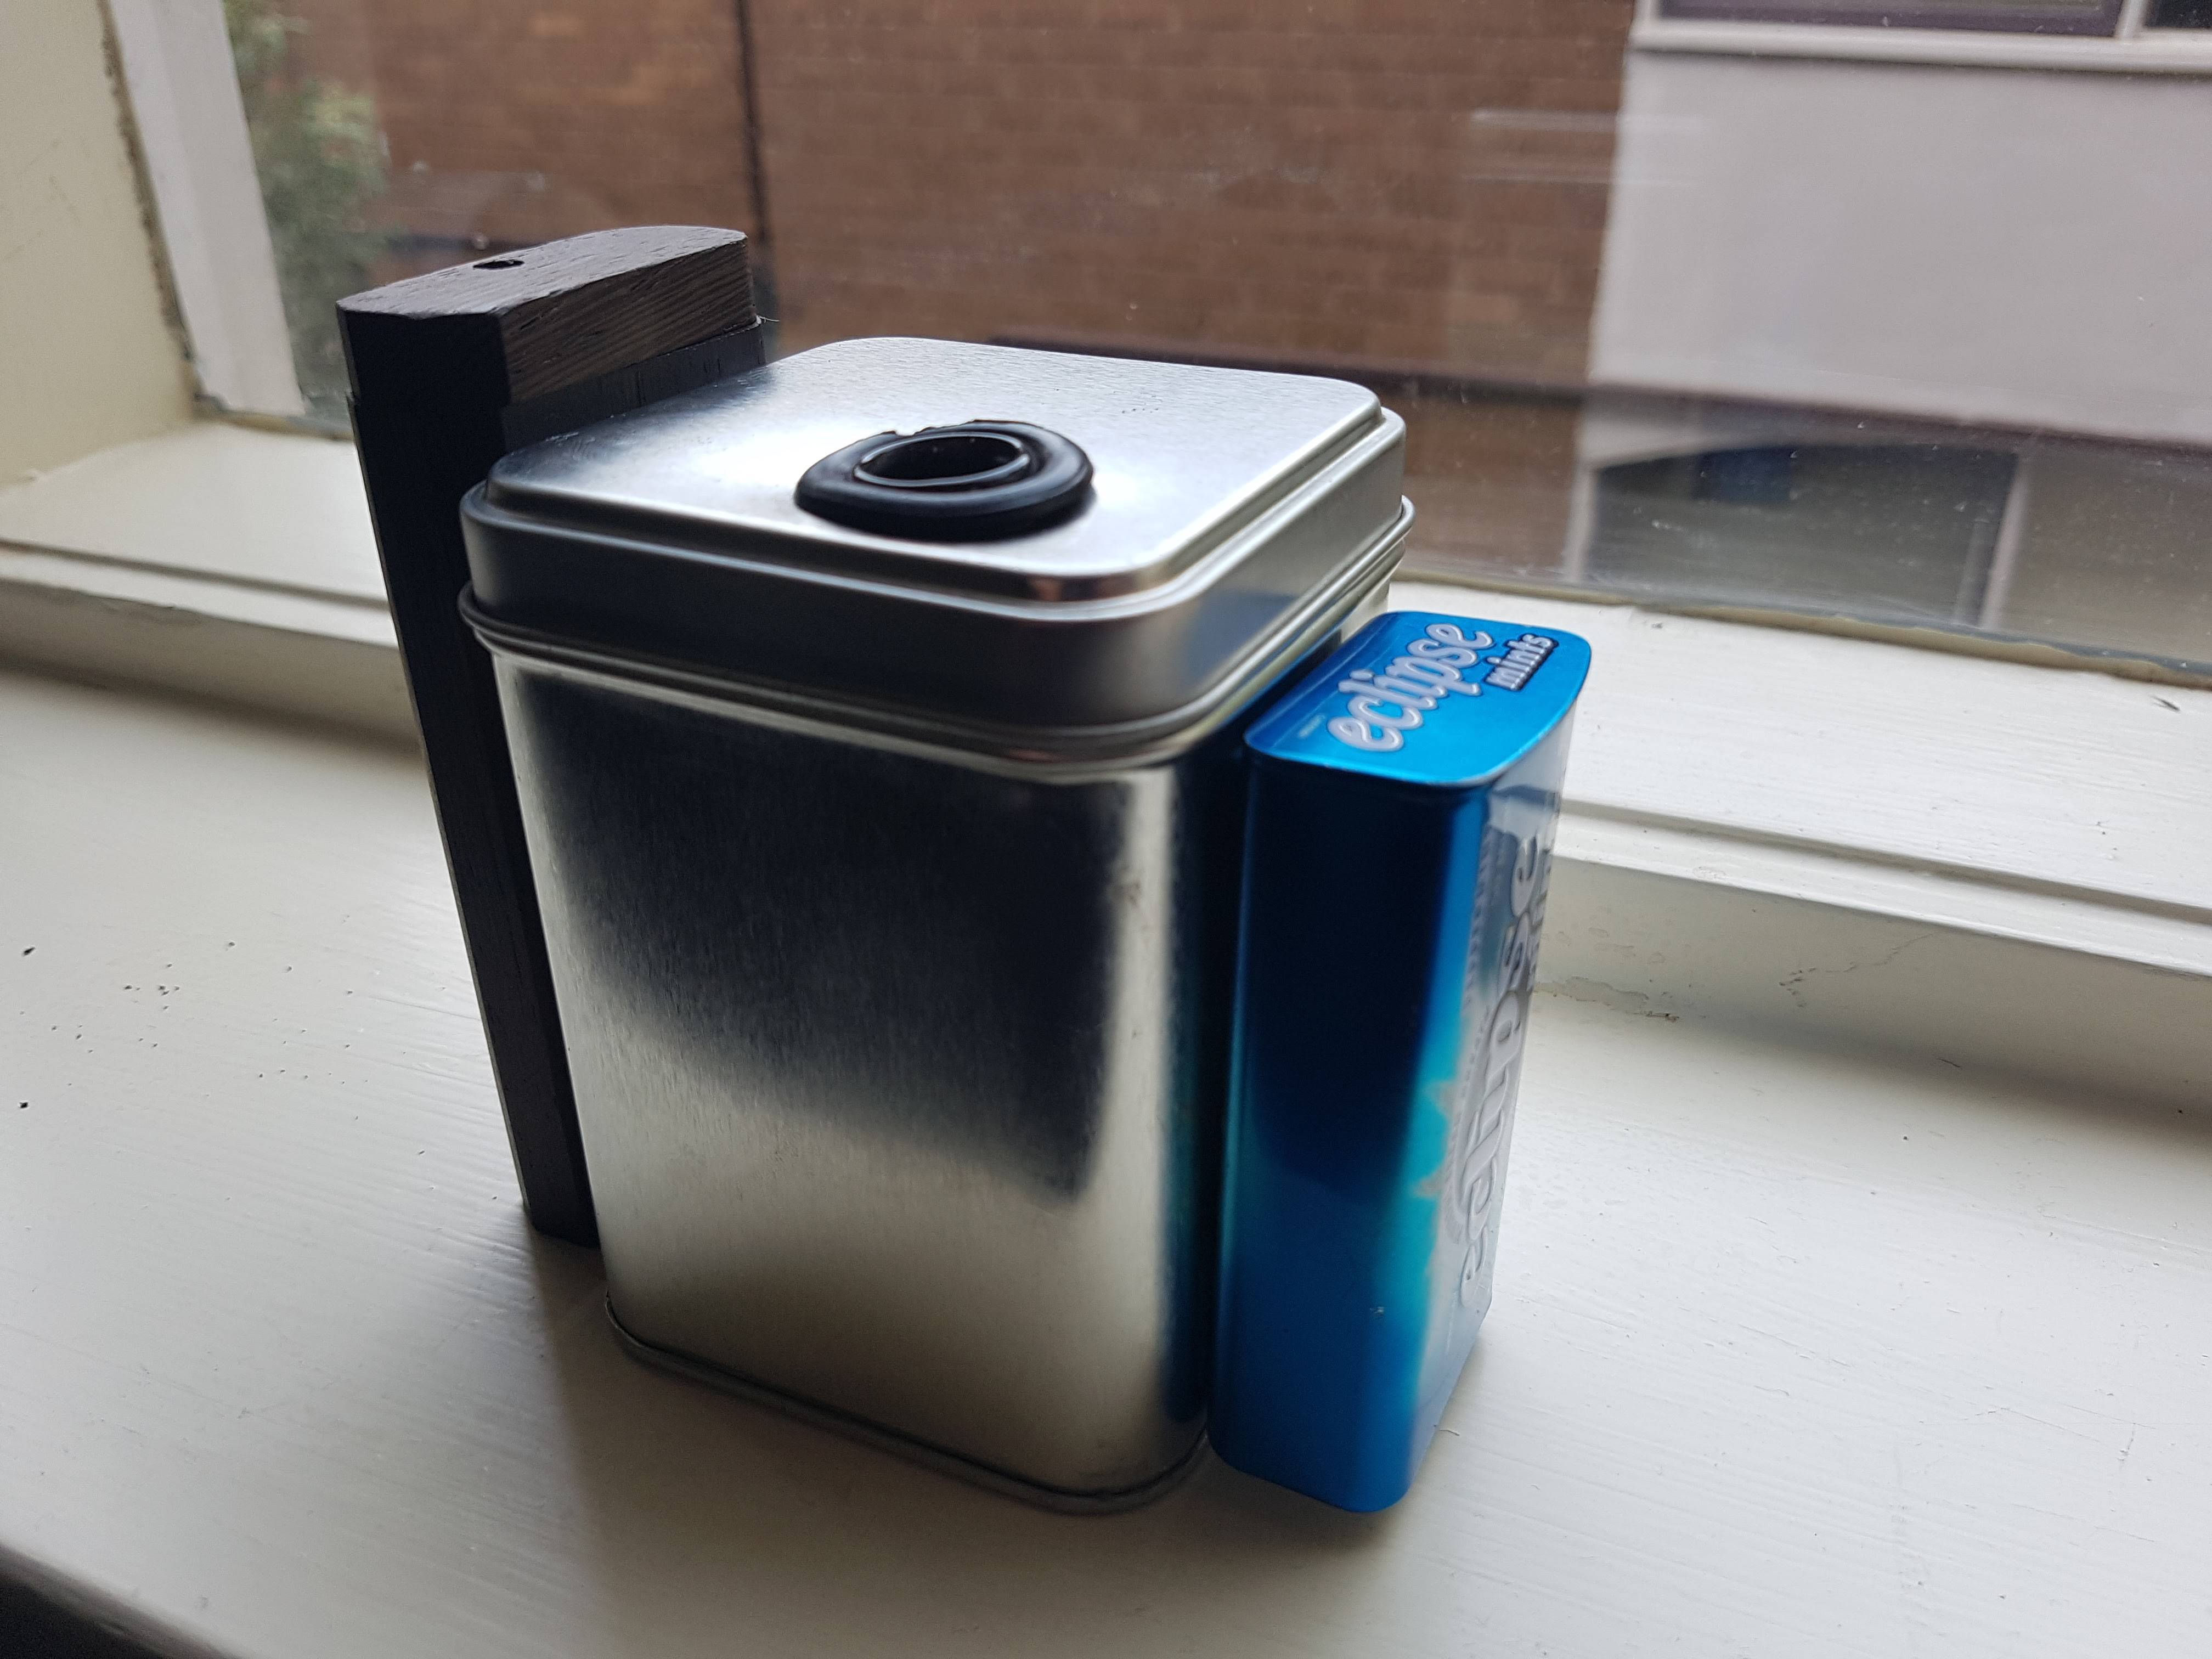
I also put magnets on the lid to cool down the VapCap and on either side of the tin - one to attach the Dynastash and another to attach a small tin to store ABV. This way I have everything I need in one portable station.

I have a couple things to do still - I need to drill a hole for the power charger and I need to replace the rubber gasket around the induction heater hole as I took a chunk out of it when got caught on the sharp tin.

I was a bit concerned about putting the rubber gasket so close to the heater but there is no smell whatsoever and the rubber is completely cool to the touch during and after use. I guess it doesn't get affected by the induction heater. The tin itself seems to only ever get very mildly warm, perhaps heating up only a couple degrees.

Obviously it's not a pocketable setup but I still have my triple jet lighter for that. Anywhere else though I'll be using this heater.
muH9fRw.jpg

oK17zq0.jpg

QjYpeNB.jpg
 

CharmCityVapeGuy

Known to some and enigma to others
I've only been running it a day now but I feel compelled to show my new induction VapCap set up as it's easily been the best vaping experience I've ever had.

I recently purchased an induction heater from Pipes (skeletor format) and put it into an old tin I found that happened to be exactly the correct size for the heater. It has three 18650 batteries and by all reports should last at least 100+ sessions. This is obviously unheard of for a portable vape.

The heater heats the VapCap to click in 5 to 10 seconds (no spinning!) and the whole process is completely effortless. I just put my VapCap into the hole and wait for the click. It's actually a bit easier to hear the click now as I don't have to listen for it over the sounds of my butane lighter anymore.

I also put magnets on the lid to cool down the VapCap and on either side of the tin - one to attach the Dynastash and another to attach a small tin to store ABV. This way I have everything I need in one portable station.

I have a couple things to do still - I need to drill a hole for the power charger and I need to replace the rubber gasket around the induction heater hole as I took a chunk out of it when got caught on the sharp tin.

I was a bit concerned about putting the rubber gasket so close to the heater but there is no smell whatsoever and the rubber is completely cool to the touch during and after use. I guess it doesn't get affected by the induction heater. The tin itself seems to only ever get very mildly warm, perhaps heating up only a couple degrees.

Obviously it's not a pocketable setup but I still have my triple jet lighter for that. Anywhere else though I'll be using this heater.
muH9fRw.jpg

oK17zq0.jpg

QjYpeNB.jpg
I can't even explain how badly I want that. Nice work!
 

CarolKing

Singer of songs and a vapor connoisseur
I might want to buy one of these when and if they are available.
I've only been running it a day now but I feel compelled to show my new induction VapCap set up as it's easily been the best vaping experience I've ever had.

I recently purchased an induction heater from Pipes (skeletor format) and put it into an old tin I found that happened to be exactly the correct size for the heater. It has three 18650 batteries and by all reports should last at least 100+ sessions. This is obviously unheard of for a portable vape.

The heater heats the VapCap to click in 5 to 10 seconds (no spinning!) and the whole process is completely effortless. I just put my VapCap into the hole and wait for the click. It's actually a bit easier to hear the click now as I don't have to listen for it over the sounds of my butane lighter anymore.

I also put magnets on the lid to cool down the VapCap and on either side of the tin - one to attach the Dynastash and another to attach a small tin to store ABV. This way I have everything I need in one portable station.

I have a couple things to do still - I need to drill a hole for the power charger and I need to replace the rubber gasket around the induction heater hole as I took a chunk out of it when got caught on the sharp tin.

I was a bit concerned about putting the rubber gasket so close to the heater but there is no smell whatsoever and the rubber is completely cool to the touch during and after use. I guess it doesn't get affected by the induction heater. The tin itself seems to only ever get very mildly warm, perhaps heating up only a couple degrees.

Obviously it's not a pocketable setup but I still have my triple jet lighter for that. Anywhere else though I'll be using this heater.

muH9fRw.jpg

oK17zq0.jpg
 

Alexis

Well-Known Member
I have the jarhead in transit to UK by slowboat. I cant remember when Pipes posted it now, it was at least 3 1/2 weeks ago. I have been onna homeopathy vapor break.
So far no sign of the jarhead. I a have practically finished my homeopathy now, and technically could vaporize any time.

I just hope my jarhead doesnt fall ofg the boat and get lost!:disgust::rip:
 

Alexis

Well-Known Member
Slow boat shipping... Hate it! You never know how many transfers may occur.
Could come tomorrow or another couple weeks. Not un-heard of at all, but a real pain when it's something you can't wait to get.
Hang in there.

Lu6DW.gif
Thanks Pipes! Once again you show yourself to be a man who cares, not only an inventive genius!
I am patient indeed rest assured, just a curious cat. Im sure it will be here anytime soon. This item is more precious than your standard mass produced products by big business, with personal and sentimental value, hence why I will be so much more pleased when it does arrive safely!
I've no doubt it will be worth the wait. All I really want is to know he's safe and sound in the hands cystody of pirates!
 

Pipes

Addicted DIY Enthusiast
Accessory Maker
A quick update for those on the PS list.

Everything is done except final assembly. All the holes are made and just waiting on the battery gauges to arrive which could be any day. Just have to determine the best mounting location for it, but putting the modulars inside the case will be a quick process. Thinking the gauge will be on the front plate centered.
Soon, very soon.

Also, to give myself something to do this summer, I've ordered enough stuff to assemble 30 more Portsides. :brow:

List is already on the go!

:science:
 

GreenHopper

20 going on 60
A quick update for those on the PS list.

Everything is done except final assembly. All the holes are made and just waiting on the battery gauges to arrive which could be any day. Just have to determine the best mounting location for it, but putting the modulars inside the case will be a quick process. Thinking the gauge will be on the front plate centered.
Soon, very soon.

Also, to give myself something to do this summer, I've ordered enough stuff to assemble 30 more Portsides. :brow:

List is already on the go!

:science:

Awesome news, I look forward to giving the PS a whirl whilst not having to give the VapCap a twirl ;)
 

herbivore21

Well-Known Member
A quick update for those on the PS list.

Everything is done except final assembly. All the holes are made and just waiting on the battery gauges to arrive which could be any day. Just have to determine the best mounting location for it, but putting the modulars inside the case will be a quick process. Thinking the gauge will be on the front plate centered.
Soon, very soon.

Also, to give myself something to do this summer, I've ordered enough stuff to assemble 30 more Portsides. :brow:

List is already on the go!

:science:
How long til these are available to retail brother? I'd love to get my hands on one or two of your products when the time comes, but I have sworn off of all pre-orders long ago.
 

Pipes

Addicted DIY Enthusiast
Accessory Maker
Who said anything about prepaid? Not my way. ;)

Payment due when ready to ship. :cool: But I do appreciate a quick payment when the time comes.
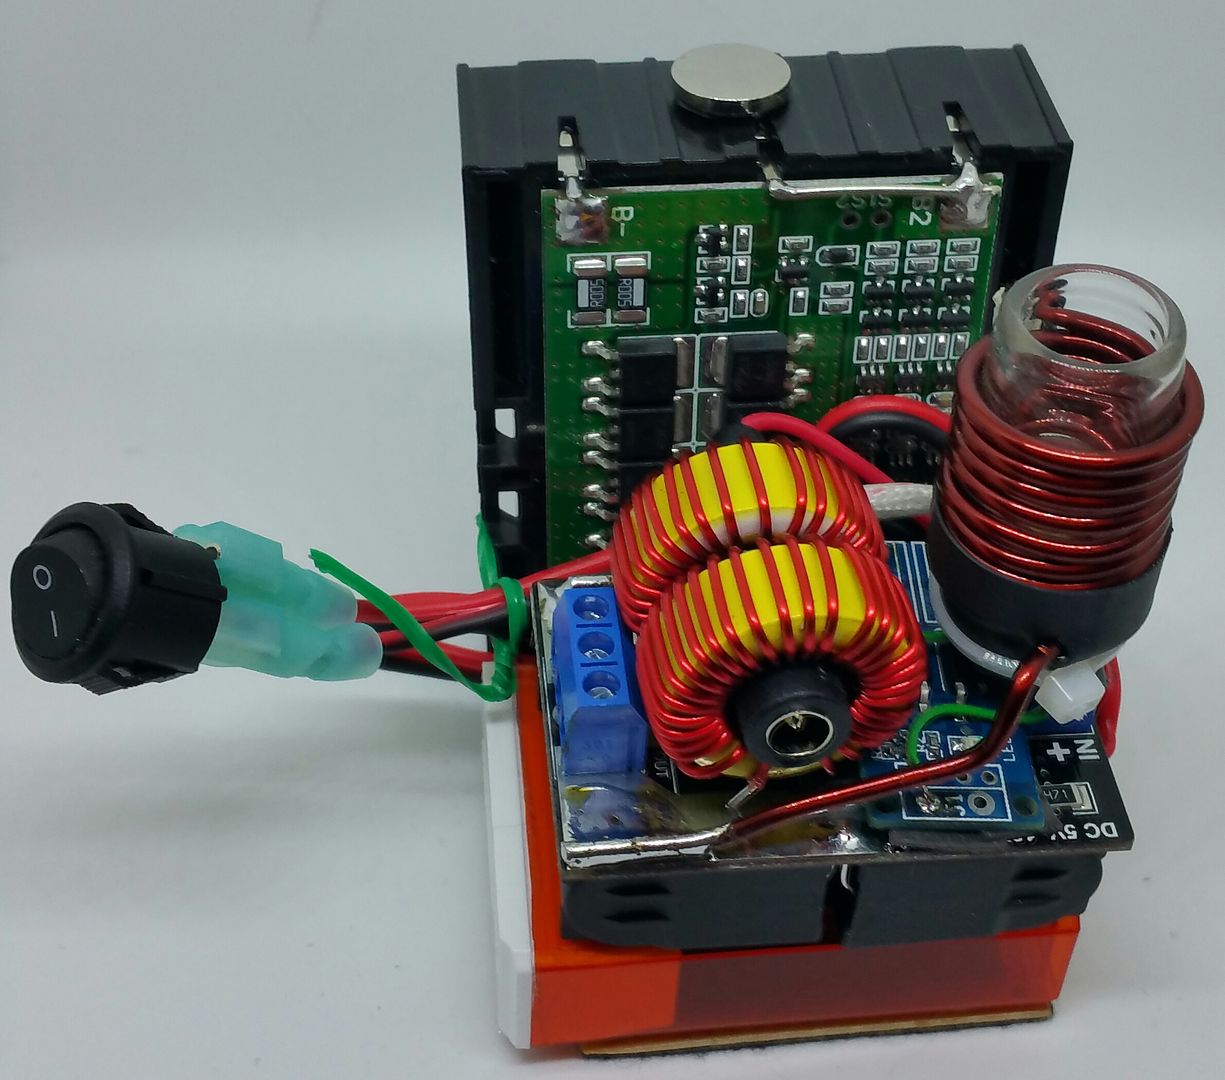
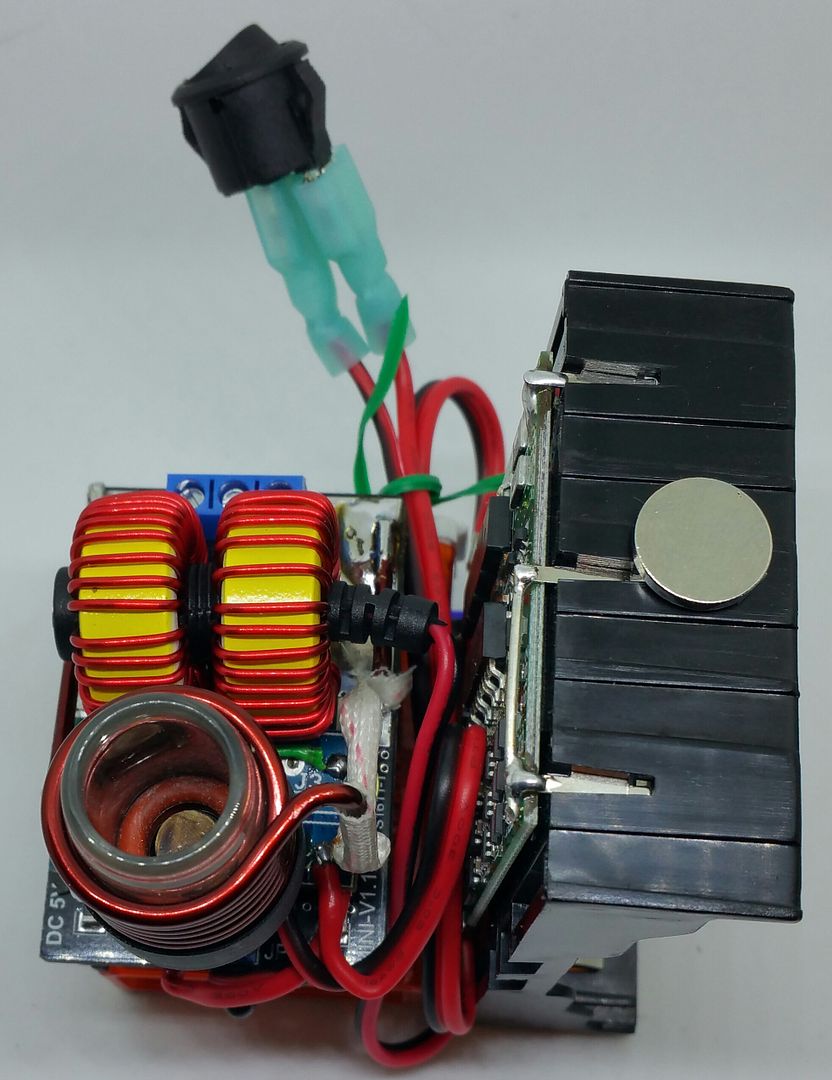
An update to Skeletor units. Once I receive the battery gauges, they will become part of the deal. Along with the addition of the Kill switch. Necessary if the unit is enclosed by buyer and batteries can not be easily pulled in the case of a coil fault and/or tactile button stuck.
So I'm upping the Skeletor price from $60 to $65. Current pending orders exempted.

Also, the Jarhead will only be made on a request basis. Currently have no more power supplies for them. But if enough interest, then things may change.

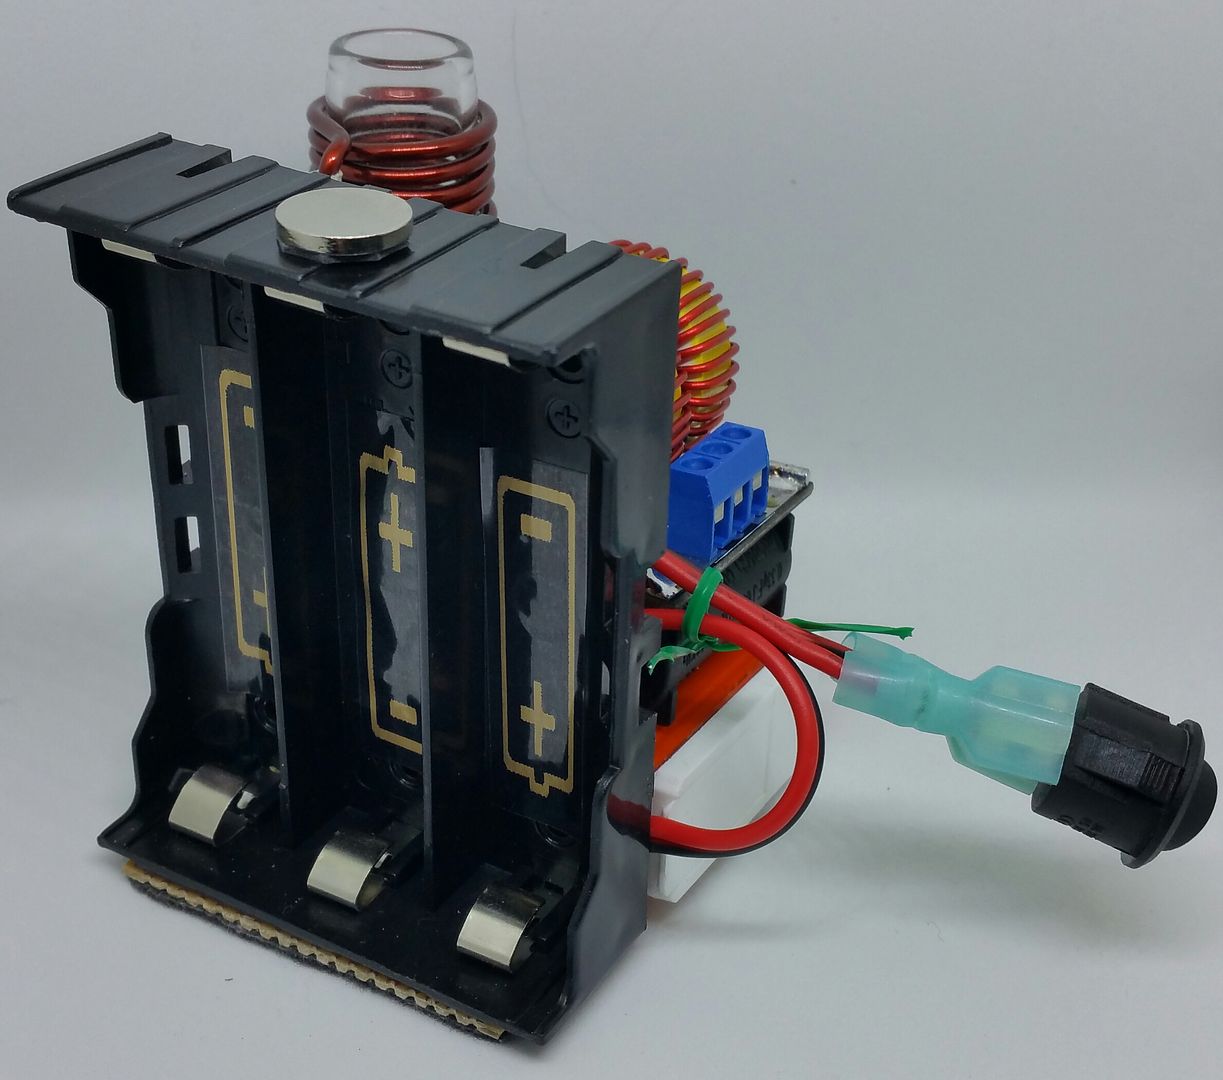
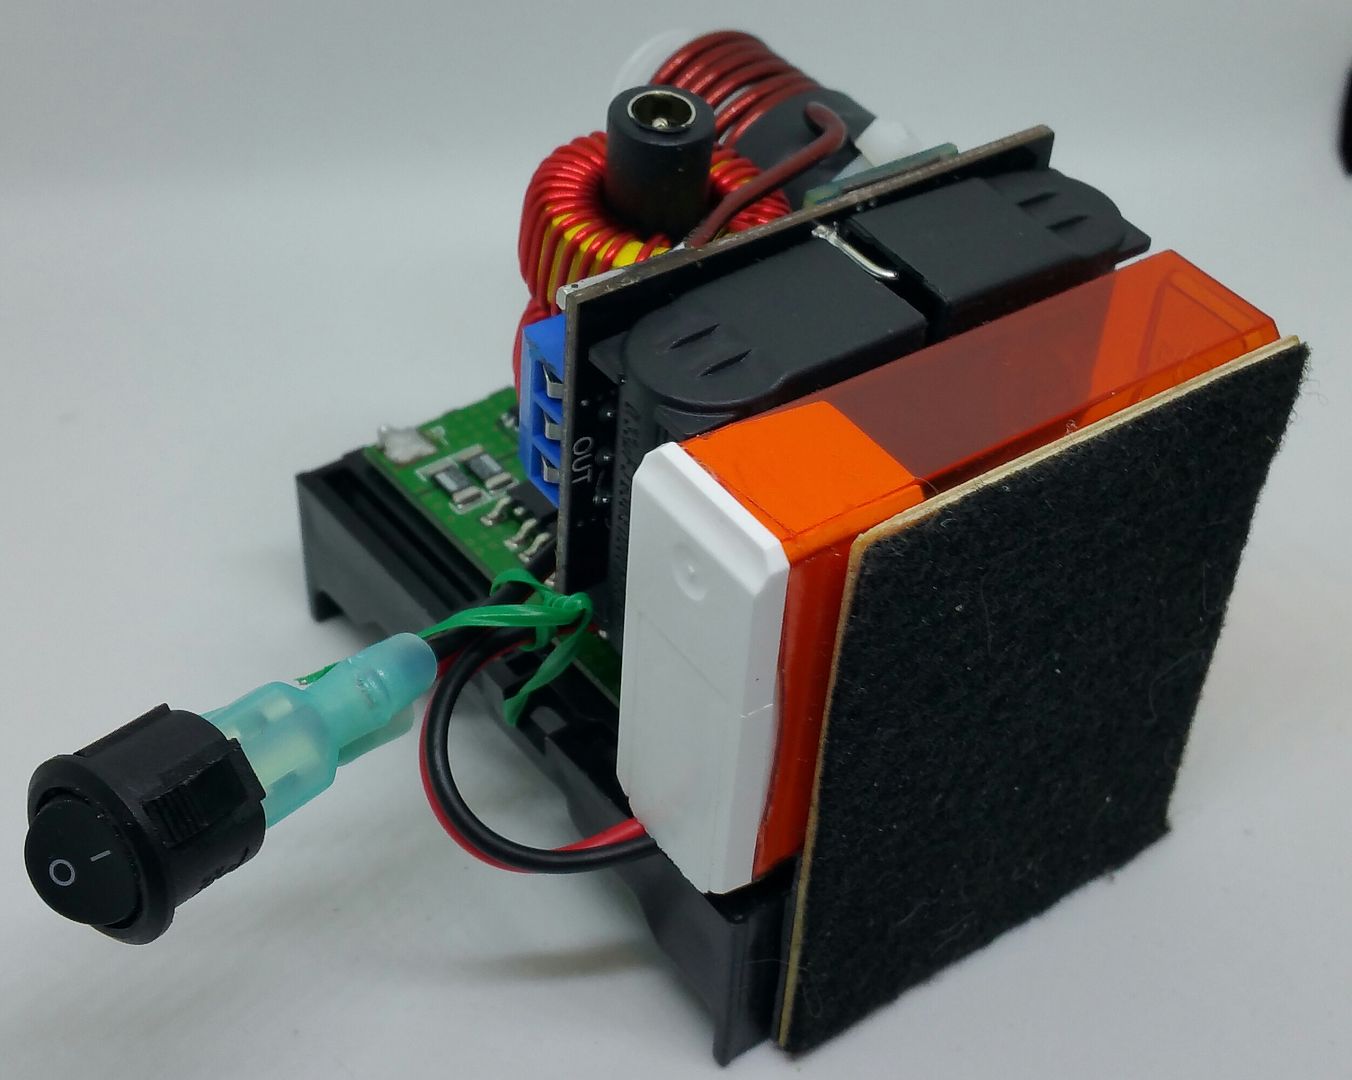
Here's a couple pics of the Skeletor with the Kill switch added. Can just be left on and tucked away if unit is such that batteries can be accessed. Or removed and the connectors bladed together. I purposely used push on blade terminals so the push through switch can be easily mounted to an enclosure without having to solder.


This unit is held together by the use of pressure activated double sided adhesive rubber tape. This makes it easy for separating for rearranging to suit the owners imagination and enclosure dimensions. :science:
:cheers:
 

Rumble Duck

Member
Hello Pipes! Just created an account here to comment on this thread. You've been doing some absolutely amazing work! Thank you so much for sharing all of this! I've only had my vapcap for a few days, but I am already fed up with butane torches. Induction heating it is!

Anyways, so I have an idea of converting a 30oz steel coffee mug into an all in one induction heater/water pipe combo. I found a thin 14mm ash catcher on dhgate that should fit inside the mug, with plenty of space left over for the induction heater and battery pack.

Mug:
http://amzn.to/2qjZbrb

14mm Ash Catcher
http://bit.ly/2oX0Wpl

Are you still selling kit versions of this? I want to get a skeletor, but I'm not sure how easily I will be able to move things around.

If not, where do you find the 17mm glass tubing? I can't seem to find any cheap sources.

Thanks again! Your hard work does not go unappreciated <3
 

Pipes

Addicted DIY Enthusiast
Accessory Maker
Now that what it's all about. Very cool idea. Not sure about fitting the battery pack into the mug. It's 60mm across so around 66mm measuring diagonally. If a 18650 cell will fit sideways, it's good to go.
The Skeletor will come apart for re-orienting easily. The double sided tape can be pried apart and re-oriented. There is enough wire lengths to move the pieces in most arrangements. I can orient the work coil for user specifications.

Still waiting on those darn battery gauges to show up.....:bang:
 

Rumble Duck

Member
Now that what it's all about. Very cool idea. Not sure about fitting the battery pack into the mug. It's 60mm across so around 66mm measuring diagonally. If a 18650 cell will fit sideways, it's good to go.
The Skeletor will come apart for re-orienting easily. The double sided tape can be pried apart and re-oriented. There is enough wire lengths to move the pieces in most arrangements. I can orient the work coil for user specifications.

Still waiting on those darn battery gauges to show up.....:bang:

Ahhhh okay, awesome! Thank you! Would I be able to buy a skeletor/kit version oriented like this one?


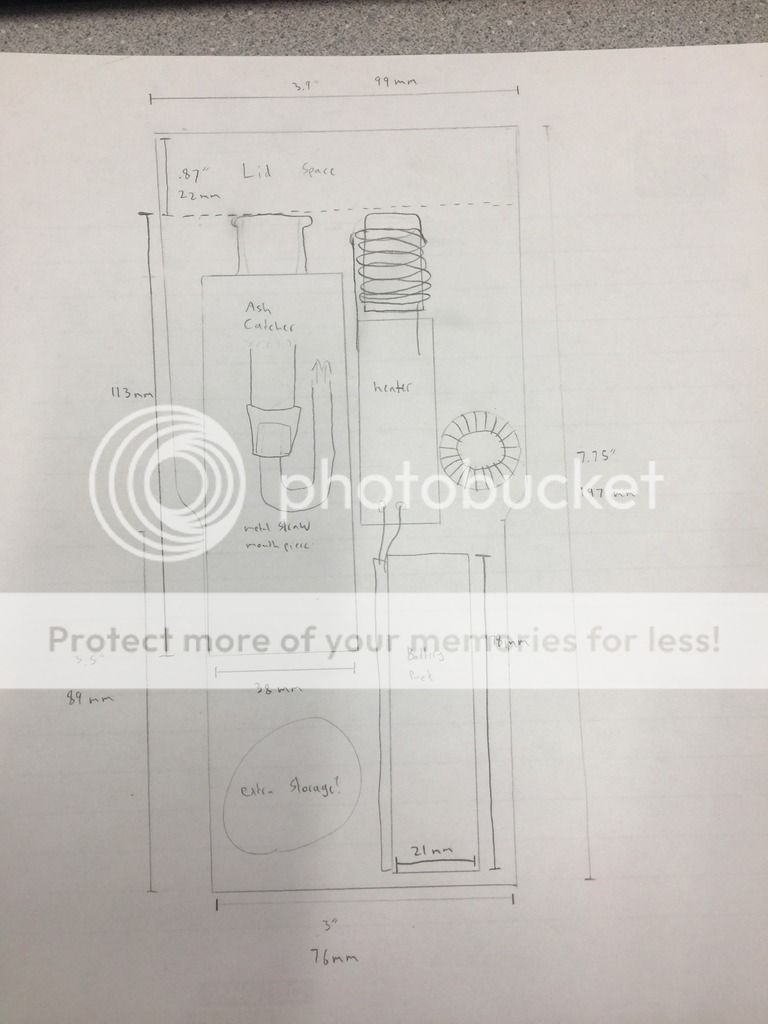
I want to try to make it is narrow as possible so that it fits in the mug. I think that the 60mm wide battery pack should fit vertically underneath the heating unit. I think the base of the mug is 3 inches wide.

I'll try to find the exact measurements of everything and draw out a little diagram showing the placement of everything.

Also if it makes a difference, I wouldn't need the battery indicator for this build since I plan on making the entire contents of the mug easily removable so that I can swap out batteries and clean the glass piece. I will be using a separate 18650 battery charging station that I already use for my arizer air.

Thanks for the quick reply!
 

Pipes

Addicted DIY Enthusiast
Accessory Maker
If no need for the gauge, I can make you up a unit pronto. Will continue in the PM.
where do you find the 17mm glass tubing? I can't seem to find any cheap sources.
Good question about where to get the glass tube. I was using the cut off ends of my Shitfucker vape pieces for this. Once this batch is cleared and moving forward, I too had been looking for a substitute. What I found was these puppies which I have a bunch on order. Again, went on back order as they were not expecting a large order I think. They are 16mm in diameter, so some re-wrapping will be necessary but no big deal. I have to for the coils that come spaced out anyway and not hard. Easiest to uncoil completely and wrap from scratch. Can get a tight wrap that way.

:science:
 

Rumble Duck

Member
If no need for the gauge, I can make you up a unit pronto. Will continue in the PM.

Good question about where to get the glass tube. I was using the cut off ends of my Shitfucker vape pieces for this. Once this batch is cleared and moving forward, I too had been looking for a substitute. What I found was these puppies which I have a bunch on order. Again, went on back order as they were not expecting a large order I think. They are 16mm in diameter, so some re-wrapping will be necessary but no big deal. I have to for the coils that come spaced out anyway and not hard. Easiest to uncoil completely and wrap from scratch. Can get a tight wrap that way.

:science:

Ahhhhh thank you!! Those look awesome. I also found these on that same website. They're a little more expensive and the tube is shorter, but they're in stock. Not sure if you could use the metal piece for anything.

And so here is my idea for the mug! These are the exact dimensions of all of the components. I had to eyeball a few things since I don't know how much space i'll have at the top where the lid is, but everything looks like it will fit! I'm hoping to have enough space to squeeze in a few of those vapcap storage tubes so I can keep everything in one spot.


Also, I found a cheaper stainless steel mug on amazon! If you go to other sellers there are some for sale for only $4 and free shipping. I'm not too sure if this is a mistake, but I just ordered a 30oz and a 20oz so lets see what happens!
 
Last edited:

Pipes

Addicted DIY Enthusiast
Accessory Maker
Looks good on paper. I'm not totally convinced the battery pack is going to fit as you hope. Maybe if sitting centered as that is a huge mug. But with it being a cylinder, you will run out of room moving towards the side very quickly. The best approach, which I was considering as well depending on design, would be to use 3 ea. single cell holders daisy chained together so the arrangement has more flexibility. In fact, I have just ordered a few to accommodate requests like yours.
Prototyping and calculating how things will come together is a task which will almost always have hitches. I generally make little boxes out of folding paper to the actual size of components. Gives a 3D visual of how it fits together. Then it's easy to try different ways to put it all together. :science:
 
Top Bottom