TinyMight / TM 2

stark1

Lonesome Planet
@Djsleepy , do let us know if/when you get it.

Orders are being taken is a good sign; no CS is a bit foreboding?

Hope all goes well. :sherlock:
 
Last edited by a moderator:
stark1,

Siebter

Less soul, more mind
So it says in manual ..:to move CU to not push on mesh but from sides But what if you push toward end for a small ball how do you get it back up to end you started from? Push all the way out?

I move the cooling unit back and forth all the time and in real life the screen of the cu is actually pretty sturdy and sitting tight too, so as long as you don't use something hard and / or pointy you should be good pushing from either side. I use my pinky to increase the chambers size (and the wooden tip of a MFLB brush to decrease it from the other side).
 

PossumMD

Well-Known Member
it has a temperature dial. internally there is a temperature sensor that reads the coil temp
ao it controls the heat.
I almost guarantee that "sensor" is actually reading the change in resistance. Different resistance equals different heat.
 
PossumMD,

justcametomind

Well-Known Member
So it says in manual ..:to move CU to not push on mesh but from sides But what if you push toward end for a small ball how do you get it back up to end you started from? Push all the way out? Just excited and got a month of questions šŸ˜‚
Where can I get the manual pls? ^^
EDIT: just found this:
 
Last edited:

m0sh

Singer Song Writer Stoner
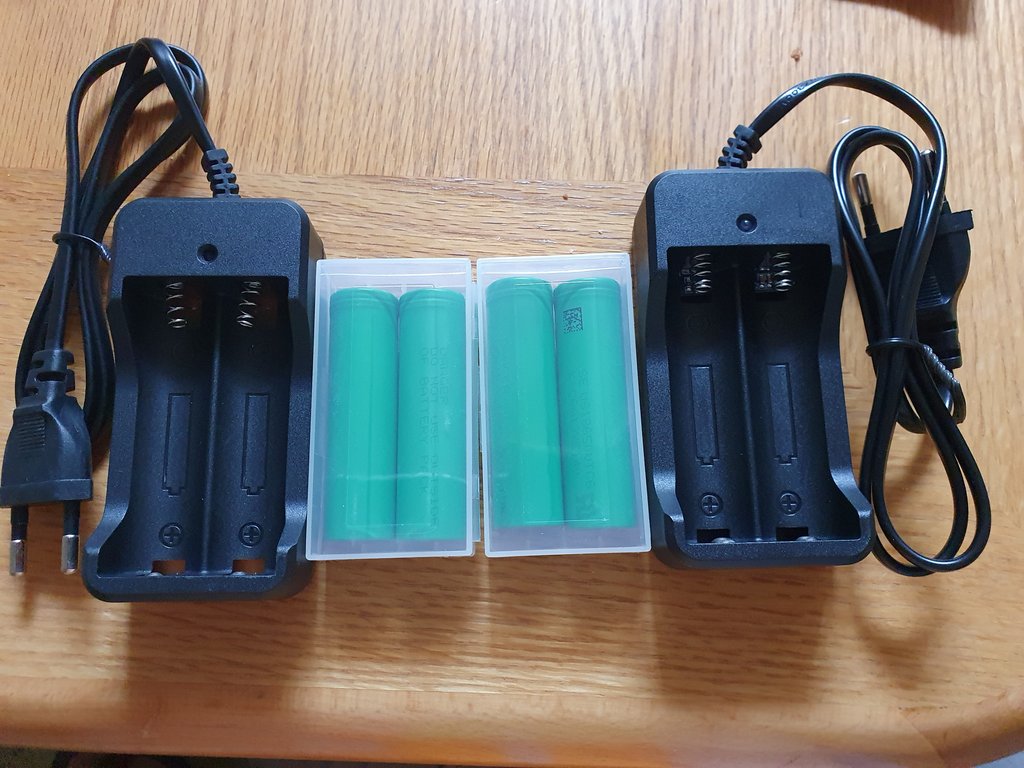
20200831-082703.jpg

My body (batteries) is (are) ready.
 
Last edited:

scooterboy

Muppet, not moped.
I move the cooling unit back and forth all the time and in real life the screen of the cu is actually pretty sturdy and sitting tight too, so as long as you don't use something hard and / or pointy you should be good pushing from either side. I use my pinky to increase the chambers size (and the wooden tip of a MFLB brush to decrease it from the other side).
I fashioned a small "hook" at the end of an unbent paper clip and use that to snag and pull the CU back using one of the holes in the non-screen end. The CU screen may be able to take being pushed on, but I still avoid it.
 

Djsleepy

Well-Known Member
I fashioned a small "hook" at the end of an unbent paper clip and use that to snag and pull the CU back using one of the holes in the non-screen end. The CU screen may be able to take being pushed on, but I still avoid it.
I can assume where you hook paper clip is strong and wonā€™t bend/ misshapen , or does CU comes out easily ? TIA

Only one adapter? :hmm::p

I only have a 18mm bubbler for all my vapes, should have gone with the 10/14/18 adapter? Or are they going to get Dirty quick and need Frequent cleanings? Just want to get all my ducks in a row if possible!
 
Djsleepy,

SquirrelMaster

Well-Known Member
I can assume where you hook paper clip is strong and wonā€™t bend/ misshapen , or does CU comes out easily ? TIA
The cooling unit is pretty strong, the screen is the only weakness and I haven't even popped mine out yet as it's secured really well on both my CU's. I push from the mouthpiece side with the back of a S&B brush or the Elev8r pick. Anything stiff will work. If I need to increase the bowl size the back of the S&B brush or anything that catches the rim of the cooling unit works well. I rarely adjust my bowl size after I set it.
 

Djsleepy

Well-Known Member
Only if you always want a smaller bowl, the 18 is adjustable
I just need to be able hook up to bubbler, and I ordered the screens for the WPA too! So Would place screen in front of cu right ? Trying to figure this bad boy out
 
Djsleepy,

Siebter

Less soul, more mind
@Djsleepy ā€“ The other side of the cu has some holes, but is solid metal:

closeup-CU.png


I fashioned a small "hook" at the end of an unbent paper clip and use that to snag and pull the CU back using one of the holes in the non-screen end. The CU screen may be able to take being pushed on, but I still avoid it.

It should work easily after one or two sessions, because then the residue will lube the o rings. After a cleaning session the cu might behave a bit stiff, but breathing into the tube to create a bit of condensation will make it cooperate.
 

Djsleepy

Well-Known Member
@Djsleepy ā€“ The other side of the cu has some holes, but is solid metal:

closeup-CU.png


It should work easily after one or two sessions, because then the residue will lube the o rings. After a cleaning session the cu might behave a bit stiff, but breathing into the tube to create a bit of condensation will make it cooperate.
Does the adapter get dirty quick?Should I have a second adapter for when this gets dirty?
 

cybrguy

Putin is a War Criminal
I only have a 18mm bubbler for all my vapes, should have gone with the 10/14/18 adapter? Or are they going to get Dirty quick and need Frequent cleanings? Just want to get all my ducks in a row if possible!
Virtually all of my glass pieces, other than a j-hook and a couple ash catchers, have 18mm joints. My logic is that I want the maximum airflow that I can get in nearly all circumstances. If I want to use a Lotus or other 14mm device I use a 18 to 14mm adapter (reducer). Since I never use a 10mm device I wouldn't want the airflow reduced that far for no benefit so I would stick with just 18/14mm. I have several I have accumulated over the years.

I came back to add an image, because, you know, pictures. 14 to 18 on top and 18 to 14 below. Sorry, the reducer needs a bath.reducer.jpg
 
Last edited:

MonkeyTime

Well-Known Member
Virtually all of my glass pieces, other than a j-hook and a couple ash catchers, have 18mm joints. My logic is that I want the maximum airflow that I can get in nearly all circumstances. If I want to use a Lotus or other 14mm device I use a 18 to 14mm adapter (reducer). Since I never use a 10mm device I wouldn't want the airflow reduced that far for no benefit so I would stick with just 18/14mm. I have several I have accumulated over the years.

I've cut almost all of the 10mm tips off any of my adapters for that reason and because of depth issues..... Maybe someday I'll regret it, but doubtful :razz:
 

RustyOldNail

SEARCH for the treasure...
20200831-082703.jpg

My body (batteries) is (are) ready.

Iā€™ve never seen lithium battery chargers that have such cheap looking ā€œspringsā€ for battery terminal connections. Donā€™t see any display, just an LED light for feedback. For the sake of your heath and SAFTY, I would recommend buying a quality charger, the price difference is certainly worth the added protection, you wonā€™t be getting with the ones you posted.
Good luck, stay safe...

78CFB1EF-AEB1-4566-8403-B2E98AAA7B3C.jpeg
 
Top Bottom