This has been my side project for the last year or so. As many of you know I've got my hands full with the Nomads, so I've only been able to work on this when I have free time. What does a woodworker do on his days off? Woodworking of course!
The concept behind the Toad is for me to just have fun and keep it loose. I won't be taking custom orders for these, I'm just going to make em' and put them out into the world. This is an opportunity to explore my art style and see what happens.
The design is mean't to be more minimalist compared to the Nomad 1 and 2. The body is pretty much a blank canvas.
Single 18650, 100% convection, unregulated. Uses the same heaters as the Nomad 1 and 2, interchangeable between all models.
____
This is no. 001, first functional unit made. It's definitely rough around the edges, but you get the idea! haha.
The dimensions are: 0.93" x 1.76" x 3.85"
The fire button is the exact same tried and true magnetic design that's in the Nomad 1 and 2. Buttons are interchangeable between all models. The entire button can be disassembled for deep cleaning, which I tend to do every 6 months or so.
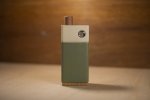
I used oil paint on this body... and I ended up not liking it so much. More on the paint later in the post.
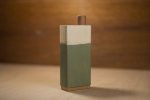
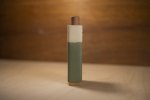
Stem system is the same as the Nomad 1 and 2, the stems are interchangeable between all models. My favorite pairing with the Toad right now is a wood stem loaded with glass cooling beads.
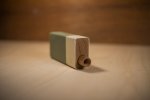
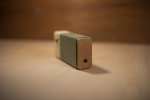
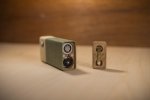
Magnetic bottom plate. I experimented with solid silver electrical contact in this one... so far no difference compared to brass. Time will tell if it's worth it. Just like in the Nomad 2, the brass connector is spring loaded, and there is a hard OFF built in that's super quick and easy. This is mean't to be pocket friendly, so while the bottom plate is in the OFF position there is no possible way to engage the heater.
You'll see that the side walls are suuuper thin. More on that later. I've tried to shave off every tiny bit of material so make this as small as you can go with an 18650 inside.
Installed into the body are two magnetic stainless steel pins. These are machined with side grooves so that when they're glued in place they'll never come back out. The only magnets are in the bottom plate, which can be easily replaced if the magnets are ever damaged.
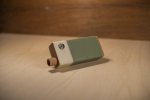
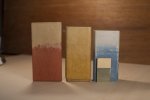
Here are some tests working out the recipe for my composite covering material. Testing various adhesives, papers, paints, and protective coatings.
I think that the most unique part of the design is the method of construction for the body. I use a solid wood core that is machined much in the same way as the Nomads are. This core is then permanently covered in what you might consider a natural fiberglass. This composite material draws on my research and experimentation from the Nomad 1. However, it's a much different material compared to the kraft paper and glue laminate material that I made the Nomad 1 "sleeves" from.
The main component of the covering is Washi paper that is hand made from gampi plant fibers. It's a sustainable and eco-friendly paper making process.
I wrap the wood cores with thin layers of washi saturated with refined wheat starch paste. The resulting composite dries to a wood-like hardness, but with greater toughness. If you cut this material in half, you don't see any layers, it appears to be a solid material.
A similar process is used to make a few super obscure Japanese objects that I won't go into too much... but that is to say that this material has a history and is known to last hundreds of years.
This composite gives the wood core greater strength, allowing me to make the side walls extra-thin. It also creates the a strong and thin bottom lip that holds the bottom plate aligned.
___
For the paint layer, I've been exploring ways to put the colour in the paper, not on top of the paper. My above tests show what the colour layers look like when they're inside the paper. The washi I use is so thin that it is somewhat transparent. This allows me to add pigment to the papers before wrapping... so that when the wrapping is complete, you can see the pigment through multiple paper layers. The colour runs all the way through the covering, down to the wood core.
The final layer is an extra-thin layer of unpainted washi. This layer is practically transparent, allowing the paint to show through. This thin layer is then saturated with natural blonde shellac. This creates the water and wear resistant top layer. More layers of shellac and sanding can give different feels to the surface, from velvety smooth and soft, to a more hard glossy feel.
The benefit to putting the colour inside of the paper is that it won't wear off with daily handling. I also much prefer the feel of this composite vs the feeling of paint (or paint-like clear coats). It has a warm feeling like leather or finely sanded wood.
Another cool thing about this composite is that it's made from 100% natural, non-toxic, materials. You could literally eat this sleeve.
I'm also hoping to make most of these from woods that I've harvested from around my house. There is a secondary goal here to make these be an example of what's possible with sustainable materials.
___
The name, Toad, is mostly just because I like toads and it's fun. I like the idea of having little toad drawings adorn some of these.... I think they give off a vibe that's kinda playful, earthy... and conjures up images of forest dwellers going on little adventures in the undergrowth.
My art style is definitely moving in a mushroomy, little creatures, sort of direction, and that's the stuff that'll end up on these pieces first I think.
Price is unknown at the moment, just going to play it by ear. They're easier to make compared to the Nomads, and so I'm hoping to hit a price point that is in the $200 - $300 range.
Not accepting any dibs or anything like that just yet. I have no idea when this will be ready... like I mentioned at the top of this thread, I've got my hands full with Nomads at the moment.
I'd like to just make a few of these, here and there, working in my own style. They'll go up for sale now and then.
___
Anyhow! Totally interested in your guys thoughts, suggestions, critiques, all that good stuff! This is the only place I've shared this. An FC exclusive!
Of course I'll be posting updates here on the process as I get closer to the final market-ready units.
The concept behind the Toad is for me to just have fun and keep it loose. I won't be taking custom orders for these, I'm just going to make em' and put them out into the world. This is an opportunity to explore my art style and see what happens.
The design is mean't to be more minimalist compared to the Nomad 1 and 2. The body is pretty much a blank canvas.
Single 18650, 100% convection, unregulated. Uses the same heaters as the Nomad 1 and 2, interchangeable between all models.
____
This is no. 001, first functional unit made. It's definitely rough around the edges, but you get the idea! haha.
The dimensions are: 0.93" x 1.76" x 3.85"
The fire button is the exact same tried and true magnetic design that's in the Nomad 1 and 2. Buttons are interchangeable between all models. The entire button can be disassembled for deep cleaning, which I tend to do every 6 months or so.

I used oil paint on this body... and I ended up not liking it so much. More on the paint later in the post.


Stem system is the same as the Nomad 1 and 2, the stems are interchangeable between all models. My favorite pairing with the Toad right now is a wood stem loaded with glass cooling beads.

Magnetic bottom plate. I experimented with solid silver electrical contact in this one... so far no difference compared to brass. Time will tell if it's worth it. Just like in the Nomad 2, the brass connector is spring loaded, and there is a hard OFF built in that's super quick and easy. This is mean't to be pocket friendly, so while the bottom plate is in the OFF position there is no possible way to engage the heater.
You'll see that the side walls are suuuper thin. More on that later. I've tried to shave off every tiny bit of material so make this as small as you can go with an 18650 inside.
Installed into the body are two magnetic stainless steel pins. These are machined with side grooves so that when they're glued in place they'll never come back out. The only magnets are in the bottom plate, which can be easily replaced if the magnets are ever damaged.


Here are some tests working out the recipe for my composite covering material. Testing various adhesives, papers, paints, and protective coatings.

I think that the most unique part of the design is the method of construction for the body. I use a solid wood core that is machined much in the same way as the Nomads are. This core is then permanently covered in what you might consider a natural fiberglass. This composite material draws on my research and experimentation from the Nomad 1. However, it's a much different material compared to the kraft paper and glue laminate material that I made the Nomad 1 "sleeves" from.
The main component of the covering is Washi paper that is hand made from gampi plant fibers. It's a sustainable and eco-friendly paper making process.
I wrap the wood cores with thin layers of washi saturated with refined wheat starch paste. The resulting composite dries to a wood-like hardness, but with greater toughness. If you cut this material in half, you don't see any layers, it appears to be a solid material.
A similar process is used to make a few super obscure Japanese objects that I won't go into too much... but that is to say that this material has a history and is known to last hundreds of years.
This composite gives the wood core greater strength, allowing me to make the side walls extra-thin. It also creates the a strong and thin bottom lip that holds the bottom plate aligned.
___
For the paint layer, I've been exploring ways to put the colour in the paper, not on top of the paper. My above tests show what the colour layers look like when they're inside the paper. The washi I use is so thin that it is somewhat transparent. This allows me to add pigment to the papers before wrapping... so that when the wrapping is complete, you can see the pigment through multiple paper layers. The colour runs all the way through the covering, down to the wood core.
The final layer is an extra-thin layer of unpainted washi. This layer is practically transparent, allowing the paint to show through. This thin layer is then saturated with natural blonde shellac. This creates the water and wear resistant top layer. More layers of shellac and sanding can give different feels to the surface, from velvety smooth and soft, to a more hard glossy feel.
The benefit to putting the colour inside of the paper is that it won't wear off with daily handling. I also much prefer the feel of this composite vs the feeling of paint (or paint-like clear coats). It has a warm feeling like leather or finely sanded wood.
Another cool thing about this composite is that it's made from 100% natural, non-toxic, materials. You could literally eat this sleeve.
I'm also hoping to make most of these from woods that I've harvested from around my house. There is a secondary goal here to make these be an example of what's possible with sustainable materials.
___
The name, Toad, is mostly just because I like toads and it's fun. I like the idea of having little toad drawings adorn some of these.... I think they give off a vibe that's kinda playful, earthy... and conjures up images of forest dwellers going on little adventures in the undergrowth.
My art style is definitely moving in a mushroomy, little creatures, sort of direction, and that's the stuff that'll end up on these pieces first I think.
Price is unknown at the moment, just going to play it by ear. They're easier to make compared to the Nomads, and so I'm hoping to hit a price point that is in the $200 - $300 range.
Not accepting any dibs or anything like that just yet. I have no idea when this will be ready... like I mentioned at the top of this thread, I've got my hands full with Nomads at the moment.
I'd like to just make a few of these, here and there, working in my own style. They'll go up for sale now and then.
___
Anyhow! Totally interested in your guys thoughts, suggestions, critiques, all that good stuff! This is the only place I've shared this. An FC exclusive!
Of course I'll be posting updates here on the process as I get closer to the final market-ready units.


 I'm waiting on all the other lists, maybe this will come up first


