The "Project" DIY Herbal Vaporizer

This last photo reminds me of Milaana heater ;)

Once dialed in they function quite similar, projects faster however albeit not quite as powerful.
Never knew that, thanks. Does that include the high temp O rings as well? This is basically the same material.
:sherlock:
Guy's, this is what I need to know as better to stop my change before in "too" deep. Would be too bad though, as the silicone is fun stuff to work with.
This is, after all, our FC home grown vape.
:science:

I don't think silicone used in this way is any big deal, however I havent messed with the molding type. If its as inert and heat resistant as the o-rings then I'd say its kosher. Just my .02 I'm still using my project regularly, once I found my sweetspot I've changed nothing. Coils still the original albeit adjusted and reshaped ever so slightly, still reading .58 and shiny after months of use.

Love it.
 

Pipes

Addicted DIY Enthusiast
Accessory Maker
Nothing wrong with the wood at all. A couple have cracked and is why i have changed the location of the outer cosmetic grooves to the thicker part of the wall.
The reason for the change is to further the robustness and accommodate a wider range of stems
As well as makes the size much more standard between units as dealing with the wood has lots of eye judgment calls along with mistakes.
Lastly, and certainly not least, is that once the mold(s) are made, the manufacturing process becomes much easier
If you look at the way it holds the bowl and oven together, the silicone is only in the air intake side which is upstream of any real heat.
Hmm. :hmm:
 

KeroZen

Chronic vapaholic
@nosmoking answered for me for the silicone part. I'm indeed quite sensitive to it.

Bonus question: can you say with certitude what kind of plasticizers are in the silicone you use? BPA? Phtalates? Surprise? ^ ^

As for the o-rings I would prefer if they weren't there but as long as they are not exposed to the air and vapor paths I'm fine with them. The ones used in the Project don't seem to have much smell but it's still covered by your damn linseed oil! :p
 

WakeAndVape

VapeLife X
What settings are best for the cuboid with the project? I have tried tcr:140/40w/460°f and having inconsistent results...

Either I get very little vapor, the greatest vapor puff ever or smoke!...can't set my watch to any particular outcome
 
WakeAndVape,
  • Like
Reactions: KeroZen

Pipes

Addicted DIY Enthusiast
Accessory Maker
First off, you should update to the newest firmware so we're on the same page. I believe the version that comes with the silly game.
I'm using the preset TCR of 120 which seems plenty good. A couple versions back, this needed to be more like TCR of 145.
Remove battery and start fresh. Ensure the mod has correctly read your ohms. Remember this measurement as will provide clues if temp starts changing on you. Lock in this number via menu.
Temperatures around 500F should be a good strating temp to zero in on perfection.
Good luck and report back.
 

E0x

Well-Known Member
What settings are best for the cuboid with the project? I have tried tcr:140/40w/460°f and having inconsistent results...

Either I get very little vapor, the greatest vapor puff ever or smoke!...can't set my watch to any particular outcome


try tcr 145 and if you coil is over or equal to .50 but less that .60 , try the temp at 220 celcius for grinder herb , inhale in what i think mid speed draw ( try keep the air just a little warm ) do this draw till you get the 10s warning , if you do right will get vapor almost at the end of the 10s period , the fist hit maybe is poor , let the coil cool down for no less that 5 seconds and try again with the same technique , this time if everything is like i think it is you will get a lot more vapor and maybe if you tolerance is not very high will get pretty high after that hit.

that is my tecnnique with the vtc mini and the rx200 , which i think is the same chip.
 
Last edited:

Pipes

Addicted DIY Enthusiast
Accessory Maker
Have the first unit out and testing.
Too early to really say a lot as it's performing identically as expected. Holds my stem very tight and going to wait till fully cured before sticking in my largest Solo stem and an Ed's stem. Already pushing it with the curing. 6 hour in of what the book says should be 24 hours to fully cure. Not commenting on taste tonight but not as back as I'm sure some are envisioning. I have have faith it will be gone tomorrow, as the tester I made yesterday seems odourless to me today.


I'm going to try to add some black pigment as a test tomorrow. Although. this colour matches @KeroZen 's E-Vic...lol, too bad about the silicone sensitivity.
Darkening it down some would be more preferable I think..?


Back to testing!!!
 

Pipes

Addicted DIY Enthusiast
Accessory Maker
Silicone enclosure testing update:

Firstly, lets go for the silicone taste/smell. Day 2 had me worried as could still taste it while using it but did not smell when cold. Yesterday (Sunday) was much better, no smell cold and no taste while using, but could still smell if you put your nose right up to it while warm. Today, no taste or smell warm or cold.
I'm quite happy with the change but please note that I'm not that sensitive the the smell as others may be.

Now for performance. Virtually identical as one would suspect to the wood design. The fit to the oven is much improved and stays in place very securely. I have also changed out the 3 O rings which hold the stainless tube to the 510 base. The units now will have 2 each of #107 size which is a thicker ring and holds the tube on very tight. The pieces all fit together really tight.
The grip on stems is great. Will accommodate a much wider range of sizes.
Durability. Hard to really judge this early but really nothing to break. You drop it and it just bounces away. Just follow it to pick it up. lol. Honestly, like dropping a square rubber ball. For a tear test, I stretched the hole in the first beta unit till it ripped. Of course it ripped at the seam but did not follow the seam and went off to one side. This is good news as indicates the strength along the seams isn't that far behind the rest. As I like to look at the servicing side as well, I performed a repair on the ripped unit using easily obtainable red high heat gasket maker. Colour is dead on. It worked but not as good as using the actual silicone. Concluded this by a second stretch test. Good enough for field repairs though. Or even user mods to conform to any stem one can think of.

Having great weather right now here and hard to pull myself away from pool side to do the stems. We'll get er done though. Nine bases complete and 5 enclosures so not too far behind my commitment of 9 by weeks end.

:tup:
 

Zangano Cruel

IG zan.cru (code) zancru (5% NV checkout discount)
Silicone enclosure testing update:

Firstly, lets go for the silicone taste/smell. Day 2 had me worried as could still taste it while using it but did not smell when cold. Yesterday (Sunday) was much better, no smell cold and no taste while using, but could still smell if you put your nose right up to it while warm. Today, no taste or smell warm or cold.
I'm quite happy with the change but please note that I'm not that sensitive the the smell as others may be.

Now for performance. Virtually identical as one would suspect to the wood design. The fit to the oven is much improved and stays in place very securely. I have also changed out the 3 O rings which hold the stainless tube to the 510 base. The units now will have 2 each of #107 size which is a thicker ring and holds the tube on very tight. The pieces all fit together really tight.
The grip on stems is great. Will accommodate a much wider range of sizes.
Durability. Hard to really judge this early but really nothing to break. You drop it and it just bounces away. Just follow it to pick it up. lol. Honestly, like dropping a square rubber ball. For a tear test, I stretched the hole in the first beta unit till it ripped. Of course it ripped at the seam but did not follow the seam and went off to one side. This is good news as indicates the strength along the seams isn't that far behind the rest. As I like to look at the servicing side as well, I performed a repair on the ripped unit using easily obtainable red high heat gasket maker. Colour is dead on. It worked but not as good as using the actual silicone. Concluded this by a second stretch test. Good enough for field repairs though. Or even user mods to conform to any stem one can think of.

Having great weather right now here and hard to pull myself away from pool side to do the stems. We'll get er done though. Nine bases complete and 5 enclosures so not too far behind my commitment of 9 by weeks end.

:tup:
Enjoy the summer my man. Take your time and I'm sure you're getting it right.
I'll keep in touch. I can't wait to put your invention to test.
Salud. Stay vaped...
 
Zangano Cruel,
  • Like
Reactions: Pipes

Pipes

Addicted DIY Enthusiast
Accessory Maker
Thanks, that would be an excellent suggestion except for the temperature rating. The Max 60 is the only one I could find that has a high temperature rating. The Equinox is safe for serving food but no rating on temperature. Suspect it will degrade where it contacts the lower oven.
I'm completely open to change it up. If anyone can find some food grade silicone that is designed so one can DIY their own baking assessors with. Not sure if it even exists..?
 
Last edited:

E0x

Well-Known Member
@Pipes any recommendation for clean the wooden mouthpiece ? i see that my have a lot of honey and is damage more the flavor
 
E0x,
  • Like
Reactions: KeroZen

Pipes

Addicted DIY Enthusiast
Accessory Maker
A Qtip for the bulk of it. Throw the honey soaked cotton into the middle of a load and vape it. Repeat until bulk is clean or you pass out.
Final cleaning would be to dampen the Qtip in ISO and finish cleaning or a pipe cleaner.
 

Slow Draw McGraw

Well-Known Member
Company Rep
Wonder what version this guy is running on his evic vct mini?
iv6z29gcv85x.jpg
 

Quetzalcoatl

DEADY GUERRERO/DIRT COBAIN/GEORGE KUSH
Maybe I meant what firmware version on his evic? Dammit sometimes I'm terrible at being funny. Lol
I was way too high when I read that to even be operating a computer. Shit, I'm still way too high to be operating a computer. I could have sworn I read "what tank" for some reason :science:
 
Quetzalcoatl,

PPN

Volute of Vapor
Oh my this is so ugly! :doh:
I confirm, how is it possible to think about to tattoo something like that on your own skin...?

edit: He's a good for a lot of laser remove of tattoo sessions in the close future


About my Project i confirm it is still in active service on my desk even after to get some news expensive toys (Guru, Apollo and Milaana). It performs consistently unlike the Mi, it is small unlike the Apollo and it performs admirably(!) through water unlike the Guru.

Only downside I can see is the taste...although I'm sticking with the provided stem and still tasting the linseed oil finish (especially after the first tasty hits) and sometime I scorch a bit the load (I have bigger issues about this scorching with the Mi)
 
Last edited:

Pipes

Addicted DIY Enthusiast
Accessory Maker
He found a new version, "V 3.DUMB.ASS". :mental:

It's great to see your enjoying the Project @PPN . An FYI, no longer using the Linseed but leaving it natural. I figure if the operator wishes they can add whatever they like or just leave as is.
Seeing users confirm the Project is still in their active line up is definitely nice to hear. Means, it's not just me...
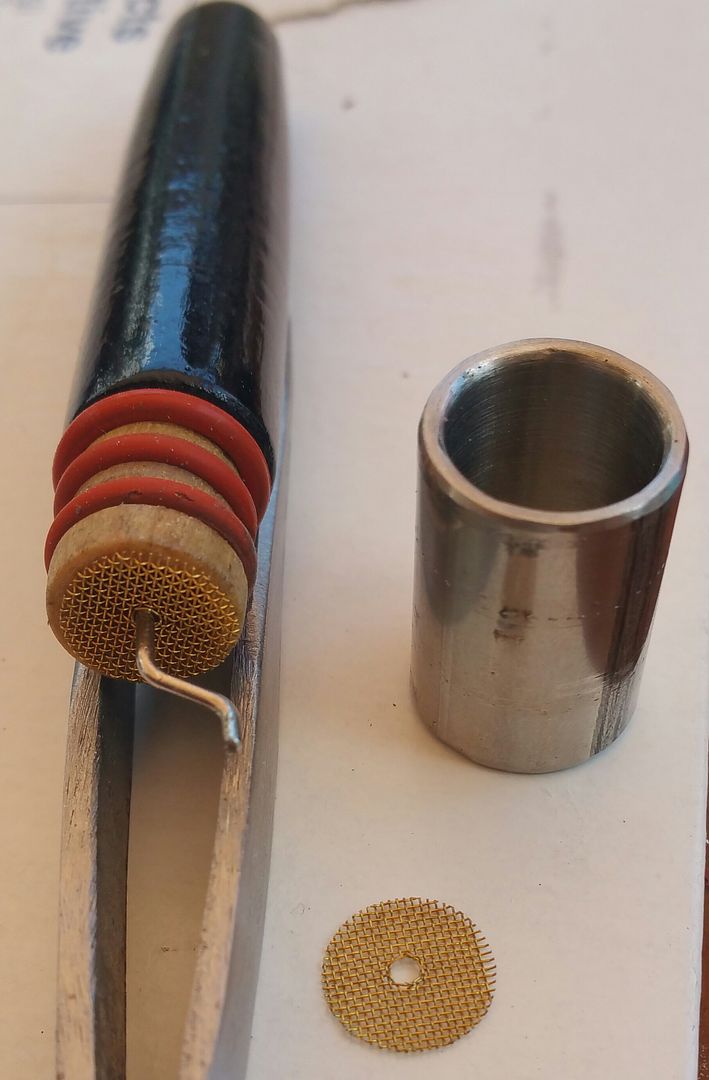
BTW, here is a possible mod for those wishing to have an easy way to give a stir to the load.
I have mentioned this before and now have confirmed it to work. Starts with a piece of stainless steel rod. Slowing bending it into a usable shape for our purpose. Inserted (screwed) into the wooden part of the stem. Push a dart of similar through the center of a screen such that the SS rod can pass through it. The most important part of the mod is to make sure the rod exits the wooden stem dead center.
The O ring will need to fit fairly loose so the wooden stem can be twisted inside the SS bowl. Either the grooves deepened or a smaller O ring.


Have also made up a jig for making up the coils. It makes the process much more uniform and quicker.


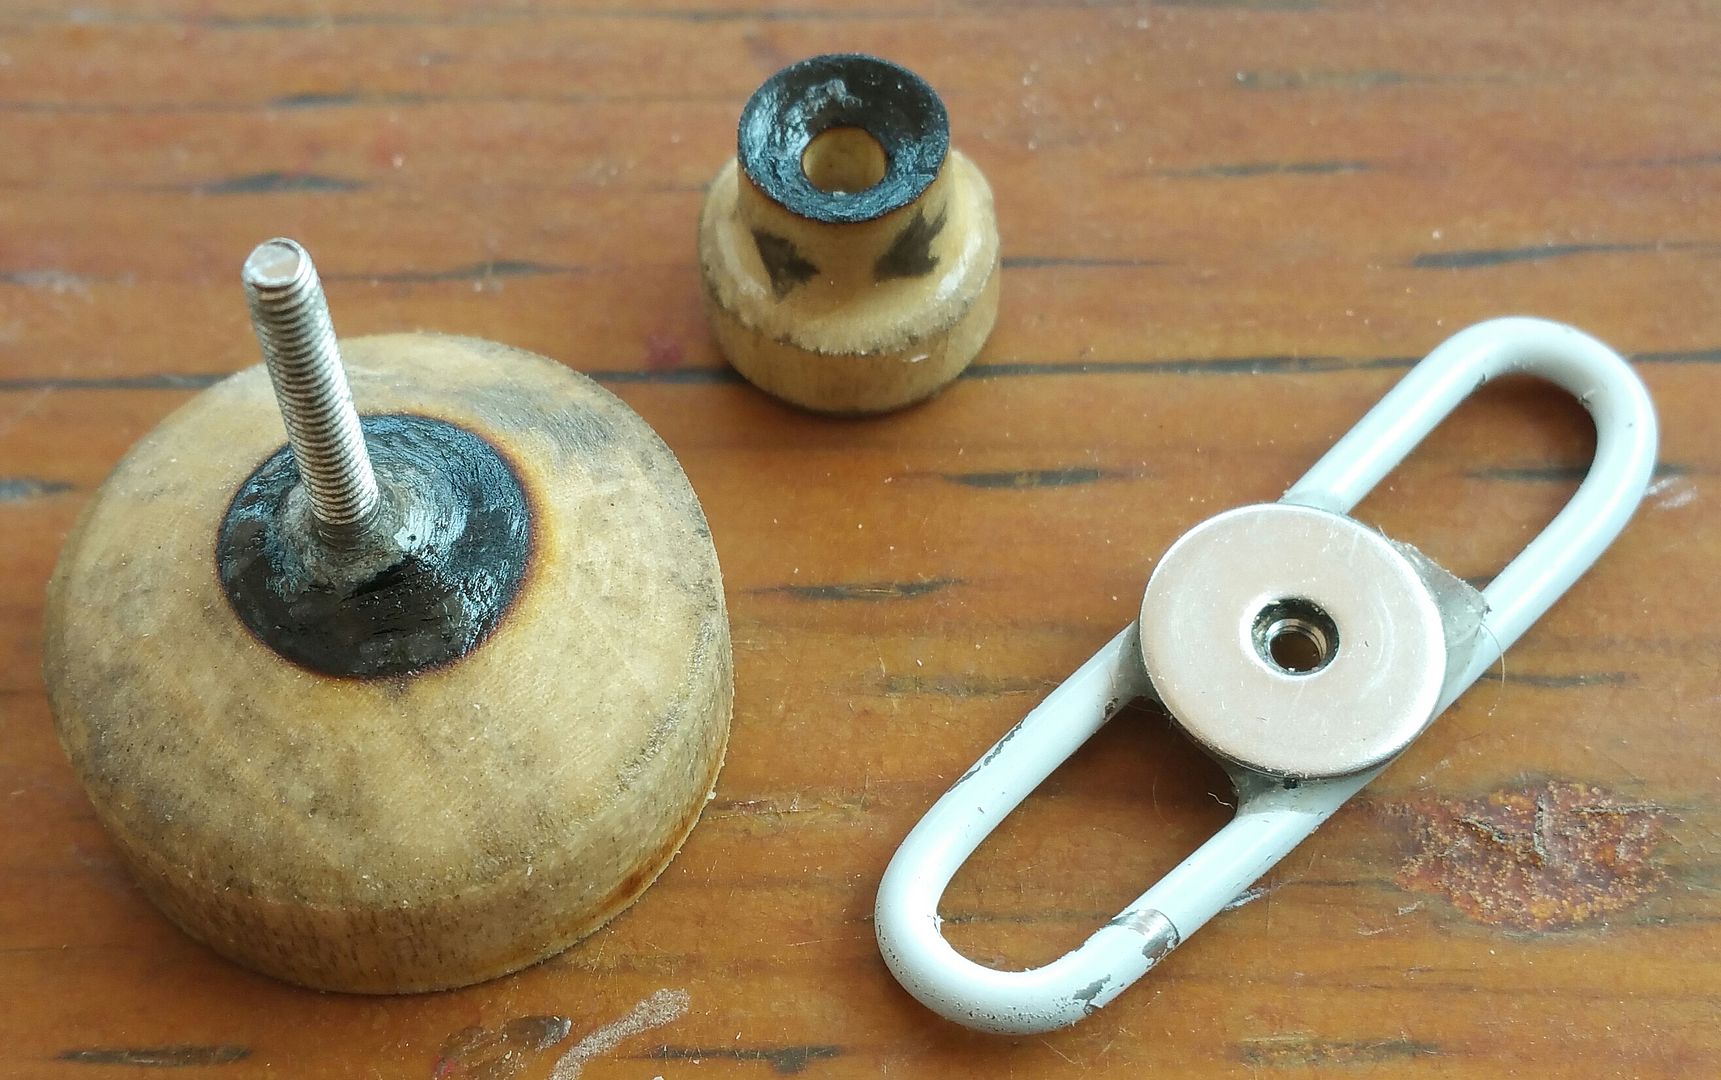
Also, was having a fuck of a time mounting the new thicker O rings onto the base. So made this and life is simple.


Above is when I was preparing the base assemblies.

:science: Vape on!
 
Great idea for a stirrer! Maybe I can throw you a bone to stick a rod in an envelope? I almost have something that would work but a bit too thick for the tight bends
 
Renthispace,
Top Bottom