The HI

jarr92

Well-Known Member
I just received my black bamboo heat island last night, still waiting to use it. It's beautiful! Will have to post some pictures.

I was just curious, what is the clear malleable ring that is included in a little plastic bag with the vaporizer?

Also just wondering, I got the glass heater cover option, does the glass heater cover need to come in contact with the herb? Or should the glass heater cover have space in between it and the herb? Sorry if this has already been posted, will delete if so
 
jarr92,

dimildarko

Well-Known Member
The silicone piece it sounds like you're describing is probably the piece that sort of covers where the plug goes in as the metal ring protruding out will get hot to the touch.

Not sure about the glass question as I have a steel core and don't want to lead you astray.
 
dimildarko,
  • Like
Reactions: grokit

Alan

Master JedHI
Manufacturer
I just received my black bamboo heat island last night, still waiting to use it. It's beautiful! Will have to post some pictures.

I was just curious, what is the clear malleable ring that is included in a little plastic bag with the vaporizer?

Also just wondering, I got the glass heater cover option, does the glass heater cover need to come in contact with the herb? Or should the glass heater cover have space in between it and the herb? Sorry if this has already been posted, will delete if so

Glad that it arrived safely and you like how it looks. As @dimildarko said, the silicone ring is to cover the exposed part of the metal power socket.

It is better not to contact the herb with the end of the glass heater cover, but there is a screen in the end to prevent any herb from falling inside the glass tube and touching the heater. I like using the two screen method to prevent the glass from contacting the herb. It also prevents any material from falling out of the roasting tube. If you are only using one basket screen, then it is best to hold the bamboo unit in one hand and the roasting tube in the other hand so that you can control how far the glass heater cover extends into the roasting tube. The roasting tube can be held at a slight angle to the heater cover to allow some room air to mix in and lower the roasting temperature a bit. It will sort of direct the hot air at different parts of the bowl too.

Happy roasting.
 

jarr92

Well-Known Member
As previously mentioned, I have a black bamboo HI with a glass heater cover. I thought I would use it with my water piece, but I love hitting it dry. So smooth! That being said, are there any bent tube options for the glass heater cover available? Something similar to the Arizer Solo bent tube?

Sorry if this has already been asked! I've got a bad neck so I figure the bent tube would make it a little easier to take a hit. Thanks!!
 

Alan

Master JedHI
Manufacturer
I like my toasty top an my micro watt I like that it vapes the weed up fast

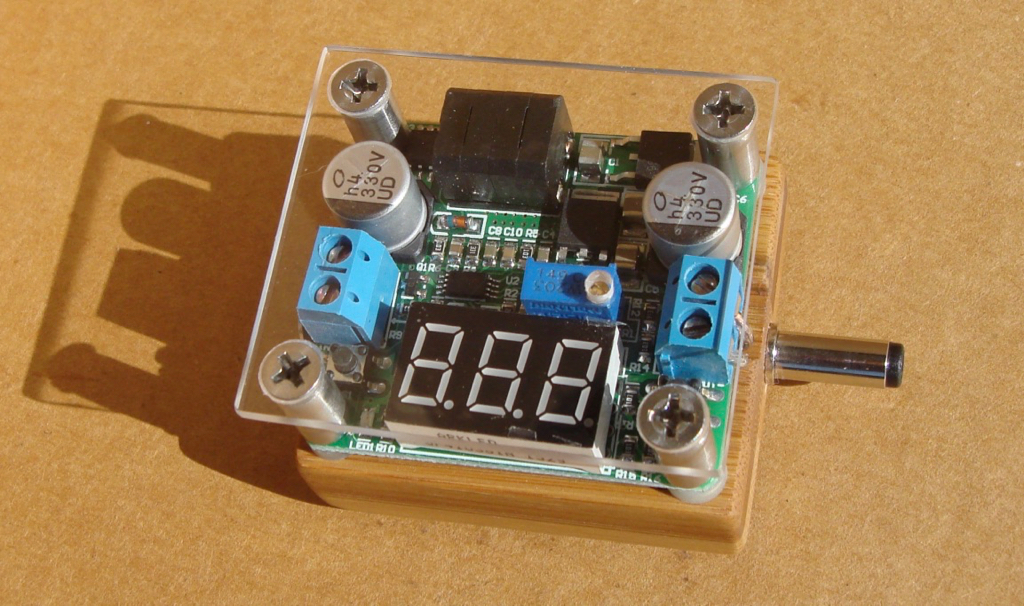
Glad you like your custom micro voltage controller. Was a bit more work, but it turned out will.
Here is a photo of it.

plexitopvcu.jpg


@jarr92 - I don't currently have any bent stems. May have to try and make one sometime.
 

Diggy Smalls

Notorious
I've got a little glass stem with a curve in it right at the end. I put a second screen in there to hold it in place and put the stem right on top. It's not a super tight fit, but heat island tech pumps out a ton of heat. Anyway, I love seeing how dirty that curve gets with particles, and the vapor is significantly more smooth compared to my default glass stem of the same length. So, yeah if you get a bent stem idea I'm down to try it out! :)

I've been working on the wood burning I'm doing on my toasty top...I'm taking it slow, but it's gonna be pretty rad and very unique.

Man, that voltage controller is so tiny! How do you adjust it? I like the cover to it, but it looks like it also blocks it from being adjusted. Pretty sweet!
 
Diggy Smalls,
  • Like
Reactions: Alan

FUCKCOMBUSTION88

Active Member
Hey guys, I was wondering if I could apply olive oil or grape seed extract oil to the HI rather than beeswax once I run out of beeswax? Would it make a difference or affect the wood negatively? Thanks
 
FUCKCOMBUSTION88,

6079Smith

Well-Known Member
Hey guys, I was wondering if I could apply olive oil or grape seed extract oil to the HI rather than beeswax once I run out of beeswax? Would it make a difference or affect the wood negatively? Thanks

Hey, FC88, I can help! You want to avoid any kind of oil that goes rancid, such as cooking oils, so I would personally not use either. I typically use beeswax plus MCT oil and/or food grade mineral oil, you can mix small batches right in the aroma cup on a hot HI and it will solidify as it cools. Near 50/50 ratio, it's hard to mess up and a little goes a long way. The ingredients are common and inexpensive.. pretty sure I'm set for life after just one purchase
 
Last edited:

FUCKCOMBUSTION88

Active Member
Hey, FC88, I can help! You want to avoid any kind of oil that goes rancid, such as cooking oils, so I would personally not use either. I typically use beeswax and/or MCT oil plus food grade mineral oil, you can mix small batches right in the aroma cup on a hot HI and it will solidify as it cools. Near 50/50 ratio, it's hard to mess up and a little goes a long way. The ingredients are common and inexpensive.. pretty sure I'm set for life after just one purchase


Thanks man
 

Abysmal Vapor

Supersniffer 2000 - robot fart detection device
I admit that i havent followed this thread for while,and i should have.. :D I've had this idea of bamboo log vape in my head for a few weeks.which came after seeing some bamboo furniture..,even ordered a 3 meter stick..lol..I have this plan on making some DIYs as gifts for combusting friends,that really need to quit it already,but are not being able to afford a nice vape.I decided that bamboo is so nice,that some must have thought about it already..and hit the search tool and it is no wonder that Alan got to it ,made it awesome,and now i want a bamboo HI glass core badly.. I will still try to DIY myself at least one but i doubt the standart log vape resistor will be hot enough..i guess i have a long road to walk and very little patience .. ..
So is there any official price on those beauties ? I started reading post from 1-2 years back to catch up with the thread ,and also tried the search tool but so far i havent gotten to the info about pricing ,i only saw that there are two models full size and mini.
 

Alan

Master JedHI
Manufacturer
@ZC - Thanks for posting the photo. That is the first time I have turned that type of wood. It looks even better in person. Hope to get it to you soon.

Thanks for the assistance @6079Smith. I have also mixed coconut oil with the beeswax to get a consistency like lip balm. It works great for your lips as well as the wood.

@Abysmal Vapor - You have some very good thoughts regarding the bamboo log. It does work quite well.
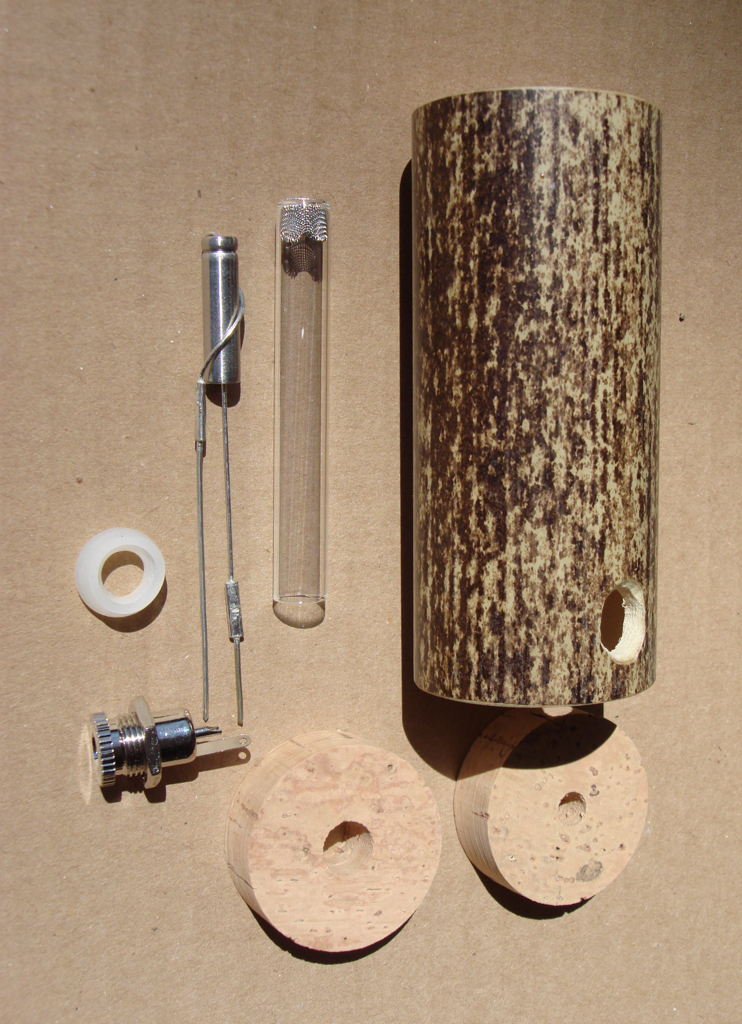
Here is a photo of the parts I use to make one with a glass heater cover.
glasshcbamboohiparts.jpg


The heater cover is a 10mm borosilicate glass tube w/ a screen in the end. It fits snugly into the 3/8" hole in the 1/2" thick cork ring which then fits snugly into the bamboo pole. Another cork ring closes off the bottom hole. The cork just needs to be sanded to fit the shape of the hole. It is best to use very round bamboo.
The power socket can be held in place with the nut since the bamboo is so thin. The heating element has been covered in a 1/4" ss sleeve to limit the amount of radiant heat energy that is lost through the glass heater cover. It also provides some additional surface area for heating the air. The stiffness of the wire provides the support for the heating element to connect directly to the power socket. Be careful if you are going to use a cartridge heater since the air will be traveling over hot wire insulation unless you can figure out a way to isolate it from the air path. The traditional resistor heater does get hot enough.
All connections are soldered to ensure maximum electrical conductivity.
The silicone ring is to cover the exposed metal part of the power socket as it gets quite warm after a while.

I am selling the glass heater cover bamboo HI's for $50 excluding power supply and roasting tube. There is no wood turning or finishing which is the majority of the cost of a HI. This is all the more I can justify charging for them.

Be careful when making the power socket hole. Bamboo does not like to be drilled. Care is also needed when cutting the bamboo to avoid splitting the edge.

The full size and mini are wooden heat island styles. The bamboo HI is 4" tall.

I have also been working on a on-demand vaporizer unit that is shaped just like a log. Here is a link to the thread. http://fuckcombustion.com/threads/insta-heat-aka-iheat.24839/#post-1140793
It can also be used as a portable using a mod box.
 

Abysmal Vapor

Supersniffer 2000 - robot fart detection device
@ZC - Thanks for posting the photo. That is the first time I have turned that type of wood. It looks even better in person. Hope to get it to you soon.

Thanks for the assistance @6079Smith. I have also mixed coconut oil with the beeswax to get a consistency like lip balm. It works great for your lips as well as the wood.

@Abysmal Vapor - You have some very good thoughts regarding the bamboo log. It does work quite well.
Here is a photo of the parts I use to make one with a glass heater cover.
glasshcbamboohiparts.jpg


The heater cover is a 10mm borosilicate glass tube w/ a screen in the end. It fits snugly into the 3/8" hole in the 1/2" thick cork ring which then fits snugly into the bamboo pole. Another cork ring closes off the bottom hole. The cork just needs to be sanded to fit the shape of the hole. It is best to use very round bamboo.
The power socket can be held in place with the nut since the bamboo is so thin. The heating element has been covered in a 1/4" ss sleeve to limit the amount of radiant heat energy that is lost through the glass heater cover. It also provides some additional surface area for heating the air. The stiffness of the wire provides the support for the heating element to connect directly to the power socket. Be careful if you are going to use a cartridge heater since the air will be traveling over hot wire insulation unless you can figure out a way to isolate it from the air path. The traditional resistor heater does get hot enough.
All connections are soldered to ensure maximum electrical conductivity.
The silicone ring is to cover the exposed metal part of the power socket as it gets quite warm after a while.

I am selling the glass heater cover bamboo HI's for $50 excluding power supply and roasting tube. There is no wood turning or finishing which is the majority of the cost of a HI. This is all the more I can justify charging for them.

Be careful when making the power socket hole. Bamboo does not like to be drilled. Care is also needed when cutting the bamboo to avoid splitting the edge.

The full size and mini are wooden heat island styles. The bamboo HI is 4" tall.

I have also been working on a on-demand vaporizer unit that is shaped just like a log. Here is a link to the thread. http://fuckcombustion.com/threads/insta-heat-aka-iheat.24839/#post-1140793
It can also be used as a portable using a mod box.
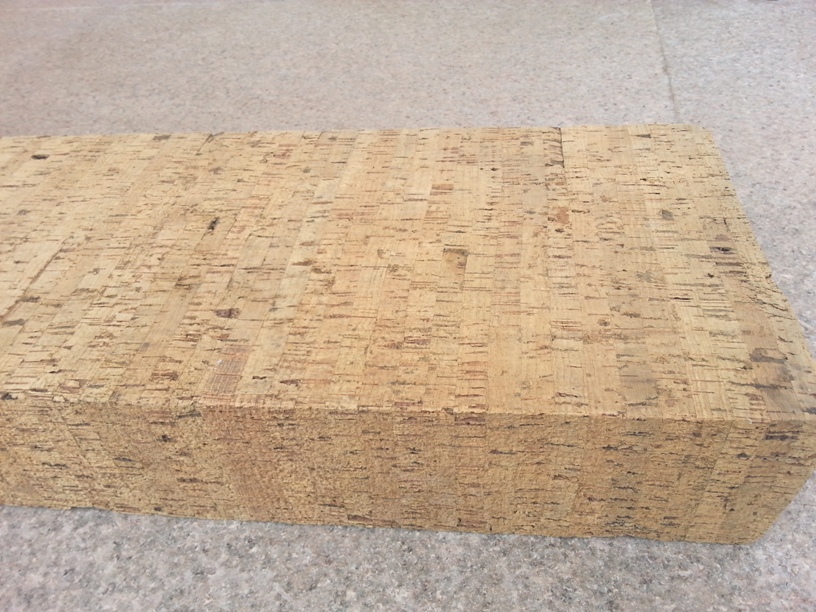
Thank you very much for the response and the pics ! I have never touched a lathe in my life,so that no being involved is a very good for my case !I was decided on those cork plugs too. There is cork supply where i live,there are pieces as big as 25x9x100 cm ,i even though of all cork vape..but i dont know if it would handle the temps.
5465918.jpg
Science says cool things about it .
Cork is temperature resistant from -180 degrees C to +110 degrees C.
Cork is naturally fire resistant. Suberin, a waxy substance found in cork, is resistant to fire. Cork trees have been known to survive through wildfires with minimal damage.
Cork has a warm feeling to it. Cork absorbs and retains the heat of its surroundings for a period of time. It is not a conductor of heat, rather it retains the heat that is already present in a particular area.
Sorry for spamming your thread with that info :)),i am quite sure it is well known to you.. but i got carried away !
Thank you very much for the tips !
I was thinking of wrapping stainless 0.1 cm thick foil around the center glass tube or/and around the inner walls of the bamboo,but seeing your design i think that might be unnecessary .. :)
50$ is a really good price ,i am sure performance is well beyond that :D.. like any other logvape IMO. That design is great for me because budget is always tight around here,and i really want some people to quit combusting...,and some of them are already dissappointed of their experiences with crappy vapes..
 
Last edited:

Alan

Master JedHI
Manufacturer
@Abysmal Vapor - You are welcome. Cork is an amazing material. Thanks for the info. I get my cork rings from Portugal. The hole in the middle is already the perfect size to hold the glass tube. I prefer to use natural cork so there are no other materials involved. I have used composite cork for my prototype and there has been no degradation after continuous use for over a year. The glass material can only conduct a limited amount of heat to the cork material. The glass in contact with the cork stays below 200F. The glass tube extends all the way through the cork ring, so the air does not pass through the heated cork material.
You may not need to add foil to the inside of the bamboo depending upon the diameter. My prototype glass heater cover bamboo HI is only about 1" ID, so it gets quite warm to the touch without having a foil liner. I have some new ones that have an ID of about 1.5" which is just enough larger that the bamboo just barely gets warm so there is no need for a foil liner. Having a shiny foil liner will reflect the radiant heat back to the heater cover and make it hotter. Hope you have good luck with the bamboo tube.
 

FUCKCOMBUSTION88

Active Member
So a quick heads up to whoever applies beeswax! Don't use a spoon! I'm aware that all the experts probably already know this. But someone who is new to wood conditioning like myself, this may be helpful, but maybe I'm just stupid. I thought that a fast way to melt the wax would be with a spoon and a lighter. (Sketchy, I know) I then poured the hot wax all over the HI and a bunch of black shit from the bottom of the spoon dripped off into the wax and melted into the vaporizer. Was quite upset but tried to clean it as best as I could afterwards. Lesson learned. (Now that I think of it, I guess a spoon could work as long as one used a cloth or something similar rather than pouring it onto the wood...)

(Edit: I accidentally dropped a piece of wax into the heating element after re-attempting to apply the wax. I dropped a few beads into the inside of the HI as usual but one accidentally fell into the heating element while the HI was on and it was producing a light amount of smoke for a few minutes. I unplugged the HI just to be safe but wasn't sure if this could have damaged the vaporizer or if it was just the wax lightly burning or (hopefully vaporizing) and melting inside the heating element. I held the HI upside down to attempt to let any wax drain out. Another situation now and I do feel like an idiot for having to post this but just wanted to be sure that I haven't damaged the HI. Going to plug it back it back in in a few minutes)


(Edit #2: I thought that I may as well mention all of the concerns that I had and ask the questions in the same post to save the trouble but I was wondering if it's fine to remove the two screws inside the HI which I believe would remove the heating element/SS core... I noticed on Alan's website that it's possible to do this for cleaning purposes but the screws seem pretty tight up against the wood and I wouldn't want to damage the inside of the HI while trying to remove them. The bottom circular metal piece seems to have some debris and dust build up on it and I figured that after dropping the wax inside the heating element/core that I would do a thorough clean. If I were to do this at some point for future reference it's pretty easy to put back together?)

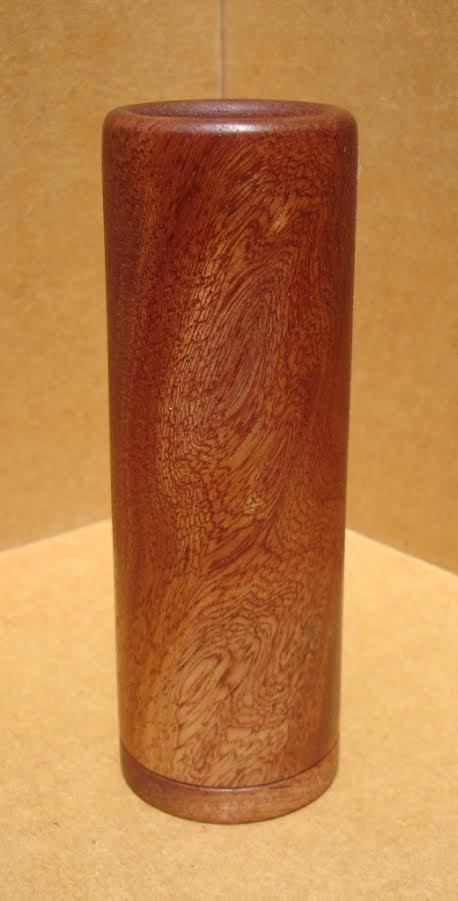
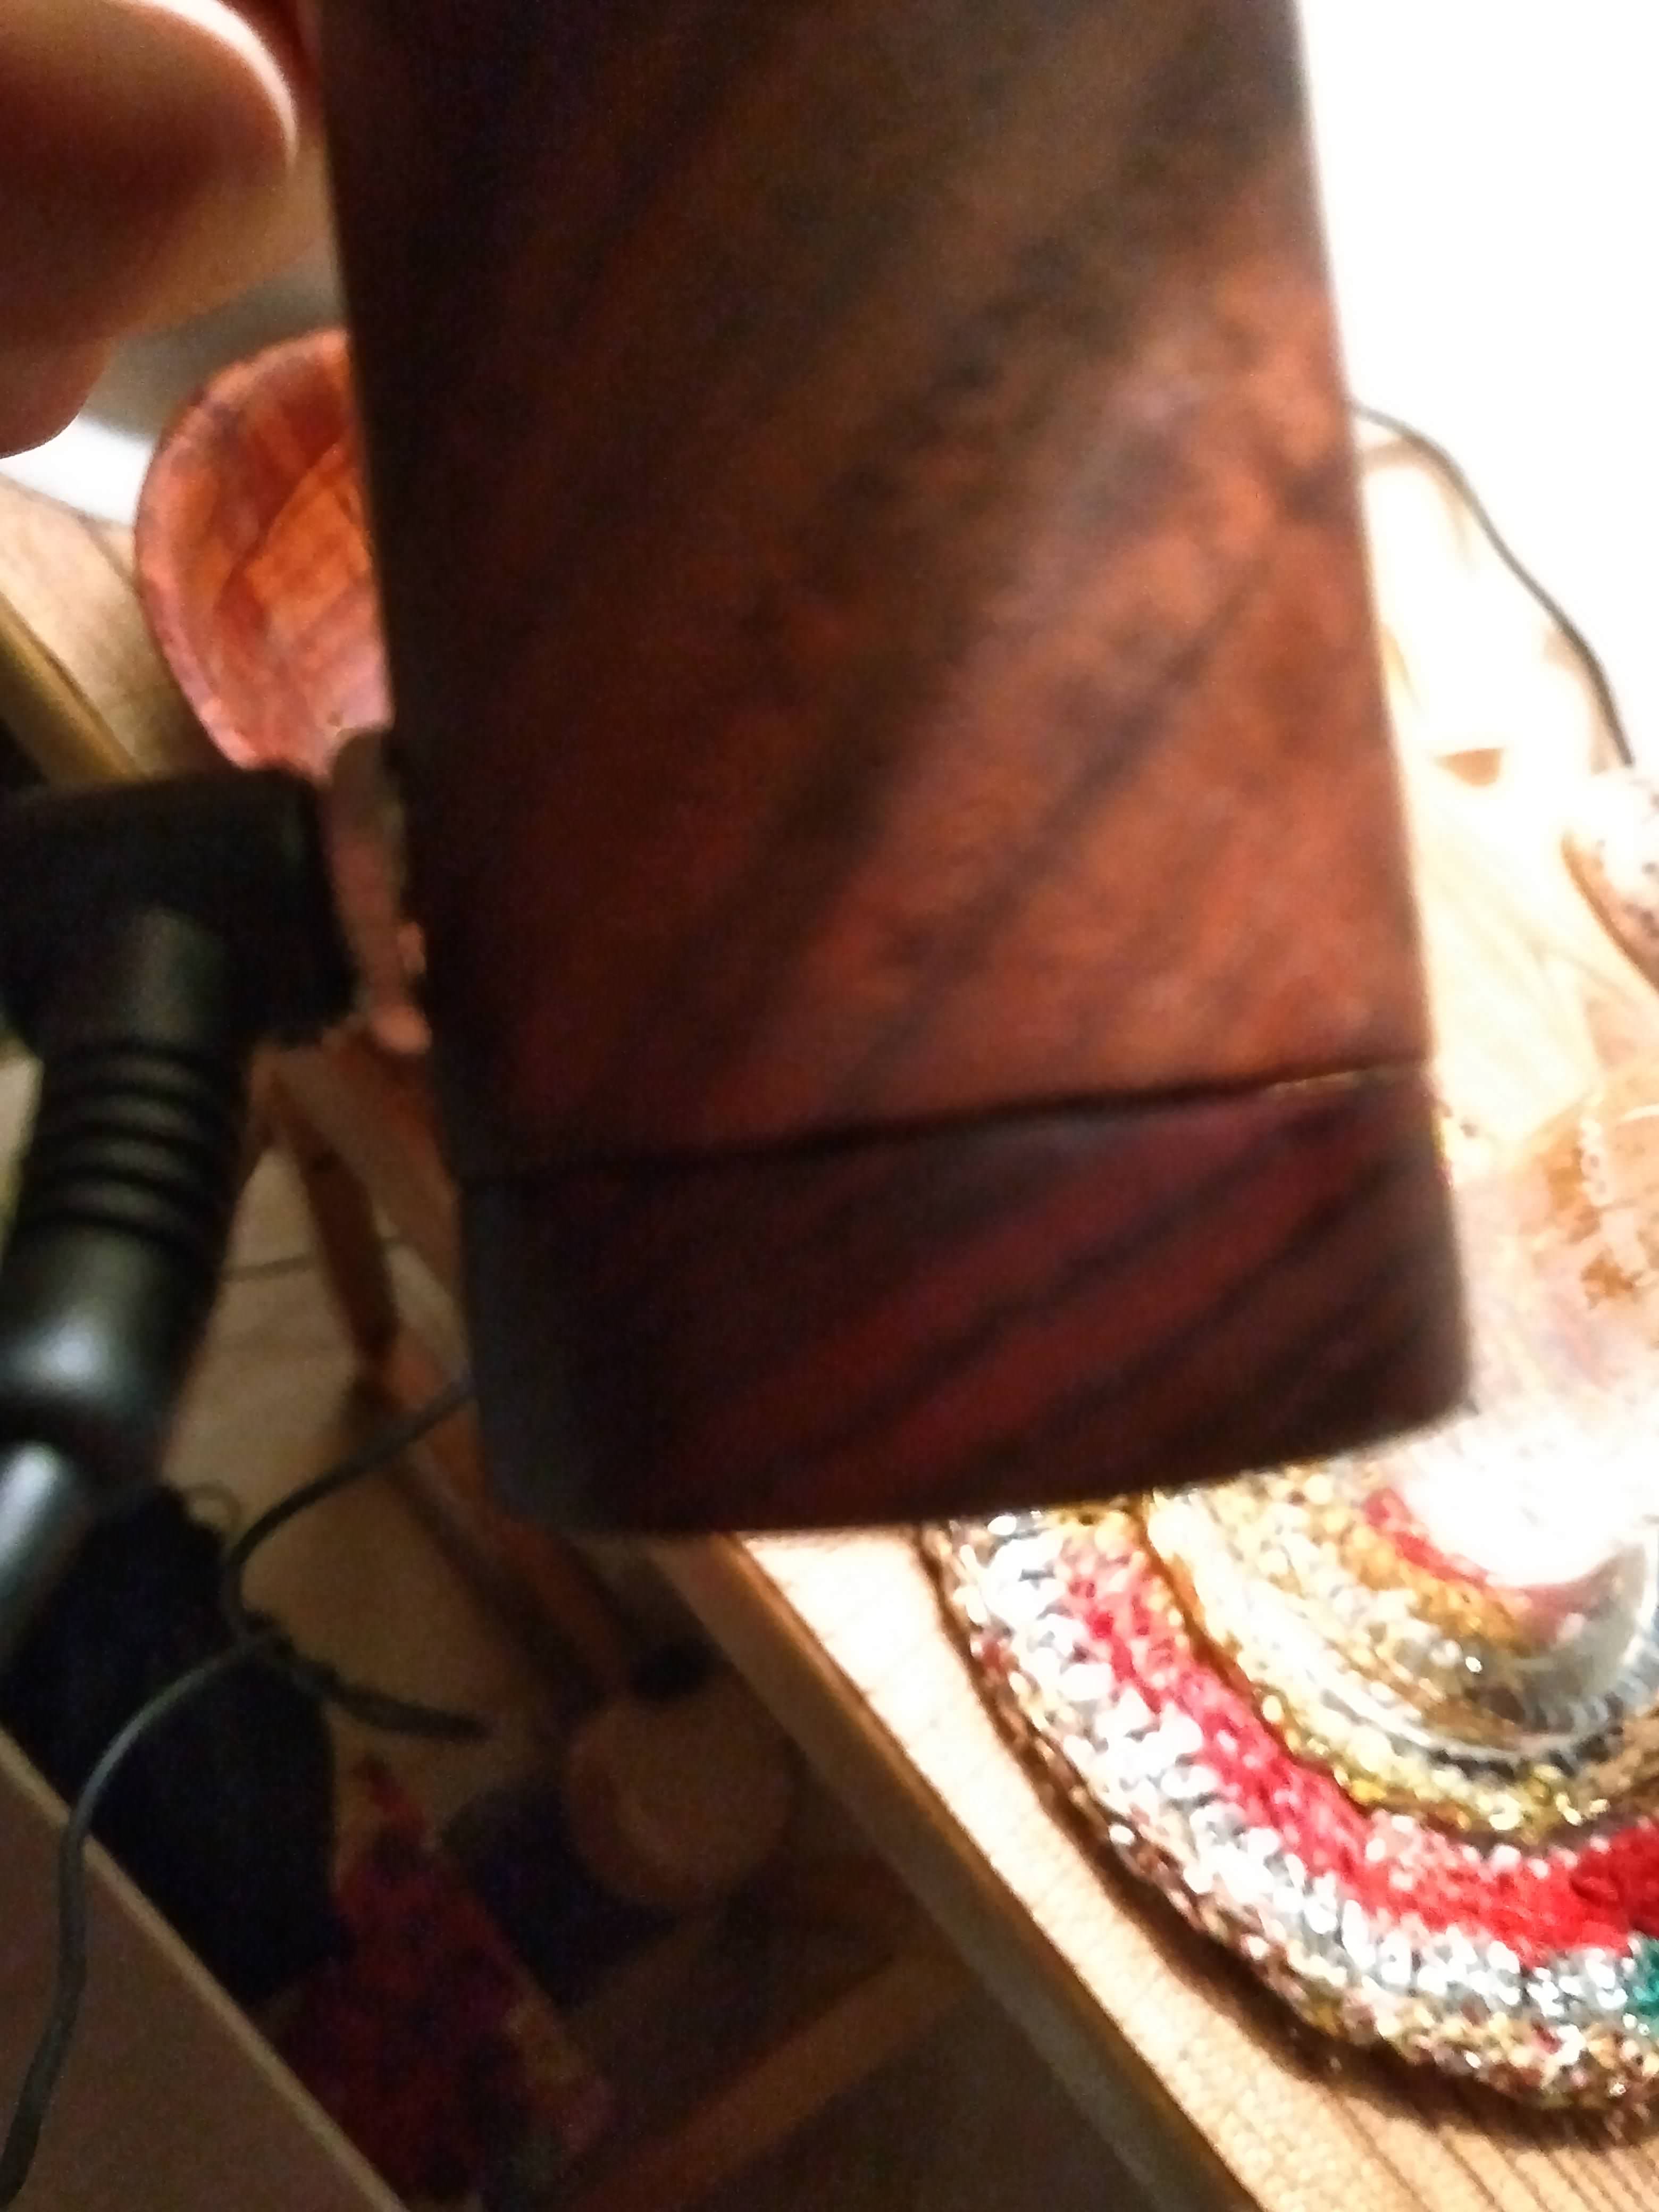
Also, I noticed that on the HI, the bottom cocobolo cap is developing a gap in between the vaporizer itself. Not sure if this is normal or if it's from the wood drying out and separating or if I've just never really noticed it before and that's how it's built. When I first received the vaporizer I may have attempted to twist the bottom cap off when trying to figure out how it works, but I was cautious and didn't twist it with too much force. The bottom cap isn't loose by any means but am just curious if the gap that developed is common with the wood drying out or whatever. Any clarification would be awesome. Thanks again guys

9gUQsdE.jpg
 
Last edited:
FUCKCOMBUSTION88,

Alan

Master JedHI
Manufacturer
So a quick heads up to whoever applies beeswax! Don't use a spoon! I'm aware that all the experts probably already know this. But someone who is new to wood conditioning like myself, this may be helpful, but maybe I'm just stupid. I thought that a fast way to melt the wax would be with a spoon and a lighter. (Sketchy, I know) I then poured the hot wax all over the HI and a bunch of black shit from the bottom of the spoon dripped off into the wax and melted into the vaporizer. Was quite upset but tried to clean it as best as I could afterwards. Lesson learned. (Now that I think of it, I guess a spoon could work as long as one used a cloth or something similar rather than pouring it onto the wood...)

(Edit: I accidentally dropped a piece of wax into the heating element after re-attempting to apply the wax. I dropped a few beads into the inside of the HI as usual but one accidentally fell into the heating element while the HI was on and it was producing a light amount of smoke for a few minutes. I unplugged the HI just to be safe but wasn't sure if this could have damaged the vaporizer or if it was just the wax lightly burning or (hopefully vaporizing) and melting inside the heating element. I held the HI upside down to attempt to let any wax drain out. Another situation now and I do feel like an idiot for having to post this but just wanted to be sure that I haven't damaged the HI. Going to plug it back it back in in a few minutes)


(Edit #2: I thought that I may as well mention all of the concerns that I had and ask the questions in the same post to save the trouble but I was wondering if it's fine to remove the two screws inside the HI which I believe would remove the heating element/SS core... I noticed on Alan's website that it's possible to do this for cleaning purposes but the screws seem pretty tight up against the wood and I wouldn't want to damage the inside of the HI while trying to remove them. The bottom circular metal piece seems to have some debris and dust build up on it and I figured that after dropping the wax inside the heating element/core that I would do a thorough clean. If I were to do this at some point for future reference it's pretty easy to put back together?)

Also, I noticed that on the HI, the bottom cocobolo cap is developing a gap in between the vaporizer itself. Not sure if this is normal or if it's from the wood drying out and separating or if I've just never really noticed it before and that's how it's built. When I first received the vaporizer I may have attempted to twist the bottom cap off when trying to figure out how it works, but I was cautious and didn't twist it with too much force. The bottom cap isn't loose by any means but am just curious if the gap that developed is common with the wood drying out or whatever. Any clarification would be awesome. Thanks again guys

9gUQsdE.jpg

Sorry to hear about the beeswax issues. There is no permanent damage done. The heat will eventually turn the wax to carbon. There may be a hint of beeswax for a little while. Try a hair dryer to get the wood hot enough to melt the beeswax. It will soak farther into the wood that way.

It is possible to remove the heater cover by removing the two screws. The heating element is supported by the wires, so it will remain in the wood body. It can be a little tricky getting the screws started and centering the heater cover again, but allows you to completely clean the heater cover.

The bottom cap is designed to be removed if you need to clean out the bottom section. There is a silicone sleeve holding the bottom cap in place. If the silicone sleeve extends down below the wood, it will allow a gap. I find the best way to install to ensure a flush bottom cap is to install the silicone sleeve into the wood first to be sure that none of it extends above the edge of the wood. Then twist the bottom cap into place. It is free to rotate to any position so that the grain lines up the best.
I have had some of that highly figured walnut wood swell and wrinkle a bit from soaking up the beeswax since it is so dry to start. The wood has been sitting in a warehouse for about 50 years.
 

little maggie

Well-Known Member
That bamboo is beautiful. I might need to get one that doesn't need special stems. My tt is beautiful but I have small hands so it's more difficult to use than my HI. And my HI can't use stainless steel. Is bamboo an exotic wood?
 
little maggie,
  • Like
Reactions: Alan

Vitolo

Vaporist
That bamboo is beautiful. I might need to get one that doesn't need special stems. My tt is beautiful but I have small hands so it's more difficult to use than my HI. And my HI can't use stainless steel. Is bamboo an exotic wood?
Domestic species can include Birch, Cherry, Pine, Hickory, Red Oak, White Oak, Maple and more. Exotic species can include Bamboo, Brazilian Cherry, Cypress, Merbau, Mahogany and others. Some species that can be considered both include Birch, Cypress, Hickory and Walnut.
 

FUCKCOMBUSTION88

Active Member
Sorry to hear about the beeswax issues. There is no permanent damage done. The heat will eventually turn the wax to carbon. There may be a hint of beeswax for a little while. Try a hair dryer to get the wood hot enough to melt the beeswax. It will soak farther into the wood that way.

It is possible to remove the heater cover by removing the two screws. The heating element is supported by the wires, so it will remain in the wood body. It can be a little tricky getting the screws started and centering the heater cover again, but allows you to completely clean the heater cover.

The bottom cap is designed to be removed if you need to clean out the bottom section. There is a silicone sleeve holding the bottom cap in place. If the silicone sleeve extends down below the wood, it will allow a gap. I find the best way to install to ensure a flush bottom cap is to install the silicone sleeve into the wood first to be sure that none of it extends above the edge of the wood. Then twist the bottom cap into place. It is free to rotate to any position so that the grain lines up the best.
I have had some of that highly figured walnut wood swell and wrinkle a bit from soaking up the beeswax since it is so dry to start. The wood has been sitting in a warehouse for about 50 years.

Thanks Alan. I applied two coats of wax successfully last night and the HI is working great so everything has improved since the beeswax occurrences. Generally how long will the beeswax maintain the moisture of the wood if the walnut wood is that dry? If the wood became too dry I assume the chances of it cracking when dropped would increase which I've considered so I try to keep it moist as a protective measure for scenarios like that as well although I've been lucky and haven't dropped it yet. Good to know that the bottom cocobolo cap can be removed and definitely makes me feel a bit better after having attempted to remove it in the past. I just tried to tighten it up to see if the gap would seal but it wouldn't budge.. It could be from having some melted beeswax in the gap but it seemed tight before as well and I feel like I may risk breaking it by twisting it with too much force so I might hold off on that for now to be safe. It's a cool little unit though. Liking it more every day. Thanks again for the help
 

Alan

Master JedHI
Manufacturer
@little maggie - Bamboo is actually a grass, but it can be worked like wood. I have some bamboo HI's with stainless steel heater covers available if you are interested.

@FUCKCOMBUSTION88 - Glad to hear all is well with your HI again. The word moisture generally makes one think of water. The heat drives all the water moisture out of the wood when the HI has been plugged in for several days, so it doesn't have much moisture. The beeswax fills up the hollow tubes within the wood grain to seal them off. It will be more resistant to moisture when not plugged in. There should be a point where you can't get any more beeswax to soak into the wood and it is completely saturated. I would apply it when the wood starts looking dull.
Cracking generally occurs when the wood is under great stress. A drop is likely to only result in a dent. Take good care of your HI and happy roasting.
 
Top Bottom