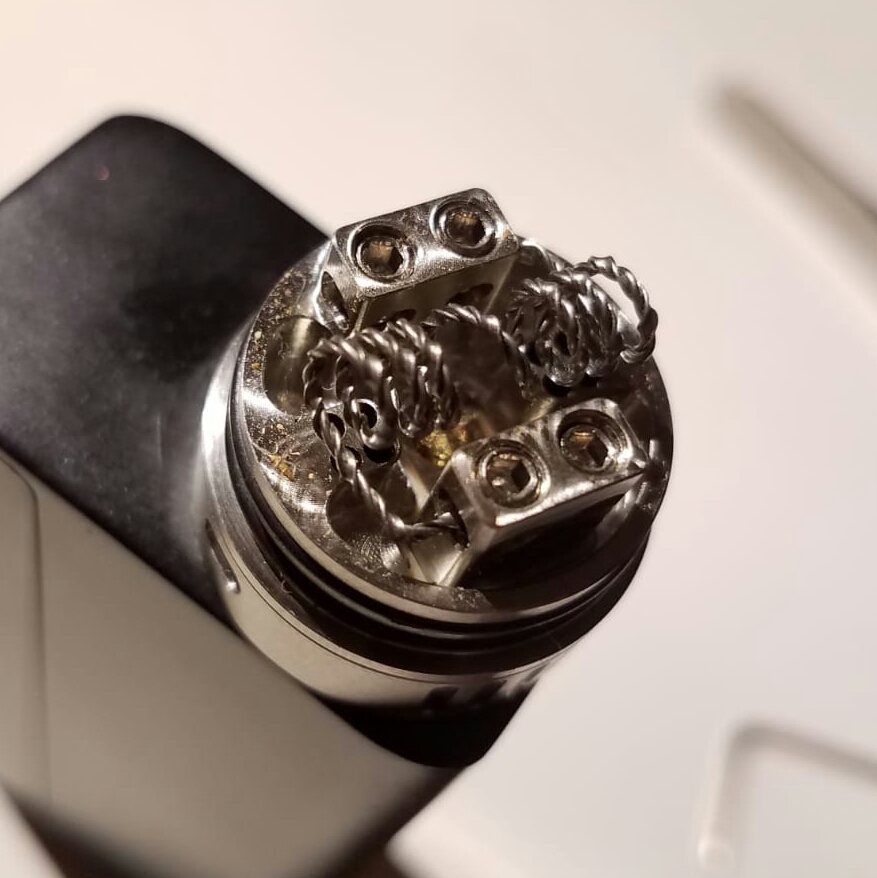
Discontinued Impcognito

simba

@weedanwine
Shame that.

Dreamwood Glow seems the closest to it.

I've never tried it though and the Glow 14 doesn't seem to be in stock, which leaves the larger Glow 18.

I'd still go for the Glow 18 provided it fits my mod, swapping out the kanthal coils for some SS316 ones should be pretty straight forward and you're good to go.

Yeah I bought the Glow to replace my Stempod 😬 clearly I'm good at losing discontinued vapes. The Glow is all good, but the Impcognito is much smaller and lower profile.
 
simba,
  • Like
Reactions: KeroZen

CanikUser19

Trenchtown Rock
Yeah I bought the Glow to replace my Stempod 😬 clearly I'm good at losing discontinued vapes. The Glow is all good, but the Impcognito is much smaller and lower profile.
Bought extra Imp coils before the shutdown. Any idea if those coils work in the Glow?
 
CanikUser19,

SilvaVapor

Active Member
Not really a worthwhile update, more of a musing about what temperature I should be aiming for and getting more accurate/true to life temperature readings on the device. According to this guy who has vape equipment that does have accurate temp readings out of the box(Volcano etc):


374F is the sweet spot he aims for, for THC, even though the boiling point is 315F.
He also touches on CBD which is important for me on certain sessions, the boiling point is said to be 356F but studies have shown you can release more of it from the herb by taking it all the way up to 446F. Which might explain why, when I mix CBD herb in my bowls, I have to take it up higher than others might, until I'm happy the bowl is fully extracted.

I've said before I take my temp all the way up to 520F but I had already gathered that's probably not what the real temperature was. It doesn't matter to most people what the real temp is as long as the performance is reliable but it is helpful to know these things to maximize performance IMO.

So, even though I knew it would probably not be that accurate, I figured since I have a digital thermometer probe I'd at least try and measure the coil temps for a ballpark figure. It's a start at least, until someone puts a heat gun or thermal camera(expensive?) on an Impog and fully dials in the the exact temps.

At 0.203 Ohms I managed to get multiple readings of 375+ lightly pressed up against each coil. With the temp set at 370F. And to be fair, on device monitor(Ntoolbox.exe), I have seen the resistance settle at 0.203Ohms on a few occasions, if I wait long enough for it to settle.

Even if that was accurate though, heating the herb via convection would require you to measure the air temperature at the point where your basket sits, if you wanted to dial your settings in as close to real world as possible for what's hitting the herb. I doubt that possible with a probe sensor, unfortunately.

I'm sure I read that somewhere on these forums, about the recommended setting being your coil resistance + at least 0.005Ohms or more. Which kind of makes sense now. As a sort of compensation for the air path/convection element. Since I normally wack it up to 500F with a bubbler before finishing on 520F. I think I'm going to try 0.207(+.004) on the Impog 1 profile for a bit. I've checked for coil glow at 500F and it seems ok. I'll just have hope I remember when I'm waved, not to finish on 520F, maybe even start finishing at 480F depending on how fast it's browning.

I might even try one of the preheat curve settings for a bit. Since it is convection and you want it to get to temp fast, so you don't run out of breath. Maybe the "boost 2s" default curve profile, which takes it to 150% for the first 2 seconds.

I would be interested to know if anyone has tried any of my settings out with theirs yet too. Even if it's not positive. I'm pretty sure after using them on two mod boxes, all you need to do is settle on the right resistance setting for your usage though.
 
Last edited:
SilvaVapor,
  • Like
Reactions: Octavia

CanikUser19

Trenchtown Rock
Not really a worthwhile update, more of a musing about what temperature I should be aiming for and getting more accurate/true to life temperature readings on the device. According to this guy who has vape equipment that does have accurate temp readings out of the box(Volcano etc):


374F is the sweet spot he aims for, for THC, even though the boiling point is 315F.
He also touches on CBD which is important for me on certain sessions, the boiling point is said to be 356F but studies have shown you can release more of it from the herb by taking it all the way up to 446F. Which might explain why, when I mix CBD herb in my bowls, I have to take it up higher than others might, until I'm happy the bowl is fully extracted.

I've said before I take my temp all the way up to 520F but I had already gathered that's probably not what the real temperature was. It doesn't matter to most people what the real temp is as long as the performance is reliable but it is helpful to know these things to maximize performance IMO.

So, even though I knew it would probably not be that accurate, I figured since I have a digital thermometer probe I'd at least try and measure the coil temps for a ballpark figure. It's a start at least, until someone puts a heat gun or thermal camera(expensive?) on an Impog and fully dials in the the exact temps.

At 0.203 Ohms I managed to get multiple readings of 375+ lightly pressed up against each coil. With the temp set at 370F. And to be fair, on device monitor(Ntoolbox.exe), I have seen the resistance settle at 0.203Ohms on a few occasions, if I wait long enough for it to settle.

Even if that was accurate though, heating the herb via convection would require you to measure the air temperature at the point where your basket sits, if you wanted to dial your settings in as close to real world as possible for what's hitting the herb. I doubt that possible with a probe sensor, unfortunately.

I'm sure I read that somewhere on these forums, about the recommended setting being your coil resistance + at least 0.005Ohms or more. Which kind of makes sense now. As a sort of compensation for the air path/convection element. Since I normally wack it up to 500F with a bubbler before finishing on 520F. I think I'm going to try 0.207(+.004) on the Impog 1 profile for a bit. I've checked for coil glow at 500F and it seems ok. I'll just have hope I remember when I'm waved, not to finish on 520F, maybe even start finishing at 480F depending on how fast it's browning.

I might even try one of the preheat curve settings for a bit. Since it is convection and you want it to get to temp fast, so you don't run out of breath. Maybe the "boost 2s" default curve profile, which takes it to 150% for the first 2 seconds.

I would be interested to know if anyone has tried any of my settings out with theirs yet too. Even if it's not positive. I'm pretty sure after using them on two mod boxes, all you need to do is settle on the right resistance setting for your usage though.
For me, reading posts like this, let alone going down this path of exploring something like “optimum temps”, slowly sucks some of the pleasure out of consumption and device usage. Just vape your herbs at a temp you like, one that gives you the effects you seek without combusting. All of my temp controlled devices live in the 360° to 400° range because I prefer to taste what I’m vaping. An occasional visit to the 420° temp to finish off a mostly spent bowl or stem. A temp of 520° on any of my devices would seem insanely hot and would never appeal to me at all. But everyone has different tastes and needs, understood. I just don’t give this kind of thought to dialing in that perfect temp.
 

CanikUser19

Trenchtown Rock
Apologies for the double post, not a lot of activity here but wanted to share a stoner discovery from last night. I searched all the way back to the beginning of the thread and found nothing. Just happen to have my cigar box full of OG E-nano stems sitting out next to my Impcognito and a delayed light bulb turned on. What do you know, they fit. Tried the ice stem, regular stems, and wpa’s. Epic usually has them in stock all the time. E-nano stems fit too


SilvaVapor

Active Member
For me, reading posts like this, let alone going down this path of exploring something like “optimum temps”, slowly sucks some of the pleasure out of consumption and device usage. Just vape your herbs at a temp you like, one that gives you the effects you seek without combusting. All of my temp controlled devices live in the 360° to 400° range because I prefer to taste what I’m vaping. An occasional visit to the 420° temp to finish off a mostly spent bowl or stem. A temp of 520° on any of my devices would seem insanely hot and would never appeal to me at all. But everyone has different tastes and needs, understood. I just don’t give this kind of thought to dialing in that perfect temp.
Yeah, I did try and make it clear at the start it wasn't a post for everyone. I agree with most of that, some people don't bother with temp control at all for these kind of atties. Dreamwood ship theirs with kanthal coils. Stempod did too if I remember right. I just prefer to have it because you can make your bowls last a lot longer with the right settings and I like tweaking them to get the experience of the draw as straight forward for me as possible.

To be honest, I don't trust the readings I got from the probe at all. I find 0.203 Ohms is too low. Next to no vapour at my starting point. I'm fairly certain the resistance is the same as first measured when setting up the Pico 25(around 0.205 Ohms), based on the device monitor readings I keep getting from NToolbox and the performance of the impcog itself.

But it wasn't all wasted effort with the tweaking and learning.

I think what I'm going to do is, aim for a setting where I can get a decent amount of vapour, while starting my session at 374F. Because you should be getting good vapour at that temperature. Some people never go higher than this according to that guy in the video I linked. I also think I am onto something with putting some consideration into the compensating for the air/convection part of how you're heating the herb. The resistance you set probably should be higher than your cold/live resistance reading. The more I think about it, I don't know why I didn't add a pre-heat boost at the start of the draw sooner too. It makes sense for convection. In theory, that should get the air/your herb to temp faster. Which should mean you don't have to put as much effort in or inhale for as long to get a satisfying amount of vapour.

I will need to test this more when I have time and report back(fingers crossed), but:

I've added 0.005 Ohms to my cold resistance on the Impcog 1 profile(0.210 Ohms).
To set a temperature of 374F in arcticfox, I had to change the steps(+/- buttons) in the NToolbox configuration profile panel, from the default 10F, to 2F.
I've put the temperature up to the new maximum of 480F and checked for coil glow there(light glow, acceptable for me)
My pre-heat boost lasts 5 seconds, it has steps and peaks half way through before ramping down again.
 
Last edited:
SilvaVapor,
  • Like
Reactions: KeroZen

SilvaVapor

Active Member
Well, it was nice while it lasted. RIP my impcog.

I have not been having the best luck the past few days in general, even before this happened.

So the story goes... I was going through my vape gear and saw the shiny new pre-built coils I got a while back and thought I'd test them out. Them little hex nuts are an odd size which none of my allen keys were the right fit for but I found a bit in my precision screw driver set that seemed right.

Sure enough the stock coils came out simple enough. I cut the new coils, as close to the length of the stock ones as possible. I got them the right width and made an identical pair ready to go. I was excited to install them and test them out. First screw of the first coil goes in fine. The second screw is going in fine too but on the second to last turn, I lost purchase. I pulled the screwdriver a way to take a look(squinting) and it looks as though I'd somehow managed to put the screw in backwards(since it's a magnetic screwdriver) since there's no hole there at all. I then start to panic because it was one turn away from being in flush and there is not even a milimeter protruding out to grip onto with some pliers or tweezers. I look closely again, cursing myself and then realised it was the right way around. However, the end of the screw driver bit had snapped off in the hex screw hollow on that second to last turn. I wasn't being overly forceful with either because it seemed to be going in fine. To make matters worse the peice it happend to, was the bit that has the 510 thread and is attached to the deck base.

Then began a long period of time, thinking of different ways I can either get the screw out or get that lodged metal in the screw out. Freezing it, heating it. Before drilling it with a HSS drill bit(desperate measures) but the metal in there was not going anywhere and it was tough enough that it broke my bit. I tried the solder method too but realised that wasn't going to work. So as a last attempt, I went back with a new drill bit to do the drill method, following what the guides so to do, slow and steady with plenty of downward pressure. I had to put the peice in a vice to do this. It still didn't work. Worse still, the brass the peice is made of isn't that sturdy and I noticed the hollow 510 thread bit is now slanted and the threads are out of alignments from the preassure(wont screw in a mod). Not only that, I took all the parts off except the wooden base because I couldn't find a tool that would unscrew the nut on the underside of the bass. IF, I'm some how able to find a part that will fit, I'll have to salvage the wooden base bit. So, I sawed most of the 510 brass thread off that peice and managed to wiggle the nut back enough with some tweazers, to get some purchase with some needle nose plyers(tried two different pairs) and I eventually got the nut off. I doubt straightening it would have rescued it because the threads were in bad shape(ie there was no saving that piece) but this was just yet more hassle.

Not even sure what to do now. I've rigged the housing of the impcog up(o-rings), with a 85mm glass stem where the coil chamber used to be. Which I hope will work for the weekend while I figure out what I want to do. I will use a lighter to heat the air but I will just have to work on my technique to avoid combusting(get my angles and distances right).

I have looked to see if there is a place that sell anything like the part I need for RDAs but I'm a bit lost where to begin. It's probably custom and I have no workshop skills(filing a brass part down to make it fit, I could probably do), not for minature things like this anyway.

I know I said would consider the glow but I don't even think I could afford one at the minute(really happened at the wrong time). I'm also second guessing the 510 attachment route, as I look for alternatives. For one main reason, they keep going discontinued and the reason I chose this route was the ability to replace parts and keep it going. But you still end up in a position where can't replace parts or even order new units. Which means you might as well go with the all in one units.

I signed up to ent exchange to see if there are any used uk deals. Most sellers seem to be aiming for close to retail price from what I saw. So that's not really an option either. Any recommendations?

Is the Xmax V3 Pro still the best bang for buck where convection is concerned? Or is there something better? Something in the £50-70 price range as a stop gap might be doable. Unless I find a used impcog or a used glow for a good price. If not I'll weigh up whether I want to pay the cost of a new glow and accessories or maybe even save up for a premium all in one unit like the Tinymight or the Legacy Pro.
 
Last edited:
SilvaVapor,
  • Wow
Reactions: KeroZen

XpeeN

Well-Known Member
About the discussion earlier:
As SilvaVapor said, 500F is not the actual temp that you guys are vaping. Because our heating element is quite small, you need to set it to higher temps so when the air passes by it heat up enough to vaporize. Just please take care of your heating elements, don't let it glow too bright. A dim red is probably fine, more than that (assuming SS 316L wire) damage it so it might release things you don't want in your lungs.

Is the Xmax V3 Pro still the best bang for buck where convection is concerned? Or is there something better? Something in the £50-70 price range as a stop gap might be doable. Unless I find a used impcog or a used glow for a good price. If not I'll way up whether I want to pay the cost of a new glow and accessories or maybe even save up for a premium all in one unit like the Tinymight or the Legacy Pro.
There's a used impc at classified. You should check that out. Otherwise, yeah the v3p is pretty good. It's not as open airflow like dw glow 18, but you get used to it.

BTW, I can't seem to fully understand why people change their coils′ resistance, any explanation? IME, I found that changing the TCR values alone is enough to find a sweet spot for a full temp range (I mean, that it let you temp step efficiently, while both low end temps and high end temps works well).
 

SilvaVapor

Active Member
About the discussion earlier:
As SilvaVapor said, 500F is not the actual temp that you guys are vaping. Because our heating element is quite small, you need to set it to higher temps so when the air passes by it heat up enough to vaporize. Just please take care of your heating elements, don't let it glow too bright. A dim red is probably fine, more than that (assuming SS 316L wire) damage it so it might release things you don't want in your lungs.


There's a used impc at classified. You should check that out. Otherwise, yeah the v3p is pretty good. It's not as open airflow like dw glow 18, but you get used to it.

BTW, I can't seem to fully understand why people change their coils′ resistance, any explanation? IME, I found that changing the TCR values alone is enough to find a sweet spot for a full temp range (I mean, that it let you temp step efficiently, while both low end temps and high end temps works well).
I suppose you have point. A higher TCR value will have a similar effect. I think had read what the range should be for the impcog here somewhere when I bought it and used that as a starting point. Think some people were saying TCR 110 and TCR 120 which was way too low for mine with the cold resistance. So I sort of upped both the resistance and the TCR values to find a middle ground close to what others were finding. I did find TCR 140 to be a nice spot but I didn't want to get too close the 180 that was recommended for it's larger cousin, the imp because it made sense that it should be lower.

I saw the classified but they say EU only because UK customs already rejected a sale attempt for it. Plus I only really need the impcog, so would have preferred the option just to take that for a little less too(as a buyer, not telling them how to sell their own stuff there).

I'm still kicking myself about what happened yesterday. I could have just left the old dirty coils in but I was suspecting they were on the way out because I was having to either bump the resistance up, or bump the temperature up further than the last time I came back to it. Which was just slightly irritating but manageable(it did the job). Also, since I bought the one that's broken second hand, did the impcog ship with the allen key needed or not? I suppose when the metal starts getting that thin, even the allen keys can snap off at the end when used enough. I'd never had that happen with any of the other bits in that set, they've all be strong and reliable so far, just bad luck I guess.

Also, looking at the glow's build deck, it looks well machined, like a mass produced one.
Dreamwood-Glow-RCV-18-V3-2.jpg

If only there was place to buy those at various diameters(just need the inner ring of deck to be 15mm) it would probably fit the impcog and function the same. They seem to have stopped making the RCV 14 completely now though, I wonder if it's because the bits become too small and easy to break.
 
Last edited:
SilvaVapor,

XpeeN

Well-Known Member
If only there was place to buy those at various diameters(just need the inner ring of deck to be 15mm) it would probably fit the impcog and function the same. They seem to have stopped making the RCV 14 completely now though, I wonder if it's because the bits become too small and easy to break.
You can try searching for cheap RDAs and use their deck. It's not as simple as it used to be back then when fasttech was online, but it's still doable at AliExpress and such. Not sure what diameter you need tho
 
XpeeN,

simba

@weedanwine
I saw the classified but they say EU only because UK customs already rejected a sale attempt for it. Plus I only really need the impcog, so would have preferred the option just to take that for a little less too(as a buyer, not telling them how to sell their own stuff there).

I was the original buyer and I'm kicking myself that I didn't ask for the attachment only. Although apparently the package was never opened so who knows what grounds it was rejected on as they never informed me anything.

I also have a Dreamwood Glow and it's great and works exactly as you expect but I did miss the form factor of the Impcognito which is why I tried to buy another.
 

SilvaVapor

Active Member
I looked on aliexpress(that new search by image feature is really helpful, used the picture in my last post) there's nothing close to the diameter needed in the results.
I was the original buyer and I'm kicking myself that I didn't ask for the attachment only. Although apparently the package was never opened so who knows what grounds it was rejected on as they never informed me anything.

I also have a Dreamwood Glow and it's great and works exactly as you expect but I did miss the form factor of the Impcognito which is why I tried to buy another.
If the mod was shipped with batteries, it could have just been that. They can be funny about those. Like I said though, it is up to the seller how they sell their gear. If they wanted to get rid of it as a set and not be stuck with a pico they don't use I understand that.

I was brainstorming while looking on aliexpress, about a way to revive that piece. I could cut off the rest of the brass threading, leaving just the top ring of the deck. Not sure if the whole of that is copper or just the terminals/blocks the coils screw into. Anyway, once that is done, I could recreate the 510 thread pipe. I did some reading and all you really need is the right brass pipe diameter(5mm OD, 3mm ID, I think) as well as the right threading die(m5 x0.5mm) and then a die wrench or ratchet with some threading oil to carry out the task, Then cut it to the right size once you've added the thread.

Then I'd still be left with two problems, I don't know how to weld, nor do I have the equipment. And lastly, that little #@$£! piece of metal and screw are still stuck in the block. I'd need to remove that first before I begin thinking about the rest. After that, I would gladly create the threading bit myself and pay someone else to do the welding via post but I couldn't find a service like that anywhere.

I'm okay at the planning part of things like this and working out how it would be done, step by step. But the process of physically doing anything like that, which requires technique and steady hand, I do not have any confidence for(from experience :doh:). Especially with things this small.

Failing that, I had another idea, have a new part recreated from scratch by using a paid service.
For example, sending a 3D CAD image of the part, to one of the hub.com - CNC freelancers, for manufacture. I have used that service before for a plastic part but I didn't create the image. You get a quote for the job and accept and they send it out to you once done. Does anyone else with an impcog, have experience in creating these CAD files(it is worth a try asking :shrug:)? I could try and teach myself, which will take longer and I might not be able to do it still. But I might need help with the orginal dimensions, since I've had to saw a peice off the 510 thread.
edit: Also I forgot it's not one solid brass piece either... the top ring is copper. Maybe that makes it a no go. Unless the manufacturer is willing to make the two parts and weld them together... Which might make it the price go up. I might send the site a query about it.

I've pm'd mistvaporizer(Dave is it?) about a replacement part or CAD file too but I've never had a reply about anything else before, so I take it he doesn't come here anymore, unfortunately.
 
Last edited:
SilvaVapor,

simba

@weedanwine
If the mod was shipped with batteries, it could have just been that. They can be funny about those. Like I said though, it is up to the seller how they sell their gear. If they wanted to get rid of it as a set and not be stuck with a pico

It did not have a battery included. The seller has successfully sent things to the UK before without issue but this occasion we got unlucky I guess.
 

SilvaVapor

Active Member
Quick update:
I got the right size screw extractor/easy out bits from aliexpress but I can't seem to drill through that wedged piece of metal from the screwdriver. Which is necessary for the extractor to get deep enough to bite onto something, to begin backing it out. I think I've given up trying to revive that piece. It's typical that the screwdriver bit was able to break off but now it's wedged in, it's become indestructible.

My xmax v3 pro arrived today, so I can stop using the jury-rigged glass tube and lighter method with the impcog housing.

I've not given up on trying to rescue the impcog completely quite yet though. I will try and create CAD file of the part. To do that, I need the dimensions of that piece. Maybe if I have enough pics and the correct dimensions, one of the hubs.com freelancers would be able to do it for me.

I could maybe still estimate how long the peice is by the contact screw length but if anyone could measure how long the 510 threaded pipe is under the top ring(pic below for reference) I'd be grateful. A couple of photos from as many different angles as possible, of the peice removed, would be most welcome too. If anyone would be willing to go to the effort. If you have a pair of needlenose pliers, you should be able to just about grip the nut on the bottom of the impcog and unscrew it from the wooden base.

I've taken photos of the top part from multiple angles already, so here's two to demonstrate which peice I'm talking about:

IMG-20241018-155040.jpg


IMG-20241018-155151.jpg


I'm hoping the xmax v3 is good enough to tide me over and I can get a new piece made. I'm also thinking that the whole thing is made out of brass afterall too, so it might be doable. I just hope I can get it done relatively cheaply once I have everything I need. The threading(outside for the 510 pipe and inside for the coil screw holes) I will have to ask about, hopefully they can do that for me too, if they can do initial peice.
 
Last edited:
SilvaVapor,
  • Sad
Reactions: simba

KeroZen

Chronic vapaholic
Over time I had a few quirks with my DNA60 mod. Some are I believe by design and some might be rare firmware bugs possibly.

The main one is when swapping the battery in the middle of a session, which happens quite often in fact. Say you start a new bowl but you're below 30% capacity and want to finish draining the cell before loading a new one (when I'm outside and want to get as much runtime as possible because I can't charge for instance)

In this case the mod when it reboots will read the resistance of a still warm coil and it can be dramatic. My coil is 0.23ohm cold but when this happens it can read 0.25ohm and the mod uses that value and then it's near combustion on the first hit.

This is probably not a problem with e-cigs since the coils are submerged and thus cool super quickly between hits. So it's clearly a problem only with our "deviant" use case that evidently Evolv does not support at all.

To eliminate the problem I had to check "ohms locked" and enter the value I got on long cold mod in the Atomizer Analyzer window (but you need to note down the first value that you read quickly because the analyzer will warm the coil by constantly pinging it to get a reading) But it's not sufficient. Although Escribe says it's not recommended, and it's for safety reasons, I also had to increase the "ohm lock range" parameter found in the "mod / safety" tab. I set mine to 50%.

This way when it reboots on a warm coil you should not get the "new coil?" prompt and it should continue to assume it's 0.23 instead of 0.25 (or whatever your values are)

This is all fine and dandy but then for some other reasons I had several times the thing reset on its own. When it happens the mod reverts to power mod in a blink. Then after letting it cool and rebooting it (removing the cell), I don't know exactly how but the ohms locking disappeared. I only noticed because I started having the above-mentioned first problem of extra hot hits after a cell swap again.

Should have noticed that the little lock icon also disappeared from the screen but after a while I forgot it was there in the first place altogether. So today I connected to Escribe again, and indeed the "ohms locked" box was not ticked anymore! So I redid the entire config and I hope it will stick and next time I'll remember to always check that the lock icon is really present.

Ultimately, and it might be a quirk of the Dovpo College only, my settings for screen brightness don't seem to have any effect: when it's firing the screen is always super bright. The settings work for the idle brightness, the fade-in and out parameters etc. It's only when I fire: full brightness, then when I release goes to the idle brightness then fades out. It's a minor annoyance but when I vape in the bed at night before going to sleep, I have to palm the screen with my hand so it doesn't act like a flash-light and wake-up my sleeping wife.

Apart from that, the DNA platform is solid, and even if I'm a tinkerer by nature, I'm glad I don't have to bother with all the fine-tuning of my other ArticFox mods. Especially the PI(D) part which is a hassle to setup right.

Ah one final note: over a long period of time my resistance reading increased from 0.23 to 0.24. As expected it's not the coils that changed (although I would advise you to brush them and strum them from time to time and double check they are not partially touching the deck or themselves) But rather it's the contact resistance of the 510 port that is increasing, due to oxidation. Unscrewing fully the attachment (a good occasion to perform some cleaning and remove the ABV dust etc) then re-sitting it helps breaking the oxide layer on the 510 threads and pin.

Don't do it too often either, as the threads can wear and it's more problematic since you can't easily solve that. It's as always a matter of good balance!
 
Last edited:

CanikUser19

Trenchtown Rock
Over time I had a few quirks with my DNA60 mod. Some are I believe by design and some might be rare firmware bugs possibly.

The main one is when swapping the battery in the middle of a session, which happens quite often in fact. Say you start a new bowl but you're below 30% capacity and want to finish draining the cell before loading a new one (when I'm outside and want to get as much runtime as possible because I can't charge for instance)

In this case the mod when it reboots will read the resistance of a still warm coil and it can be dramatic. My coil is 0.23ohm cold but when this happens it can read 0.25ohm and the mod uses that value and then it's near combustion on the first hit.

This is probably not a problem with e-cigs since the coils are submerged and thus cool super quickly between hits. So it's clearly a problem only with our "deviant" use case that evidently Evolv does not support at all.

To eliminate the problem I had to check "ohms locked" and enter the value I got on long cold mod in the Atomizer Analyzer window (but you need to note down the first value that you read quickly because the analyzer will warm the coil by constantly pinging it to get a reading) But it's not sufficient. Although Escribe says it's not recommended, and it's for safety reasons, I also had to increase the "ohm lock range" parameter found in the "mod / safety" tab. I set mine to 50%.

This way when it reboots on a warm coil you should not get the "new coil?" prompt and it should continue to assume it's 0.23 instead of 0.25 (or whatever your values are)

This is all fine and dandy but then for some other reasons I had several times the thing reset on its own. When it happens the mod reverts to power mod in a blink. Then after letting it cool and rebooting it (removing the cell), I don't know exactly how but the ohms locking disappeared. I only noticed because I started having the above-mentioned first problem of extra hot hits after a cell swap again.

Should have noticed that the little lock icon also disappeared from the screen but after a while I forgot it was there in the first place altogether. So today I connected to Escribe again, and indeed the "ohms locked" box was not ticked anymore! So I redid the entire config and I hope it will stick and next time I'll remember to always check that the lock icon is really present.

Ultimately, and it might be a quirk of the Dovpo College only, my settings for screen brightness don't seem to have any effect: when it's firing the screen is always super bright. The settings work for the idle brightness, the fade-in and out parameters etc. It's only when I fire: full brightness, then when I release goes to the idle brightness then fades out. It's a minor annoyance but when I vape in the bed at night before going to sleep, I have to palm the screen with my hand so it doesn't act like a flash-light and wake-up my sleeping wife.

Apart from that, the DNA platform is solid, and even if I'm a tinkerer by nature, I'm glad I don't have to bother with all the fine-tuning of my other ArticFox mods. Especially the PI(D) part which is a hassle to setup right.

Ah one final note: over a long period of time my resistance reading increased from 0.23 to 0.24. As expected it's not the coils that changed (although I would advise you to brush them and strum them from time to time and double check they are not partially touching the deck or themselves) But rather it's the contact resistance of the 510 port that is increasing, due to oxidation. Unscrewing fully the attachment (a good occasion to perform some cleaning and remove the ABV dust etc) then re-sitting it helps breaking the oxide layer on the 510 threads and pin.

Don't do it too often either, as the threads can wear and it's more problematic since you can't easily solve that. It's as always a matter of good balance!
Would you mind sharing your DNA settings for your Imp?
 
CanikUser19,
Top Bottom