Arizer Solo

sickmanfraud

Well-Known Member
I clean my water pipes, bubblers, stems and GonG's before they become dirty? I vaporize however eating cannabis sounds gross to me?

If you are worried about the cannabis taste you could make a Green Dragon tincture and then make a solvent transfer to get the cannabinoids into coconut oil.

When I clean my stems and GonGs I clean with ethanol and then add that to my next batch of AVB tincture.

This is a little off topic. PM me for more info.
 
Last edited:

TheWhisper

Well-Known Member
Shatter, wax or BHO can be wrapped in cotton and vaporized that way. You can make a wax sandwich by putting shatter or wax inside your herb and vape away. You may need s higher temp. I like to use my bubbler for higher temperatures.

Sweet, an herb & wax sandwich sounds like just the thing! 6 or 7 is hot enough for the wax to vaporize?
 
Last edited:

TheWhisper

Well-Known Member
Two more questions about vaping wax.

1) Does it produce noticeable vapor? (If you could equate it to vapor from dry herb at X temperature in the Solo, what temperature would that be?)

2) How can you tell when the wax is "kicked"? While color isn't a foolproof way to tell with dry herb, it works well enough for me. But it doesn't look like there's a color change with the wax.

I tried rolling some up in a rolling paper, and I did get some vapor butts. However, I'm not sure if that was from residue/ABV crumbs in the stem or from the wax. And then when I took the rolling paper out of the stem, the whole thing was stained with the wax color and there was no actual wax rolled up in it. I assume that means it was all either vaporized or absorbed into the rolling paper.

As might be obvious now, I've never used wax at all via any method before today :p

EDIT:
I am currently baked after that small bit of wax I put in the rolling paper, so I guess it worked. :zombie:
 
Last edited:

OF

Well-Known Member
Yep, I like 'em too (there are two lengths actually, 60 and 70mm). And they are definitely 'the poor man's GonG adapter'.
I HAD to try this asap
Arizer Solo firing up

and...
Awesome dude! Thanks for the tip
Hits better than the GonG imo.. It PULLS vape down into the d020 like a beast

I think i might just get myself some more of these! .

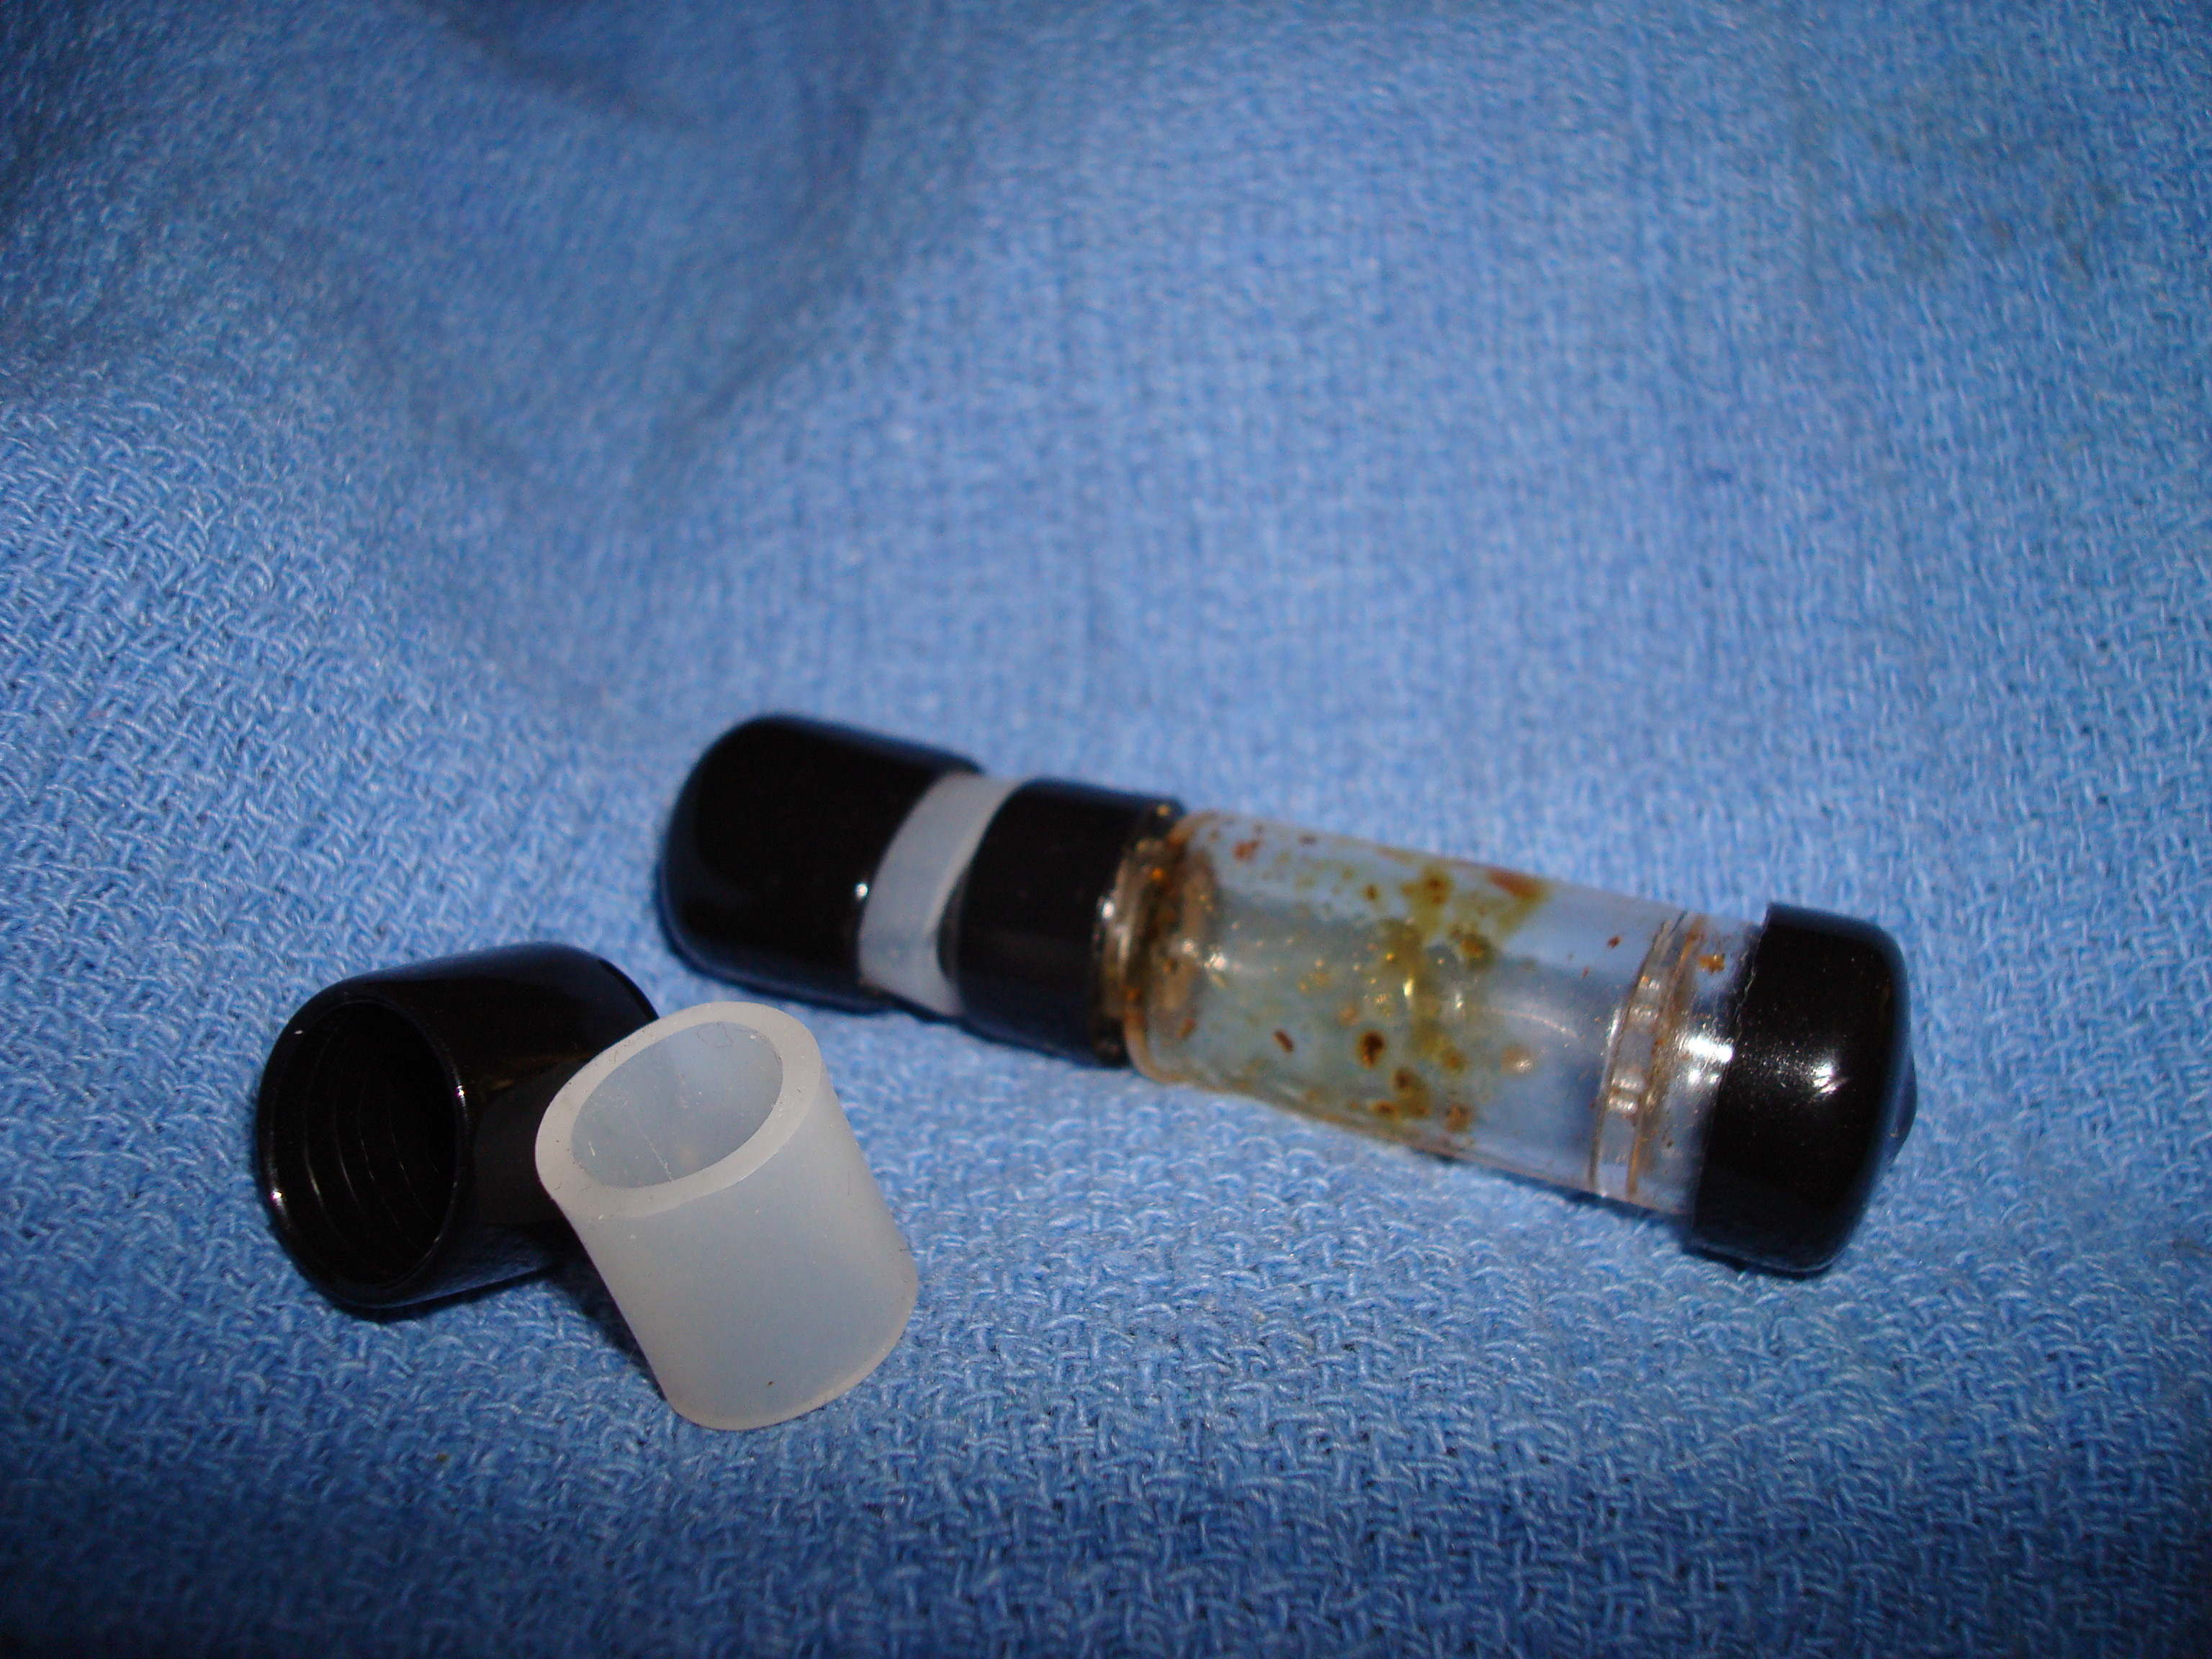
Yep, at ten bucks each it's worth getting a couple as spares. I also load and cap a couple, it avoids stem reloading in the field. Pull the cap off, swap stems, use the cap over the ABV. Simple, fast, neat.

WgOYSb5.jpg


I cut the (hard) caps for the bowl off to make them easier to snap on and off, the MP end is kind of an afterthought. It uses a soft cap and piece of 1/2 inch OD tube which easily distorts to grip the flatted MP well. You can even carry the lot in half a dual 18650 box, although I usually use a shirt pocket.

BTW I should also have mentioned that the two Air stems have different bowls. The 60mm one is more than just shorter over all, it's got a 'shortie bowl' as well. Not a lot, maybe 25% reduction? But useful.

OF
 

Quetzalcoatl

DEADY GUERRERO/DIRT COBAIN/GEORGE KUSH
Two more questions about vaping wax.

1) Does it produce noticeable vapor? (If you could equate it to vapor from dry herb at X temperature in the Solo, what temperature would that be?)

2) How can you tell when the wax is "kicked"? While color isn't a foolproof way to tell with dry herb, it works well enough for me. But it doesn't look like there's a color change with the wax.

I tried rolling some up in a rolling paper, and I did get some vapor butts. However, I'm not sure if that was from residue/ABV crumbs in the stem or from the wax. And then when I took the rolling paper out of the stem, the whole thing was stained with the wax color and there was no actual wax rolled up in it. I assume that means it was all either vaporized or absorbed into the rolling paper.

As might be obvious now, I've never used wax at all via any method before today :p

EDIT:
I am currently baked after that small bit of wax I put in the rolling paper, so I guess it worked. :zombie:
Flower + oil stems come out darker for me when done compared to the same flower in a stem with no oil. You'll know when it's done because nothing more will come out of it. Rolling papers will work but I much prefer some flower or cotton/rayon as a wick.
 

ataxian

PALE BLUE DOT
Flower + oil stems come out darker for me when done compared to the same flower in a stem with no oil. You'll know when it's done because nothing more will come out of it. Rolling papers will work but I much prefer some flower or cotton/rayon as a wick.
I've used The SOLO for wax and shatters.

I don't like the taste of a herb sandwich!

Cotton from a vitamin bottle or FINNS organic cotton (small piece of cotton )

I vape on level 4 for flowers and 5 for concentrates!
 
Last edited:

fernand

Well-Known Member
Hey, @ataxian, been a while. Do you find the cotton method better than a bit of screen or Bikel & Sikel oil pad? No burned cotton taste?

With flowers I always use a screen on top of a ball of SS mesh, that acting as a spacer in the Solo stems, because a whole stemfull is a waste. Then just smearing some oil on the screen works ok for me.
 

Tommy10

Well-Known Member
Just broke my last stem:( top is snapped about half an inch. Does anyone know much about cutting it below the break? I don't own a dreamil.
Also, any Australians here have any ideas on replacing stems? Looked on ebay and the usual vape shows, with postage it's getting on $25+ a stem if you get a few and I really only want 2 max. I tried dhgate but they only sell dodged units not the glass on its own:(. Anyone know anywhere to get some cheap solo glass, quality is not of the highest order, just want to use it without cutting my mouth for a bit longer.
 

Quetzalcoatl

DEADY GUERRERO/DIRT COBAIN/GEORGE KUSH
At the mouth end? Perhaps a torch lighter and some careful application could melt the ends down. You'll want the glass going yellow I believe it's one of the components heating and melting. (Potassium? I bet OF knows...)

Then maybe some silicone tubing over that??
 

Tommy10

Well-Known Member
At the mouth end? Perhaps a torch lighter and some careful application could melt the ends down. You'll want the glass going yellow I believe it's one of the components heating and melting. (Potassium? I bet OF knows...)

Then maybe some silicone tubing over that??
Cheers! Manged to heat and snap the cut clean enough then fit a tapered washer on it. As a result it fits much tighter in my bubbler and for the first time I can see decent vapor build (not extremely dense but visible with iPhone torch pretty well). Also scored 2 straight stems for $38 next day delivered, Aussie shop so can't complain. Placed the order then emailed (between trading hours here) to see if I can swap one for an arizer air short stem since they are listed as the same price. Shorter stem is easier for using the water tools I currently own (I'll update to some proper GONG attachments at some stage but for now I'm fiddling. So might have turned this nightmare into a $40 lesson with a positive outcome.... Rock on SOLO!

Edit to add, the new found water tool airtightness is grand! Been giving her some serious testing... Turned off halfway through a draw, in my head I would just draw the bowl cold and clear the chamber with fresh cold air coming through the bowl, in reality I was beaten, coughing chamber still hazy. Hit the stem again dry not long after and pulled some more visible vape, so big + on retaining heat!
 
Last edited:

OF

Well-Known Member
Edit to add, the new found water tool airtightness is grand! Been giving her some serious testing...

Glad to hear you got it sorted out. In the 'may be useful for the next time' area you might consider using a rubber band wrapped around the last half inch of so of the stem to make a better seal for the WT?

You might also consider ordering Air stems instead. They're the same size from the same maker and fit fine. And the plastic cap is shaped to mate with 14mm GonG connectors. The 60mm one has a 'shortie bowl' as well, which many consider a plus:
http://arizer.com/store/en/arizer-air-parts-accessories/95-air-glass-aroma-tubes.html

OF
 

Tommy10

Well-Known Member
Glad to hear you got it sorted out. In the 'may be useful for the next time' area you might consider using a rubber band wrapped around the last half inch of so of the stem to make a better seal for the WT?

You might also consider ordering Air stems instead. They're the same size from the same maker and fit fine. And the plastic cap is shaped to mate with 14mm GonG connectors. The 60mm one has a 'shortie bowl' as well, which many consider a plus:
http://arizer.com/store/en/arizer-air-parts-accessories/95-air-glass-aroma-tubes.html

OF
Thank you very much, I always wanted shorter stems, I ordered two new full length stems, I'll call them first thing and see if I can change the order.

The tip looks elongated and not circular? Or maybe it's just my eyes, hopefully I can get my order changed in time because shorter stem and smaller bowls I would like both.
 
Last edited:

OF

Well-Known Member
Thank you very much, I always wanted shorter stems, I ordered two new full length stems, I'll call them first thing and see if I can change the order.

The tip looks elongated and not circular? Or maybe it's just my eyes, hopefully I can get my order changed in time because shorter stem and smaller bowls I would like both.

You're welcome. Remember, the 60mm version has the smaller bowl, the 70mm one is the 'normal size'.

Yes, the black plastic part is somewhat 'flatted off' (round at first to match the threads and GonG seal), IMO a better shape (you don't find tobacco pipes with round mouth pieces.....).

I also find the shorter size convenient to load and cap and carry in your pocket for instant use:
WgOYSb5.jpg


OF
 

HomeFree

Well-Known Member
Has anyone ever hooked their Solo up to a timer for charging, so you could charge while sleeping and not worry about overcharging? Seems like it would be simple enough to set it for however long it generally takes to charge from 2 lights. Usually it takes about 1:00-1:15 for me to go from 2-7 lights.
 

howie105

Well-Known Member

Tommy10

Well-Known Member
You're welcome. Remember, the 60mm version has the smaller bowl, the 70mm one is the 'normal size'.

Yes, the black plastic part is somewhat 'flatted off' (round at first to match the threads and GonG seal), IMO a better shape (you don't find tobacco pipes with round mouth pieces.....).

I also find the shorter size convenient to load and cap and carry in your pocket for instant use:
WgOYSb5.jpg


OF
Cheers, changed my order to two air plastic tip stems. Should be here by the weekend, I have an event this evening with a bunch of mates where lots of cannabis helps smooth the end of the night ;) I have a solo and my friend has a solo, between the 6 of us we will give it a good working so I'll report back.
Can't do photos but so I'm enjoying my broken shorter stem with rubber mouth peice, fits well in my bubbler bowl! I was always a bit unsold on water pairing now I see!
Left my bong at my mates, so I'll get that tonight. http://www.dhgate.com/product/glass...olator-pipes/203464552.html#s1-9-1a|174962355 . Anyone tried a similar bong for vaping? I noticed even without a proper airtight seal this had more visible vapor then my bubbler so with the seal it should be better.
 

OF

Well-Known Member
Has anyone ever hooked their Solo up to a timer for charging, so you could charge while sleeping and not worry about overcharging? Seems like it would be simple enough to set it for however long it generally takes to charge from 2 lights. Usually it takes about 1:00-1:15 for me to go from 2-7 lights.

Yes, several of the more careful Members do just that. The idea is very sound IMO, and can pay big time in battery lifespan (more charges with less sessions per charge cycle). We're talking two or three times the total number of sessions before replacement.

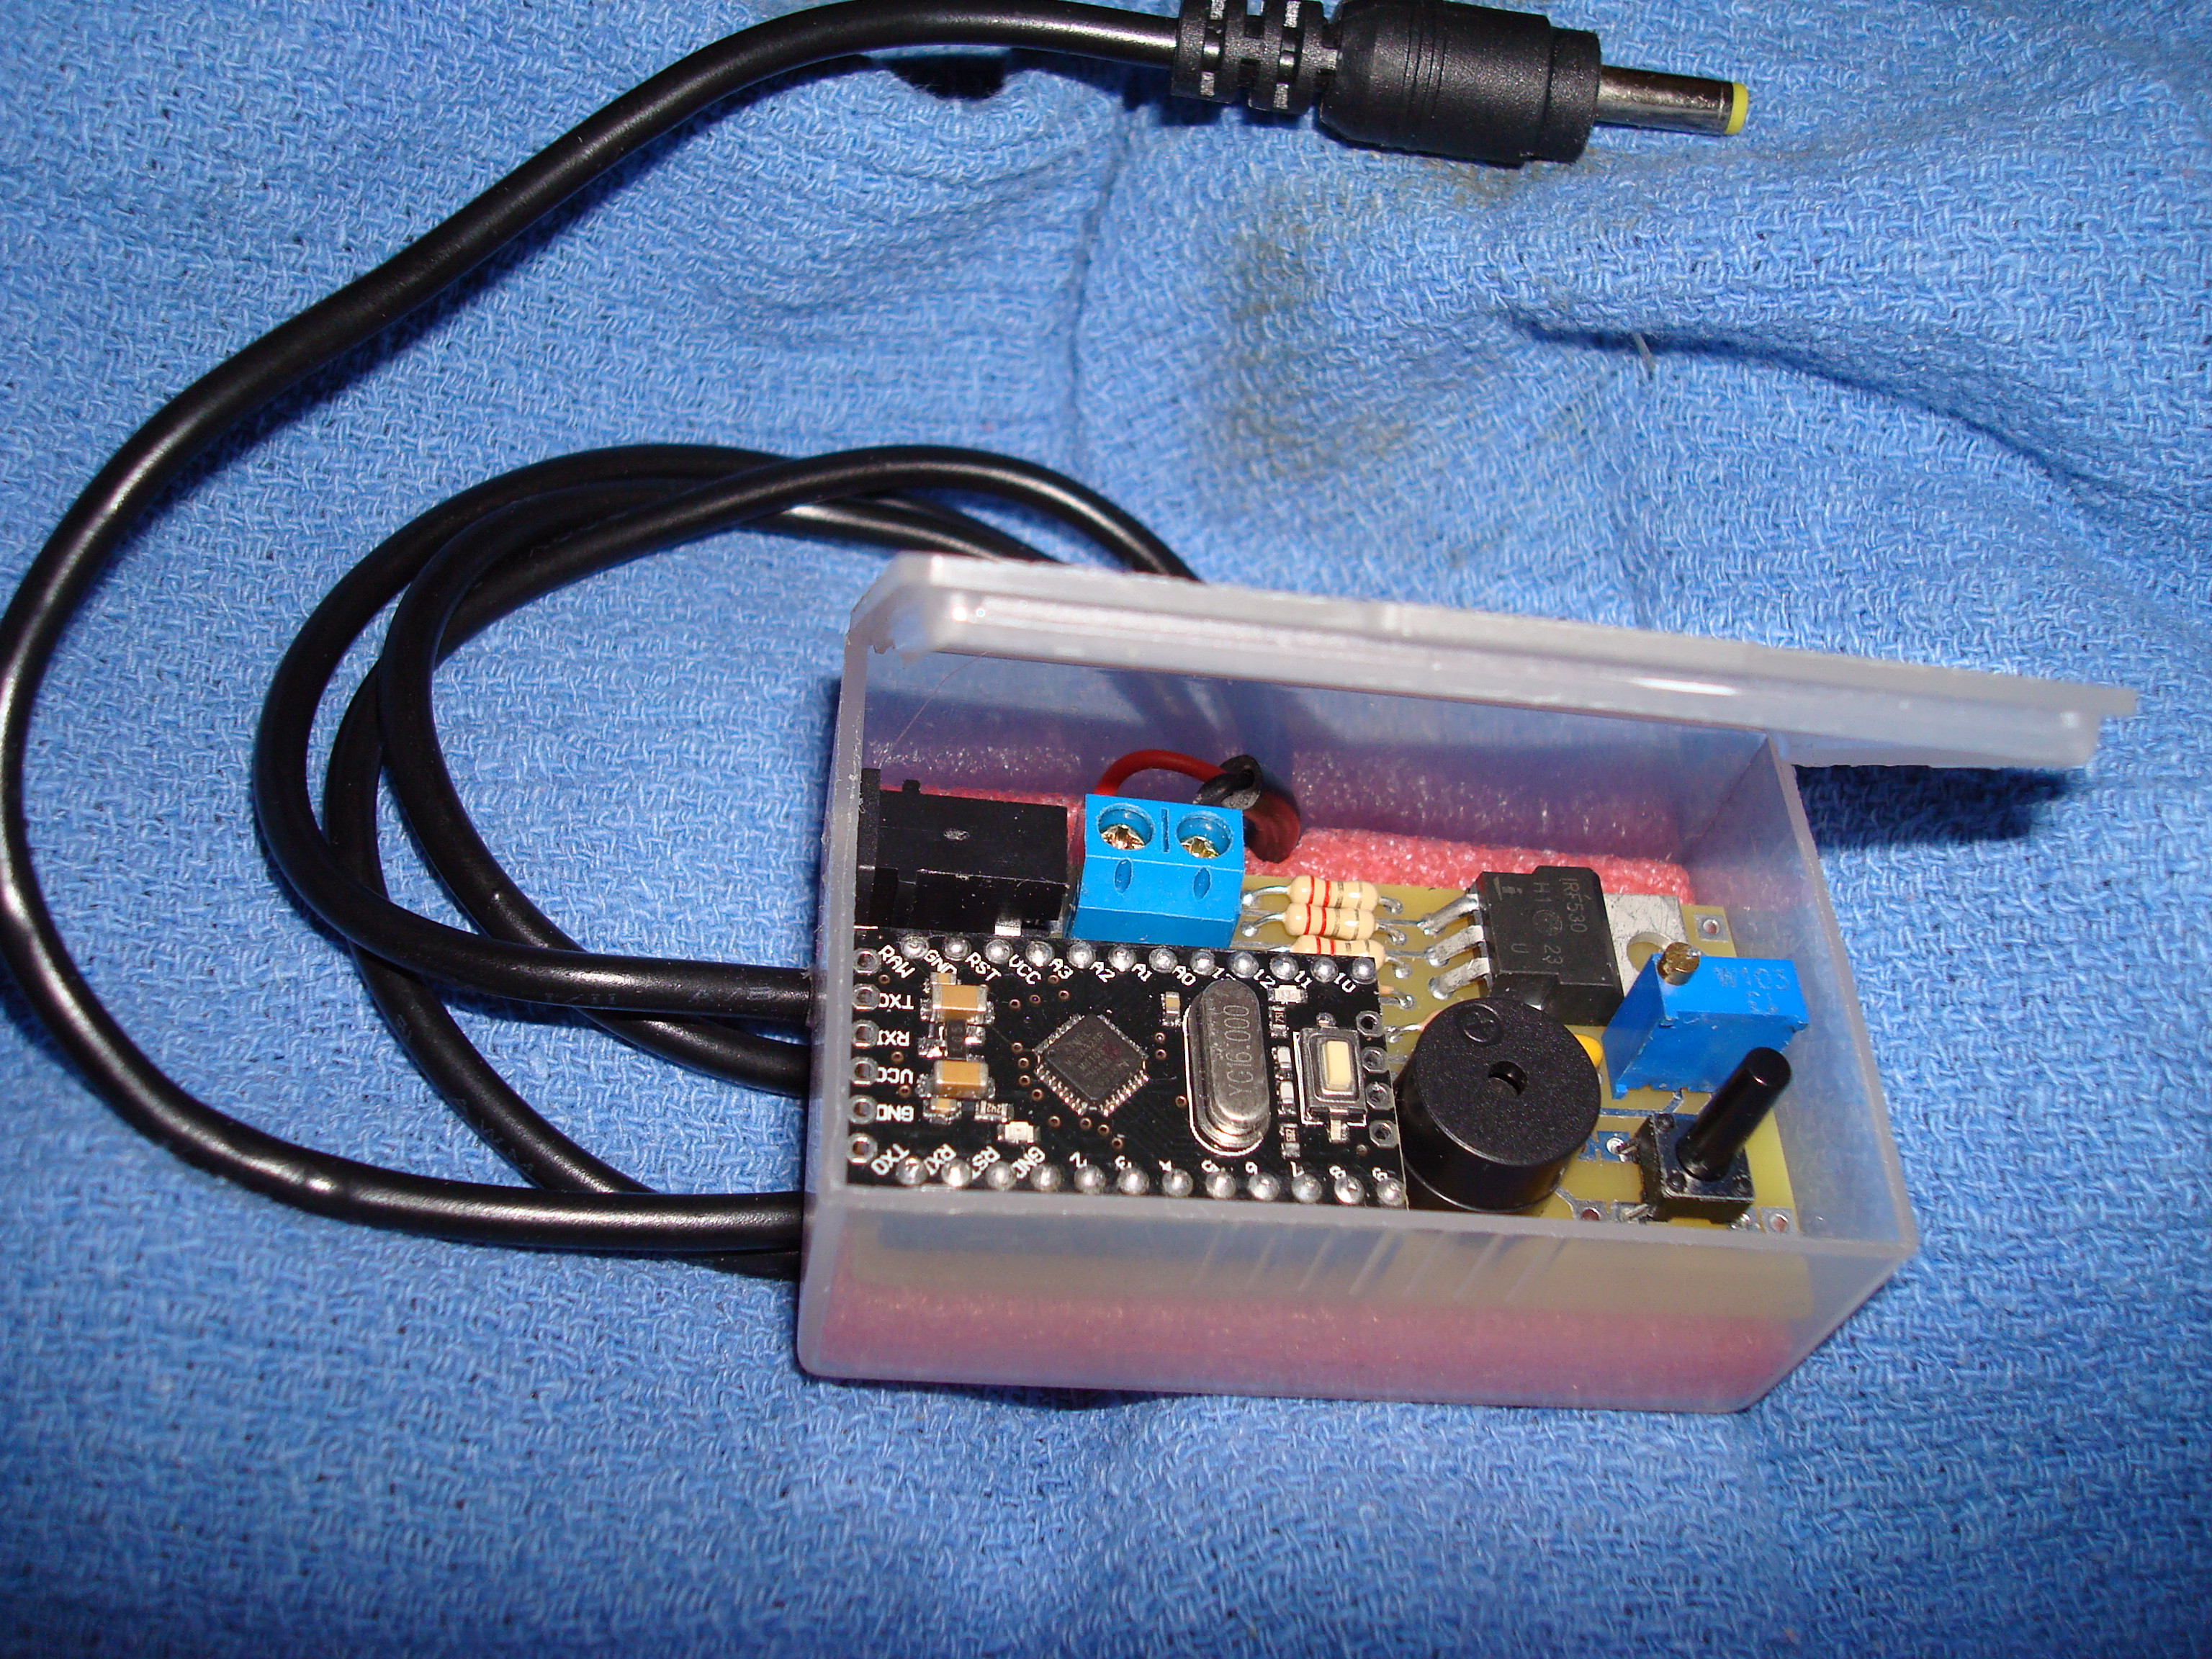
The idea is important enough, I think, I developed a 'gadget' to do just that: Automatically shut down before the charge is complete. The current model (pun intended) looks like this:
jy0w0hN.jpg


The normal charger cord plugs into the black connector upper left. Pushing the button lower right turns on the transistor upper right. The processor lower left monitors the current via the resistors center top until the level drop set by the blue adjustment screw is reached when it shuts down. Comes with a blue LED to tell you it's working, and beeps at you when done.

Several of 'the usual suspects' around here have them testing them for me. IMO it's working great.


That doesn't mean those levels are good for maximum battery life. Consider who sells replacements and who makes the most money by pushing the charge level as high as possible to get long run times........

If you stop .1 Vollt 'early' (less than one session per charge) you get twice as many recharges. Twice. Drop it another .1 (now 2 sessions or so per charge) and you get FOUR times the life. Good reading on the topic here:
http://batteryuniversity.com/learn/article/how_to_prolong_lithium_based_batteries

Notice the information around Table 4. Say 300 charges times 8 sessions for 2400 sessions or 1200 charges at 6 each for 7200 total? Four times the charges with 3 times the total. Sort of like 2 free replacement battery packs?

The 'money' is in pushing it to the top, 'they all do it', but that doesn't mean it's the smartest deal going from our end?

Worth considering IMO. And in my case acting on.

My advice remains 'if you can catch it with the top LED (step 7) lit but the charge light still flashing unplug it!' Doing so makes the next charge cycle 'free' from a replacement cost standpoint........

OF
 

ataxian

PALE BLUE DOT
Hey, @ataxian, been a while. Do you find the cotton method better than a bit of screen or Bikel & Sikel oil pad? No burned cotton taste?

With flowers I always use a screen on top of a ball of SS mesh, that acting as a spacer in the Solo stems, because a whole stemfull is a waste. Then just smearing some oil on the screen works ok for me.
I like the cotton method!
My pieces are tiny.
A supplement bottles have the cotton.
or buy some FINN's organic?
I tried some stainless screens as well!
The cotton works fine just keep the piece small.
I have tried the Stainless Steel but found it sub standard!
 

Quetzalcoatl

DEADY GUERRERO/DIRT COBAIN/GEORGE KUSH
It's such a no-bullshit vape I can't really think of anything... Screens in the stem? Don't pack tightly? Medium grind, level 3-4 so he gets a handle on it before trying 2 and thinking it sucks? Oh, the stem is hot coming out of the Solo, should mind the end so as to not get free tattoos... and don't fight the draw resistance too much??
 

OF

Well-Known Member
It's such a no-bullshit vape I can't really think of anything...

Boy isn't that the simple truth of the matter. "Solo: The no bullshit vape".

Unfortunately that doesn't make a good corporate motto......nor socially acceptable advertising.....but it does sum it up nicely.

Give it half a chance and you'll be rewarded with useful results which you can fine tune to your individual delight. Even Ataxian likes it. What better recommendation is there? "Ataxian likes it"? That might not sell to that wide an audience come to think of it.

Still hard to go wrong no matter how you approach it.

OF
 
Top Bottom