Condenser.
What exactly is a condenser? Well from a physics perspective (and I like physics) a condenser is a component which facilitates heat exchange (cooling) of vapor promoting phase change.
So what is the role of the condenser in a VapCap? First and foremost, cool the vapor. How does this work?
This is the fun part. When Vapor is drawn from the VapCap, there is airflow from two locations. Some from the air port (this is the inverse induction air) and some from around the cap which then displaces the vapor produced in the vaporization chamber. The ratio of these two is variable, which gives the operator control over the strength and the temperature of the extracted vapor. More air through the air port results in a cooler lighter vapor, less air, results in a stronger and warmer vapor.
Here is where this gets more interesting. The air port is not by definition a carb which is just a hole. It is where the inverse induction comes into play. When we look at what is happening to the air after it enters the air port, the physics get more interesting. First, the air flows around the condenser tube. This is good for a few reasons. During use, vaporizers get warm. This is a primarily a result of the heat used to vaporize conducting to the other parts of the unit. So during the design phase I put some thought into a way to reduce this. As I was contemplating this, it seemed like I could combine several objectives in the process of cooling the vapor stream, like cooling the device as well.
As the incoming inverse induction air transits the interstitial space between the inside of the body or stem and the outside of the condenser, it also cools both of these pieces. This reduces the rate of the conducted heat transfer from the hot end to the not so hot end. At the same time, as the induction air comes to the end of the condenser, it makes a 180º turn, which imparts significant turbulence, inducts the vapor, mixes with it and cools it. Next, upon entering the condenser, the harshness of the vapor is further reduced as some of the heavier oils and other higher evaporation temperature compounds condense on the inside surface of the condenser.
Now, I have a condenser upgrade for the Original VapCaps. As of last week, all condensers have been upgraded to a new more durable and more free flowing design.
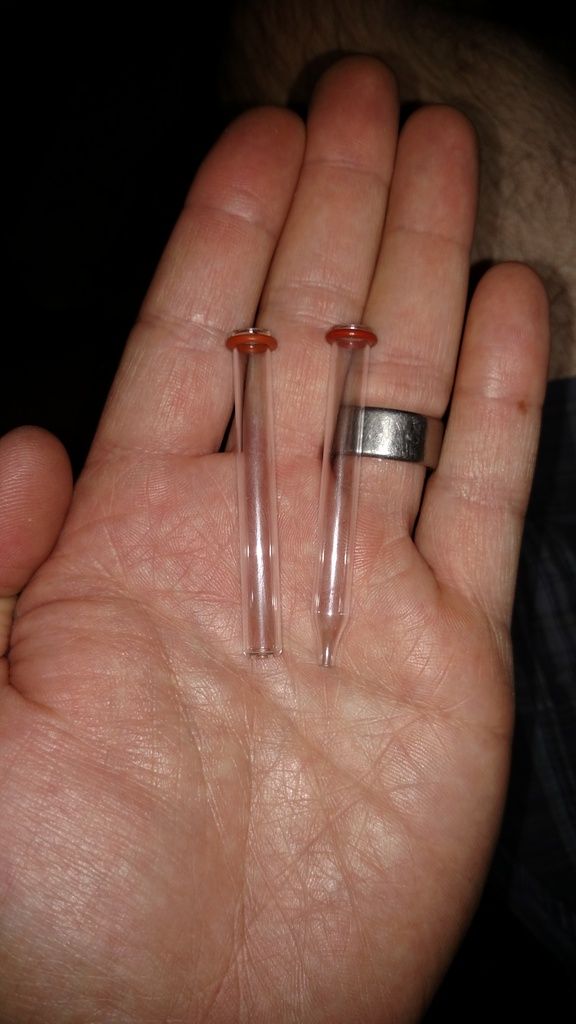
Here are a few pictures to show the difference.
New on the left, old on the right.
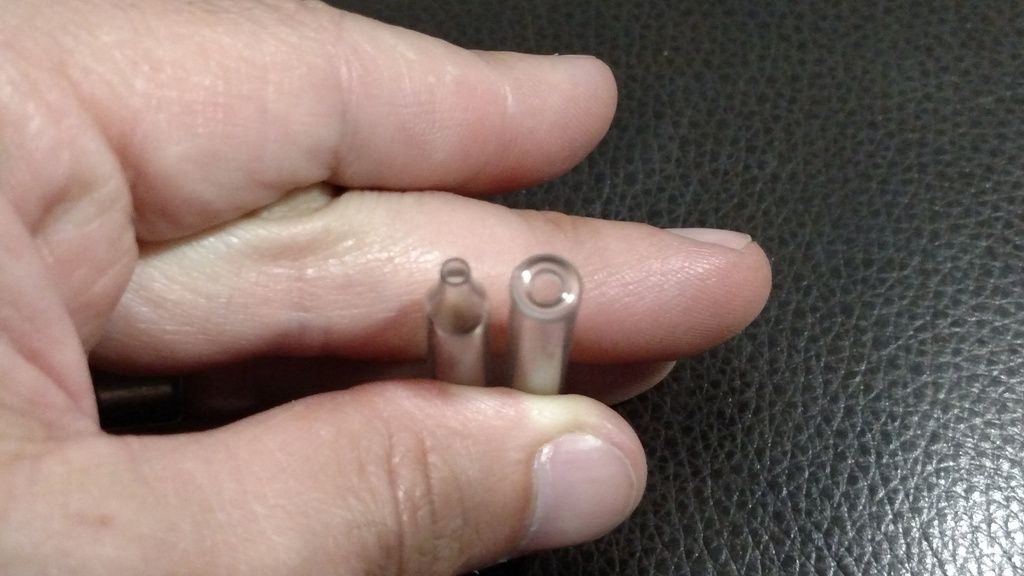
Here is an end on view.
All in all, I hope this is interesting information regarding the components and their purpose.
Cheers,
George

")


")


 .
.