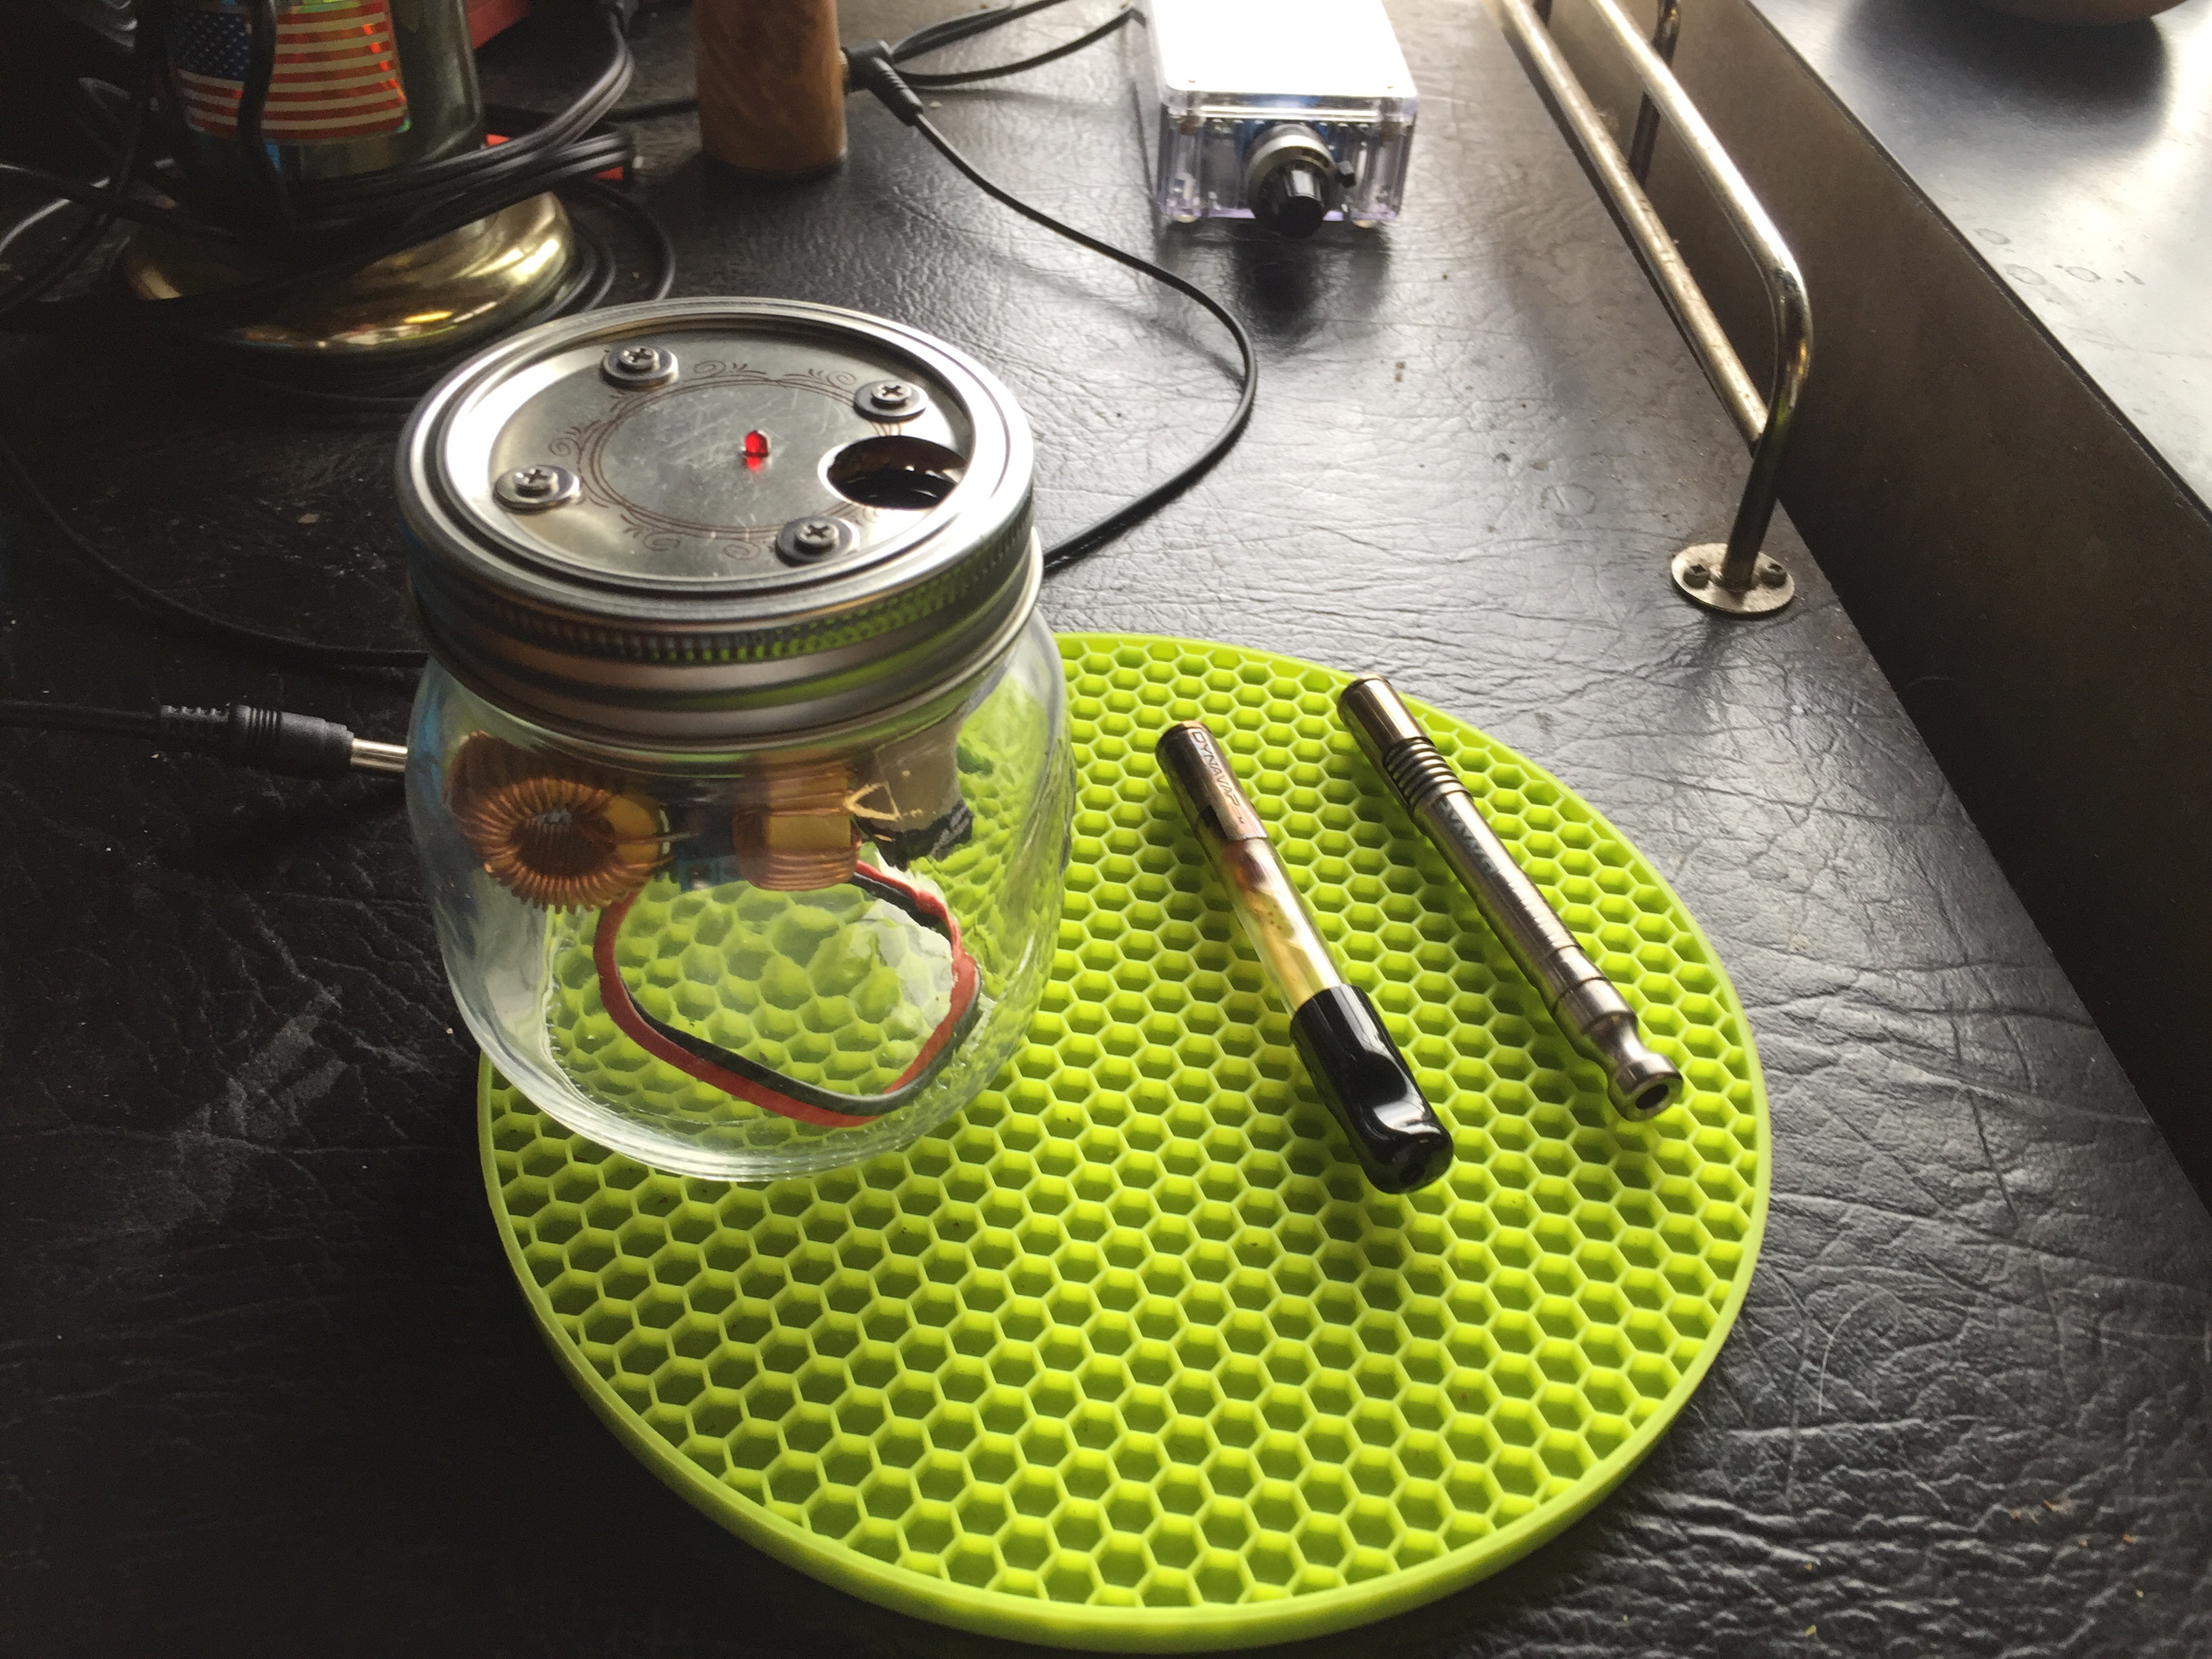
VapCap Induction Heater for Desktop and in Car Use

Pipes

Addicted DIY Enthusiast
Accessory Maker
A finial group photo. They are all done and ready to go!
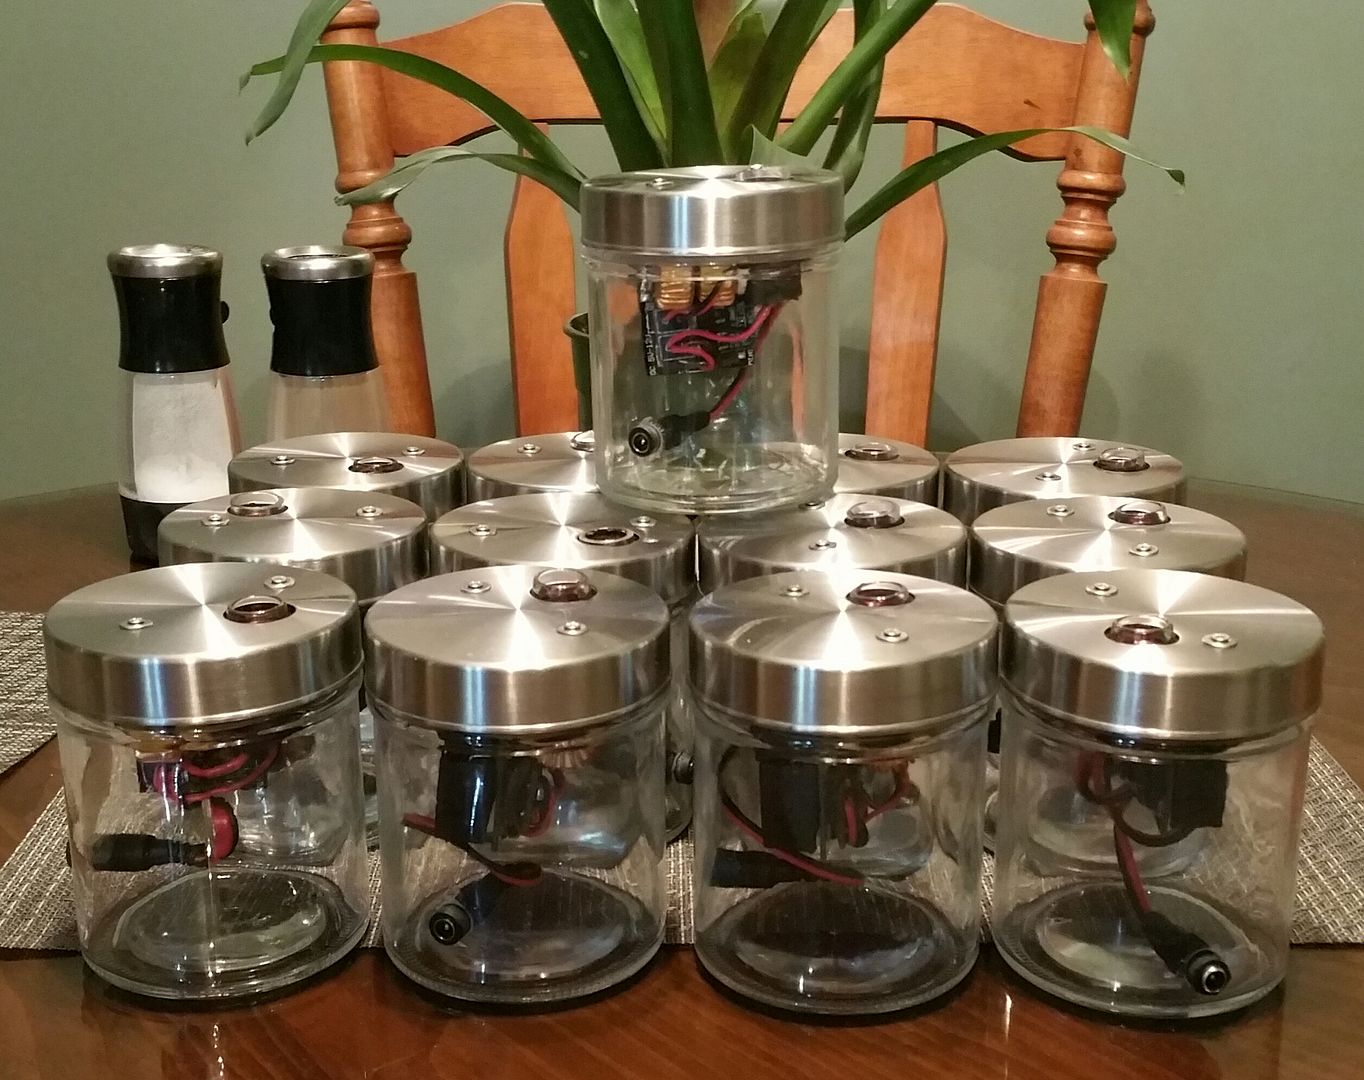


I've reached out to all the souls on my list and they have the choice of these units or wait for the development of the portable unit. If I missed anyone, let me know.

BTW, @GeeWhiz, that particular stem is one I did make. And Daddy got a new laser engraver yesterday!!!


The only tweak the user may want to play with is the VC resting height. I made this adjustable to change the click speed to suit the users preference. The deeper the VC sits, the longer it will take to click and the load will be hotter when it does, but going too far will make the power supply hiccup.

To adjust, the center spacer part can be grabbed with tweezers or fine needle nose pliers through the top opening. Once out, it can be sanded down a bit or extra space added to make longer. Then re-inserted and pushed into the sleeve. They are currently adjusted to click in 4-5 seconds and then a 3 count. (2 seconds)
Most will want to shorten this by a mil or so but I did not want to get it working with my VC to have the supply hiccup on someone else cap.

Here is the way it sits inside the tube.


Made it.... Now I have to figure out packing....
 

GeeWhiz

Well-Known Member
A finial group photo. They are all done and ready to go!
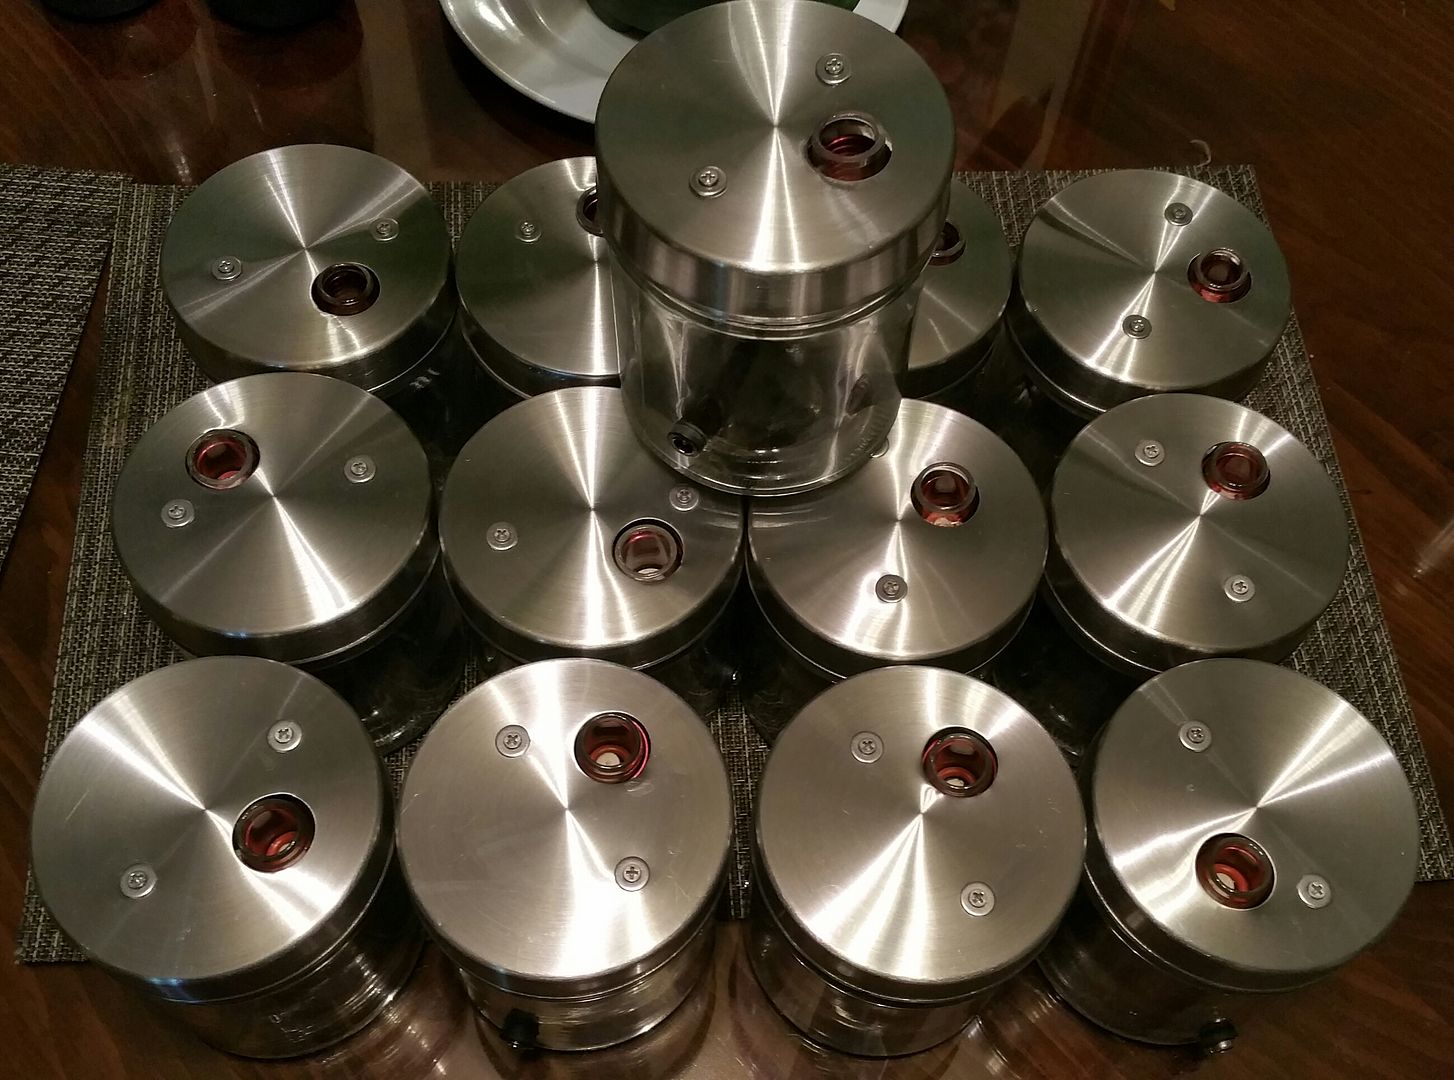


I've reached out to all the souls on my list and they have the choice of these units or wait for the development of the portable unit. If I missed anyone, let me know.

BTW, @GeeWhiz, that particular stem is one I did make. And Daddy got a new laser engraver yesterday!!!


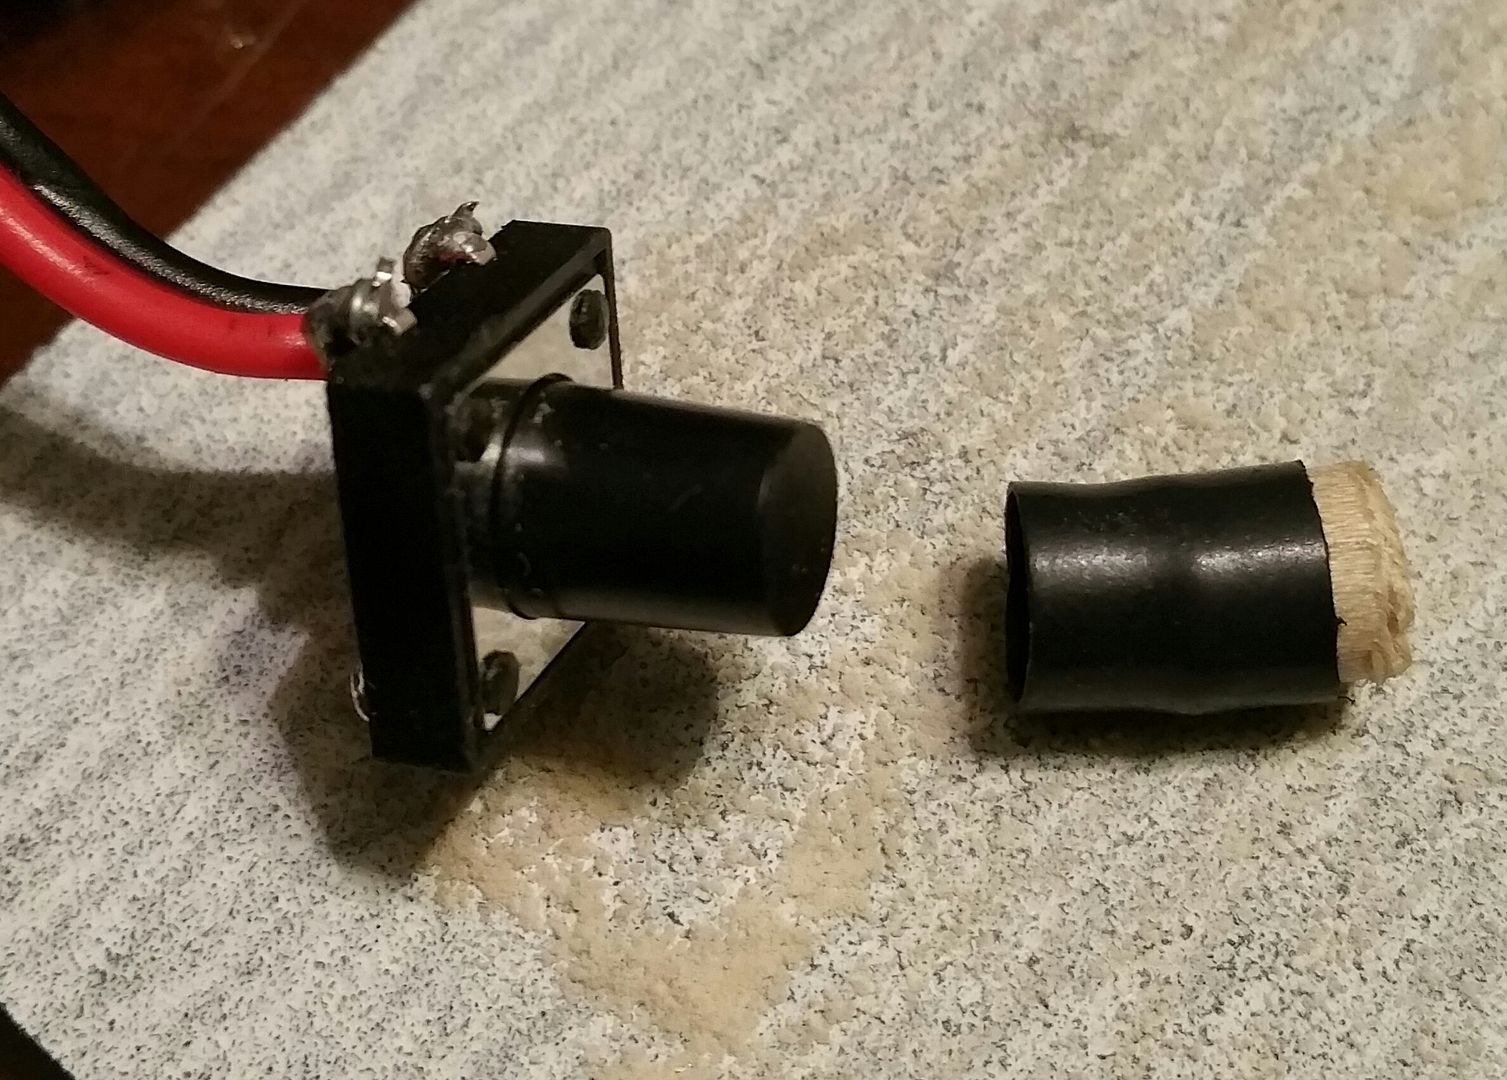
The only tweak the user may want to play with is the VC resting height. I made this adjustable to change the click speed to suit the users preference. The deeper the VC sits, the longer it will take to click and the load will be hotter when it does, but going too far will make the power supply hiccup.

To adjust, the center spacer part can be grabbed with tweezers or fine needle nose pliers through the top opening. Once out, it can be sanded down a bit or extra space added to make longer. Then re-inserted and pushed into the sleeve. They are currently adjusted to click in 4-5 seconds and then a 3 count. (2 seconds)
Most will want to shorten this by a mil or so but I did not want to get it working with my VC to have the supply hiccup on someone else cap.

Here is the way it sits inside the tube.


Made it.... Now I have to figure out packing....
What is your end price? I mean for those who are buying them. Quite amazing really. I so much admire those guys who can make stuff. :)
 

Winegums

I make things from wood
Accessory Maker
Wow this thread has progressed a lot since I last checked! awesome awesome awesome work.

If I had only stayed after my first year in computer and electronic engineering I'd be making something like this. Instead I'm making wood =P

Colour me interested in a unit at some point, perhaps even doing a trade?
 

ander

Well-Known Member
This pic of the army of induction heaters is amazing...
20170224_034444-1_zpsskhqgewk.jpg
...and all the VapCaps said YEAH!
 

GeeWhiz

Well-Known Member
Hope you don't mind I got this for you @Pipes ...


You guys have to READ the thread too, ya know! ;)
well I followed it and read the whole thing but I did not realize a price had been settled on. Thanks :) I just got my glassy replacement in the mail today and .... :( its broken. I have written them. It took like three days for the omni to work well. Finally I hit the sweet spot last night. I was worried it was not as good quality as the glassy but now.. it seems to be working awesome.

Pipes.. So is there or is there not a condenser in your long stem? if so how do you get one in such a nice piece?
GW
 

natural farmer

Well-Known Member
No condenser, with the newer, with more air flow caps, (last two versions) IMO, condensers are not needed nor the carb.
Not with a wooden stem but that freaking Ti is getting hot even with the condenser after a good hit. With two back to back hits it feels uncomfortably hot. I have tried no condenser with my OG as well and it also gets too hot...
 

Andreaerdna

If God is the answer, then the question is wrong
I just put together battery pack and I am happy to report overpowering issue is resolved for me: both caps work and click in time. I can arrange clicking temp "" by putting a thinner/thicker stopper at the end as @Pipes described already (coil tighten up with leather cord).

This is a freaking great accessory

Have only a couple of load so can't report about battery life, but there is no reason doubt battery long lasting as project leader ( :) ) already reported

this is the most precious tool for every vapcap lover.

Edit: also a small cheap ultrasonic bath is a powerfull tool to regenerate ti tip and cap
 
Last edited:

hardboiledfrog

tinkerer
really nice work @Pipes :clap::tup:
how hot does the coil get now? do you get any smell from the insulation?
I couldn't use the stock coils because of this with my e-nail. the temps I needed to run were just too high and the coil smelled pretty bad.
the air intake is way too close to the coil for that, yuck! :puke:
 

Stu

Maconheiro
Staff member
I've been playing around with my plug-in jar thingie for a couple of days now and have to say that I'm really enjoying it. It seems to work much better with my OmniVap, even though it takes about twice as long to heat to "click" as the OG does. The bowl temp : cap-click ratio seems to be tuned ideally for the Ti tips, although I can get good sessions with the OG as well with a little practice.

BCrOgjC.jpg


All in all this thingie is cool as hell.:tup: Thanks Pipes!

:peace:
 

Pipes

Addicted DIY Enthusiast
Accessory Maker
Glad you're enjoying it Stu!!
EDIT: Also, you do know there is a magnet on the opposite side from the hole for cooling your VC...? You can't see it but your cap will stick.

really nice work @Pipes :clap::tup:
how hot does the coil get now? do you get any smell from the insulation?
I couldn't use the stock coils because of this with my e-nail. the temps I needed to run were just too high and the coil smelled pretty bad.
the air intake is way too close to the coil for that, yuck! :puke:

Coil heating isn't a problem in this application. You can actually still touch it without getting burnt after a 10 second on time. I'm guessing now, but think it would take closer to a minute before it gets hot enough to smell.
 
Last edited:

GeeWhiz

Well-Known Member
Hows things going with the portable idea? I just saw some stand up butane lighters that caught m y attention. I was wondering about a butane that causes the heat to move around the sides when heated as if it were sunk straight in as you did for the electric one. Im working on mental stuff but I aint got the engineering.

I sure do wish i did. I am really impressed with your work and ideas. :)
 

Andreaerdna

If God is the answer, then the question is wrong
Little report from battery option:

3new lghe4 full loaded:

26 loads, yes 26, no jokes, each one 3cycles/clicks.. and battery pack is still kicking (one cap 15secs from cold, the other 9secs) this is fucking performant, best battery life ever :) and best accessory ever
 

Pipes

Addicted DIY Enthusiast
Accessory Maker
That verifies my findings as well. Got well into the triple digits on number of puffs before I stopped counting.

Just to let everyone know, I still have Jarhead Desktop units for sale as seems most want to wait for the portable. Can't blame the bums though. So anyone feeling the VAS eating at them, shoot me a PM.

On the portable front, I've received my enclosure for fit testing and it all fits very nicely. Also, I now have all the other parts, so just have to verify this enclosure is the one and I'll order some quantity. The parts all perform as expected and the charger charges the battery pack very well and shuts off when pack is full. It also has an LED to know if charging or battery full.

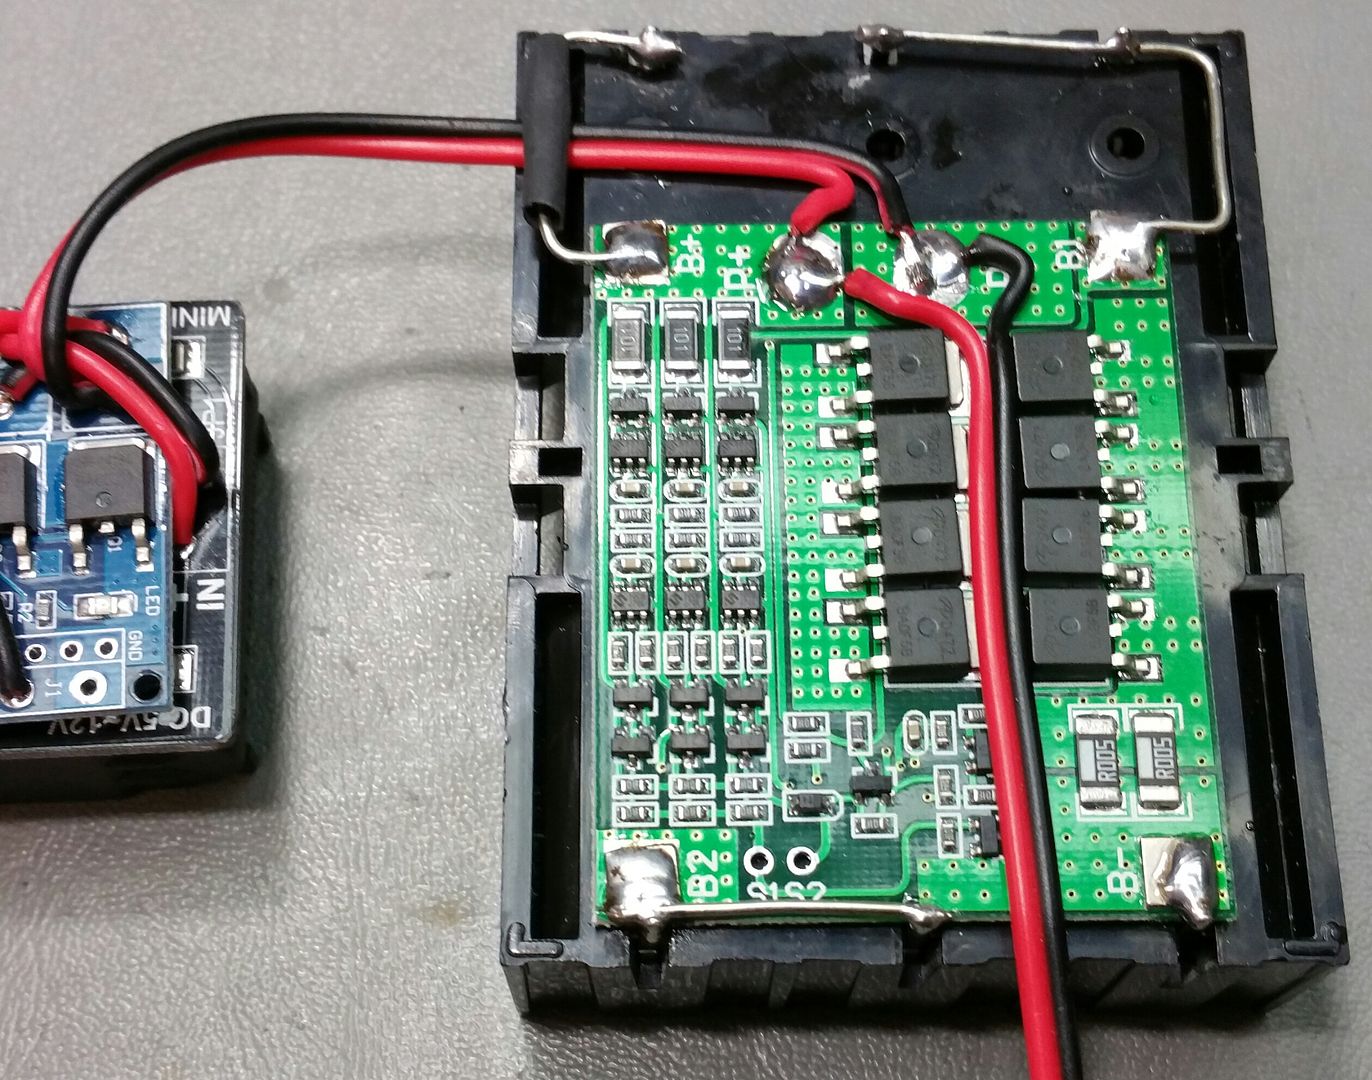
The BMS board fits perfect on the rear of the battery holder. I used a good gauge hook up wire to join the appropriate connections. It's held onto the holder by the solder connections as well as double sided rubber tape.


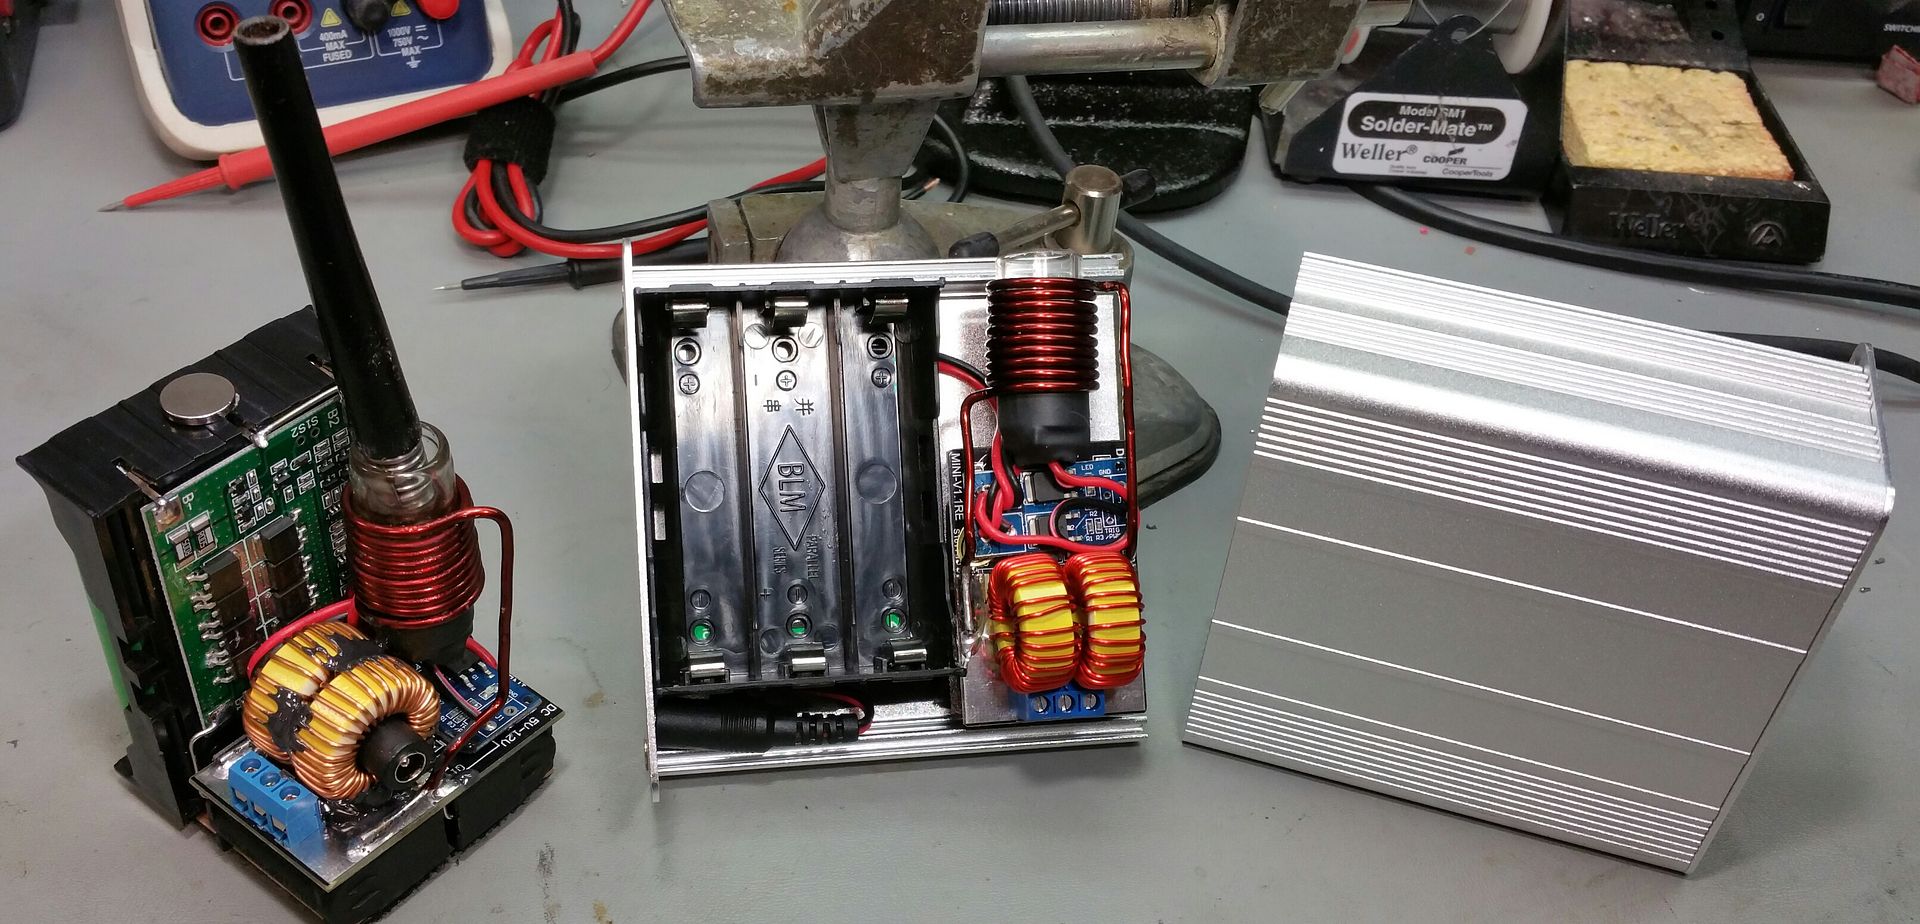
The enclosure is on the right and a skeleton mock up functional unit on the left. Yes, the pieces are joined by sharing a piece of perf board. Ideally, an enclosure measuring 65mm X 65mm square and 80 mm high would be absolutely perfect, but can't find anywhere. Skeletor could just drop right in. Not to be the case, pardon the pun. However, the extra space in the test case above the battery holder measures 18mm X 54mm X 100mm depth could be utilized for storage..? A couple of those plastic VC tubes would fit perfect and leave the snap lids protruding. We'll see, maybe something similar.


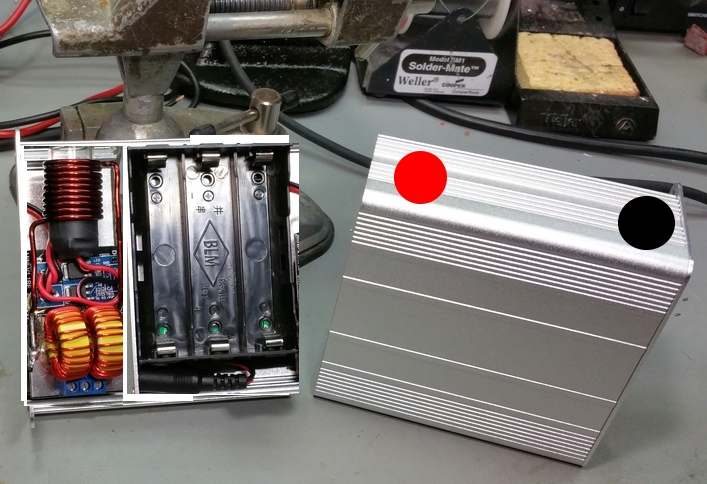
I still have to finalize the hole placement but have a good idea on how I want it. Going to orient it on it's side so it can be placed wedged beside a car seat more easily and takes up less surface area.

All in all, I'd say the Porta Induction Heater is coming soon. Maybe under a month away!!

Now, I've also had inquiries about a kit form of this. Basically, the components pre-wired with enough wire lengths to allow perks with different skill sets to make their own enclosures. To this I say Bravo!!, No problem as saves me some work. Or even sell the Skeletor type units like the one above, and one can build around it. Again, fine by me.

A kits would consist of a package like the following. Arranging the coil could be done by request on orientation or done by recipient.
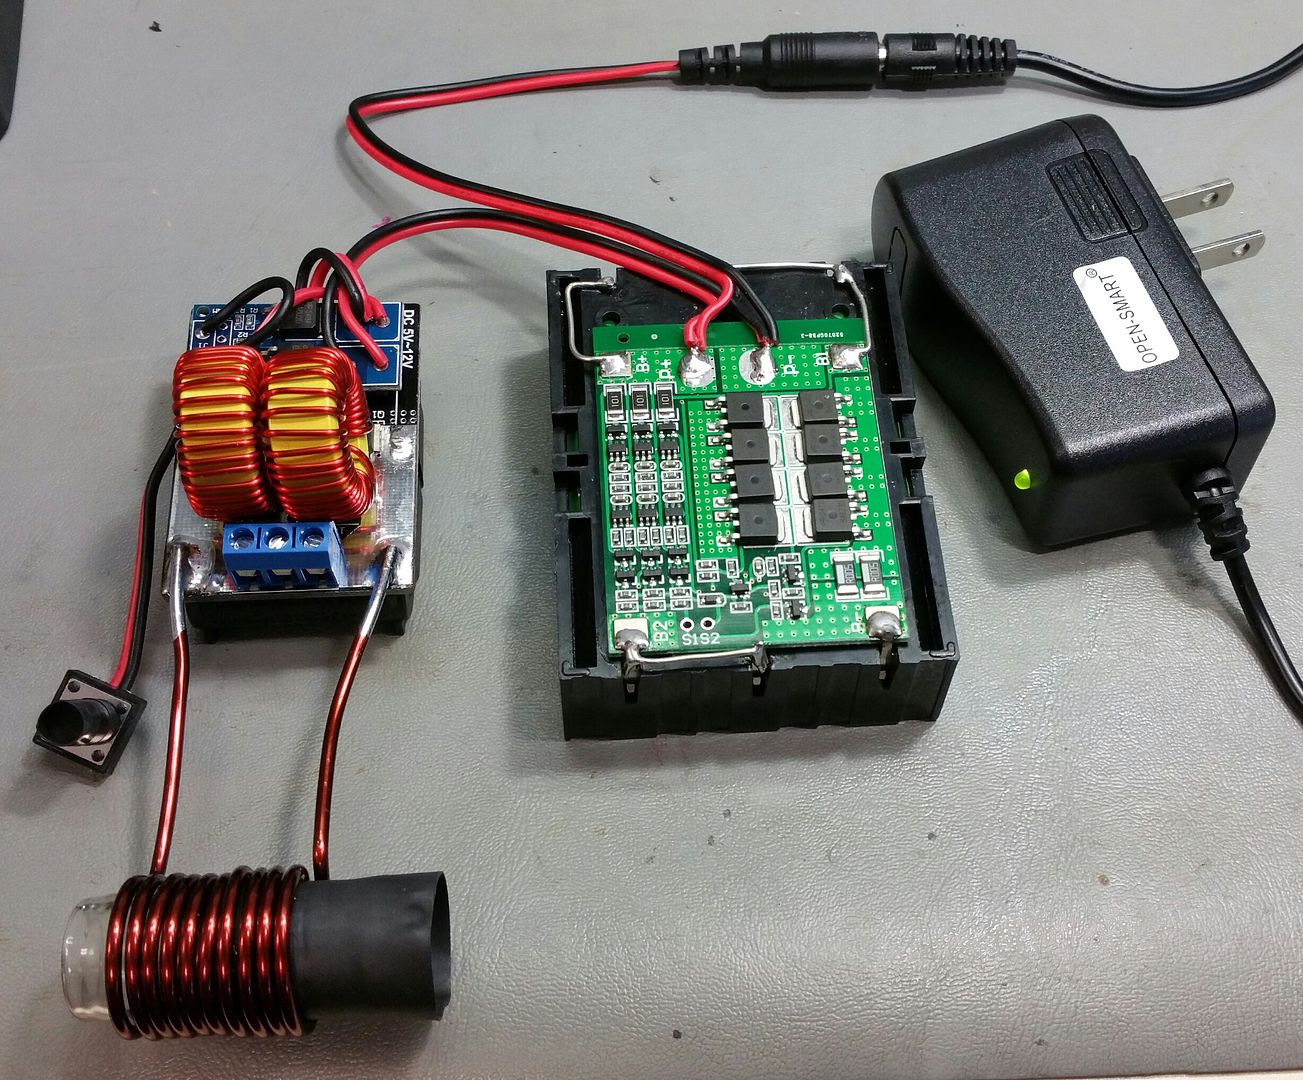


Lots of options.
:tup::science:
 

GreenHopper

20 going on 60
That verifies my findings as well. Got well into the triple digits on number of puffs before I stopped counting.

Just to let everyone know, I still have Jarhead Desktop units for sale as seems most want to wait for the portable. Can't blame the bums though. So anyone feeling the VAS eating at them, shoot me a PM.

On the portable front, I've received my enclosure for fit testing and it all fits very nicely. Also, I now have all the other parts, so just have to verify this enclosure is the one and I'll order some quantity. The parts all perform as expected and the charger charges the battery pack very well and shuts off when pack is full. It also has an LED to know if charging or battery full.

The BMS board fits perfect on the rear of the battery holder. I used a good gauge hook up wire to join the appropriate connections. It's held onto the holder by the solder connections as well as double sided rubber tape.


The enclosure is on the right and a skeleton mock up functional unit on the left. Yes, the pieces are joined by sharing a piece of perf board. Ideally, an enclosure measuring 65mm X 65mm square and 80 mm high would be absolutely perfect, but can't find anywhere. Skeletor could just drop right in. Not to be the case, pardon the pun. However, the extra space in the test case above the battery holder measures 18mm X 54mm X 100mm depth could be utilized for storage..? A couple of those plastic VC tubes would fit perfect and leave the snap lids protruding. We'll see, maybe something similar.


I still have to finalize the hole placement but have a good idea on how I want it. Going to orient it on it's side so it can be placed wedged beside a car seat more easily and takes up less surface area.

All in all, I'd say the Porta Induction Heater is coming soon. Maybe under a month away!!

Now, I've also had inquiries about a kit form of this. Basically, the components pre-wired with enough wire lengths to allow perks with different skill sets to make their own enclosures. To this I say Bravo!!, No problem as saves me some work. Or even sell the Skeletor type units like the one above, and one can build around it. Again, fine by me.

A kits would consist of a package like the following. Arranging the coil could be done by request on orientation or done by recipient.


Lots of options.
:tup::science:

Bravo, it's all looking awesome bud!

most want to wait for the portable. Can't blame the bums though.

This made me snigger into my coffee, now I need a new keyboard :lol:

Going to orient it on it's side so it can be placed wedged beside a car seat more easily and takes up less surface area.

That case looks nice and I like the idea of a side loaded heater port.

I assume it is stable on its side and will not wobble or flip on its broadside when holding the VapCap down against the activation button? Feels like it should be fine as those push buttons don't offer much resistance but thought I'd ask.

However, the extra space in the test case above the battery holder measures 18mm X 54mm X 100mm depth could be utilized for storage..?

Maybe another port for the VapCap to rest in? So you pull the VapCap out of its resting port and place into the heating port. One could use the VapCap and then return back to the resting port. This would work really well for those who do intend to use in the car. I feel that the resting port should be deep enough so that the VapCap is secure in there in case your roads are as poorly maintained as ours ;) It should probably have a plastic washer or something to stop the VapCap rattling as well if that's the route you go down.

I'm just spitballing ideas here.

Thank you @Pipes, I'm really looking forward to having a play with this heater, especially after all the good reports of the JarHead coming in.

Also want to thank @Andreaerdna as well for keeping us in the loop on their design.

Been great following this project.
 

Andreaerdna

If God is the answer, then the question is wrong
Thank you for kind words @GreenHopper :)

36loads with the 3 battery pack, so more than 100 confirmed clicks :)

Now the angel eye (blue round led of momentary switch) turns off when cap reaches click. Batteries are low but I can still get at least a couple of loads more if I use the "low power" cap

About this, one cap drain less and need more heating time to click. The other drain more current but it is faster to heat, cooling down click takes longer too with second cap, as if it has more weight..

36 loads are a mix of both caps.

+1 for VapCap storage in extra space, but me think VapCap xl is too long to fit(?)
 

guyonthecouch

Well-Known Member
this is absolutely amazing. @Pipes you mad man!! ..not sure if possible, but if the storage space was metal(or ceramic, etc) you could also stash away while still hot and not have to worry about melting the plastic case. When out and about you never know when you'll have to tuck it away.
 

snamuh

ghost
Imagine having that in the stereo bay of your car dash, haha.

I think my option would have to be my door compartment.

So the portable model is 15 seconds cold start and 9 seconds after its been heated once?

A storage spot for the VC could be cool...
 

GreenHopper

20 going on 60
but me think VapCap xl is too long to fit(?)

I actually see this as a good thing.

If you want to carry a VapCap inside the device you can use your non-XL VapCap.

However it may be advantageous in certain circumstances to use an XL VapCap where the mouth piece protrudes the top of the unit. In this scenario one could locate, remove, insert into heater port, hit and replace back into storage port all with one hand and by feel.

A great feature for those driving me thinks.

I feel that for easy location of storage port vs heater port though it may be necessary to swap the battery caddy and heater?
yTZH7Er.jpg
 

GeeWhiz

Well-Known Member
Thank you for kind words @GreenHopper :)

36loads with the 3 battery pack, so more than 100 confirmed clicks :)

Now the angel eye (blue round led of momentary switch) turns off when cap reaches click. Batteries are low but I can still get at least a couple of loads more if I use the "low power" cap

About this, one cap drain less and need more heating time to click. The other drain more current but it is faster to heat, cooling down click takes longer too with second cap, as if it has more weight..

36 loads are a mix of both caps.

+1 for VapCap storage in extra space, but me think VapCap xl is too long to fit(?)

100 clicks is like 200 hits on three AA batteries? Dang. How can you beat that. My flowermate mini has basically one battery but it takes two minutes to heat first time and only about 4 rounds before its toast. Well 4 rounds of three temps. lol also Pipes what is the temp this is clicking at? do you have an idea?

Thanks
GW
 
Top Bottom