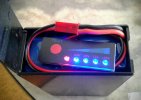
Got the HotShot today and this was easy!

Off to find a charger and look what I found -
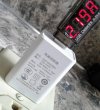
Do with this what you will. I don't know what it belonged to.
I know the Lenovo variable voltage just shuts down.
Charge was fast and things got warm - I knew things were busy inside and that is a good thing. Okay, I cheated - I was also reading the power going in. This charger was pushing the full 10+ watts.
@Pipes was also kind enough to give me a sneak-peak of the insides to see what's going on. Very helpful in going forward with a good teardown review. I did check out the battery door and removed the cell and all that good stuff. I did not go so far as to pull out the 'worx'. This is what I able to arrange without too much difficulty and maintain minimal tension on the hinge and the latch;

The charge cycle is interesting. It went from 1.75 amps to -DONE- just like that. No fucking around trickling electrons with this circuit. Now I understand the 2amp requirement. As you can see, it will draw 2.2 amps if given a chance. The voltage on my charger is reading 5.26V so this is charging at 12 watts. Nice! I checked the battery voltage off the charger and I got 12.62V with my trusted meter. The battery connector to test the voltage is tucked in nicely next to the battery. Don't use this trick to charge the battery! These cells require balance-charging. There is another connector in there for that but I don't recommend cycling the cell in and out of the case. It does take a little finesse to lay the wires right to get a neat packing - the image above is proof it can be done. More below with warnings.
As to the puddin' - FUCK YEA! I stuffed a Ti tip with my 'hottest' cap in there and it went off perfectly right at the height of the 'green' Love the color-wheel option. There is no hotter tip that I can think of and the hottest in my collection surpassing my favorite '18 cap. This meets my version of the stress test. The HotShot past the power test with rainbow colors! Straight up solid rip on Ti without scorching! Love these rare caps!
For the curious - I figured you might want to see what is under the cell - not much to see. However, you might like to see how I dressed the wires to achieve the fit. But first let me make a comment on the little hinge - the way this cover works, the 'backside' of the hinge doesn't matter. The pins on the door do matter! The case has strong 'seats' for the pins and the way it latches, the seats will maintain the cover just fine. So if you play with the battery and you suddenly get that sinking feeling, don't worry, it just makes changing out the cell that much easier.
What I do below risks the thin membrane in the hinge cracking or breaking away. Again, this is only cosmetic, if not functionally preferable; you've been warned ;]
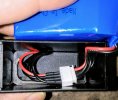
Notice the 'twist' in the battery's lead. This helps draw the connector inside the J-spacer in the background. (I was informed the spacer is a tool)
This is where the hinge is most at risk. I started by tipping in the backside of the cell and then working in the front paying particular attention the the lead-wires;
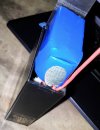
From here you can tuck away the spare connector as in the picture above.
@Pipes - this is a bold build - wonderfully and masterfully structured. Full featured and truly pocketable.
And now to reveal stealth mode...
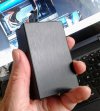
Nothing personal! ;]
Thank you for another excellent heater for the community. I have no problem recommending this with high marks on first impression.


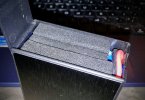


 As long as the washer is more magnetic than the VC it will stay in place. Pretty easy as the VC is actually not that magnetic.


