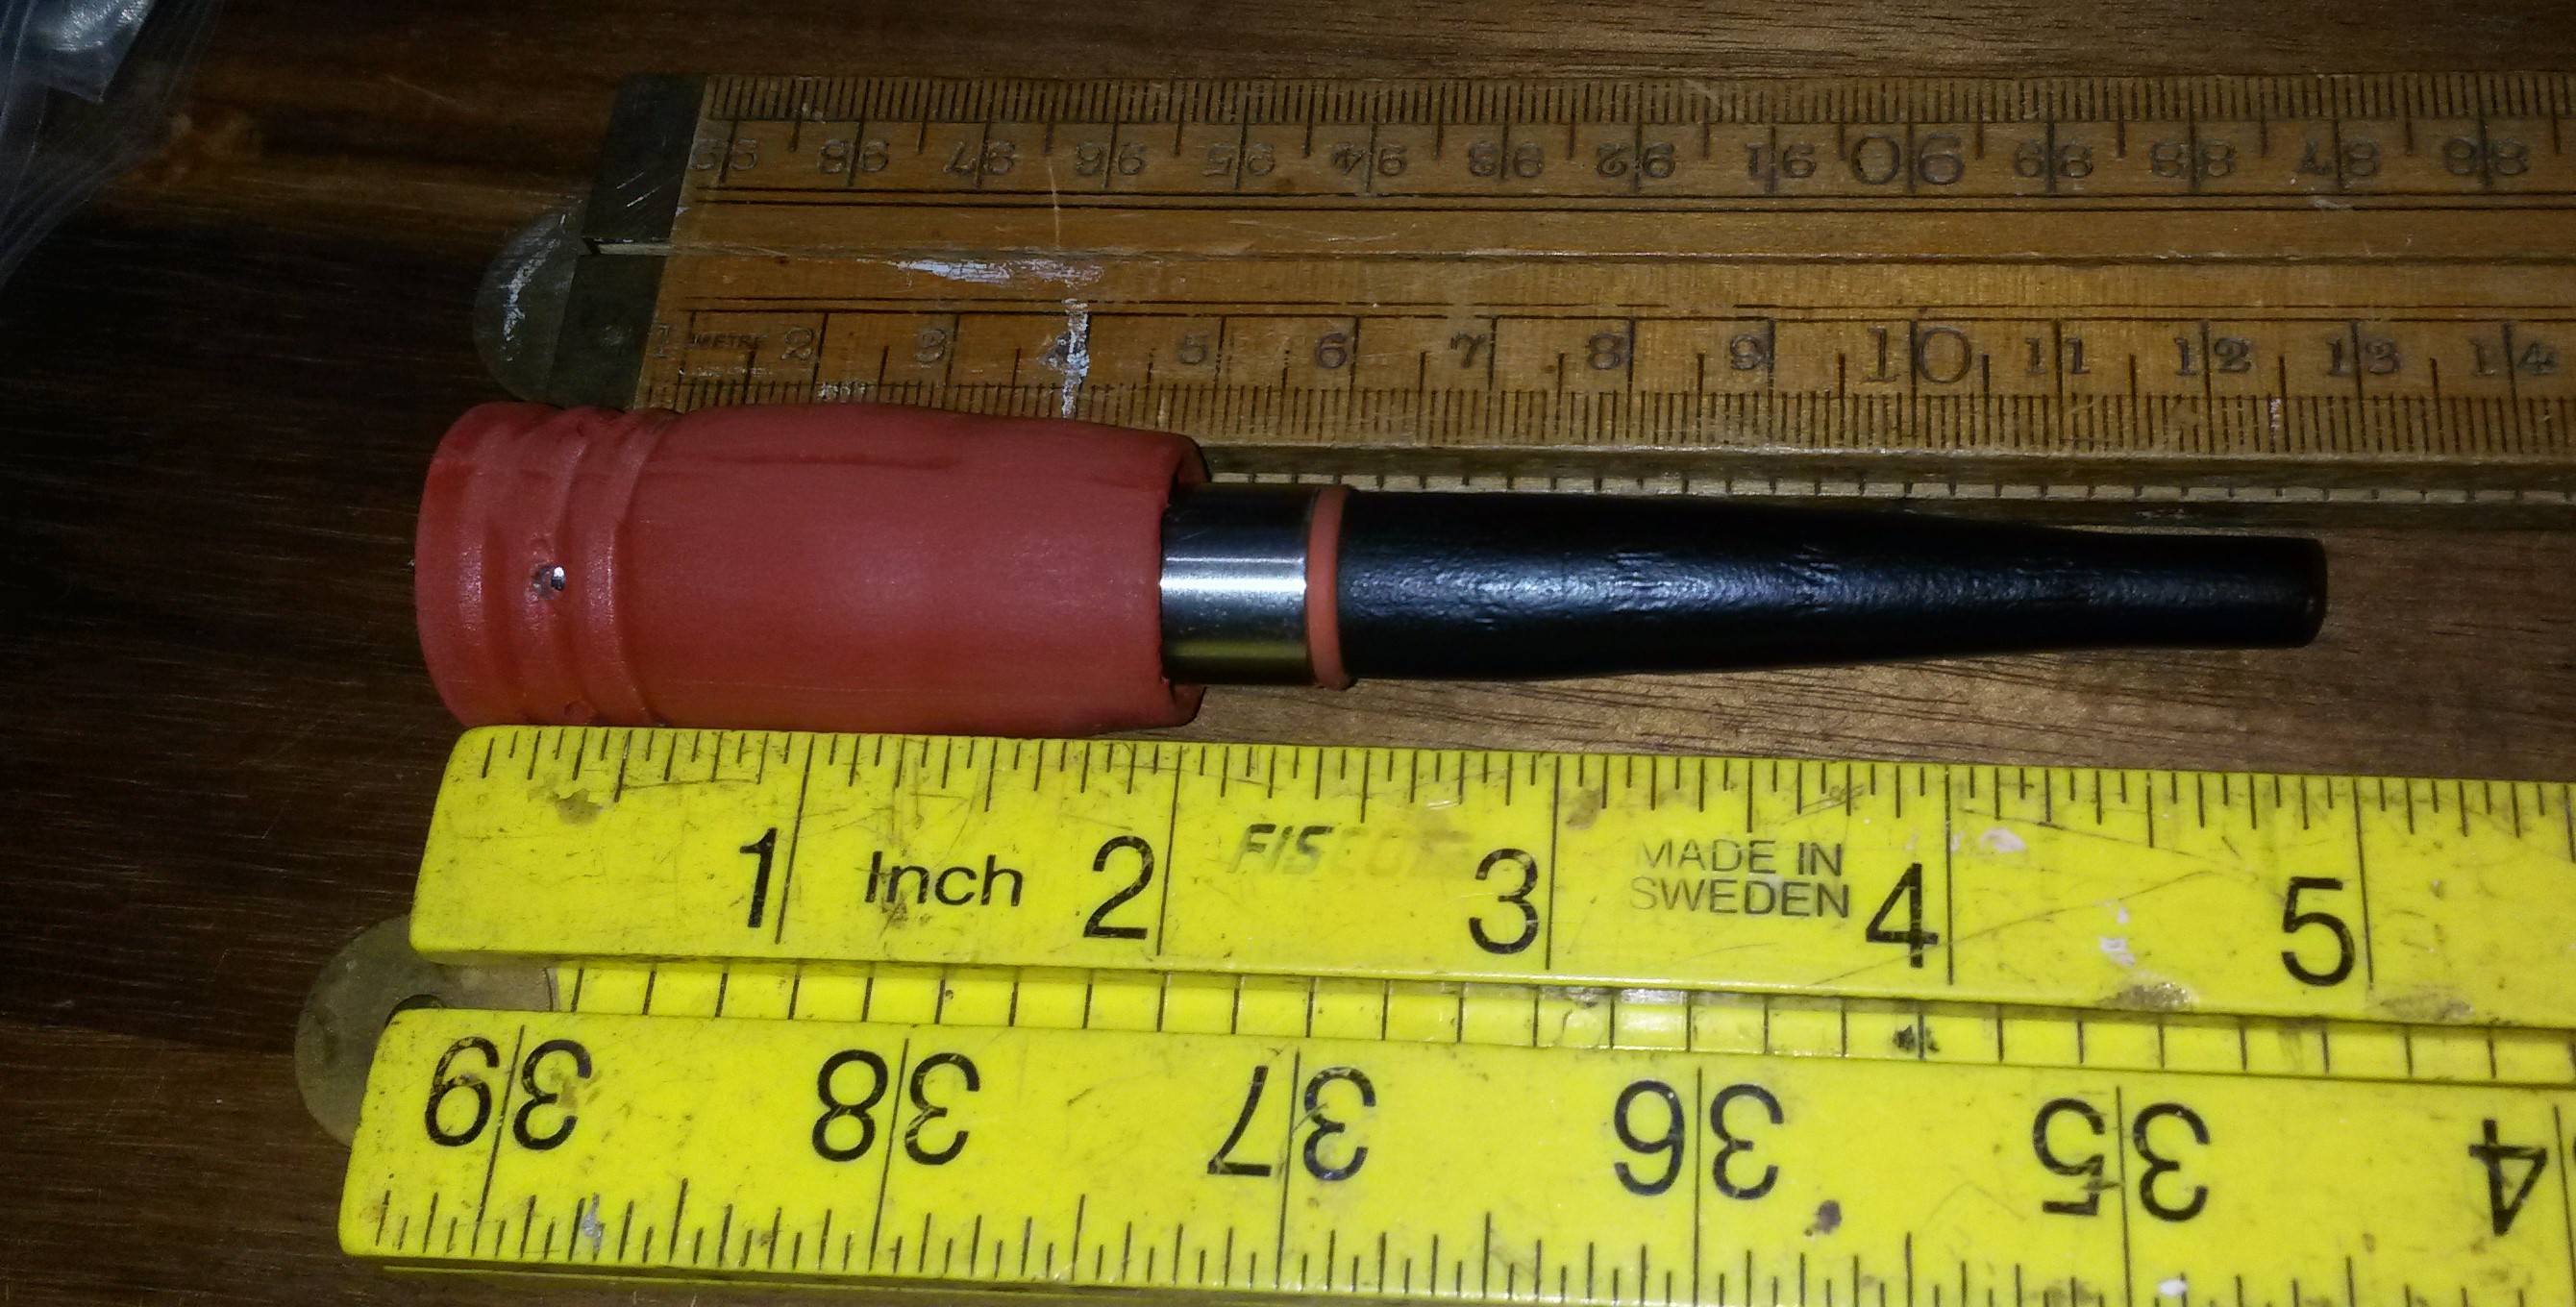
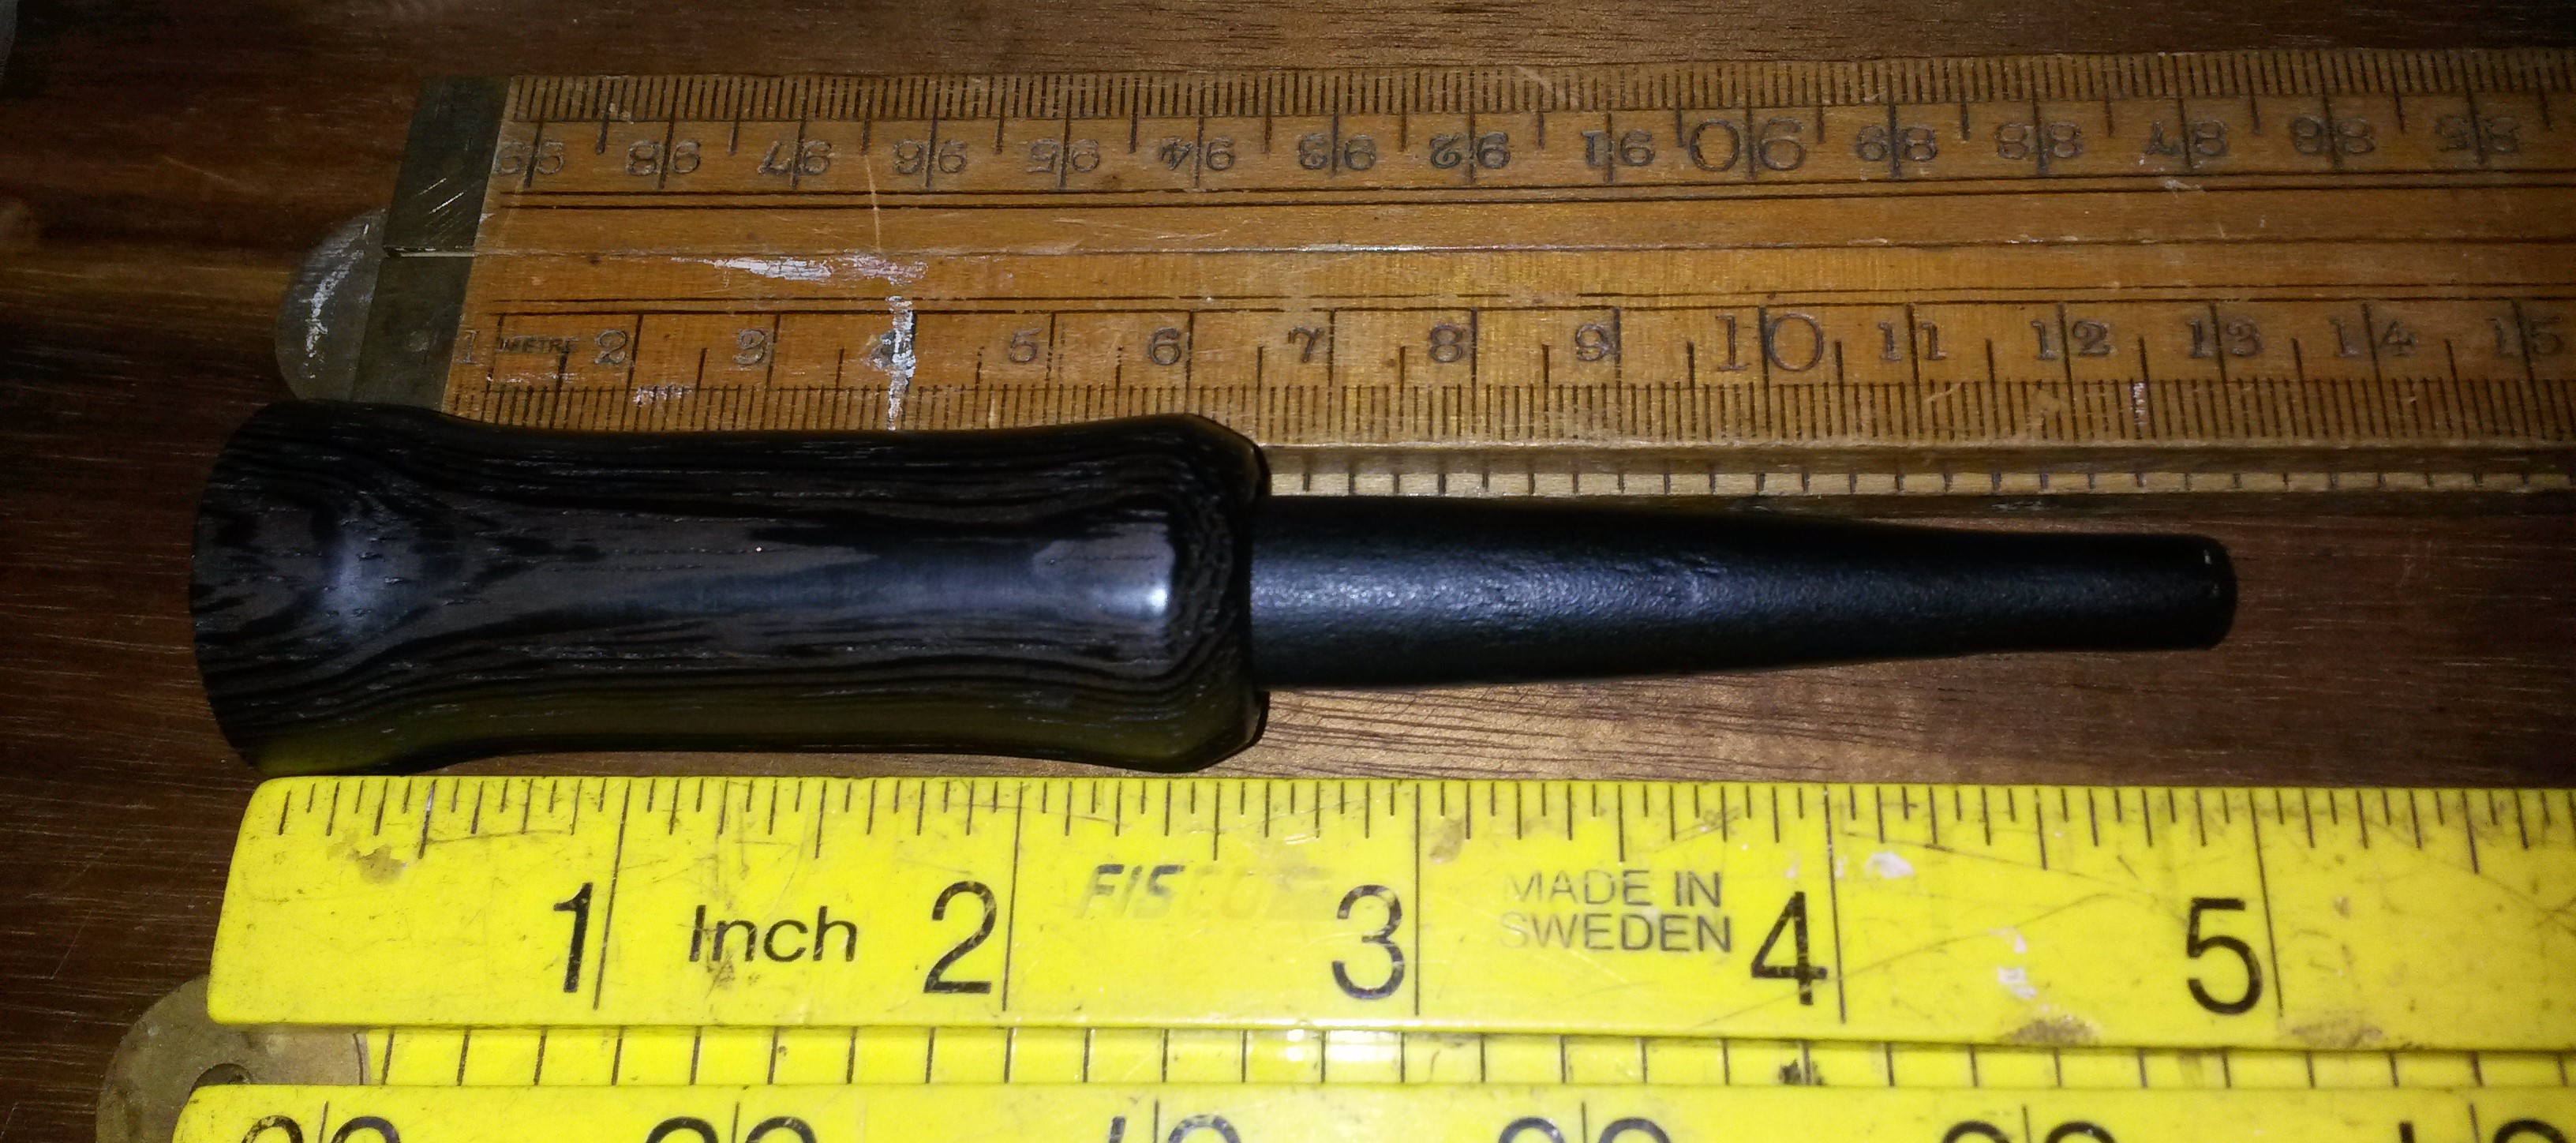
@emmdeemo @natural farmer or anyone else running a Pico mod, I'm curious what your settings are since it has no PID or ohm overide.
-
SCAM WARNING! See how this scam works in Classifieds.
-
The Frolic by Limelight Giveaway is over. Congratulations to the winner: Numerous_Nothing!
You are using an out of date browser. It may not display this or other websites correctly.
You should upgrade or use an alternative browser.
You should upgrade or use an alternative browser.
The "Project" DIY Herbal Vaporizer
- Thread starter Pipes
- Start date
Sorry for the noob style question above... I found the TCR numbers listed in earlier replies in this thread. Feeling pretty ashamed, but I figured I could maybe redeem myself by saying anyone with a Pico should get the Arctic Fox custom firmware. It is easy to setup and use but makes the mod function 10 times better. Longer adjustable hit timeout and PI temp control make this update a must have.
great ! @phattpiggie i love it
fluffhead
Recovering Idealist
Damn @phattpiggie that looks amazing! Hopefully you will get your 2/3 soon and will be able to start to play with your project.
I may have to take it to the local ecig shop and get a couple of fotos of it on some mods, once I've cut thru the thick fog of sweet sickly vapor the young men in there chuff.
Still got a ways to go to make sure it'll all stay together when it's warmed up, I've used Wenge as if any wood is going to give up but look good while doing it it's this stuff.
It looked way too tall when I turned it but once I stuck Pipes stem in it all came together, got a couple of different O rings to source and a bit of fettling.
Anyone who's running or has run an Eraser buck naked in the past, just the SS.
How hot is it getting?
@natural farmer how did your VC convection idea work, it won't take much to do sleeves that accept the VC Ti?
natural farmer
Well-Known Member
Triple like from me @phattpiggie !!! Looks gorgeous!!! Me wanna wood my Project sooo much!!! @Pipes was great to send me a couple of potential wooden sleeve blank cylinders but I haven't tried to make any yet due to lack of tools and craftsmanship...  You are the man! Are we getting close to limited production for these?
The old Ti tips with the thin airway worked ok, not as good as the standard Eraser SS bowl if I remember correctly but I didn't test much due to lack of herbs at that time. Then the new tip came and I tried it but there was to much air coming from the deep grooves and didn't work right...
I think there should be a SS sleeve made that mimics Ed's Woodscent's heater, that one sits inside the VC bowl so the grooves don't spoil the fun!
I used the Eraser naked with some silcone tubing to hold the stem at the tip and I didnt find it dangerous. Not more dangerous than the VC when cool-clicking or the Vapman crucible after a hit. Very manageable but of course I am not sure how the wood will take it after prolonged use. Do you use high temp o-rings between the wood and the SS heater tube? That might do the trick...
 You are the man! Are we getting close to limited production for these?
The old Ti tips with the thin airway worked ok, not as good as the standard Eraser SS bowl if I remember correctly but I didn't test much due to lack of herbs at that time. Then the new tip came and I tried it but there was to much air coming from the deep grooves and didn't work right...
I think there should be a SS sleeve made that mimics Ed's Woodscent's heater, that one sits inside the VC bowl so the grooves don't spoil the fun!
I used the Eraser naked with some silcone tubing to hold the stem at the tip and I didnt find it dangerous. Not more dangerous than the VC when cool-clicking or the Vapman crucible after a hit. Very manageable but of course I am not sure how the wood will take it after prolonged use. Do you use high temp o-rings between the wood and the SS heater tube? That might do the trick...
Last edited:
No O rings, my log is on for 7-8 hours at a time and there is direct contact between the wood and SS.
You'd have to be pushing an Eraser to be putting the same amount of stress thru the wood.
I could be wrong but there's only one way to find out
@natural farmer I can make any of the VC tips work, in theory, just need to try it out. I used the cooling fins of the Ti to locate a couple of O rings and @Pipes SS bowl but left it in the Eraser body.
As for producing more I wish I could say. I've got to try this one out thoroughly first and a couple need to go out for trial and we'll see after that.
Joaon
Well-Known Member
So last night, I decided try back the Eraser after some times with the Omnivap as daily driver,
and the red silicone sleeve cracked along the air holes.
It still seal well, but the more it goes, the more I can see the Project/Eraser NEED a wood body !
Thanks @phattpiggie to take that road !
Maybe it could have a 14mm tapper, something like the Milaana-Bodhi ?
So we could use stems like this one: (Glass, or wood .. ^^)

and/or a male-male adapter for bubblers :
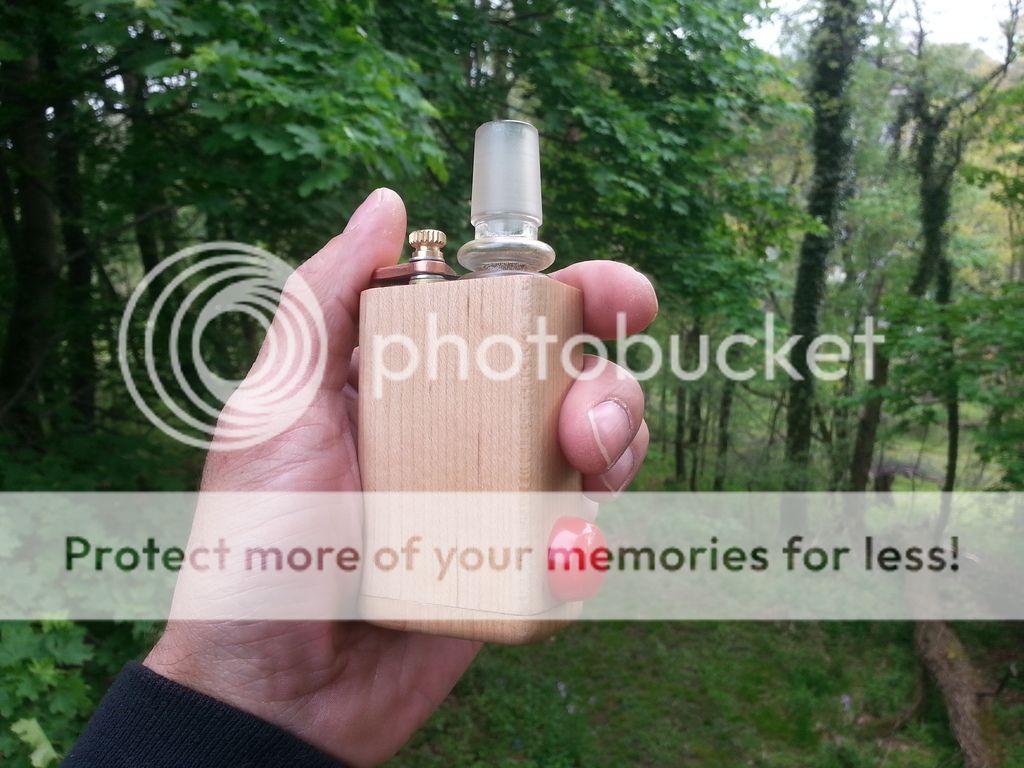
Or you prefer to stay with VC tips ?
*Edit: Or what about something to drop S&B pre-filled capsules ?
**Edit bis: And what about the Lotus wpa ?
The Eraser works and extract pretty well , it just needs some wood and to keep the all thing as short as possible ! But we'll get there !
I'm currently thinking to anticipate and get a RX2/3 as well, along with pretty wood skin..

and the red silicone sleeve cracked along the air holes.
It still seal well, but the more it goes, the more I can see the Project/Eraser NEED a wood body !
Thanks @phattpiggie to take that road !

Maybe it could have a 14mm tapper, something like the Milaana-Bodhi ?
So we could use stems like this one: (Glass, or wood .. ^^)

and/or a male-male adapter for bubblers :

Or you prefer to stay with VC tips ?
*Edit: Or what about something to drop S&B pre-filled capsules ?

**Edit bis: And what about the Lotus wpa ?
The Eraser works and extract pretty well
 , it just needs some wood and to keep the all thing as short as possible ! But we'll get there !
I'm currently thinking to anticipate and get a RX2/3 as well, along with pretty wood skin..


Last edited:
KeroZen
Chronic vapaholic
AFAIK you may still order any of the 3 versions. The Eraser internals are longer though, so you can't just put a OG sleeve on yours, but you can convert it into a Project AA if you have some cork laying around. Or maybe just ask @Pipes to make you a longer OG sleeve?
Here's the full official family:
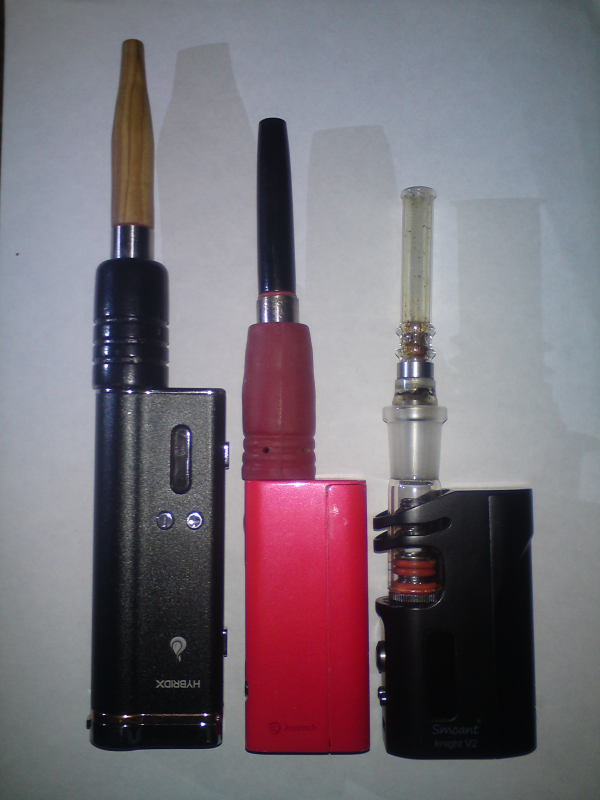
Here's the full official family:

natural farmer
Well-Known Member
AFAIK you may still order any of the 3 versions. The Eraser internals are longer though, so you can't just put a OG sleeve on yours, but you can convert it into a Project AA if you have some cork laying around. Or maybe just ask @Pipes to make you a longer OG sleeve?
Here's the full official family:

The wooden version can't be ordered at the moment afaIk as dear @Pipes has his hands full for now with the induction VC heaters so @phattpiggie is trying to find a good design that might come soon in our greedy hands. Looking forward as well! @phattpiggie already has a beta wooden sleeve that he posted a few days/weeks ago!
@KeroZen the wood version never was really good in my opinion ( but opinion are like ass , everybody have one ) , the loose way it was ( not tight how i think/look the @phattpiggie ) that was my main problem , second problem is the look of it, the third problem i forget to mention is that the stem was never tight too ( a least in my case ) .
natural farmer
Well-Known Member
The Smoant with the Glass Project looks really nice! How you like the Smoant so far? I have found that it is unable to raise the temps past 260C while the Pico and the Cuboid of course can go as high as fuck... Maybe a protection feature? Not that it needs to go that high of course, just saying...
ander
Well-Known Member
It begins......
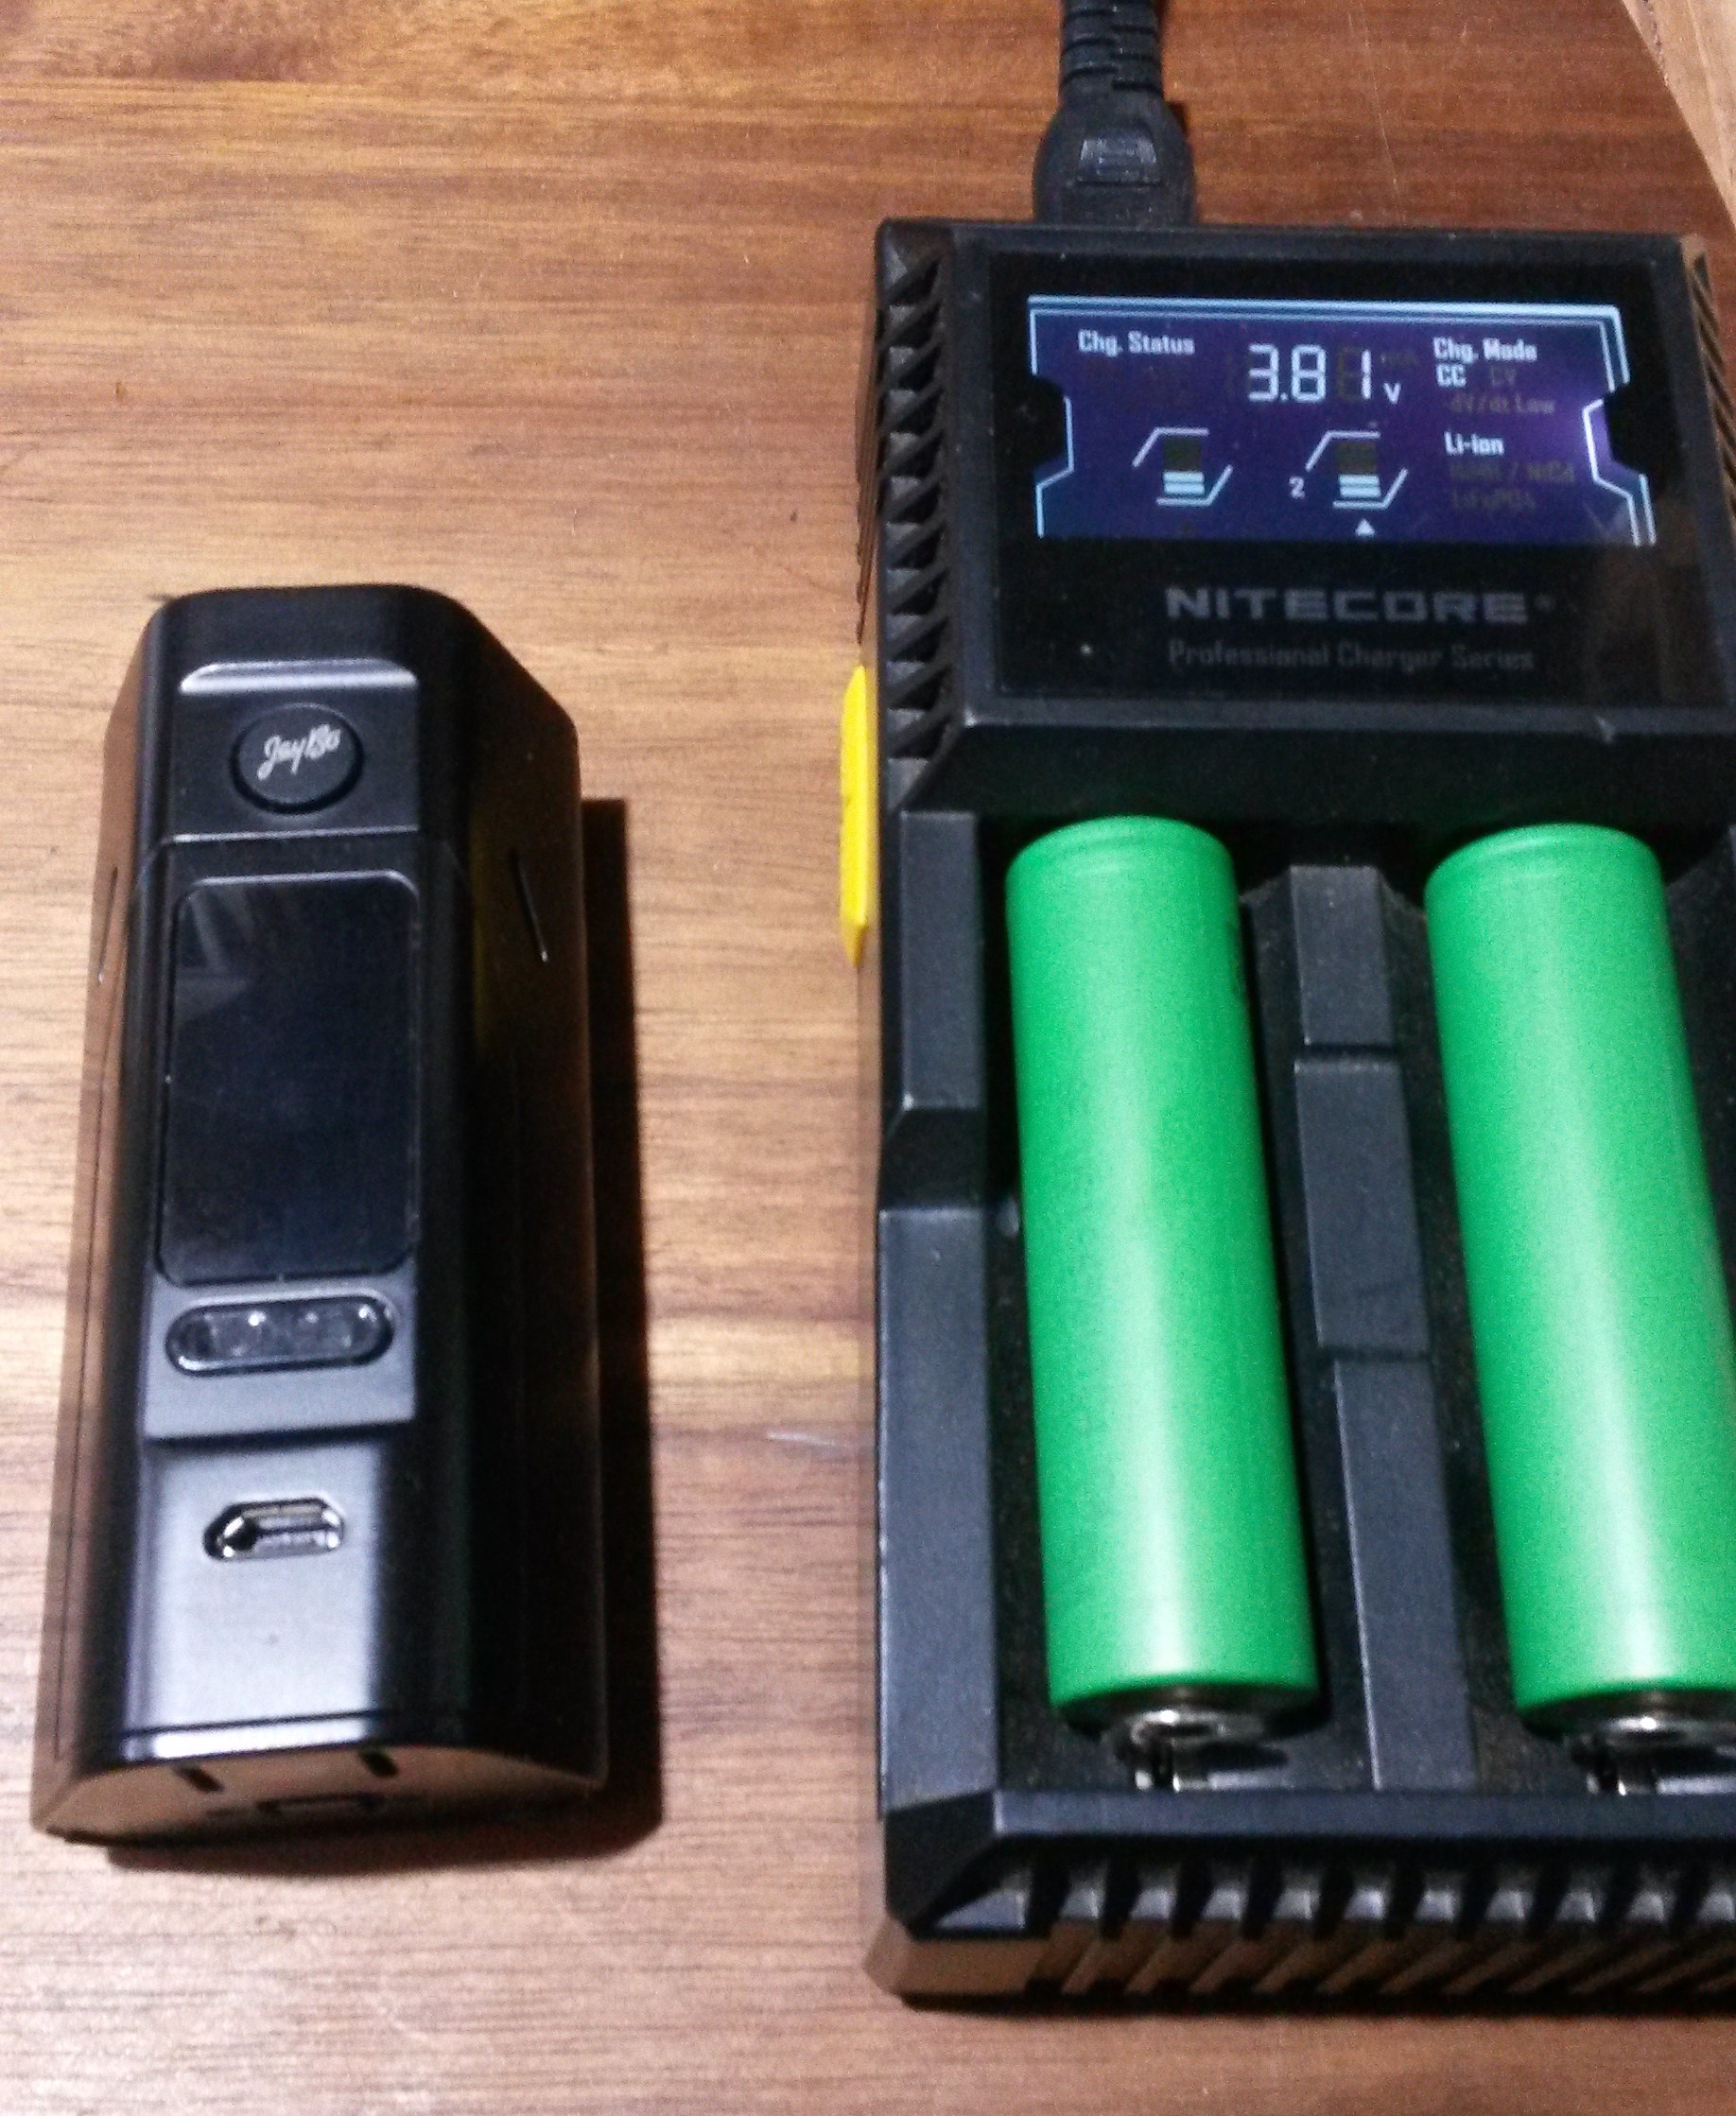
Picture was taken nearly three hours ago, I'd forgotten how long they take to power up.
Got some 'paperwork' done whilst they were doing their thing.
Back to now, just left it on the settings it came with.
Started out low temp, 180c not much vapor doing from there up to 200c. Nice flavor's.
Upped it to 235c the temp. it came set at.
Now it's a different kettle of fish.
Still tasty, nice vapor production and plenty left in the greenery.
Many thanks @Pipes and @emmdeemo, spot on. This is gonna be fun.
in my case a least the project is better use it in reverse , what i mean is start the first couple of hit with more highter temp that you intent , then keep slow the temp by 5 or 10 degree ( Celsius ) till the temp you want. because it take a little bit for the SS and everything that can rob the heat soak in it , other way is set that low temp you want and be patience , in the first 2 or 3 will poor but after that is great, of course you can't not let it cool down too much or you will start in the begining that is why i think the style for low temp need to be like a cigar smoking a joint puf puf puf , wait for a few seconds , puf puf puf , something like that , not sure if my idea get understand but i hope that help others.
pd: i do not have enhance firmware , i use my rx200 with manufacture firmware so i have a limit of 10s per hit that i am very used to it
pd: i do not have enhance firmware , i use my rx200 with manufacture firmware so i have a limit of 10s per hit that i am very used to it
@emmdeemo @natural farmer or anyone else running a Pico mod, I'm curious what your settings are since it has no PID or ohm overide.
Dont think I even upgraded the firmware. Still on a ten second time out, TCR is 170, and the ohms are locked at its native reading, 0.57. Temp is usually set around 260c to 280c.
Progress....
Sorry about the focus. The original try was fine but I found after a day or so of use the original 14mm SS heater sleeve got stuck in the wood, and in use the wood was gripping a bit to much on the stem ferrule. A night out in the shed and the 14mm sleeve loosened of and the ferrule was back to where I began, a nice fit.
The way it went together I had to fit the 510 then drop the wood and sleeve over it, a sloppy fit and a PITA. The three O rings don't offer enough grip in the sleeve when it's like this.
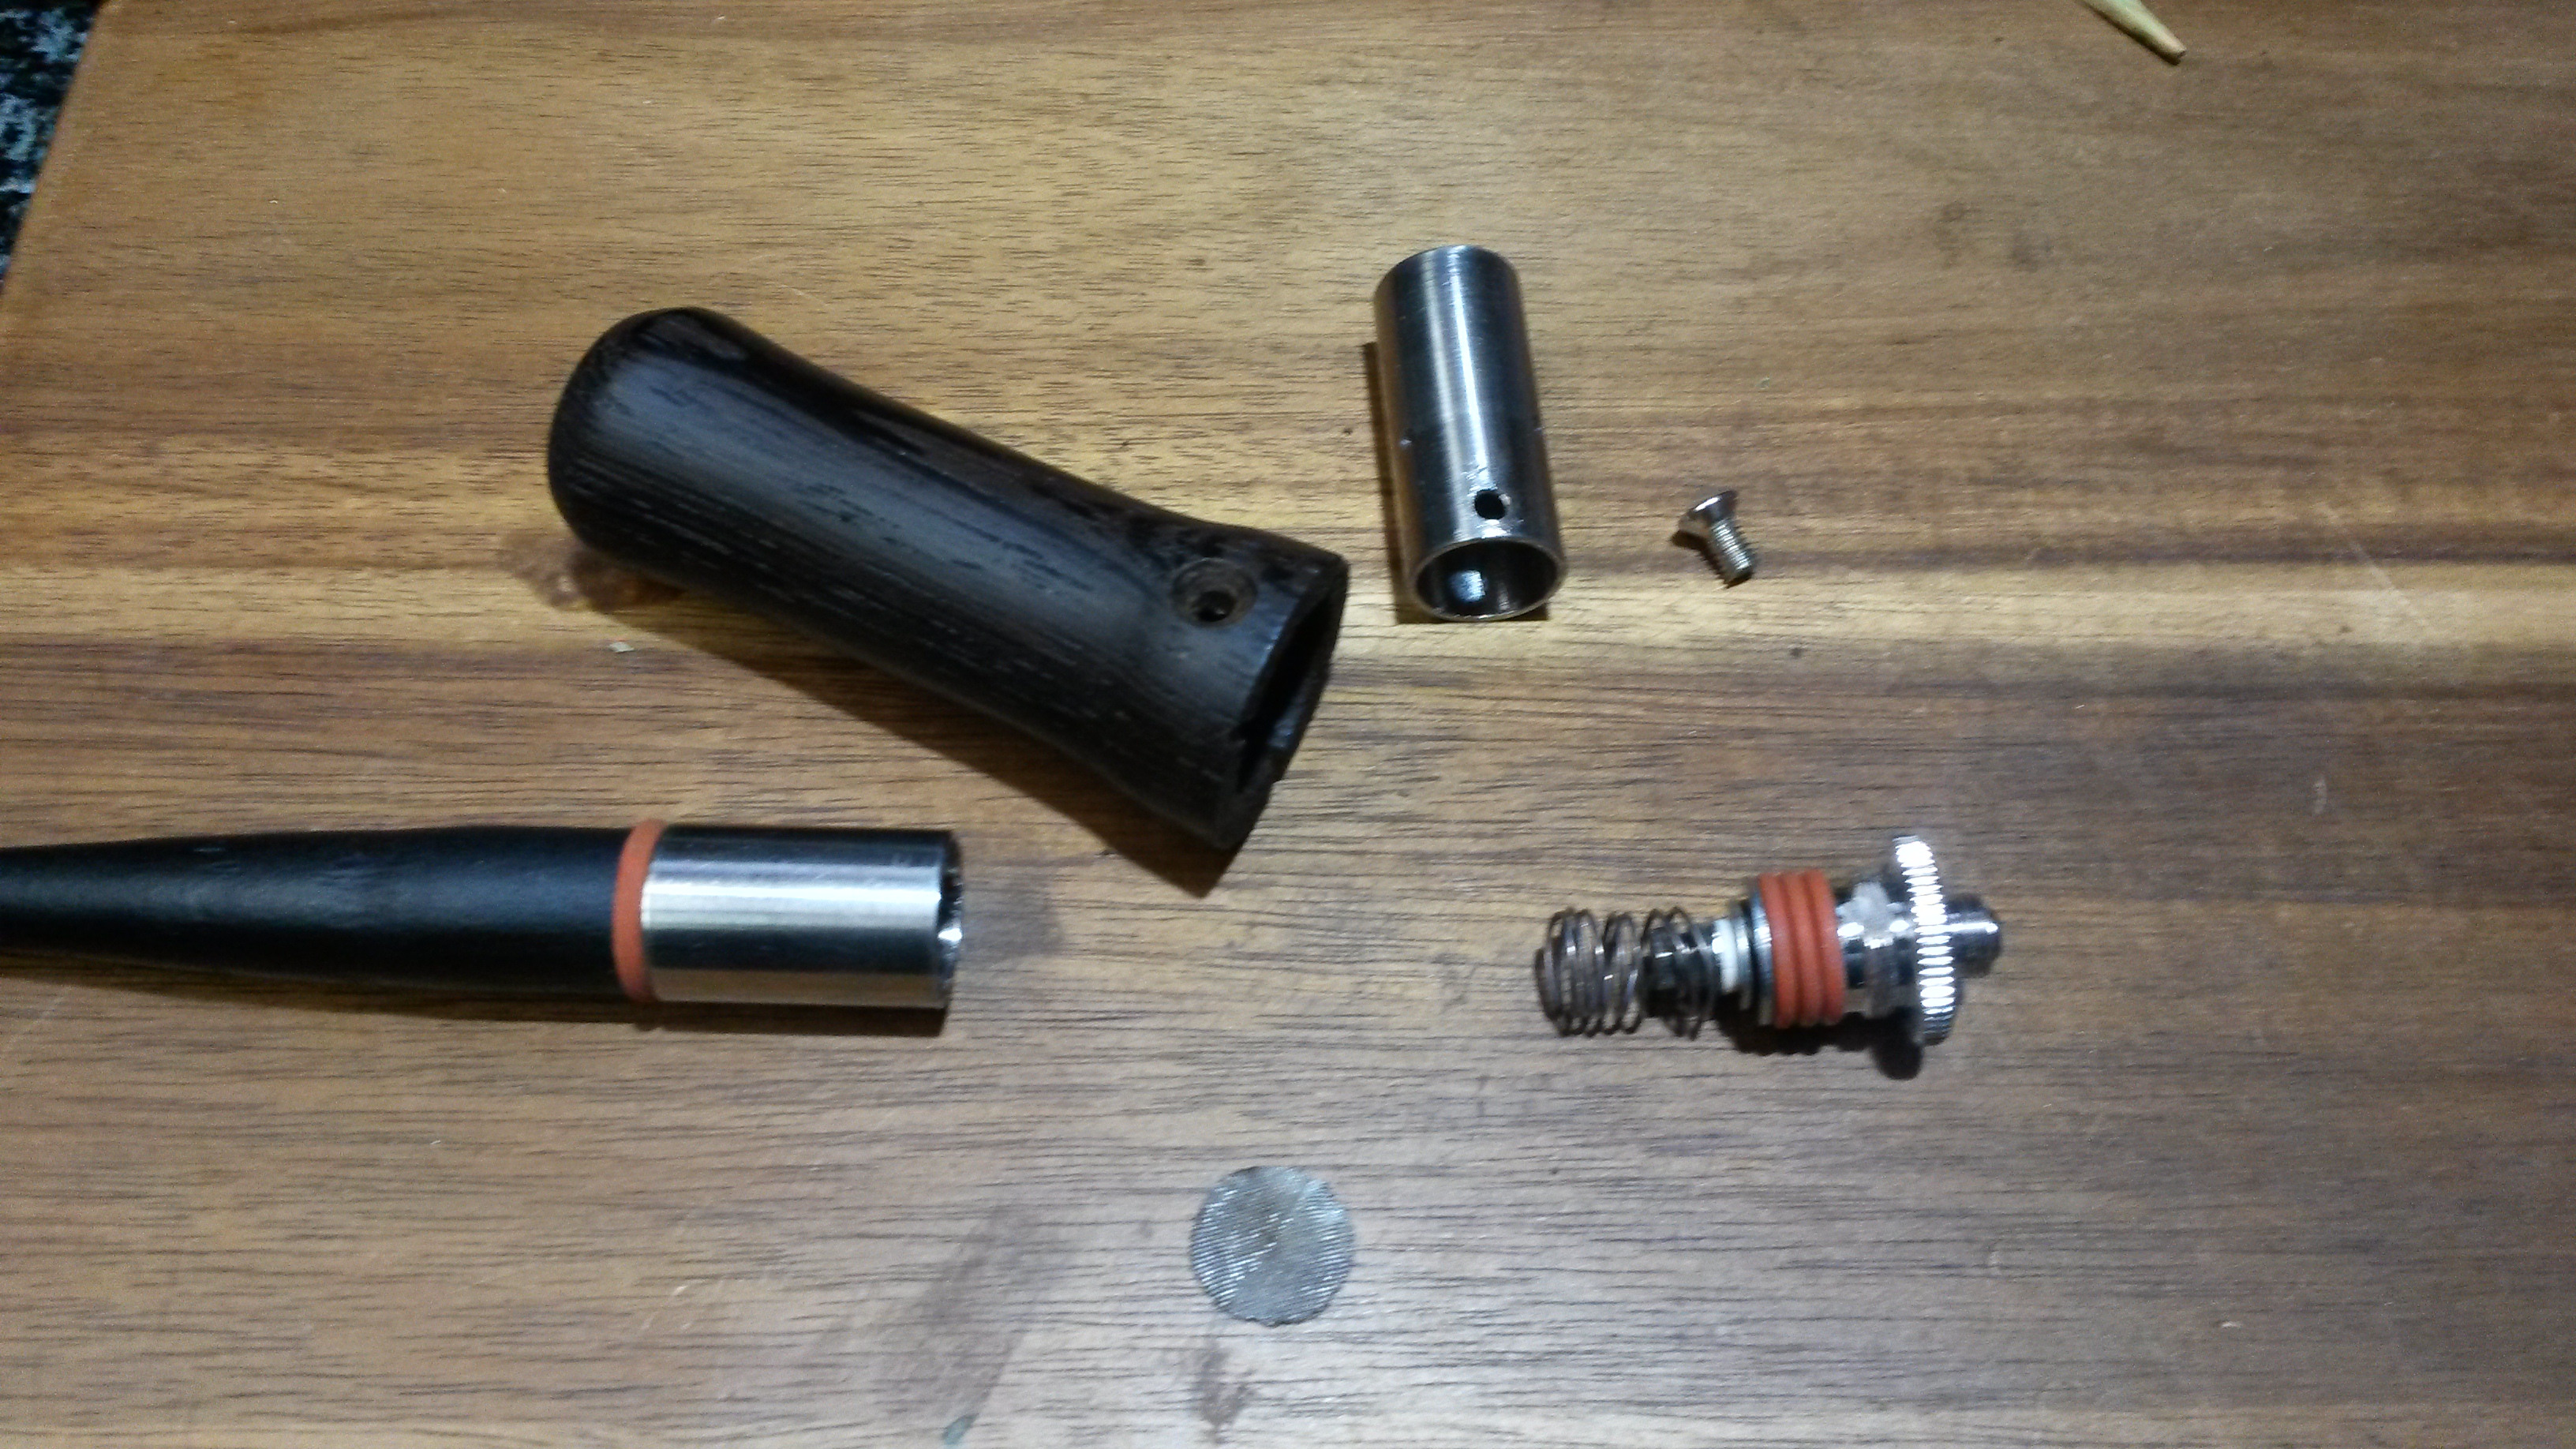
I drilled and tapped the SS at 3.5mm, I have a box full of these screws and a tap. The wood has a countersunk hole in it and the 510 has a flat filed on it.
The wood has three grooves to allow air in and I put three grooves in the base as well. These match the holes @Pipes put in the 14mm tube. Also put a recess in to hide the 510.
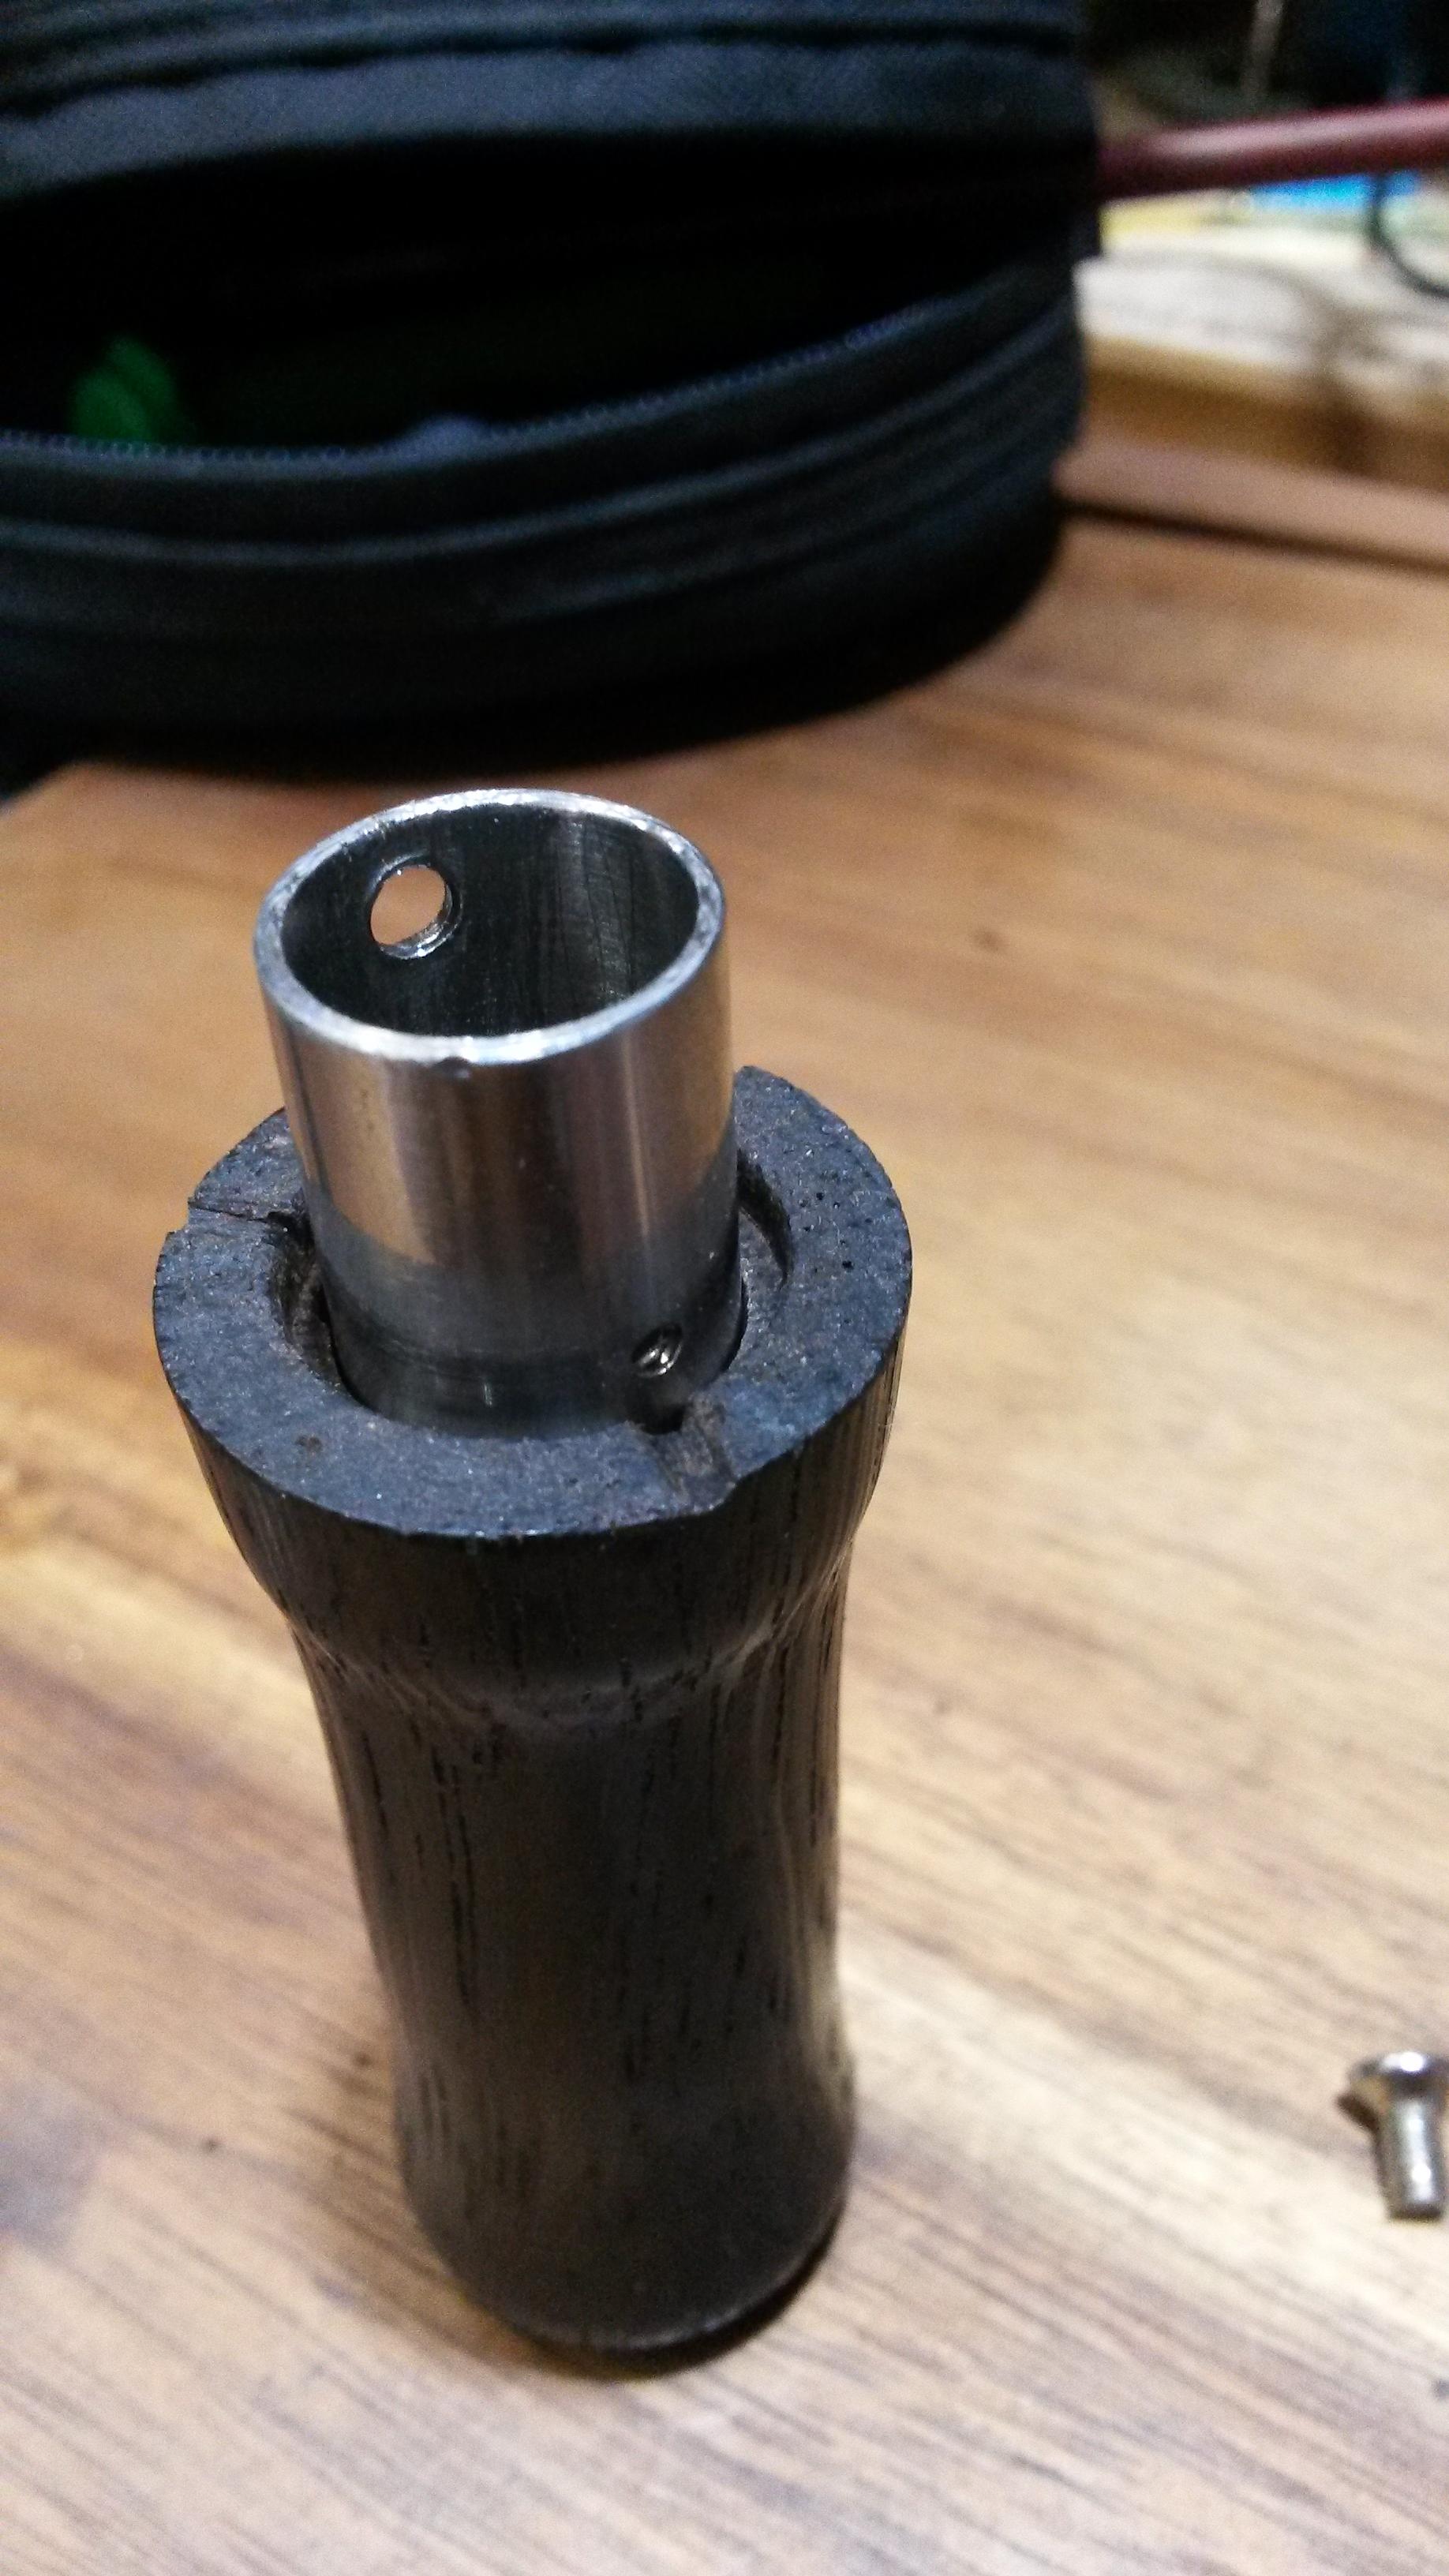
It all lines up and the 510 sits in the recess and the screw bottoms on the flat spot.
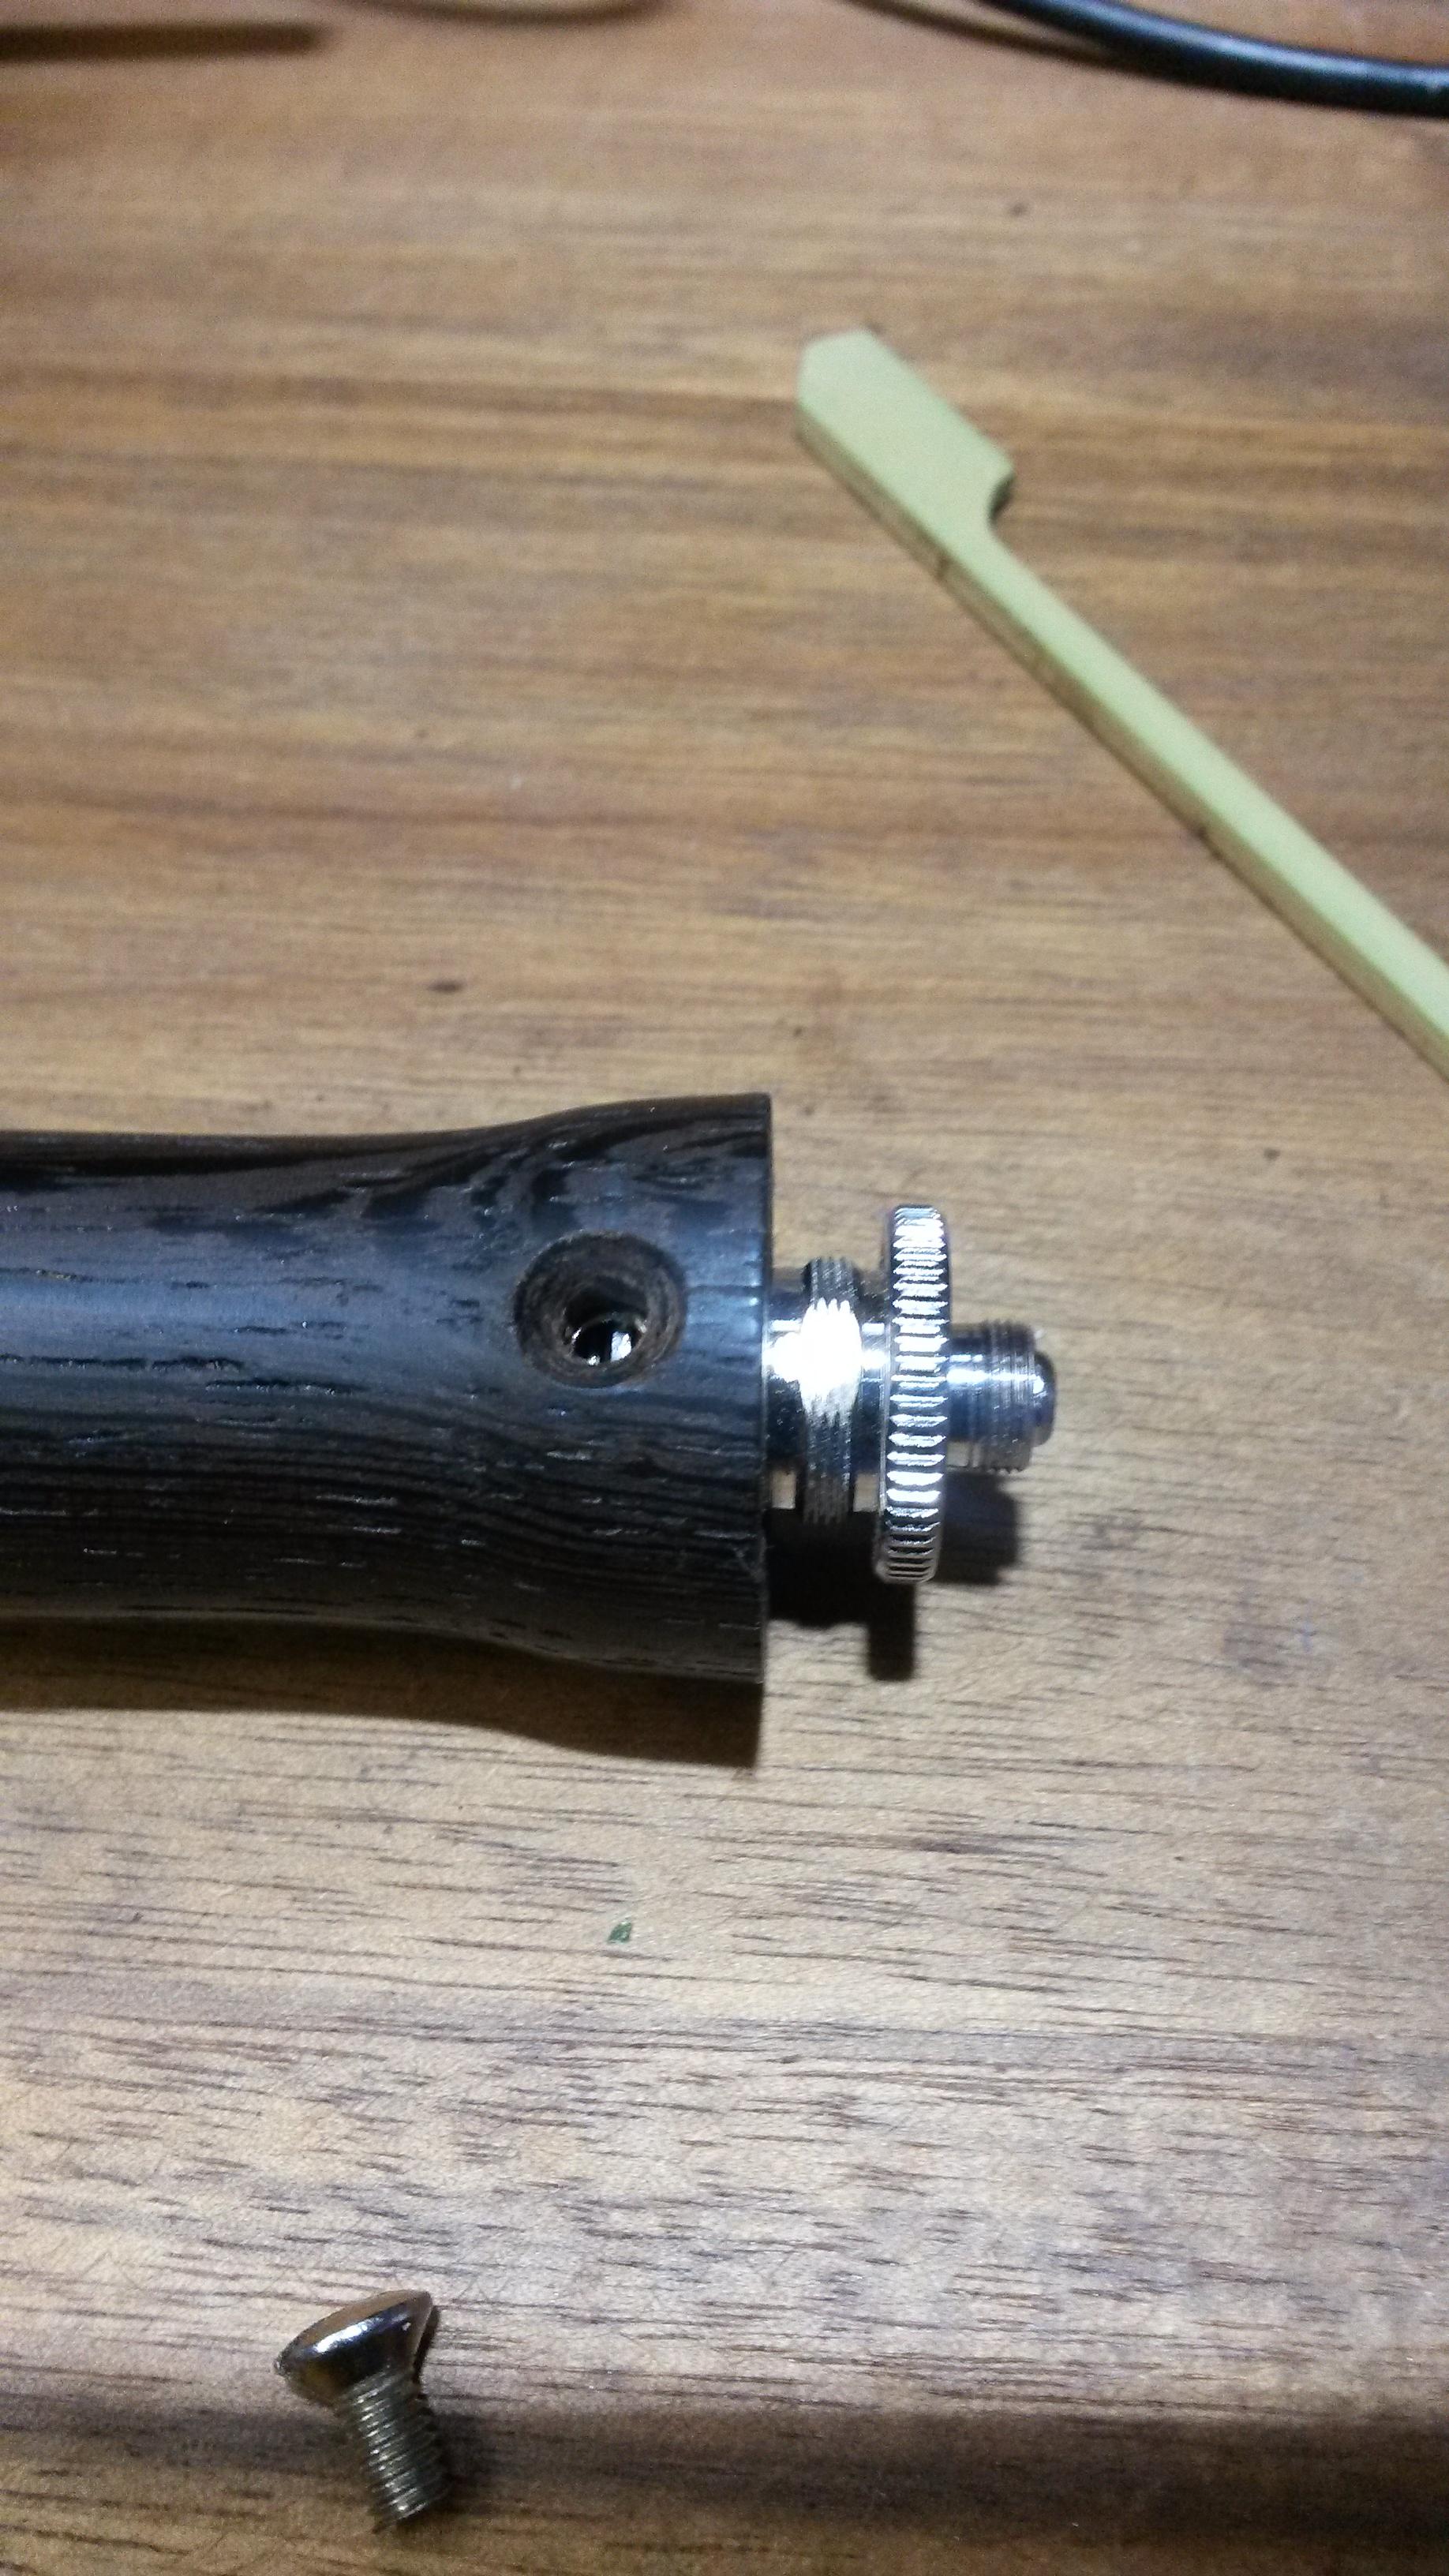
I can now fit the wood and heater in one, and I can do this with it and it's not going anywhere.
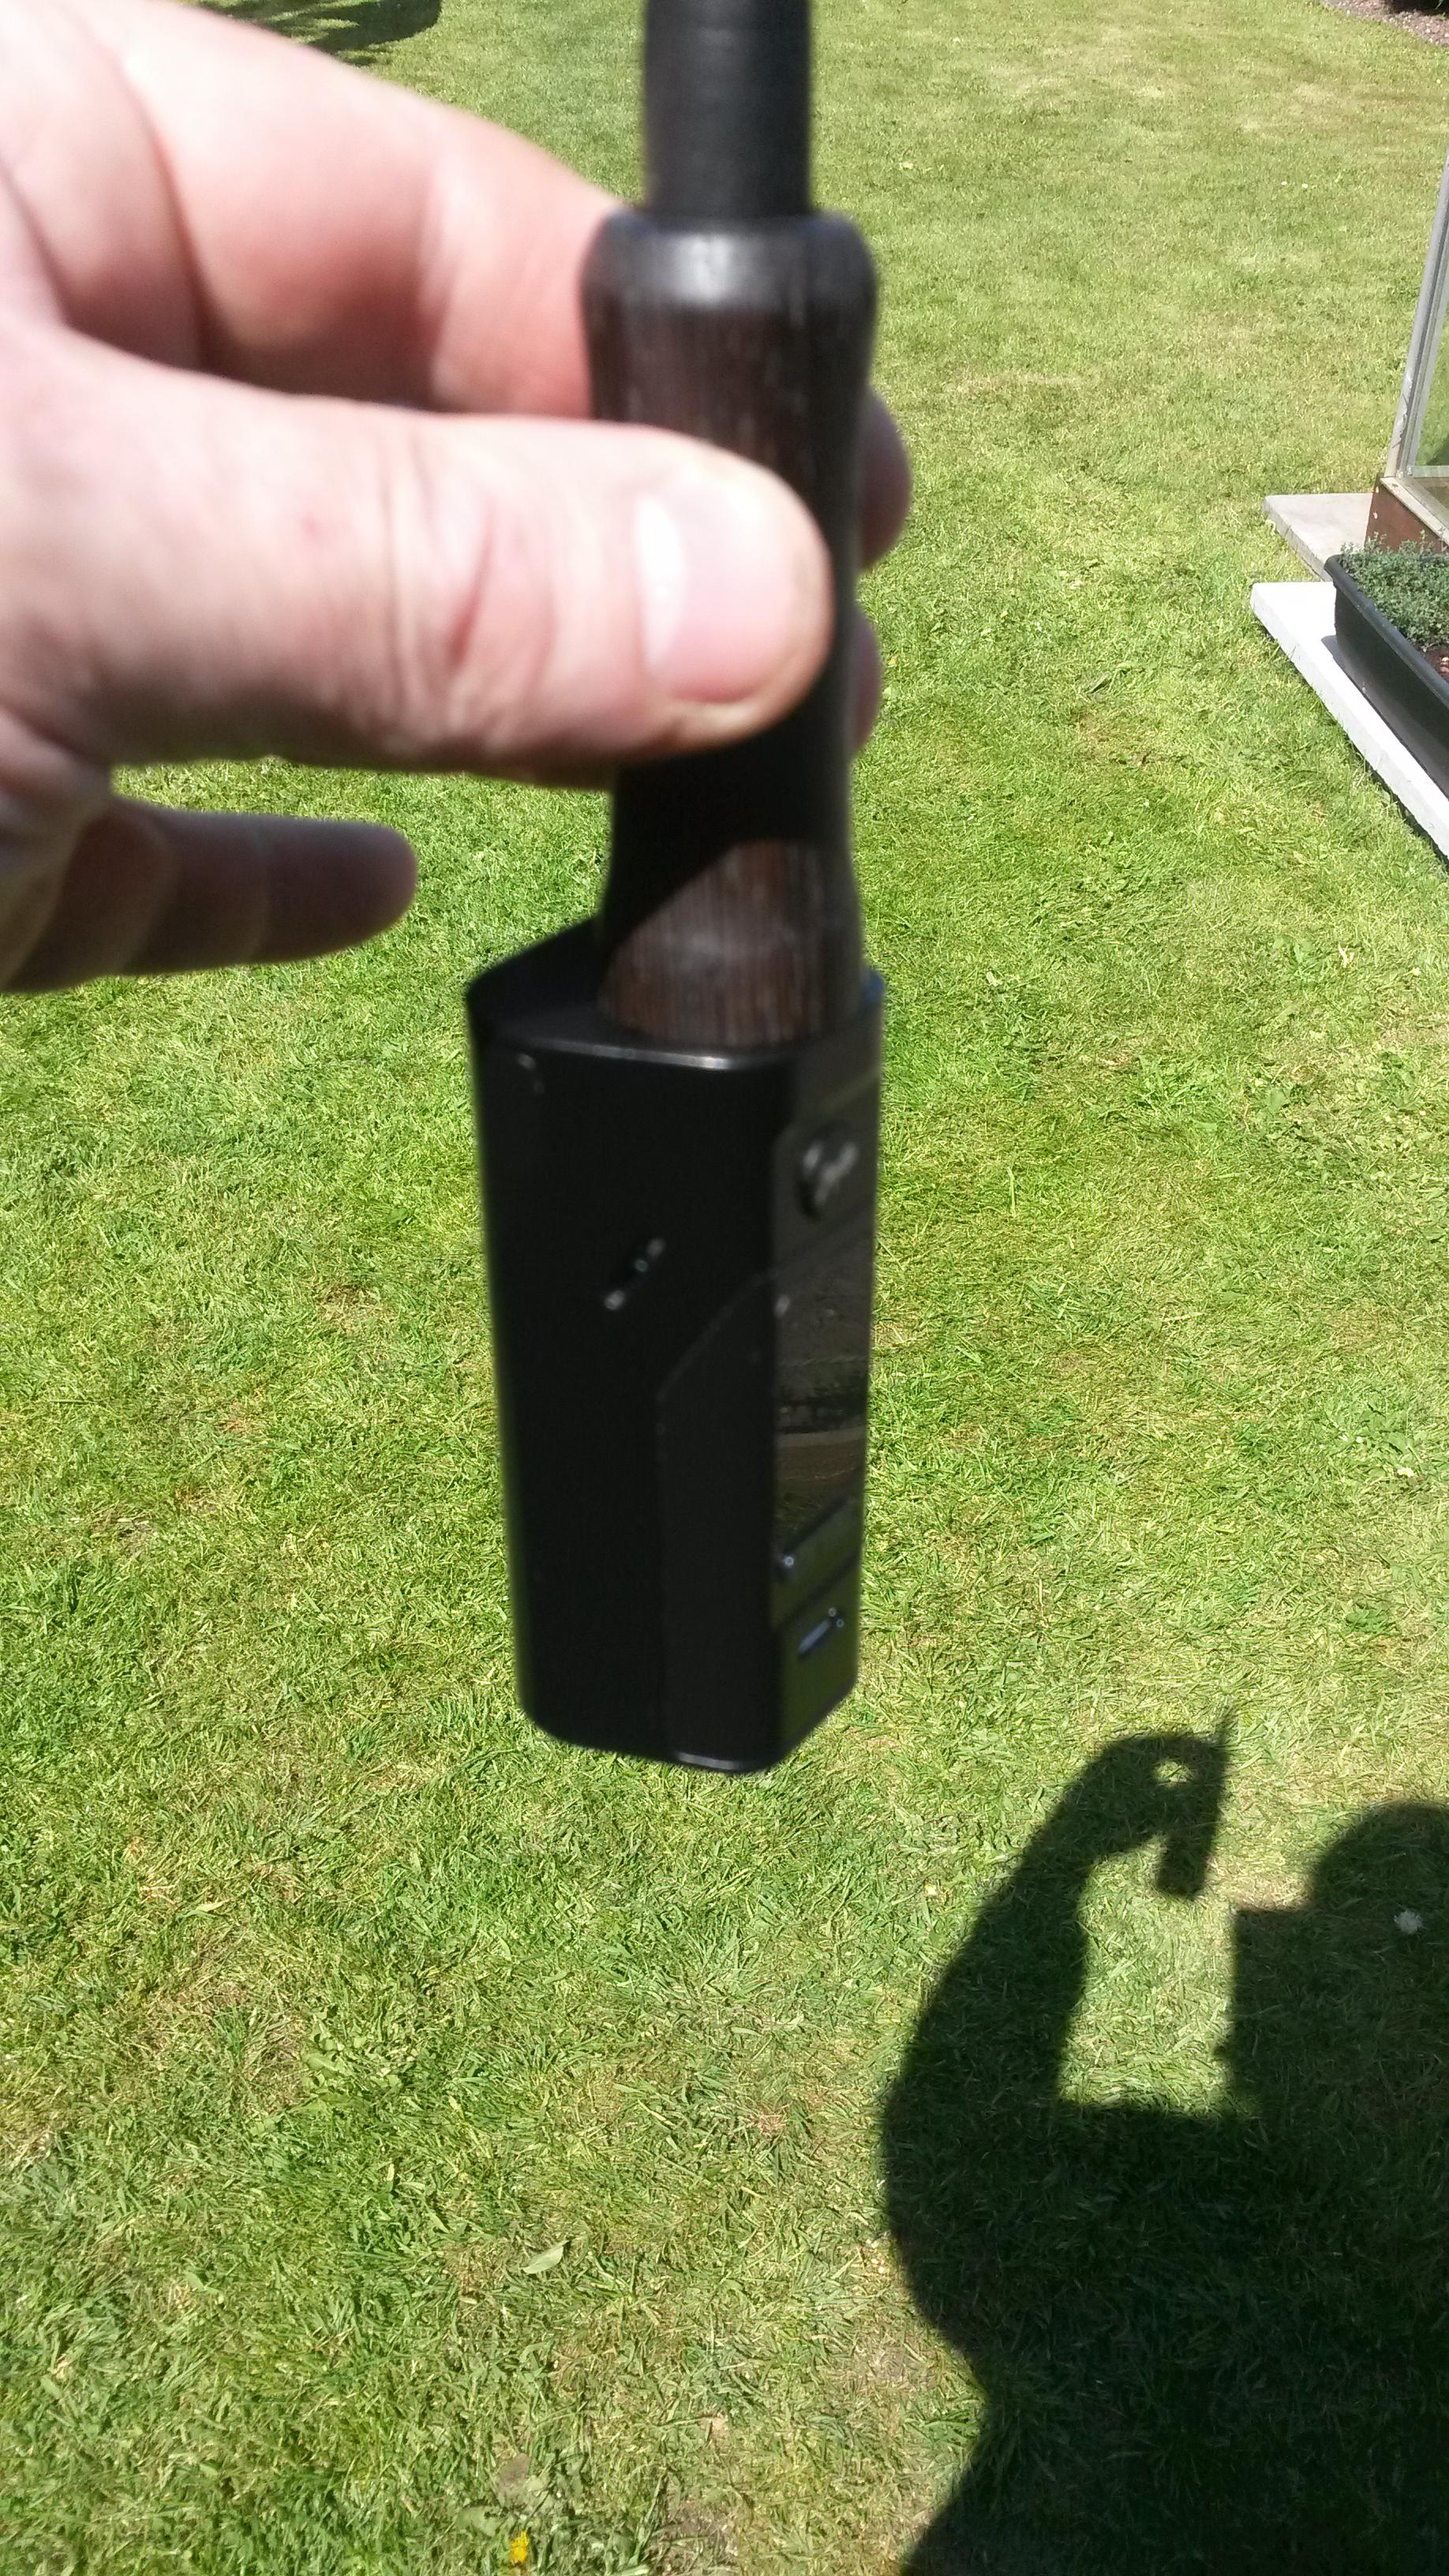
Before it held okay without the batteries in but when fitted the O rings didn't hold on and it would slowly slide apart.
Still getting some good results, it's given my green a speedy effect rather than the spinal melting I get from my VC. I've been mischievous all week.
Hotspots and stirring, I've put the extra bowl screen on top of the load which has helped a little.
The SS is heat soaking but not enough to make the wood uncomfortable to hold.
I push the button and draw, then keep drawing after I let off. The soaked SS holds a bit of heat.
Got a couple of bits to work out so the stem fits better, @Ruta will be round this week for a bit of testing while I get some more stems done.
So far I've learnt that I need to learn more about the RX settings, I need to practice making coils and I now know not to touch the coil after it's been fired up.
Sorry about the focus. The original try was fine but I found after a day or so of use the original 14mm SS heater sleeve got stuck in the wood, and in use the wood was gripping a bit to much on the stem ferrule. A night out in the shed and the 14mm sleeve loosened of and the ferrule was back to where I began, a nice fit.
The way it went together I had to fit the 510 then drop the wood and sleeve over it, a sloppy fit and a PITA. The three O rings don't offer enough grip in the sleeve when it's like this.

I drilled and tapped the SS at 3.5mm, I have a box full of these screws and a tap. The wood has a countersunk hole in it and the 510 has a flat filed on it.
The wood has three grooves to allow air in and I put three grooves in the base as well. These match the holes @Pipes put in the 14mm tube. Also put a recess in to hide the 510.

It all lines up and the 510 sits in the recess and the screw bottoms on the flat spot.

I can now fit the wood and heater in one, and I can do this with it and it's not going anywhere.

Before it held okay without the batteries in but when fitted the O rings didn't hold on and it would slowly slide apart.
Still getting some good results, it's given my green a speedy effect rather than the spinal melting I get from my VC. I've been mischievous all week.
Hotspots and stirring, I've put the extra bowl screen on top of the load which has helped a little.
The SS is heat soaking but not enough to make the wood uncomfortable to hold.
I push the button and draw, then keep drawing after I let off. The soaked SS holds a bit of heat.
Got a couple of bits to work out so the stem fits better, @Ruta will be round this week for a bit of testing while I get some more stems done.
So far I've learnt that I need to learn more about the RX settings, I need to practice making coils and I now know not to touch the coil after it's been fired up.

@phattpiggie what about something like this:
http://a.co/9qMwQRE
add 3 of this and use not so large screw to put pressure on to the base/deck of hte project , this is nice because don't damage the wood screwing and unscrewing the screw ?
pd: or this: http://a.co/eHBRCTC
http://a.co/9qMwQRE
add 3 of this and use not so large screw to put pressure on to the base/deck of hte project , this is nice because don't damage the wood screwing and unscrewing the screw ?
pd: or this: http://a.co/eHBRCTC
@E0x the wood has just a hole, there is just enough thickness to the SS that it has held the thread and I can tighten it down well.
It's all nice and snug and as it's below the O rings and there's very little heat transfer.
Thank you anyway for the idea. I only used those screws as I've got plenty of them and have the correct tap, I will see how it holds out.
It's a course enough pitch, 0.6mm, to not cross thread very easily.
It's all nice and snug and as it's below the O rings and there's very little heat transfer.
Thank you anyway for the idea. I only used those screws as I've got plenty of them and have the correct tap, I will see how it holds out.
It's a course enough pitch, 0.6mm, to not cross thread very easily.
I like the mod for locking the deck to base.  I find the looseness seems to snug up as time passes and O ring settles in.
Never really think about it, but then again, avoid grabbing by the top automatically from experience...
There is a way not to have to go through the wood at all. You could use an allen-grub-screw and just make a channel in the sleeve for the top, as you did for air intake.
Freakin A+. Love that wood!!!
 I find the looseness seems to snug up as time passes and O ring settles in.
Never really think about it, but then again, avoid grabbing by the top automatically from experience...
There is a way not to have to go through the wood at all. You could use an allen-grub-screw and just make a channel in the sleeve for the top, as you did for air intake.
Freakin A+. Love that wood!!!
The wood has gone from a 'nice glide in' fit to 'stuck fast' and now after a night outside 'looser than a late night hooker'.
Turning it will have released a bit of internal pressure causing it to misshape slightly and then the heat has shrunk it and now the cooler air outside over night has opened it up so the 14mm fell out.
I figured I'd lock it all together, no reason a grub screw couldn't be used and cut so it sat just below the woods surface. I'll have a look for some fine pitch one's it'd look neater than the countersunk head.
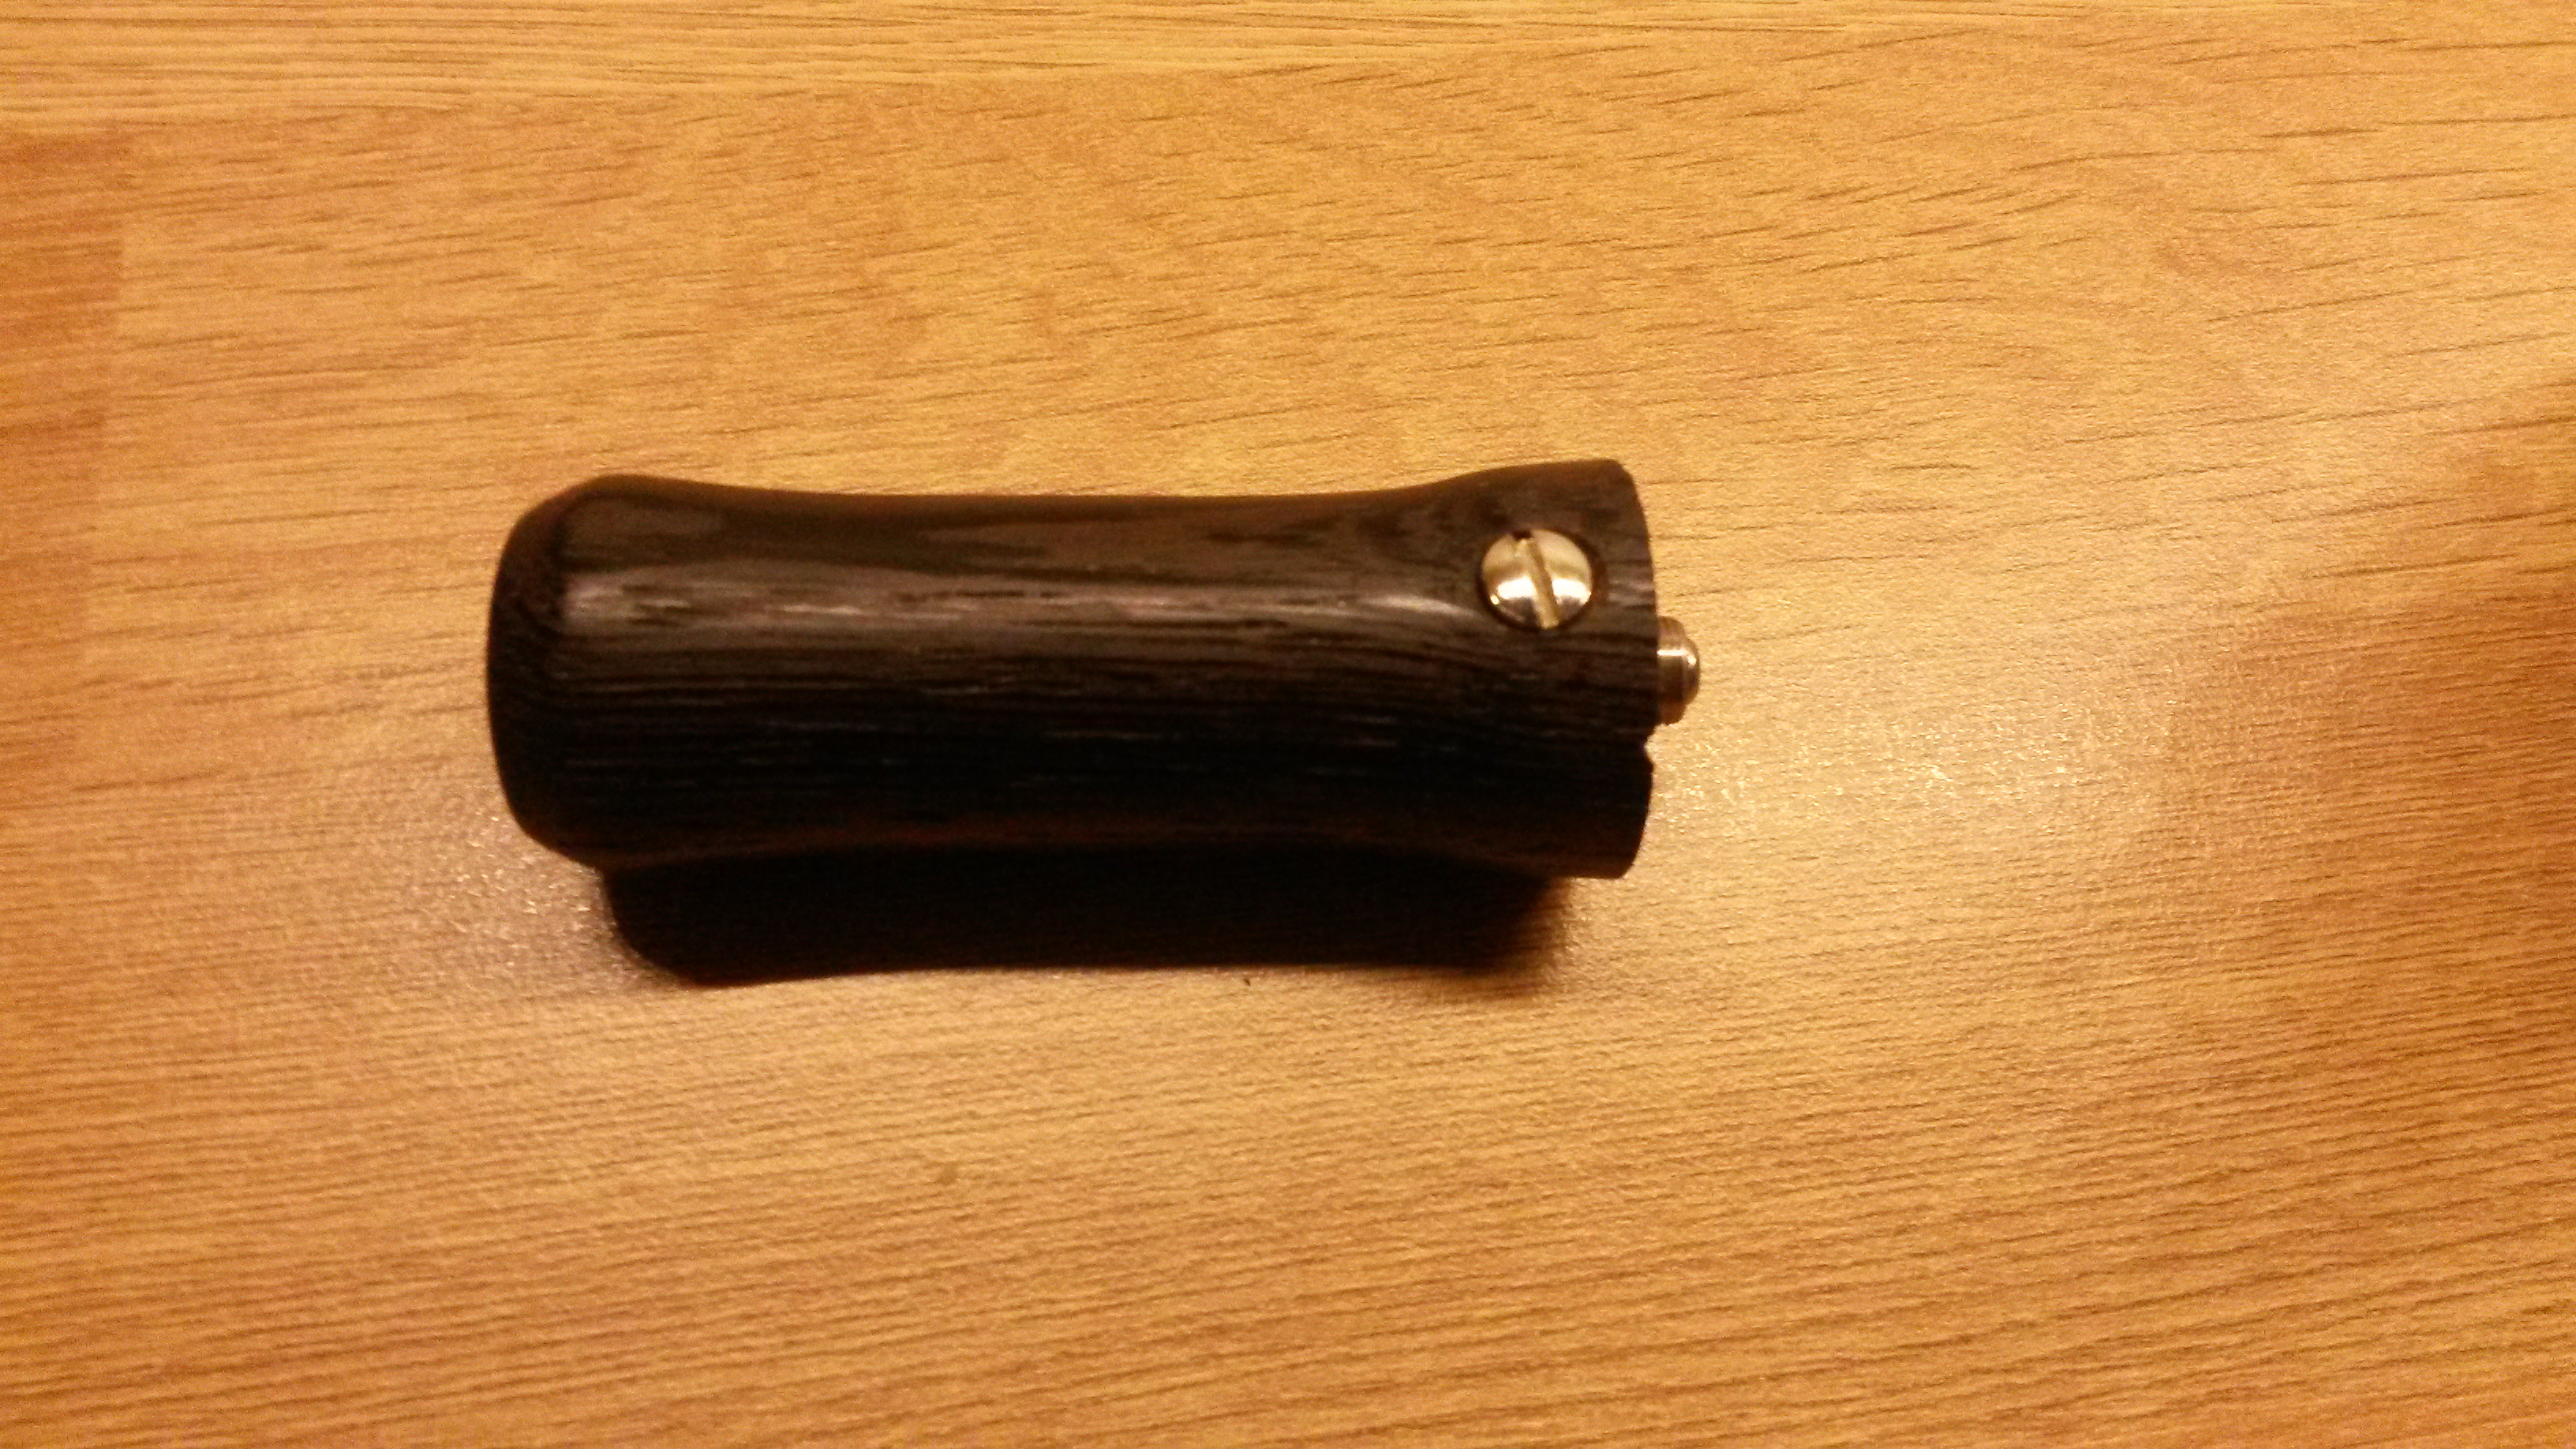
The Wenge looks great, it's a very open grain and I split a piece on something else. It doesn't take much for it to crack when thin.
If it can stand up to the fluctuations in temp etc then I'm sure other harder woods will.
I'll learn a lot from this first attempt and in a way it would be beneficial for this bit to crack so I can see if it needs to be done another way.
Turning it will have released a bit of internal pressure causing it to misshape slightly and then the heat has shrunk it and now the cooler air outside over night has opened it up so the 14mm fell out.
I figured I'd lock it all together, no reason a grub screw couldn't be used and cut so it sat just below the woods surface. I'll have a look for some fine pitch one's it'd look neater than the countersunk head.

The Wenge looks great, it's a very open grain and I split a piece on something else. It doesn't take much for it to crack when thin.
If it can stand up to the fluctuations in temp etc then I'm sure other harder woods will.
I'll learn a lot from this first attempt and in a way it would be beneficial for this bit to crack so I can see if it needs to be done another way.

