marduk
daydreamer
So far I really enjoy the 1" charcoals.
Just curious, what is it that is more enjoyable about the 1" charcoals? Also, have you tried 3/4" charcoals?
So far I really enjoy the 1" charcoals.
Just curious, what is it that is more enjoyable about the 1" charcoals? Also, have you tried 3/4" charcoals?
Dan - about how long does it take for a well-lit charcoal to stop burning when untended by drawing or re-ignition with flame? Thanks!The longer burn is much nicer for tobacco, you can really load it up and puff on it just like a tobacco pipe.
I just think that it allows you to sit back and relax a bit more. Pretty much doubles the session time.
Dan - about how long does it take for a well-lit charcoal to stop burning when untended by drawing or re-ignition with flame? Thanks!

I'll throw another related question out as well. What is the average time that a session would last for 1/2 and 1 inch coals? I'm sure there are variables but just a roundabout time frame.
I don't know if it's been mentioned anywhere within this thread already. But my wife just looked at this thing and said it looked like Dr. Who's Sonic Screwdriver.
Love how easy it is to make them...will probably still rely on you for a while first though... I live in an apartment building, and don't have easy access to open fire since I'm in the city.So I decided to do some more extensive testing on 1" length charcoals. Usually I make them 1/2".
I wanted to bring you guys along for the process, and give you an idea of how you could make your own charcoals!
I used bamboo that you could get at any garden store. I used a 5 foot long piece of cane, which will produce about fifty 1" charcoals. Price for a 5 foot length of cane is generally around 50 cents - 1 dollar.
I cut these with my bandsaw, but you could use a cheap fine-toothed handsaw.
The bamboo segments were placed into a candy tin, any sturdy tin with a good lid will work well. Holes have been punched into the top to let gases escape (very important, or the top will pop off!).
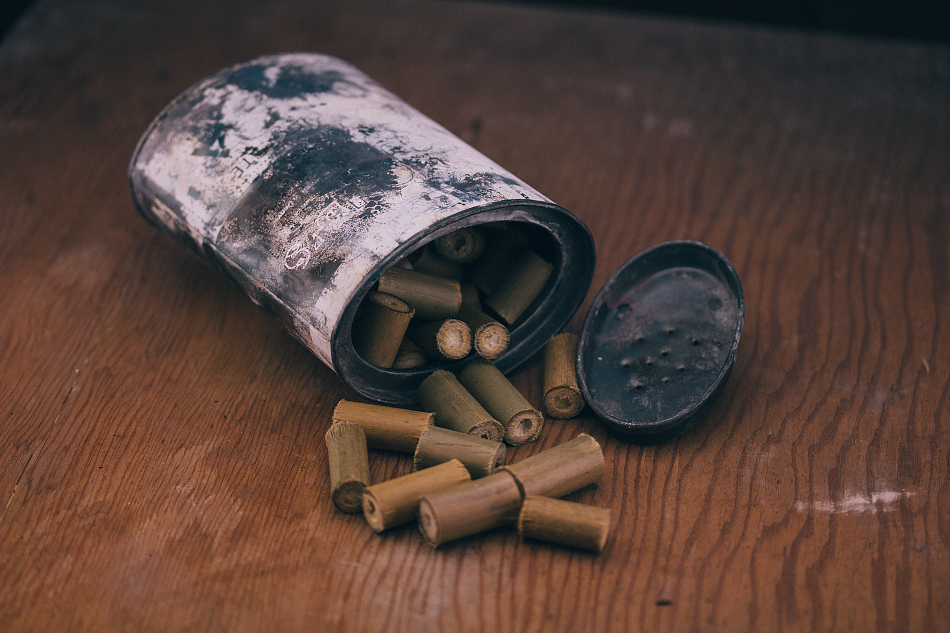
I tossed it into my fireplace, and let it heat up slowly. You'll see steam and volatile gases start to escape.
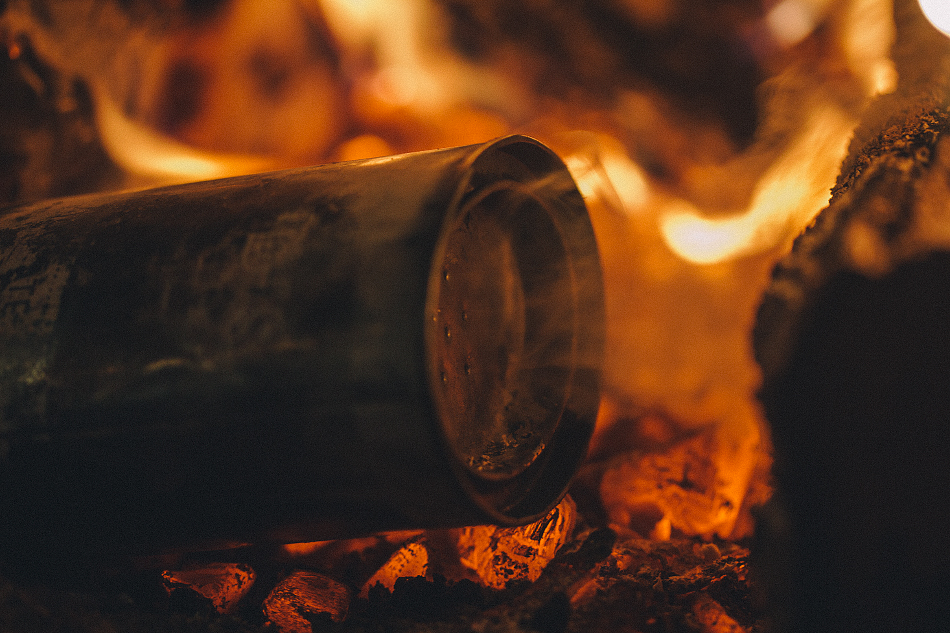
Next, the escaping gases will ignite as the tin is pushed further into the fire. Here you see the steady jet flame that is produced, it sounds like a jet too! it's important to not let this happen too quickly as the pressure may pop the top off. These gases are generally referred to as "wood gas". Some people even use wood gas to run gasoline engines!
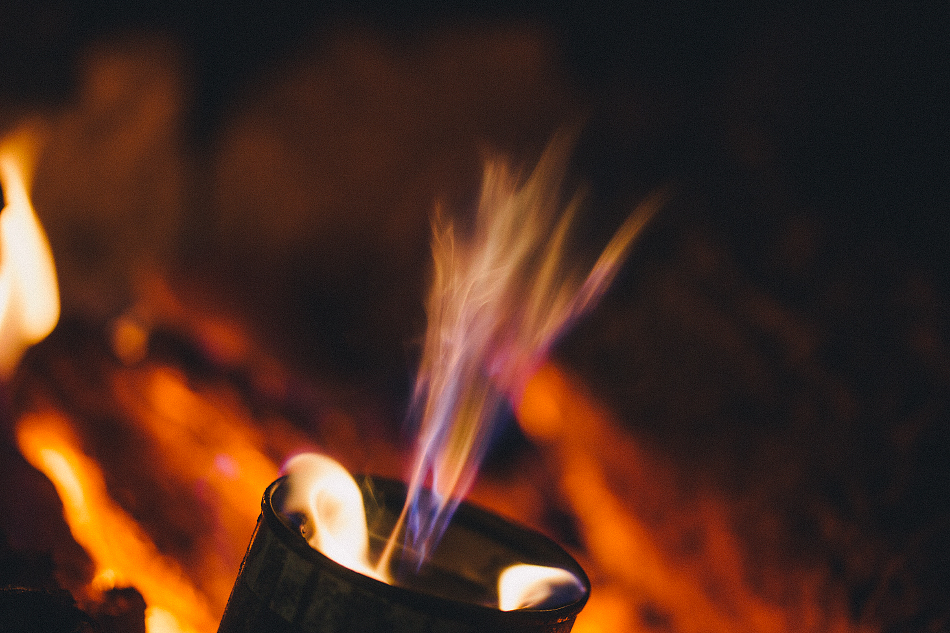
As the gases start to taper off, the tin should be pushed into the hottest part of the fire. You can monitor the escaping gases by looking at the flame produced near the punched holes in the tin.
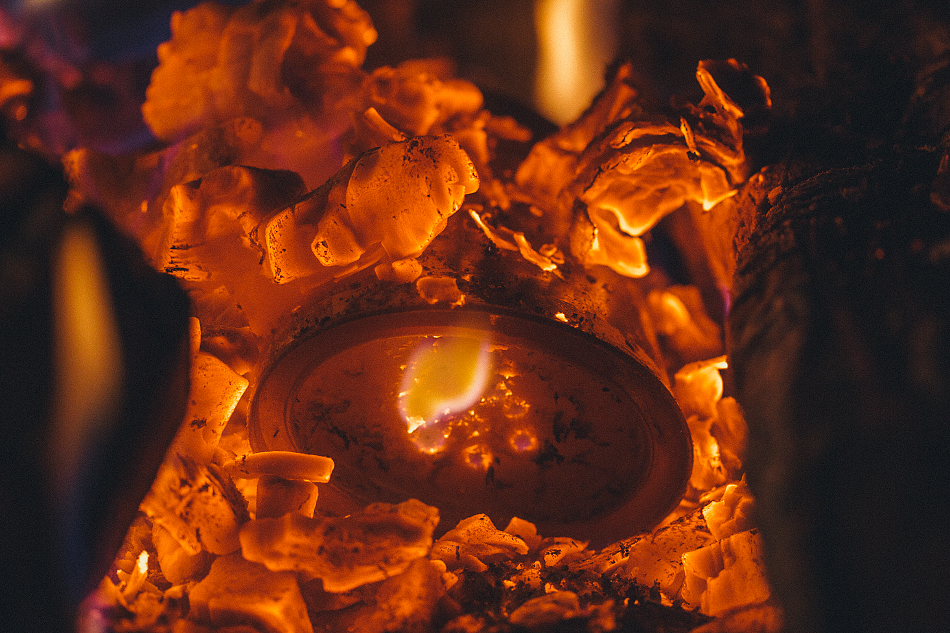
The tin needs to get red hot, the best charcoal is produced at 700-1000 °C (1292 - 1832 °F). At this carbonization temperature the fixed carbon content of the charcoal will be between 92-93 percent. This is way higher than most commercially available charcoal. This also means that the volatile content will be around 2-3%, extremely low. The remainder is made up of ash (mostly calcium).
A BBQ or hookah charcoal (coconut husk), especially the cheaper brands and compressed bricks will have a fixed carbon content of around 50-80%, with the remainder being mostly volatile mater. This volatile mater is what gives lower quality charcoal it's bad smell.
The only other charcoal on the market (that I know of) that is comparable to my bamboo charcoal is Binchōtan, http://en.wikipedia.org/wiki/Binchōtan
This is why you can't compare the taste, smell, or emissions between normal charcoal, and properly made bamboo charcoal.
Here, you see that the volatile gases have all escaped, and there is no more flame near the punched holes. The steel is bright red/orange, indicating a temperature above 700 °C inside the tin (probably close to 900 °C). I leave it in the coals for a few minutes before taking it out to let the tin cool off.
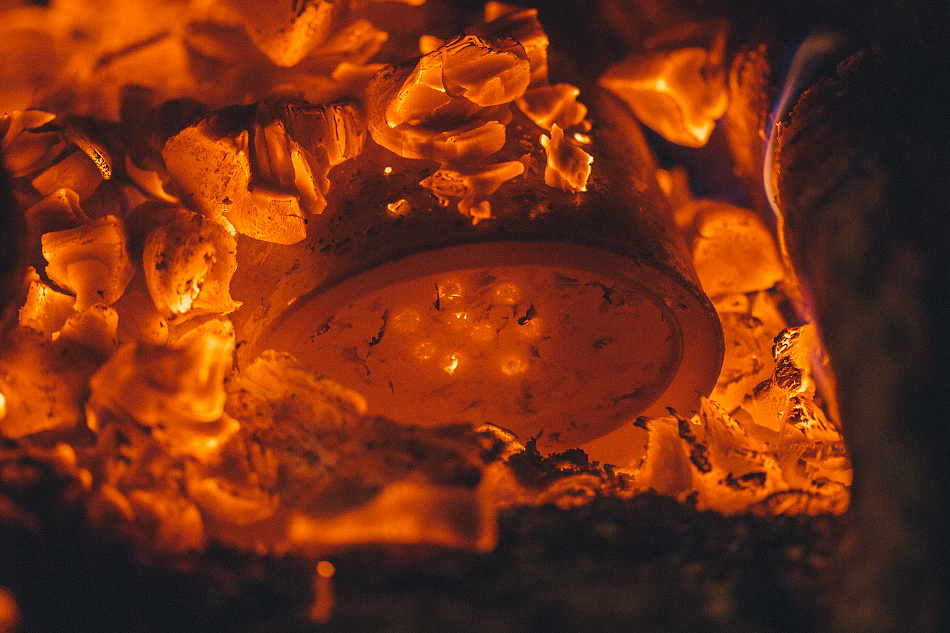
The tin must be cool to the touch before opening the lid. If the lid is opened at any time during the process, oxygen will get to the bamboo charcoals and they will start to burn.
Here is the finished charcoal, the carbonization process took about 10-15 minutes for a tin this size. The yield was 50 charcoals.
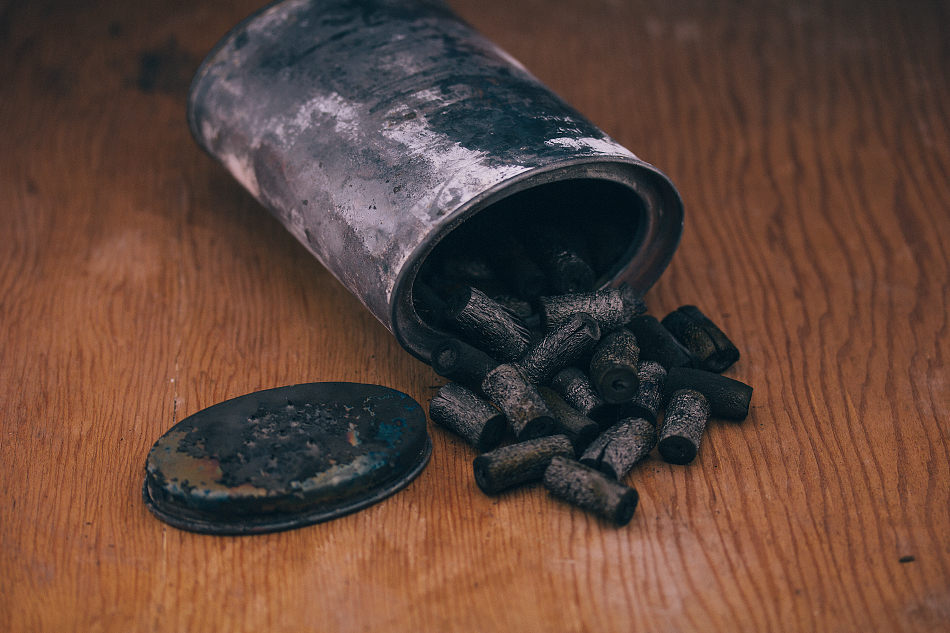
Since these are twice the length of the usual 1/2" charcoals, they are taking up much more space, but even still I am able to fit about 35 charcoals into the prototype case. Looks sweet! These charcoals are quite hard, they have a high pitched sound when you hit them. You could make wind chimes out of this stuff!
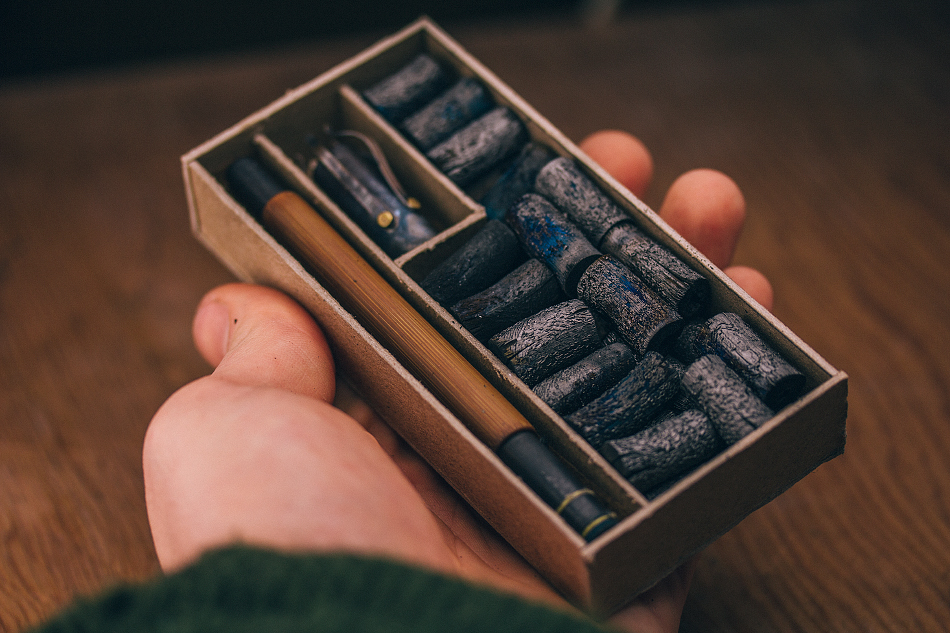
I'm not sure why there are deep vibrant blue on some of these charcoals... I assume it's some sort of thin oxide layer. They look exactly like the oxides produced on polished steel when it's heated, though.. to much lower temperatures than that used in this context. hmmm.
I think I'm looking forward to this even more knowing Star Wars is coming out this year...and this will probably be in my pocket by then!
So far I really enjoy the 1" charcoals.
Also, I am definitely adding a second, smaller, brass screw to the prongs. Silver solder is out, mechanical connections are the way to go!
And I think I will shorten the length of the bamboo segment of the stem by about an inch.
An update about the testers. The design is so close to being perfect... I feel it in my bones. It just wouldn't have made sense to rush the testers out while I was still making tweaks to the prototypes. Every new model gets better, but reveals small improvements that I had to explore! So, soon!
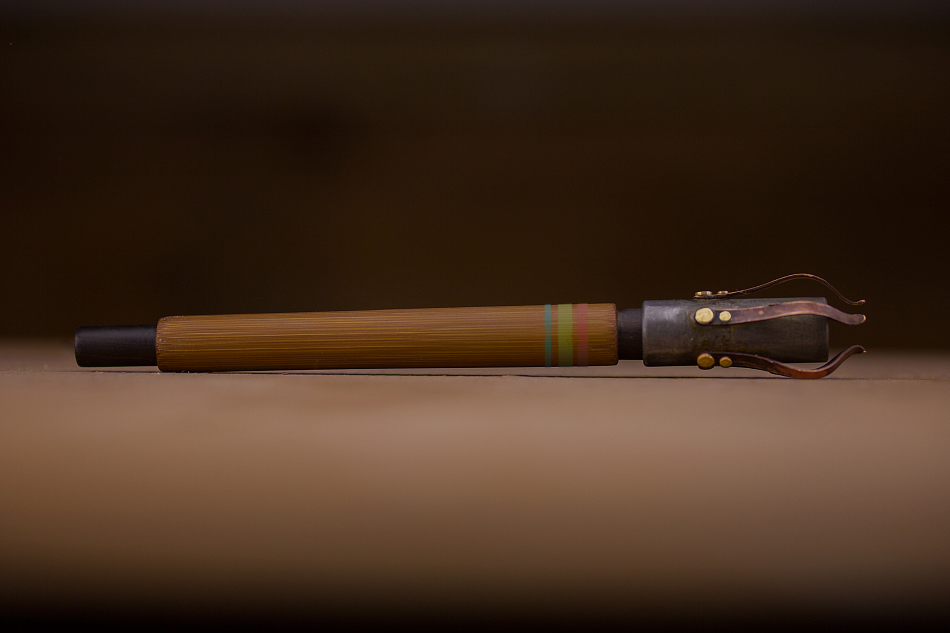
This vape keeps looking better and better.
Noticed you said you shortened the bamboo segment.
Not that this change is deal breaker haha, but I'm just wondering. Why make the bamboo an inch shorter? Better use of materials? Aesthetics? Better fit for the box?
