Arizer Solo

OF

Well-Known Member
Pipes is there a connector piece that can change the big male thingy to the smaller oem one or does it have to be a whole new piece?

I'm not exactly sure what you mean here Lady (go figure....) male and female gets kind of mixed up with these guys, most makers list the plug on the Solo charger that goes in to the socket on the Solo as female....because they're focused on the pin in the center of the socket on the Solo. If you want to make the cable end that's too big fit the Solo, this is what you want:
http://www.jameco.com/webapp/wcs/st...oductId=2113703&catalogId=10001&CID=PDF133CAT

Otherwise, as Pipes says finding the bitty male (socket) to bigger female (plug) converter is not so simple.

OF
 

Dreamerr

Always in a state of confusion and silliness♀
Oh my thanks for the confusion OF as I think pipes knew what I meant and now I don't know up or down. Let me move back to my language cause you always understand that. The thingy in the PA base is big. I want to put the stock OEM by pass PA into that PA base with big thingy. You got it now....pipes said I can't do that and if so thanks for trying to confuse me on purpose:rofl:.
 

OF

Well-Known Member
I want to put the stock OEM by pass PA into that PA base with big thingy. You got it now....pipes said I can't do that and if so thanks for trying to confuse me on purpose:rofl:.

Yes, if you want to put the small plug (called female.....) in the base Pipes sent me to test (same as yours I think?) you're SOL. The problem is the socket end.

Hopefully Pipes will address that, lucky for me I don't have it.....or I'd chop the little sucker off and replace it.

OF
 

Snappo

Caveat Emptor - "A Billion People Can Be Wrong!"
Accessory Maker
Yes, if you want to put the small plug (called female.....) in the base Pipes sent me to test (same as yours I think?) you're SOL. The problem is the socket end.

Hopefully Pipes will address that, lucky for me I don't have it.....or I'd chop the little sucker off and replace it.

OF
I've been using Tim's $olow-Mio PA/Charger religiously...love the whole package! Wonder if the plug will fit with Pipe's Solo stand?
 
Last edited:

OF

Well-Known Member
I've been using Tim's $olow-Mio PA/Charger religiously...love the whole package! Wonder if the plug will fit with Pipe's Solo stand?

Yes, it will. At least mine fits the Beta stand Brother Pipes sent me. It uses the same 5.5 X 2.1mm series connectors you find on the input of both Tim's and Pipes' regulators. Due to mechanical problems (now corrected I'm told) my Beta stand from Pipes won't mate up with my particular Solo, but clearly the rest do?

You should have no trouble substituting Pipes' stand for Tim's 'whip' cable and making lots of lovely vapor. If/when Pipes changes connectors on the stand you'll just have to use the whip as well, no big deal IMO.

Best wishes, enjoy your Solo and PA and seriously consider that little stand if it appeals to you.

OF
 

Snappo

Caveat Emptor - "A Billion People Can Be Wrong!"
Accessory Maker
Yes, it will. At least mine fits the Beta stand Brother Pipes sent me. It uses the same 5.5 X 2.1mm series connectors you find on the input of both Tim's and Pipes' regulators. Due to mechanical problems (now corrected I'm told) my Beta stand from Pipes won't mate up with my particular Solo, but clearly the rest do?

You should have no trouble substituting Pipes' stand for Tim's 'whip' cable and making lots of lovely vapor. If/when Pipes changes connectors on the stand you'll just have to use the whip as well, no big deal IMO.

Best wishes, enjoy your Solo and PA and seriously consider that little stand if it appeals to you.

OF
I've been wondering if Pipe can fashion the stand out of a solid grade Styrofoam with a taller Solo body side support...rather than a mold material. A plastic sleeve could be inserted to reinforce the strength of the body support. Due to the lighter weight, perhaps the bottom would have to be broadened also. A plastic sleeve could be used like a wall anchor for rigid support to fit in the plug. With a non-slip material patched to the bottom. This all would probably not be an at-home manufacturing project, but could be done at a laser molding outfit, i would think. Set up, materials, and manufacturing costs may not be that high. Waddya think, Pipes? :-)

Edit: On another topic... Observational theory: Solo effectiveness is greatly enhanced through convection. I've noticed that no matter the temp, first draw is always lighter on vapor than on follow-up draws. This, I feel, is due to convection adding/spreading heat throughout the pack and perking up the vapor. 2nd, 3rd, 4th draws, and so on are hotter due to convection, much more so than conduction. Conduction/radiation get the ball rolling, but convection really makes it all come together for big vapor.
 
Last edited:

thesoloman

Well-Known Member
I got @OF's package in the mail yesterday. I had the sticky and the washers applied to my solo in under 5 mins. supper simple installation, remove the 4 screews and then place the sticky pad on the botom of the solo, I then took a razor blaze and trimmed around the edges, and scored a hole in the center for air vents/charging. i then cut around the screews and assembled everything. Super Easy!!! thanks of OF i really am liking the new look/feel even with chipped corners.
Photoon9-21-13at802AM2_zpsaf1de56a.jpg
Photoon9-21-13at802AM_zps936ff79c.jpg
 

WaxOnWaxOff

Well-Known Member
The speaker or piezo went out on my Solo. Has anyone else experienced this? I'm not too bothered by it but it does tempt me to open it up and do some failure analysis.
 
WaxOnWaxOff,

Dreamerr

Always in a state of confusion and silliness♀
Did you try to turn it back on? It has a function to be on or off. I can't remember which button as I always have to guess, but it is either holding the right one till it makes noise or the left. It takes about five seconds.
 
Dreamerr,
  • Like
Reactions: Pipes

OF

Well-Known Member
The speaker or piezo went out on my Solo. Has anyone else experienced this? I'm not too bothered by it but it does tempt me to open it up and do some failure analysis.

You've no doubt just disabled it. Turn it on (no beep of course). Now, you know how if you hold the down button down for a few seconds it reloads the last session temperature? Do the same with the up key. Hold it down for a long five count then shut it off and retest (no confirmation for silent you know.....it might not give a confirmation beep).

I got @OF's package in the mail yesterday. I had the sticky and the washers applied to my solo in under 5 mins. supper simple installation, remove the 4 screews and then place the sticky pad on the botom of the solo, I then took a razor blaze and trimmed around the edges, and scored a hole in the center for air vents/charging. i then cut around the screews and assembled everything. Super Easy!!! thanks of OF i really am liking the new look/feel even with chipped corners.

You're very welcome, glad it went well for you. I agree, that thin rubber pad makes it much nicer to handle and it's just enough to keep the screws and washers from scratching stuff up.

I think we're on the right track here. Next step is a punch to knock out the hole in the center first. That can be done a lot neater and easier I think before mounting? I also bought a cheap punch kit like you'd use to 'adjust' your belt after the Holidays..... 5mm seems just right to punch out holes after the fact for the washers, much easier and neater than notches. I'm thinking we could make some simple brass tube punches so owners could have a throwaway punch. I think I know the 'right' rifle cartridge case for the job, under half a buck easy.

Next one I do I'm going to try freezing the Solo and rubber pad first, I bet it slices even easier and neater when stiff?

And, IMO most important, it seems to stop the breaking of the corners because we're no longer wedging the tapered screw into the hole but now compressing the plastic instead where it's much stronger. You can then patch the broken parts....but that's a topic for another day.

A couple more passes and we should be ready for some Beta testing???

Thanks again for the feedback, time to upgrade the package and try again I think. Now, to make a punch......

OF
 
Last edited:

thesoloman

Well-Known Member
@OF Damn i should have thought about the punch first! I could have been much neater. but i was just going to get her done lol. If i end up doing the other one i will make it much neater.
 

Snappo

Caveat Emptor - "A Billion People Can Be Wrong!"
Accessory Maker
@OF Damn i should have thought about the punch first! I could have been much neater. but i was just going to get her done lol. If i end up doing the other one i will make it much neater.
Paper hole punch...Office Depo!
 
Snappo,
  • Like
Reactions: OF

OF

Well-Known Member
@OF Damn i should have thought about the punch first! I could have been much neater. but i was just going to get her done lol. If i end up doing the other one i will make it much neater.

Not to worry, it's a work in process as they say. It's easy enough to peel the rubber off, not so easy to get the adhesive off (tough stuff) but 'doable', then you can take another try.....I've done it several times. I wanted a 'reality check' though.....which you delivered in spades. Thanks again for that, time to press on with the project.....as the spirit moves of course.

Edit: Hey, I just realized, you posted two Solos.....I think I just found a test pigeon for the next version........

Paper hole punch...Office Depo!

Could be, although the ideal size is about .20 inches (smaller than Office Depot). I also found prepunching harder to deal with than putting an oversize sheet on, punching the holes over the screw bumps and trimming in place.....all subject to change of course.

The 5mm punch I bought (part of a sub ten dollar set) does a great job 'by hand' but so would an edge sharpened brass tube. My thought is to size a .223 Remington case down in the neck and cut a chamfer on the lip. Should take under a minute each and the brass is basically free. It only has to cut four holes in soft rubber, hardening shouldn't be needed but's easy enough to do if so. Being a copper alloy you'd just torch it until it glows and let it slowly air cool (opposite of iron alloys).

A bigger hole in the center is probably better punched. Placement is not so critical. Or not.

Fun stuff, and I really do like the 'feel' of the rubber on the bottom. It also sits on the desk with a little more 'authority' if that's the right word?

OF
 
OF,
  • Like
Reactions: Snappo

MassEffect

New Member
Total bullshit. I received my solo on the 17th from Massdrop. Model, M1B11. Since i was out of town, i didnt get to open and use it until yesterday. I first noticed that something was obviously loose inside and when i pressed the buttons, that led display cover would press in slightly. I charged it up and tested it out. Worked really good except i could barely draw(which i have read a lot about). No problem... Until my second session when the solo got so hot that it burned my hand. I took the cap of and noticed that the delicate chamber housing cap was screwed all the way down by 4 screws but wasnt snapped into the clips on each side. So i thought maybe it just needs to be pushed down some. I lightly pushed down but obviously it got damaged in shipping and handling or wasnt assembled right. It wouldnt budge near enough to snap into the clips and it remained loose(was still able to wobble side to side). Because it does not reach down to snap into the clips, there is a gap between the chamber housing cap and the housing itself. I assume a lot of heat is escaping through that gap instead of being insulated inside that chamber housing. I also think thats effecting the temperature that the solo is maintaing and emanating. It might or might not be massdrops fault but this will definitely effect my feelings. I felt there was absolutely no worry about receiving a defective product as long as i was patient. I will never know if this happened during assembly, shipping or massdrop's handling. Hopefully Arizer will acknowledge my purchase and honor a replacement since the screws are probably set totally wrong and or stripped. Who knows if the air path can even possibly be proper. What am i going to do, pay the damn shipping from Miami to Canada and back.....probably going to be another month till i can use what i payed for a month ago. Boooo..... Of course any help would be appreciated. I do not want to take the whole housing apart if it messes with the warranty. (I even unscrewed the four screws to try to get the cap to snap under the clips, still didnt work)I assume some wires or something are in the way. But the housing threads for the screws have to be totally messed up... i can just tell by looking at it. I have aTerrible pic because i only have a macbook to take the photo but i dont know how to upload images. You can clearly see how the cap is not clipped in even though the screws are set all the way in. What a disappointing mess... Never even seen this problem on this thread and ive been reading posts for the past two months.
 
MassEffect,
  • Like
Reactions: OF

Snappo

Caveat Emptor - "A Billion People Can Be Wrong!"
Accessory Maker
Total bullshit. I received my solo on the 17th from Massdrop. Model, M1B11. Since i was out of town, i didnt get to open and use it until yesterday. I first noticed that something was obviously loose inside and when i pressed the buttons, that led display cover would press in slightly. I charged it up and tested it out. Worked really good except i could barely draw(which i have read a lot about). No problem... Until my second session when the solo got so hot that it burned my hand. I took the cap of and noticed that the delicate chamber housing cap was screwed all the way down by 4 screws but wasnt snapped into the clips on each side. So i thought maybe it just needs to be pushed down some. I lightly pushed down but obviously it got damaged in shipping and handling or wasnt assembled right. It wouldnt budge near enough to snap into the clips and it remained loose(was still able to wobble side to side). Because it does not reach down to snap into the clips, there is a gap between the chamber housing cap and the housing itself. I assume a lot of heat is escaping through that gap instead of being insulated inside that chamber housing. I also think thats effecting the temperature that the solo is maintaing and emanating. It might or might not be massdrops fault but this will definitely effect my feelings. I felt there was absolutely no worry about receiving a defective product as long as i was patient. I will never know if this happened during assembly, shipping or massdrop's handling. Hopefully Arizer will acknowledge my purchase and honor a replacement since the screws are probably set totally wrong and or stripped. Who knows if the air path can even possibly be proper. What am i going to do, pay the damn shipping from Miami to Canada and back.....probably going to be another month till i can use what i payed for a month ago. Boooo..... Of course any help would be appreciated. I do not want to take the whole housing apart if it messes with the warranty. (I even unscrewed the four screws to try to get the cap to snap under the clips, still didnt work)I assume some wires or something are in the way. But the housing threads for the screws have to be totally messed up... i can just tell by looking at it. I have aTerrible pic because i only have a macbook to take the photo but i dont know how to upload images. You can clearly see how the cap is not clipped in even though the screws are set all the way in. What a disappointing mess... Never even seen this problem on this thread and ive been reading posts for the past two months.
Do not attempt any repairs or inner inspections further. It is defective, possibly by factory assembly, or tampered with somewhere between Arizer and/or at Massdrop. This did not likely happen in route during shipping. Call Arizer for instructions. You needn't go into detail beyond the fact that the whole unit overheats, screws are not in holes, and the insides are loose. Sorry to hear this happened to you. Good luck!

EDIT: You are not expected to open the unit and reattach wires or screws or realign any internal parts (nor should you be asked to), whether you are an expert or not. Doing so should void your warranty. Contrary to our much respected fellow members who could put Humpty Dumpty back together again and enjoy it, out of the box, the Solo you received is not in acceptable condition.
 
Last edited:
Snappo,
  • Like
Reactions: OF

OF

Well-Known Member
Until my second session when the solo got so hot that it burned my hand.

I took the cap of and noticed that the delicate chamber housing cap was screwed all the way down by 4 screws but wasnt snapped into the clips on each side. So i thought maybe it just needs to be pushed down some. I lightly pushed down but obviously it got damaged in shipping and handling or wasnt assembled right.

Sorry you seem to have temperature problems, that definitely needs attention.

However, the clips not latching is very common and no cause for concern. I think the clips are only there to keep the heater assembly together until the four mounting screws are in place. I've opened four, 3 had clips not latched. Putting the screws in unlatches them, actually, if you carefully disassemble it and remove the assembly. The screws control things, nothing to worry about there.

Are you sure the heat failure came before messing with the oven assembly? The reason the latches are there is to protect the four leads up to the heater. The sense leads are very thin and frail, breaking one would cause the heat to run 'wide open' I believe. As a guess, that's what broke on you, one of those two tiny wires from below up through the gap on the left (looking at the front panel) side. You can just see them near the latch on that side?

The fact that it worked OK once is telling, it eliminates lots of potential problem areas.

BTW, rattles happen sometimes too. I've had it happen. My thought there is it might have been the keys on the front panel? Removing the battery pack, making a few measurements and putting it back together seems to have fixed it at any rate.

Bummer that the lack of control demands service, IMO the rest is not really an issue.

Good luck with it.

OF
 

Pipes

Addicted DIY Enthusiast
Accessory Maker
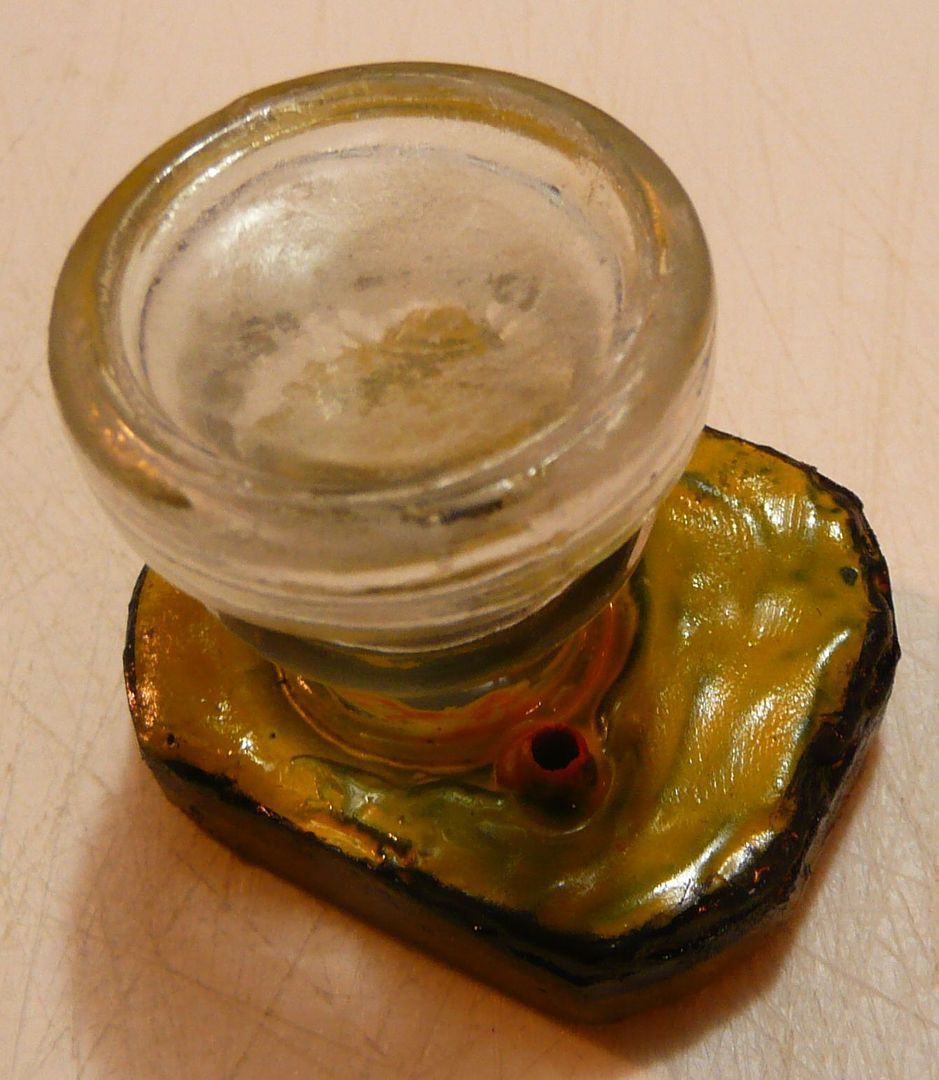
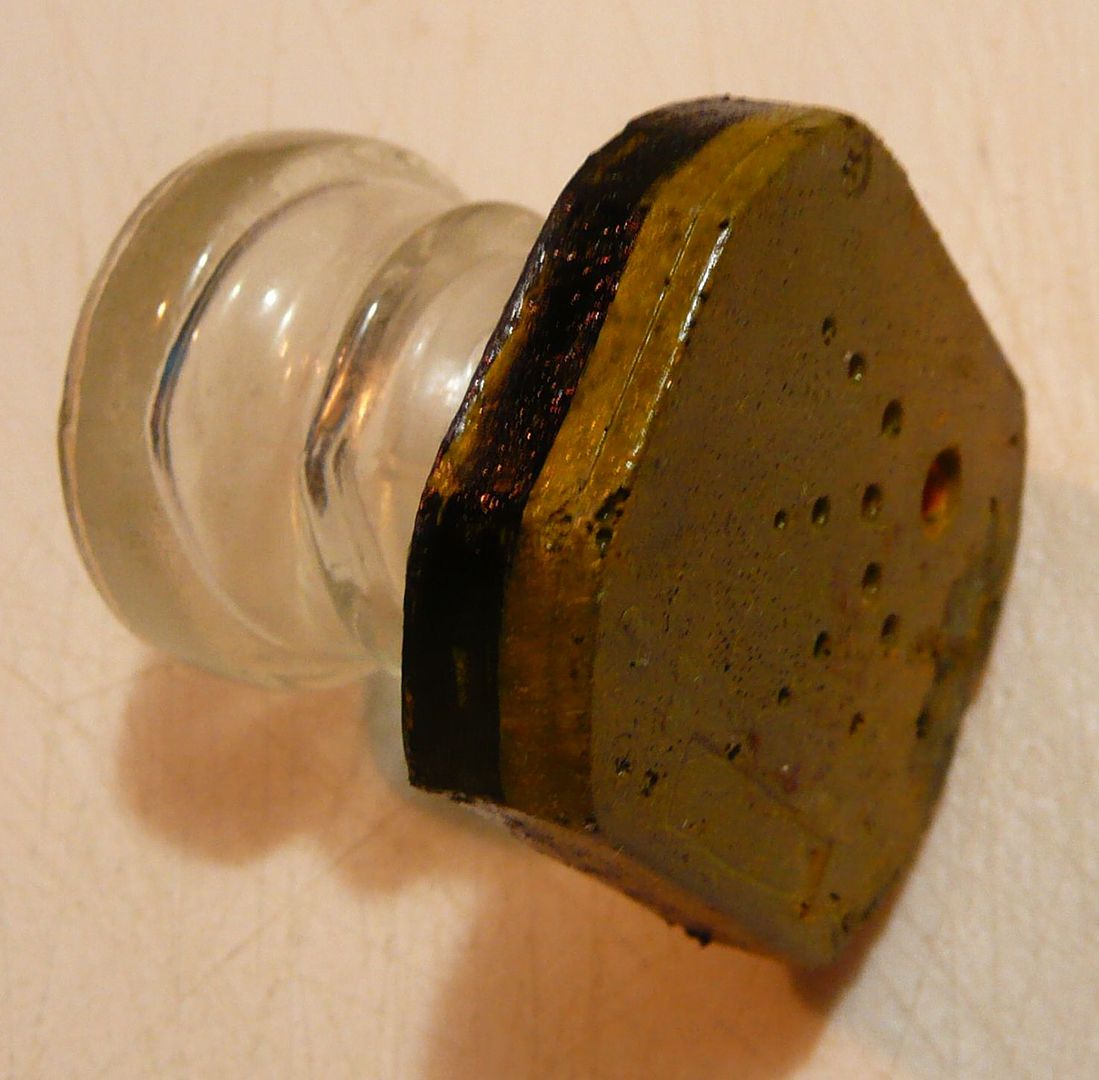
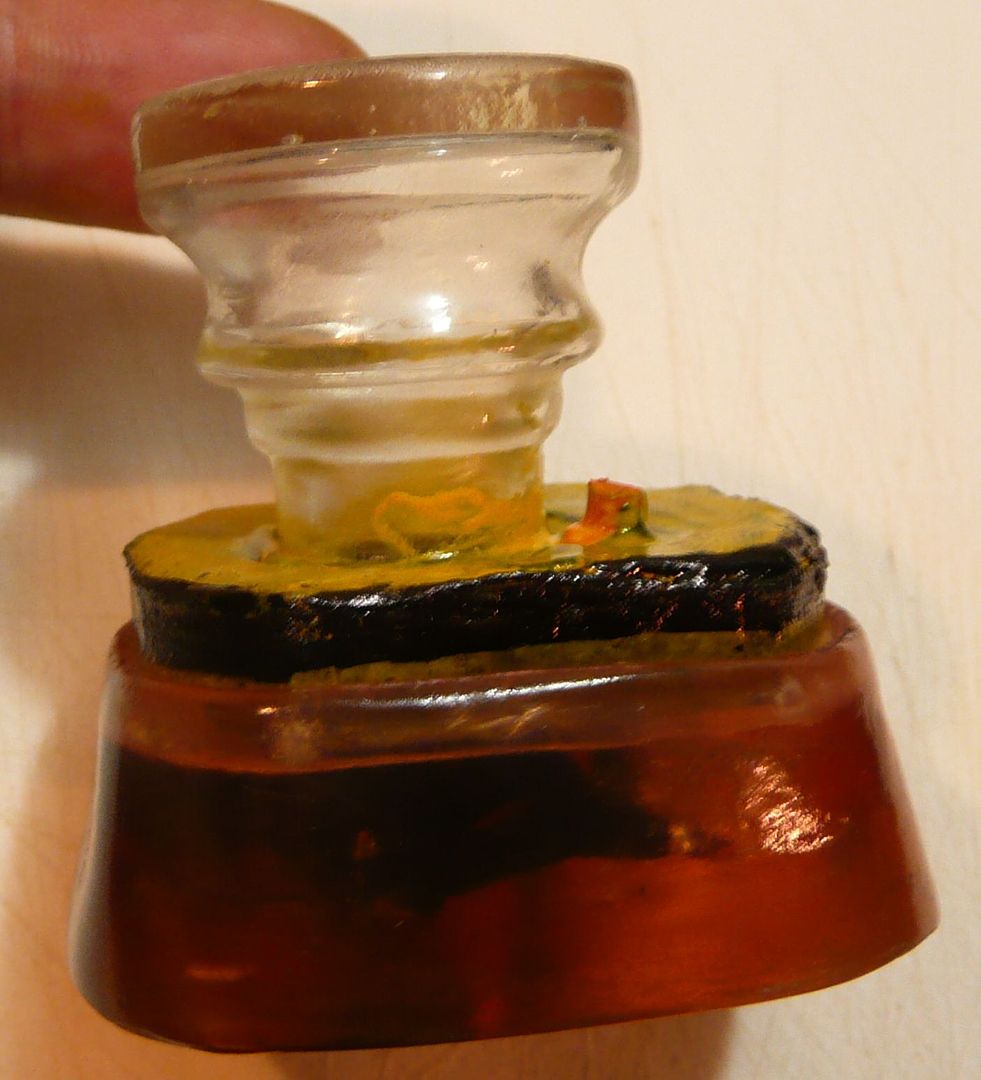
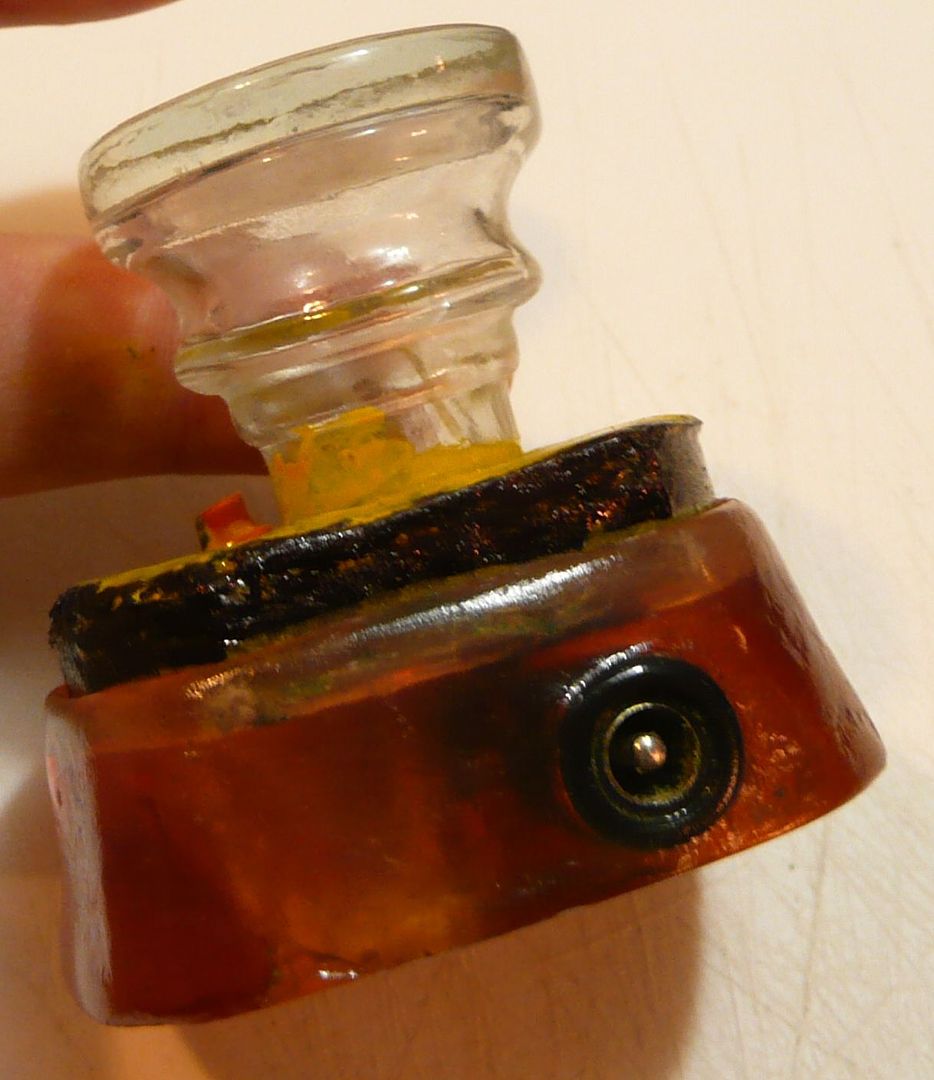
Hey all, made a cool jig for myself today. I was using my Solo for fitting the stands. Wanted to avoid the excessive wear and tear on my poor Solo with all the adjusting and such. It also checks the power plug to ensure straightness.

SoloCastJig2_zps67cff914.jpg
SoloCastJig1_zpscdbb649b.jpg

SoloCastJig3_zps0a202643.jpg

SoloCastJig4_zpsbdae84eb.jpg


The black and yellow colours indicate straightness and fit. The glass top is actually just from and old spice container top stopper.


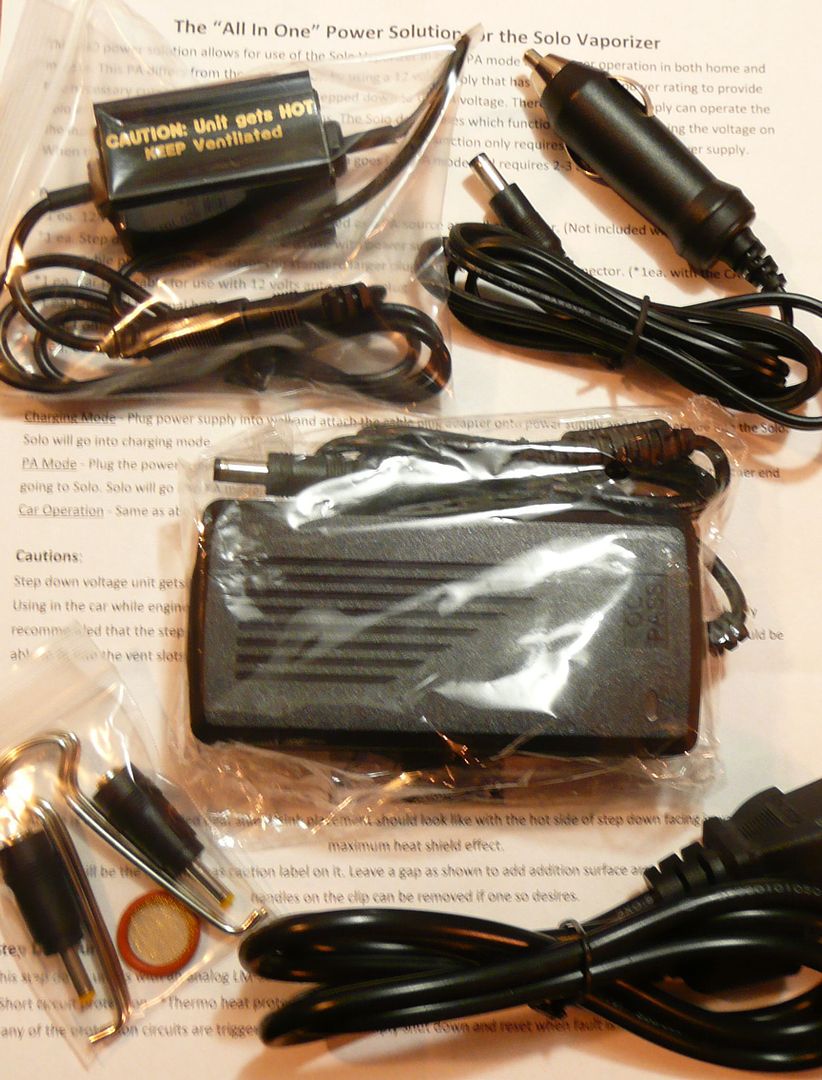
On a note regarding the AIO PA, here is a picture of the current stuff included in the kit:

SoloAIOPackage_zps587e5230.jpg


I have taken the liberty and pre-installed the external heat clip and put the detachable push springs in a bag with other complimentary items. O ring and screen as folks can always use a spare.

Also, I am introducing the stand as an option for the AIO as well. An AIO + I guess would be the phrase.?
I am charging an additional $15 for the stand when purchasing an AIO. These customers will take priority on any inventory. Also, any previous adopters, I will let them go for $10 which works out to basically splitting the shipping.
For stand buyers only the price will be $20 once I get some more inventory happening. This will be the same for the OEM compatible version with 1.7mm plug. (couple weeks)

Cheers all,
 

MassEffect

New Member
Its regulating temperature but after half way through one session the top part of the solo becomes extremely hot. There is a gap between the housing cap and the housing itself, where the screws go in. You can actually see the screws reaching across the gap as best they can into the housing. When i did the three burn offs I noticed that it got fairly hot but i did it over the extent of a few hours so i kept letting it cool down. Once i used the stem, thats when it started heating up excessively. It does not combust but the aluminum cap gets very hot, enough to burn me. Right when i took it out of the box and noticed the wiggle inside, i put my pinky into the chamber and was able to wiggle it some. I do not expect thats how it would function. I assume it has to be very sturdy to accept the stem repeatedly. If there is a gap, doesnt that totally mess up the air flow? I never thought the clip thing was an issue until i realized there is a gap. Its a total bummer because i just had a difficult tooth extraction and in no way can i combust because the tissue wont grow back to except the implant and bone grafting. The doc says to just take some tylenol(wtf)... My gums are stitched together and it couldnt be anymore painful or annoying. I sent arizer an email but i havnt set up the warranty yet because i dont know whether to sign up with my name or my fiancees. She bought it through massdrop with her card, for my bday. Hope they get back soon, real soon. Thanks for the swift responses. *Fingers crossed*
 
MassEffect,
  • Like
Reactions: Snappo

poonman

Well-Known Member
i put my pinky into the chamber and was able to wiggle it some.

That is def. not right ,
You need to send it back for another one .

RE ; dental surgery
If you NEED to smoke a joint ,
Try to cover up the spot with some Gauze as to protect it from contact with the smoke . ( I know it's
not perfect ) . Then afterwards , RINSE your mouth out with warm water and salt .

Hope that helps .
Good luck with your tooth and Solo .
 

OF

Well-Known Member
That is def. not right ,
You need to send it back for another one .

Not having seen it, I can't agree with that. The OP did say"was able to wiggle it some" which covers a lot of ground. For instance the seal (what he most likely poked pinky in, right?) is in fact loose in the cover? At least at times. And even though mine is 'rock solid' it still doesn't feel that way when I poke a finger in due I think to the profile of the side walls. Nor does not being solidly mounted effect operation past getting stems in and out.....which seems to be going fine?

Normally, now that we have additional information, I'd say it sounds even less defective to me. It's going to get hotter if you hit it for sure. If it's not combusting, it's probably not really "too hot". Since it no longer seems to be running out of control, normally I'd say let's start troubleshooting this in the hopes it's new owner jitters (face it the record of Solos out of the box is extremely good, unlike many others). But since the specter of a defective/damaged unit has been raised I suggest a trip to the shop is the best plan as well.....even if for different reasons. It may not be necessary but it's probably the best move from here, it will get a 'fresh start'.

OF
 
OF,
  • Like
Reactions: poonman

Snappo

Caveat Emptor - "A Billion People Can Be Wrong!"
Accessory Maker
Not having seen it, I can't agree with that. The OP did say"was able to wiggle it some" which covers a lot of ground. For instance the seal (what he most likely poked pinky in, right?) is in fact loose in the cover? At least at times. And even though mine is 'rock solid' it still doesn't feel that way when I poke a finger in due I think to the profile of the side walls. Nor does not being solidly mounted effect operation past getting stems in and out.....which seems to be going fine?

Normally, now that we have additional information, I'd say it sounds even less defective to me. It's going to get hotter if you hit it for sure. If it's not combusting, it's probably not really "too hot". Since it no longer seems to be running out of control, normally I'd say let's start troubleshooting this in the hopes it's new owner jitters (face it the record of Solos out of the box is extremely good, unlike many others). But since the specter of a defective/damaged unit has been raised I suggest a trip to the shop is the best plan as well.....even if for different reasons. It may not be necessary but it's probably the best move from here, it will get a 'fresh start'.

OF
OF, respectfully - This is very simple. The NEW car was not delivered to the customer in acceptable condition. The carburetor is not aligned to the manifold correctly, and the bolts are loose. The engine runs, but it is overheating (but not catching fire)...the hood is too hot to the touch! The engine shakes and rattles under the hood (engine mounts not set).

Fuck troubleshooting. Send the fucking car back to the dealer!!!
:bang:
 
Last edited:

poonman

Well-Known Member
I think we're all in agreement to send it back .
I would be interested in knowing ' How ' a warranty is processed with a Massdrop purchase .
Is it thru Massdrop ? or thru Arizer ?

Massdrop took a long time to deliver it , I hope it doesn't take as long to warranty it .
 
poonman,
Top Bottom