Discontinued The Timber Elite by Vapwood

Easywider

Simple is the way
@Easywider I see you are using the basket screen are you finding any benefits over the normal screen mesh? Wondering if you find the little extra restriction they offered was something you found helpful or not? I go back and forth on my preference using them.

I don't want it too restrictive and find too much and you get into fighting it for a hit. Too less can lead to hot spots but it also allows some killer hits once you adjust the breathing rate.

I'm a bit back and forth myself, I find I get a somewhat better performance ( more even roast ) with the included basket screen with the larger mesh. I can tamp the "espresso puck" a bit tighter to decrease flow a bit. I guess the rimmed ones just seem to fit my routine better. I have about 20 of them and I store them in a baby food jar with iso. I just swap the baskets every few days for a fresh one from the jar. Another thing is I like to use a spike for clearing the stems and I'm always moving the position of the rimless style screens. So I go back to them every know and then but usually get back into my routine.

@Easywider An Elite / Classic vape station is something I'd love to have time to work on, even for personal reasons. Nice set up!

Art this beautiful most certainly needs an equally nice place to be displayed :nod:

@bossman I know you want another DNAc :brow:

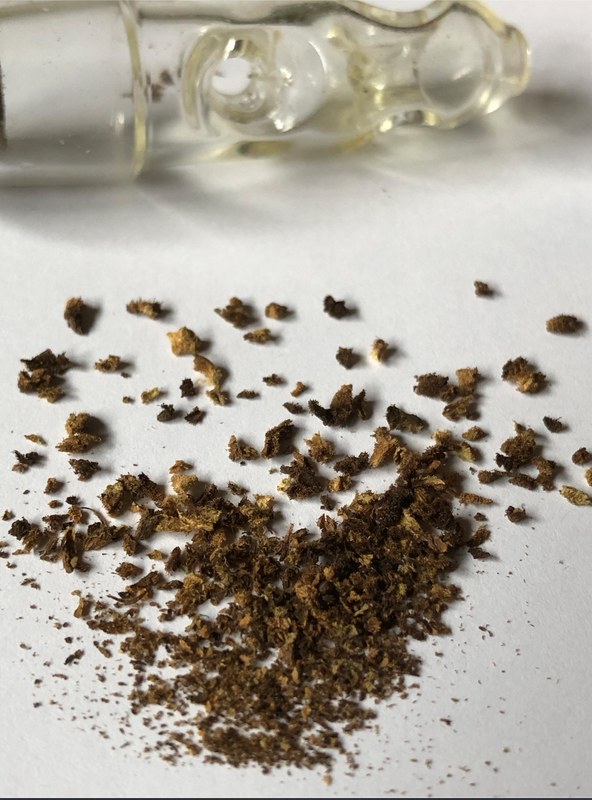
I must say the ergonomics on this device are just amazing, It's like sipping on a flask but better. The flask of the civilized age.
 

P.A.M.

Vapo Rising
It's like sipping on a flask but better. The flask of the civilized age

Quite interesting , I feel the exact same while outdoors or indoors using the Elite. That flask like feeling isn't in the Classic. Cool to hear someone else shares the flask/civilized/elegant/class feel I get! Cheers man! Happy you like the Elite , it will still get better with a bit more time with it , haha. Can you believe that ? @nonbeliever now does , lol

I toned down my cold ohm to .312, Elite Cool trend , 42watts, using a dome screen inserted about 1/8" to 1/4" deeper then the rim . I had it sitting at the edge and found outer circle stayed abit lighter. Recessed bowl screen a tad and now all roast equally and evenly, no stirring , like a freaking charm !

Pre-load
IMG-4081.jpg

Loaded
IMG-4082.jpg


So perhaps a tip for people new to Vapwood and experiencing hot spots or odd roasting ; try different screens, different depths, you will find a groove that works for you, there is no wrong here , it's what I did with my LB Classics. Always good to step out of the box and try a new technique every now and then . Mike's vaporizers are very versatile in how they can be used .

I was just thinking about the famous vapor lung , whoa, I'll have to pull a vapechute with the Elite some day , that'll be as milky as @Easywider 's bottle . Nicely done !
 
Last edited:

Bravesst

Full Steam Ahead
Manufacturer
Quite interesting , I feel the exact same while outdoors or indoors using the Elite. That flask like feeling isn't in the Classic. Cool to hear someone else shares the flask/civilized/elegant/class feel I get! Cheers man! Happy you like the Elite , it will still get better with a bit more time with it , haha. Can you believe that ? @nonbeliever now does , lol

I toned down my cold ohm to .312, Elite Cool trend , 42watts, using a dome screen inserted about 1/8" to 1/4" deeper then the rim . I had it sitting at the edge and found outer circle stayed abit lighter. Recessed bowl screen a tad and now all roast equally and evenly, no stirring , like a freaking charm !

Pre-load

Loaded
IMG-4082.jpg


So perhaps a tip for people new to Vapwood and experiencing hot spots or odd roasting ; try different screens, different depths, you will find a groove that works for you, there is no wrong here , it's what I did with my LB Classics. Always good to step out of the box and try a new technique every now and then . Mike's vaporizers are very versatile in how they can be used .

I was just thinking about the famous vapor lung , whoa, I'll have to pull a vapechute with the Elite some day , that'll be as milky as @Easywider 's bottle . Nicely done !
Exactly how I load @P.A.M. ! That's about .1 or maybe a bit less of dried herb. That gives me the smoothest, milkiest results. I've done all sorts of stuff with good results - deeper, rimmed, glass lined (which allows me to narrow the diameter of my draw, I would think increasing suction PSI). When I get it just right, which is pretty much every time, it almost does feel like a sip on a flask. It's like painting your tongue with the milky smoothness.

I was gonna take pics, but that would be jumping the gun. Done hand sanding (love the sponges), and I'm ready to apply beeswax to 25 Classic / Elites, about a dozen Walnut Classics already beeswaxed, and another dozen Elites or so will wait. This is the batch that will get photographed properly, as it is the best looking batch to date, and I have just about everything.

Once customers are paired to pre-assembled units, I will start the assembly process, testing as I go. I will do some sample case thermal analyzer tests once again (my results have been pretty consistent here), and install Elite software settings on each device. I will do my absolute best to be as consistent as possible. Consistency, doing everything the same exact way every time, is the key to the best possible results. With consistency, comes reliability, what we all want and expect from our high end vapes.
 

Easywider

Simple is the way
I've been getting some Mighty even ABV lately without stirring, I just rotate the stem about 1/4 turn after each hit.

This is a stem start to finish @ 385 , Top of the bowl is just a tiny bit darker then the bottom.
Screenshot-2019-05-01-13-02-38.png


Every now and then I get really freaked out when I hear a rattling noise from my unit. Heart stops for a second and then I remember I put toothpicks in battery compartment. Great little place for when you need a poker !
 

P.A.M.

Vapo Rising
n I remember I put toothpicks in battery compartment. Great little place for when you need a poker

I do the same but with round Bamboo BBQ skewer. I cut the pointy end the length of the battery compartment . It's longer then a toothpick and long enough to insert in the tube and use the other end to jab out or place the screen ;)

Ive been using a sturdy basic flat circle pipe screen (from a Halifax seller on eBay, 10cents a screen) , I squeeze it in the tube creating the dome bowl , it doesn't move too much once in place . I have r tried to stock screens with the Elite yet, they are my fav for the Classic . My current screen remains clean for days it seems , sign of good full extraction . :cool: Nice abv @Easywider
 

Bravesst

Full Steam Ahead
Manufacturer
Smooth and refined is a great way to capture the changes that have taken place. I got beeswax on 10 of the 14 Elites I need to complete. Tedious work, hadda stop. These haven't been buffed on the buffing wheel (trade secret just slipped out), but the smoothness delivered by the combination of belt sanding and hand sanding sponges, and finally 400 and 600 grit sand paper, but that is only the final step. These guys have been meticulously paired - back plate, cover plate, and bottom cap. You can see the cover plates sit slight proud in this design, creating a very interesting look. There are another dozen Elite blanks, cut to size and single mortised, that are on deck. This is just one quick shot. Friday or Saturday, I'll finish them all up, buff, and take a bunch more.

20190501-164207.jpg
 

Bravesst

Full Steam Ahead
Manufacturer
Good Morning,
Another non shop day. I am pretty happy with progress up to this point. I am at Beeswax, and that is saying a lot. Now, it's a simple matter of assembling 50 units. My focus will now turn to what has to happen to make assembly easy. Final assembly prep is quite involved. It is a kind of a check list to make sure that as much as possible is done, prior to installing the coil, chip, etc.

FINAL ASSEMBLY PREP CHECK LIST
1. Coil formed and mounted to disc
2. Vent holes drilled
3. Board wired up, ready to mount to cover plate
4. Back plate finalized, perfectly fit to unit
5. Bottom cap finalized, interior chiseled / filed out
6. Battery compartment sanded smooth / veneer floor
7. Cover plate finalized, buttons tested
8. Coil compartment filed, sanded smooth
9. SS foil sized to coil compartment

Sounds pretty straightforward, but if any of those steps are neglected, assembly time can really increase. Having a perfectly formed coil that can drop right in the unit with minimal adjustment is key. Sanding, filing the necessary parts of the interior of the unit is also quite time consuming. Being conscientious, keeping up with the finish level of the interior, can shave many minutes off final assembly as well (battery comp, coil comp, chip comp, bottom cap, taper). Almost there with this batch.

I really don't have a marketing strategy, other than to get more Elites out there as quickly as possible. Let's hope the Elite is going to need much, other than some use and exposure. It's a superb combination of skills and technology, and the result is a very pleasurable experience. Lil' Bud Elite, tell a friend...
 

Alex3oe

Accessory Maker
I'm fighting a cold so been using the elite with the Magic flight orbiter today. This little setup is producing some excellent vapors. Haven't seen much discussion on use of Elites with water.
Anyone else try there's thru water?

Only glass without water :)

And much via different j-hooks, as I run completely out of weed once more and got only hash left. Fixed with a clip and a leather band for one-hand vaping.


May I ask which adapter you guys are using?
I've the Milaana 2 water adapter from vapefiend, its 19mm. I'm feeling as it could be some longer. Measured nearly 29mm down to the screen of the Elite, so there would be lot's of space. All is working great with this short adapter, but I need quite some temperature (from 195° up to 215°), Punch is set to 9 and a bowl costs between 20% and 25% power. I've ordered some cheap 19mm male-male adapters from dh, these should fit, at least with some adjustment. Hoping so save some energy with em.
 

muunch

hotboxing the cockpit
Measured nearly 29mm down to the screen of the Elite

Thank you for posting this!! I have began running TCR back with Elite Hot, and added Preheat back in, because I felt like TCR was taking way too long to ramp up... I had a feeling distance between load/heater was why and think this confirms it.

The thing is, the heater response is very rapid, but finding a middle ground between quick ramp up (leads to scorching/hotspots) and the slow consistency of TCR is a little more of a balancing act than anticipated.

I am appreciating the multiple profiles of the Elite the more I use it. Watts, and Boost have been seeing use lately...

I have been feeling kinda crappy with sinus/allergy issues so mostly have been using the xl8r shorty stem, which does make it a bit harder to judge the vapor from it's temperature, leading you to rely more on taste.
 

Bravesst

Full Steam Ahead
Manufacturer
Got home a bit early and got all units beeswaxed and buffed. It is now time for mega-assembly. All told, I've got about 40 units pre-assembled with beeswax finish, a combination of Classic and Elites. This is a job I'll probably never like, using the heat gun, oven mitts, gloves, just soaking the beeswax into the wood. Once buffed on the wheel, the wax really hardens, forming a long lasting protective seal. The better it's buffed, the better the wax seals, protects. The buffing wheel is a huge time and labor saver.

@muunch
If my throat, lungs are sensitive, a glass lined long tube does really super smooth things out for me. I agree about the multiple profiles, nice to have Boost and Watts. Lately, I've been going at 25 watts, preheat on 5, never really touching any settings, and controlling everything my breath, while getting my best sessions yet.

There is something else the low wattage settings have led to. I think this happened subconsciously, and I'm not say that I've never used a bit of this methodology before, but let me try and describe what I'm doing.

I'm using a long glass lined cherry tube. I can pull slowly and *restrict* air flow with the lips, creating a really powerful suction (negative PSI), which translates into complete control of the vaporization process. I can start and stop it on a dime, and at the vaporization point (in the load) the draw is wide open, not restricted. If I were to mechanically restrict things, the control and total effect would be lost. It has to happen with a narrowing of the lips, and with all sorts of bio feedback. It's almost a siphon effect that creates the perfect flow. I really feel like I'm sipping on a warm milk shake when doing this. Not sure if I am describing it right on, and many of you may already draw this way. I am just amazed at how great it pairs with low wattag and a long glass lined tube. Like I said, this wasn't even intentional, more instinctual. And I can get an awesome session without the increased suction. Maybe it's a bit of a habit, a quick way to pull lots of vapor.
 
Last edited:

P.A.M.

Vapo Rising
Lots going on in this photo . Pre-roast / after-roast piles, no stir! settings can be seen on Elite DNA Display , from start to finish at 410 F.
Notice how I "punched" my flat screen to make it look like the heater screen :) liking the results so far.

Vape On !
IMG-4088.jpg
 
Last edited:

HerbieVonVapster

Well-Known Member
Some real beauties there. Where are the air holes in these guys located.

Also what's going on with this one? Looks like it has the fire button top mounted instead on the bottom?
Is that the one we had talked about to for testing out this change?
20190503-065517.jpg
 
Last edited:

Bravesst

Full Steam Ahead
Manufacturer
Hey All,
The flipped cover plate was an accident. With this design, I should have no problem flipping it back in the final assembly. The problem with flipping the fire button is the 14 gauge wire (vs 18) that will now have to travel the length of the board (behind the board), necessitating a deeper compartment, wider unit. It's not impossible, but not part of this design.

The vent holes are drilled after finish is applied, so basically right at this stage. I can make it part of final assembly as well. The 3 choices that come very close in performance are 3 same-side 5/64" (15/64) or 3 same side 1/16" (12/64) vs 2 opposite-side 3/32" (12/64).

Not much else changing, other than the short cover plate. I'm expecting an order of custom buttons that will dress the plates right up. For this weekend, it's going to be about coil prep, board prep, in anticipation of the final assembly process.
 

Bravesst

Full Steam Ahead
Manufacturer
Just shopping for parts. One of the hats I wear is *buyer*. It's kind of amazing what goes into fueling an active Lil' Bud shop. While keeping a quality supply of wood is most important, it's probably the easiest thing to stay on top of. There are also tools that need to be maintained, replenished (think sandpaper, drill bits) that make up a large part of my restock budget.

I search for bargains, and do comparison shopping. It's important to me to keep pricing as low as possible, but the Elite comes packed with over $130 worth of parts, which are some of the most expensive items on the list below. Here's an idea of some of the shopping I do, buying something just about every day. It's kind of a juggling act, staying ahead of what I need based on sales trends.

Wood: cherry, walnut, maple, koa - local lumberyard, ebay
Battery terminals - Digikey
Hardware: 11 screws, 2 washers, 2 nuts - Bolt Depot, Microfasteners
Magnets: 4 - K & J Magnetics
Coil Mesh - Alan
SS Foil - Ebay
18 Gauge Wire - Ebay
14 Gauge Wire - Ebay
Butt Connectors
Ring Connectors
Solder (lead free) - Ebay
3 Amp Switch - ATI
DNA75c - Evolv
DNA75c Screen Holder - Shapeways
Roasting Tubes - Alan
Buttons - Alan
Batteries - IMR batteries

Ongoing supplies
Sandpaper (120 to 600 grit)
Drill Bits (6)
Router Bits (4)
Beeswax

Some of the larger purchases this year
Drill Press
Caliper
X / Y axis vice
Trim Plunge Router
Multiple File Sets
 

Bravesst

Full Steam Ahead
Manufacturer
Back spazzed out on me. Happened yesterday AM, got a bit worse today. I think it's from standing at my nieces track and field meet for a few hours in the cold on Friday night. I feel like a big wimp.

I soaked all my glass stems in almond milk, about 6. They were embarrassingly caked with resin. I took about a cup down to about half a cup on a low boil. This cleaned them right out. I put the mixture in my Ninja to get rid of any particulates, and simmered once again. I threw a shot or so in a cup of coffee, and unfortuantely all I could taste was resin. I drank it anyway, hoping there would be some pain relief. It may have helped, feeling a bit better. I still have about 85% of it. Not sure if I *feel* it, as I'm hitting on my nice clean tubes. I personally, don't seem to get acute pain relief from vaping, nor did I with smoking. Unless it's happening and I just don't realize it (God forbid).

I worked inside, pretty much sitting, forming much needed coils. Right now I have 20 plus coils ready to go. I also went through my list of customers. Of my 50 plus units being worked on, 20 are sold. This includes a couple of replacements. That's 12 Classics and 8 Elites all told. These units will now be assembled and shipped, hopefully by mid to end of May. Any units purchased this upcoming week will be included in this batch. The cut off will be mid May.

Anyone who's been waiting for awhile, I apologize, but now is my time to completely catch up. By maintaining a decent supply of units in pre-assembly will allow me to fill orders much faster. The key now will be to keep the pre-assembly stock high. Right now it's at what I would consider 30% full. My goal is to have 50 Classics and 50 Elites in stock, broken down into Maple, Cherry, Walnut, possibly Koa and Figured Waple (walnut and maple).

EDIT: BTW, clean tubes are sweet! Ripped on 24 watts, 5 preheat.
 
Last edited:

P.A.M.

Vapo Rising
I was going to quote the "shipping timeline" progress, but nah,... :lol: for those who are just joining in , Mike ships every so often so don't worry, you'll get your goodies. It's best not to pay attention to his tentative shipping dates and get too excited, an artist / craftman who works at mike's already good rhythm can't be rushed further nor will he will let himself be rushed either . Tentative dates are still fun , I still get excited even when don't have any coming..
I've been training my Elite . Giving my HI Log attention , letting the Elite watch .. lol.. desktops and portables at its finest
 

Bravesst

Full Steam Ahead
Manufacturer
I was going to quote the "shipping timeline" progress, but nah,... :lol: for those who are just joining in , Mike ships every so often so don't worry, you'll get your goodies. It's best not to pay attention to his tentative shipping dates and get too excited, an artist / craftman who works at mike's already good rhythm can't be rushed further nor will he will let himself be rushed either . Tentative dates are still fun , I still get excited even when don't have any coming..
I've been training my Elite . Giving my HI Log attention , letting the Elite watch .. lol.. desktops and portables at its finest
*PROJECTED* ship dates... As most of you know, I tend to go to the post office once per month with a large order, and maybe once or twice with some stragglers in between. That's not going to change, but having stock will allow me to reduce the overall wait. @Alan 's HI / iHeat set quite the standard that I strive to live up to. :bowdown:

I'm going to dive into assemblies this week. Once that's complete, the Elite software adjustments should go much easier this time around, with testing being much more straightforward, thanks to @HerbieVonVapster. I've got a good understanding of what's happening, and why. Looking forward to it this time. I'm going to let the program do most of the testing.
 

Bravesst

Full Steam Ahead
Manufacturer
I just broke my record on coil forming. I got over 20 coils, from scratch, formed in 2 half days of work. All told, I have over 25 (15 Elite / 12 Classic). Even though they are the same exact coil, the Elite leads are much shorter, as the board is wired with it's own 14 gauge wire that marries up to the 18 gauge coil leads. The Classic coil wires feed one to the switch, one to the battery.

I got on a coil roll. There is really no way to even put into words the methodology I was using, but of course I'll try. The prepped, pre-formed coil looks a lot like a tennis net, with the mesh as the net, wires as the end posts. One end post becomes the center wire, and this wire / butt connector is used to start the rolling process. The right hand twists / rolls the wire, the left hand feeds the mesh. I need to keep my eye on the spiral as if forms. There is a lot of back and forth, to and fro, allowing some springiness to develop, using that to kind of coax the straight mesh into the consistent, yet ever changing, coil radius. Once I'm satisfied with the unmounted coil, it has to be mounted to a 7/8 disc, which is a real challenge to keep the coil perfectly perpendicular and symmetrical during and post mounting. I'm really glad this process has gotten so much easier for me. It used to take almost an hour to form one high quality coil, never mind prep work. Now, after I get warmed up, I can pretty much roll a really good coil in about 5 minutes, once all the prep work is done.
 

Bravesst

Full Steam Ahead
Manufacturer
I noticed I rushed a drying sesh, and I definitely got a bit harsher vapor. My throat is pretty sensitive, and hint of a biting feeling is picked right up. Dry right, make a perfect espresso puck. It's worth it in pure flavor and super smooth vapor with zero bite.

You saw the list in my previous post, and it's shopping time, once again, in Vapwood. To fund this *spree*, I'm offering a little sale. Use coupon code: STOCKED, and save 10 percent site wide on all Elites and Classics.

I need magnets, wood, solder, wire, and I could always use some more DNA75c boards, screen holders, and custom buttons. Let's keep this stock building.

>> https://vapwood.com - STOCKED saves 10%

@P.A.M. nice I can keep rolling something!

20190503-065747.jpg
 
Last edited:

Bravesst

Full Steam Ahead
Manufacturer
It's at the end of a long day working in Manhattan, but finally it's Lil' Bud time. Nice to know I can just clean out a tube, and count on that quick and simple, tasty vapor. I'm cruising along on my personal fave - Booster / 25 watts / preheat at 5. So much so fast. I'm still the captain of the ship, and I need to steer her right, but our on board DNA75c chip is like a wave tamer, harnessing the power of our instaheat coil. And I'm on my first bowl... :clap:

I managed to get in the shop briefly. I am trying to work out the vent holes. I built a couple of simple angle jigs, and if going with two 3/32 holes, 45 degrees seems to look the best, and probably give us some resistance with a hole that size. I'm looking forward to my first session with this set up.

I've never been more poised to build. If I were any more prepped, the units would fall together themselves. Let's hope that's the experience, I could use some time off. I've never been more confident in the consistency of a large batch. The Elite has become as consistent as the Classic.
 
Top Bottom