Phase3 Vaporizers

lazylathe

Almost there...
ok...as far I understand he is using D-Nail pinout wiring (which I'm not sure I totally understand the meaning...I think D-Nail must be a company) which should be compatible with disordely conduction pid.....and the pinout of disorderly is different from the one I own...If I understood good I should buy whole kit...


For $200 for a full kit, this is the way to go!
Simple 'plug and play', ready to go in 5 minutes!
 

lazylathe

Almost there...
ok...as far I understand he is using D-Nail pinout wiring (which I'm not sure I totally understand the meaning...I think D-Nail must be a company) which should be compatible with disordely conduction pid.....and the pinout of disorderly is different from the one I own...If I understood good I should buy whole kit...

Also check out the Classifieds section!
@invertedisdead is having a sale of a few items and some FULL ZX kits are available!


Varden

Well-Known Member
ok...as far I understand he is using D-Nail pinout wiring (which I'm not sure I totally understand the meaning...I think D-Nail must be a company) which should be compatible with disordely conduction pid.....and the pinout of disorderly is different from the one I own...If I understood good I should buy whole kit...
To make it even more fun, b2cvape has two type of connectors. On top of the typical XLR, some of their PID boxes have DEN connectors instead.

I personally prefer the DEN connector to XLR but since XLR is more common, it only adds to the confusion.
 

Axel_420

Well-Known Member
ok...as far I understand he is using D-Nail pinout wiring (which I'm not sure I totally understand the meaning...I think D-Nail must be a company) which should be compatible with disordely conduction pid.....and the pinout of disorderly is different from the one I own...If I understood good I should buy whole kit...
I think that's right.
It is my understanding that B2Cvape's PIDs will not work with coils from many American companies, including D-Nail, but also Auber, CH, 710 Coils, etc.
And from what I understand, even if you choose on the website the option that allows you not to buy the temperature controller the coil will be there, already installed. So you better buy everything.

There are also adapters that allow you to use a PID that has a different pin configuration than the coil, but I can't find them right now. And in any case it might be cheaper, talking about time and money, to buy the complete ZX kit.

The cost of taxes in Italy could be around 50/60€ in case you are interested, based on what other Italians have paid buying that bundle.
 

lazylathe

Almost there...
I found a small J-Hook dry tube in one of my drawers, it is 14mm.
IIRC, i bought these off AliExpress a few years ago as they were super cheap!
They are very small and fit in the hand very nicely but still keep the heater far enough away from your face.
Using the glass bowl, glass J-Hook is an amazing flavor train!
No need for water cooling or hydration as this little beast never makes me cough!
Troy noted on this in their one YT show.

It's a heavy hitter in a tiny package!
Delivers copious amounts of vapor with ease and tastes so pure at the same time!
It also milks up my foot tall Roor WT with ease, this is my DD setup with the ZX.

I like to run on the cooler side of things, I am now at 424.4F (218C) and it still blows me away every time I use it.
The ZX and it's older brother, the Z8 are my only flower devices in use. All my other flower vapes have been packed up and a majority sold off to new owners. These GoPhase3 heater are THAT good! @invertedisdead has developed the Holy Grail of convection flower vapes imo.
I love the tiny form factor of the head, it's so light and fluffy!!!
The price also makes it easier for newbies to buy into some serious, high quality gear for minimal cost.
Some of the kits are $500+++ and you may still need to buy/own some other gear to get them up and running.
$200 for the kit for now, you supply the bong and herb and you are vaping with some of the best gear out there!

It's great to see so many new members rolling with the ZX!!
It's a fantastic vape and it seriously has any of my VAS under control, just reading about the new vapes is fun but the ZX has me.
Having amazing gear and vaping top quality herb is a beautiful pairing!
Supporting FC manufacturers is also important to me as these small businesses need our support to continue providing us with the best new gear!

And lastly a tip!!
The pesky screen we keep talking about...LOL!
I have figured out a solution that works really well for me using the glass bowls.
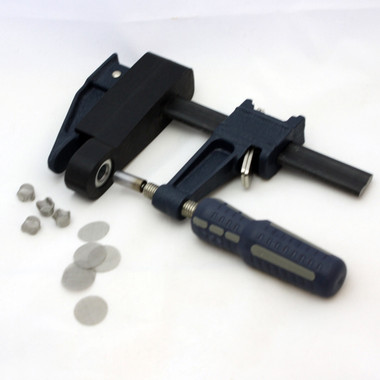
First roll the screen perfectly flat on your desk. I use a S&B wooden brush, the handle works great. The screen needs to be FLAT.
Take a Grasshopper PFE, insert the screen into the glass stem and gently push down the the PFE until fully seated.
Use a pick to push down all the edges from the opposite side down onto the PFE.
The screen will be nice and tightly seated.

I am sure you could do the same with a glass adapter, just push the edges of the screen down against the adapter.
 

CaleidosCope

Well-Known Member
Tinkering! One-hitter!

I don't know what lung volumes are available here among the members while I'm eagerly waiting for the first ZXL reports to come in... mine is limited🙃. Until the ZX-Bowl (and the ZX), my favorite bowls were 14/19 male glass adapters with different screen depths.

For the "bowl reduction“, had to grind the outer diameter a bit, and with the pliers deformed it so that it clamped.
A venturi vape?

We are talking about 0.05g loads.. or less! ONE fluffy tasty big HIT (at least for me ;) )


Have fun.


Translated with DeepL
 
Last edited:

lazylathe

Almost there...
Tinkering! One-hitter!

I don't know what lung volumes are available here among the members while I'm eagerly waiting for the first ZXL reports to come in... mine is limited🙃. Until the ZX-Bowl (and the ZX), my favorite bowls were 14/19 male glass adapters with different screen depths.

For the "bowl reduction“, had to grind the outer diameter a bit, and with the pliers deformed it so that it clamped.
A venturi vape?

We are talking about 0.05g loads.. or less! ONE fluffy tasty big HIT (at least for me ;) )


Have fun.


Translated with DeepL

Wonder if @invertedisdead could design a micro-dose bowl for us?
There should be no problems having th inside of the bowl a bit thicker or even better yet, Zirconia inserts that can be dropped into the OG bowl as reducers!
Zirconia sleeves that just drop in would be awesome!
 

CaleidosCope

Well-Known Member
Zirconia sleeves that just drop in would be awesome!
...with a small groove on the outside, filled with a hemp-thread to hold it in the bowl chamber. Different inner diameters. Coneshapes. I am IN. :love:...need better glasses and smaller fingers.

I try to make a video. Maybe to euphoric... It seems to me that the vape is generated more instantly. The heat is forced through a smaller diameter = concentrated. I still catch myself pulling a second time after stirring... useless. Taste is pronounced once more.
 
Last edited:

Stueylakes

Well-Known Member
Still in love. B2, Hot Rod and Couch log haven't been switched on since arrival. The @VaPeD&CoNfUsEd wpa is magic for larger loads, especially with the adjustable screen. Super terpy, sublime hits. This french OGB clone is fab with this set up and I have when home and able not really used my portables outside of the Lotus. Hmmmm could I be a 2 vape guy......treat yourself this system is divine.


lazylathe

Almost there...
Taking about adjustable screens...

My absolute favourite bowl is a 18M to 14F adapter.
I made a fine SS mesh bowl with 3mm tall sides. Drop the screen in and press ZX in to seat bowl at the perfect height.
Herb sits directly under the nozzle and does some magic to the herb! Super thick, tasty rips!!
Micro-Dosing on another level!

Getting the herb as close to the heater as possible needs to be on the invention list!
These one hit rippers are insane!

I think I need to make an adjustable screen for my Zirconia bowl. Those few mm's closer make a huge difference in performance!

Pics and video to follow once I clean everything...
 

CaleidosCope

Well-Known Member
img_9636dofjv.jpg
My absolute favourite bowl is a 18M to 14F adapter.
... these "bowl reducers" work natively in the 18/14 glasadapters (no grinding). Drop in...gets stuck in the middle. Give it a try... same microdosing-FX. In combination with the SS-screen you could get closer to the nozzle. Measures are: OD / ID / height. They sell different heights on amazon. :D
 
Last edited:

lazylathe

Almost there...
... these "bowl reducers" work natively in the 18/14 glasadapters (no grinding). Drop in...gets stuck in the middle. Give it a try... same microdosing-FX. In combination with the SS-screen you could get closer to the nozzle. Measures are: OD / ID / height. They sell different heights on amazon. :D

I saw that and actually had a look in a few hardware stores to see if I could find something similar but did not have any luck.
Another reason I prefer my method is less metal in the air path, just a SS screen. I would also imagine less heat theft as I would imagine the inserts would absorb quite a bit of the heat as they get up to temp.

I can simply move the screen around to be closer or further from the nozzle.

I love all the ideas that are brought to life with the aim of a perfect session!!
 

CaleidosCope

Well-Known Member
I saw that and actually had a look in a few hardware stores to see if I could find something similar but did not have any luck.
May be HERE is a starting point on amazon.com or on Aliexpress (OD 11mm or 11.5mm would be plug and play... didn't find any)


I totally agree. I love perfect-ses-tinkering too and I am sure there are people out there that just love it like it is. ZX is perfection!

I agree less metal in the air path is preferable. We talked about zirconia inserts. yummy. Personally I don't mind the SS on the 220°C-ish side. A glowing ss-coil in the air path is a different thing. (Just thought over... while grinding down the outer diameter without a mask ...got a good load of stainless to my lung. ;) don't mind :rolleyes: I am not serious in that business)

Your bowl depth trick is cool too. Handy. Need to try. ;)

Heat absorption from any parts is, with this little beast, IMHO the least problem. Maybe the reflected heat helps a little. The funnel effect is for me the best explanation. Airflow is super high in the reduction - the heat gets compressed.
I would like to see some fancy 3D-airflow simulations... let's wait. :spliff:

EDIT: Another way to think: The heatguns come with different nozzles. The smallest gets the hottest spot.
 
Last edited:

CaleidosCope

Well-Known Member
I can simply move the screen around to be closer or further from the nozzle.
Really cool. OK. Best of both worlds. Less metal ✅, screen depth adjustable ✅, closer to the heater (adjustable) ✅, funnel-effect ✅, maintenance a little worse ✅. Proof of concept - YES.✅


The o-ring is from a Dynavap.

I had a good tasting "one-hit" with less than 0.02g. Cool. Worth the hassle? IDK.:smug:

Have a nice Sunday.
 

lazylathe

Almost there...
Really cool. OK. Best of both worlds. Less metal ✅, screen depth adjustable ✅, closer to the heater (adjustable) ✅, funnel-effect ✅, maintenance a little worse ✅. Proof of concept - YES.✅


The o-ring is from a Dynavap.

I had a good tasting "one-hit" with less than 0.02g. Cool. Worth the hassle? IDK.:smug:

Have a nice Sunday.

Not quite what mine looks like... You have too much stuff in the adapter!
I have a longer adapter and just a screen I made myself.
The screen is pushed up or down depending on what you are looking for, closer for micro dosing and further away for larger loads.
It's a lot closer to the heater than the Zirconia bowl and I find it works great for me.

Adapter and screen

20231126-112635.jpg


Screen pushed under heater

20231126-112707.jpg


Screen pushed away from heater for larger load

20231126-112722.jpg


I will upload a video a bit later!
 

lazylathe

Almost there...
And the promised video!!
This was at 442F!!


@TedJones
It's a neat trick and it's a super easy mod! Glad it worked out for you!
I find that my screen stays much cleaner when it is closer to the heater.
 
Last edited:
lazylathe,

lazylathe

Almost there...
Would you please show us what you form your screens with? Or even how you make them? Pretty please ... ;)
That info is TOP SECRET.... LMAO!!
It's a super simple system I came up with in my workshop. If you have some tools, it is very easy and quick to make.

First you need to figure out what size you want your screen to be, this can take a bit of trial and error...
The locate a Stainless Steel washer that has the same size hole. I had to modify mine slightly and make the hole bigger by grinding it out some more. I mounted it on two pieces of board that i had lying around, it's very rudimentary and should be built much stronger. More support around the entire circumference would be beneficial.
The I found a drill bit that fit in the hole with an even gap all the way around that was about the same thickness as the mesh I was using.
Cut a square of mesh that overhangs the hole by about 8mm on each side.
Center the drill bit over the mesh that is over the washer and press down to form the screen.
Remove screen and trim the edges to the height you want!

Our one amazing member and manufacturer @Delta3DStudios sells a kit to make your own basket screens.
May be easier!!

My nasty bits and bobs for awesome screens!

Washer mounted to boards, the right side is broken... I just super glued it together.
I will remake it with a wooden base and a cut out for the washer to sit in perfectly.
The problem is, I have been using the same screens I made more than 5 years ago with this contraption and they are still looking new!
20231126-145007.jpg


Brill bit next to the amazing screen contraption!

20231126-145105.jpg


Space around brill bit shank and washer is even to or slightly larger than thickness of mesh being used to form the basket.
20231126-145111.jpg


Hope this makes some sense...:shrug::rofl::hmm:
 
Top Bottom