[Reached Character Limit...had to double post]
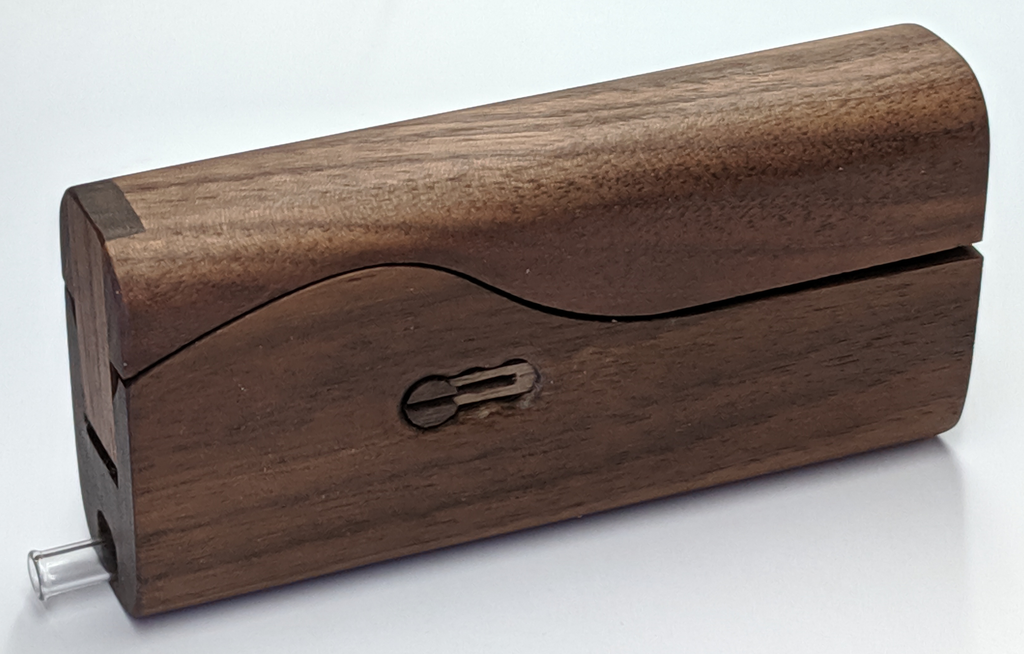
As with the FW5, the FW6 lacks a digital display and uses haptic feedback allows for the smaller form factor and overall is a really neat concept. Everything (engaging heater, changing and checking settings) is done through the fire button which is actuated by pressing the two sides together. It appears that there is a spring mech of some sort behind the heater and when compressed, it completes the circuit and allows power to be sent to the heater. That said, the easiest way to actuate or engage the heater is to hold the FW6 towards heater end of the FW6 when pressing together and grip like a joystick. The use of a grip style fire button now allows easier use with gloves since fat fingers only really affect buttons. Firing the FW6 and changing between temp settings is pretty easily done and its very convenient to check current temp settings and battery power levels.
The ability to preset the heater temps to 3 separate settings is very helpful and a huge improvement over the FW5. This ability essentially makes this a much more refined regulated vape but without an app or display to read. Heater can be set in 10 degree (F) ranges that start at 250F (e.g., 250-260, 270-280, 400-410, etc.) I would however recommend changing these settings as the default for 2 clicks isn’t very useful IMO since its 300-310F. IMO I feel like the default temp setting should be adjusted so that users can have 3 immediately useful settings to go to. I would recommend something similar to my current temp settings:
2 clicks: 370-380
3 clicks: 400-410
4 clicks: 440-450
That said, Changing the temp settings per the included instructions is a little confusing and it can be difficult at times for the FW6 to register the 7 consecutive clicks needed as a part of the process as well. Use the FW5's ability to give temp setting via haptic feedback as a tool during this process (6 clicks). That said, temp setting should be set once and should be no need to touch again. IMO one of the settings should be the max of 440-450 and then pick two others that might suit your style. The max is there for a reason and I think you should make it available for use. I would think 370 would be as low as most people would want to go but YMMV.
I do tamp down each load lightly with the included stir/tamp tool. I tamp just enough to prevent the load from falling out if the unit is inverted. The resulting load size for me has varied from 25% to 50% of chamber. This can still be an effective micro doser. It can be difficult to combust unless you draw a very long time and the bud is already near spent. The ABV produced can come out dark when taken all the way to the end on max temp. I feel like the slightly larger stem diameter has improved draw resistance on the FW6 as compared to the FW5 as well and makes it easier to get a satisfying hit.
When it comes to overall experience, you should expect similar to the FW5. It does not provide the type of power that a Splinter or Tubo can. However, that was not remotely within my expectations and wouldn’t be realistic given the size of the unit. The heater does seem to be more powerful at the top end of the temp range resulting in larger clouds vs. the FW5 at max heater setting. I do feel that the larger bowl plays a role in this as well since the load itself can now be bigger. The flavor is still very much top notch. Same terpy hits that you can get out of the FW5. I will not keep a vape in my collection if its not capable of producing good flavor and this is very tops on my list of good flavor producers. If you have the FW5, you know what I’m talking about. First hit is lip smacking good.
With the FW5, I consistently found that there was a little bit of green around the edges of the bowl which necessitated stirring to get all of the goodness out of the load. With the FW6 however, stirring is pretty much unnecessary as extraction is much more even and uniform throughout the load. You won’t see specs of green around the edges anymore. I suspect the tapered and deeper bowl design might have something to do with this improvement. But with all convection vapes, stirring can eek out one last hit if you so desire.
My technique with the FW6 is pretty much the same as it is with the FW5. I engage the heater and allow for a 3 second warm up after the buzz (not after pressing the button). I then do 3-4 quick cigar puffs to help bring some heat into the load. This is all done within 5 or so seconds so very quick puffs here. After this, I reload my lung capacity and take it for a steady 10-15 second draw. Draw speed is normal breathing rate otherwise you overpower heater and get the warning buzz. I can achieve visible vapor on my first draw at the 370-380F setting albeit smaller with larger subsequent hits. Not much different than the FW5. At the highest setting 440-450F range, I can get a rather large cloud that can send me coughing. Its still not quite as dense as what a Splinter/Tubo can accomplish but it should satisfy all but maybe the most intense of cloud chasers especially for OTG use. As compared to the FW5, I am getting bigger clouds at highest temp setting with the FW6. I use 400-410 at home and 440-450 OTG. Depending on size of bowl (400-410F), I can usually get 4 decent hits off each one (keep in mind I never went beyond 50% full when tamped). Battery Life on the FW6 is also pretty impressive. I am able to get 4-5 50% loaded bowls before switching batteries. I don’t let the battery go past 2 buzzes on battery meter.
Overall, the FW6 is an extremely capable portable device. Thiis vape has quite a few distinctive features. It’s pocketable, reasonably powerful, efficient, flavorful, uses hot swappable batteries, regulated temp, battery/temp meter and onboard storage chamber. On top of this, it’s handmade from beautiful wood. It's affordable to boot and ~10% less than the FW5.
Based on the overall progression of the Firewood line, I was pretty certain that this was going to be a great OTG option. I am super happy to have one right now and it competes for my top OTG option (or comes in very close second). I can also see myself using this in home as well while I didn’t do that with my FW5. This isn’t perfect and I’ve mentioned some minor nits but the hype is real. If you like the FW5, I can’t see how you wouldn’t love the FW6. I have already let Marc know that I want an exotic version as well if he chooses to produce one. Sorry for this novel and I really hope this its helpful to some.
Also, I can not take pics of the FW6's internal at the moment as it has now been used. If I can find the time to clean, I can do so but it most likely won’t happen until next weekend at earliest. Maybe someone else can help with that? That said, Payton's video showed quite a bit of the internals. I am also quoting
@firewood 's earlier post showing internal pic for reference.
TL;DR: FW6 is an improved FW5 in almost every way. It is one the very best on-the-go options available right now.


")
") So I know I get into the programming with the 8 clicks, and then what steps allow me to check the current setting?
So I know I get into the programming with the 8 clicks, and then what steps allow me to check the current setting?