You're in the best guide available! Welcome to FC and the nano-nation!
Best of thread has some good info all in one place. You'll probably also want to skim the last 150 pages or so for good info that comes up all the time.
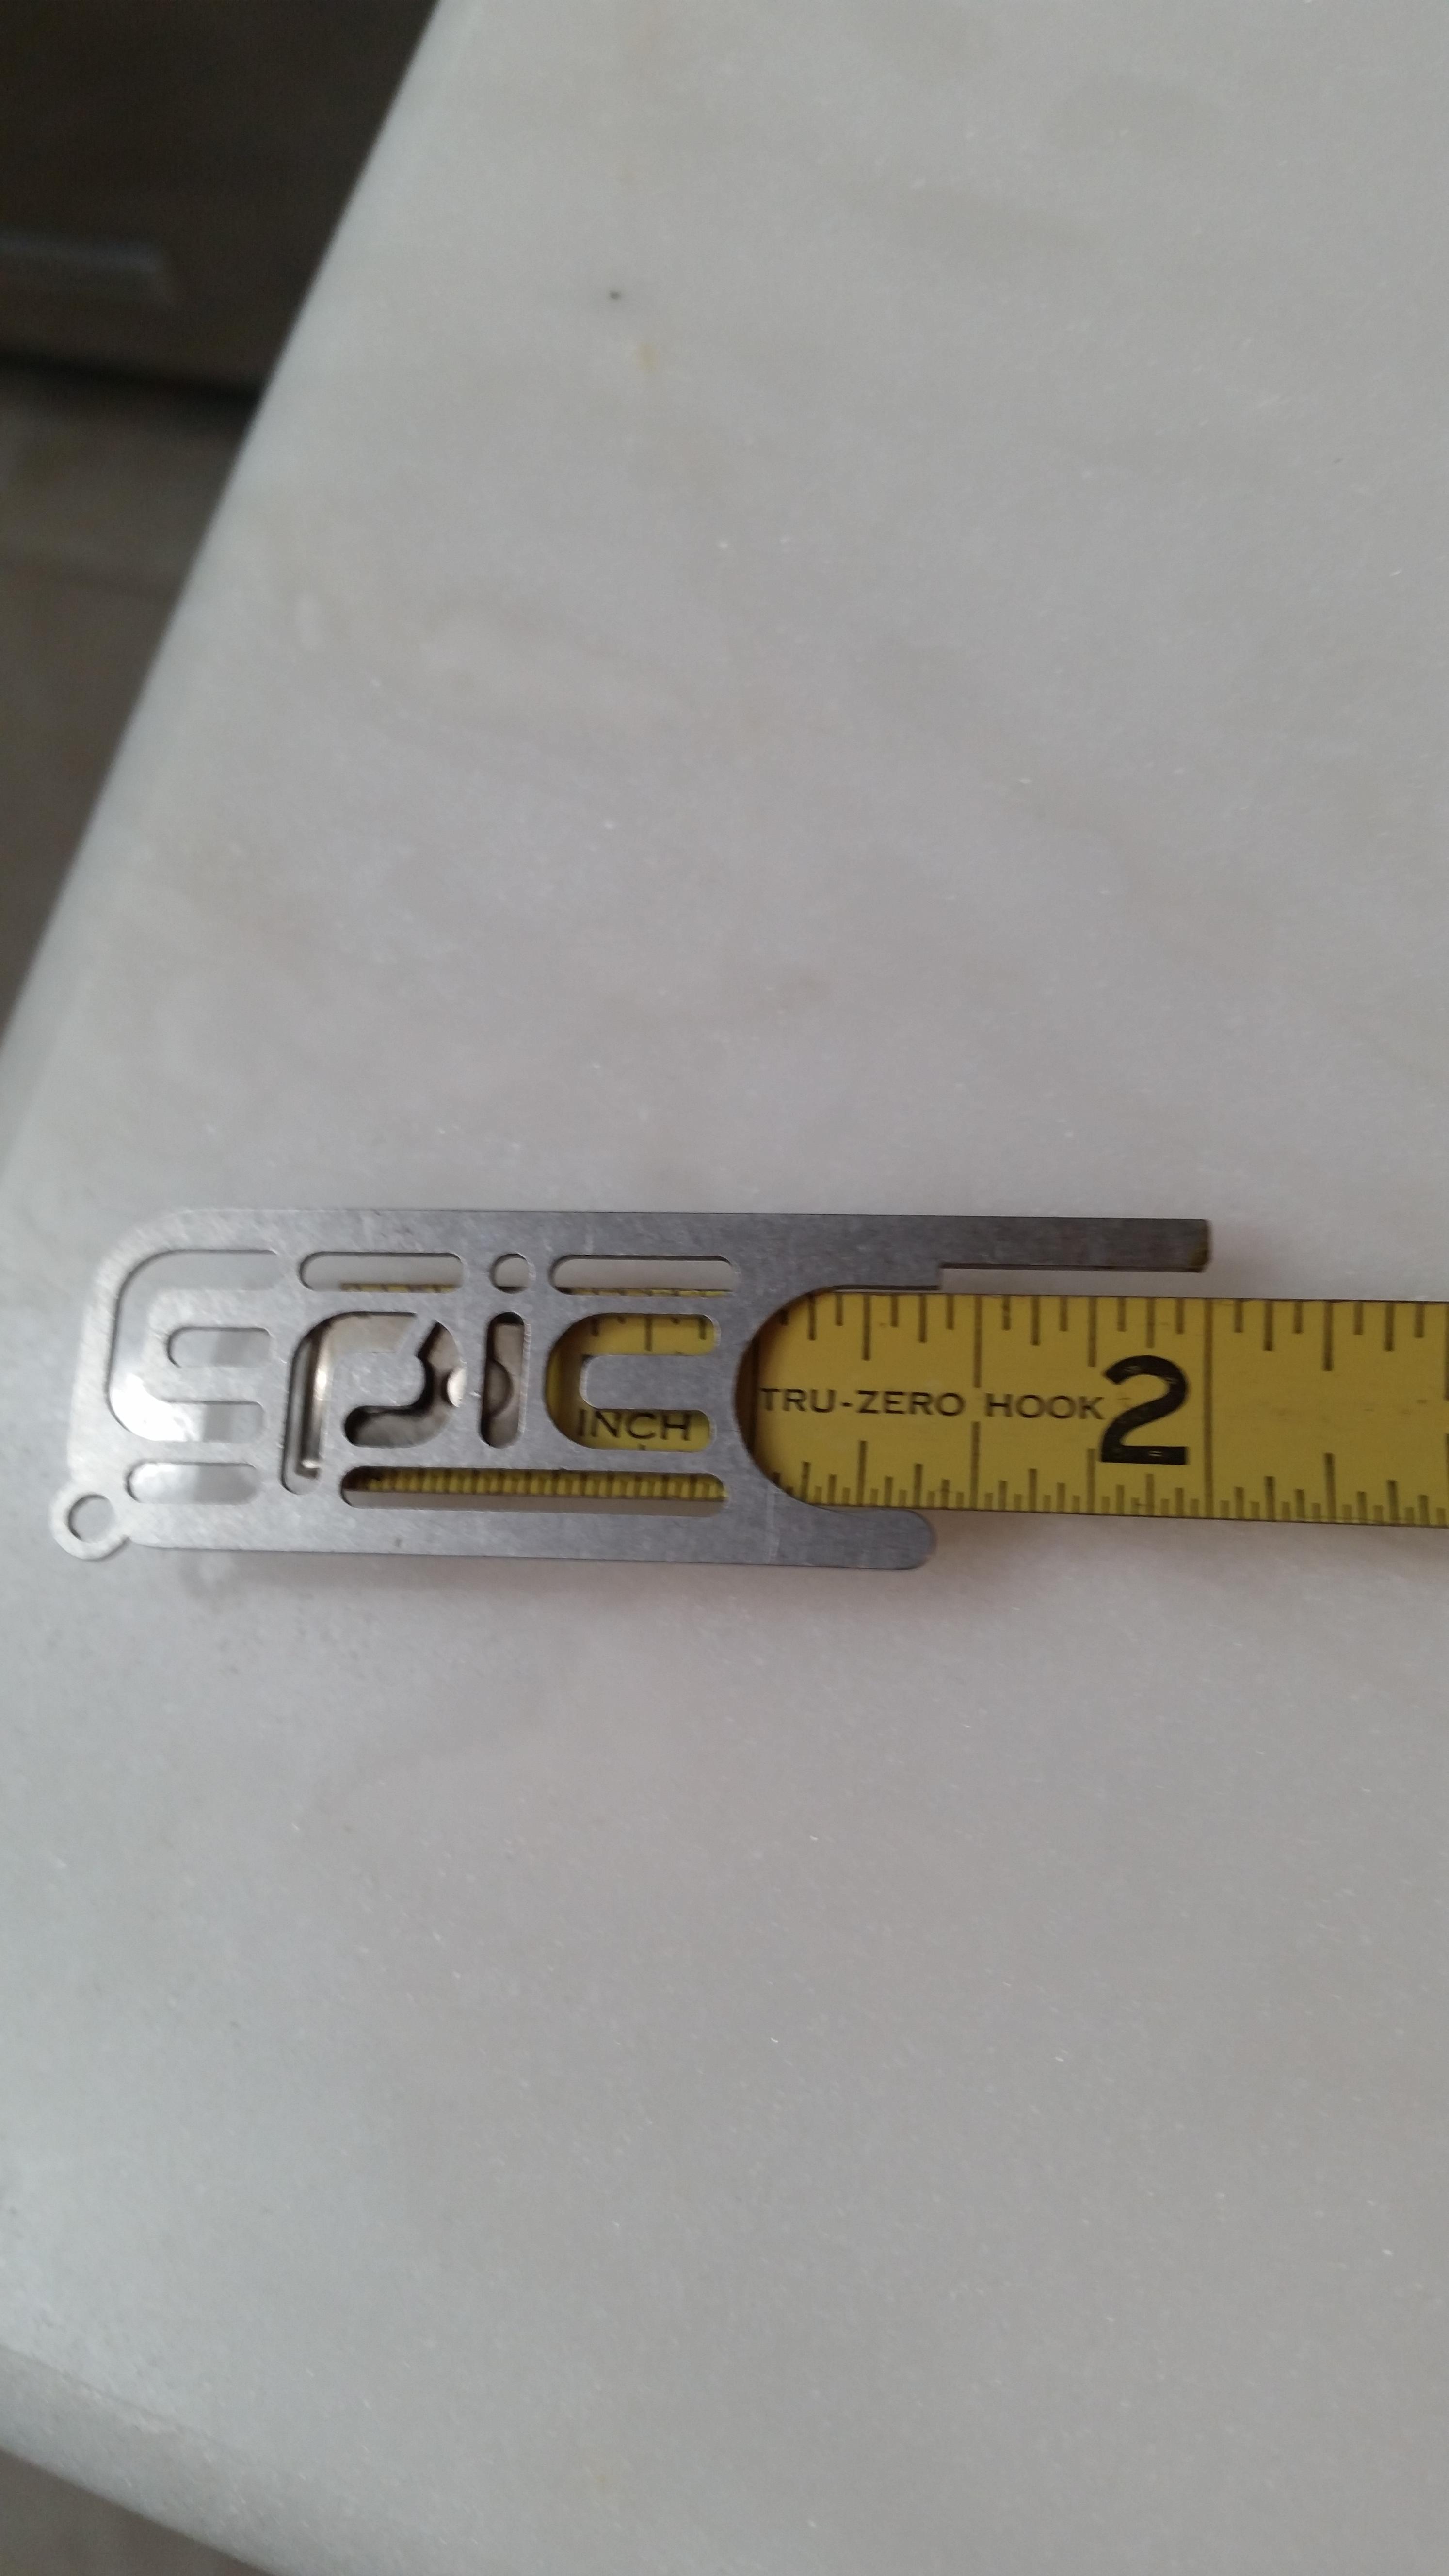
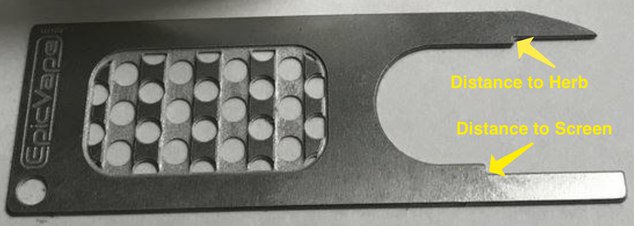
Seems you have seen posts about using the tool to set screen depth. Put it on your short list for when you order accessories from EpicVape. Think they're still only $5. The depth of the screen from lip should be about 14mm +/- 2mm. 12 - 15 mm is the length of the long leg you'll see in pictures of the E-Pik tool. Think they used to be a little shorter. Sorry
@SloJimFizz - not even close to an inch depth - more like 1/2 - 5/8".
Is this your first vape? OR, maybe first real vape I should ask. IOW, not a simple conduction (oven) based portable? Asking because there are some vaporizing basics that apply to most vapes - especially convection vapes like nano. Many factors are going to lead to better or not so good vapor, and different results. Also, there are many personal preferences (like how brown your ABV will be). Too far from heating element can be a problem that will leave less material vaporized to brown. Too much moisture in load, too low of heat, drawing too fast, heater set too low and screen too low in stem are some of the variables that can cause this, as well as others. You also need decent nugs for worthwhile vapor production. Schwag or Mexi-dirt can work, but not too well.
Try to get load as close to heater you can without touching, and tweak on your own using info here to find your favorite settings or to deal with things out of your control. Many of these parameters will also change a little bit depending on your material, how dry it is, ambient temp and even a bit of difference where you have it plugged in and how (such as using extension cord, surge suppressor, different circuit at home that may have other stuff running on it). Usually these changes are very minor, but you'll be able to tell once you get used to your nano.
5-7 on the dial is probably about where you want to be for power setting. Bare in mind these dials are not exact from one to the other (my 6 may be your 5.75 or 6.5 or whatever), and that the dial position can be moved. Seems like you picked this up used, and previous owner may have moved it a little one way or the other. Best placement IMO is to be sure your 0 mark lined up properly and go from there. Lower temps produce wispier vapor that creates more of a "heady" high. Higher temps will produce denser vapor that usually has more of a "body" or "couch-lock" buzz, both in varying degrees depending on variables. 5.5 - 6 on dial seems a good place for most to start and adjust from there as you like. Always better to start lower and work higher while trying to find your sweet spots. No use starting higher and moving lower, as you'll be vaping actives at the higher temp that the lower temps won't release.
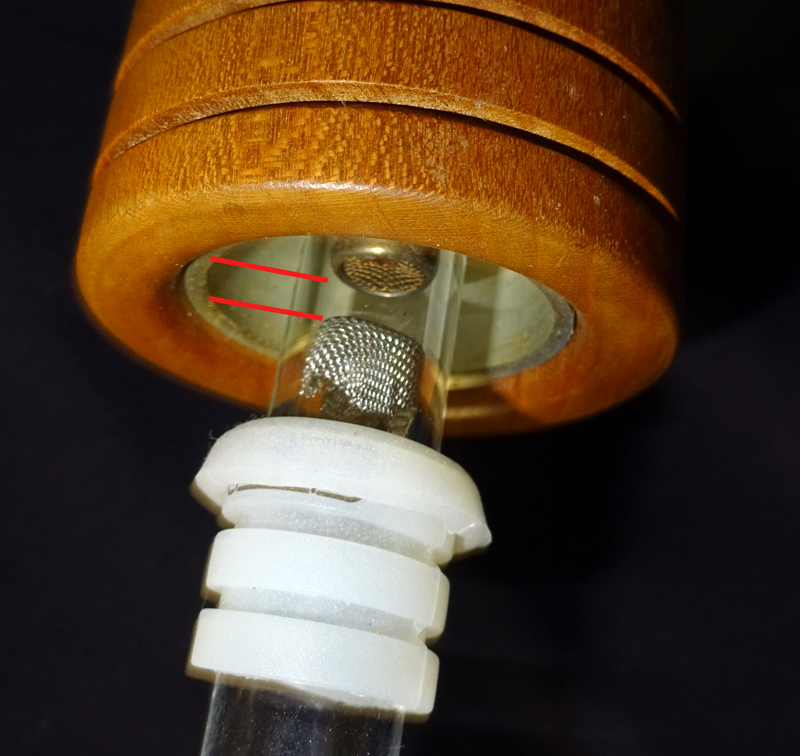
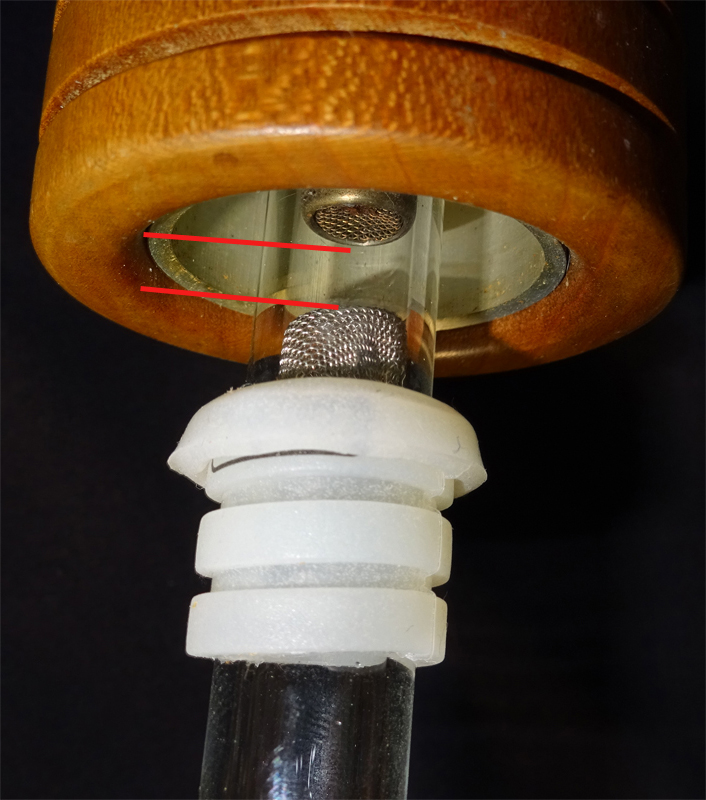
How much to load is pretty much up to you. Some load less (I usually do) and some load more. What's really more important than size of load - or depth of screen for that matter - is distance from heater screen (the one on top of cylinder inside nano cup). Optimal is to be as close as you can without load touching it. Err on the side of not touching, rather than barely touching, for best results. You're not going to want to tamp the load down too tight, so you use screen depth to make a deeper area for a larger load. Keep in mind that larger loads will require more stirring, but give more hits. Just another thing the E-Pik tool is good to have for. But, anything with a flat small blade (like a small screwdriver, or cut off and flat blade shaped chopstick) will work well.
I prefer to use material with a medium-fine grind. Others use whole nugs. Both work well, though you'll notice differences of each. Whichever you use, don't pack too tightly. nano being convection requires airflow around and through the load for good vapor production. If you pack tightly, it won't work as well and you'll be straining to get good hits. Kind of like trying to suck a very thick milkshake through a too thin straw.
Size of load gets very subjective, and I think it is easier to site view it than weigh. What you want is a very lightly tamped load that will barely not touch heater screen. A good way to figure this out is to use a cold nano to push the load down and force the screen deeper (or a hot nano, but be sure to gently clean any material off the heater screen soon as you can). Use a tamper (I like a golf pencil or flat end piece of chopstick - the top part) and push it just a little lower. You can mark this screen depth and where the heater core goes into your stem so you know how much you can put in with a Sharpie right on the glass (cleans off easily with alcohol later), or use the silicone sleeve as a depth guide for screen depth if you have one on your stem. After doing this I'd dump that load and fluff it a little, because pushing it down like this will probably compress it too much. No worries, your spots are now marked. Just put not quite all of that load back in to vape and you should be good to go.
I usually like a very small load that only gives 3-4 hits. 2nd and 3rd being the best. 1st can be a bit wispy as you're heating everything up (but not always) and 4th is straining to get vapor because it is pretty much spent. Usually takes a good stir to even get that from it. Sometimes I'll go with a larger load (up to 7-10 hits) and just stir every 3 to keep it going. Flavor will usually drop off after first 3 hits either way. This is the biggest reason I like smaller loads, but larger ones will still be effective even after most flavor drops off.
nano will work OK by just loading it and getting things lined up. But, with a little practice it gets SO much better. This is one of the great things about this vape. It works OK if you throw it together, but is so versatile it allows any user to tweak to their own preferences and use in different ways (big loads vs small, higher heat vs lower, on a water piece instead of dry stem, for concentrates, etc).
So, my advice is to get reading, and start practicing. The best of thread is a great place to start. Learn how to use the search function at the top right corner of every FC page. It can be a pain in the ass, but will usually point you in the right direction. Also, hate to be snooty/conceited, but I've made a good many posts about nano use and tips for more than 4 years in this thread. You can use the search function to look for posts by a specific user in a specific thread. Look for my posts and you can usually tell from the first couple lines whether there is worthwhile usage info and tips - or is just me stoned and rambling on about whatever.
Once you get a better grip on things, you might want to check out nano with a bubbler or other water tool. Most of us do, though some still prefer dry. Might want to keep this in mind while searching thread. You'll need a GonG adapter of proper size from EpicVape, and a glass piece to put it on. Many cheap ones available from China that work great. More on all of that later if you like.
You should post other questions as needed here in the thread. FC is a great place, and this thread is one of the best IMO. Plenty of people will be anxious to help you get a handle on things. But, do a little checking on thread. Some things are asked repeatedly - and some members (me probably worse than most) get a little gripey when you ask a question that was just answered recently on the previous page or three. Also, feel free to PM me for any specifics you'd like (click on someone's name and then start a conversation in the pop-up).


 I'm gonna continue imagining she is as she travels the country sampling the finest herbs in her RV which has a Murphy piano of some sort that folds out of one of the push out walls so she can keep her chops up. Don't burst my bubble.

 There's still some left.


 My 14mm gong. I barely knew thee.


")


 Figured it was going to go here once I started taking pics. NO worries.... will just have to cut the grass tomorrow.
 ")
