'The Misty Log' - DIY wooden Log Vaporizer

blokenoname

DIY Log Dabbler 😁🪵💪💨💨💨
Found a table, giving the angles: 1:10 taper is 5,71°
I'll play around with the sharpener option a bit and see, what I can make of it.

Yes. It's a friction fit. It's quite unyielding wire ;) That ss wire is 1.2mm in diameter, adding a total of 2,4mm to the 6mm diameter of the cartridge (8,4mm). ID of the heater cover is 10,4mm.
Leaves about one millimeter all around, for the air to pass.

Also works out quite well, giving an even heat distribution across the whole 1,0cm wide bowl. For the Arizer stems and also for the Vapcap, it works out quite well, indeed :D Very satisfactory :clap:
 

blokenoname

DIY Log Dabbler 😁🪵💪💨💨💨
ImgBB test:

B4119-E63-BD3-D-4913-A2-F5-2-B36571-F040-D.jpg


Love me new 11 mm hc Monster Misty :love::rockon:

Ordered two Arizer 14mm WPAs, to complete the set.
And also took a deap breath, sighed and... ordered a disk sander, to finally produce my own WonGs :p
 

brainiac

log wrangler
Yep - great work on the Monster Misty :clap: - I can feel the heat from here :D

Thanks for that info on the taper angle :tup:. I was thinking 5 degrees might be a touch on the thin side.

A disc sander's a very useful workshop addition. Which one did you go for?
 

blokenoname

DIY Log Dabbler 😁🪵💪💨💨💨
Suprised myself a bit there actually, that a Log sized glass core/air-path setup should produce clouds like that :D
But it does :science:

Can even improve a bit there, by adding a sheet of ss foil to the inside of the heater well, as a reflector. Keeps the shell cooler to the touch and shaves maybe 0,5-1,0V off the energy balance (i.e. even better extraction at lower voltage). Trying this out right now here, with a sheet of 0,3mm ss foil in the Maple GC Misty.

0,3mm is a bit thick for a reflector, though. Ordered 0,1mm 304 ss foil, but it'll take till mid September, till it finally has crawled up the silk road :p
 

blokenoname

DIY Log Dabbler 😁🪵💪💨💨💨
This is the Maple GC unit with the added 0,3mm ss foil. Bit inflexible ;)
Bet it looks better with the 0,1mm one.

Personally, I like the look better without any steel liner, but in case of the glass core, it really adds to the performance. On the other hand, it remains totally optional. Without the ss liner, you need a bit more voltage to get the same experience and the outer shell gets somewhat hotter :)

FA82-D4-B0-5515-4383-9561-F247-CD576-C00.jpg


4-CEFA301-F81-D-4-A2-E-9581-58-F2-AED14957.jpg
 
Last edited:

Megaton

Well-Known Member
Such outstanding devotion to duty :clap:
You are truly the patron saint of log testers :tup::D

Let it never be said that I didn't do my duty :lol: it's a tough job, but someone has to do it, hey?

@blokenoname wow that maple looks great! Reminds me a little of the super heavy core maple! I cant imagine needing more power with this glass core, I almost dread to think how hard that one must hit!

Been loving mine at 12v, dry with the sliding stem, massive clouds, great flavour, full extraction. Just wonderful. Looking forward to trying it through water tonight!
 

blokenoname

DIY Log Dabbler 😁🪵💪💨💨💨
Thanks :) Seems, Bloke can cook :D :clap:

Well, it can only get so and so hot without burning the load anyway ;)
With the ss liner, you'd probably get the same performance at 11,5v, you now get at 12v and the upper part of the body would remain a bit cooler, is all :)

But also depends a bit on the cartridge used (19 ohm or 20 ohm) and the density of a given unit's wood. I expect the mahogani to be a bit denser than the maple, therefore already reflecting a bit more heat back to the hc.

Anyway... the ss liners can easily be added or removed as need be :)
 
Last edited:

blokenoname

DIY Log Dabbler 😁🪵💪💨💨💨
Well... had the maybe not so brilliant idea, to get some 12mm/10mm OD/ID boro glass test tubes, as I thought they might make good glass direct draw stems. Just need to cut the bottom off ;)

But... a) forgot to check the length of the tubes, before I placed my order. 75mm isn't exactly a sufficient length for a dd stem :rofl:

Also... b) just 1,0mm wall thickness proves to be quite fragil! They break relatively easy, compared to the 10mm glass straws (1,5mm WT). Not ideal and also makes it somehow not feel safe, to put them to your lips as a mouthpiece :(

However... they still have use for making the front end for my two part sliding stems, which is not in direct contact with your lips. They accept even the 10mm OD glass straws that were on the bigger side of the tolerances and would't fit into the thicker 13mm/10mm OD/ID tubes. Sliding is also much smoother and easy going, as the fit of the silicone sleeve is a bit less tight.

1481-F9-D4-8-CB4-4790-A81-F-DC09-DE3-FE436.jpg


As their walls are thinner, they also heat up faster and won't rob so much heat out of the system, as the thicker walled tubes do. Result is, you'll get better roasting at lower temps again.
The sliding stem works also better on the steel core units now, due to the thinner walled glas.

Can make sliding stems for the next 150 years now :nod:
:D
 

blokenoname

DIY Log Dabbler 😁🪵💪💨💨💨
Oh... look! :o

It's been 'building funny halogen Logs' day again :D:lol::evil:

I'll update this post with more of the details later tonight :science:

30l2pkz.jpg

28s1zeb.jpg

21bk5rs.jpg


ETA: Ok then :D
This baby was partly inspired by a private conversation about building halogen logs, I had with @brainiac today, who's working on his own rustic halo unit recently :cool: :tup:

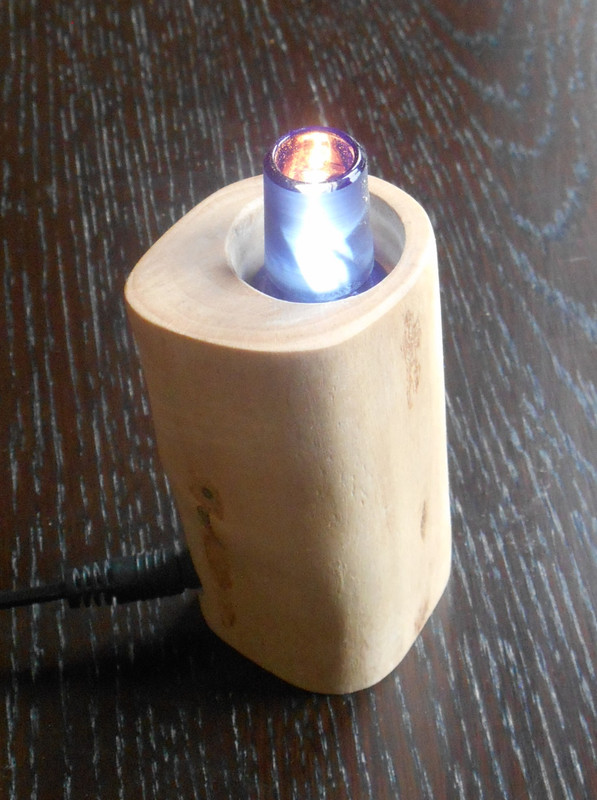
Apart from managing the glare of the bulb, another problem when placing a halogen heater inside a wooden log body, is the immense heat, a 35w or even 50w bulb radiates and conducts to the wood. Having built halo logs myself at first, that were based on Tobias' MUSA, the question posed itself: why having the hot glass heater cover within the log's body in the first place, when the ground glass joint holding the bulb is extending from the wooden body anyway? Looks good, but serves no real purpose, as it doesn't provide any kind of insulation for the bulb, but heats up the wooden body unnecessarily and thereby looses a lot of heat to conduction.

So maybe a better solution, to place a short heater cover on top of the unit, with the body just housing the wiring, managing the air intake and serving as a handle.

Also stumbled upon some pics some time ago here, from a short lived wooden vape manufacturer, Old City Diffusers/OCD, who produced some beautiful looking wooden vapes back around 2010 or so. One of the units he produced, was kind of a log vape, but with the (non halogen) heater situated on top of the unit, rather than within a heater well and contained within a short glass heater cover, that was essentially a right angle 14mm female socket.
Now... hadn't something like that lying around here, but sorting through my parts, I found the ballon/whip adapter from my defunct Arizer EQ tower, which would do nicely for a proof of concept unit. It's basically a 18mm male joint, set at a 45° angle.

Next I found me an old Misty beech wood body with the wider 30mm bore, that I don't do any longer, a cork, a 35w bulb and some wiring and started to cobble this baby together. Having no real fine mesh at hand, I used an old cut up ELB screen for covering the bulb and also a short piece of 0,3mm ss foil. Would have liked to also cover the bulb itself with the ss foil, but 0,3mm is a bit too thick there, to comfortably fit between the bulb and the glass joint. When my 0,1mm ss foil arrives, I'll give it another try.
Air intake is via 4 holes, drilled into the cork base.

Finding a direct draw stem for use with the vape, I got lucky with my latest slide in all glass stem, as it's front end tube is cut from the 12mm OD test tubes... which fit neatly into the 18mm male joint, as it's cut a bit shorter, than the standard 19/26 joint and therefor a bit wider. 19/23, it is, I would guess. :clap:

Now... all that remains is testing :science:
One thing I want to explore is the question, if 35w for the heater are really needed, to make this thing work! If maybe 10w or 20w are sufficient already, when there's not so much heat loss from conduction.
Would also mean, less glare and we could go with a common 1A or 2W wall wart here, instead the fat 3A power brick ;)

So I'll work myself up the voltage scale now, starting with 10w/5,5v, to see, where the vapor starts :p

Here are some pics from the original Old City Diffusers' vapes, back in 2010:

971j5j.jpg


ETA2: Test Results with 12mm OD dd glass slide in stem

10w at 5,5v = get terpene and the vaguest of vapor! Good taste :)

13w at 6,7v = get good visible vapor already and a nice taste.

15,9w at 7,5v = yup! This is it! :rockon: :D Fat clouds and a nicely gold brown avb, halogen style :clap:

So! This is it then. All that's needed are 15-16w, to make this baby sing :nod:
35w bulb is vastly overpowered then, at least in this setup here. 20w will do.

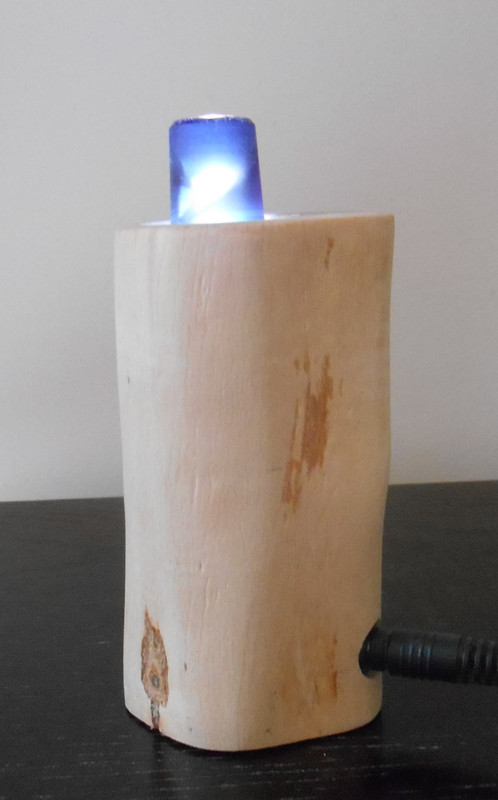
Nice coeffect: at just 16w, there is really no brightness issue, to speak of! This is a kevel of brightness, you can simply stare into, without even a twinkel and not even enough, to meaningfully add to the dim, mostly candle lit illumination of my living room :D
A very far cry from what I had experienced so far with my other halo logs, that had to be run at near full brightness, that really hurt the eyes.

And as the halogen heaters heat up rapidly, there isn't even need to run the unit constantly at 7,5v. You can just turn It down another 3v, and have a very cool looking ambient light standing on your table :lol:

Body stays totally cool. You can even touch the glass cover below the 45° angle: it's damned hot, but you won't burn yourself. Cork totally unaffected.

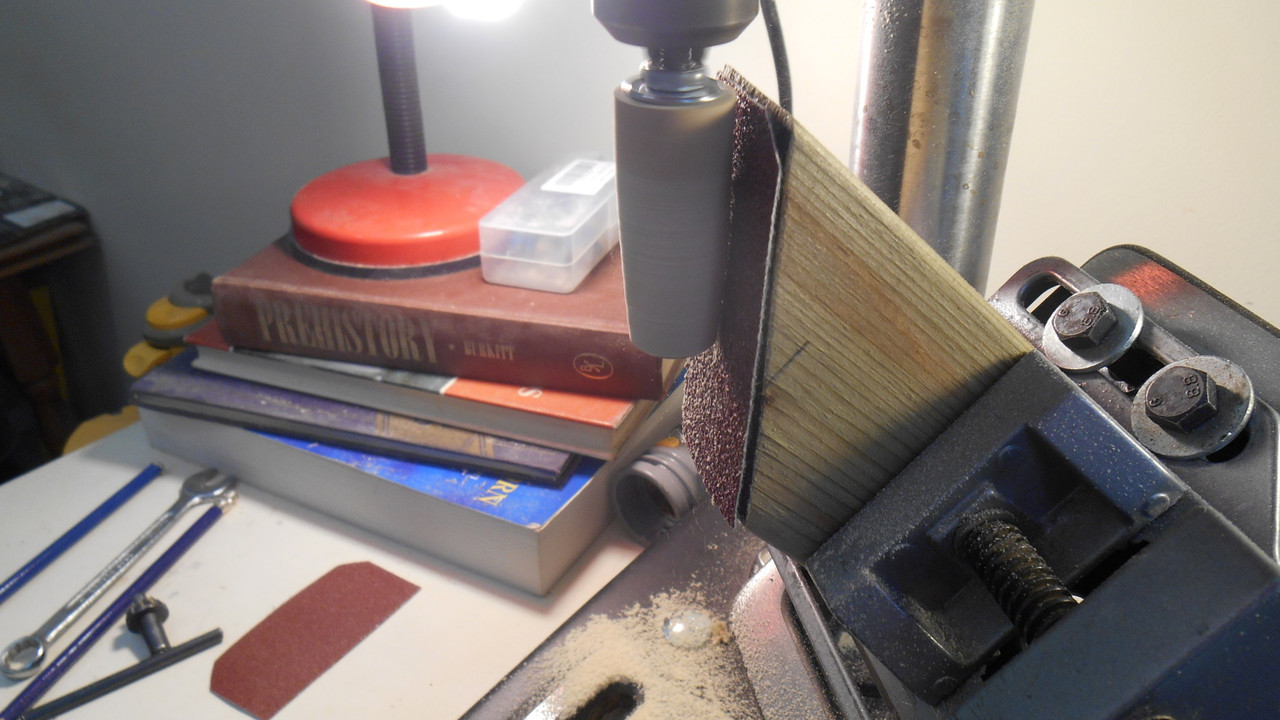
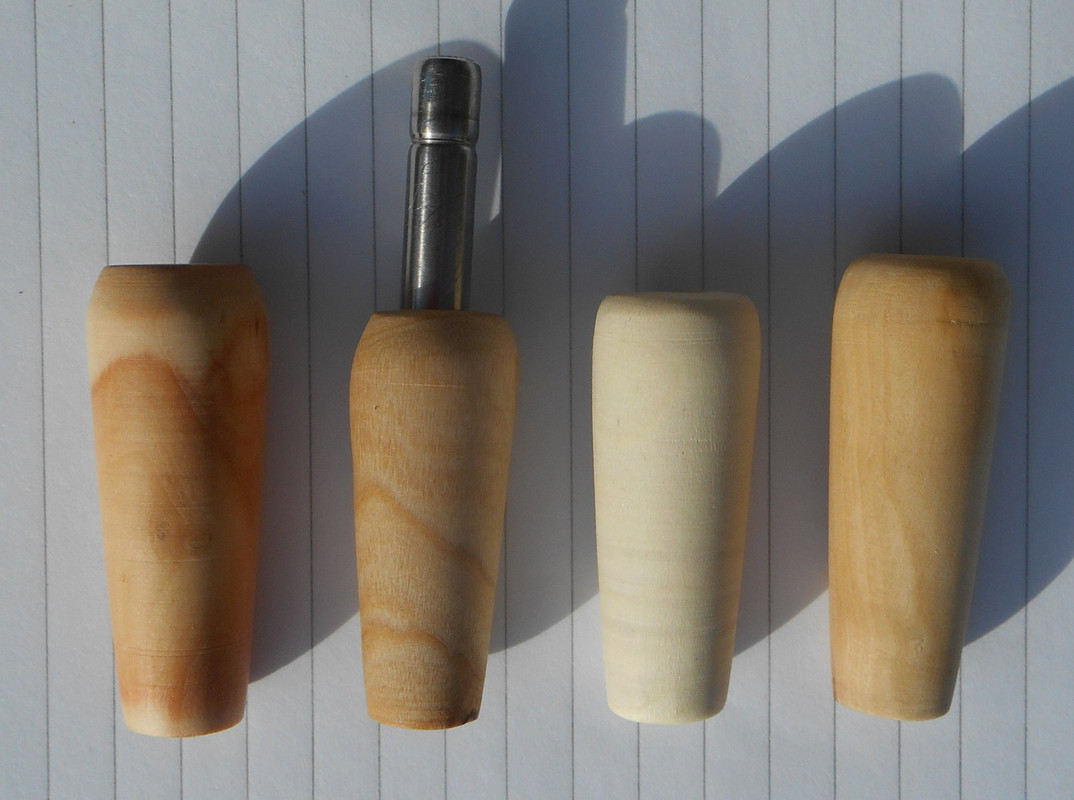
Let's give this a nicer, bit sturdier body and maybe some little tweaks here and there... and this is a very cool vape, I think :D

This thing is fun! :clap:
 
Last edited:

brainiac

log wrangler
A dim bulb and a brilliant idea :tup:
This would appear to control the two main issues with a halogen build - heat and light.
Will you be testing it with the 10w bulb as well?

My recent attempts at a Rustic halogen produced an interesting column of well-illuminated cork smoke :o
Great invention for communicating via smoke signals at night :D

I'll certainly be using your 20w bulb running at 15-16w method as soon as I have the parts.
Well done Bloke :tup::clap: This is a major advance and offers up several new build options.
 

blokenoname

DIY Log Dabbler 😁🪵💪💨💨💨
Here's, how the brightness levels look in bright daylight.

Left is standby mode (4,5v/7,5w)
Right is vape mode (7,5v/16w)

Even the camera can handle that :D

2u760d4.jpg


10w bulb doesn't get hot enough. The 20w bulb with a G4 socket should do. It'll draw a bit less amps and needs a few volts more, to achieve the 16w, due to having a higher resistance, than the 35w bulb. So you'll probably have to set it to 10v or 11v, to get the 16w there. This is also more ideal, when working with a dimmer, instead of a buck/vvps :)

As that Arizer mini whip adapter is a bit bulky and expensive, I'll go for this angled 18mm m/m adapter, to do a nicer looking version next, made from walnut or mahogany.

2emg4mx.jpg


Hopefully, the joints are short and wide enough, to allow for the 12mm glass dd stems. Otherwise I have to shorten them myself.

Disk sander isn't of much use there, with grinding down that fat glass. At least not with the standard sandpaper, the machine was delivered with.
Dremel duamond cutter disk works fine though, but don't try to cut the joint (will break eventually), but use the flat surface of the cutter disk instead, to cafefully sand it down to the desired length. Takes sone time and patience and you've to do it with a lot of feeling ;)

But works out, eventually :D
And very accurate, too ;)

2j29rvc.jpg
 
Last edited:

brainiac

log wrangler
Thanks to Bloke's usual generousity with ideas, advice and practical help :tup::clap: ...
here's the Rustic halogen unit version 2.

blue-halo-on-3.jpg


It works reasonably well but needs further refinement before I could say I was happy with it's
performance as a vape. Certainly illuminates the path to v3, though :)

blue-halo-on-1.jpg


That's the light at working temp or perhaps a little below. It'll work better when the OD 12mm
glass tubing arrives and I can make a proper GonG stem for it.

Here are most of the parts. The 35w bulb wrapped in 200 mesh ss is already inserted and is located
1.5cm below the top of the glass heater cover - thereby allowing for a slide-in glass tipped dd stem.

blue-halo-parts.jpg


Four air inlet holed were drilled in the bulbous middle section of the hc (one of which is visible) which is an 18mm male/male adapter. This was done to avoid the need for an air inlet hole in the base.

The wooden collar on the glass hc allows the hc to sit on a shelf inside the (beech) body of the unit. The collar has groves on it's inner wall for the retaining wires. I got a taper on it's ID with that DIY conical sanding bit. Basically, it's a W(onG) with a narrow strip of sandpaper wrapped diagonally around
it and glued.

The outer wires run through groves in the sides of the base plug and then are folded down across it.
Holds the hc in place well enough for testing at least.

Opted for coloured glass on the basis that if you're gonna generate a lot of light it might as well be put to good use. It's an extra layer aesthetic possibilities.
 

blokenoname

DIY Log Dabbler 😁🪵💪💨💨💨
Oh... look, what I just found in me post box :clap::love:

Many thanks to @brainiac :bowdown:
Great work, mate! They look stunning!
It's sycamore and plum :)

rc82rp.jpg


In other news today... I'm working on a 2nd Halo Misty prototype, to test out covering the bulb not with fine mesh, but simply wrap it with a rolled up piece of ss foil. So far its not overheating the bulb, but I did only an hour worth of test runs. More hours to be put in over the course of the evening here.

It also is designed to take a user replaceable bulb, the extended leads of which will connect to a proper ceramic G4 socket, further down inside the unit's body. User can then simply pop out the heater cover and bulb, replace it with a new one and push the heater cover back in again. This will probably only work with a straight heater cover, but not with the angled cover of the recent 'Blowtorch Misty'.
The socket isn't incorperated yet. Still waiting on delivery.

2zg51mp.jpg
 
Last edited:

blokenoname

DIY Log Dabbler 😁🪵💪💨💨💨
Due to another case of 'bad eyeballing day', I guess there is a significant change in my approach to halo Log building now :o :rofl:

The 20w G4 bulbs are a good deal smaller, than the 35w ones :cool:
Means, there is no longer any need for the stove pipe sized 19/26 gg joint stems as a heater cover! These little buggers fit easily into 14/23 stems or even 11mm/10mm ss tubing :lol:

@brainiac ... sorry for that, mate. Honestly thought, they were the same size as the 35w ones :uhoh:

Well... this changes the whole equation. If they are still powerful enough to produce vapor now (the change in size will have consequences for the heat output of course), we can rethink the whole project again and go with the more traditional Log design again... just using the bulb there, instead of the resistor/cartridge :D

And if not... well, the damage is still less than £10 for the ten bulbs and the ceramic G4 sockets are still useful, for setting in the extended leads from resistors, cartridges and 35w bulbs alike :clap:
This can produce user replaceable heaters for all Misty models :tup:

262nkmu.jpg
 

KeroZen

Chronic vapaholic
I forgot if we discussed it already, but probably yes, but did you try sourcing those special bulbs that have their spectrum adjusted to produce more IR than visible light? I think they are specially designed for heating applications and were mentioned in the Venus/Helios/Apollo threads by their maker.
 

blokenoname

DIY Log Dabbler 😁🪵💪💨💨💨
I forgot if we discussed it already, but probably yes, but did you try sourcing those special bulbs that have their spectrum adjusted to produce more IR than visible light? I think they are specially designed for heating applications and were mentioned in the Venus/Helios/Apollo threads by their maker.

Nope! Didn't even know s/th like this exists :shrug:
But thank you! :clap:
Will read through the Helios/Apollo/Venus threads this WE and see what I can find there :):tup:

Thanks!

Update:

Mates... I just love it, when an accident works out! :D :rofl:

This litte halo bugger needs just ~10,5w and 8v with the smaller sized 20w G4 bulb and a smaller diameter 14/23 glass heater cover to blow your mind and reward you with 100% extracted AVB :cool:

Best of all: you can build it just like any other non-halo based glass core Log and even can have the joint recessed into the heater well again. So far, there seems to be not even the necessity for a ss reflector in the heater well :clap:

The 14/23 joint will accept 9mm OD glass stems/tips and 9mm OD stainless steel tips, for sliding into the core.
Will also accept any GonG with a 14/23 socket, sliding over the core.
As there are still 4v left till full burn, you've sufficient backup to crank up the heat beyond ideal vaping temp anytime, if need be :rockon:

Not exactly a beauty right now, but just cobbled it together within a few minutes, for a proof of concept ;)
Have some new Misty bodies in cherry, walnut and maple sitting on the shelf, that just need to get the hole for the plug and a bit of sanding, and will set the core into one of these later tonight :nod:

Well.. at least for me, this is a real deal changer now, in how to build a proper halo Log! I like this much better, than all my approaches with the bigger 35w bulb and the fat 19/26 heater cover :clap:

ogw5xh.jpg

2i4t1z.jpg

afbodg.jpg

2q3zxol.jpg
 
Last edited:

brainiac

log wrangler
@brainiac ... sorry for that, mate. Honestly thought, they were the same size as the 35w ones :uhoh:

No need to apologise. The reason I asked if they were the same size was because I was hopeing they'd be smaller. Those 18mm stems are too big and clumsy. 14mm/10mm works much better for me. And going by your post it sounds like the smaller bulbs are more suited to the task in hand. So, better all round :tup:

Made a few more WPAs and I'm getting slightly better at it :)
Here's the jig.

WPA-jig.jpg

The drill press plattern is set at 44 degrees and that block of wood in the machine vice is cut to 40 degrees - so it's sanding at an angle of 6 degrees which is close enough for the WPAs to fit.
A lathe would do the job far better, ofc.

Here's the latest batch.

four-WPAs.jpg


L to R - plum, cherry, European sycamore and another cherry.

Working on a lovely walnut log blank atm. Should be ready in a few days.
 
Last edited:

blokenoname

DIY Log Dabbler 😁🪵💪💨💨💨
@brainiac
Those WonGs look gorgeous already :bowdown::love:

Trying to make WonGs here with the disk sander has to be delayed till beginning of next week, as I missed out on ordering the most essential parts there: proper sized wooden dowls! :rofl:

Yep! Smaller bulbs are so much better!
Now... that's a proper Halo Misty :rockon:

ETA: With the smaller diameter heater well and a 9mm stainless tip, I'm now down to 7,72W at 6,5V :D

2uj3xq1.jpg

2m7hob8.jpg


ETA2:
Brightness at 7,7W - i.e. at vaping temp
That's maybe a brighter candle now :cool: :D

2n7huw.jpg
 
Last edited:

blokenoname

DIY Log Dabbler 😁🪵💪💨💨💨
9mm full glass direct draw stem and 14mm m/f GonG adapter for the Halo Misty v3 :D

The 14mm GonG has a removable 12mm glass insert, that carries an adjustable basket screen. Easily loaded, inserted, removed and cleaned :)
And of course, it can also be used as a dd stem ;)


jgmfdc.jpg

ekmjnp.jpg
 

Abysmal Vapor

Supersniffer 2000 - robot fart detection device
Nice development you got here @blokenoname :)) ! What is that weird adapter ? Is it a carbon filter ?
I think i mentioned somewhere about the thing Kerozen is talking about. It is an IR coating which makes certain spectrum bounce back at the coil and increase its temperature and alters it spectrum due to the filtering.. As far as i could grasp from Osram and Sylvania sites ,it is on the inside of the bulb,so no danger in using it. Other than that i have tried the 12v 50w with the IR coating and other then they being 2 times the prices of the regulars i see nothing special in the performance nor the spectrum,also i found their shape (spherical top) to be less desirable for the purpose.
All my halologs now have SS foil 0.1mm as a shielding.. It is a matter of personal preferance but i prefer the glow to be minimized to lowest extend. I have to post a picture of my solution for the sockets for the bulb wires ,makes change easier compared to coil ends also it allows greater area of contact.
As far as monitoring the health of the bulb, you can watch the coil,if it goes out of shape ,then you are overheating it :).I havent had yet any exploded but it makes uneven heating of the bulb,as it heats on side more than the other,for the record this happened with only 3 bulbs out of 30 and all were 50w and driven on max power for prolonged periood of time .
Do you find any hotspots with the angled concept ? I imagine in a larger joint like 19/26 the top part would be hotter than the one below ,but in your concept wherer the bowl enters inside the cover is not an issue,due to smalled id and conduction.
 
Last edited:
Top Bottom