Win an Ascent Vaporizer by DaVinci!

Status
Not open for further replies.

Zee007

Member
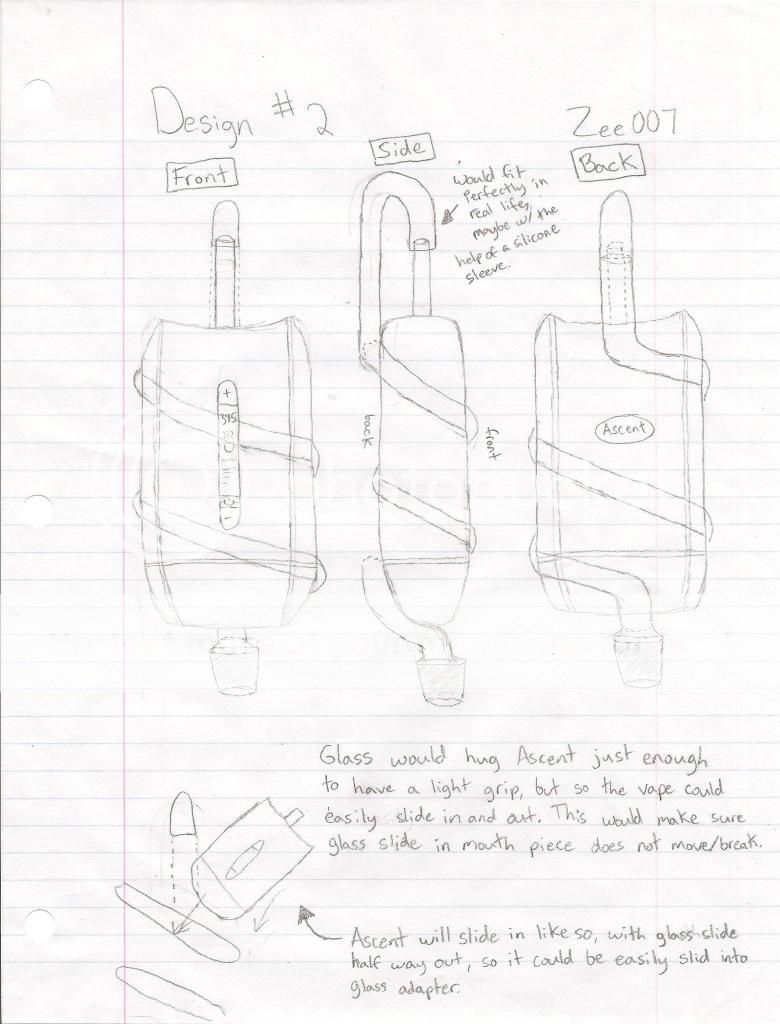
Not the most practical but you've got to admit it would be pretty cool. :shrug:

D2.jpg


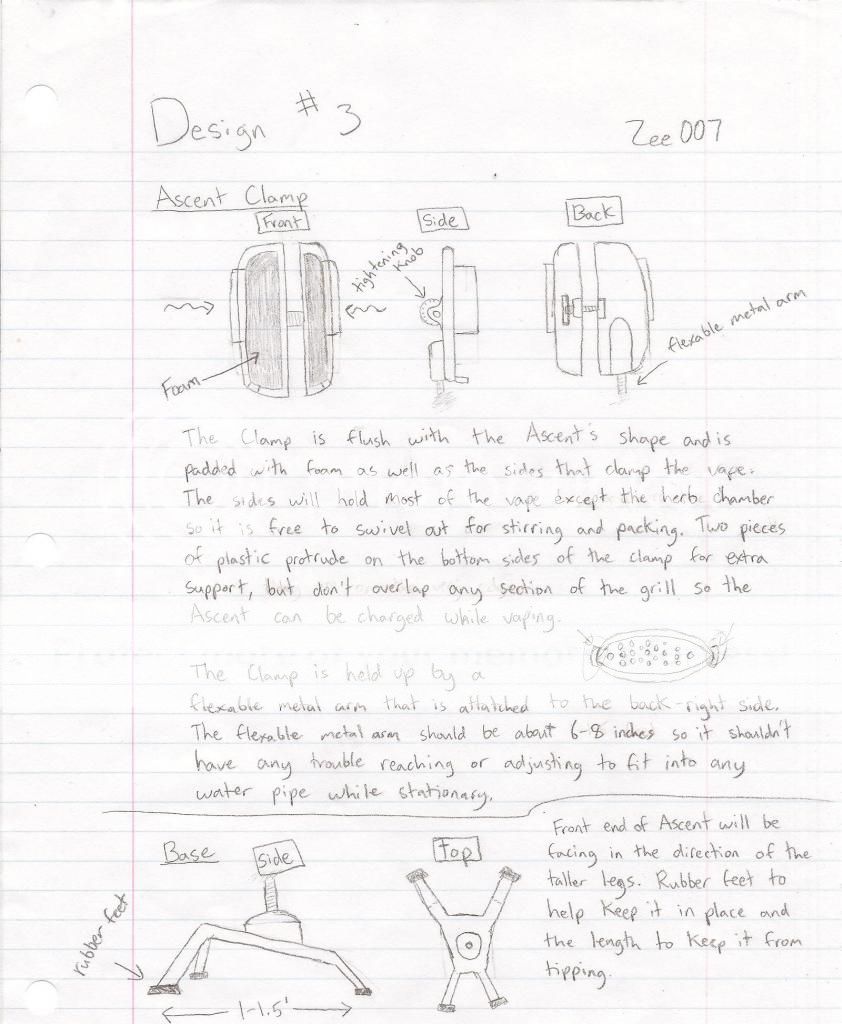
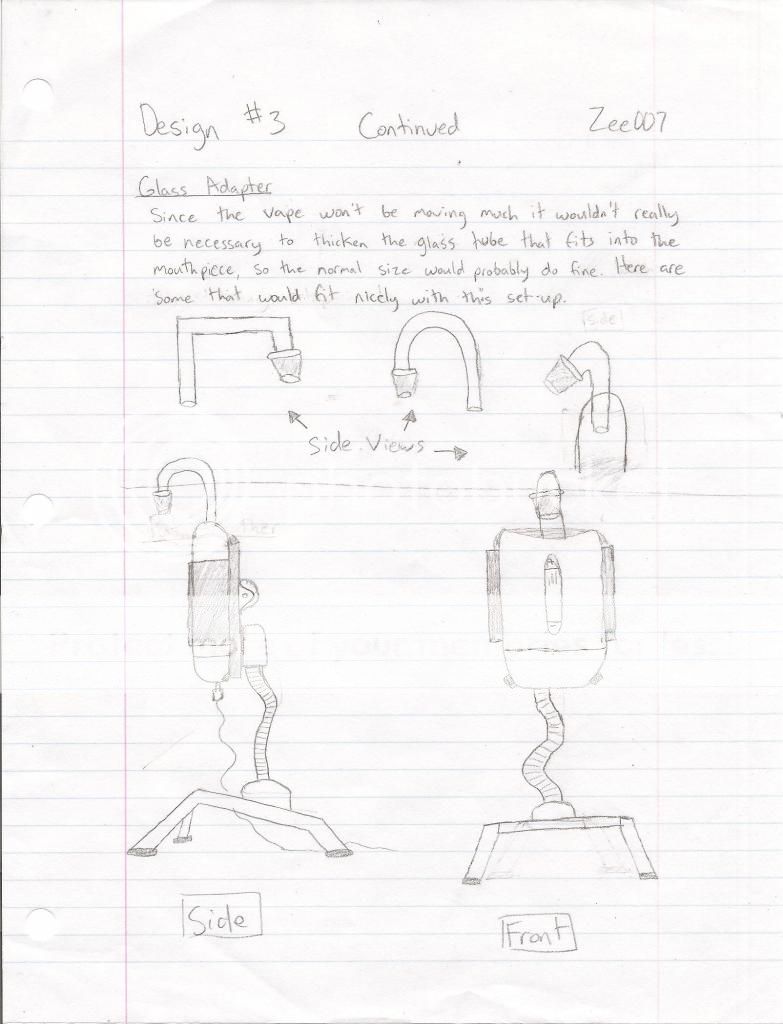
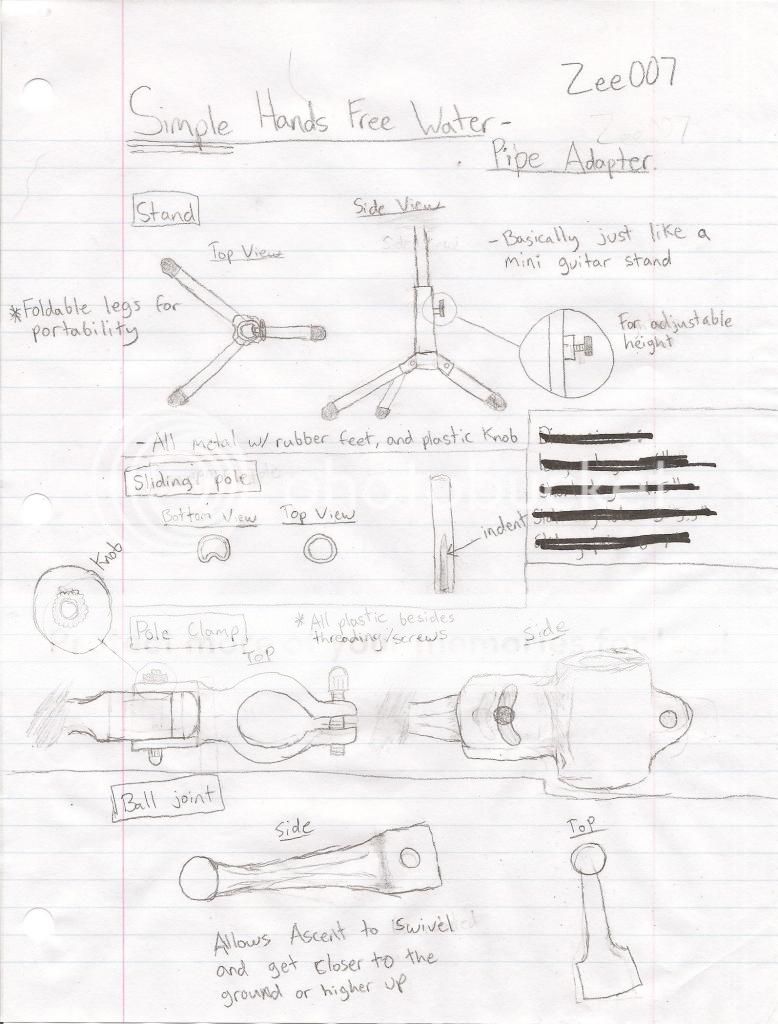
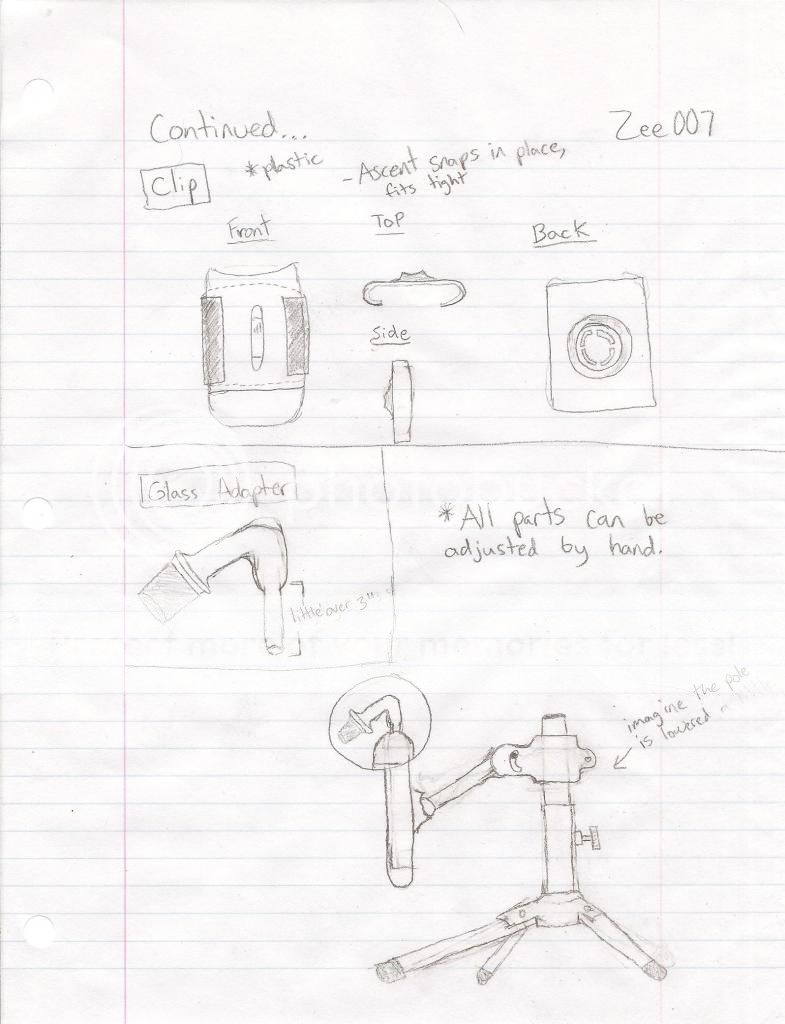
Design #3 is all about hands free vaping, you can leave it on this device all day while it chargers, kinda like an ipod dock if you wanted. Allows full performance, and you can adjust it into whatever position you need.

d3.jpg

d32.jpg

d34.jpg
 

CEOnnor

Well-Known Member
finalwd.jpg


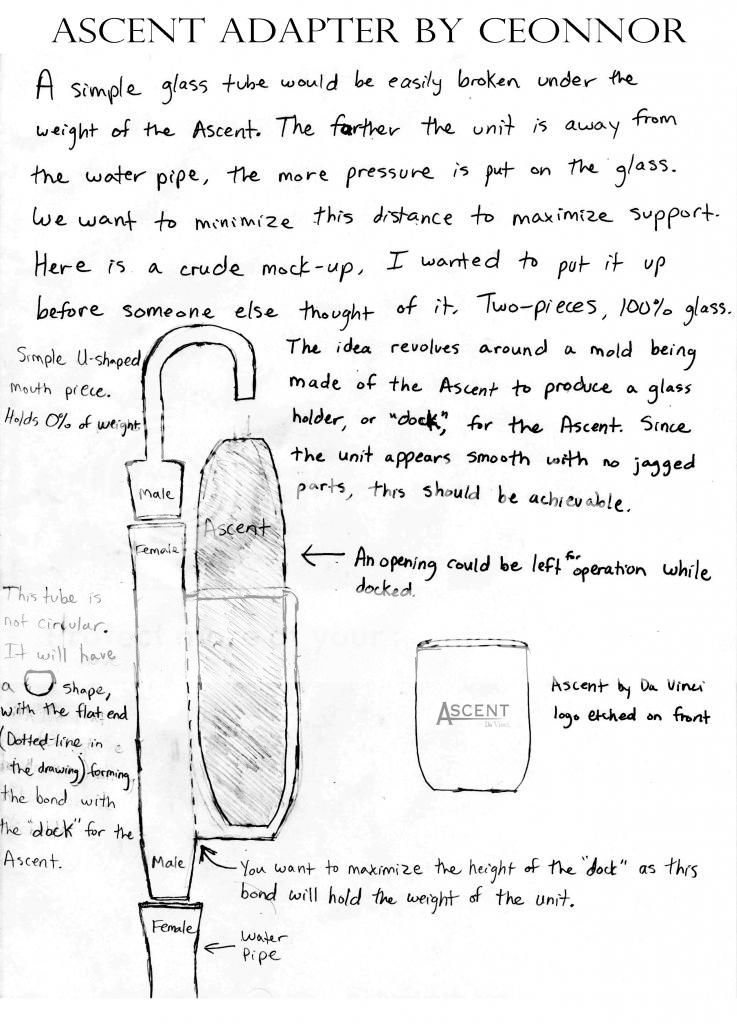
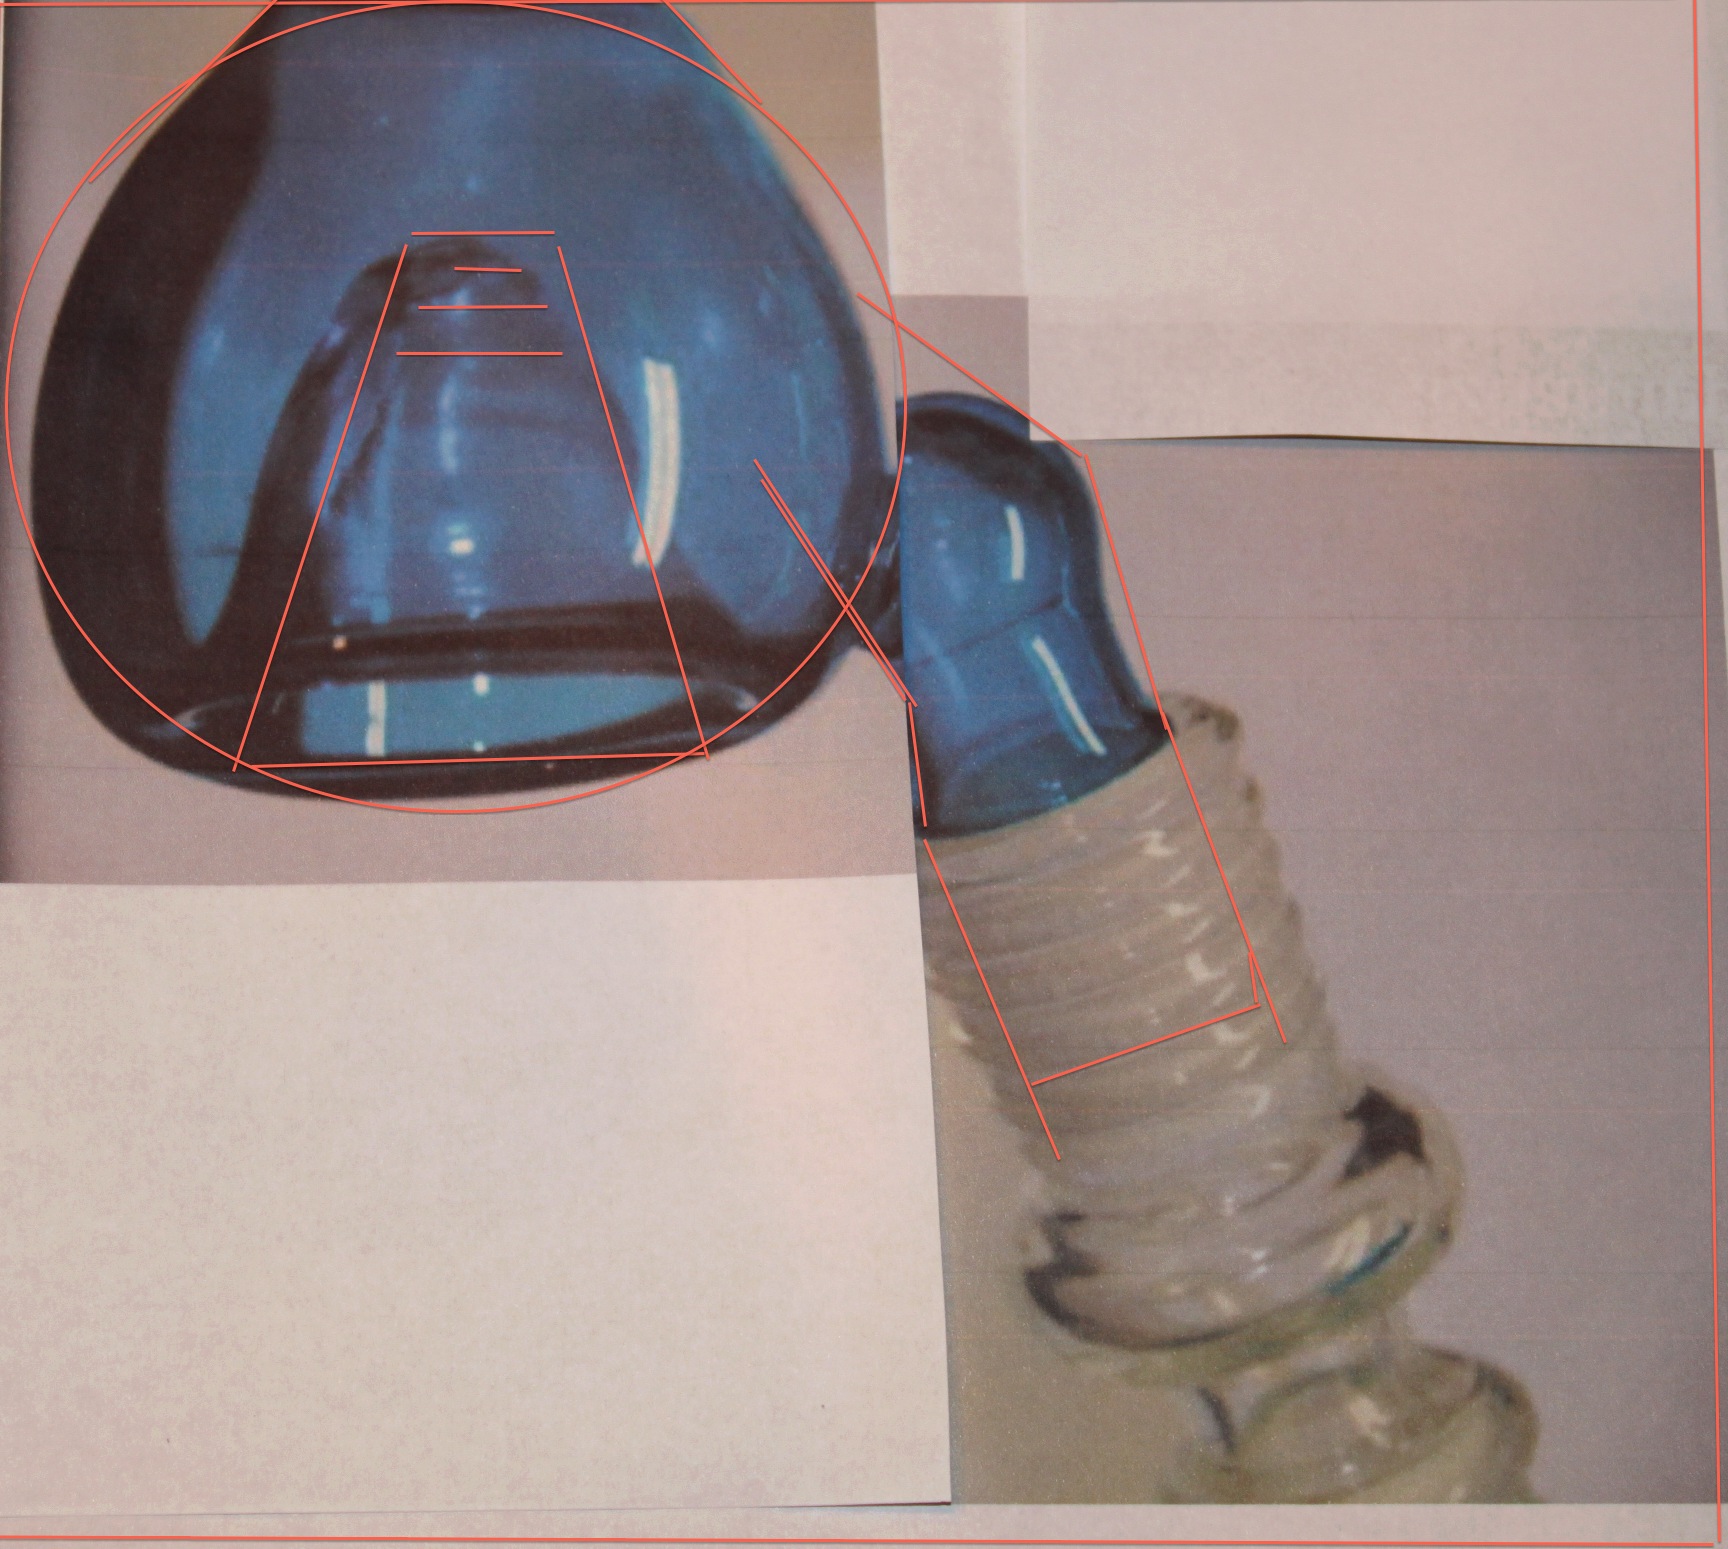
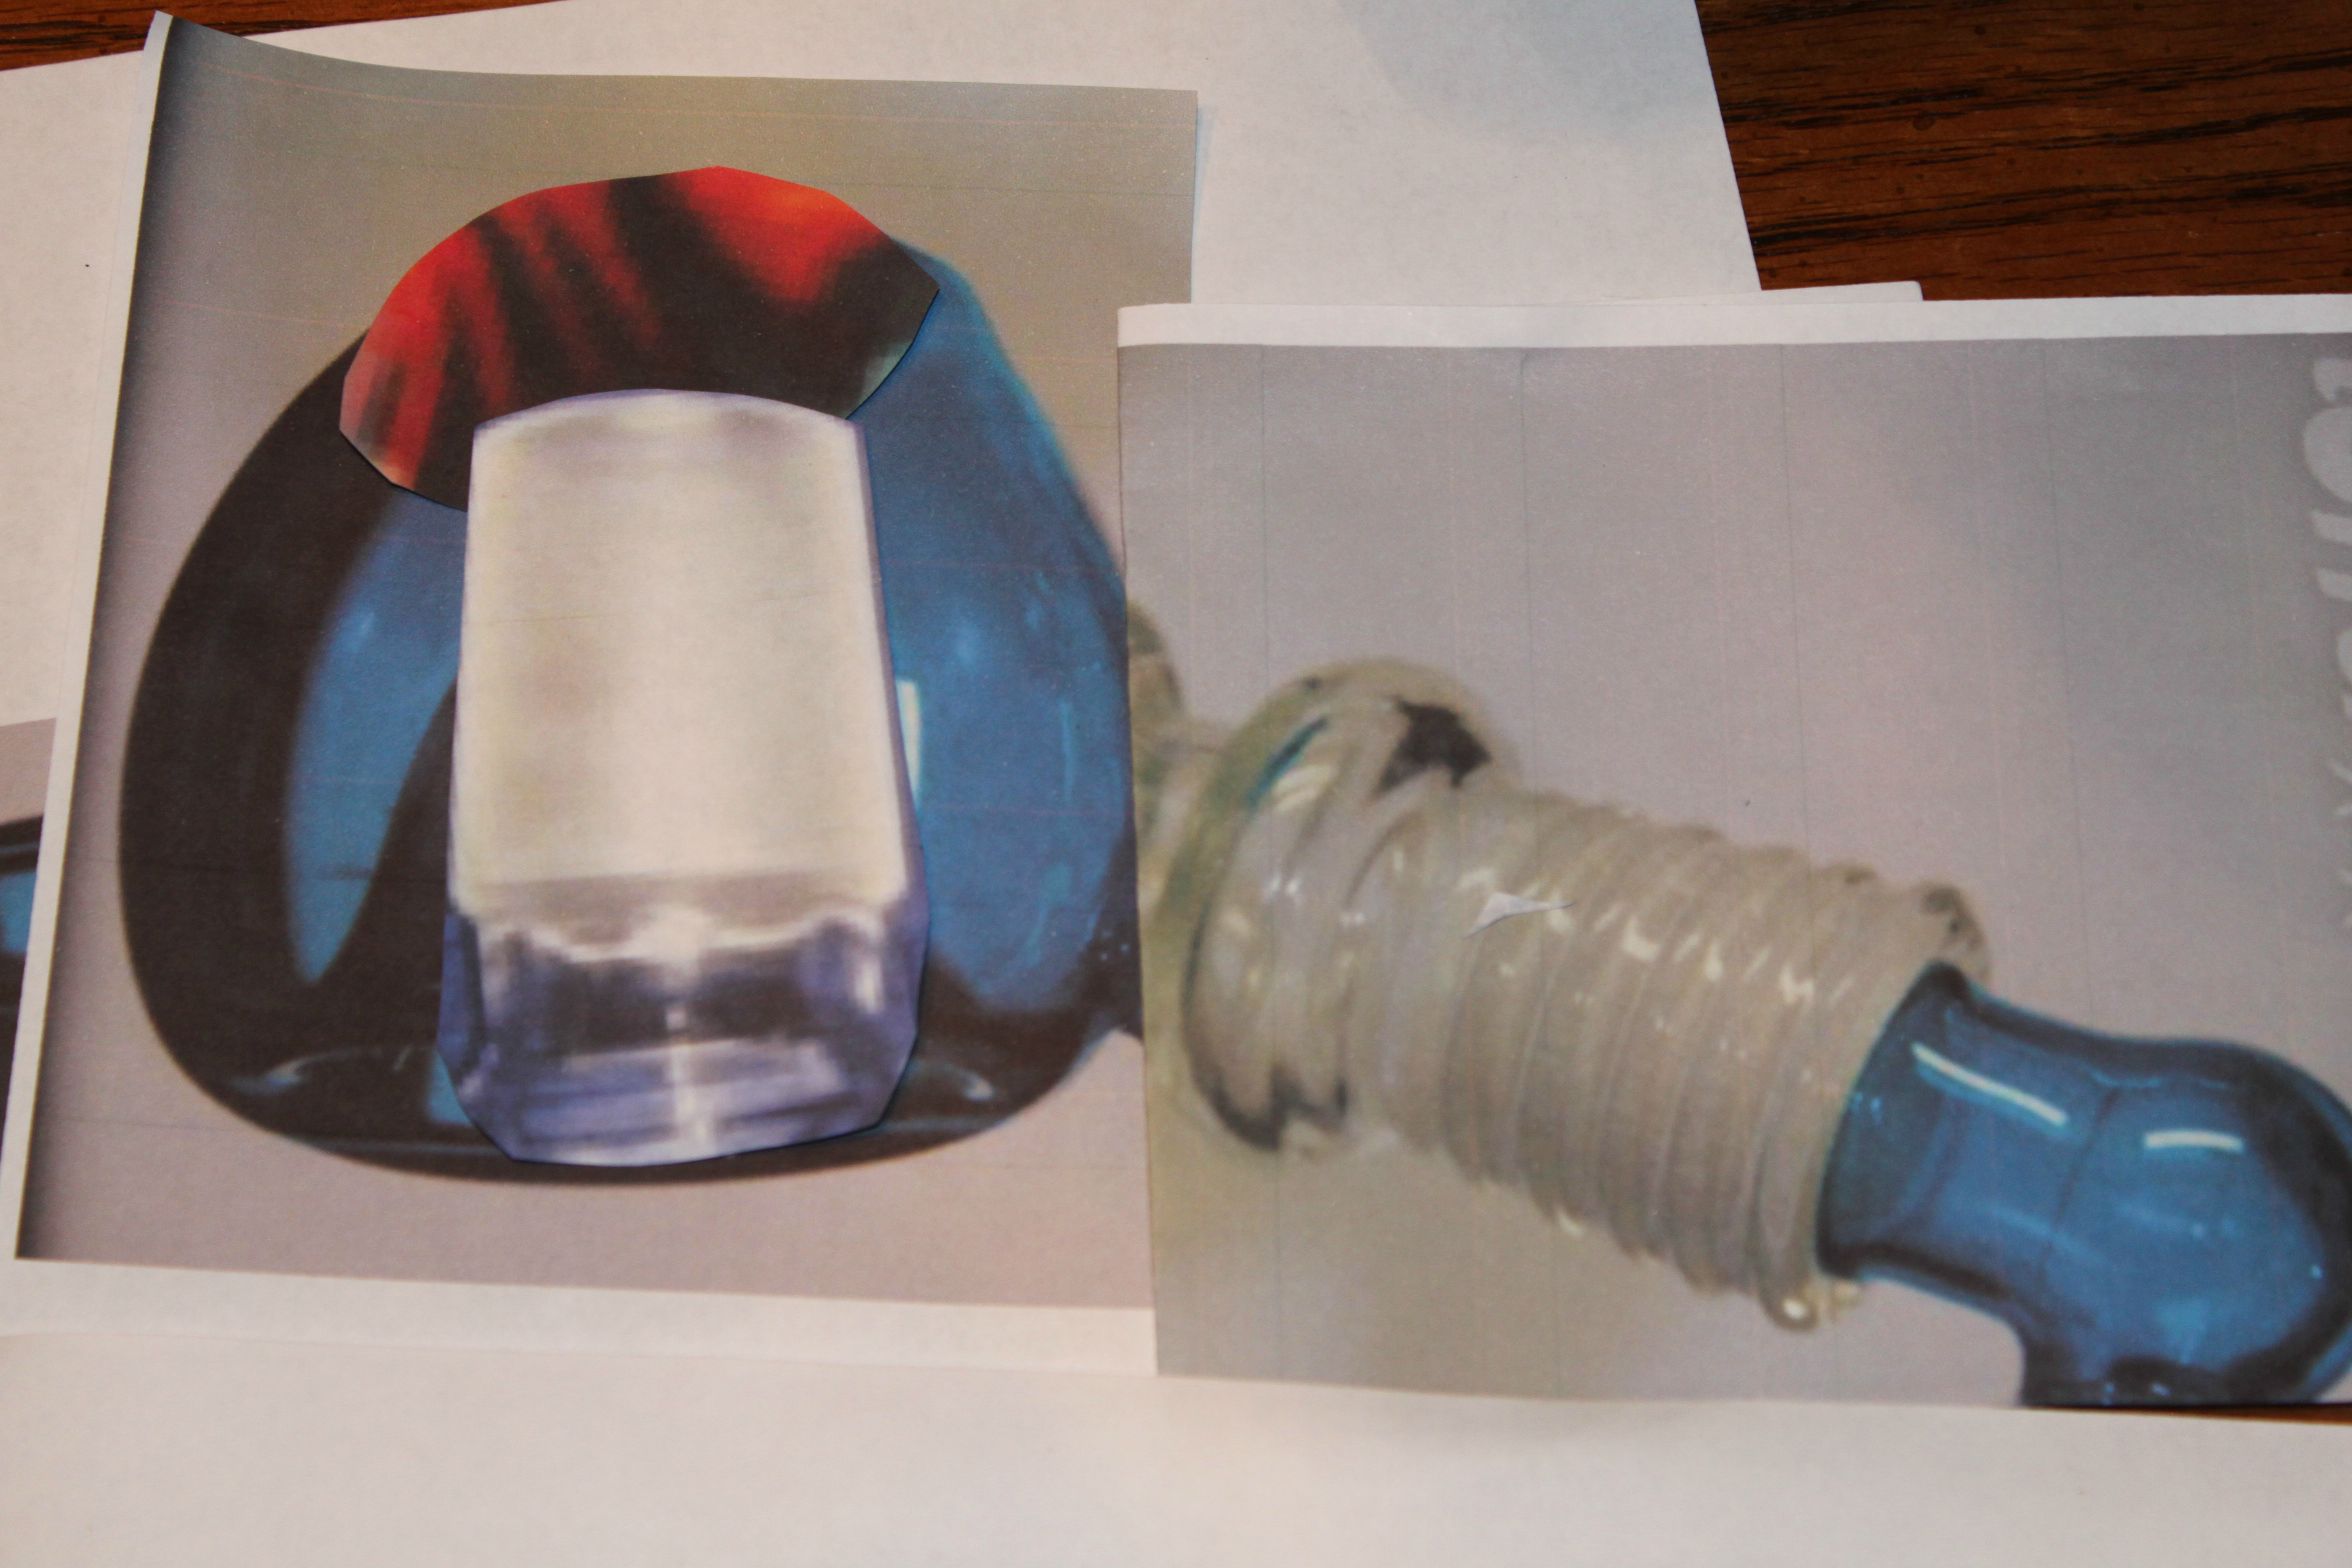
Thanks for the contest Da Vinci! Having to take multiple physics classes got me excited for ways I could implement it into this project. Stability was my biggest concern when thinking of the design. Moving the Ascent to intersect with the glass tube instead of it sitting parallel to the tube shifts the attachment's center of mass inward. This is desirable because if the center of mass is too far out, the water pipe could tip easily (a catastrophe too familiar). The angle of 17.5º also increases the stability of the unit and water pipe itself. When an object is angled on a slope, the force of its weight is split into two components instead of a single downwards force from gravity. One force is angled downwards and parallel to the slope while the other is also angled downwards but perpendicular to the slope. The angle allows for the weight of the Ascent to be directed down into the water pipe itself, adding sturdiness. The downward force put on the glass itself is decreased 5% while greatly increasing the amount of glass that the pressure is applied. This means that the force is more dispersed and not focused on one location. To accommodate those of us whose down stem is angled instead of straight up and down, the attachment can be rotated. The built in angle of the attachment will counteract the angle of the down stem, allowing the Ascent to sit upright even when sitting in an angled stem. On the front of the dock is an etched "Ascent by Da Vinci" logo. On the right picture it looks like the glass tube that holds the slide for the mouthpiece is tapered off at the end. It's not, I was trying to show that it's angled away (seen in the middle). Good luck to everyone, a lot of the designs are looking good and the competition is helping to build these up. I enjoyed working on this and hope ya'll enjoy checking this out! and if you didn't at least you learned some physics lol.


Original:
001.jpg
 
Hopefully my explanation does these poor drawings some justice... Please note that I have not drawn anything to scale, this is merely a rough sketch of the idea.

This design is based off of the demo video that was posted recently. I also got inspired for this design when someone mentioned a cap for the device.

Basically, it would be a tightly fitting cap with a hole on either the top or side of it that would fit the glass pieces for the gong adapter snugly. The glass could be removed and you could make some sort of opening/closing compartment for the hole so it could function as a cap for the ascent while it wasn't in use.

In the video, I noticed that you could draw from the ascent without the mouthpiece extended, so the design can function with the original glass mouthpiece still inserted into the device. Since the cap would provide for a good seal, attaching the gong glass to the original mouthpiece would not be necessary.
I do have 4 designs. 2 of them show how the glass for the gong adapter could fit over the original mouthpiece if it were extended. The other 2 show how It could work without the two glass pieces attached. That method would be like drawing on it with the glass stem inside of the unit (like in the video), except through a water pipe.

There would be silicone to keep the glass in place and protected just like the ascent already has for the glass pieces. The ascent would stand up on the ground and then the gong would be attached to the water pipe.


attachment


attachment

attachment

attachment
 

Bouldorado

Well-Known Member
My second entry:
ascent.png


The angle of the glass accommodates both 45* and 90* pieces (should even work with dewaar joints). The rubber spacer has a sleeve to hold the the glass tube in place and is molded on each side to conform to the shape of the ascent and the glass tubing. In addition, the spacer serves to more evenly distribute weight. Finally, a ratchet strap (or other manually tightened device) is used to hold everything together. I chose the ratchet strap for two reasons:

1) from watching the demo video, the ascent seems rounded enough that a friction-fit clamp may not work
2) this design is very easy to remove; simply loosen the dial and pull off.


While not technically a "ratchet" this is what inspired me:
cateye-ld610-bicycle-taillight.jpg
 

Zee007

Member
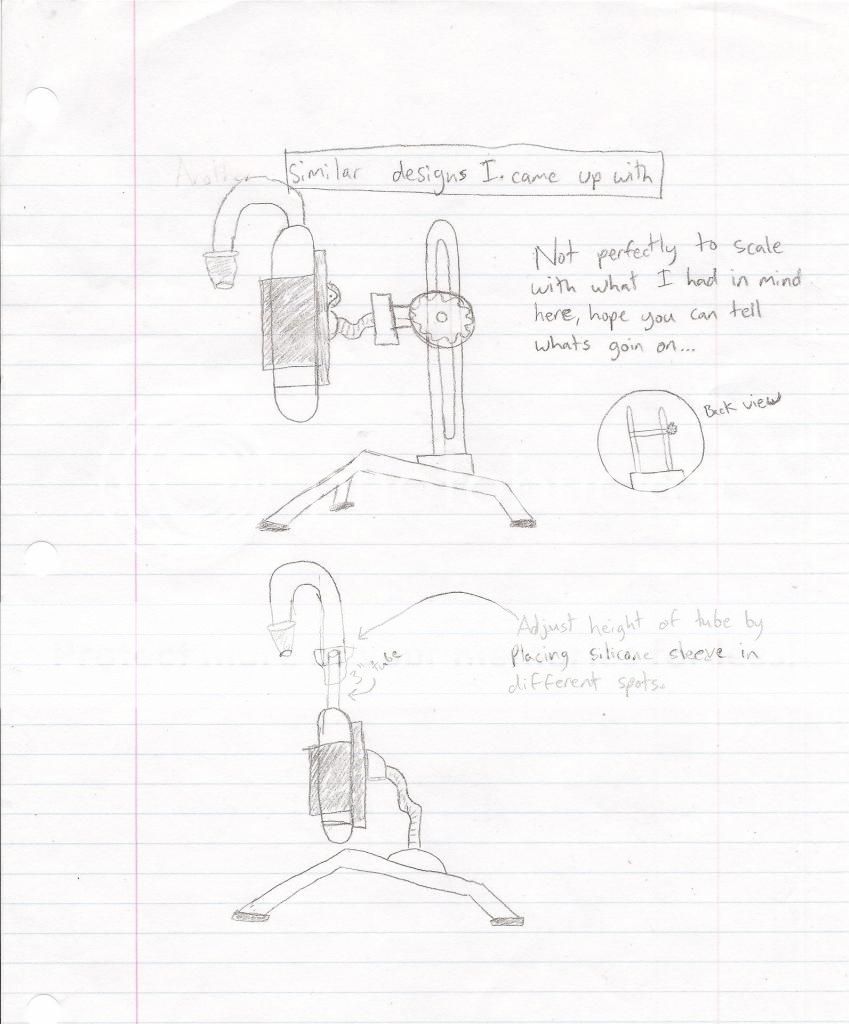
Another Hands free design, although probably not as sturdy as my first, this one is portable, and probably more cost efficient. Pretty much every piece can be dissembled.

hf1.jpg

hf2.jpg


Although I only provided one glass adapter with this one, it would work with the other glass adapters from my previous design. It would also be possible to make each glass piece wider without being worried about the stem breaking with the rubber sleeve I used in my first design just by shortening the part top of the clip, or the top of the clamp in my last design; which shouldn't really effect how well the Ascent is held up.
 

JCat

Well-Known Member
Accessory Maker
I know the rules said 1 single optimal GonG connector, but I, as a pretty much guaranteed future owner of your product (since my vape obsession is in full swing right now! :lol:), would prefer separate 14mm and 18mm GonG adapters. Here is my reasoning for this ...

If the adapter is universal than for users requiring a "more discrete" 14mm connection, such as when in use with my Zapubbler or the future f-Bomb from PlanetVape for instance (ie. a portable 14mm GonG type Hydratube), it would be much larger and less convenient than a strictly 14mm one. (just my 2 cents ... my customers and employer often ask for things without thinking about everything so as opposed to following blindly I feel it's better to put your "best foot forward" and offer your best advice not just what they have requested to hear.)

So ... based on that and my overall opinion on the matter, not to mention when you consider manufacturing costs and the fact that people will want a GonG adapter but will not want to pay exorbitant prices for it .... the best option is a simple straight stem to replace the current one with 14/18 options (since they would be relatively cheap one could own a couple of each if required this way ... and if dropped or broken accidentally somehow it wouldn't be so crushing)

So ... I'll see if I can draft up a quick JPG of a 14 and an 18 adapter (according to my above comments) ... and maybe a "Universal" that would do both 14 and 18 but the cost would be higher to manufacture due to the increased machining costs of creating the glass stems.

It fits the upright condition if used with Hydratubes ... and there is no specification in the contest as far as what type of water attachments it will hook to or what direction the female GonG adapters on the tools will be or even if it will be female are specified. I would stick with the keeping it simple principle and just go straight with GonG connection to replace standard tube ... if it really needs to stay upright while in use and someone wants to use a standard bubbler with an upright connection ... than they could easily enough make use of a small silicone tube to connect the GonG adapter in question to the stock Ascent stem.

Edit: I know this is not the most creative option, and I regret that; but I still do believe, in this case, that it is the best, and most desired, option by most customers.
 

Lee_

New Member
I know the rules said 1 single optimal GonG connector, but I, as a pretty much guaranteed future owner of your product (since my vape obsession is in full swing right now! :lol:), would prefer separate 14mm and 18mm GonG adapters. Here is my reasoning for this ...

So ... based on that and my overall opinion on the matter, not to mention when you consider manufacturing costs and the fact that people will want a GonG adapter but will not want to pay exorbitant prices for it .... the best option is a simple straight stem to replace the current one with 14/18 options

if it really needs to stay upright while in use and someone wants to use a standard bubbler with an upright connection ... than they could easily enough make use of a small silicone tube to connect the GonG adapter in question to the stock Ascent stem.

Edit: I know this is not the most creative option, and I regret that; but I still do believe, in this case, that it is the best, and most desired, option by most customers.

I agree with you on this. Manufacturing costs need to be low so that there is profit to be made while selling these for a reasonable price. It's a great case where simpler is better. Check out my post earlier, I think you'll find it similar to what you are picturing (seperate stems for different adapter sizes) that simply replace the stock glass tube.

And like you suggest, if you need the Ascent to function upright, you can attach the GonG adapter to the original stem with standard FDA approved, inert silicone tubing.
leegong.jpg
 

Herbal Ant

Well-Known Member
Hey DV, may I call you DV? :cool: Just curious, if you were to say pick mine, would you make the stand too or just the GonG? Should have asked this sooner rather then possibly waste thinking time on a stand that isn't gonna happen.
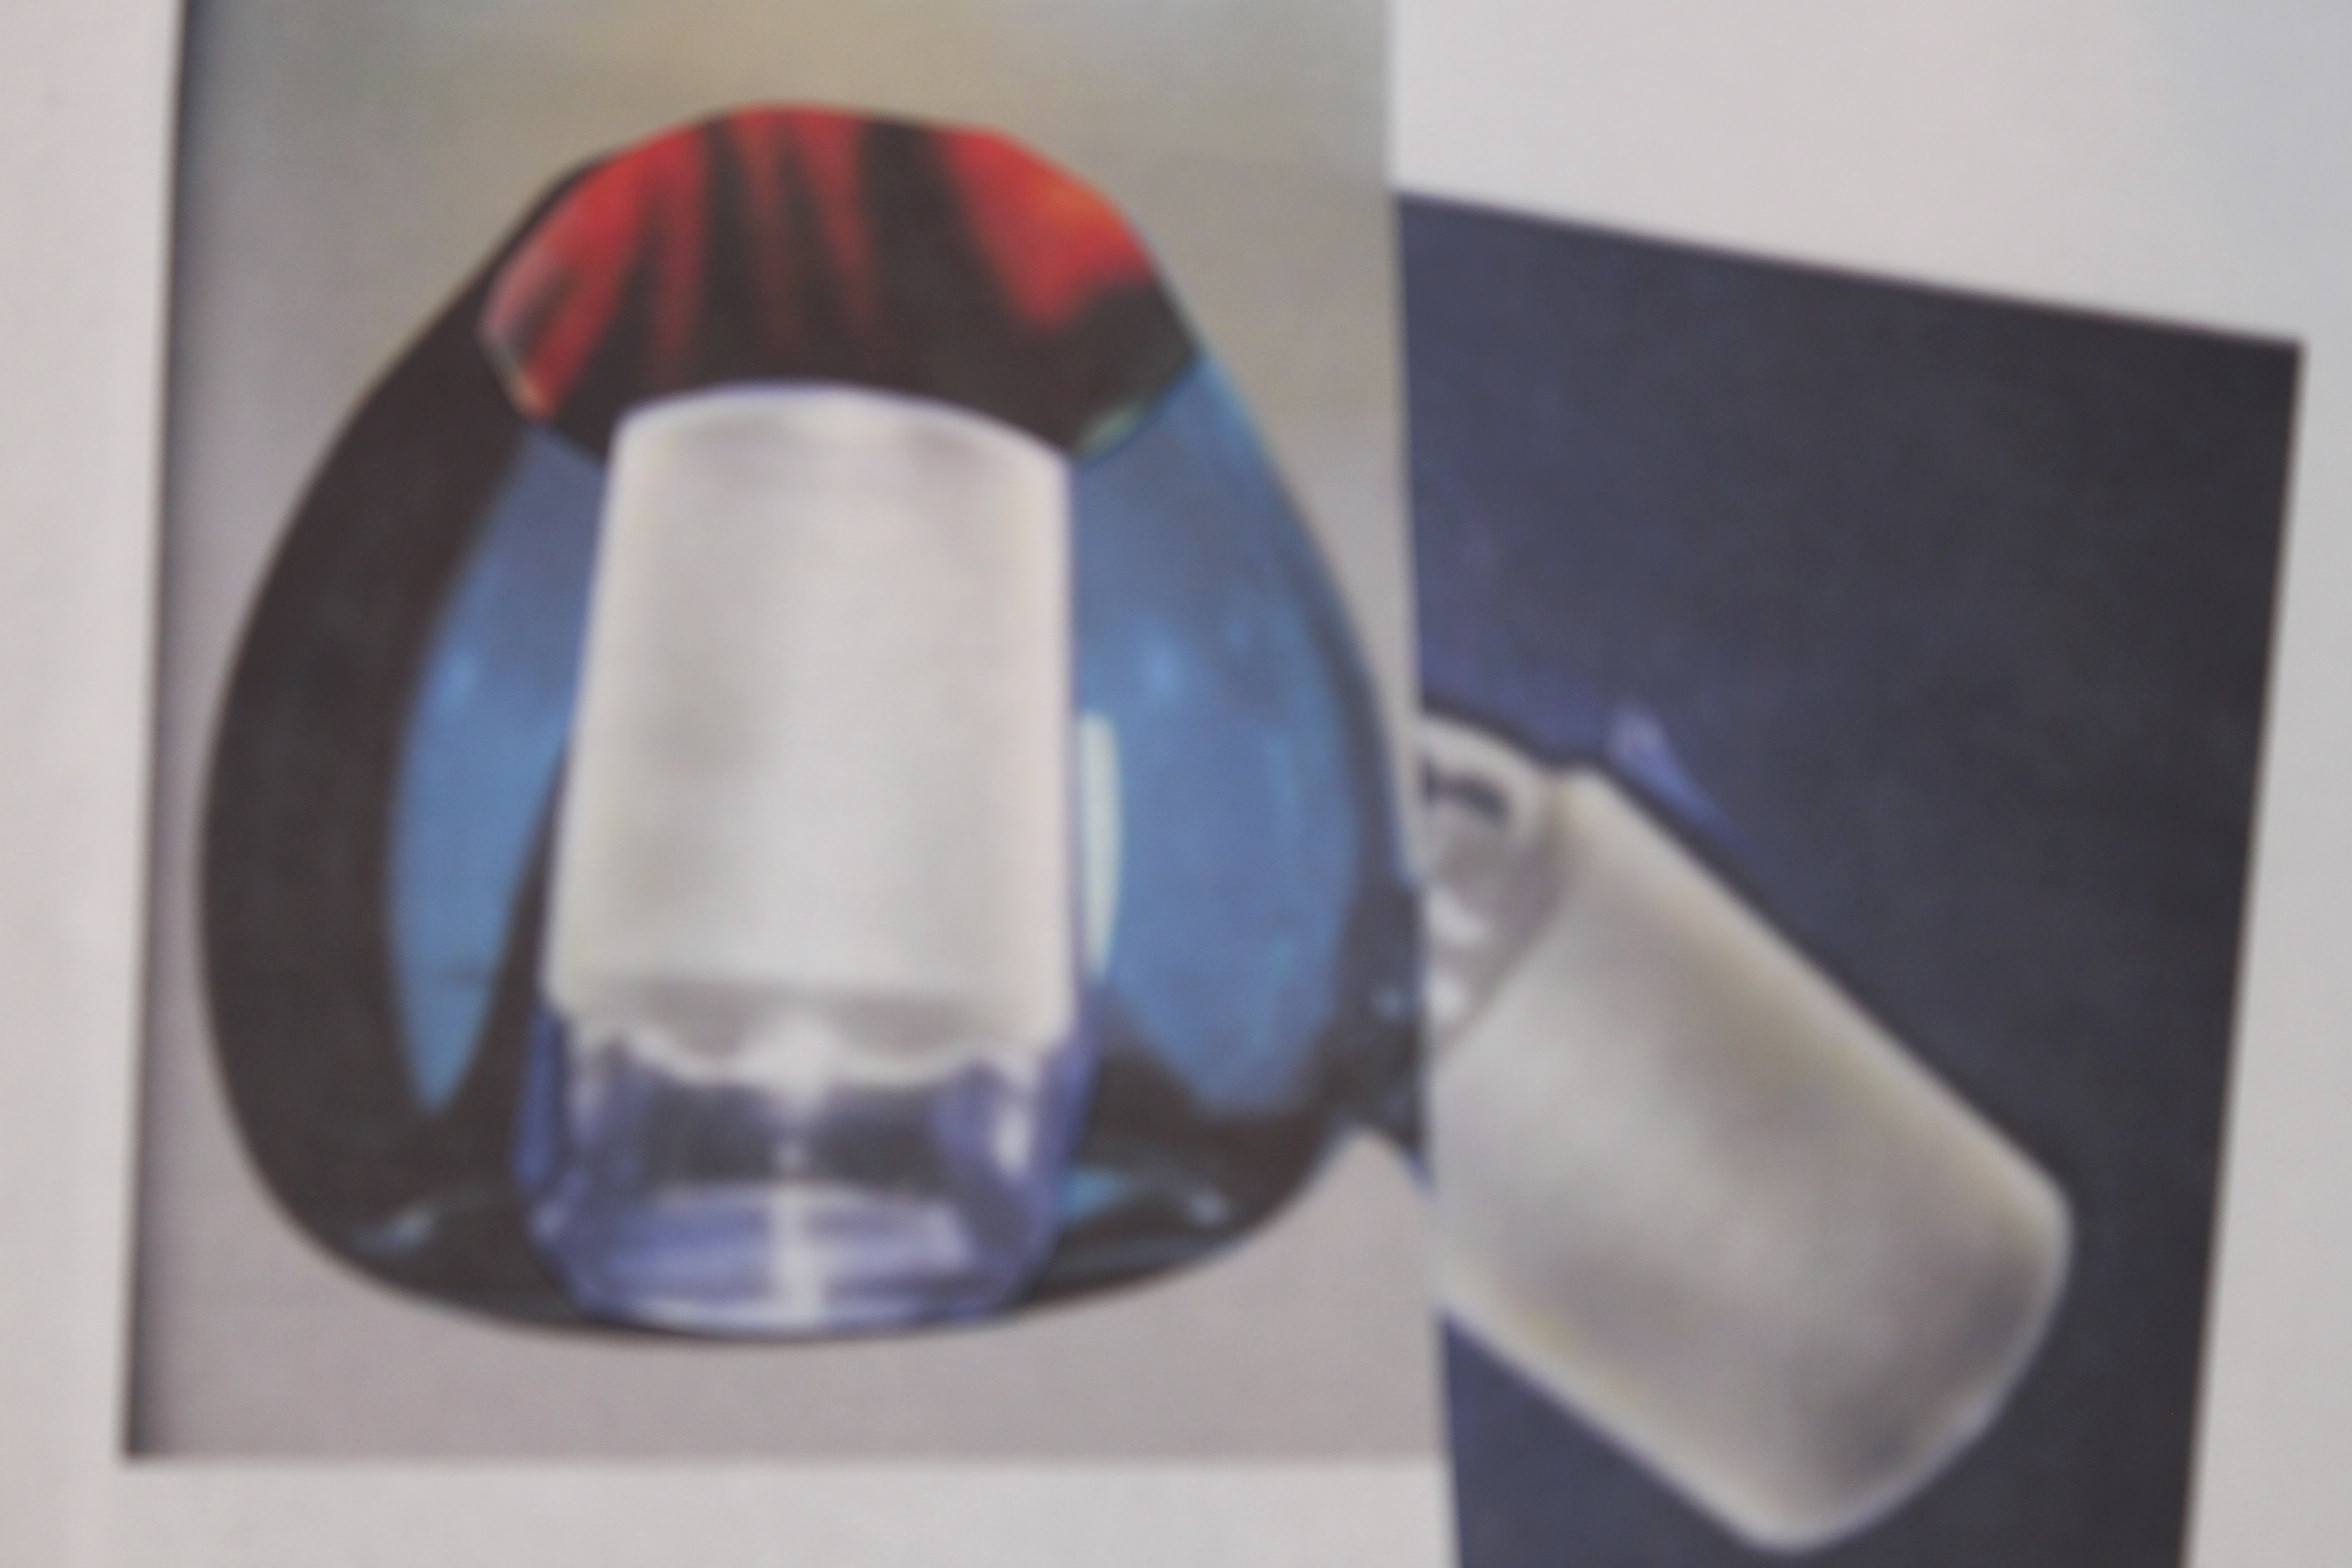
Although come to think of it, with my design it might be sturdy enough to just sit in the tobacco water pipe without a stand as long as the sleeve inside the unit could hold the hanging weight of the "Ascent". Maybe have a small indent around the middle of the flared out piece of glass that I wanted to fill the recessed mouth piece area with. Then you could put a rubber ring, or something to that effect, around it so it would fit more snugly on top of the unit.
 
Herbal Ant,

Zee007

Member
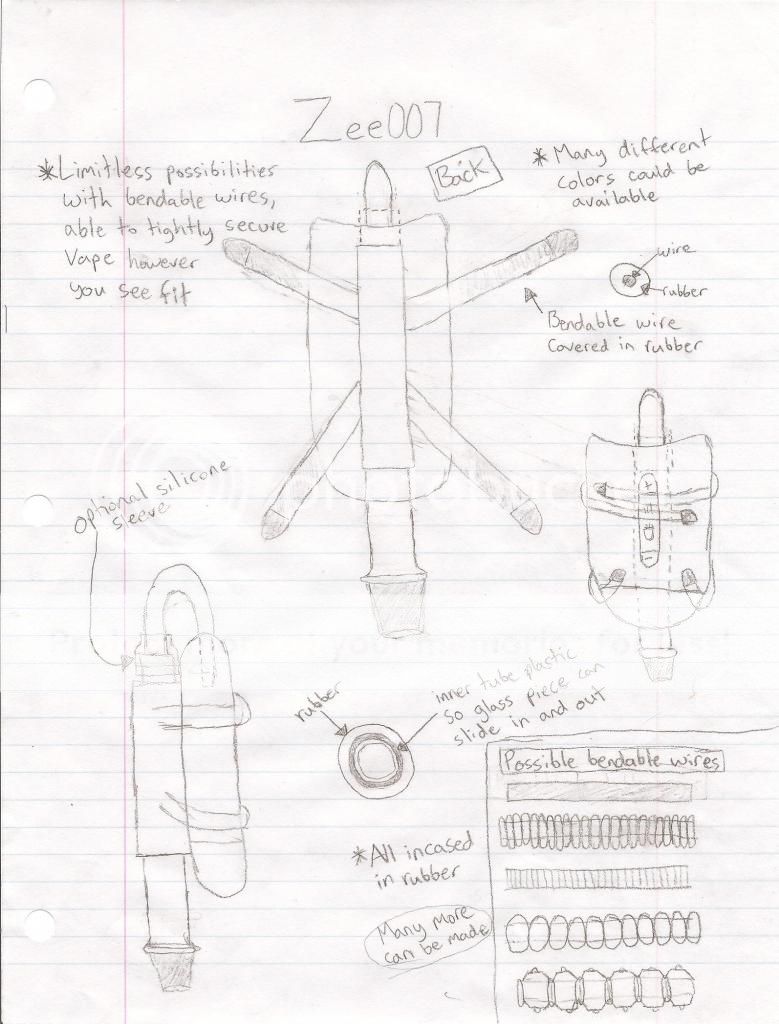
My last design, pretty exited about how this one could turnout, A little sloppy because I was in a hurry.
bendy1.jpg

fixed.jpg


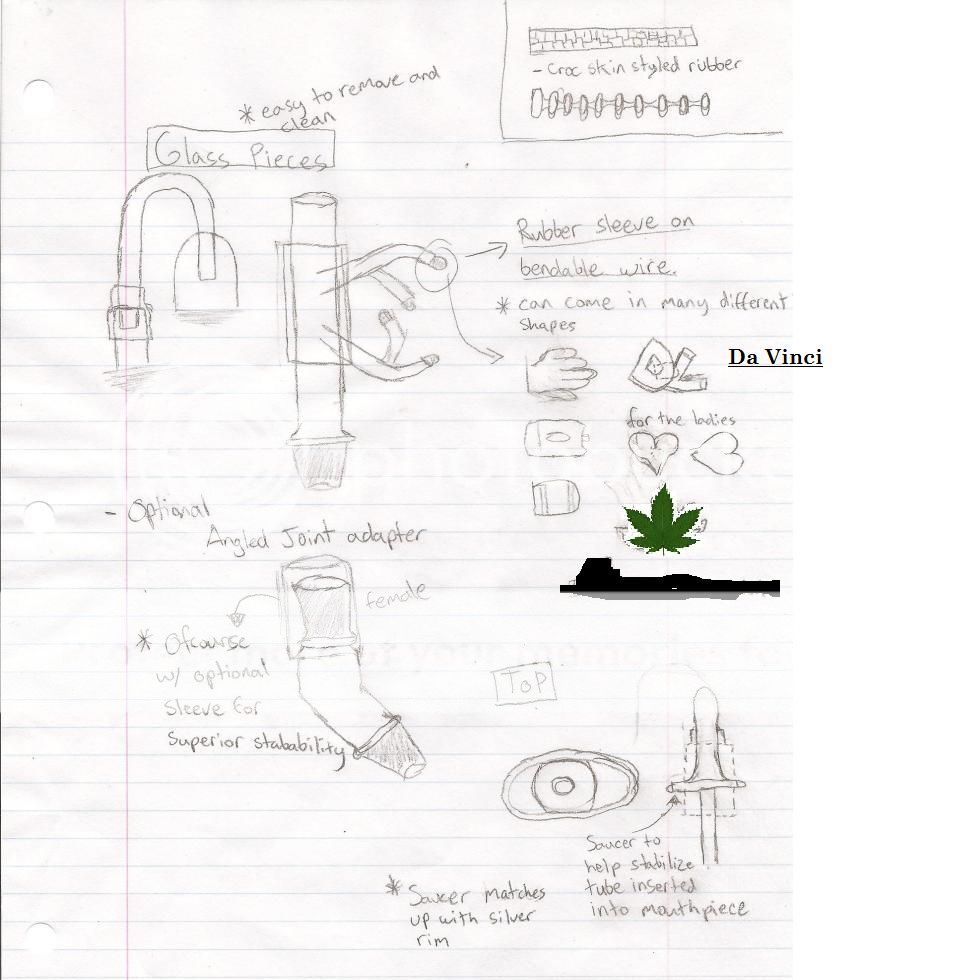
Flexable wire design to hold Ascent in place however you'd like, for those who may be confused on how this device works this is where I got my inspiration.

New-Digital-Camera-font-b-Tripod-b-font-mini-Flexible-Camera-font-b-Gorilla-b-font.jpg

Fresh-Lamp.jpg


CEOnnor

Well-Known Member
finalrc.jpg


I made this edited version to keep the amount of glass used low to drive the production cost down. The part removed wouldn't make a difference in stability and the lower weight is beneficial.

Having taken multiple Physics classes for my major, I got excited for ways that I could implement it in designing a piece that was sturdy and durable. Stability was my biggest concern during the design process. Moving the Ascent to intersect with the glass tube instead of it sitting parallel to the tube shifts the attachment's center of mass inward. This is desirable because if the center of mass is too far out, the water pipe could tip easily (a catastrophe too familiar). The angle of 17.5º also increases the stability of the unit and water pipe itself. When an object is angled on a slope, the force of its weight is split into two components instead of a single downwards force from gravity. One force is angled downwards and parallel to the slope while the other is also angled downwards but perpendicular to the slope. The angle allows for the weight of the Ascent to be directed down into the water pipe itself, adding sturdiness. The downward force put on the glass itself is decreased 5% while greatly increasing the amount of glass that the pressure is applied. This means that the force is more dispersed and not focused on one location. To accommodate those of us whose down stem is angled instead of straight up and down, the attachment can be rotated. The built in angle of the attachment will counteract the angle of the down stem, allowing the Ascent to sit upright even when sitting in an angled stem (Coolest feature in my opinion). On the front of the dock is an etched "Ascent by Da Vinci" logo. On the right picture it looks like the glass tube that holds the slide for the mouthpiece is tapered off at the end. It's not, I was trying to show that it's angled away (seen in the middle).

If you have any questions about the design feel free to ask. Thanks again for this opportunity and good luck with the Ascent launch, I can't wait to finally get one.
 

Rocco

Well-Known Member
DHE2EIa.jpg
RYy9F2y.jpg


So heres my first draft that I put together.... Basically a regular bowl type piece, just you flip the bowl part upside down, and rather than having an upside down bowl, have a straight piece insert for the Ascent mouth piece with either slits in the top or a hole for air to travel. With this type of design I would suggest that Davinci also keep in myind that it may be useful to Have A small little foot contraption (not complicated by any means) basically think of like this.

You have An aweosome book that you want to stand on its own but it is slightly round at the bottom, well get book stands and sandwhich the book between two straight surfaces with slightly lipped bottoms for better footing..... and now your book is standing firmly.

To apply this concept to the Davinci, you just need a small plastic piece shaped like a hat with that has a cutout in the top to fit the Davinci in like A glove and A small rim at the bottom of said "hat piece" to add that standing balance. These would probably cost chump change to make compared to designing a whole glass gong with a holder. This way allows the user to experiment using whips with the device as well for small gatherings of friends or personal sessions, not to mention it would make it look wicked like it was a trophy piece, or an Iphone on its charging dock.:freak:

edit: to ensure a slightly stronger glass design I would suggest a more cone or swirl top shape rather than a plain bubble bowl shape since the triangle shape would probably better distribute tension in the glass... just my own theory. Also to add a wow effect or kind of trick people out,if using clear glass for the rest of the piece just make the top of the bowl a shiny redish swirl on top to give A small illusion that the top is burning like a regular combusting bowl :spliff:
 
Status
Not open for further replies.
Top Bottom