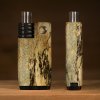
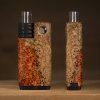
The Nomad From Morwood

EmDeemo

ACCOUNT INACTIVE
Here it is:


Simply stunning.
 

Zuhdj

Charles Mingus
Is there any idea when some nomad ii's will be out in the wild? I'm hoping to see some people thoughts on it. Maybe how it compares to a tinymight. It would be really cool to see a full assembly, usage, sis assembly and cleaning video. I just kinda wanna get an idea of the device
 
Zuhdj,

Mr. Me2

Well-Known Member
Is there any idea when some nomad ii's will be out in the wild? I'm hoping to see some people thoughts on it. Maybe how it compares to a tinymight. It would be really cool to see a full assembly, usage, sis assembly and cleaning video. I just kinda wanna get an idea of the device
Greatness can’t be rushed. But let’s hope we see some Nomad II’s in the next couple months.
 

EmDeemo

ACCOUNT INACTIVE
Is there any idea when some nomad ii's will be out in the wild? I'm hoping to see some people thoughts on it. Maybe how it compares to a tinymight. It would be really cool to see a full assembly, usage, sis assembly and cleaning video. I just kinda wanna get an idea of the device

I'm hoping its before the looming apocalypse. Cutting it fine now :)
 

Vaporware

Well-Known Member
Is there any idea when some nomad ii's will be out in the wild? I'm hoping to see some people thoughts on it. Maybe how it compares to a tinymight. It would be really cool to see a full assembly, usage, sis assembly and cleaning video. I just kinda wanna get an idea of the device

I hope to see some Nomad II reports soon too, but since the changes in the II are mostly toward the cosmetic end of the spectrum I expect performance to be just about the same. The heaters are identical and interchangeable (although Dan or someone else could come up with a new heater for both), the battery and unregulated nature of the device are unchanged, and as far as I can tell the electrical circuit is only slightly changed so I wouldn’t expect it to impact performance much.

That said, while there aren’t a lot of Nomads out there and there are even less reviews, here’s what I’ve seen people say:

1. I’ll get the negatives out of the way first. There are a couple of people who haven’t loved it, and I’m not sure I know all the reasons but here are the top 3 I think may have contributed.

A) The most likely problem is that if a Nomad is not used frequently it needs its contacts cleaned occasionally to maintain good performance. Some units’ contacts may even have needed cleaning when they arrived, and if that wasn’t done performance would have been significantly impacted.

B) It’s possible they could taste something they didn’t like from the heater since a small percentage of people have issues like that with a lot of vaporizers that use metallic heaters.

C) At least with the older spring-activated button (which can be upgraded) a couple of people with hand issues had trouble holding down the button.

Those are all of the negatives I can remember seeing, and they’re heavily outweighed by the positives I think. :)

2. On to the good! Taste tends to be rated between good and excellent, especially with the lower temp heater.

3. I don’t remember if anyone’s got 1-hit extraction down (or if anyone’s trying), but you can extract pretty fast or slowly over a long time since it’s on-demand full convection.

4. Battery life is good and especially with the II the 18650 battery’s easy to switch out.

5. On the usability instead of performance front, the Nomad is maybe the smallest on-demand convection portable with a glass (or whatever you want to use for a stem) vapor path.

It’s unregulated, but if you understand what that means and you learn how to use it there aren’t a lot of things that could go wrong. No electronics to fail, no wires to come loose, etc.

I don’t want to get too much into the TinyMight here (use the AskFC forum if you need more), but here are some obvious differences.

1. The Nomad is unregulated so the heater is just full on as long as you hold the button down and off when you let it go while the TM has electronics to heat to a specific level and stay there.

Neither of these is “better”, but the Nomad offers extra flexibility at the expense of a little more of a learning curve while regulated vaporizers are more simple for new users to pick up and go at the expense of a more complicated device that more things can go wrong with.

While the TM seems fairly solid, I’ve seen a lot more issues in that thread than here. Although Dan has offered to do things for people and he’s at least made a new sleeve for someone, I’m not sure a Nomad’s ever had to be sent back for repairs.

I don’t have my Nomad yet and I haven’t tried a TM either, but because the TM has a larger heater and larger diameter stem it should be capable of providing an even bigger single hit, but the Nomad has plenty of power too (especially with the higher temp heater) and I’ve seen more than one post in here where new users were impressed with the Nomad’s power so unless you care about fast extraction over everything else I wouldn’t choose based on this issue.

I like the Nomad’s button placement and size better too, and aesthetically...well...the TM isn’t bad and I wouldn’t mind maybe having one someday, but in my opinion Nomads are easily the best looking vaporizers out there with the most attention to detail in every aspect of every one of them. I think what you get here is worth much more than Dan asks for while most devices are...priced more favorably for the people selling them. :lol:

I think I posted a similar comparison recently too if you want to look for that, but hopefully this answers your questions.

For me the only reason for most people here with enough money not to buy a Nomad right now is the waiting list. If you need something soon I’d get a TM or something right after getting on the Nomad list so you have something to use while you wait, but if an unregulated on-demand convection artisan vaporizer is what you really want this is the place to be in my opinion. :tup:
 

jds

Well-Known Member
Here's a mockup of the Nomad II design I went for, in case anyone is interested:
22.jpg


I was trying to go for a classy look, and I love african blackwood, so the choice was simple.

I'm still super excited to get it! From what the latest email said, building should maybe begin in autumn.
 

Gup de Fump

Well-Known Member
Here's a mockup of the Nomad II design I went for, in case anyone is interested:
22.jpg


I was trying to go for a classy look, and I love african blackwood, so the choice was simple.

I'm still super excited to get it! From what the latest email said, building should maybe begin in autumn.


Beautiful. I love the African blackwood, and think I'll choose it for some of mine as well when my number comes up. These are all so gorgeous.

I can see it being a portable that in reality is very much a stay at home vape for me... I recently stressed big time about travelling with my Sticky Brick and that would be much quicker/easier to replace or repair if anything happened to it!
 

Gup de Fump

Well-Known Member
Is the wooden stem and chamber assembly gizmo likely to make it into availability as an upgrade? It is certainly something I would love to have with a nomad. Very clever and beautifully conceived.

Here's the latest wood stem prototype.

This wood stem is made from lightly spalted apple wood. I'm not too sure what woods I'll be able to use quite yet, but I'm working through that now.

The chamber is made from briar burl, very durable, high heat resistance, very neutral taste. A tiny groove is cut into the bottom face of the chamber, where a screen has been press fit. This tiny groove has a little lip that prevents the screen from popping out.

The chamber has a nice smooth fit in the stem, not too tight, not too loose. One of the main hurdles of this design is using woods that are matched well, and where both are perfectly stable so that they'll always have that perfect fit.

I use an in-body screen inside the Nomad, so that when the stem is inserted it seals the chamber against that screen. No more fiddling with screens in the stem, or needing to put a dome screen on top of your loaded chamber.

The one obvious difference between this design and my stock glass stem is that there is no way to adjust the depth of the chamber. I used to feel like this was an important aspect of the design to keep... but over time I've come to realize that I pretty much never adjust the chamber size... but rather keep it at an optimal depth for best performance. I've tried to figure out what the optimal chamber size is, and this is that size here... I think the user friendliness of this design is worth the loss of that feature.

fyi, this design is not compatible with glass stems, because glass is not produced in the tolerance range needed to make these snug fitting chambers.

View attachment 894View attachment 893View attachment 892View attachment 891View attachment 890
 

Dan Morrison

Well-Known Member
Manufacturer
Is the wooden stem and chamber assembly gizmo likely to make it into availability as an upgrade? It is certainly something I would love to have with a nomad. Very clever and beautifully conceived.

Yep! I'll be accepting orders for stems shortly, I'm just finalizing some wood choices.

Every Nomad that goes out the door now comes with the upgraded briar burl herb chamber installed in the stock glass stem, instead of the two basket screens and wood "ring".

The briar wood herb chambers are friction fit to the glass stems, so they don't just fall out if the stem is inverted. This also provides an air-tight seal so you're not getting any loss of airflow through the herb load.

Here's what that looks like.

DSCF1314.jpg

DSCF1317.jpg

DSCF1319.jpg

DSCF1320.jpg

Along with the new stem, I'm now installing a double-layer mesh heat diffusion screen inside of the Nomad bodies. This new mesh layer sits just above the heater. When the stem is inserted the wood herb chamber hits this mesh and is sealed so that no herb falls out.

I tested a bunch of "heat diffuser" layers between the heater and herb chamber to find the right balance. Too much mass, and this layer would absorb too much of the heat and negatively affect heat up time. The double layer mesh seemed to give the best airflow diffusion without too much mass.

With this new setup, it's easier to achieve perfect heat distribution over the entire herb load, from center to edge and all the way through.

A nice bonus is that you can remove the herb chamber and brush off both sides of the 316ss screen, reducing the need to deep clean as often.

Deep cleaning is easy with a q-tip and acetone. No need to remove the screen from the wood, both can be cleaned with acetone.

Another bonus is that you can fill the glass stem with cooling balls, you could use stainless, ceramic, glass, or silicon carbide/nitride ball bearings. Each of which will do the job. With glass you can achieve what I consider to be too much cooling effect. I believe there is a balance between too little cooling, and too much. Too much cooling and you're reducing vapor density/flavor without much additional cooling benefits.

This, like everything with vaporizers, is personal preference... which is why I like the customize-ability of cooling balls.

fyi, you can do the same with the all-wood stems I'll be offering. My personal favorite right now is an all wood stem stuffed with about 8-10 glass 6mm balls.

With this setup you can extract a full chamber load in two or three long rips from cold, with a very comfortable amount of heat in the throat. Even at this fast extraction rate, you still get even AVB.

I will say that when used with cooling, you need to have your timing locked in, because there is no feedback from vapor heat, you're relying on practice to tell you when to let go of the fire button and stop your inhale.

@tragique , Your Opal came in a while ago, looks AMAZING. Been loving the opal buttons... they just POP.
 

Mr. Me2

Well-Known Member
Yep! I'll be accepting orders for stems shortly, I'm just finalizing some wood choices.

Every Nomad that goes out the door now comes with the upgraded briar burl herb chamber installed in the stock glass stem, instead of the two basket screens and wood "ring".

The briar wood herb chambers are friction fit to the glass stems, so they don't just fall out if the stem is inverted. This also provides an air-tight seal so you're not getting any loss of airflow through the herb load.

Here's what that looks like.

View attachment 1929

View attachment 1930

View attachment 1931

View attachment 1932

Along with the new stem, I'm now installing a double-layer mesh heat diffusion screen inside of the Nomad bodies. This new mesh layer sits just above the heater. When the stem is inserted the wood herb chamber hits this mesh and is sealed so that no herb falls out.

I tested a bunch of "heat diffuser" layers between the heater and herb chamber to find the right balance. Too much mass, and this layer would absorb too much of the heat and negatively affect heat up time. The double layer mesh seemed to give the best airflow diffusion without too much mass.

With this new setup, it's easier to achieve perfect heat distribution over the entire herb load, from center to edge and all the way through.

A nice bonus is that you can remove the herb chamber and brush off both sides of the 316ss screen, reducing the need to deep clean as often.

Deep cleaning is easy with a q-tip and acetone. No need to remove the screen from the wood, both can be cleaned with acetone.

Another bonus is that you can fill the glass stem with cooling balls, you could use stainless, ceramic, glass, or silicon carbide/nitride ball bearings. Each of which will do the job. With glass you can achieve what I consider to be too much cooling effect. I believe there is a balance between too little cooling, and too much. Too much cooling and you're reducing vapor density/flavor without much additional cooling benefits.

This, like everything with vaporizers, is personal preference... which is why I like the customize-ability of cooling balls.

fyi, you can do the same with the all-wood stems I'll be offering. My personal favorite right now is an all wood stem stuffed with about 8-10 glass 6mm balls.

With this setup you can extract a full chamber load in two or three long rips from cold, with a very comfortable amount of heat in the throat. Even at this fast extraction rate, you still get even AVB.

I will say that when used with cooling, you need to have your timing locked in, because there is no feedback from vapor heat, you're relying on practice to tell you when to let go of the fire button and stop your inhale.

@tragique , Your Opal came in a while ago, looks AMAZING. Been loving the opal buttons... they just POP.
LOVE the briar burl herb chamber!
 

Gup de Fump

Well-Known Member
Yep! I'll be accepting orders for stems shortly, I'm just finalizing some wood choices.

Every Nomad that goes out the door now comes with the upgraded briar burl herb chamber installed in the stock glass stem, instead of the two basket screens and wood "ring".

The briar wood herb chambers are friction fit to the glass stems, so they don't just fall out if the stem is inverted. This also provides an air-tight seal so you're not getting any loss of airflow through the herb load.

Here's what that looks like.

View attachment 1929

View attachment 1930

View attachment 1931

View attachment 1932

Along with the new stem, I'm now installing a double-layer mesh heat diffusion screen inside of the Nomad bodies. This new mesh layer sits just above the heater. When the stem is inserted the wood herb chamber hits this mesh and is sealed so that no herb falls out.

I tested a bunch of "heat diffuser" layers between the heater and herb chamber to find the right balance. Too much mass, and this layer would absorb too much of the heat and negatively affect heat up time. The double layer mesh seemed to give the best airflow diffusion without too much mass.

With this new setup, it's easier to achieve perfect heat distribution over the entire herb load, from center to edge and all the way through.

A nice bonus is that you can remove the herb chamber and brush off both sides of the 316ss screen, reducing the need to deep clean as often.

Deep cleaning is easy with a q-tip and acetone. No need to remove the screen from the wood, both can be cleaned with acetone.

Another bonus is that you can fill the glass stem with cooling balls, you could use stainless, ceramic, glass, or silicon carbide/nitride ball bearings. Each of which will do the job. With glass you can achieve what I consider to be too much cooling effect. I believe there is a balance between too little cooling, and too much. Too much cooling and you're reducing vapor density/flavor without much additional cooling benefits.

This, like everything with vaporizers, is personal preference... which is why I like the customize-ability of cooling balls.

fyi, you can do the same with the all-wood stems I'll be offering. My personal favorite right now is an all wood stem stuffed with about 8-10 glass 6mm balls.

With this setup you can extract a full chamber load in two or three long rips from cold, with a very comfortable amount of heat in the throat. Even at this fast extraction rate, you still get even AVB.

I will say that when used with cooling, you need to have your timing locked in, because there is no feedback from vapor heat, you're relying on practice to tell you when to let go of the fire button and stop your inhale.

@tragique , Your Opal came in a while ago, looks AMAZING. Been loving the opal buttons... they just POP.

This all sounds incredible. It is a real pleasure watching the design process develop and mature. Very cool!

I love the chamber inserts. Brilliant.
 

Dan Morrison

Well-Known Member
Manufacturer
Just to clarify, when you say "both" did you mean the double-layered screens or the screens and the wood? Is acetone not going to discolor stained wood?

And yes, what a VERY cleverly designed idea for the stem!

.

I mean't just the briar wood herb chamber, and the screen that it's attached to it.

For the In-body double layer screen, In my experience this screen should never need cleaning. If you need to clean them, you can simply pop them out by pushing them back out of the body, soak in acetone/ISO, then push em back into place, pretty easy. You can also use the q-tip dipped in acetone method and keep these screens in the body. The acetone won't hurt the inside of the Nomad.

And, acetone doesn't discolor natural woods. You said "stained" woods, and for that... I'm not sure. I assume that it'll remove synthetic stains, since most stains are either alcohol or water soluble, acetone would likely remove either. Either way, I don't use stained woods.

On raw, natural wood, acetone will remove some of the natural oils/resins from the surface, but they can be replaced with a neutral oil or wax like mineral oil/beeswax. The color actually doesn't get removed. And actually I use acetone on purple heart to bring out MORE color.

For low resin content woods like most domestic hardwoods, etc... you can clean these woods in acetone without damage of any kind. On high resin content woods, you just need to be careful not to deposit resin residue back onto the surface, which will mess with the surface finish slightly.

For wooden stems, you can clean the interior walls with acetone.

There is some misinformation out there about cleaning woods with solvents, but it's actually no problem at all in my experience.

I would recommend acetone over ISO. ISO has a higher water content, and it's the water that wood doesn't like. Acetone is more effective at cleaning resins/oils, it evaporates faster, and it'll be easier to find vs. ISO.

___________


I've been working on the final case prototype as well, and doing natural dye experiments. I've landed on a textile, it's an organic cotton from India, has a nice natural hand-spun look.

These dye experiments are with myrobalan,

Myrobalan - This dyestuff consists of ground nuts of the Terminalia chebula tree. This tree grows in Nepal, India, Sri Lanka, Burma, Thailand, Indochina and south China. It may be classed as both a mordant and a dye, giving a light buttery yellow when applied. It is an important tannin based mordant for cotton in India and southeast Asia due to the light warm colour it imparts to the cloth. Myrobalan is a good foundation for overdyeing. It is also the perfect colour to lay down under a single indigo dip for teal.

The dark green is the second process, where the dyed fabric is dipped into iron to change the color.. by pulling the fabric out of the pot slowly, you can get a nice fade effect, very neat!

DSCF1430.jpg

DSCF1488.jpg

I should have some final case photos soon!
 
Top Bottom