TinyMight / TM 2

Momor

Well-Known Member
No, I do not, but I am pretty sure in my TM1 (well, technically my friend's now) you can change the glass by just unscrewing the top round thing without the need to unscrew the torx screw and removing the whole aluminium cover. There is no SS cylinder in the TM1.
Well, I have one in hand and it happens that I already have had to change the glass 😅
Look at that video carefully (it's been shared here a few times)
 

Cheebsy

Microbe minion
No, I do not, but I am pretty sure in my TM1 (well, technically my friend's now) you can change the glass by just unscrewing the top round thing without the need to unscrew the torx screw and removing the whole aluminium cover. There is no SS cylinder in the TM1.
The airflow liner you can't replace without removing the top plate. The oven liner you can. The oven liner was only glass for the very first beta run though, and TM were advised to change to metal for that one before the first full production run. The airflow liner has only recently changed on the TM2.
 

RustyOldNail

SEARCH for the treasure...
No, I do not, but I am pretty sure in my TM1 (well, technically my friend's now) you can change the glass by just unscrewing the top round thing without the need to unscrew the torx screw and removing the whole aluminium cover. There is no SS cylinder in the TM1.

Not true. When my friends TM1 came, the UPPER GLASS liner was broken. I had previously purchased a spare glass liner for backup. I had to carefully unscrew the torx, to access that glass liner, the ONLY REMOVABLE part that you can access without removing the entire top of TM1 is the secondary METAL LINER, which was originally an ALUMINUM cylinder, later a STAINLESS STEEL replacement cylinder was offered. These cylinders could be swapped just by UNSCREWING the ROUND MOUTHPIECE TENSION ADJUSTMENT RING, on the TOP of the TM1.

As there was broken glass in my friends TM1, at the inside bottom, from the top section broken glass that I couldn’t remove, stuck pieces, I then had to remove the bottom of the TM1. This is where the 2nd GLASS LINER is located (same as TM2), and this GLASS CYLINDER is what houses the actual METAL HEATER COIL, which is like wound like a SPRING inside that glass cylinder. I was being as careful as possible, but the COIL came out, and that was the end of my repair attempt. Had to return it to Finland, and they sent another one.

So evidently TM got tired of these broken glass repairs, the latest ones now have a METAL INTERNAL INNER, but there is still the SAME GLASS CYLINDER in the BOTTOM half of the TM housing the heater coil, which can STILL BREAK!

Not sure what the confusion is regarding this??????
 

Varden

Well-Known Member
Well, I have one in hand and it happens that I already have had to change the glass 😅
Look at that video carefully (it's been shared here a few times)
Yes, I shared that video here and rewatching it, it is clear you are right. I also had to change that glass once and I though I did it from the top without unscrewing the bottom but I guess memory betrayed me.
 

Tellus

Human (H. sapiens x H. neanderthalensis)
If I'm honest, the stir tool is the most underwhelming part of TM2.
I just don't like the flat end, it's not good in corners ..
I agree, I fixed that with a little pocket knife when I was sitting outside one day with my tm 🌲🪵 Carved a little poker with a pointy end. Never finished it really, turned out short & still rough looking but I like it now. Use it all the time
IMG-20240430-204523.jpg

IMG-20240430-204252.jpg

I made mine pointy with sand paper and a bit of elbow grease but a little dremel can do the trick more easily. 😉
woodyvapors on Instagram makes wooden ones with tiny scoops on the end.
Thanks for the idea, i will maybe try sandpaper on the stir stick. And carve a little wooden scoop too
 

Shit Snacks

Milaana. Lana. LANA. LANAAAA! (TM2/TP80/BAK/FW9)
Thanks, I read his post but my understanding was that most of the changes were all part of the small improvements in the latest batches of TM2, except for that one mysterious "internal improvement" that hasn't been disclosed yet.

I'm so curious to know what that is!

Yeah so my understanding is that the standard walnut TM2 will have all of the upgrades coming with the new purple heart units... And to answer your question, there's nothing better about using purple heart wood over walnut and arguably there are only things that are worse potentially (as also evidenced by how long it has taken them to ensure there will not be any issues with this exotic wood as a body here) :tup:
 

Vaporific

All who wander are not lost...
Yeah so my understanding is that the standard walnut TM2 will have all of the upgrades coming with the new purple heart units...
I’m not sure about that from what TM said to me in an email. I would think the internal upgrade in the RED/purplewood run would eventually make it into the walnut or brown species but they didn’t say that explicitly or when. We’ll find out eventually…:peace:
 

sedentree

Well-Known Member
I agree, I fixed that with a little pocket knife when I was sitting outside one day with my tm 🌲🪵 Carved a little poker with a pointy end. Never finished it really, turned out short & still rough looking but I like it now. Use it all the time
IMG-20240430-204523.jpg

IMG-20240430-204252.jpg


Thanks for the idea, i will maybe try sandpaper on the stir stick. And carve a little wooden scoop too

Another option for a stir stick for those in the UK at least
 

Sto.Oned

Well-Known Member
Now I want to make some final diy so I have few questions:

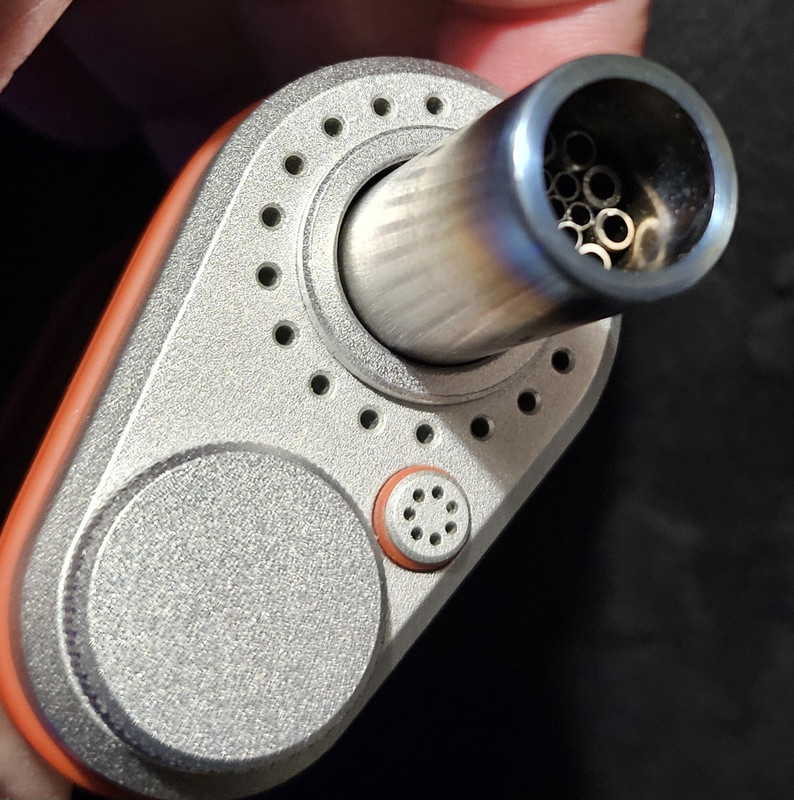
1- does that strong light on the bottom can be covered somehow? I could dismount it and add a little bit of cotton in that area (between the wood and the metal), or directly insert it mounted in the hole with a needle, do you suggest anything better?

2- how to "clean" and make almost new all the gray areas that are a bit signed?

3- Is it possible to color the ring and battery button(only top), which is the right material to spray it and should be long lasting (and mostly that doesn't fall internally) ?

4- Where i can find a cheap cu? There's a trusted source or forum (here or elsewhere) where to buy it? I see that Aliexpress doesn't sell anymore tm spare parts 😅

5- i found a single piece to fit in the cu, do you know which kind of bolt do I need? Option is between 20/25mm(bottom right in the image) , i hope that one of them it's the right one.


For now, thanks to all this beautiful forum and for all the improvements I m making 🚀
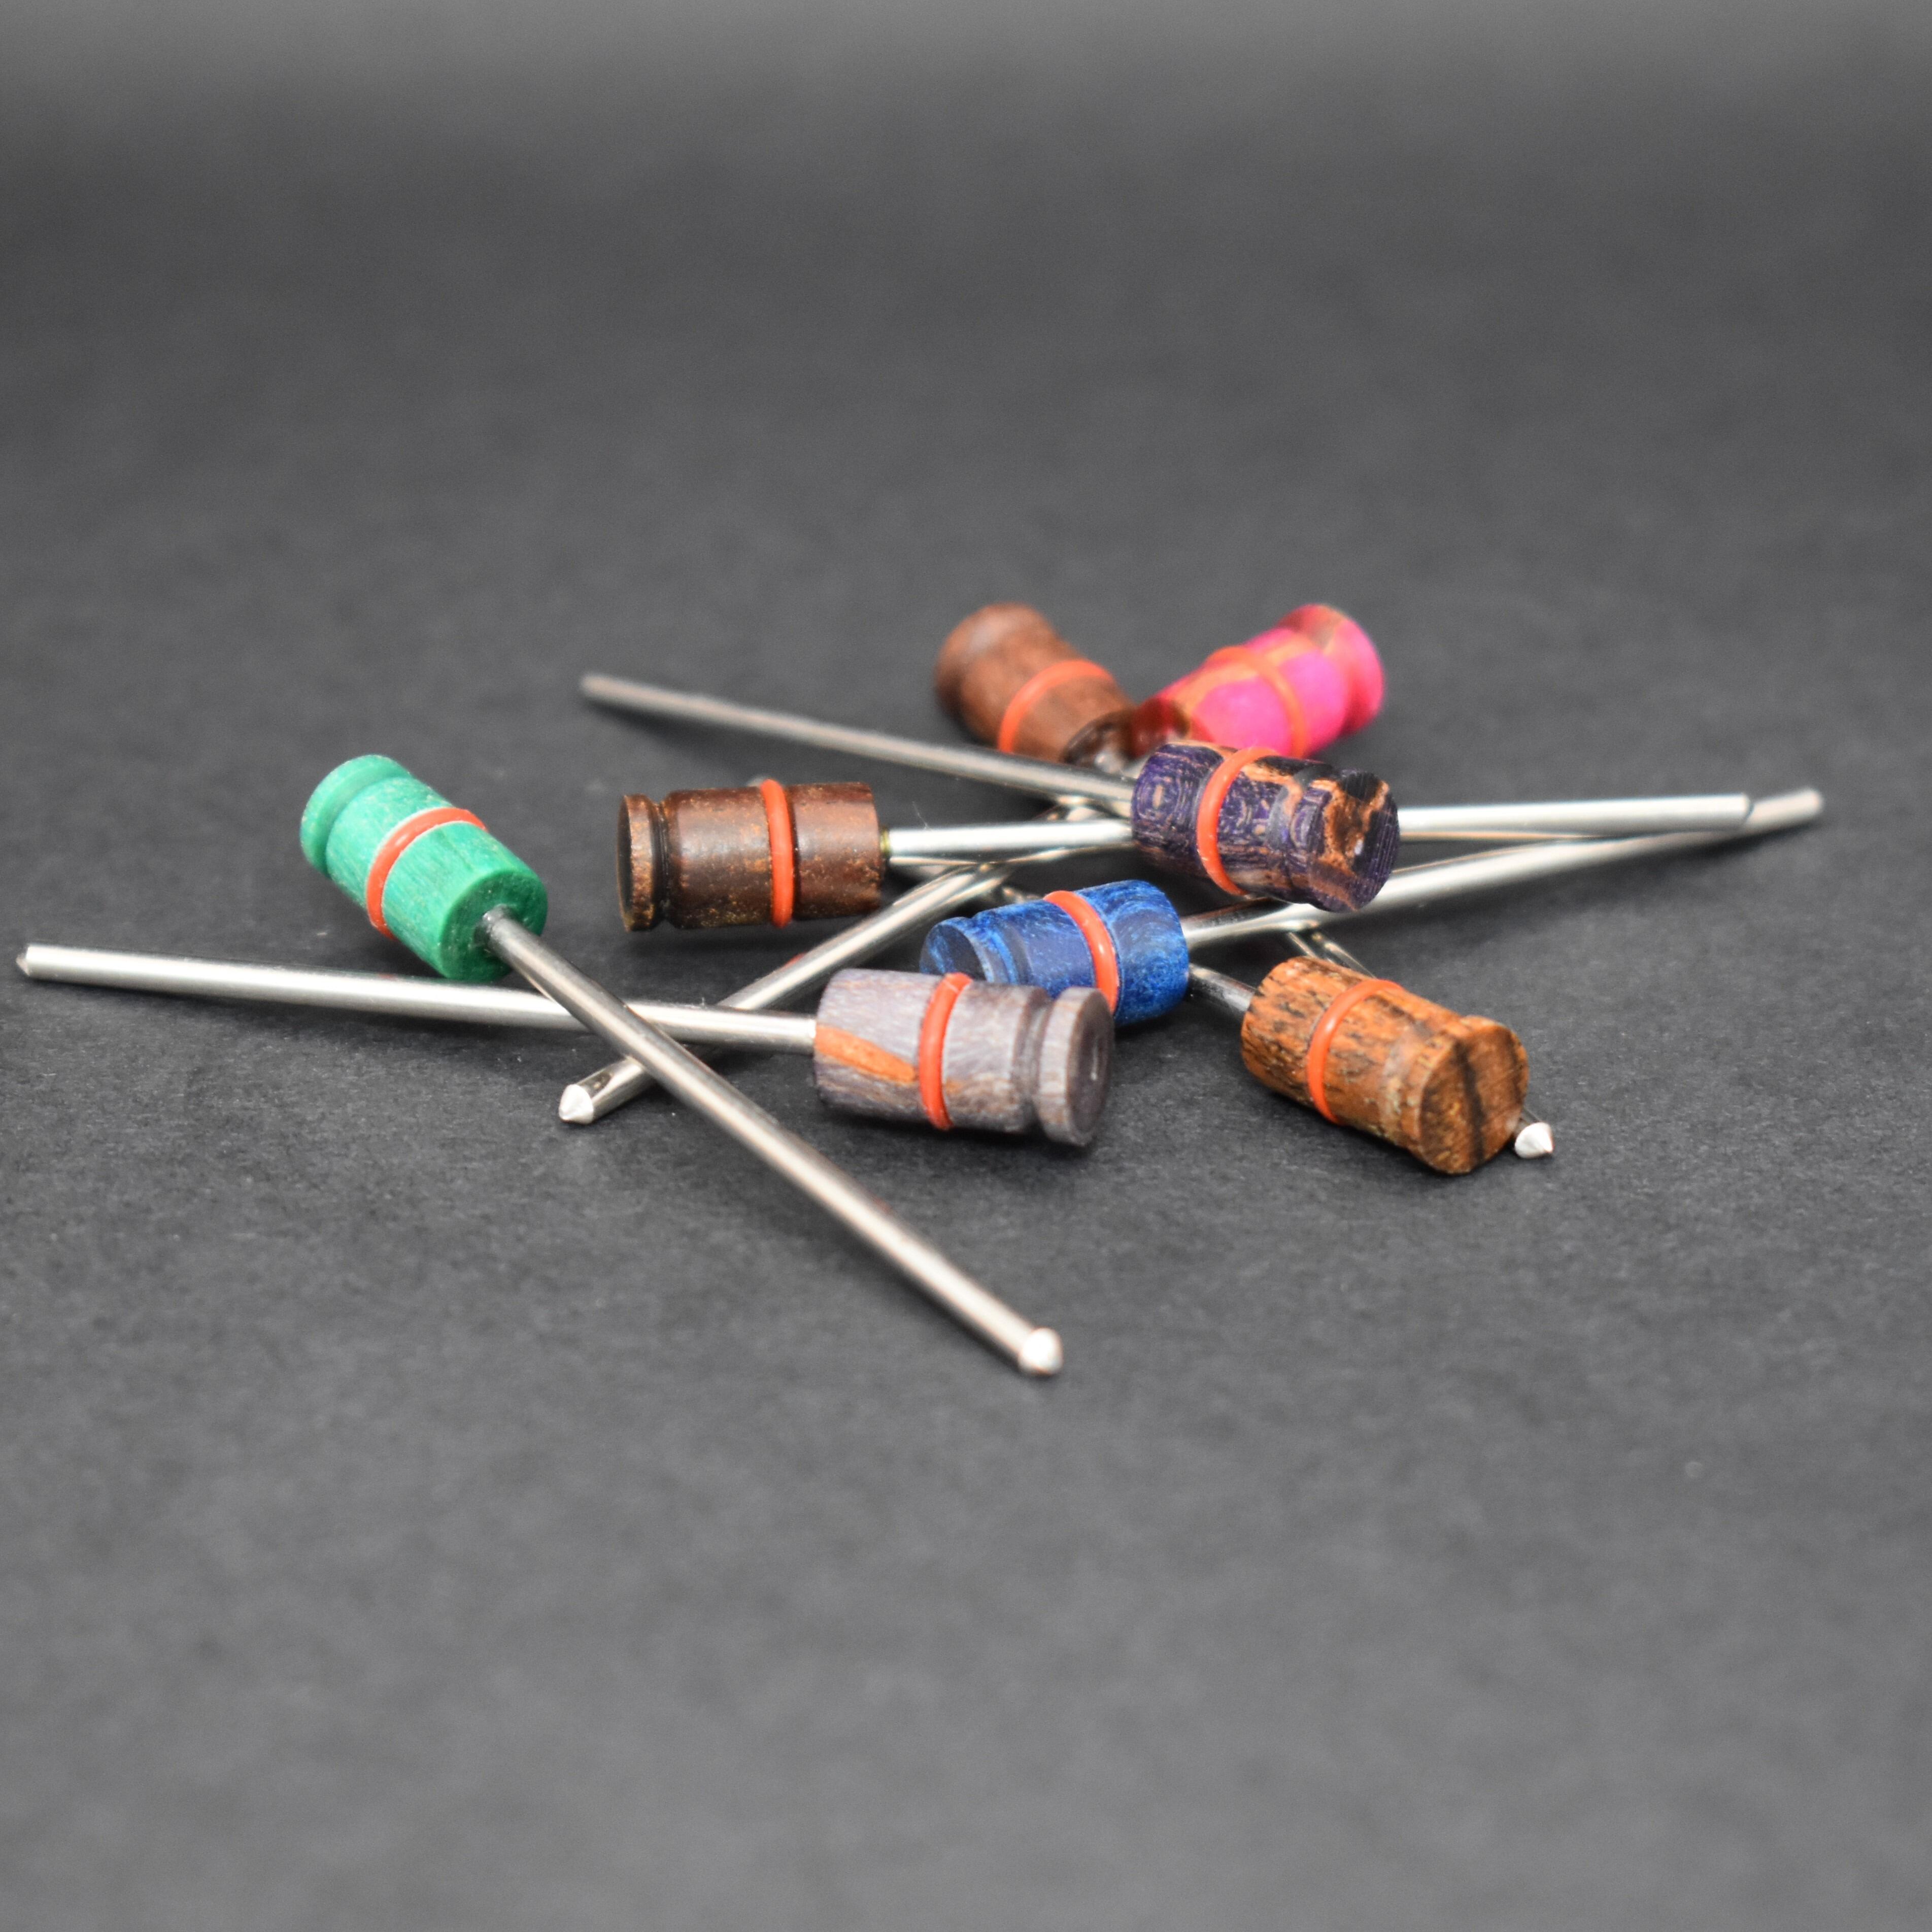
Can anyone reply to my five questions?
To question number one i partially fixed it putting inside cotton with a needle. But still the light is visible through the hole.
 
Sto.Oned,

Shit Snacks

Milaana. Lana. LANA. LANAAAA! (TM2/TP80/BAK/FW9)
Can anyone reply to my five questions?
To question number one i partially fixed it putting inside cotton with a needle. But still the light is visible through the hole.

Sorry

1- does that strong light on the bottom can be covered somehow?

There is someone who actually covered it, I believe it was like an aluminum tape that they used? To completely cover the light and perhaps even the USB plug, since they were always externally charging anyway, and so much LED light leaks through that port as well... Unfortunate classic problem, I am always careful about covering mine up in use, and not pointing it in my eye if I can avoid it lol

2- how to "clean" and make almost new all the gray areas that are a bit signed?

Not sure exactly what you mean, and depending which version, the anodized aluminum finish or bead blasting whatever it was could wear over time from slight scraping of inserting removing stems, not sure there is anything really you can do outside of replacing the part with one that was brand new, that there were unfinished parts at one point in some units that I think are nicer... If you were talking about other such marks, you can try different cleaners, you could try removing all of the finish even perhaps, and if you mean build up in like battery hatch threading, some sort of bluetac type putty stuff can be useful although be careful?

3- Is it possible to color the ring and battery button(only top), which is the right material to spray it and should be long lasting (and mostly that doesn't fall internally) ?

I mean, there is the maker of that bowl, that also sells colored battery caps and rings, anodized color as well though so they could wear I think? Anyway I guess anything's possible if you don't mind covering the material and it potentially wearing off, having that material or smell etc... If it is on the outside I don't think it would cause anything to fail on the inside??

4- Where i can find a cheap cu? There's a trusted source or forum (here or elsewhere) where to buy it? I see that Aliexpress doesn't sell anymore tm spare parts 😅

I think there are some people that literally went to a hardware store? You could try to source pure material parts, but there is no trusted specific source for these specific items other than the official products?? Or complete alternatives...

I think somewhere in this thread someone detailed the parts, their specs, you might want to go for their back like closer to the beginning though unfortunately if you cannot search it well enough
 
Last edited:

m0sh

Singer Song Writer Stoner
Another option for a stir stick for those in the UK at least

Cool, but with shipping its 30 euros...
Way way way way too much... even 20 is too much IMO
 

badbee

Well-Known Member
There isn't anything you can spray that I, and most of us I think, would consider safe. It's aluminum so you can anodize it to one of the possible colors, either yourself or get a pro to do it. Many people create their own cooling stems using any straight tube, basket screens and appropriate beads (boro, ruby, etc).
 

golfer

New Member
Has anyone tried the tristem from sneaky pete? And was it recently added? I don't recall ever seeing it before. I really like having the glass screen built in on the WPA I mostly use so this looks right up my alley.
 
golfer,
  • Love
Reactions: dimmusp

Sto.Oned

Well-Known Member
There isn't anything you can spray that I, and most of us I think, would consider safe. It's aluminum so you can anodize it to one of the possible colors, either yourself or get a pro to do it. Many people create their own cooling stems using any straight tube, basket screens and appropriate beads (boro, ruby, etc).
So, resuming, there is no colored ring /button for tm1 and there's no material with which i can paint them?
Surely the battery button is safe to paint (but i still need to know which is the right thing to put on, to avoid that easily goes away), i hoped that also for the ring would be the same, being on the external part.. But maybe that area become so hot that is not considered safe to be painted, am i right?

Do anyone knows where i can find a cheap cu, or anyone here(or in any specific forum) can sell them?
 
Sto.Oned,
  • Haha
Reactions: Petetbay

gangababa

Well-Known Member
Deleted my previous useless words as the subject addressed was better answered by others.

So here is a picture of my new experimentation using Arizer Solo stems in the TM.
By replacing the original O-ring with one with a 3mm cross section (20mmOD, 14mm ID), most of my Solo stems are securely sealed in the oven.
I like how this works with the smaller diameter glass bowl. Obviously the draw is more restricted.
Now I can use my 14mm WPA Solo stem with the TM.

20240429-120444.jpg
 
Last edited:

Petetbay

Well-Known Member
Has anyone tried the tristem from sneaky pete? And was it recently added? I don't recall ever seeing it before. I really like having the glass screen built in on the WPA I mostly use so this looks right up my alley.
It was available for a while at Sneaky Pete North and I see it’s available now at Sneaky Pete USA. It’s not 6” long, it’s 4 5/8” and cools pretty good. The rimmed bucket screens or the glass mp’s don’t fit and the glass screen is slightly shallower than normal so caps stick out a bit, but are ok for width. I like it, got the 1st one for free and 2nd one was $20CDN on 420, really cheap as stems go, never have enough stems to make dirty and add to the pile.:2c:

 
Petetbay,
  • Like
Reactions: dimmusp

Rodney

Well-Known Member
Can anyone reply to my five questions?
To question number one i partially fixed it putting inside cotton with a needle. But still the light is visible through the hole.

Deleted my previous useless words as the subject addressed was better answered by others.

So here is a picture of my new experimentation using Arizer Solo stems in the TM.
By replacing the original O-ring with one with a 3mm cross section (20mmOD, 14mm ID), most of my Solo stems are securely sealed in the oven.
I like how this works with the smaller diameter glass bowl. Obviously the draw is more restricted.
Now I can use my 14mm WPA Solo stem with the TM.

20240429-120444.jpg


This is a great idea and has helped me fit one of the stems I got that was too small into my TM 2 with the same size rings as you but mine are black. I got a box of them of all size w while back.

See when first read this post I just stopped reading it when I read " Arizer Solo stem" as I do not own a Arizer Solo stem but then when I looked at the picture and seen the bigger O rings I understood completely what you did here.
 

Shit Snacks

Milaana. Lana. LANA. LANAAAA! (TM2/TP80/BAK/FW9)
So, resuming, there is no colored ring /button for tm1 and there's no material with which i can paint them?
Surely the battery button is safe to paint (but i still need to know which is the right thing to put on, to avoid that easily goes away), i hoped that also for the ring would be the same, being on the external part.. But maybe that area become so hot that is not considered safe to be painted, am i right?

Do anyone knows where i can find a cheap cu, or anyone here(or in any specific forum) can sell them?

.... Did you not read my reply to you?

If you want to ruin it, go ahead and paint it, if you want quality colored parts for some reason, just buy the ones from the person who sells them anodized... Look up the specs for the cooling unit parts if you want and source them where you can cheap?
 

dzoinp

Well-Known Member
Accessory Maker
I’ve actually been wanting to make a dry bong like that for a number of years now.

You don’t have the new steel liner though do you? With the SS liner those tubes would get so hot the cooling function would be gone after two hits. It completely changes the game.
Yes, I have the TM1 and TM2 with the ss liner.:rolleyes:
So I know what I'm talking about from my own experience.:science:
If you haven't tried this cooling system, I don't know how you came to that conclusion.:hmm:
This 6cm TiStem with capillary tubes cools just like my 10cm spiked glass stem . Only loses in back to back sessions
20240501-224233.jpg
 
Last edited:
dzoinp,

invertedisdead

PHASE3
Manufacturer
If you haven't tried this cooling system, I don't know how you came to that conclusion.:hmm:

Well considering the stock system uses a silicone o ring buffered cooling unit and still gets incredibly hot, obviously an entire metal system will get way hotter since you have a thermal bridge. I don’t believe any working principal of physics would allow a titanium stem to transfer less heat than a silicone o ring.

I already sold a stem like this for the dynavap so I’m familiar. For actual cooling to occur you have to remove heat faster than it accumulates. Cooling for one or two hits isn’t quite what I’m talking about.
 
Last edited:

badbee

Well-Known Member
So, resuming, there is no colored ring /button for tm1 and there's no material with which i can paint them?
Surely the battery button is safe to paint (but i still need to know which is the right thing to put on, to avoid that easily goes away), i hoped that also for the ring would be the same, being on the external part.. But maybe that area become so hot that is not considered safe to be painted, am i right?

Do anyone knows where i can find a cheap cu, or anyone here(or in any specific forum) can sell them?
I just looked at VGoodiez for ideas and noticed the base XL cooling stem is now down to $12 USD, the only way you can get anything cheaper than that is to buy this: https://lampworksupply.com/product/lenz-14-23-male-uber-ground-joint

Note, that second thing isn't really a cooling stem, I tried it as an experiment but don't really recommend it. It's OK, but not great, reasonable for < $4. It's somewhat cooling due to the extra thick glass.
 
badbee,
  • Like
Reactions: Petetbay

Tellus

Human (H. sapiens x H. neanderthalensis)
Well considering the stock system uses a silicone o ring buffered cooling unit and still gets incredibly hot, obviously an entire metal system will get way hotter since you have a thermal bridge. I don’t believe any working principal of physics would allow a titanium stem to transfer less heat than a silicone o ring.

I already sold a stem like this for the dynavap so I’m familiar. For actual cooling to occur you have to remove heat faster than it accumulates. Cooling for one or two hits isn’t quite what I’m talking about.
I agree with you, that a all metal stem will get hot (real hot). But I think it also depends on the user and their needs. For example a microdoser would have different needs than a macrodoser. It looks to be a compact solution with good cooling if microdosing, or if someone never does more than one session at a time, etc? Maybe it's enough cooling then? But yea maybe not the most effective for a broad use case?
 

dzoinp

Well-Known Member
Accessory Maker
I agree with you, that a all metal stem will get hot (real hot). But I think it also depends on the user and their needs. For example a microdoser would have different needs than a macrodoser. It looks to be a compact solution with good cooling if microdosing, or if someone never does more than one session at a time, etc? Maybe it's enough cooling then? But yea maybe not the most effective for a broad use case?
You're right, this depends on the use. I'm not a microdoser but my sessions are quick... 5 seconds/hit x6 and only one session.
 
dzoinp,
Top Bottom