DiY glass symphony

iDRINKBLEACH

knowing is half the power - Gi-JOE
Accessory Maker

The Chemist

New member but long time lurker
Thank you so much for that list!
I just ordered all the parts to make one.
Building a GS was on my to do list and you just simplified my life so much, now I won't have to waste my time looking for the parts.
:tup:
 

Zuhdj

Charles Mingus
I did not make this list https://www.reddit.com/r/vaporents/comments/l64nv9
This guy beat me to it. I was putting a list together after talking to the guy who posted his DiY a week or so ago. I was going to make then post.

here’s the video of the glass symphony.
https://www.reddit.com/r/vaporents/comments/l17vrj
and here’s a pic of my wife when I was telling her I need to order more diy project supplies for another vape project View attachment 5600
HEY i made the list ;) it's been updated from the original
 

Resistanceseeds

Well-Known Member
I am interested in building one of these, but have some questions regarding the heating element and power supply:

In the parts list the heating element is specified at 120v. Does the PID box put out 120v or is this dependent on the input voltage of the pid box?

For example if I am in Europe with 230v power, do I need a heating rod with 220V Or can I use the 120V one in the list and only have to get a PID Box with 230V input Voltage?

Could somebody suggest a heating element / power supply setup that would work with 230V power?
 
Resistanceseeds,
  • Like
Reactions: arb

GoldenBud

Well-Known Member
For example if I am in Europe with 230v power, do I need a heating rod with 220V Or can I use the 120V one in the list and only have to get a PID Box with 230V input Voltage?
the voltage converter will be connected to the wall. the PID supports 120V/220V in most cases, so it'll be like - Wall>Voltage Converter>PID>Heating element
btw this item isn't in stock - https://www.amazon.com/Deschem-Glas...coding=UTF8&psc=1&refRID=8DHX2A6WHGTYT118RGWX - any link for aliexpress for the heating cover rod?
 
GoldenBud,
  • Like
Reactions: arb

Hippie

Well-Known Member
Search the same seller's store for a 240V (and 220v) heater and PID controller

Jojo monkey used 3/16mm balls (4.7mm) in his diy build. I find using smaller balls adds more resistance to the flow and requires more power as there is more mass (less gaps) to keep hot.

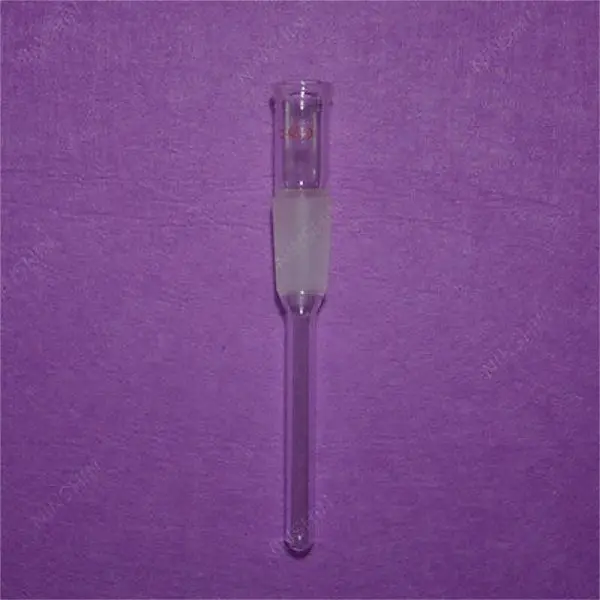
if you search for "Thermometer adapter" and the joint size you want (24/40 or 24/29) you should find a few to choose from. Likewise for the bowl too, there are a few more different length reducing adapters to choose from if you search for 24/29 or 24/40 to 19/26 reducer or reducing adapter.
 

Resistanceseeds

Well-Known Member
the voltage converter will be connected to the wall. the PID supports 120V/220V in most cases, so it'll be like - Wall>Voltage Converter>PID>Heating element
Hmm, so I need a voltage converter and a PID Box? I was under the impression the PID connects directly to the wall? Could you help me out and show me the needed components for a 230V power supply for the 120V heating element?

btw this item isn't in stock - https://www.amazon.com/Deschem-Glas...coding=UTF8&psc=1&refRID=8DHX2A6WHGTYT118RGWX - any link for aliexpress for the heating cover rod?

from the same shop as the other glass components:
 

Hippie

Well-Known Member
Yes - that's the way I read it but I would mail them and ask to be sure (and ask for a deal lol)
I'm quite tempted by some of the other heater sizes too as an 8mm heater should fit in a thermometer tube and we don't really need 100mm length.
 

Resistanceseeds

Well-Known Member
Yes - that's the way I read it but I would mail them and ask to be sure (and ask for a deal lol)

I eventually contacted the seller and there is now a 6,5x100mm heater with PID control box set for european current (220v) in his shop.

I also ordered all the glas parts on the list and found a local source for borosilicate balls.

Looking forward to composing the symphony :brow:
 

Hippie

Well-Known Member
Grrrrrr :cuss::mad:
Just received the element and it's instantly killed an enail controller
Swapped the fuses in the unit and the plug (and reset the rcd and all the clocks in the house) but it's definitely dead :( So it's turned out to be a bit more expensive than I planned and now I need yet another enail controller (says he looking over at the broken one, the newly promoted backup and a newvape controller)
Would be a lot cheaper and easier if there were a standard for these things :rant:

So I guess it's probably best to buy the controller and element together if you don't have a Topright controller already lol
 

The Chemist

New member but long time lurker
Grrrrrr :cuss::mad:
Just received the element and it's instantly killed an enail controller
Swapped the fuses in the unit and the plug (and reset the rcd and all the clocks in the house) but it's definitely dead :( So it's turned out to be a bit more expensive than I planned and now I need yet another enail controller (says he looking over at the broken one, the newly promoted backup and a newvape controller)
Would be a lot cheaper and easier if there were a standard for these things :rant:

So I guess it's probably best to buy the controller and element together if you don't have a Topright controller already lol
That sucks! What element did you use that killed the controller exactly?
I'm still waiting on the XLR element and I'll finally be able to build this thing.
Hoping I won't have any bad experience with it.
 

iDRINKBLEACH

knowing is half the power - Gi-JOE
Accessory Maker
I’ve been waiting for you guys to get some put together and go from there😂. I would have fried my controller for sure @Hippie that sucks. Is any one trying make with a shorter element? I really like this DiY but a compressed version would be ideal.
 
iDRINKBLEACH,
  • Haha
Reactions: arb

Hippie

Well-Known Member
It was the 220V 6.5mm x 100mm version of the element by Topright on Aliexpress (see links above ^^)
And a cheap controller I bought from ebay, which I had been using for the last year with a few extra coils bought from dhgate.
Foolishly, as the Newvape and eBay controllers show EEEE on the display if you connect up the Newvape coil to the ebay controller or the dhgate (or ebay) coils to the Newvape controller, I expected it to do the same.
 

Hippie

Well-Known Member
New PID and cartridge heater arrived and this time they've sent me a 12mm heater :doh:
So I tentatively tested the 6.5mm killer heater in the new PID (after unplugging the PC 1st this time as it either took out the motherboard or power supply when it poppedthe PID) ..... which works OK :tup:
So now I'm tinkering away with different claisens, balls, joints, bowls ... at last

My 1st build with a 19/26 Claisen, 19/26 thermometer tube and a Herborizer bowl is good news for those that want smaller altho temps are a bit high in the 800 region. I'm sure that will come down with some balls or packing in the mix or using a combo of the slightly shorter claisen I have (so the heater hangs out the bottom like the herbo) and the shorter Elev8R bowl ... if the diffusion is still good.

Has anyone else tried using these heaters with different claisens? I have 19/26, MA2/3 (which has 19/26 and 24/29), 24/29 and 24/40 in slightly different lengths and diameters from different suppliers
Are you guys using balls below the pinch in the claisen? or different diameter balls above and below the pinch? how are you keeping them in there?
 

Hippie

Well-Known Member
Just me then? lol
I've been having a blast with the 6.5mm heater rod and my lab glass collection :science:

The temps came down to 650 and 680 with the two different length 19/26 builds with 2.5 or 3mm balls in the body section with the Elev8R (short) and Herbo (deep) bowls and are quicker to start producing the thick vapour now.

And I got the biiiig bowl 24/29 and 24/40 versions working in the 850 region and a MA2/3 build with the 19/26 thermometer tube hanging out the bottom of the 24/29 joint like the Herbo working really well at about 750 on the controller, all with the same rod.

So that's 5 heavy hitters to choose from with the same rod and controller (when it's cool as it expands a lil when it's hot)

I'm sure they'd be more efficient and the temps would come down further if I could find some claisens with the side arm closer to the top joint (like the ones Jojo Monkey had made), or cut some holes up there, so the air has to travel down the full length of the heater rod. So I'm on the lookout for some glass like that and the dremel's whispering to me now lol
 

average_joe

Well-Known Member
Hello and thanks to GoldenBud for letting me know about this vape and thanks to everyone else who put their effort to show us this great build.

My question is if this part could work, as I am trying to lower the cost and the other parts posted that I have found have expensive shipping to Chile :(
https://www.aliexpress.com/item/328...2d228dcf-1&pdp_ext_f={"sku_id":"65119166969"}

I also noticed that the handle has a narrow part, is that important? or can I pick anything to use as handle that has the 24/40 plug?

Thanks in advance!
 

Hippie

Well-Known Member
I'm gonna say yes as I've made working vapes with all the claisens I've tried but it depends how long they and the thermometer tubes are really.
24/40 and 24/29 thermometer adapters (and bowls) will both fit in the joint but one will sit lower than the other
It makes no difference to performance having a male or female sidearm joint
The height of the sidearm is important tho so you want that as high as possible really to get the most out of the heater
 
Top Bottom