BaKx (heating principle) inspired desktop vape

highvaper

Well-Known Member
Bit of experimenting with the element heater - the hall sensors turned up already as well as some victoria clips.


So put together a basic heating thing - it struggled with just the one battery and even with 3 in series with about 12v is pushing somewhere around 1-1.5 amps though the ribbon. I blew my multimeter amp meter fuses at some point messing with the batteries and dont have a spare plus the hall sensors are maybe a bit too high current rated at 30A so the sensitivity to lower amps isnt great.

Im thinking there may be no need to actually measure current or ohm or voltage in the element at all - it takes a good few mins to get up to 200C and that's with the coil length cut in half with the little strip on the top (im moving that about to see how long is too long). So think there wont be any need to worry it getting too hot too fast and having to adjust the wattage going in and its going to be on/off and no pwm either with just a the thermocouple being used.

I may keep the hall sensor to check current is actually flowing but may just add complication to the setup for the time being.


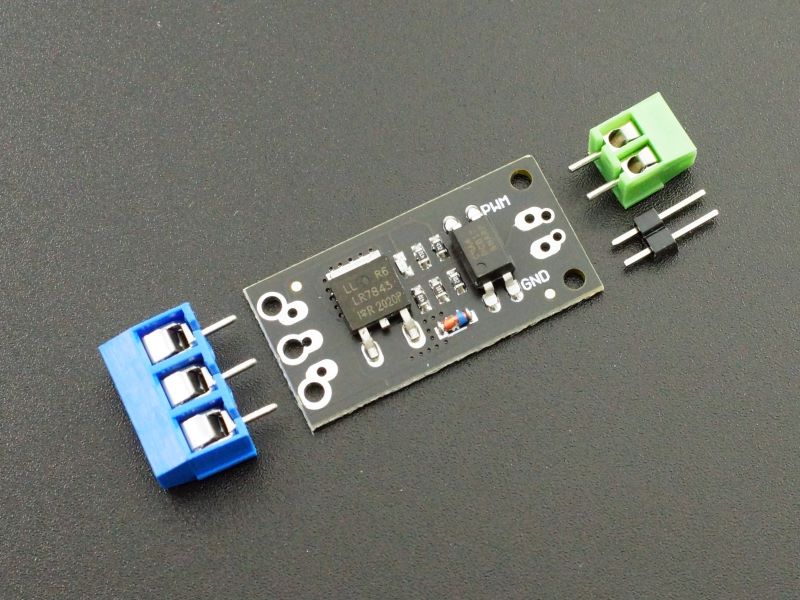
Well an extra battery and i gave it a quick test - works surprisingly well for just a glass straw, test tube, wire and batteries - just need to hook up the mosfet and thermocouple and all good to go - i think if i can fit it inside a larger tube then the heat from the coil will be concentrated inside the rather than 1/2 of it just dissipating off the ribbon into the air.


More messing with tube in tube and different heating coil positions


Works pretty well with tube in tube but did forget outer tube would get how and again more burnt fingers - this is hazardous

Works faster with the coil all at the bottom but does lessen the amount you can put i the straw. Im thinking maybe fill the outer tube with little glass balls to retain the heat as there is plenty of space - also i need to replace the red insulation with a simple copper strip running down the inside of the larger tube so there is only metal inside.

The Victoria clip is very useful when making the winding to quickly clamp it in place - but think i can just use the little wire connector things which are covered in plastic but once u rip that off its just a small bit of metal. I have some really thin 0.2mm stainless steel round wire as well i can give a try and see how that performs but need to get stuff setup with the pi in order to be able to measure better
 
Last edited:

highvaper

Well-Known Member
Well i think i have fcked one of the picos i have - fortunately i have 2 - the ground on the batteries is at 12v and the pico is at 3.3-5v but thought it was ok as for the induction heaters i used a common ground for the pico, mosfet trigger switch thing and heater and no probs but it seems i didnt realise the battery is not the same ground as the usb powering the pico so i think bang.

This is the sort of knowledge im lacking and am surprised i havent fried it before - i think a 1k ohm resitor from the gpio pin to protect it when connecting it to the mosfet but think i need to some how protect the ground of the pico as well but not sure how.
 

highvaper

Well-Known Member
i have just one ground - the battery ground.

The problem for me with the pico is im using the usb interface as a console and to program it and also power

I also got about 5 or so of most things - but the place only had 2 of the picos in stock at the time.


Just fried my second one - i was using the power supply i used for the induction heater setup but maybe these mosfet switching modules are not good - have just ordered some more picos and some lr7843 mosfet modules as they are supposed to be optically isolated so hopefully should work when the pico is on usb and not the same powersource as the element

Better news is that with the other power i have done a few tests just plugging it in and using a thermocouple with the multimeter and well a few straws and it working really well - the outer larger tube really helps to keep the heat in

Seems the rough guide to the coil resistance is about 5-10 ohms (closer to 5 though on the smaller tube is ok with about 8-9 wraps around it) with my 12v power supply
 
Last edited:

highvaper

Well-Known Member
More messing with test tubes and steel wire to come to a very elegant one.


The heavy copper wire provides power but is also the stand.

If you look at the right hand image there is the adjustable strip to change the length of the coil however i had a brainwave - it could be used to split the coil in half - like the 2 induction coils and flip power between each half to have more than just the lower part heating up and provide more convection heating. A bit of a mad side idea have a lot of short wraps maybe 3/4 turns and have 4 going up the tube so you dont need 12v and can use a smaller battery.

It really is simple to make the victoria clips really were a fantastic suggestion thanks again @BreadStick - and with 3 x lipo batteries in series providing power it works really well without any temperature control - its hard to hit the sweet spot but its really flavourful compared to the tm2 and is a nicer high.

I do want to get it into a tube to keep more heat in and provide some protection for the element - maybe a little hole in the side of a big tube and some ship in a bottle type skills to get a bit of wire in along with the temp probe - or just back to cutting off the bottom off and having a small gap to have wire access - for cleaning the cut bottom may be easier and i have a glass cutter so no dremel purchase yet ...

The tiny hole idea does make it easier to add some glass balls to help maintain the heat as it does cool down quite quickly when not in the tube.

Another idea if there are more coil(s) to heat the glass with - you can use a larger tube - put the straw in then "pack" around the straw rather than in it - a bit of a pain to load but would take a considerable amount depending on the difference between straw and tube so only need loading once in a while. It would a pain to clean as well but suppose its a test tube and you can just fill it with ipa and leave it to soak and just swap in another coil/tube setup depending on the housing.


Ah yes if anyone has tried the code and having and issue with the ssd1306 missing a function - for some reason whatever libary i used is different from what i can now find but fortunatley managed to save copy of /lib before frying my picos and have now just added all to the repo to make live easier.
 
Last edited:

highvaper

Well-Known Member
Not done much today as i dont have a pi and well i do need to do some work once in a while.

@Hippie Dickie - im going to look at nichrome as the the heater element - the reason i used the stainless steel ribbon is i had it and also its what the tm2 and other heater elements seem to be made of - just want to check my calcs - if your using about a foot long 3mm x 0,2mm ribbon your pushing over 30 amps @ 12v? does it get hot enough with 10amps at 4v? its pretty cheap so may go for some 3mm and 2mm to see how it performs.

Also i have had a look at the polyimide tubing and it is very expensive and hard to source - what do you think about the PTFE tubing @TommyDee suggested as its much cheaper and from the table on: https://ptfe-machinery.com/properties-ptfe-insulating-materials/ looks like it can deal with similar temps to the polyimide and perhaps a higher continuous one.

I do think i could make a TM2 heater with a couple of needles and the steel ribbon - if you run a sharp edge against the ribbon it curls up - im debating having a go a a convection purely manual one where a mostfet connected to a button just powers a coil - maybe with a thermopile plus a potential divider to shut it off when its too hot - i suppose you could ditch the micro-controller and do the whole setup like that even - i may give that a go just to see how different it is.


Thats the sort of thing i was thinking - i have seen the c555 timer relays which you can adjust easily down to 0.,1s but i dont think thats realistic more like 0.2-0.3 is my guess - my issue with the ss316 is you can only heat up about 20cm of it so not sure how the tm2 does it with just the one battery - you do hear it buzz when its up to temp so there must be some kind of tcr and mosfet going on as i dont think there is a sensor on the heater.

So my thinking is you can use just the one 4v lipo battery as long as you have short enough element and with the c555 timer + relay it will just jump between the 2 outer needles to power the different lengths of the coil. This is for a convection tinymighty type vape with the airflow passing through the element rather than the all glass more conduction type.

Another arrangement instead of one long coil with the common middle - use 2 coils with the same inner needle and different outer one at different heights instead so there is more of a column of air heated rather than just 1mm of the coil height - would make it more even as dividing the single one in half would create a hotter middle than the outer side so would need to mess with dividing it up to even that out.
 
Last edited:

Hippie Dickie

The Herbal Cube
Manufacturer
i used a button to supply power to the coil in a very early iteration. it was too much amps for the button i used and feathering the button was very hit or miss (lol). same for using a potentiometer to set the current for a pwm - there was a single spot that was best and it burned out that one spot. PID is a better solution.

i saw a chart once that said 16 awg nichrome80 needed 3 amps to hit 400°F. i tried about 30" of that and had to keep cutting it down to get to vape temp - but it couldn't recover from a hit fast enough. played with trying to increase the mass for better heat retention. useful learning experience? PID is the better solution for maintaining setpoint temp.

i started with A123Systems batteries. the LiFePO4 chemistry is best for massive current output. safer, too. charge faster - can handle up to 6A charging current. my 2-cell pack charges in 60 minutes for 90 minutes of run time using a 3A charger.
 

highvaper

Well-Known Member
yes i have had to keep cutting the length of the steel ribbon down to get it hot enough hence me now looking at the nichrome - and have realised i need to do some kind of pwm to control it - tbh im a bit unsure how the tiny mighty 2 element pushes out so much heat if its about 20cm long and is only powered by one battery - my steel is 1mm x 0,1mm and im struggling with more than 20cm ad was taking at least 3 or more mins to get up to temp - i realise its different in their heater shape but still with just 4v not sure how they are doing it.

I was a bit WTF when i calculated that your pushing over 30 amps through the element - like at 12v thats over 350watts which is a factor of 10 more than i was pushing - no wonder you said its like controlling fire. Im hoping i can get the temps up high enough with some 2mm 50cm length stuff as i want to cover a larger area of glass than yours.

Ah i had my first go at trying to cut a glass tube - made some kind of jig which needs improvement - i think i may have been a bit ambitious starting with the 3cm tube but i have over 10 of them - i first heated it with a butane torch i have and then etched a cut line into it - i then blasted it again with the torch and bang it kind of exploded as i dont think i did it evenly enough but most of it broke along the line with a bit of jaggedness.

I gave the longer bit of the broken tube another go to try and clearup the end but that didnt work too well and the whole thing collapsed when i tried to then break it after scoring it again. i think this may be the most difficult thing to do in this build so far - may even splash out on a dremmel and see if a diamond bit will be able to slowley cut through as im not sure i can snap the 3cm ones.

Just had some of these arrive:


You can wire them in parallel so should be able to pump a decent current through and keep the pico nice and safe
 
Last edited:

Hippie Dickie

The Herbal Cube
Manufacturer
check YouTube for glass tube cutting - may give you some ideas. i have some mention of my technique in my long thread - don't know where. in the earlier part i think. i scored, used a BIC to flame heat the score, then a damp cloth around the tube while i snapped it. then file the damage. spouse was into stained glass for a while so i have access to some useful glass working tools.

it was a learning experience to get custom cut glass from India. got up at 2am to call and talk on the phone once. then they flame polished the end and that fucked up the finished dimensions.
 

highvaper

Well-Known Member
I followed your method but think just was too quick with the heating after scoring the glass - there are some nice videos on youtube - one using a dremel type tool which is really pushing me towards getting one - and some of non dremel copies look quite good and pretty cheap and i do want to try designs which need holes drilled.

Also there is a special tool i have seen which is designed for cutting glass tubes up to 40mm - just search for tube glass cutter - sort of like a clamp with a glass cutter wheel for about $10 - just score with than put in hot and then cold water and its done - maybe with some wet & dry paper to smooth off the edges.
 

highvaper

Well-Known Member
I had an idea for an insulator for the thermocouple - anodised aluminium foil - just did a quick read up on how to do it and looks simple enough with sulphuric acid + distilled water and a battery. I realise would be quite fragile but maybe a nice way to allow almost bare metal contact between the coil and sensor. Or perhaps some slightly thicker ribbon rather than just foil so its not so fragile - or just anodised wire wrapped around the sensor.

Also i was looking at the high temperature resistant paint - like 800C - looks like its mostly titanium oxide once the solvents evaporate - its quite cheap and again just a few coatings on the sensor should insulate it from shorting against the nichrome. I do have some ptfe on order - its was cheap like <$10 for 3 different diameters at 1m length each including postage from far off land - compared the the polyimide which is $$$ and hard to get hold of.

or maybe some ceramic glue - i have seen some which is rated to over 1000C - just coat the sensor with a little bit.
 

Hippie Dickie

The Herbal Cube
Manufacturer
i avoid aluminum and titanium oxide. polyimide is as toxic as i want to get. ptfe should be ok.

when i started my project there was a website called smallparts.com which sold all kinds of materials in small batches. they got bought by Amazon and that source for DIY projects disappeared.
 

highvaper

Well-Known Member
Amazon have killed a lot of things unfortunately and the quality of some of their stuff is questionable.

My placement of the thermocouple is going to be at the oppose end of the tube to the intake and possibly shielded from it entirely so may try out some of the 800C spray paint on it.
 

highvaper

Well-Known Member
Not much happened this weekend - a few replacement pico's arrived otherwise still waiting for various width nichrome wire - i thought was coming from a local supplier on ebay but looks like its on the way from china so could have a weeks wait before any more build stuff happens.

Have had some thoughts on pwm and pid power level and how to handle that but not worked it through fully - i do need to do a little bit of an update code wise to deal with the element heater instead of the induction one so may try and get that done this week - im away at the start of april so suspect not much will get done without the setup to test with.

I do want to have a play with a fully convection based vape after messing with a pin and some stainless steel ribbon i have made a few pretty cool little tiny mighty esque heaters - thats completly different direction and more just for my curiousity on how to make one and i think will be more intricate/delicate work than the heater element wrapped glass tube - also the pure glass path from test so far is much nicer flavour and high.
 

highvaper

Well-Known Member
Plugged in a new pico and forgot i had renamed the file to main.py so was nice when it rebooted and everything just started up.

So had to have a few tests with stainless steel heater - there's about an inch of the tube being heated at around 50w - it takes a couple of minutes to get up to 200C and then you need to leave the glass straw in for a minute or so as well but its a really flavoursome draw once it gets going and stays hot for a while as the straw has quite thick walls.


The new isolated mosfet at first wasnt working and i just couldnt figure out why when testing with a led and the 3.3v power rail on the bread board as the power source to be switched - so grabbed a lipo and that still didnt work and finally read the specs again to see it needs 6v min for the load voltage - so once i added an extra lipo i destroyed the led.

So think there is enough there to get on with the pwm for the heater - im thinking just breaking up the power result from the PID into the following :

<0 = Off
0-3.3 = 1/4 sec on, 3/4 off
3.3-6.66 = 1/2 sec on, 1/2 off
6.66-10 = 3/4 on, 1/4 off
>10 = On

I dont think there is much point in breaking it up much further considering the thermal lag getting through the glass should buffer it too.


Well adding pwm was a lot simpler than i thought - here is the updated element heater class - will push to repo later

Python:
class ElementHeater(BaseHeater):
    def __init__(self, element_pin):
        super().__init__() # Initialise the BaseHeater attributes
        print("ElementHeater Initialising ...")
        self.element = Pin(element_pin, Pin.OUT)
        self.pwm = PWM(self.element) # Initialize PWM for the element pin
        self.pwm.freq(1000) # Maybe too much? need to see how this goes with nichrome
        self.pwm.duty_u16(0) # Initialize PWM duty cycle to 0 (off)
        print("ElementHeater initialised.")

    def on(self, power=10): # Default to full power
        duty_cycle = int(power * 6553.5)
        print(duty_cycle)
        self.pwm.duty_u16(duty_cycle) # Set PWM duty cycle to control power
        self._is_on = True

    def off(self):
        self.pwm.duty_u16(0) # Set PWM duty cycle to 0 (off)
        self._is_on = False

    def set_power(self, power):
        duty_cycle = int(power * 6553.5)
        print(duty_cycle)
        self.pwm.duty_u16(duty_cycle)
        self._is_on = power > 0


Im not sure on the pwm frequency and maybe should be a lot lower

Looks good with the PID controlling it now - have lowered the frequency to 8


I blew on it at about 30 secs hence the sudden temp drop
 
Last edited:

highvaper

Well-Known Member
Some more testing - have figured out a nice way to use it while i have the slower warm up time - its only pulling 30w so not complaining.

Gauze about 1.5 inches into the straw then use like a straw and suck up ground bits to vape - leaving a little bit of space at the end - add a little bit of gauze as a stopper to the end - you can tamp with a toothpick or similar.

Put in heated test tube and let it heat up - takes a bit of time first time - you can pre-warm the straw first but put the first gauze in before hand - then have a few puffs and put back into warm up more - repeat a few times but is usually finished after 2 or 3 depending on how hard its packed in.

To empty just use a toothpick to take out the bottom bit of gauze and just blow the leftovers into your abv jar - not so hard that the first bit of gauze is dislodged. Then straw is warm and just repeat procedure just be a bit careful putting in the second bit of gauze. As the straw is hot it doesnt take long for the second/third ... i have actually put the other vapes aside as the taste is so much nicer and im getting higher with less even though it is a bit more of a faff to use than the tm2.

Have added a little buzzer to the setup as when the session timer ends you dont sometimes notice and is a bit annoying when you have put a straw in and wonder why its taking so long to get hot so it does a couple of little beeps when the session finished. I dont want to just have a non timed "Session Mode" like the tiny mighty as you forget to turn it off and it just sits there roasting the device itself.

Also added a buzz when it first gets a few degrees off the setpoint so you dont have to sit there and watch while it warms up - again i dont like the way the tiny mighty vibrates every time you release the button and it gets up to temp again as sometimes you release it without meaning to and its basically already hot enough.

All pushed to the repo so if anyone is giving this a try add a active buzzer to your shopping list - i think everything is in place for other people to give it a go - the tube / heater part is kind of a different bit to the project and would be curious to see others people take on that side of it. I have some 20mm diameter test tubes on order as i think they will be a good size for a tiny mighty width stem - as i have a few stems to mess with.
 
Last edited:

highvaper

Well-Known Member
Been testing it out hard this evening with the heater pretty much been on for the past 3-4 hours - no issues just need to remember to blow out the straw before it gets too cold - i have left it on over night a few times (not the heater part) and its been fine the next morning but today is the first time i have just hit it again and again without letting it cool down at all.

The buzzer is great idea and at the moment have just been restarting the session as soon as it ends

Im thinking perhaps once you start a session to jump to a screen which you can adjust the session time starting on a default number of minutes and you just turn the rotary to set the time for that session and then leave it for a few secs for it to begin the session and return to the main page

Also maybe instead of the warning at the end of a session have it a few secs before the session ends with a screen asking to extend session and any input returns user to the session time page where they can just leave it to carry on or adjust as needed. For desktop use i think fine to have on all day long with a mains power supply but i do think it could be made into a smaller device so would need more control over how long a session is to save on battery life.

It does struggle to get to 250C with the stainless steel element when the straw is in but leave it long enough and it makes it - very curious to see how the nichrome performs in its place and from calcs I reckon the 3mm stuff will be pushing about 5 times the wattage through a larger wire surface area so expect heat up time to be in a few seconds range with the upper temp way past 300C and more like 500C or perhaps higher so the PID better do its job!

If with nichrome there is less heat up time so a session may be less important so before i do a load of extra stuff need to see how it performs first - also there is plenty of other stuff to get on with re some kind of housing and making it a bit more user friendly and soldered together rather than on the bread board.
 
Last edited:

highvaper

Well-Known Member
Still waiting on the nichrome so decided to reduce the length of the element by a few turns and pushed watts up to about 40w - has sped up the heating time a lot and also seems to be ok with the distance between the coils a bit further apart so perhaps with a smaller diameter tube the stainless steel is useable but it will use more power than nichrome so for batteries isnt good.

After my few hours of use i noticed the 12v @ 10amp (max) power supply was a bit warm - not hot just warm to the touch but have realised that im going to be pushing close to 120w depending on the length of the wire and perhaps even more - so have added a limiter to the element heater - essentially it just takes in a max % duty cycle for the pwm.

With 10% on my watt meter the stainless steel coil pulls a bit over 4w (with nothing attached to the supply it pulls 0.7w) and at 50% was around 19w
so think it works well enough to not blow the supply - you do need to work out the percent yourself from:

max wattage the power supply can handle / power element will draw

power element will draw is from: (supply voltage * supply voltage) / element resistance

so for my 12v max 10 amp supply i would limit the duty cycle for a 200w element to 60%

Github updated with limit just in case people are testing and actually trying it out
 

highvaper

Well-Known Member
Yay - nichrome arrived - the 2mm x 0.2mm and 4mm x 0.2mm - still waiting for the 3mm.

I went for the 2mm to start with - glad i did as the 4mm is going to be such overkill.

As you can see it goes up the tube a lot further than the stainless steel one.


The SS one resistance is currently at 3.6 ohms and was pulling 40w at 12v.

I did a quick check on the resistance of the nichrome and it was 1.5 ohms so would pull 96w - so first set a limiter to 25% to make sure my calcs were ok and it was pulling a little more than 25w so on to 75% and well time to be a bit more careful you can feel the heat off it.


The video is when the limiter was set to 75% - which seems to be a ok level for the 12v supply. Note: the thermocouple is inside the tube not touching the element at the moment so is reading the temp the staw would be in.

So no chance am i going near the 4mm stuff unless its about twice the length at least so maybe for a jumbo sized version for the 30mm tube and a car battery to power it. And im not sure im going to need the 3mm stuff either as im not making use of the the full capabilities of the 2mm - i will be doing some experimenting with a couple of lipo batteries and limit it to 6v to see how that goes.

But wow nichrome is the way to go heater element wise - i did blow a mosfet isolated module when i shorted the coil so have now added some insulation on the solid core copper wire - glad i got 5 and will be adding another 5 to the shopping list again as i suspect these are going to be very useful for other projects and know im going to short them again.

Just need those 20mm tubes to arrive so i can mess with some wider straws but am having some ideas on how to make a more user friendly version as at the moment its a bit awkward with wires everywhere


Figured out a temporary way to hold the thermocouple against the glass for the time being


Not perfect but should give a reading similar to whats in the tube.


Just upped the limit to 85% and pulling 93watts - from cold start to 230C took 45 secs

And at full whack 36 secs to get to 230 from cold (25C) - that hit 110 watts but settled around 108. PID is holding temp better than when it was throttled/limited as i think that was messing with the algorithm as it thought it was apply 100% but didnt know about the limit.

@Hippie Dickie ok i really get your point about controlling fire now with the nichrome.
 
Last edited:

highvaper

Well-Known Member
Slow start to work so with the 4mm nichrome sitting there next to the mod i decided to retry my little mod experiment.


I imagine this is what the BAKx must look like inside or something pretty similar.

On first go i got it up to 210C but the battery wasnt full so couldnt carry on - the mod cuts out after 10 secs so it took about 5 or 6 goes to get the temps up.

When i swapped the battery with a new one i kept getting the overheated error and figure without a custom mod to mess with the protection in it will stop it from working.

The pico setup is going to cost less than a custom mod and has proper pid temp control over the tcr or just guessing from the watts pumped in so have satisfied curiosity re doing this with a mod box instead. But i do need to look into how it gets 100w from the single 4v p28a - im thinking it must use a dc boost convertor to push it up to 12v?


Clearing up i found my DV5 water adaptor so gave it a go -


Not really needed and takes away the flavour a bit.

The thin glass straw is really interesting - if you let it heat up to about 220C in the tube and then suck up what you want to vape - it starts to vape while your sucking it into the tube and its very terpsy - there is enough heat held to even let you have a draw before having to heat it back up again.

Some checking on the thermocouple and pid


Dont know what happened to the aspect ratio of the video but the meat / bbq spike thermometer was in the tube and staying pretty much spot on throughout a 3 min test with a bit of variation (under 5 degrees either side of the setpoint) on the pico thermocouple reading which is on the outside - also its not in the center of the tube so is cooling a bit faster i think but the tube acts as a buffer so im very happy with how well it is staying with in the setpoint.
 
Last edited:

highvaper

Well-Known Member
This build has worked far better than i was expecting - i have read the bakx thread with a pinch of salt about how much nicer the taste is compared to convection but the difference a pure glass little baking oven compared to the normal convection vapes is like a pure joint vs one with tobacco - the flavour just shines through.

The temp control is superb - i start at 180 - once its warmed up after about 30 secs a nice just taster pull while i rotate the dial up to 200 taking a couple of pulls as i do - the dial is really nice to use and tactile with a little clicks feedback - compared to a shitty mighty+ buttons and you can do it while its firing which is impossible to do with the tiny mighty.

Once its at 200 a few really nice pulls - you can take the straw out or just lift up the jar im currently using as a kind of housing and have a sip through the straw - its a bit like having a drink and you get heated air from the tube walls boosting the vaping.

On to 210 for a few more pulls while slowly dialling up to 220 and 230 before its pretty much done at 240. So far not got close to combustion and frankly unless you purposefully turn the dial past 250C its not going to happen as the temperature control is far beyond what i thought i could achieve.

Im surprised as to how much you get from a single straw - currently i have set the session time to 5 mins but you need another 1 or 2 if you pack it with a fine grind. I have added a 1 minute session after four clicks as i found it can be useful for warming up the tube or if you want to just eek out a bit more from a straw, also the menu still just isnt right but cant figure it out. The straw size was just by chance as i was looking for various glass tubes and that size look like it would work well - as mentioned i do want to try with larger heater tubes and fatter stems though.

Beginning to not see the woods from trees now code wise and not sure what to work on with it so other people using it would i think help now with their input. I have had a few ideas re the housing/actual vape build so will be playing about with different battery combinations and coil/tube sizes to see what works together. From the mod test with the 4mm nichrome just one p28a may be enough for a few sessions - may need to add a dc booster.

I have seen 30mm OD / 20mm ID 10cm long ceramic tubes for about $25 - not sure how good they are as thermal insulators but perhaps could help protect whatever housing its in - the glass jar im currently using is like a warm mug of tea/coffee after a few repeated sessions. I have sort of envisioned a kind of wooded housing with a glass/ceramic lining with the nichrome wrapped tube inside. Unfortunately i dont know any one with a proper wood workshop and tbh no way i could get a band saw, lathe and upright drill past the gf (a dremel is small enough...)

However im beginning to think that any kind of housing like that to make it portable would be ok for a few mins use at time but you would need to leave it to cool off - the tiny mighty gets pretty hot (i think its a 70w coil) but it isnt designed to work like a little oven which will just radiate the heat into the housing (despite any ceramic/glass protection).

I do have an idea for a box to house the batteries/electronics and tubes for when travelling and when you want to use some kind of hinge comes into play and the tube rises up like some kind of rocket/scud launcher thing so no need for any thing around the tube as it would be air cooled.

Well sales pitch over back to testing.
 
Top Bottom