whammy_time
Well-Known Member
Greetings!
Intro (since it's my first real post)
I've been lurking for a few weeks here as from my various google searches this seems like one of the few goto resources for vaporizing. Other than trying a volcano maybe 4+ years ago, I've always used combustion. I quit smoking cigarettes ~4mos ago and took a long break from ganj at the same time. After 3mos, I was a little nervous that it might cause nicotine cravings, but the experiment was a wonderful success!
Now that I can taste and smell again... smoking weed stinks! I started looking into vaporizers for the first time, and definitely got some sticker shock! Perhaps like some others around here (though few, it might seem, by reading through the arsenals in some signatures!), I wanted to see if I could improvise something functional and economical.
I felt quite at home, as there are some incredible tinkerers around here. My goodness were threads inspiring and impressive. I can't help but acknowledge @Pipes for his incredible work in the Bulli and Project threads, which have given me ideas. It's a testament to the cool factor that the former has been active for more than 4 years!? I quite enjoyed @Hippie Dickie 's toaster, the lab glass vape ( @jojo monkey ) and a super recent one that looks like something out of my own home (@rz).
Anyway, inspiring shit and hopefully I can contribute here among my newfound inventors!
The Halotron
Silly name, but it seems people name their stuff so I thought I'd do no less. Somewhere I stumbled on someone suggesting a halogen bulb as a heating element and started digging. I guess it's common knowledge to many of you, but i had ~zero knowledge of vaporizers prior to maybe 3 weeks ago, so this was exciting stuff! I was most intrigued since it was simple and available (easy to get a hold of). I tinker with microcontrollers quite a bit and wanted to try a temperature controlled system using PID.
Here's my current list of parts:
I was able to borrow the glass components, had the power supply and the arduino/electronics (minus the thermistor), so I only spent $12 on everything. The project wouldn't have been nearly as appealing to try if I'd needed to buy everything... at $100 I might as well just spend another $30-50 to get a commercial vape.
How she looks like
So, finally, here's the gist! Used a scrap piece of oak for now just to hold the light put and manually got the thermistor placed above the bulb, positioned just by wires holding it there. I only had lead solder, so I used makeshift crimp connectors for now... I'd like a better solution, and getting the thermistor past the glass joints proved tough! I would ideally like to have just the actual glass encapsulated thermistor in the air stream, with the wires not in the heat path... if I ran them on the outside of the bottom glass joint, the next one (as expected) was really far from seated. As is, I don't like that the leads are going to get hot as fuck as well (which plays with wire resistance and overall thermal mass). Anyway, here you are...
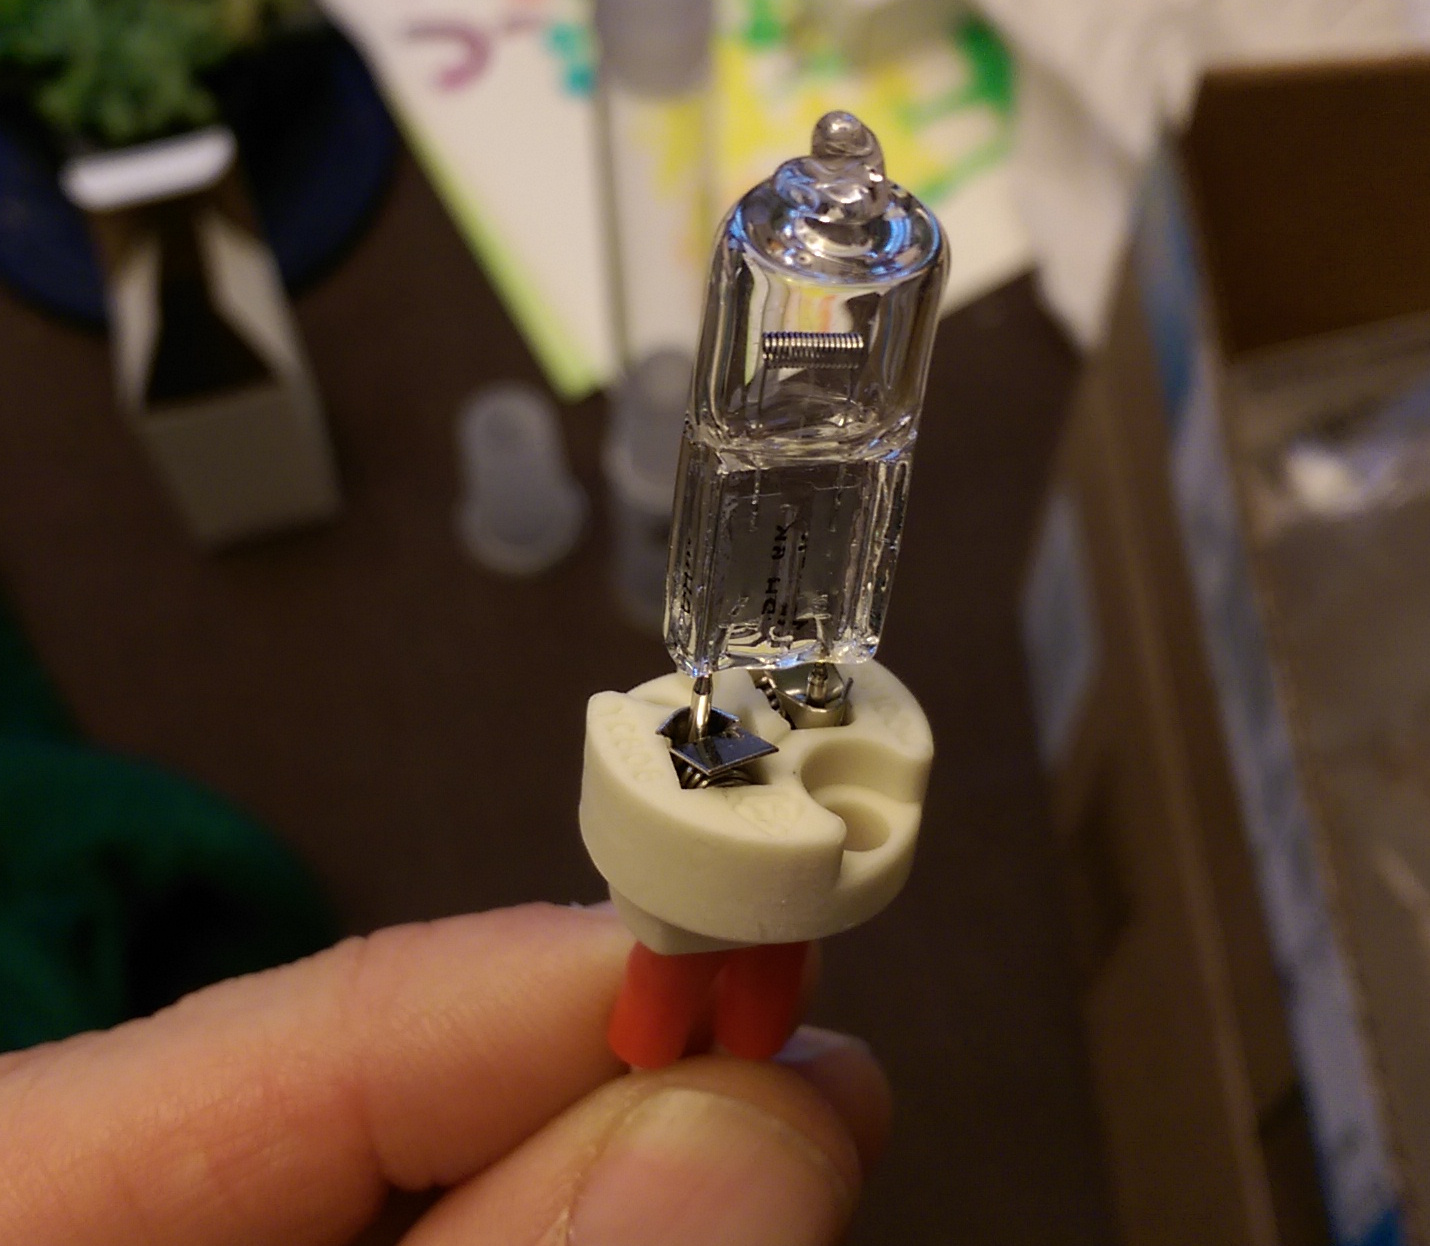
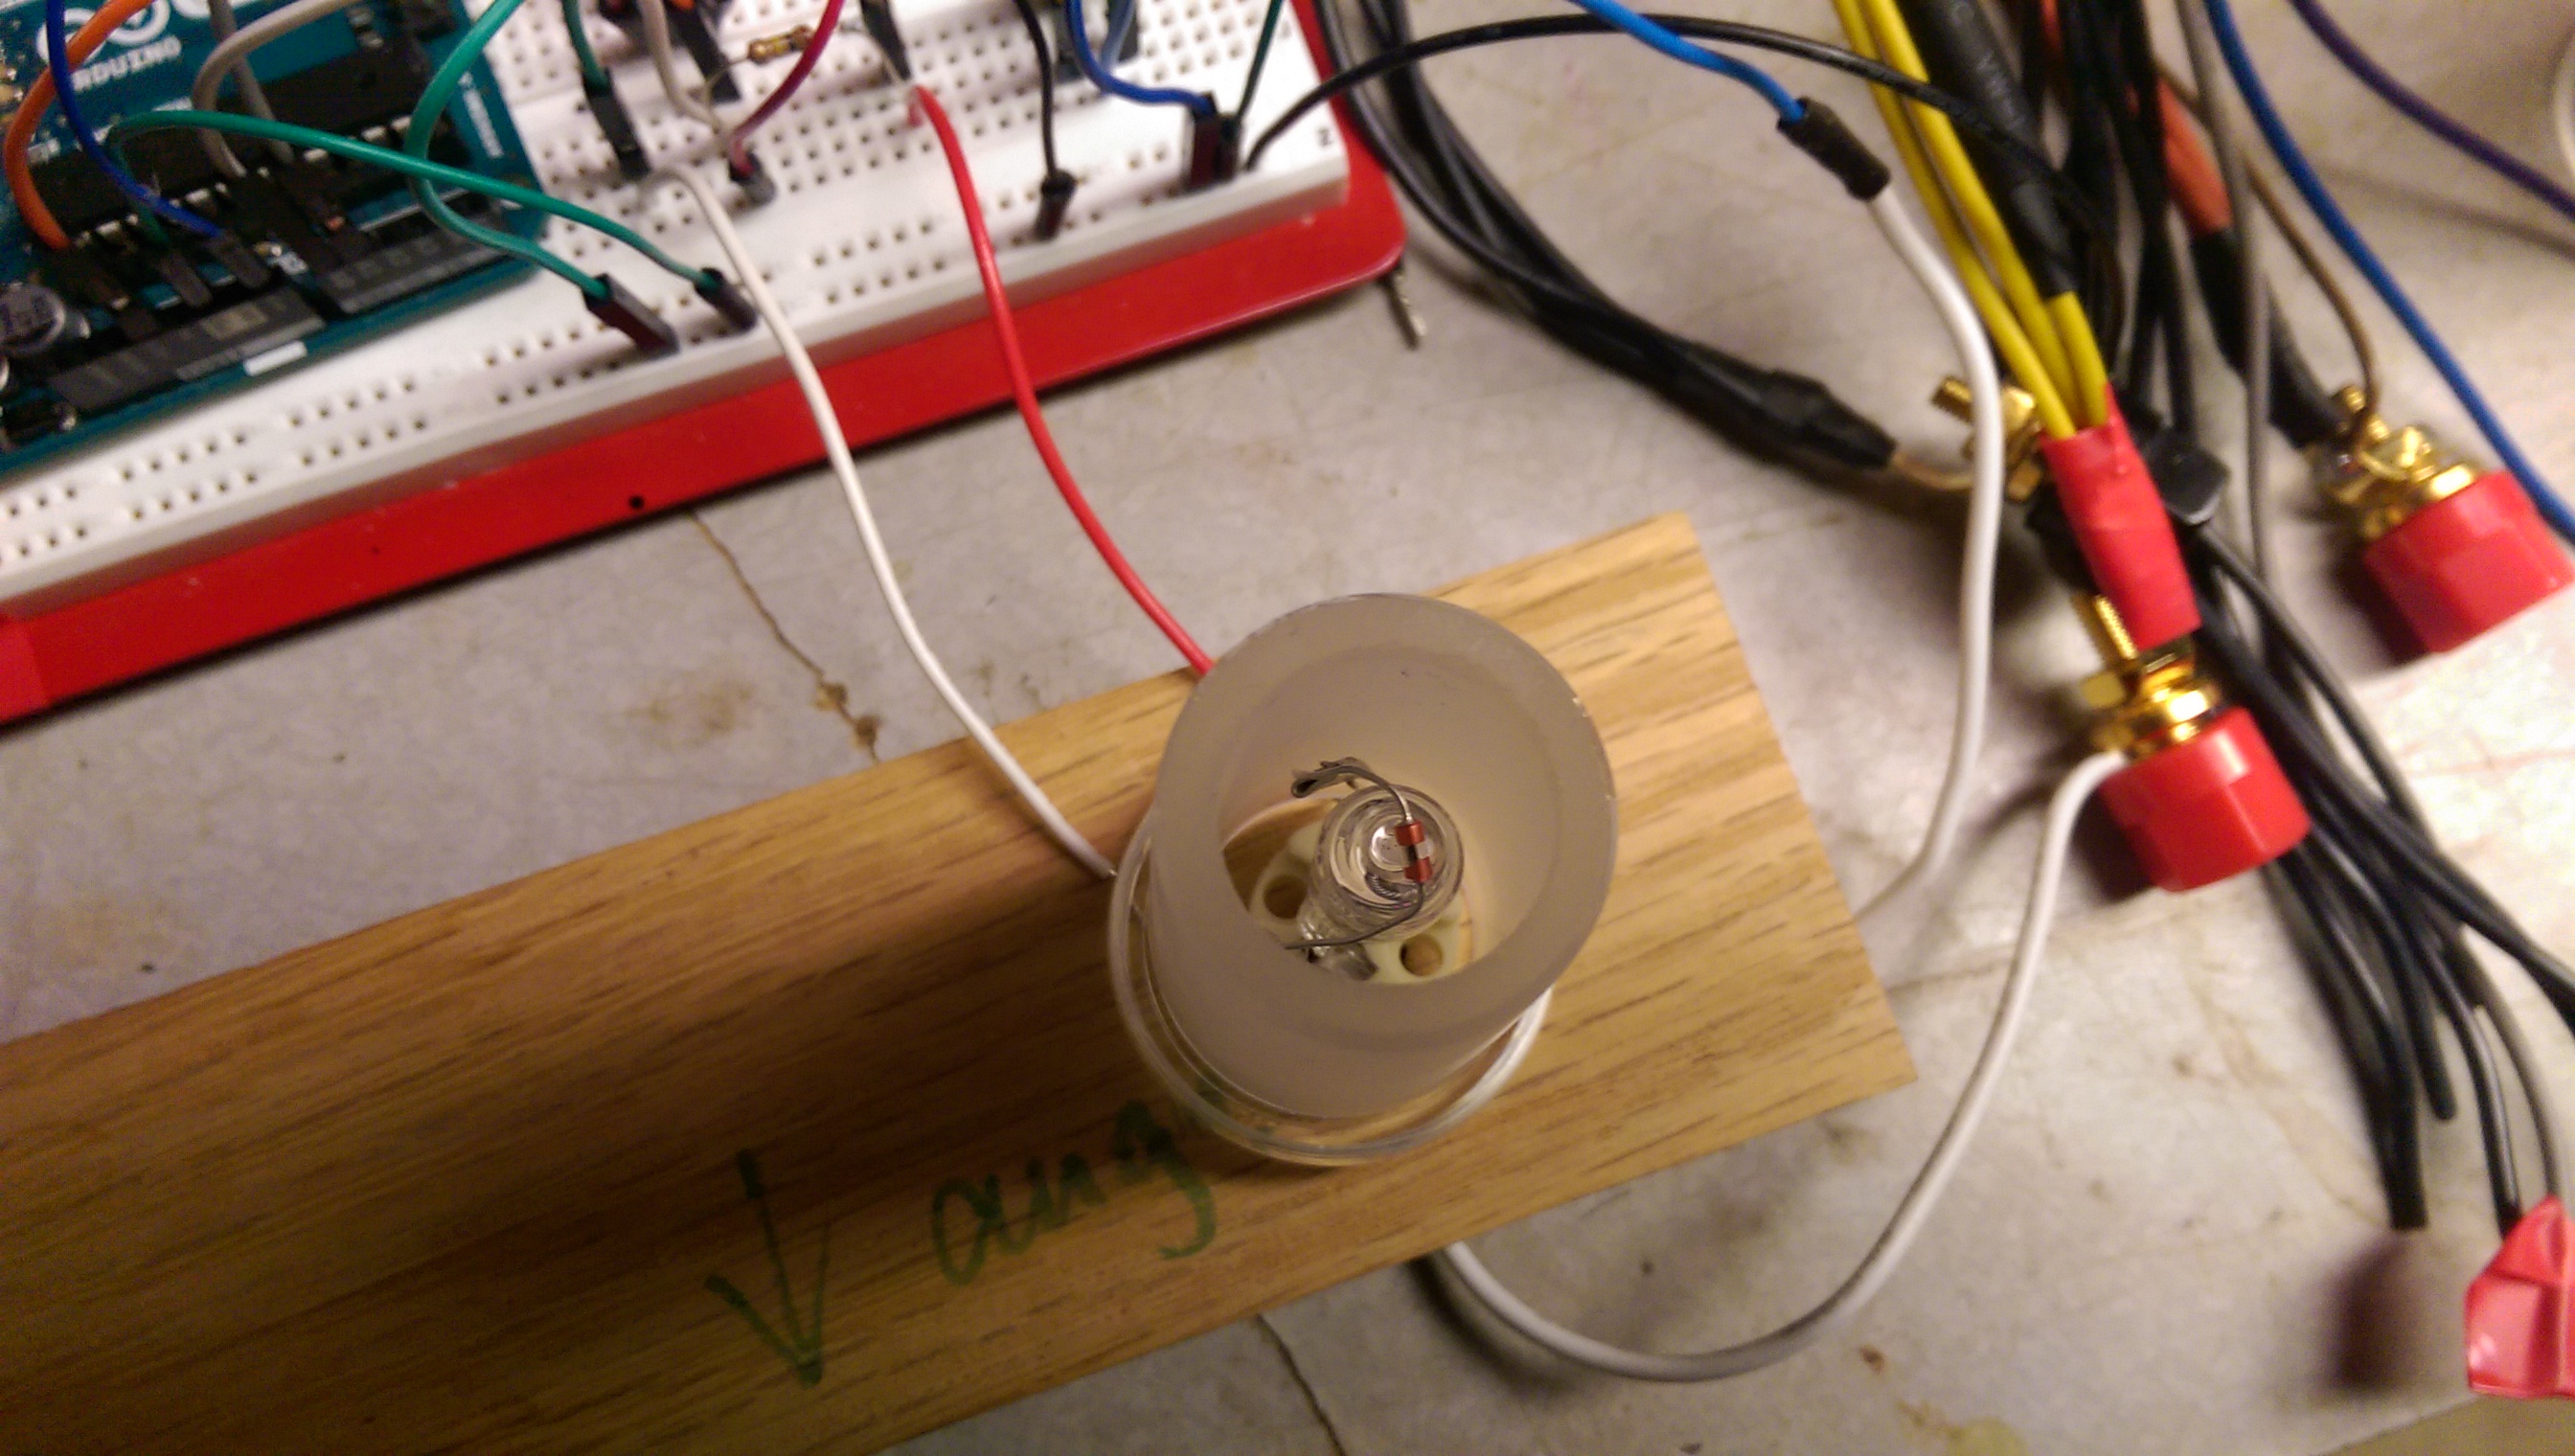
Closeup of halogen fixture
Glass bushing to surround the light, thermistor over bulb, and a small screen bowl will sit in this opening
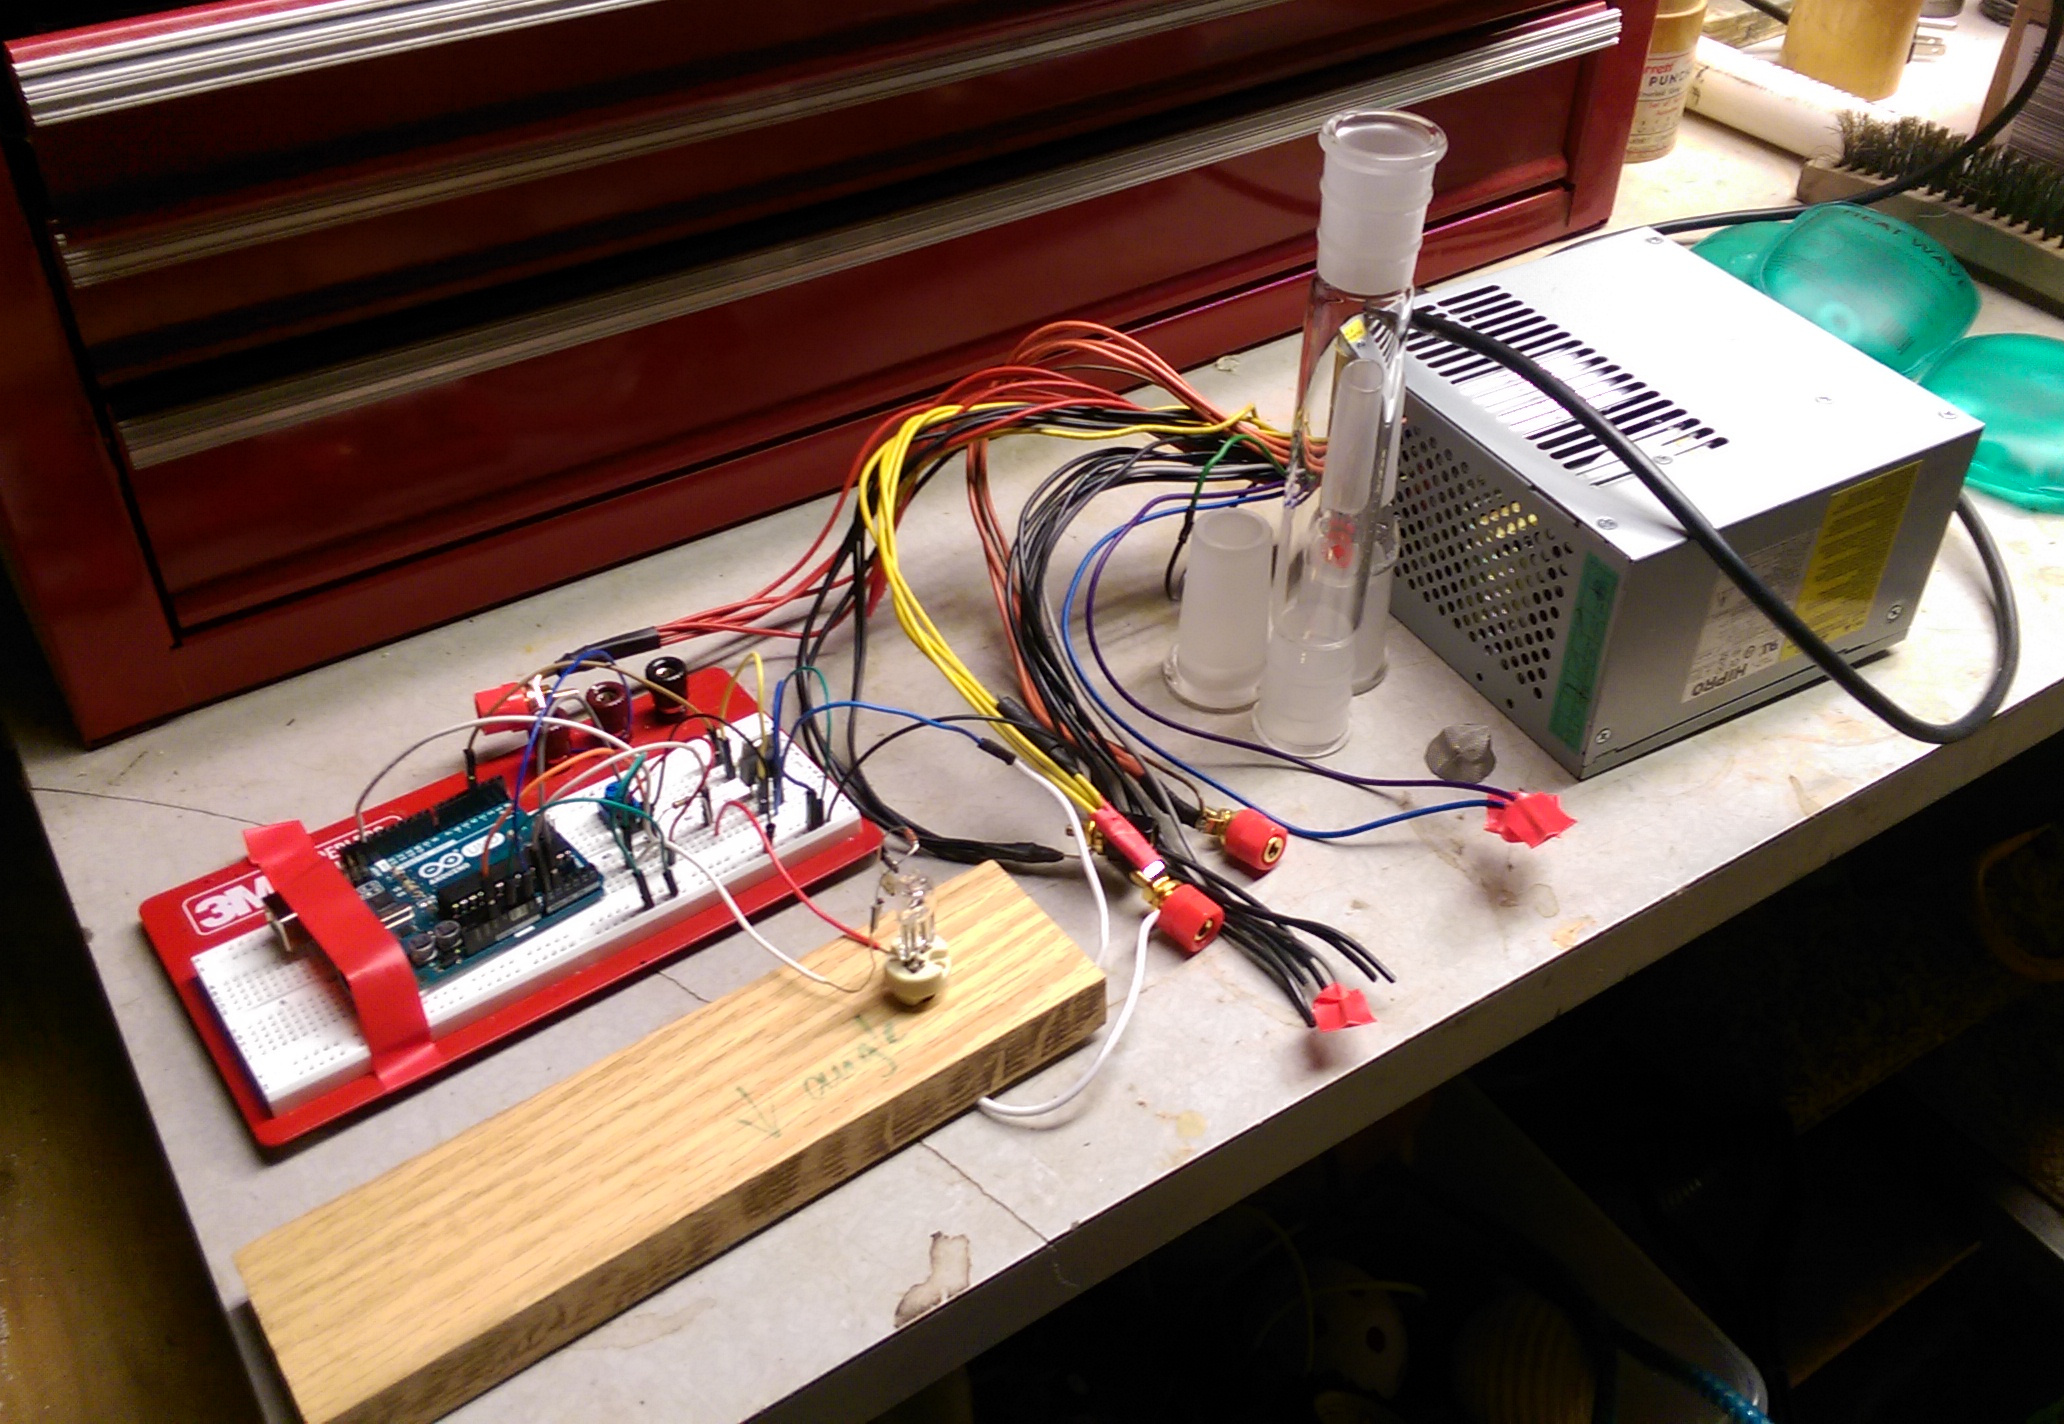
Getting ready for test drive; you can see the three glass pieces (one's hidden a bit but surrounds the bottom piece shown above and connects to the longer piece)
Preheating
Test setup to try and find good PID settings and explore the capabilities of the light
Preliminary data gathered with tmp36 sensor to evaluate PID temp control (only good to 125C)
Trying PID values (top labels in form of "P, I, D") with a 150C setpoint once I had my thermistor
Thoughts from the test drive
I ended up setting up a potentiometer so I could change the setpoint on the fly from 150-250C. I wanted options below my true target of 170-220C just in case I was reading high/low. Even at the high setting, I couldn't get any vapor at all using the PID controls! I think there are a couple possible issues:
I removed all the controls all together and just treated the bulb like a lighter I guess. Shortly after I saw my first vapors! They were quite thin and I was super paranoid about combusting, which I'd seriously like to avoid in my garage. As mentioned, I've only vaped once so I had no idea what to really expect. I just kept sucking on those whispy streams, having no idea what temperature I was at. Tasted almost sweet and fruity, though... kind of reminded me of fruit loops.
I got more and more bold, leaving it over the light for longer periods. At one point I coughed and think it might have been from some smoke occurring, but if so it was minimal as it didn't smell/taste like it (just felt harsh on my throat). Other than that one hit, everything felt really smooth.
After a few minutes of this, I wasn't really feeling anything and thought I might need more bud (didn't measure, but eyeballed a medium bowl). I let things cool a bit and started breaking up more bud... while doing that, I realized I was lit! Cool! I added just a bit and started 'er up again. This time I popped the top glass off and stirred occasionally. The concept works, just not like I'd planned!
Mods planned
For the next round, I'll be trying the following:
Conclusion
Hopefully this isn't too long! I don't have an awesome sense of what's alright on this forum, but have seen some thorough posts so I hope this is alright. At the moment I'm just happy to have found some other awesome and very resourceful tinkerers and join the fun. I'd love any thoughts/suggestions.
Thanks for taking a look/having me aboard.
Intro (since it's my first real post)
I've been lurking for a few weeks here as from my various google searches this seems like one of the few goto resources for vaporizing. Other than trying a volcano maybe 4+ years ago, I've always used combustion. I quit smoking cigarettes ~4mos ago and took a long break from ganj at the same time. After 3mos, I was a little nervous that it might cause nicotine cravings, but the experiment was a wonderful success!
Now that I can taste and smell again... smoking weed stinks! I started looking into vaporizers for the first time, and definitely got some sticker shock! Perhaps like some others around here (though few, it might seem, by reading through the arsenals in some signatures!), I wanted to see if I could improvise something functional and economical.
I felt quite at home, as there are some incredible tinkerers around here. My goodness were threads inspiring and impressive. I can't help but acknowledge @Pipes for his incredible work in the Bulli and Project threads, which have given me ideas. It's a testament to the cool factor that the former has been active for more than 4 years!? I quite enjoyed @Hippie Dickie 's toaster, the lab glass vape ( @jojo monkey ) and a super recent one that looks like something out of my own home (@rz).
Anyway, inspiring shit and hopefully I can contribute here among my newfound inventors!
The Halotron
Silly name, but it seems people name their stuff so I thought I'd do no less. Somewhere I stumbled on someone suggesting a halogen bulb as a heating element and started digging. I guess it's common knowledge to many of you, but i had ~zero knowledge of vaporizers prior to maybe 3 weeks ago, so this was exciting stuff! I was most intrigued since it was simple and available (easy to get a hold of). I tinker with microcontrollers quite a bit and wanted to try a temperature controlled system using PID.
Here's my current list of parts:
Code:
| part                                | source        | cost    | note         |
|-------------------------------------+---------------+---------+--------------|
| 50 watt halogen bulb                | home depot    | $2.12   | 4 for $8.50  |
| ceramic halogen socket/fixture      | amazon        | $2.50   | 2 for $4.99  |
| honeywell 135-104LAG-J01 thermistor | amazon        | $5.94   |              |
| irlb5721 mosfet                     | adafruit      | $1.75   |              |
| computer power supply               | surplus store | $5.00   |              |
| 29/42 to 24/40 bushing              | ctech glass   | $21     |              |
| 29/42 to 24/40 reducing connection  | ctech glass   | $17     |              |
| 24/40 straight adtapter             | ctech         | $17     |              |
| banana jack binding post            | amazon        | <$1     | 10 for $6.76 |
| arduino                             | amazon        | $22     |              |
| breadboard with jumpers             | amazon        | $6.47   |              |
|-------------------------------------+---------------+---------+--------------|
|                                     |               | $101.78 |              |
I was able to borrow the glass components, had the power supply and the arduino/electronics (minus the thermistor), so I only spent $12 on everything. The project wouldn't have been nearly as appealing to try if I'd needed to buy everything... at $100 I might as well just spend another $30-50 to get a commercial vape.
How she looks like
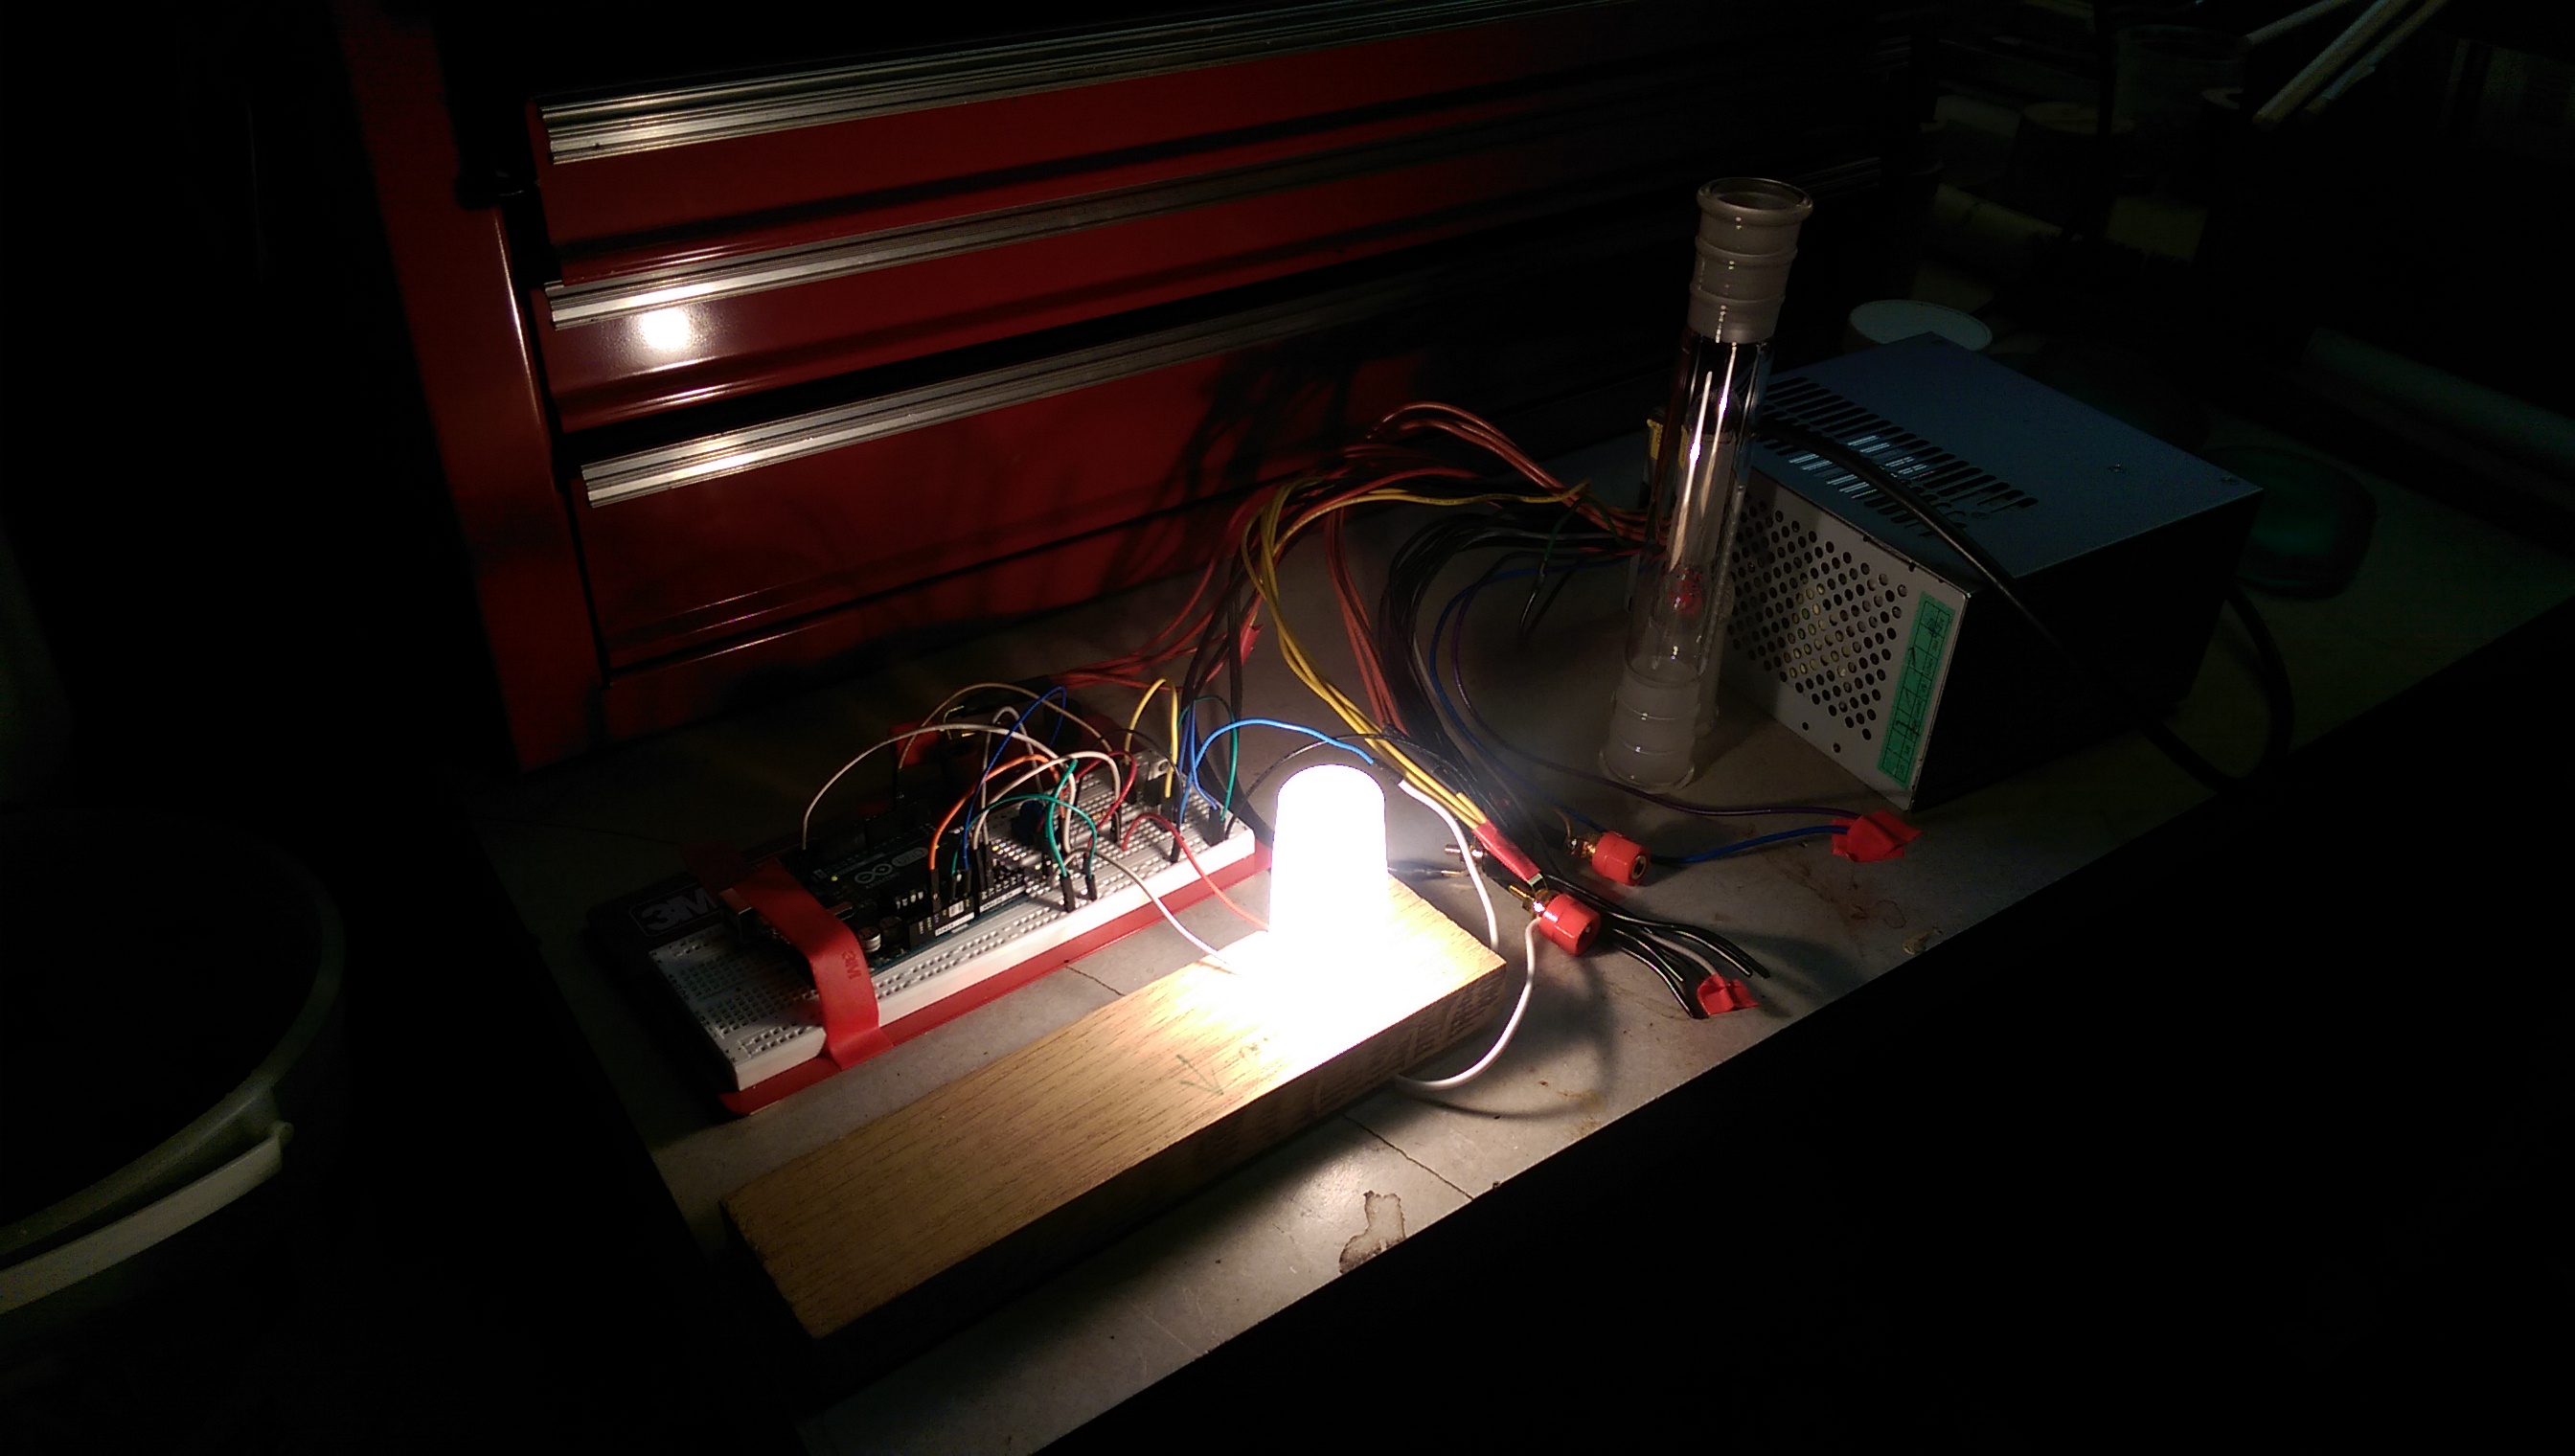
So, finally, here's the gist! Used a scrap piece of oak for now just to hold the light put and manually got the thermistor placed above the bulb, positioned just by wires holding it there. I only had lead solder, so I used makeshift crimp connectors for now... I'd like a better solution, and getting the thermistor past the glass joints proved tough! I would ideally like to have just the actual glass encapsulated thermistor in the air stream, with the wires not in the heat path... if I ran them on the outside of the bottom glass joint, the next one (as expected) was really far from seated. As is, I don't like that the leads are going to get hot as fuck as well (which plays with wire resistance and overall thermal mass). Anyway, here you are...
Closeup of halogen fixture
Glass bushing to surround the light, thermistor over bulb, and a small screen bowl will sit in this opening
Getting ready for test drive; you can see the three glass pieces (one's hidden a bit but surrounds the bottom piece shown above and connects to the longer piece)
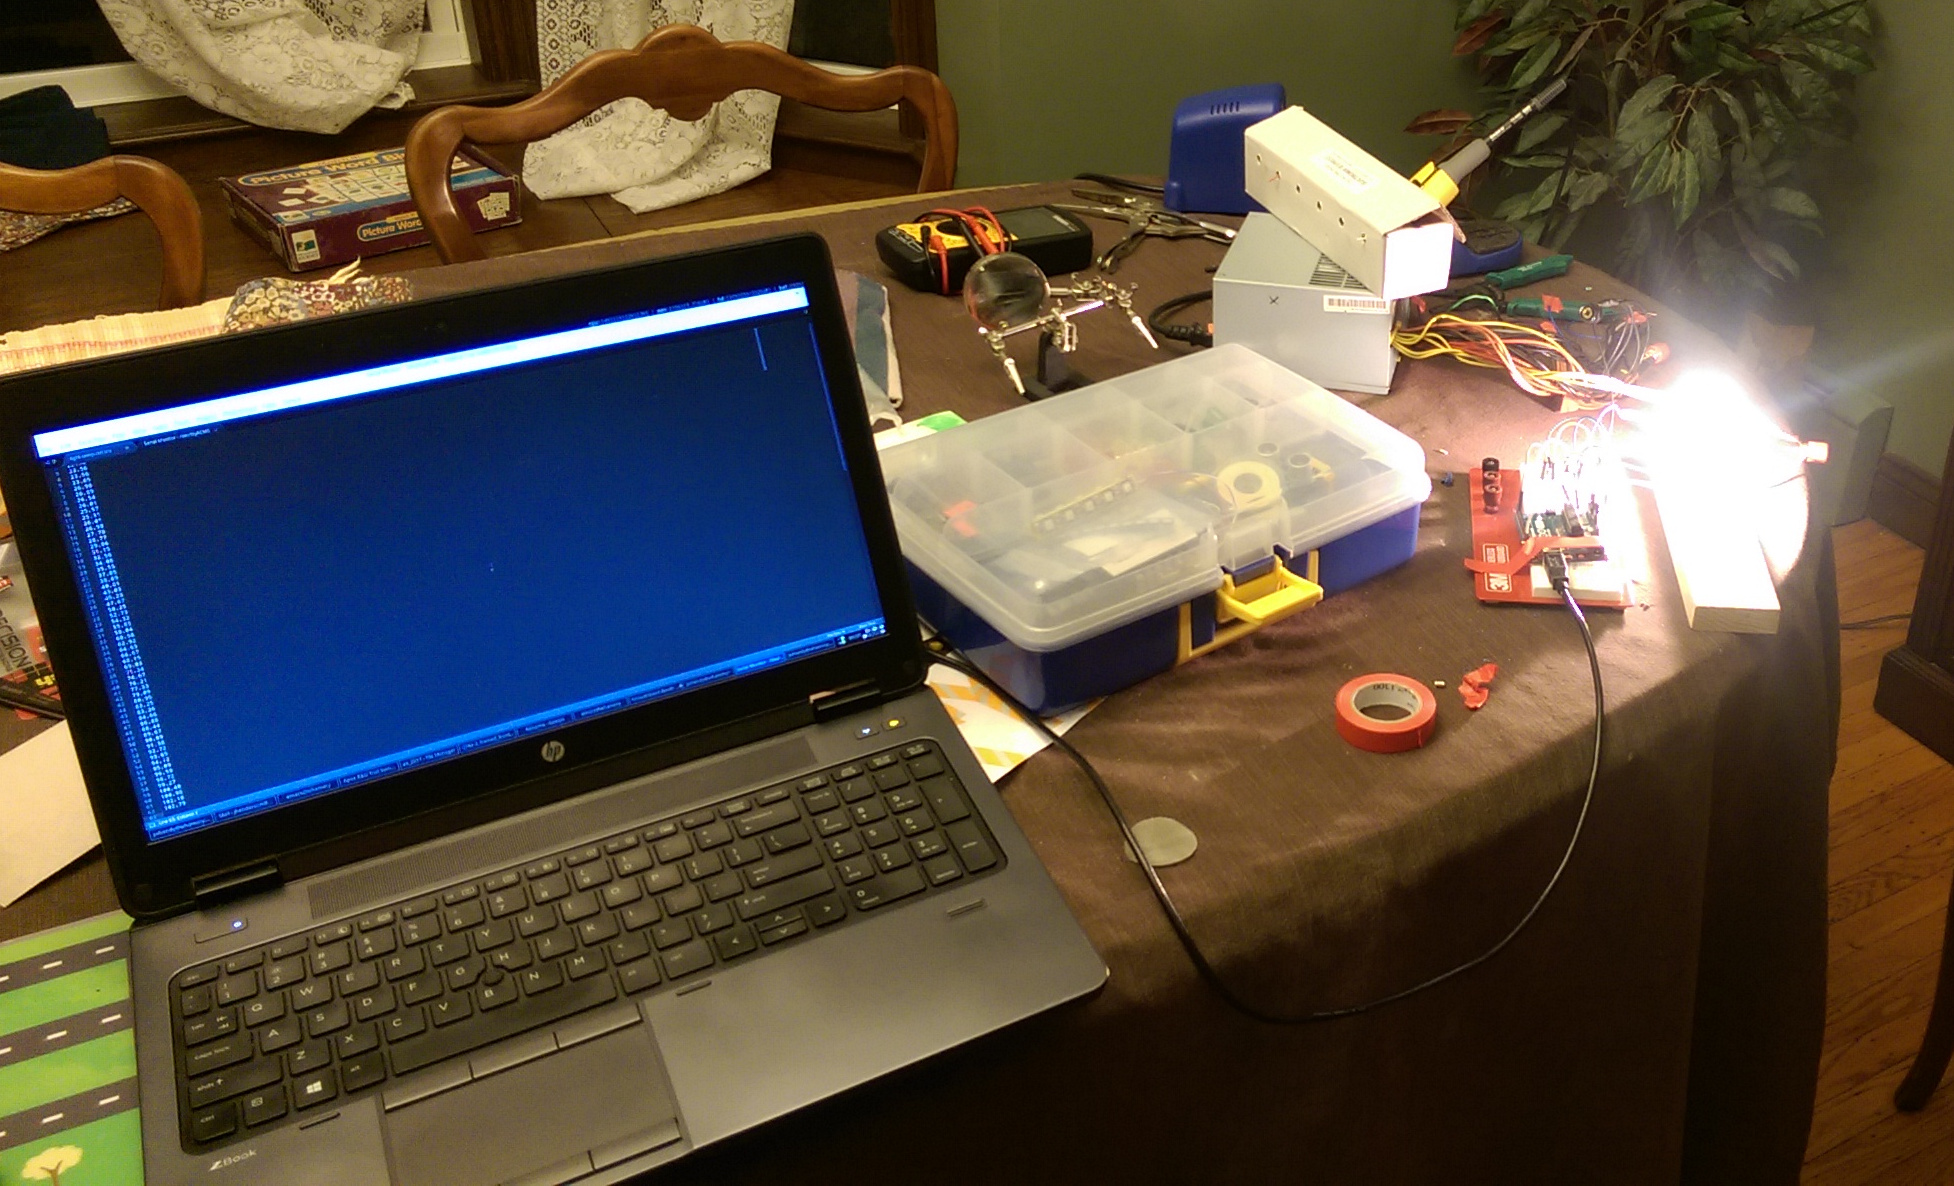
Preheating
Test setup to try and find good PID settings and explore the capabilities of the light
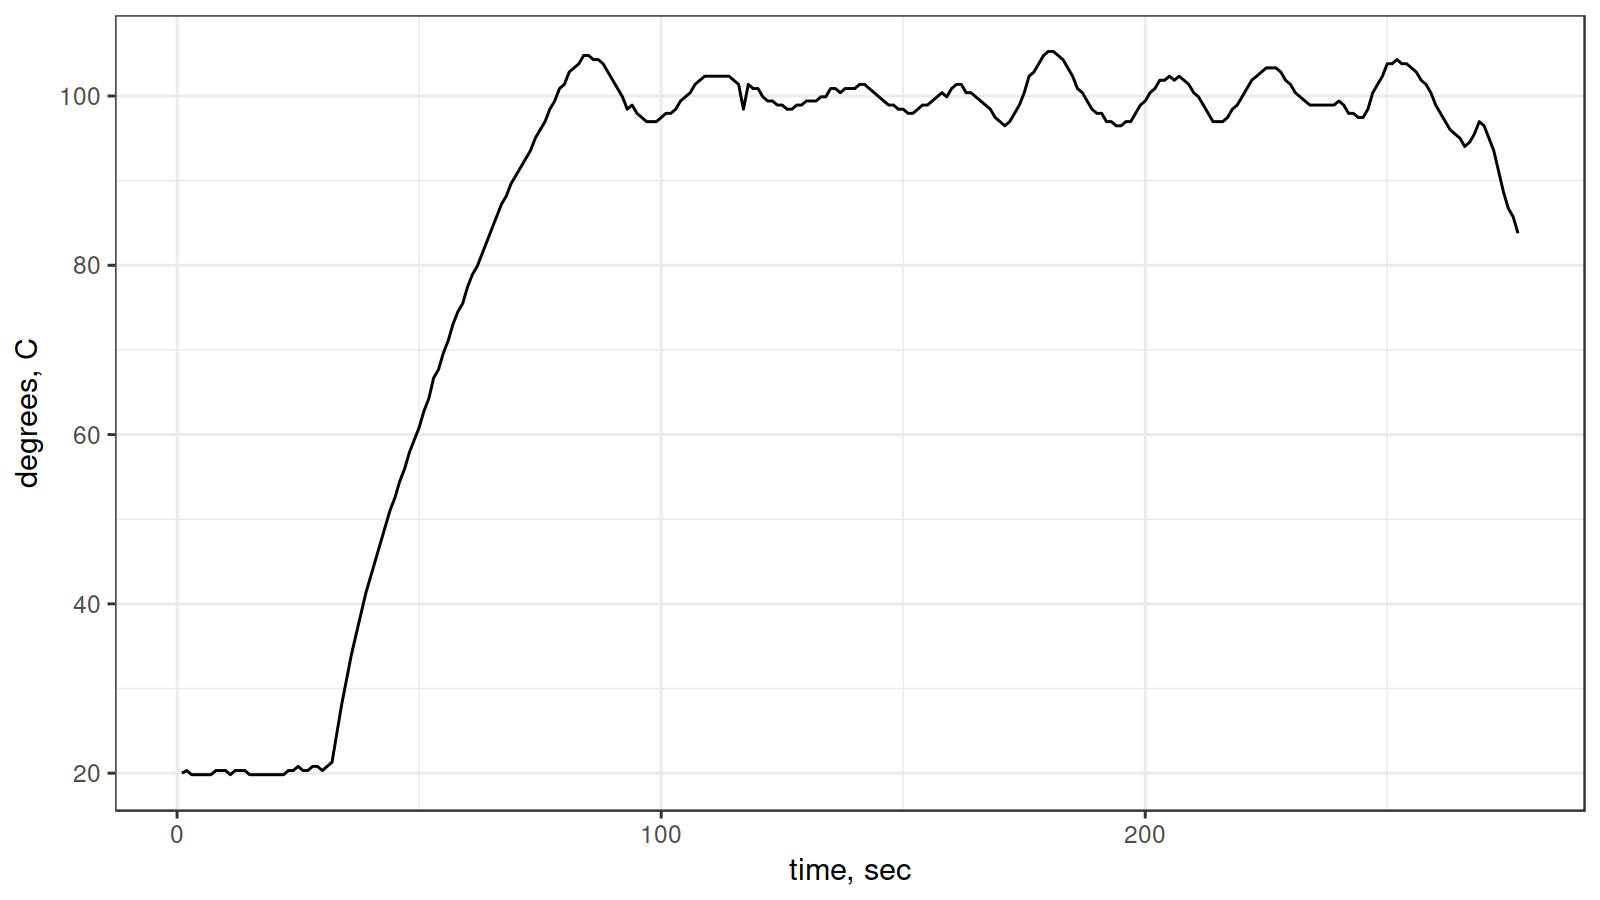
Preliminary data gathered with tmp36 sensor to evaluate PID temp control (only good to 125C)
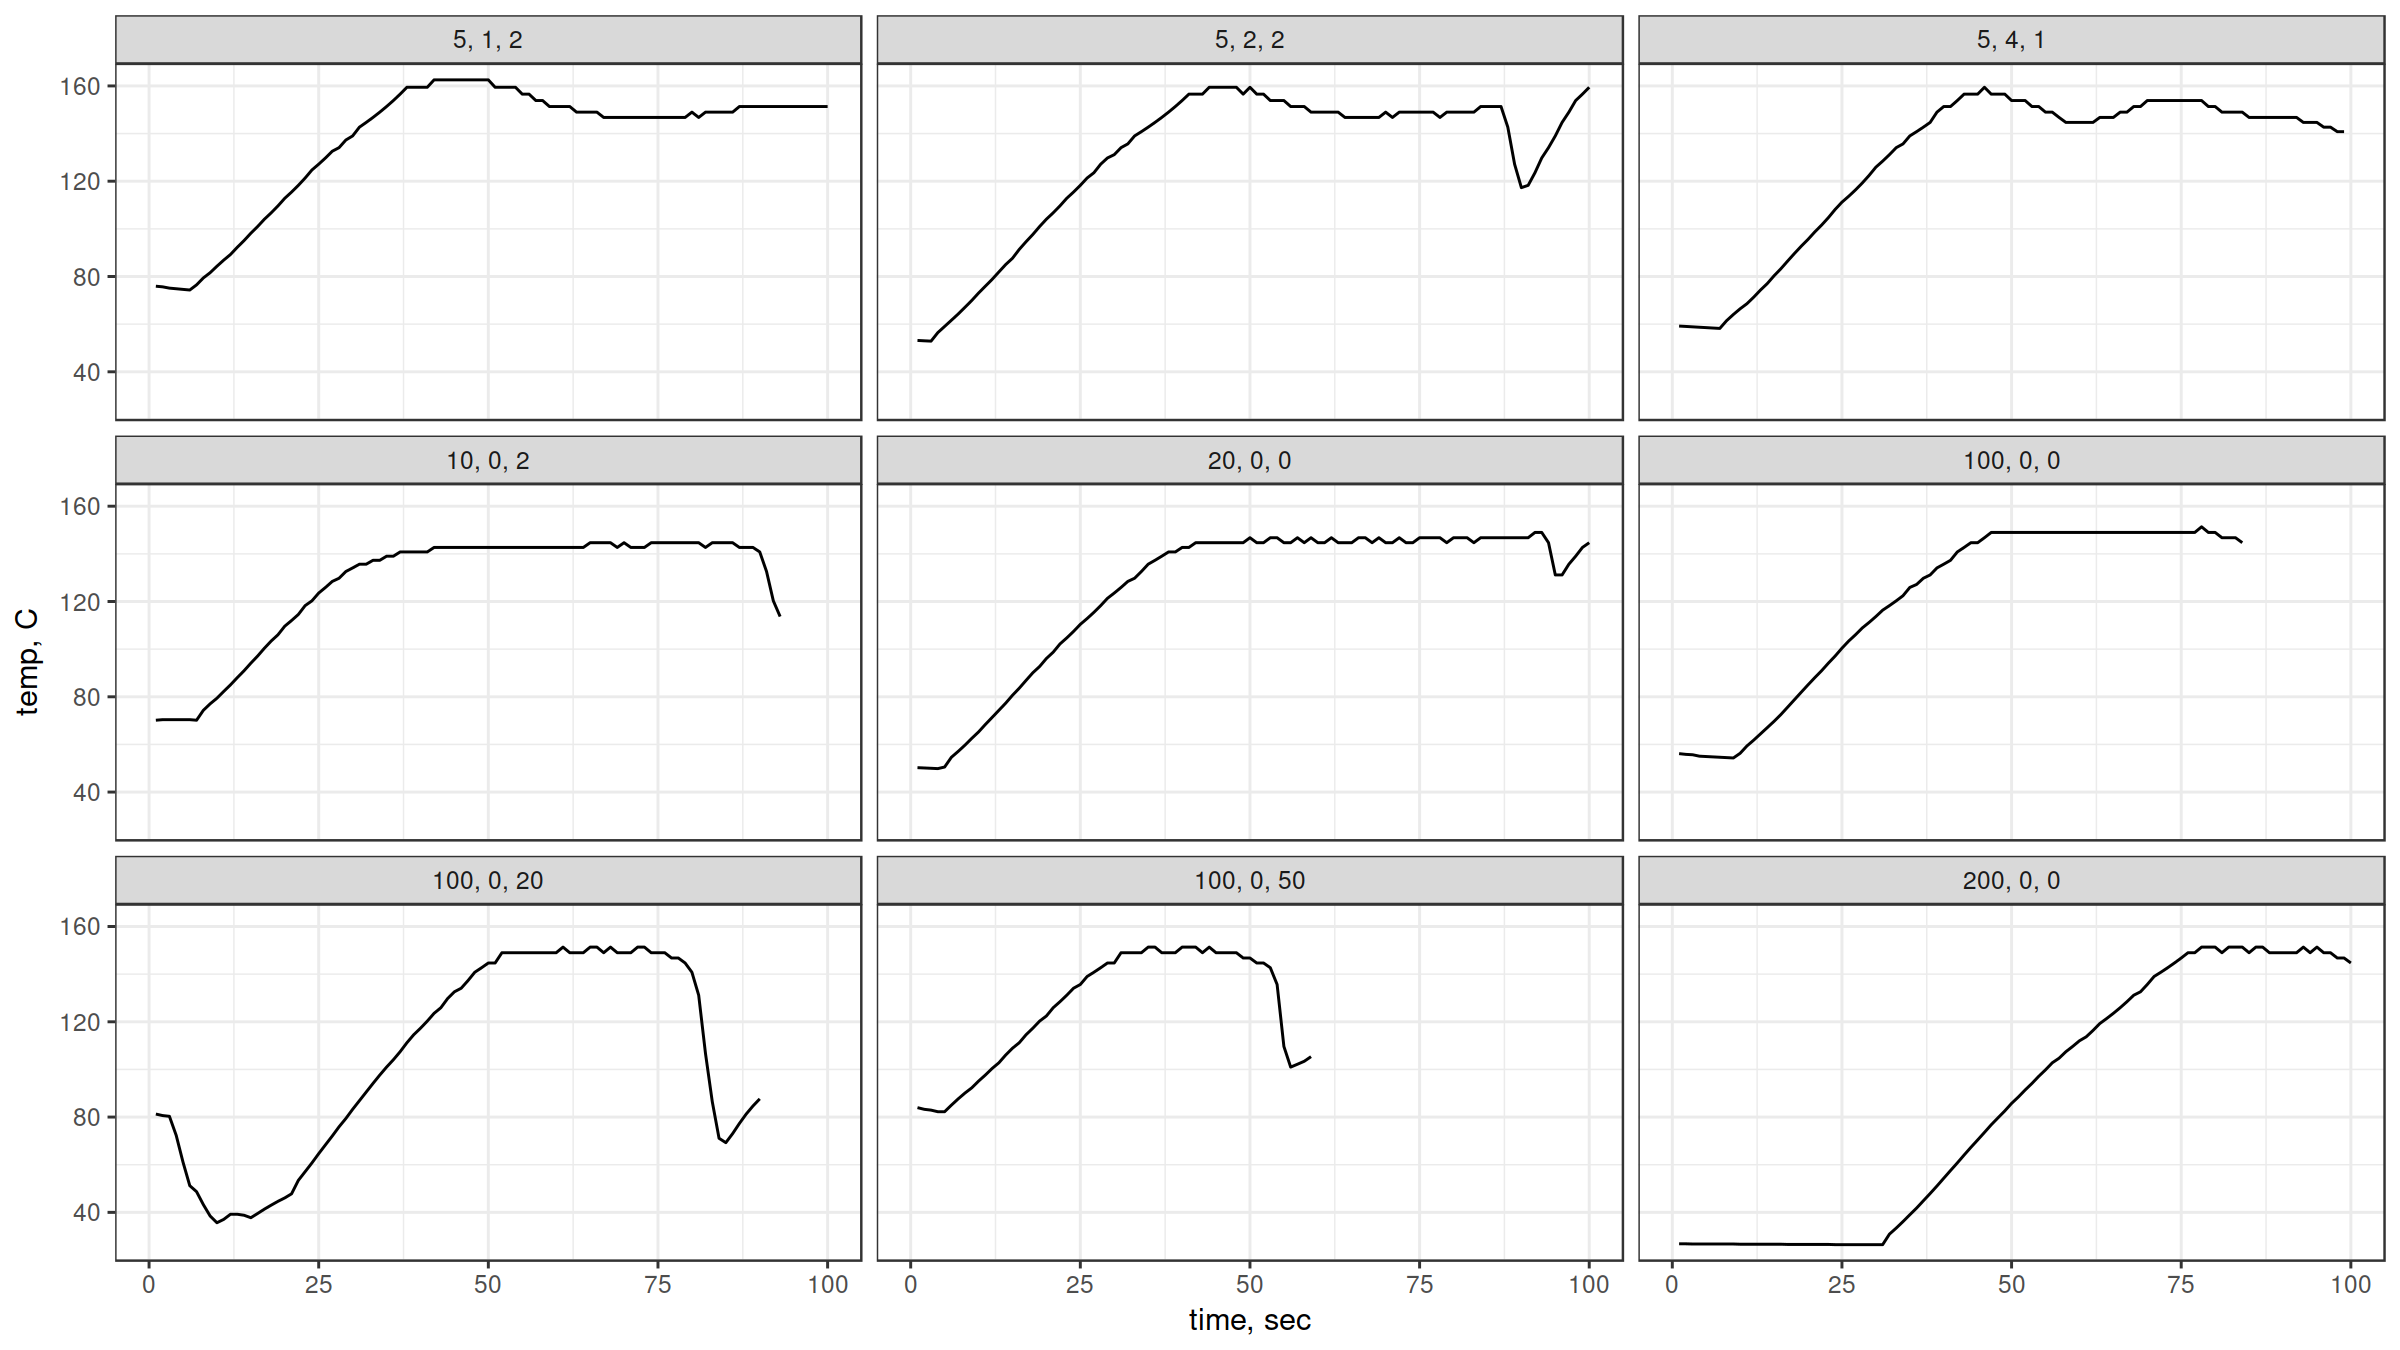
Trying PID values (top labels in form of "P, I, D") with a 150C setpoint once I had my thermistor
Thoughts from the test drive
I ended up setting up a potentiometer so I could change the setpoint on the fly from 150-250C. I wanted options below my true target of 170-220C just in case I was reading high/low. Even at the high setting, I couldn't get any vapor at all using the PID controls! I think there are a couple possible issues:
- the thermistor is super close to the bulb, so perhaps right above it actually is ~200C, but at the top of the glass where the screen sits, it's not there yet. Moving the thermistor higher could help with that.
- the method of reading temp altogether could be off and I should really calibrate with boiling water or so to make sure I'm accurate.
- this NTC style thermistor drops in resistance as temperature increases. Because of the formula used to calculate which relies on taking the log of the resistance (simplification), there's really poor resolution at the top of the temperatures. I realized that mathematically, there start to be very discrete "steps" one can measure based on the analog to digital converter. As the resistance decreases, my steps around the 200C mark are really far apart: 237, 222, 211, 202, 195, 188, 183, 178, etc. This is far from ideal as I just don't have the resolution desired.
I removed all the controls all together and just treated the bulb like a lighter I guess. Shortly after I saw my first vapors! They were quite thin and I was super paranoid about combusting, which I'd seriously like to avoid in my garage. As mentioned, I've only vaped once so I had no idea what to really expect. I just kept sucking on those whispy streams, having no idea what temperature I was at. Tasted almost sweet and fruity, though... kind of reminded me of fruit loops.
I got more and more bold, leaving it over the light for longer periods. At one point I coughed and think it might have been from some smoke occurring, but if so it was minimal as it didn't smell/taste like it (just felt harsh on my throat). Other than that one hit, everything felt really smooth.
After a few minutes of this, I wasn't really feeling anything and thought I might need more bud (didn't measure, but eyeballed a medium bowl). I let things cool a bit and started breaking up more bud... while doing that, I realized I was lit! Cool! I added just a bit and started 'er up again. This time I popped the top glass off and stirred occasionally. The concept works, just not like I'd planned!
Mods planned
For the next round, I'll be trying the following:
- improve temperature sensing. One uses a fixed resistor to calculate, and if my math is correct, decreasing this value should give me more steps at the top. I'll try dropping from 100k to 50k or 22k. I'd also like to test in boiling water. Lastly, I'll try to move it up just below the screen. I didn't run my computer in my garage, so I have no idea what the thermal drop is when I take a hit, but that might be good to know (can this bulb keep up?)
- increase thermal mass/surface area. When I read the Bulli/Project threads, I immediately was thinking that more surface area would help vs. just a coil. We want the air to be able to efficiently remove the heat, and surface area helps immensely with that (think of the fins on heat sinks). Because I have it available, I plan to lightly pack the heat chamber with coiled, flat SS from a cleaning scrubbie. I'm not in love with it touching the bulb, but I think it will help a lot... hold some heat to "cushion" when taking hits, and more efficiently heat the air.
- i'm likely losing a lot of light/IR since it's, well, a bulb. Since it's out of the air path, I thought of wrapping the outside in foil with the shiny side in. Down the road, I'd like to get some SS foil or shim stock and form some kind of reflector tube. I think this will keep the heat in.
Conclusion
Hopefully this isn't too long! I don't have an awesome sense of what's alright on this forum, but have seen some thorough posts so I hope this is alright. At the moment I'm just happy to have found some other awesome and very resourceful tinkerers and join the fun. I'd love any thoughts/suggestions.
Thanks for taking a look/having me aboard.
")
")