Best of the E-Nano from Epicvape thread

Status
Not open for further replies.

ACE OF VAPE

Vape outside the box
Manufacturer
mod note: To comment on the E-Nano, go to the full E-Nano from Epicvape thread. To add posts to this thread, read the sticky at the top of this forum.

Introducing the E-Nano from Epicvape.


My goal in designing the E-Nano was to blend the efficiency, beauty and ease of use of a log style vape with the power and benefits of 120v ac. Here are some of the key features and benefits that have been achieved with this hybrid.

  • Fast 2 minute heat up time = No more waiting.
  • Rotary variable power/on off switch = You chose the temperature from 0-460F.
  • 11 watts of full ac power = Plenty of power for concentrates.
  • 7' power cord plugs directly into a 120v outlet = No bulky external power supply.
  • Body hand crafted in the USA from a solid piece of sustainable American hardwood = No laminates, no glues.
  • Custom designed all ceramic heating element = 100% Rohs compliant.
  • Pure EZ draw air-path = Pure taste, big hits.
  • Isolated heater core = No wood charring or taste even at max power.
  • Natural shellac finish = No Voc’s No Lacquers, No paints.
  • 48 hour factory burn in = Ready to plug and play when you un-box it.
  • 3 year warranty = We stand behind our products.
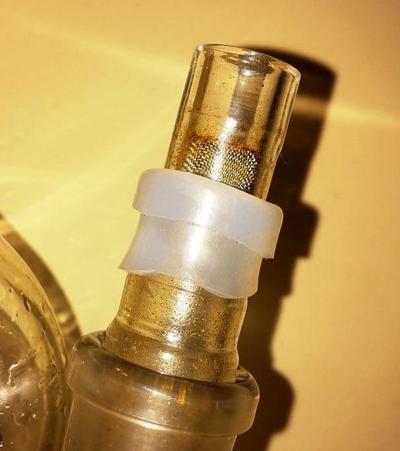
  • Stainless steel heater core accepts standard 3/8" ID wands.
  • Gong adapters available.
  • Soft Neon blue power indicator light varies in intensity with power input.
  • American designed and built
Note from FC management: Any units purchased prior to April, 2013 can be returned for a free internal wiring termination change from wire nuts to crimped terminations, and the addition of a strain relief.


Available January 2013
201211301328231.jpg

Please note this picture and these specs are of beta units.
Production unit specs and dimensions may change based on beta tester feedback and this forum's input. I will try and keep this thread updated on any changes.


Looking forward to your thoughts and questions on this thread.
Andy@epicvape.com

 
Last edited by a moderator:

ACE OF VAPE

Vape outside the box
Manufacturer

For all glass lovers:
The delux all boro-glass stem for the E-Nano. Eliminates the need for metal screens.

 
Last edited by a moderator:
ACE OF VAPE,
  • Like
Reactions: arb

ACE OF VAPE

Vape outside the box
Manufacturer
I'm interested in the mention of exotic woods.
Exotic woods will be available as well as send your own wood options.
I"ll also offer laser etched graphics of your choice. I'll post some examples after the holidays.

Andy

 
Last edited by a moderator:
ACE OF VAPE,
  • Like
Reactions: arb

flotntoke

thoroughly vaped
...I always thought well.. to be as efficient as the nano i just pack need to less right? Boy was I wrong. :)

:lol: So many techniques and options with the nano, but I like to pack less and load more stems. Group settings and rushing to get there are a bit different, but if I'm kicking back at home I usually aim for 1 or 2 hits of vapor bliss. IME no matter how much you load, the first hit or two is where it's at. Proabably have said it at least 10 times now, but study @Caligula 's "2 hit" extraction vid. Just click on vid link in his sig and find the right one. Enjoy the other vids, too.


Sandwiched some nice hash with some great bud last night, the taste was something special. The Nano knocked me on my ass as usual, this unit never disappoints. :D

Is there any type of guide on how to use the Adjust-a-Bowl GonG? I'm not sure if the basket screen etc is inserted how it should or if I have all the parts on mine, it seems like it would crush down on the bud the way it is now.

There is much info here in the thread, but it's a tough search to get to the juicy posts. So, will post a bit here in hopes that others will find it too. Sorry, but only one quick pic below. There are plenty around of all this stuff so maybe someone else will find and link or repost, or anyone could dig for them. Use the search function!

Screen tutorial -
  • Preferred method of most is to use screen upside down rather than as a "basket". In other words, flat side gets the load and stays toward nano. Basket side towards bubbler or mouth. Can be used either way, and think all below will still apply.
  • Small adjustments in distance of screen from heater and dial setting can produce very different results.
  • There are many variables at play with almost every hit. Temp, distance from heater, draw speed and strength, performance of bubbler, quality of material, dryness of stash, dryness of load (drys more with every hit), etc. Keep this in mind and try to use what you can figure out to your advantage.
  • Get yourself a flat end toothpick, small screwdriver, chopstick or other poker so that you can push screen from either end of your GonG or stem.
  • Suggest you do this using Caligula's 2 hit method. Grind or break up a few loads at the same time and mix it all up to keep that variable minimal. Start with screen about 5mm from heater and a very small load. Be sure it covers the screen evenly, but doesn't touch heating element screen. Set your temp a little less than you usually do (probably around 6 for most, maybe less). Take a hit, give it a stir and take another. Be sure you're up to full steady temp before tweaking (nano at setting or close for at least 7-8 minutes - wood should be warmed up).
  • Adjust heat or screen as necessary. If vapor is too thin, tap the heat up just a little bit (1/8 of a full number setting) or push the screen up a smidge (1 smidge = 1mm or less!). If you're getting close to combustion do the opposite. As you're getting closer to having her dialed in, only do one or the other.
  • Keep fiddling and tweaking using the first hit as your main guide and the second for fine tuning.
  • Once you find your particular sweet spot, use that as base in the future. Keep in mind, anything you switch is probably going to move the sweet spot. Some things more, some less, but changing bubbler, draw speed, dryness of stash, fineness of grind and others will all throw it off a little in one direction or the other.
  • Note where your screen is in relation to the end of tube or silicone sleeve. I think using the sleeve as a guide is easiest. You can usually move it a little up or down to use it as a solid marker. I try to have mine lined up so the bottom (open end) of basket is level with it at my base-0 height. (see pic below) And, note where your heat is.
  • If you're doing all this you should notice subtle changes. Be forewarned, you'll probably be about stoned after a few good loads so this process may take a few sessions!
  • Every load should get a little better, to which you'll be thinking "I got it figured out". Don't rest on your laurels... keep tweaking when you have a little time to play. On occasion that "I got it figured out" will change to "HOLY FUCKING SHIT!! Wish I could do that every hit!" as you settle back into the sofa with a big shiteating grin on your face.:ko: That's when you know you've hit it. I still can't hit it like that every time, but probably a few times a week (and only fully tweaking like this on occasion). And, all the other hits are very sweet, too.
  • Maintenance.... stir and dump the load, then give it a good blow between loads to knock out fine crumbs and cool the screen. If you're done for a while, clean her out. If you forget, do a kinda nasty leftovers hit to heat the load back up. It will stick in there if cooled and left sitting. A little heat will do wonders.
  • When screen starts getting cruddy (week or 2 for me), drop it in some 91% iso alcohol for 1/2 hour or so. Then give her a scrub with a dry toothbrush or similar and rinse well with hot water. Blow it dry and take some dry hits through it from the nano to fully dry if using immediately. Better if you have a few screens in the rotation, so you can just pop a fresh one in when you dump a dirty in the iso.
  • Sometimes they get a bit bent out of shape while cleaning. Reform them, but be very careful not to roll the end up. That is a bitch to straighten out!
  • If they feel loose in the stem, get a GonG, a flat ended pen (or dowel) and a tapered end marker. Put screen in GonG basket side up. Hold in place with pen or dowel, form out with marker. Other tools can be used, but think all should understand the process. Basically, you just want to spread it back out a bit and better to do that as much as you can up the side of the screen, not just the end of the basket.
Bonus tip for those of you reading down this far in another of my lengthy posts....
  • Roll the silicone on your GonG down over itself. By down I mean towards the GonG - away from nano. Don't fold it all the way over, only about half way.
  • When you lift the nano to clear, drop your pinky or ring finger or both down to the silicone lip and lift nano and GonG up easily with one hand.
  • Set whole thing back on bubbler and pull only nano if taking a breather or giving a stir, or take another hit if you're rolling.
Still not posting vids, but here is at least a crappy phone pic. Sorry so dirty! Saturday is cleaning day and just grabbed this one from bubb.
Zq6fGFl.jpg


Last edited by a moderator:

flotntoke

thoroughly vaped
Not sure what type of screens or solos others are using, but screen in mine doesn't seem to help airflow at all. If anything it seems to slow it down after a few loads as the screen gets a little dirty. Almost always use the screen so bits don't come through the glass one, making a mess of the stem and letting flakes hit my tongue, and probably go all the way down into my lungs. Not really a fan of that.

And sorry, but can't resist saying it any longer..... If you really think the solo is in the same league as the nano, you've either got one hell of a solo you lucked into - or you're not using your nano as well as you could be. I've used solos off and on for a couple years, and just recently bought one of my own. After playing with it for a few weeks, I think I've pretty much seen everything the solo can do. For simple to use portability, it's tough to beat. But next to a nano? It's not even really worth comparing! Not even sure if you could. If I'm in a heavy or quick session by myself the solo heat can't even keep up with my tired old lungs. If you can draw nano heat down like that, I salute you and your fire-breathing lungs! Going to avoid getting too much into the rest of the reasons I feel confident in this assessment, but have to at least mention two - flavor & effeciency.

Back to the nano.... (where we should probably be in this thread anyway!) I seldom have trouble with heat concentrating in the center (green on sides) - but I am a stirrer. Always have been with vapes and think it is necessary to get the most out of your meds with almost every vape. Sometimes there are other ways to "mix" besides stirring (air stir in EQ and to some extent Volcano, shaking MFLB), but it usually pays to mix the load and give it another hit or two before dumping. For the nano it depends on how I'm using it. If "2 hitting" I give a stir after first and second hit (after that it's done, if it makes it that far). If loading a little more & bumping up heat, I take a few hits, stir, repeat until spent.

Temps on the nano (and pretty much everything else) tend to be very subjective - even way beyond how you or I or someone else likes their vapor. There are SO MANY variables. Your stash and how covered with trichs it is; how dry it is; room temp; how close your load is to the heat; size of the load; variations in A/C power where you have it plugged in; variations in the dial itself; wet or dry; how hard you draw; and more!

For me, with my nano, my stems/bubblers, my stash, etc, I can have my heat anywhere from 5.5 to 7.5 depending on what I'm looking for and how I'm playing with the nano that day. Usually for everyday regular use I'm at about 6.25 - 6.5 and going through water. But my nano has the attached cord and is probably a good bit older than most (think it was 10th - 12th one produced), and think it runs a tad hotter (1/4 dial setting? maybe 1/2?) than newer ones. It is going to vary at least some for everyone. Analog dials such as this will seldom be the same from unit to unit and tweaks in production have probably added a bit more variation.

You should also consider the nano's ability to deliver different flavors and effects at different temps & screen levels. Most vapes do this, but the nano excels with it IMO. For instance, I always taste test a new stash at 5.5 with a dry stem and screen pretty close. Flavor is awesome down here, and effect is more heady and less couch lock. IME this type of buzz gives a better comparison of one strain compared to another, and the taste difference part speaks for itself. When you're vaping mostly terpines and a little THC the flavor comes right through and is different for different strains - often even a bit different for different buds from the same plant. Dry is the way to go here, as even a little bit of diffusion will knock down the flavor.

7.5 creates much heavier vapor and will dope you up to get ready to sleep or just be silly stoned. But, if you're throwing that kind of heat on things you're better off moving your screen further away from the heater. Haven't really tried it higher temp with very close screen but can see how this might cause more uneven roasting with hot spot in center and greener around sides. If you're up around these temps, you're probably going to want to use a bubbler. Flavor isn't as pronounced, so diffusion isn't taking much away and a little moisture will go a long way in keeping your throat more comfortable while allowing you to take bigger hits.

For as simple of a device as it is, the nano gives a lot of flexibility - much more than the solo where your option is to do all the same and just adjust the heating number. This is one of the reasons I love the nano more than any other vape I've tried. Whatever you're looking for out of it - or however you use it, you owe it to yourself to play with things a little to see what else it can do. Tweak it a little in both directions and find those subtle differences. Whether you want it to perform differently to cater to your mood or stash - like me and a few others around here; or whether you just want to find your own optimal set-up to go with all the time; a bit of tweaking can make this an incredible vape instead of just merely a good one.

There is much more info in this post I made a while back, but check it out for a quick tutorial on tweaking and getting your screen where you want it. PLEASE let me know if any of it isn't clear or if you have any questions. THANKS!

 
Last edited by a moderator:
Status
Not open for further replies.
Top Bottom