'The Misty Log' - DIY wooden Log Vaporizer

f2j

Chaque jour est une chance
The story about the item is pretty cool ! Don't worry I won't download the movie even though i'm a curious person, it seems too old for me :D

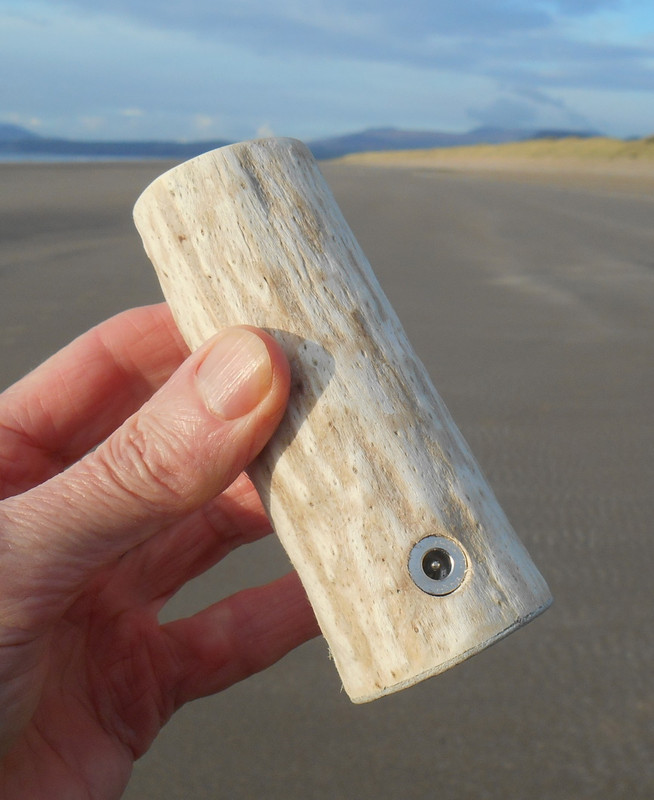
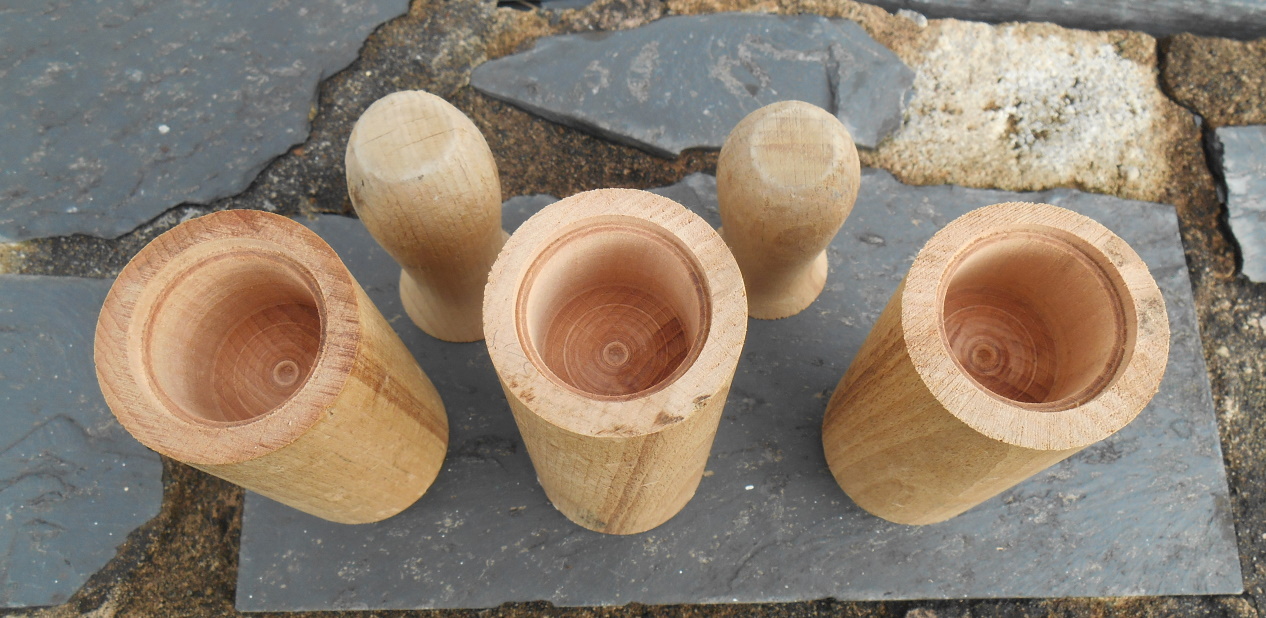
Yes I was talking about the rolling pin unit. I was convinced it was natural beechwood, but i'm not an expert at identifying wood species.
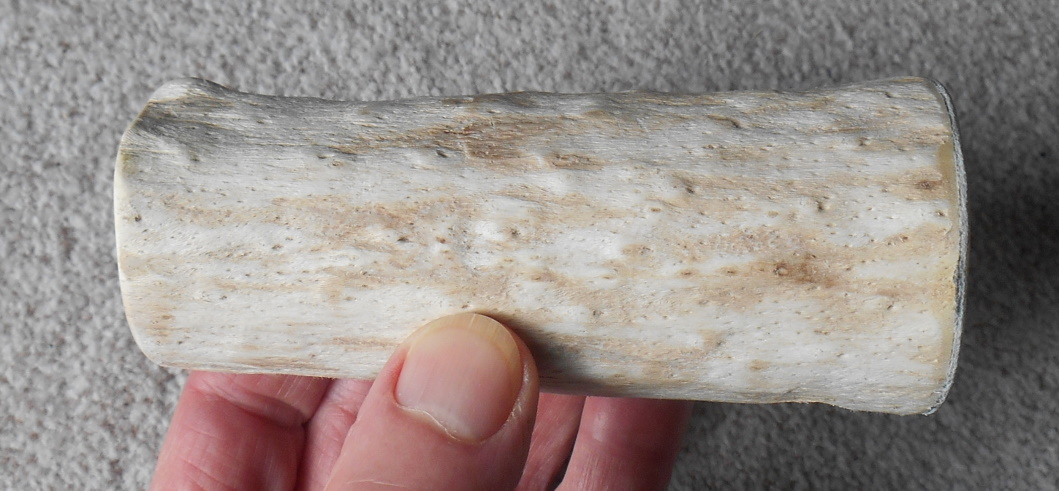
Look at this picture of natural beechwood (here under), it has the same noteworthy darker rays.
faggio-flexform.jpg

Plus i've googled quite fast and read that : "Maple and beech, the most common hardwoods used for rolling pins, provide good value, durability, and a pleasing weight. Some high-end rolling pins are made from other hardwoods, like walnut or cherry, while the cheapest pins use beechwood.".

But again I may be mistaken as i'm far from being an expert.
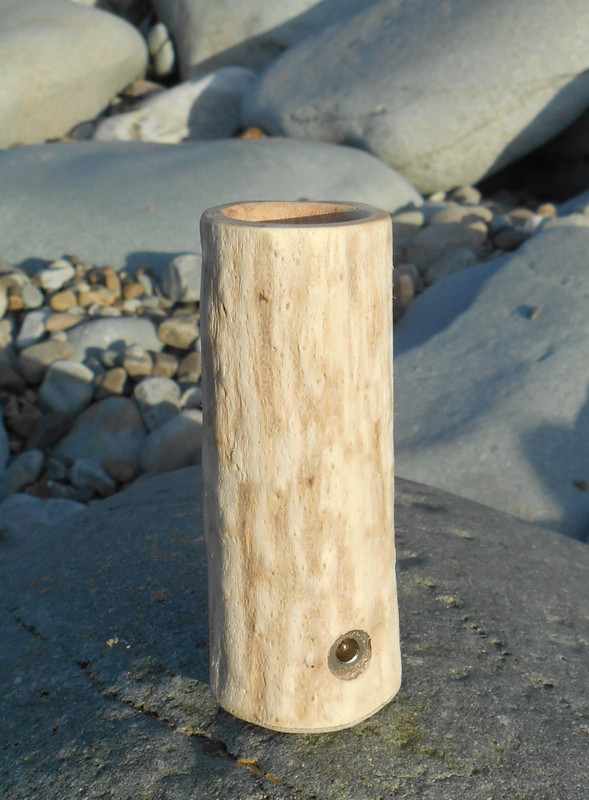
Of course I'll keep you posted here when I get back to the lathe work (i'm waiting for the drill chuck for the tailstock) :)
 

blokenoname

DIY Log Dabbler 😁🪵💪💨💨💨
Evening 😃

Finally found me a multi part box with stainless steel circlips on Amazon, which look much better, than the black spring steel, you usually get (only had a few of the #30 ss circlips up until now).
Used one of my 25mm diameter M8 washers to cover the screws of the heater cover in the narrower 25/26mm heater well... enlarging its hole with a 10mm drill bit and fastened it with the #25 ss circlip. That looks much more tidy now :nod:
Have to get me some M10/25mm washers though, to make that easier and spare me the drilling part 😉

C23-C9-D9-F-3-BCA-460-F-B2-B4-2-E101052817-E.jpg


And here is a 25J resistor driven beech unit with what I call a 'semi closed core' concept, I mentioned earlier, when @brainiac and I were talking about it.
That's one of the recycled earlier bodies (again), cut from a 4cm beech wood dowel, you can get by the meter from our local Obi DIY market here. Used the 30mm Forstner bit first, to drill down maybe 1.5cm and then applied the 25mm Forstner bit for the rest. As this was a first try, when I did that a year back or so, it (of course 🙄
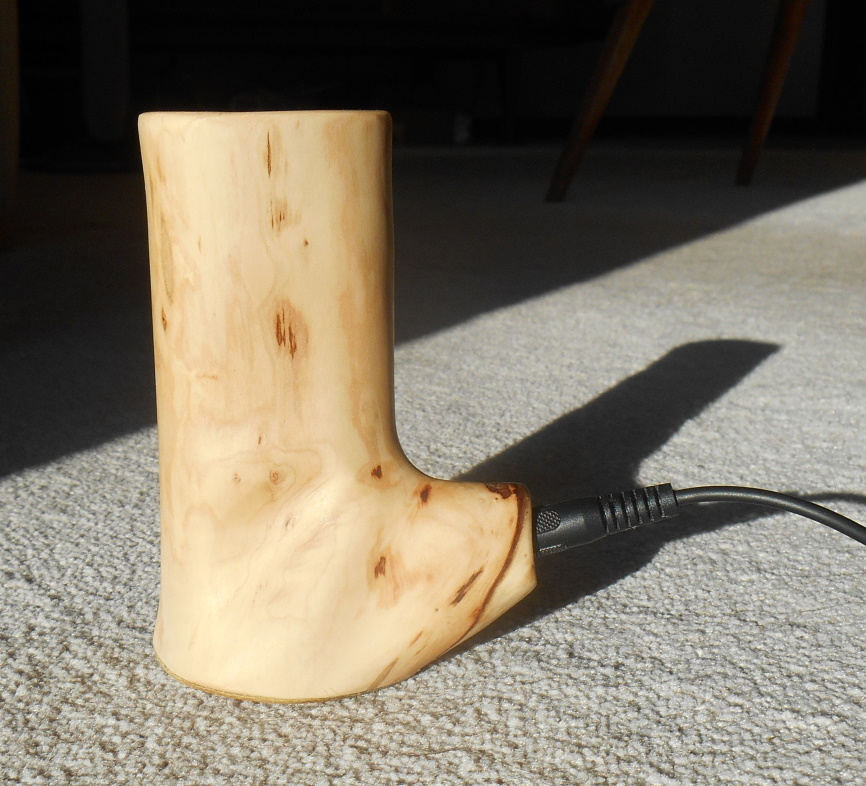
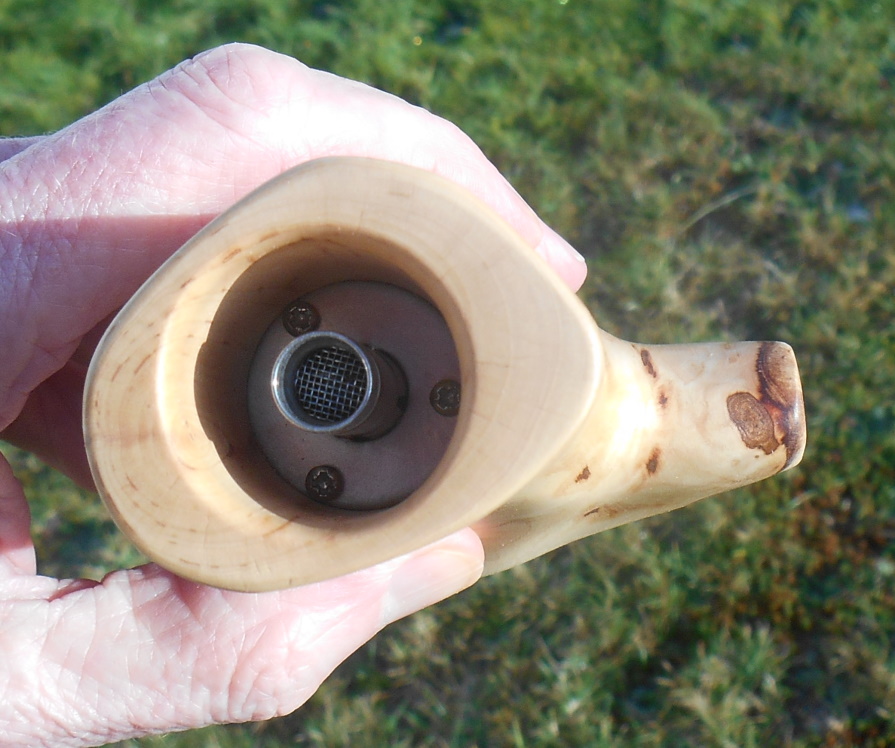
) went horribly off center, but still manageable... and once the 'lid' is on, it's invisible anyway.
So... in goes an older 3/8" heater cover with the 25mm washer at the bottom, which is then fastened with the screws (missing from the pic, sorry) and on top of that goes the larger 30mm M10 washer, resting upon the lip of the 25mm hole, which is then in turn fastened with a #30 ss circlip.
Works fine :tup: 
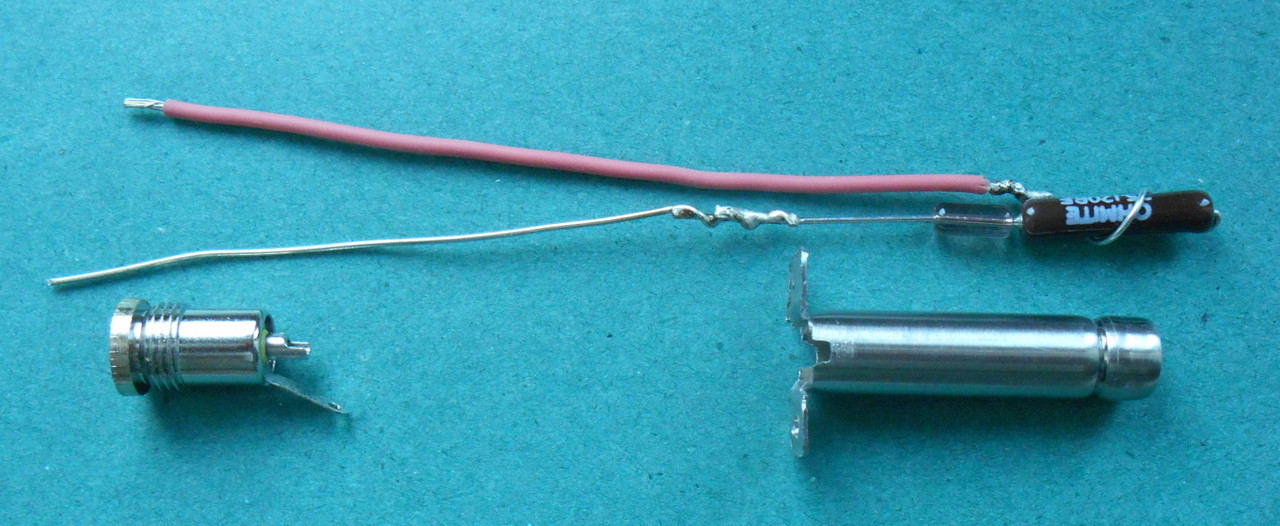
so far, but will probably replace the heater with a 95J tomorrow, as the old, preinstalled 25J gives me only 6.5w at 12v now for some reason, so that I've to ramp it up to 12.5v already, to work properly. Probably screwed up on the soldering there earlier on somehow, when I installed it originally 🤷‍♂️.

755-BAAAA-6574-4-CFC-A2-C5-980121329259.jpg


Edit: Ok... already replaced the heater and added a maple bottom cap 🙂

6-BD5-AC20-1-A9-A-4-D64-BD56-2717-ABEC0-C00.jpg
 
Last edited:

blokenoname

DIY Log Dabbler 😁🪵💪💨💨💨
@blokenoname what is the semi closed core ? Where take air and how perform ?
Early Log vapes, like the Purple Days (PD), had a much more massive heat exchanger, than you see in modern Log vapes today.

To quote @Alan, who has a nice pic and description of Log Vape core evolution over at his The HI thread:
The PD core consisted of a series of flat and star washers held together with a 3/8" ss tube with a bar through two holes near the top and flared out at the bottom. There were two air intake holes in the top washer which was larger than the rest. The outer sleeve set into the wood was a ss sleeve and the core was held in place with a clip ring.

Looked like this 👇
D433-E37-E-FD38-41-F1-BD87-7-D7-E2-FB44-DCE.jpg


In an ideal world, this type of construction would allow the air to enter through the openings at the top of the cylinder only and then pass down through the battery of flat and star washers and then up again, through the central heater tube, never being in contact with the surrounding wood or else.
The downside of such a massive construction, was a very long heat up time of about 3/4 of an hour, alas 😝

Also, the added thermal mass did not really add much to the whole equation, so that in most modern logs, an open core design, consisting of the center tube only, prevailed.

So my semi closed core design above, basically just copies the larger top washer located at the top of the heater well as a pure ornamental design choice, giving it a more nostalgic look 😊

As fo the air intake: the M10/30mm flat washer, I use there, has an opening of 10,5mm diameter, while the heater cover has the standard 3/8" (i.e. ~9.5mm) outer diameter ss tube and so still allows for sufficient air flow between washer and tube, to enter the air intake slits, at the bottom of the standard heater cover.

Edit:
A bit more Log vape nostalgia 😊. Here's the top view of a Purple Days/PD (left) and a Ceramic RockZap/CRZ (right), though the core of the CRZ didn't feature a battery of washers, but was machined from a solid stainless steel cylinder, IIRC.

DF3-B3608-1908-4-EBD-88-D8-F87-F113-DD3-BC.jpg


The old threads for both of these vapes are still extant here at FC's Plug-in Vaporizer section BTW, and you can find some nice pics of the classics there, especially in the AromaZap/MyrtleTap/CRZ thread 🤓☝️
 
Last edited:

brainiac

log wrangler
Out on a walk last year I came across some dumped garden waste. After getting mildly irritated by the antisocial behaviour I noticed that amongst it there was yucca plant. Looked like it might have the right diameter for a log if I stripped the bark off. Sadly, it did not look like good log building material. the wood was light and fiberous and the surface texture was pitted and lumpy. The blank sat on a shelf for months but kept catching my eye - it was such a contrast to all my other units and it had a lovely gentle taper from base to top. So I made a log from it.


Yucca-beach-1-crop.jpg
Yucca-beach-stone.jpg

Yucca-texture.jpg


It certainly works :nod::science: 
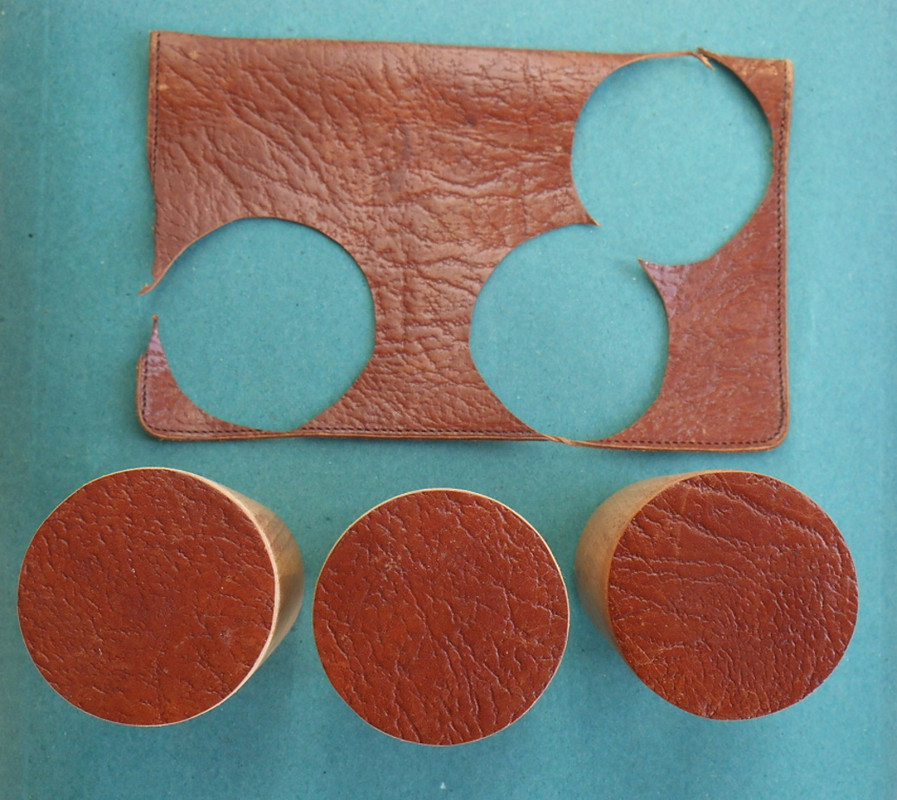
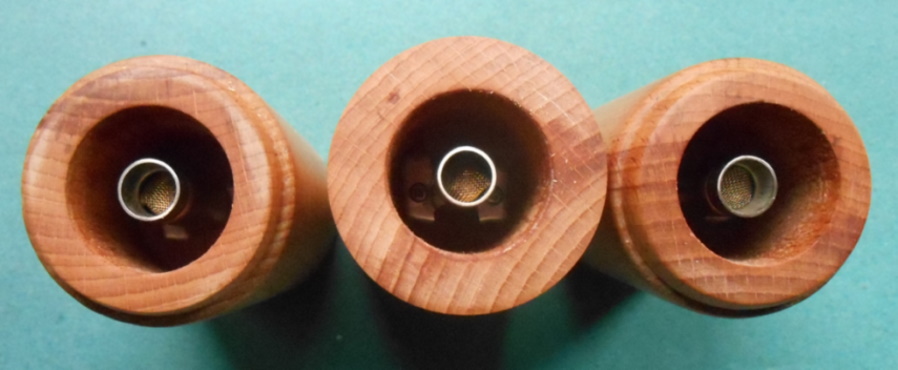
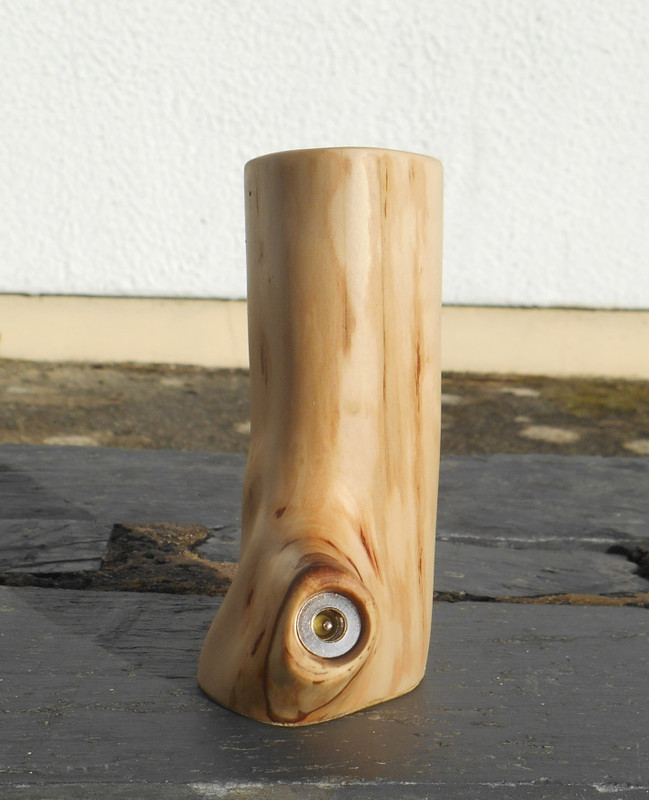
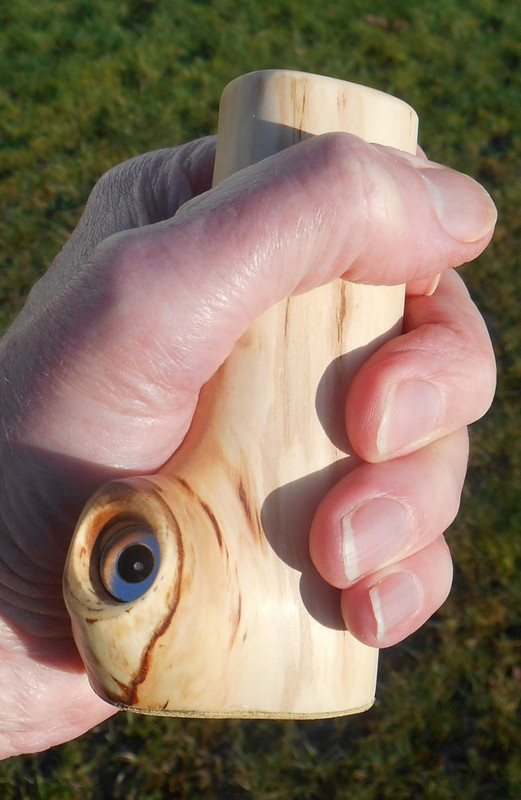
and the texture, although curious, is not unpleasant. I really can't recommend yucca for log making, though. The fiberous core is not ideal for seating the HC or retaining the jack connector. But it was fun to make and it'll look good on the desktop for a while before I recycle the electrical parts.
 

brainiac

log wrangler
Another charity shop rolling pin gets seriously repurposed. This time I did a batch build.
Here's how it went.

1-R-Pin-whole.jpg

2-R-Pin-One-cut.jpg


Heater wells drilled out. I glued white paper to the blanks as it helps with the all-important job of centering the forstner bit.

3-R-Pin-tops.jpg


Bottoms up. Through holes drilled after taking this. Note the step for the base plug.

4-R-Pin-bottoms.jpg


Heater assembly. Hybrid wiring (teflon/silver coated copper) for stability and insulation. Glass bead at vulnerable point for extra insurance. The stalwart Ohmite 25J for thorough herb cooking. DIY ss heater cover w/debris screen installed.

5-Heater-assy-2.jpg


Base wiring, a calf leather Oxfam wallet and the hardboard base plugs.

6-R-Pi-3-top-down.jpg

Poss-bases.jpg

RP-tops-rs.jpg


9-R-Pin-trio-complete.jpg


Completed units with Rustic pick/tamp, cherry dd stem, plum Wong and a cheap Chinese bubbler.​

Now there's just the testing to do :whip::science:
Also recently completed an applewood unit that turned out well. I'll post it here when I get some good pictures.
Strict lockdown in force here over the holidays - so more quality time with the logs :tup:.
Stay safe all.
:peace:
 

blokenoname

DIY Log Dabbler 😁🪵💪💨💨💨
Great work on the new rolling pin Rustics again, @brainiac 🤗👍

As Christmas 🎄 obviously got canceled (more or less anyway) this year and we now even have a nighttime curfew in place, here too is a great time for doing some loging 🪵 😃.

New maple unit with 7.5w cartridge heater and semi closed core; this time within the smaller 25mm diameter heater well. Adding a short silicone sleeve to the direct draw stem, allows it to double as a 14mm WonG.

My most favorite cherry unit (due to the nice stripes) simply got an all new 3/8" heater cover, a new GonG and a dd glass stem. This one features one of the new 95j resistors for a heater.

B83-E7-B12-7-C0-F-4-E41-A4-DB-8-BC7292097-C0.jpg

108-E3-FFD-06-F1-443-F-B9-E5-08-EF3817-AE54.jpg


418-CC9-C6-CFBA-4816-A93-D-7565-EDFF51-D6.jpg

E93-E8-D4-A-7760-4-D14-955-F-B574-E3-D2-B32-A.jpg


Merry Christmas, all🎄🎁 🧑‍🎄
... and stay safe 🤗☝️
 

blokenoname

DIY Log Dabbler 😁🪵💪💨💨💨
Morning 🤗🎄

From the department of jerry rigging comes this great tip 😃☝️:

In case the idea of doing a semi closed core comes as an afterthought and your unit's body is lacking the two step heater well... simply use a second circlip for supporting the top washer 😉. Works best and is more stable of course when you create a groove first, at the inside of the heater well, the supporting clip can snap into. I think @brainiac came up with a little DIY tool for that a while ago.
Also: you can add a high temp o-ring between the supporting circlip and the washer to reduce conduction and avoid rattling later on.

B4134-D39-881-C-4-B6-A-93-FC-A66-ECB8-E3635.jpg
 
Last edited:

blokenoname

DIY Log Dabbler 😁🪵💪💨💨💨
Is there a reason to use the 5w omite resistors over the 10w resistors other than 7mm vs 10mm? At the same resistance, they would produce the same amount of heat, but the 10w could be driven harder and give better heat distribution.
Diameter 🤷‍♂️. 10mm does not fit the classic 3/8" tubing, which has an inner diameter of approximately 8mm.
Wouldn't probably even fit my larger 11mm OD/10mm ID heater cover, as then the resistor body would completely block the air stream.

Most of my newer units are cartridge driven anyway today.

Wish all of you a (hopefully) better and healthy New Year 😃🥳😃.

13385A93-3756-4866-9C7B-2DD052C5FCA7.jpeg
 

brainiac

log wrangler
.... yep, amen to that.

2021.jpg

Decided to knock out a batch of dd stems over the 'holiday'. I had plenty of pine and oak dowel to use but the big problem, indeed the only real problem, is drilling a hole accurately through the centre of the dowel using a drill press. Here's what worked for me.

Stem-jig-3.jpg

It's a very simple jig; a block of wood that'll fit in your machine vice, drilled half way through with a forstner bit of the same diameter as your dowel (12mm in this case). Next, swap the forstner for a standard 5mm wood bit and drill through to the other side. The only tricky part is to set the platern height so's you can swap the bits without having to move the platern - and that's critical. Then, as you've probably already figured out, put the dowel in the slot and drill it from the other side. Drill the dowel half way then turn it round and repeat for other end. The jig won't last forever but will certainly do a good batch. You'll still have to countersink one end of the dowel for the ss tip. I use a step bit for that which helps to keep it central.

As @blokenoname mentioned, back in the thread somewhere, ss drinking straws can be used to make the tips. Sanded off the logo here with 600 grit. These are £2 a packet and you can get 5 x 4cm tips from each straw....

stem-straws-2jpg.jpg
stem-batch-2.jpg


...and even the bendy section can be used :).
 

f2j

Chaque jour est une chance
Very nice tip for the dowel drilling. And nice stems ! There's one thing i've still not managed to understand ^^ it's that shape on the tip of the stem (SS side). I assume it is done to place a SS screen inside, but how is it done exactly ? I am very curious about that :)
 

brainiac

log wrangler
Hi @f2j

Yes, it's a 'waist', or crimp, to help hold the screen in place. I make them by scoring a line around the ss, 7mm below the tip, with the pipe cutter. Then, removing the cutting wheel from the pipe cutter and replacing it with a suitably sized ss washer. That is then applied to the scored line until a deep enough waist is made. Clamping the ss tube in order to do this, without distorting it, requires some care. Labour intensive but it works.
 

brainiac

log wrangler
Well that's enough stems to be going on with - so back to the logs :tup:.
This one's European walnut. It donned it's mustard yellow lederhosen yesterday and is currently undergoing intensive quality control :science:.

Purely in the interests of trying something different I retained about 2.5cm of a side branch and used it for the jack connector. The wiring in most logs goes directly from the heater unit to the connector but in this case I had to add extension wires to the connector, then screw it into the thread I'd tapped into the branch and finally connect them up in the base well to the wires coming down from the resistor. Am happy to report that it functions really well. I used a 95J20RE on this one which runs fairly hot and yields dark to v dark brown ABV.

branch-EW-JC-1.jpg
branch-EW-grasp-1.jpg

branch-EW-side-1.jpg
branch-EW-top-1.jpg

That fourth picture showing one of @underdog Dave's heater covers lending a reassuringly professional finish to the build :cheers:.

:peace:
 

Sawyer

Active Member
What a cool thread! Loving all the creations. I was looking for a log vape in Europe and ended up here. I don't want to risk import fees and taxes ordering from US / Canada / UK, and the new Musa is kinda rich for my blood. Hopefully I can piece everything together and make one myself. Gives a more personal connection to the device too. Seems there are two heater options: a resistor or a halogen light. I'll probably end up going for the halogen light. I found the "shopping list" on page 30.
I like to tinker with stuff, but I'm totally out of my element with electrics. Building a log seems like a good way to get into it :)
If I'm not mistaken, the setup is as follows:
  • log / wooden cover: holds everything together, serves as a mounting point
  • log base: to close off log bottom after inserting the electronics
  • VVPS (external): to connect outlet to DC jack
  • DC jack: connects to halogen socket via wires
  • halogen bulb: inserted into halogen socket
  • SS heating cover: covers halogen bulb, guides air around bulb to heat it up, heats up air itself a bit.
  • fine gauze / screen: placed in heating cover to dim light coming from bulb and stopping debris from falling onto the bulb
  • SS stem: acts as bowl and stem, place herbs in bottom (screen on top) and place onto heater
Is there anything I'm missing? Seems pretty straightforward.
 

HighVapeEnthusiast

Well-Known Member
What a cool thread! Loving all the creations.
Me too! Hey there, my first Post @ FC great community here!
@blokenoname @brainiac well done dudes!
Finding this DIY section some years ago would save me a lot of Money!:D
I still read the hole tread and just build about six mistys at this time!:clap:
And they really rocks like shit!!!:rockon:
@Sawyer , you are right with your parts!
You just have to get the right dimensions of
SS tubes for the SS heating cover and the stems! They have to fit to each other and the bulb.
Also the DC Jacks can variety by the size of the pin in the middle.
The DC PS should fit in...

Sorry for my english, isn’t my mother-language.
I also come from Europe...
Greez and stay high!✌️
 
Last edited:

Sawyer

Active Member
Me too! Hey there, my first Post @ FC great community here!
Welcome :wave: Your English is fine, don't worry about it. Probably a lot better than my German/French/Spanish/Italian etc. Thanks for confirming the setup. Looks like I got some shopping to do.

i think that this thread it's 90% European...i'm wrong ? need more log vape in Europe. I'm also from EU.

I guess in America there are plenty of log vapes readily available, so less DIY interest?
 

GI

Well-Known Member
It's possible, for me was easy to made and wonderful to use thanks to this thread, i start vaporize with a Dynavap, try sticky brick and then made my logs, if i have to suggest to a friend where to start i think these kind of log are perfect. Maybe is the most easiest to build ?
 
Top Bottom