VapCap Induction Heater for Desktop and in Car Use

goodpunk6

Well-Known Member
Nice, very nice!!!

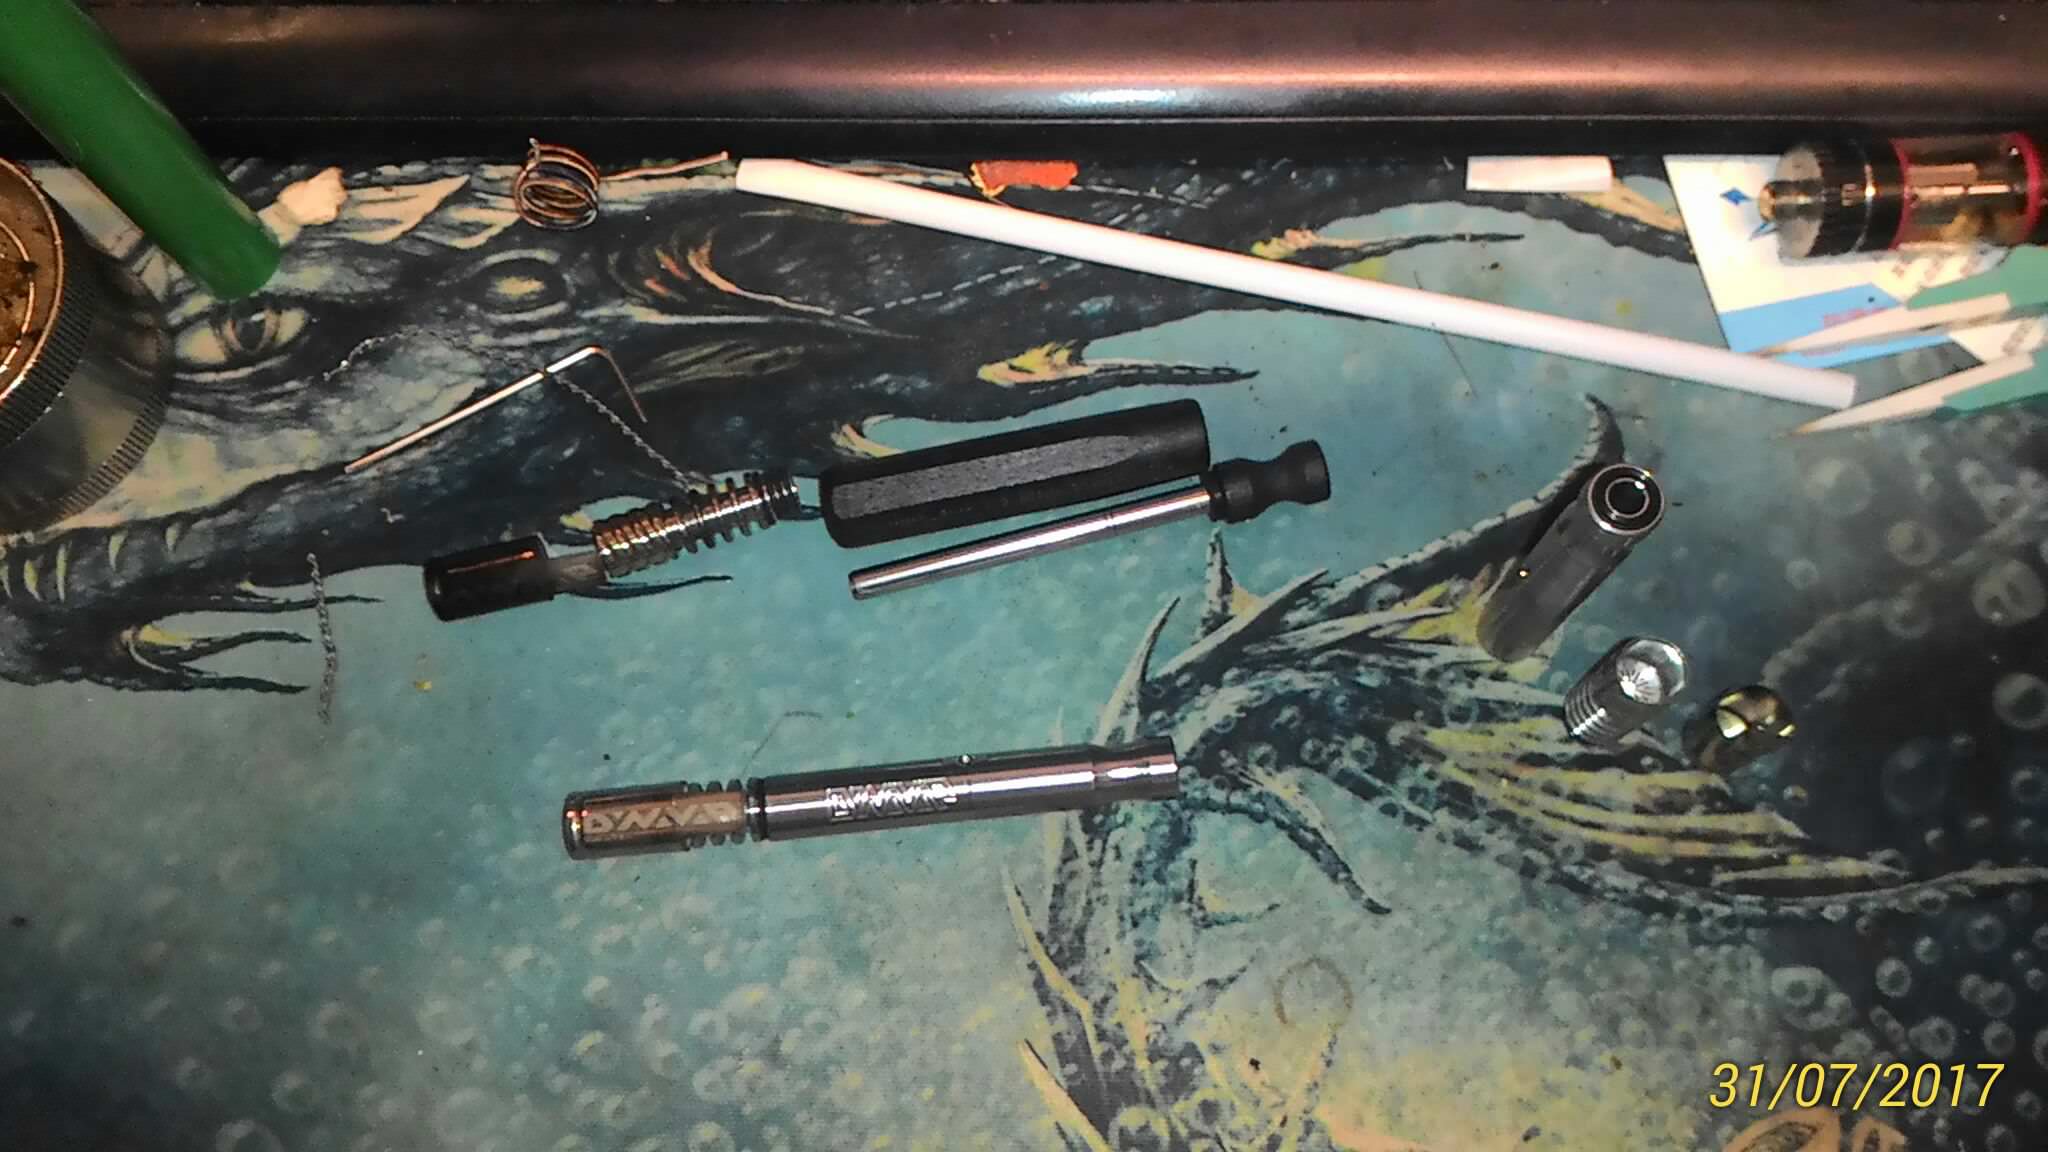
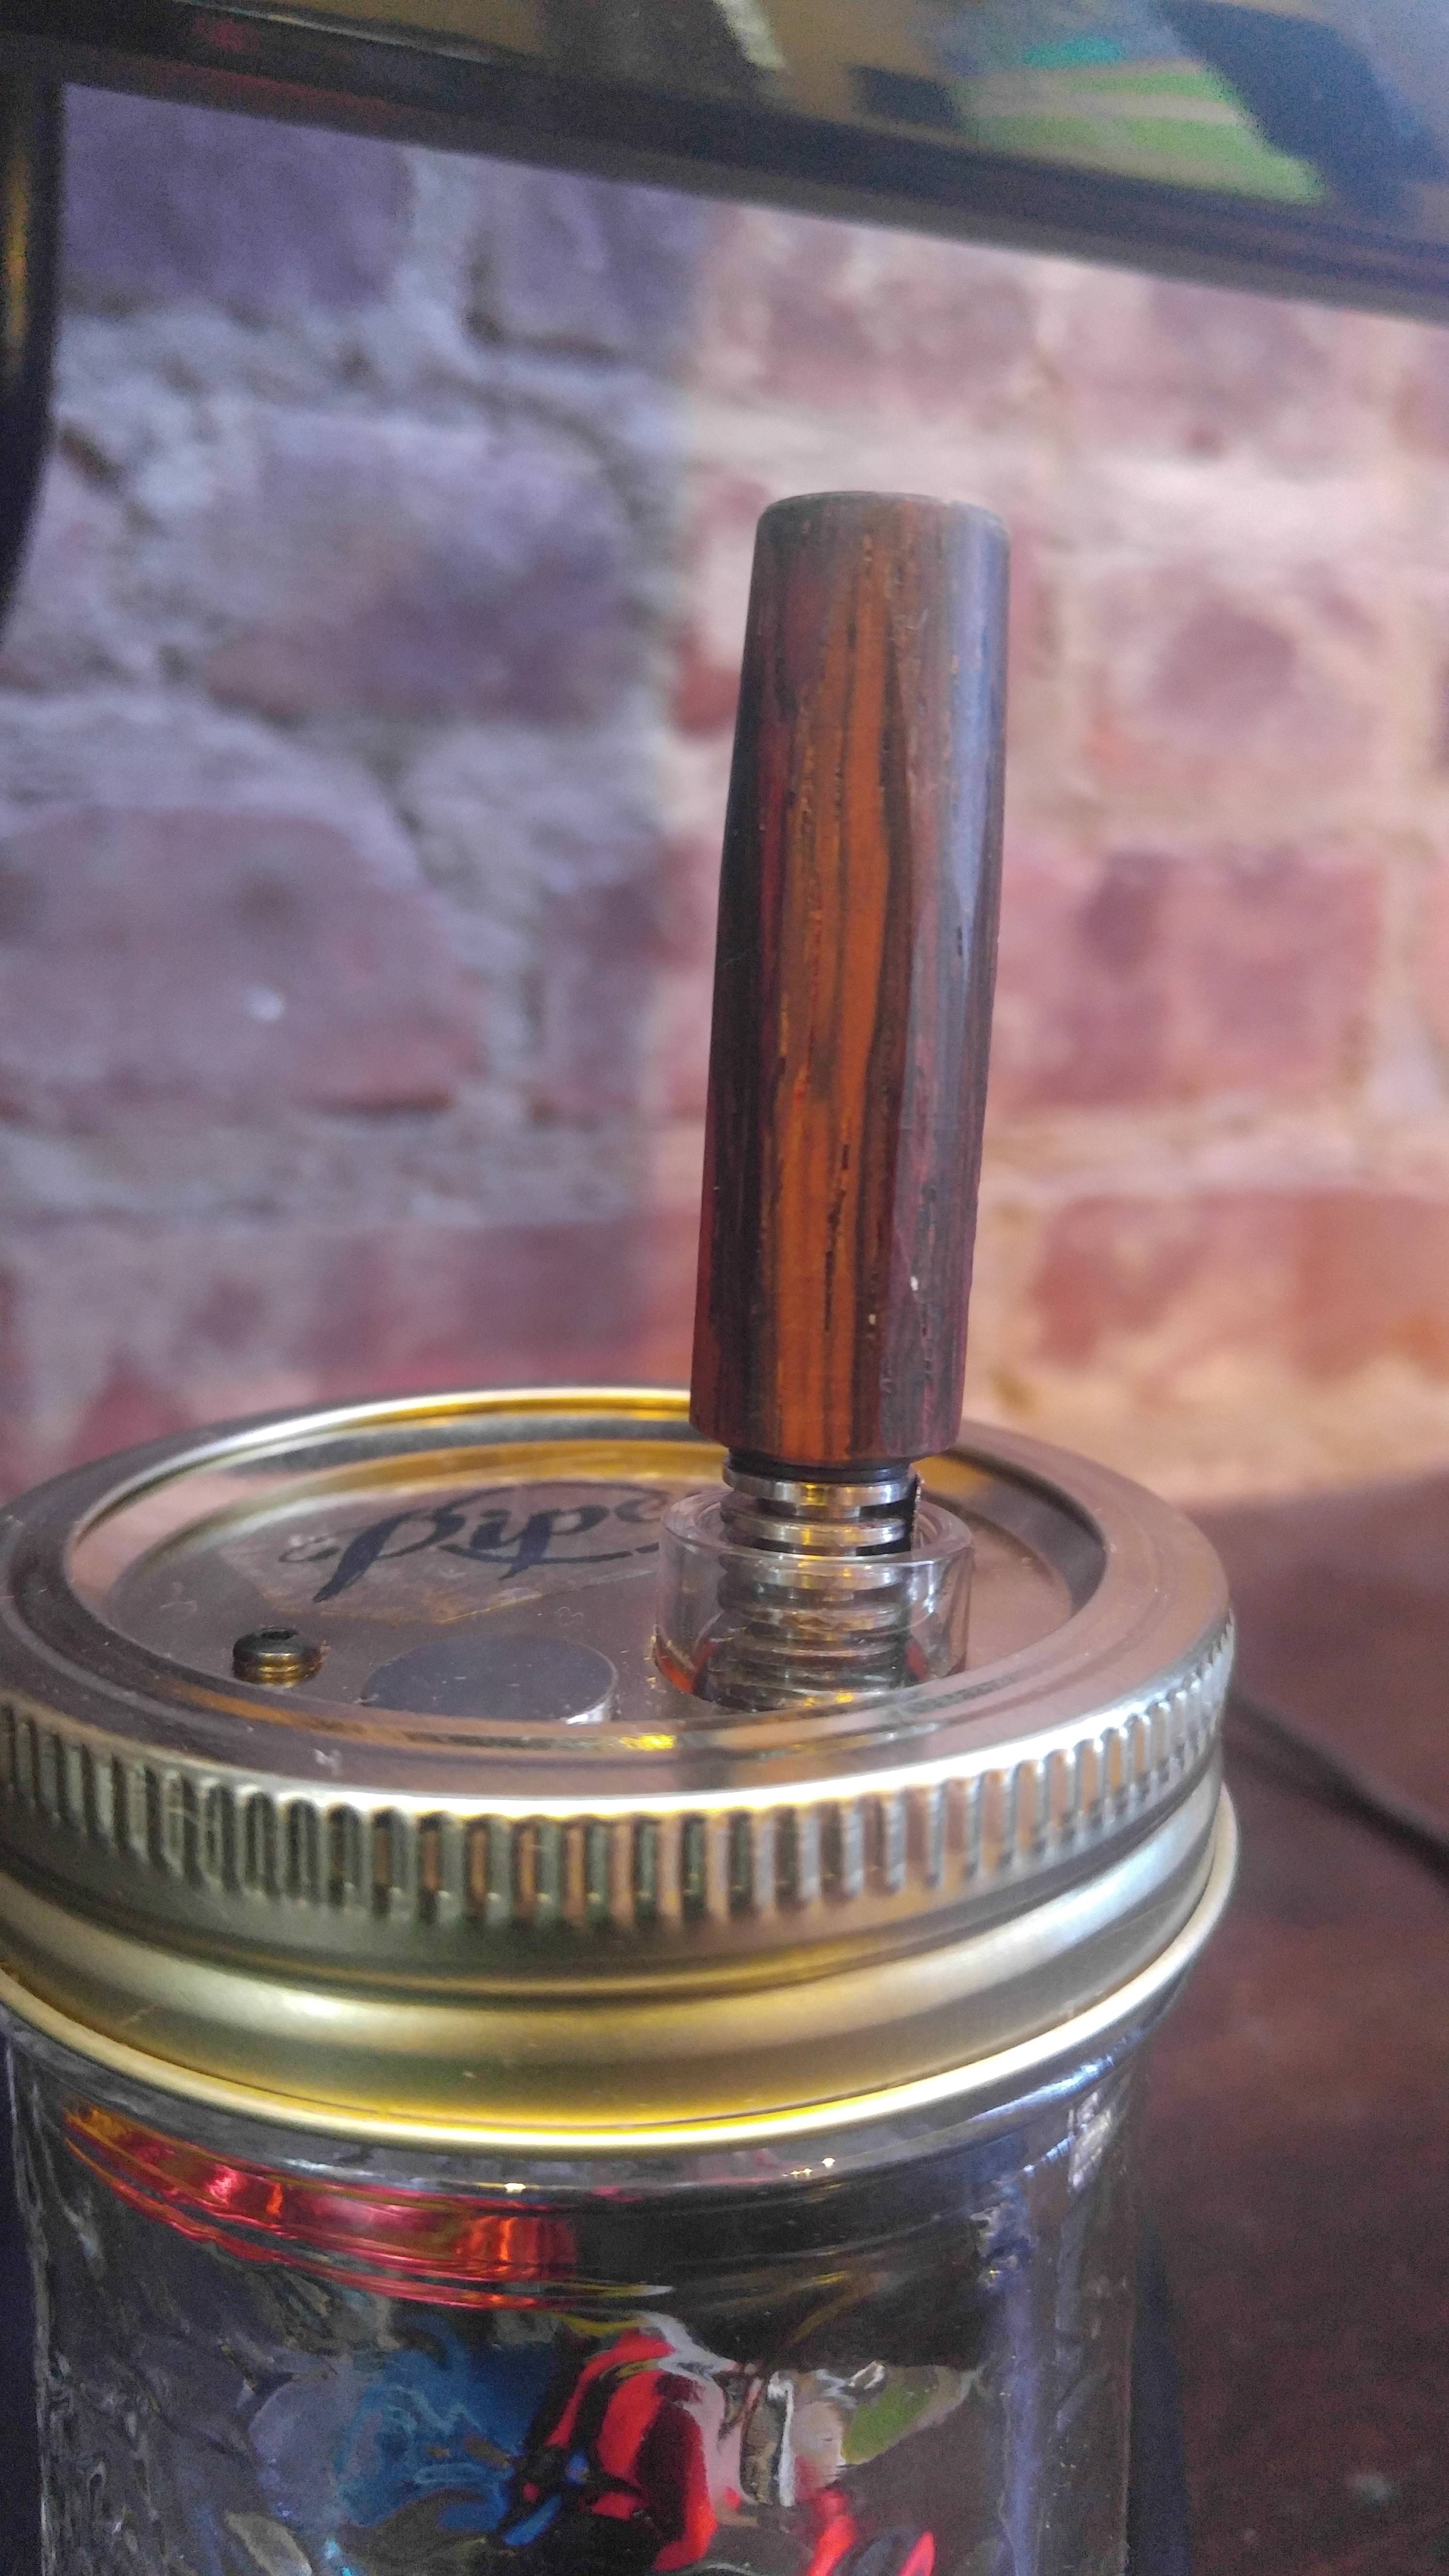
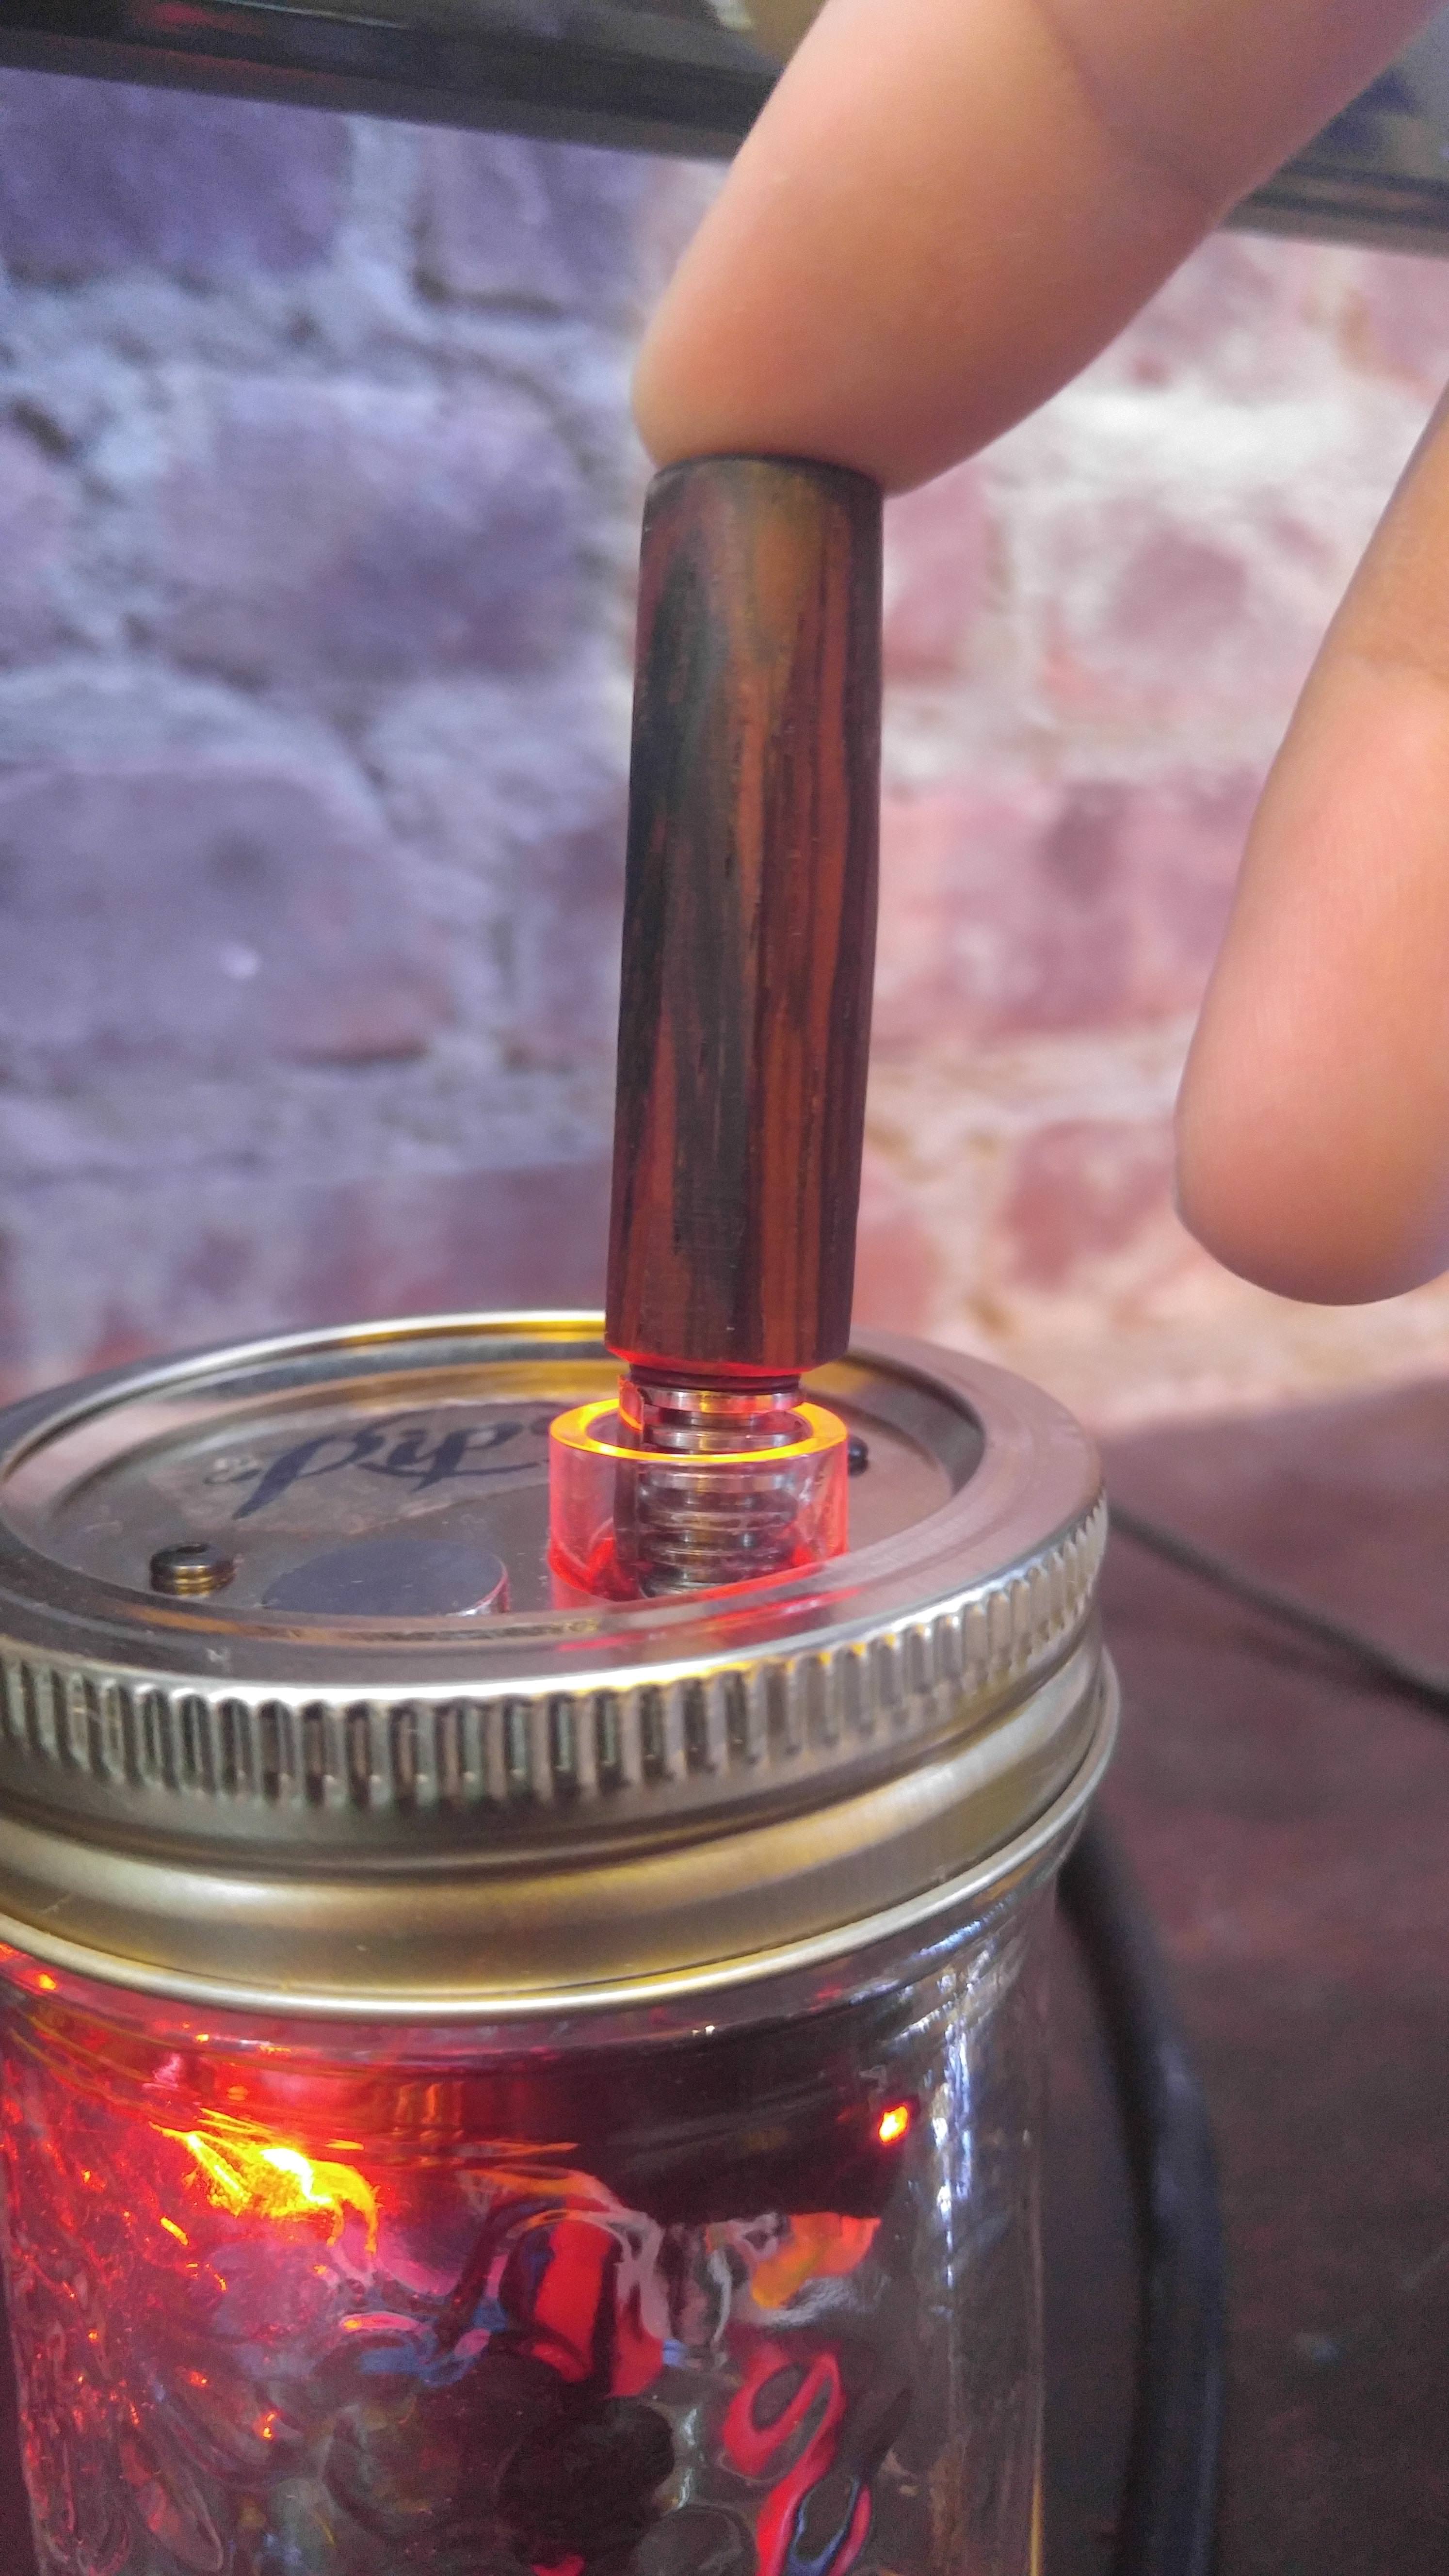
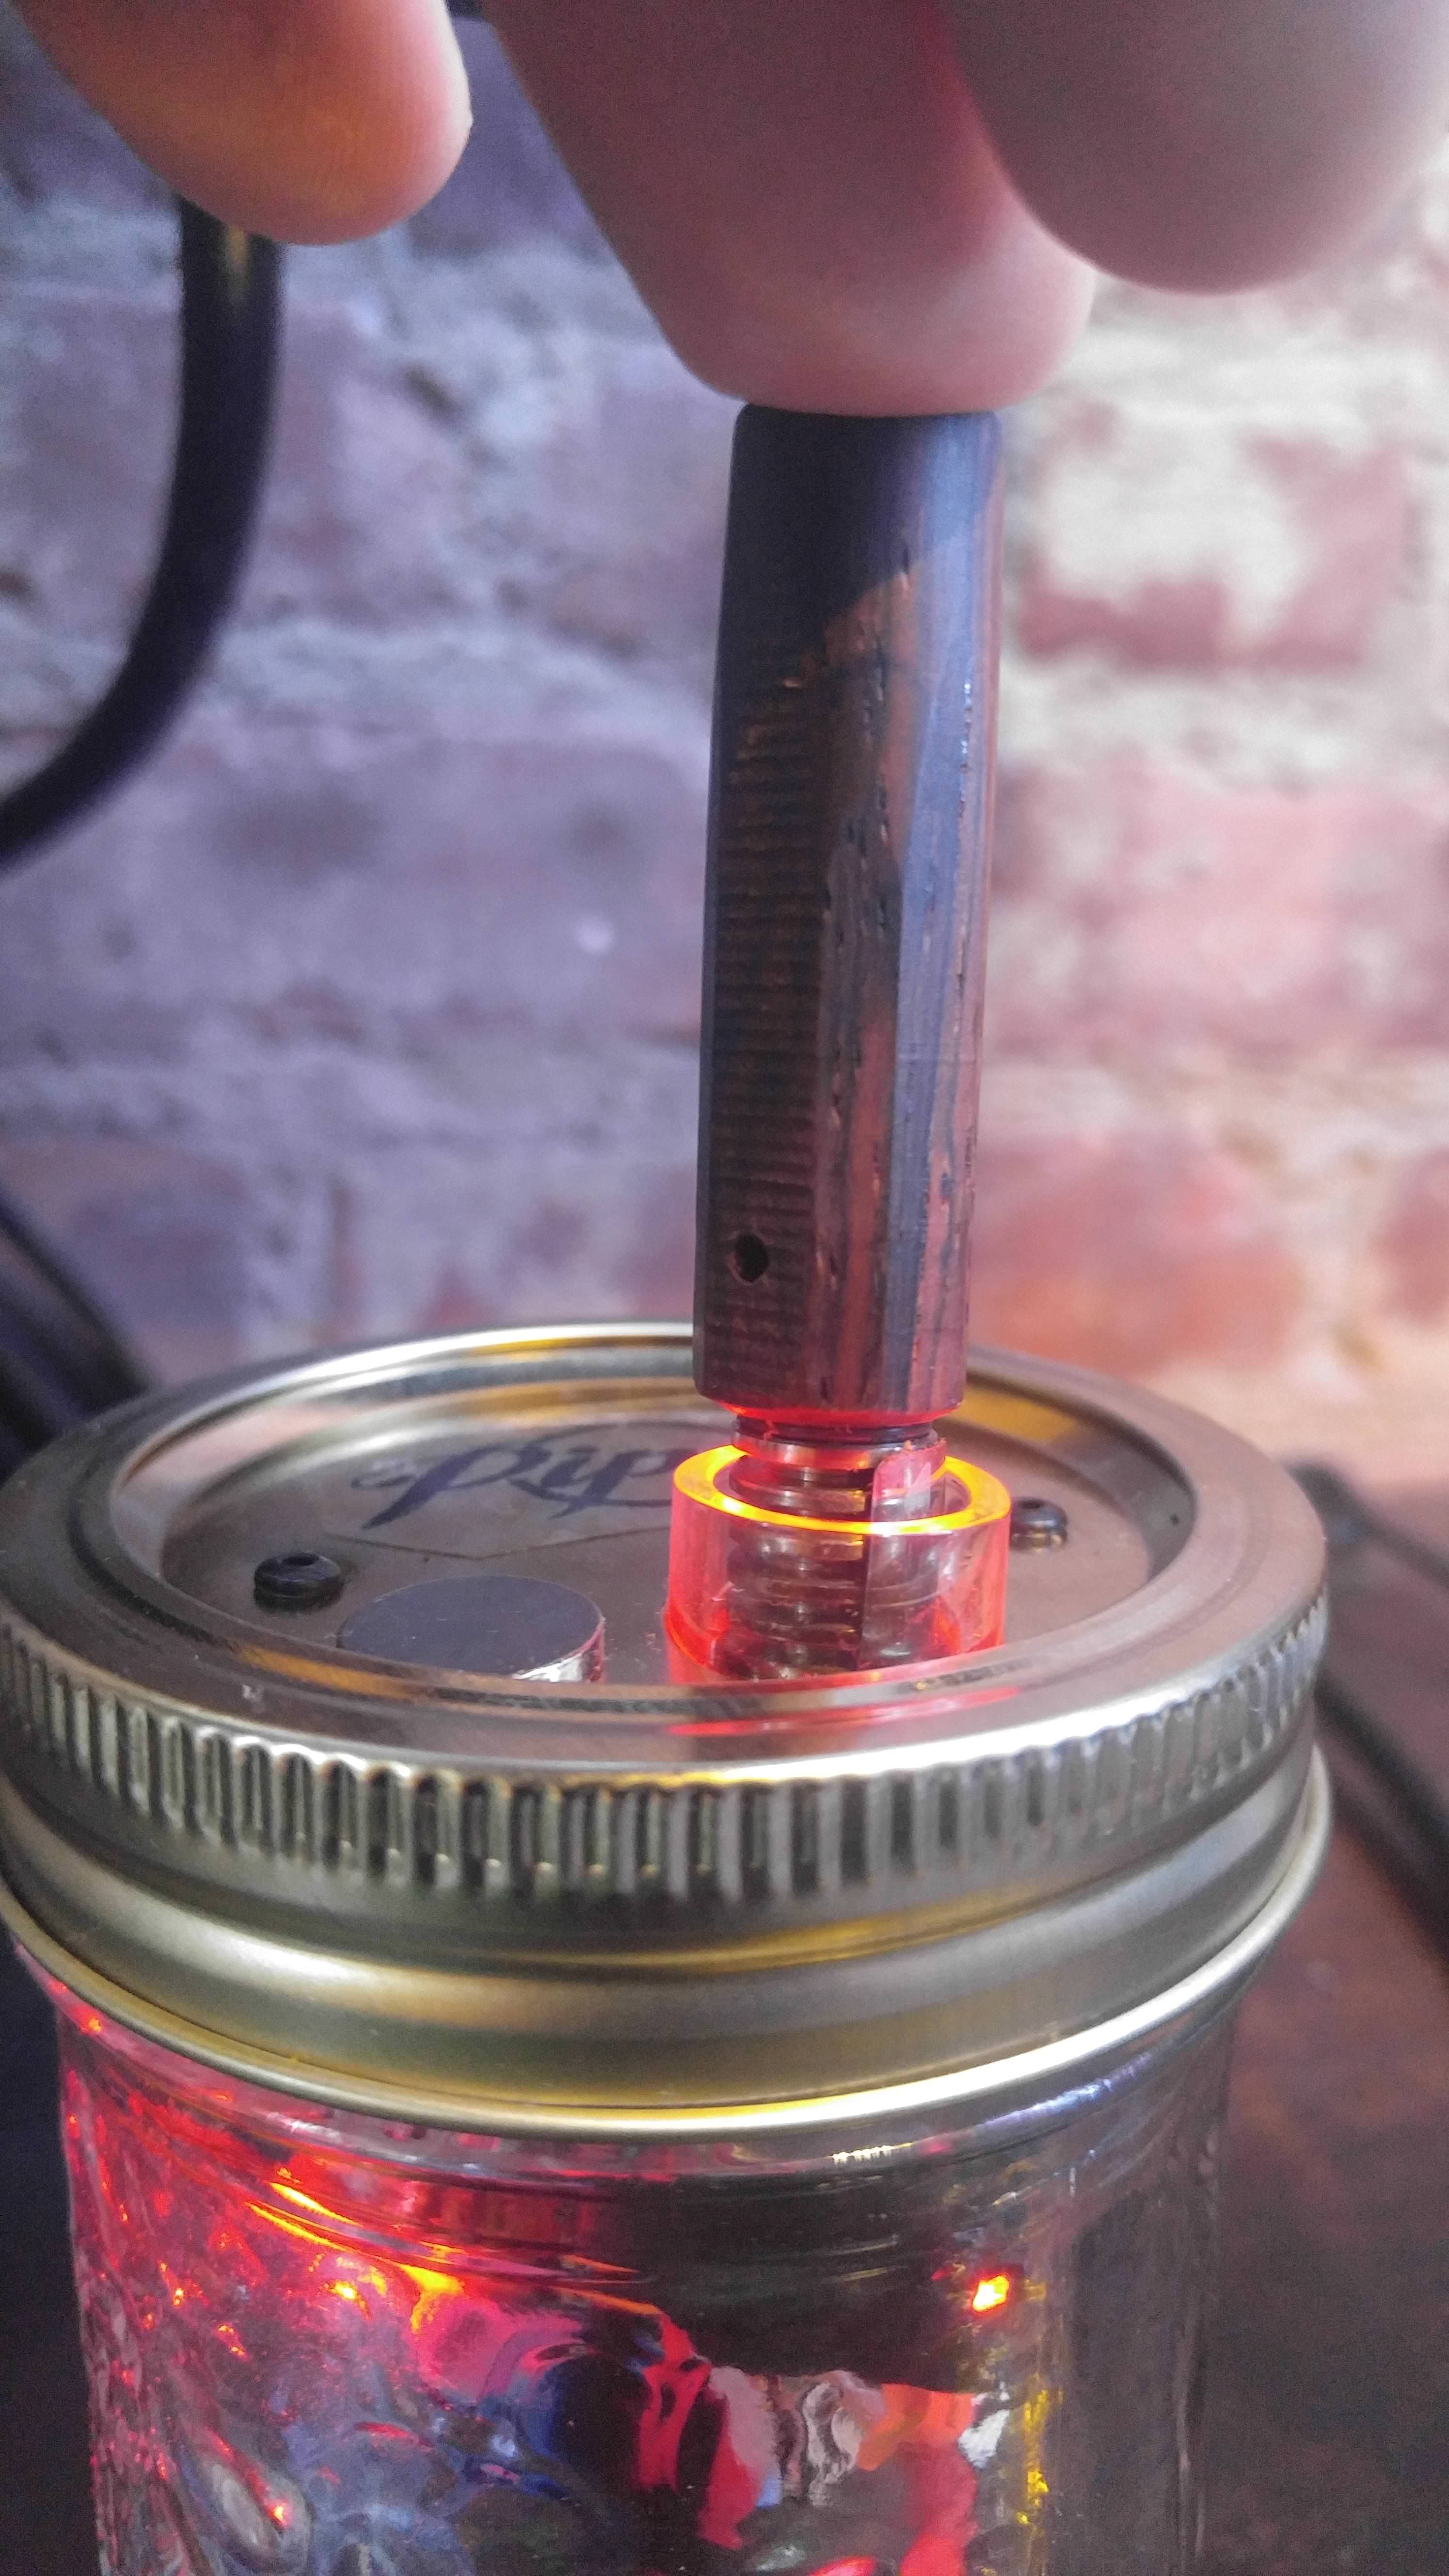
So I put together a video of how to remove and insert the height spacer.

@goodpunk6, I'm afraid your best option is to get a friend over with a big roach clip.... How do you live without tools? I'd die.

Careful not to drop the small pieces, if your like me that stuff disappears to an alternate dimension never to be seen again. :suspicious:
Sand the spacer down by 2 mils and re-insert. Test, oh and don't forget to be beside a strait wall. :p

@Pipes now that looks easy enough for me to do! :sherlock: I do have things like a screwdriver, hammer, and even a hammer drill. I built my own desk but had to borrow my father's tools. Needle nose pliers however, must be picked up at the hardware store. I'll pick up some sand paper too. Have a suggestion for the grit size?
 

Pipes

Addicted DIY Enthusiast
Accessory Maker
Grit isn't really important. 100 grit would be fine. It's just a small piece or doweling and could be replaced with any rigid, non metal, heat resistant material. Even a cut pencil or chop stick would work in a pinch if you lose or split the existing wood. Try not to lose the piece of tubing though. Remember that alternate reality under the table...:suspicious:
If you need to re-insert the Oring, I use the open end of a sharpy marker lid. It will push the Oring evenly and not push the switch. Stop pushing once it's just even or under the top of spacer. Don't push the Oring all the way down as it's function is to keep the switch from being pushed sideways.
Sound complicated but it's really not.
:science:
 

Nevil

Well-Known Member
So I've had my JHII for a few weeks now, just finally getting a chance to post. I have to say this thing is amazing no more spinning while heating with a torch is going to save my hands a lot of pain so thank you very much @Pipes!:clap:

I too was having the issues where the top of my bowl was getting a little scorched with the bottom still being a little green. After catching up on this thread I was able to sand down my spacer a little, it had a notch on the bottom, presumably from where it was originally cut, I got rid of that and took a little more off and now I'm getting nice even ABV all the way through.

Thanks again @Pipes! So stoked to hear the Portsides are shipping soon! Not having to be tied to an outlet is going to be amazing! Can't wait to get that IM from you. :)
 

Gigsabits53

Well-Known Member
Wow look at you guys being all prepared. My skeletor arrived yesterday and I somehow forgot to purchase batteries. :doh: Amazon will be delivering those tomorrow so my poor skeletor is just sitting on my desk staring at me, almost like it is saying, "come on, let's go". Tomorrow will put him to use... :)
 

MonkeyTime

Well-Known Member
Wow look at you guys being all prepared. My skeletor arrived yesterday and I somehow forgot to purchase batteries. :doh: Amazon will be delivering those tomorrow so my poor skeletor is just sitting on my desk staring at me, almost like it is saying, "come on, let's go". Tomorrow will put him to use... :)
It's far from my place to judge, but you seem unworthy, you should send that unit to me :razz:
 

goodpunk6

Well-Known Member
Ok, got a pair of needle nose plyers and a nail file. I pulled the little button out and out came the O-ring. No biggie. I shave down the notch from where it got cut. I test this out with a 7-one thousand count and I'm still burning the tip. Take it out again and use a box knife to mark off where I'd like to file down to. After a halfway attempt, I try it out, there is progress.... but the result is still a touch burnt at the tip while there is still some green. I shave it down some some more and now, on a 7 count, I'm noticing that the tip is touch more cooked than the rest of the bowl, but for sure, it is more evenly cooked. Think it needs the most subtle and slightest adjustment to be perfect. I'll ride it like this for a bit until I get curious again. Either way. I've been able to reproduce the same exact quality of vapor over and over again. @Pipes, again, thanks bro. I'm addicted to your stuff.

gy7sl9k.jpg


BsDASiV.jpg


APC933d.jpg


These are after pictures BTW
 
Last edited:

Gigsabits53

Well-Known Member
Batteries charged and I inserted a loaded VC.....................and nothing. No heat, no light. Battery tester shows fully charged. Did I get bad batteries or is it something else I'm missing?

Edit: never mind, it would help if I turn on the damn switch :rofl:
This thing is freakin awesome!!

Thank you @Pipes !!!
 
Last edited:

MonkeyTime

Well-Known Member
Ok, got a pair of needle nose plyers and a nail file. I pulled the little button out and out came the O-ring. No biggie. I shave down the notch from where it got cut. I test this out with a 7-one thousand count and I'm still burning the tip. Take it out again and use a box knife to mark off where I'd like to file down to. After a halfway attempt, I try it out, there is progress.... but the result is still a touch burnt at the tip while there is still some green. I shave it down some some more and now, on a 7 count, I'm noticing that the tip is touch more cooked than the rest of the bowl, but for sure, it is more evenly cooked. Think it needs the most subtle and slightest adjustment to be perfect. I'll ride it like this for a bit until I get curious again. Either way. I've been able to reproduce the same exact quality of vapor over and over again. @Pipes, again, thanks bro. I'm addicted to your stuff.

gy7sl9k.jpg


BsDASiV.jpg


APC933d.jpg


These are after pictures BTW

Looks like you went the space further than I did. While it's been better, I'll be taking mine down a little further soon, it's still a little top heavy. I like my bowls done in two heat cycles and it's 5-6 right now without charring the tip.

Any problems with the power block?
 

goodpunk6

Well-Known Member
Looks like you went the space further than I did. While it's been better, I'll be taking mine down a little further soon, it's still a little top heavy. I like my bowls done in two heat cycles and it's 5-6 right now without charring the tip.

Any problems with the power block?

No problems with power. Just figuring out how deep this thing should go is a pain. I only shaved off about .9 of a millimetera.
Looks like you went the space further than I did. While it's been better, I'll be taking mine down a little further soon, it's still a little top heavy. I like my bowls done in two heat cycles and it's 5-6 right now without charring the tip.

Any problems with the power block?

No power problems
 
goodpunk6,

Hogni

Honi soit qui mal y pense
So, after 4 days drying after my rain accident with my Skeletor I charged the batts, cleaned the bit rusty contacts and gave it a try. Batt controls - ok. Trying to start the heater - no way. The tiny red LED at the bottom of the coil, not the LED for illuminating the glass tube, is shortly blinking before darken again and nothing happens. Any advices?
I'm loving my Skeletor so much I could cry - please help, @Pipes! Where could be the damage?
 
Hogni,
  • Like
Reactions: Summer

Pipes

Addicted DIY Enthusiast
Accessory Maker
That sounds like the over current is coming on. Or battery contacts.
You say that nasty word "rust". If the battery contacts were rusty, you really need to scrape it clean followed with a polish with wet/dry sand paper. Then wipe with ISO. Clean battery contacts are very important for high current devices.
Give a shot. Report back.
 

Hogni

Honi soit qui mal y pense
Thanks @Pipes! How I've said cleaning of the contacts was one of just a few thing I did.But hurrah, my beloved S. is wotking again!!! :D:D
Yesterday in the evening after uplifting my mood a little bit with my Herb Ti I sat still very sad at my desk the S, in front of me. Remembering the nice times with it I put lost in thoughts a VC into the coil and was sadly pushing the contact button from time to time breaked by wiping my tears away. Maybe after 20-30 pushs the S. started working again!! Guess contact of the coil start button was corroded a little bit too and while pushing the button again and again from time to time I was "cleaning" it at the same time.
However the PIH is now officially water resistant proofed !
Oh happy sunday!!
 
Last edited:

Gigsabits53

Well-Known Member
Thanks @Pipes! How I've said cleaning of the contacts was one of just a few thing I did.But hurrah, my beloved S. is wotking again!!! :D:D
Yesterday in the evening after uplifting my mood a little bit with my Herb Ti I sat still very sad at my desk the S, in front of me. Remembering the nice times with it I put lost in thoughts a VC into the coil and was sadly pushing the contact button from time to time breaked by wishing my tears away. Maybe after 20-30 pushs the S. started working again!! Guess contact of the coil start button was corroded a little bit too and while pushing the button again and again from time to time I was "cleaning" it at the same time.
However the PIH is now officially water resistant proofed !
Oh happy sunday!!

That is great news!! Glad to hear you got it working again !! It truly is awesome!!:)
 

Pipes

Addicted DIY Enthusiast
Accessory Maker
Glad to hear it!
Yeah, water really doesn't hurt electronics as long as current isn't flowing.
Biggest mistake people always make is to try and work the device right after the mishap. This is where the problems happen.
I've had boards that failed do to coffee, pop and alike and best cleaning is to drop the whole board in hot soapy water and scrub away the gunk with a stiff brush. Rinse and dry as fast as possible. Hair drier followed by oven at 160 degrees F.
Following that, a voodoo dance and chances are, all will be good.
:science:
 

Pipes

Addicted DIY Enthusiast
Accessory Maker
I prefer an iso bath and the Hippy Hippy Shakes
But that may just be me tho :rofl:
Bath being the key word. Cleaning old dried pop or milk product takes a lot of ISO. Hot soapy water is cheap and can repeat many times.
Just ensure to blow out the water from all the cracks and potentiometers. Followed by a baking for insurance.

Salt water is very bad, as is coke or coffee with cream in it. Those may have a delayed failure effect as the corrosion or conductive crud builds up.
Keyboards nightmare. No voodoo will help there I'm afraid.

:tup:
 

jimt0r

Well-Known Member
Woot!!! one half of the perfect vaping experience is here
NWtBcb0.jpg

OMG even with a BIC lighter these are awesome

Modnote: Edited to display image

Thanks Mod - please pm correct method
 
Last edited:
Top Bottom