'The Misty Log' - DIY wooden Log Vaporizer

blokenoname

DIY Log Dabbler 😁🪵💪💨💨💨
Halo Vasor 1.0 tested, Ready and able to give you a head ringer. :cool:
Notice I touch the glass heater stem, Where the wires are fed and it stays cool to touch. The only place that heats up is the bulb area.
Good work, as always! :tup:
Though I still don't get the part with the Vapcap. You simply leave the cap on top of the bulb then, after the click? And the hot air passes at the gap between the cap and the glass?

@all

New 20w heater works out very well. It's 6mm*50mm in size and so fits neatly inside one of the 10mm OD glass straws, which again fit nicly into the adapter. The black insulation is glass silk, which can stand up to 400°C and more. Completly odorless.
Using the original Herborizer Ti bowl, I'm at 10,2v at an output of 13,5w now, for producing a nice, cloudy roast :)
 

Vaporooni

Well-Known Member
Accessory Maker
Good work, as always! :tup:
Though I still don't get the part with the Vapcap. You simply leave the cap on top of the bulb then, after the click? And the hot air passes at the gap between the cap and the glass?

@all

New 20w heater works out very well. It's 6mm*50mm in size and so fits neatly inside one of the 10mm OD glass straws, which again fit nicly into the adapter. The black insulation is glass silk, which can stand up to 400°C and more. Completly odorless.
Using the original Herborizer Ti bowl, I'm at 10,2v at an output of 13,5w now, for producing a nice, cloudy roast :)
I did away with the VapCap over the bulb, And now use a SS sleeve that has a lip that keeps it afloat in an 18mm glass fitting with an Arizer dome screen to protect the top of the 20 watt bulb. The vapor tastes much better from a true SS heat sleeve. The VapCap works, Just did not preform as well.:nod:
 
Last edited:

brainiac

log wrangler
Continuing the theme of halogen vapes...

Here's the latest Rustic from the log lab at Brainiac Towers :).

Ash-RH-2.jpg


Local ash, 10w halo, hybrid wiring, coiling on the solid wire for heat dissipation, 11mm OD ss heater
cover (from Bloke :tup:), and an off-white leather base cover. It's oval in plan which gives it both good ergonomics and enhanced visual interest to make up for the slightly plain wood colour.

And... an additional little feature in the base:

base-asy.jpg


A piece of sea glass from the local beach with 0.3mm ss foil above and the hardboard base plug beneath
with a dremeled out recess to hold the glass. 6mm holes drilled in the foil and hardboard and punched through the leather.

Ash-RH-base-light-2.jpg


It't quite a subtle effect, only really visible as a light on the desk as it's picked up for use. It's actually greener than the camera's rendered it here - a greeny gold.

It's working fine atm :). The body's warm, not hot, and the jack socket it is also merely warm. It's running via a VVPS dialled down a little as it will combust bud if run directly from the PSU.
 

TommyDee

Vaporitor
I got the stainless straws in. They are seam welded tubes. Why in the hell anyone would use this for drinking is beyond me. Basically they are guaranteed germ traps. But for our purpose they are quite cheap! FWIW, the tube ID is ~ 11mm. I measure a wall thickness of 0.4mm with an OD of 12mm or under.
A 20mm bulb fits easily and a 35W bulb fits but only half way.

I could see a talented CNC programmer carving a lithothane onto the ID of such a log. Light would bring forth the image from the lithothane.
 
Last edited:

brainiac

log wrangler
A bunch of apples :)

The 24v/30w cartridge heaters arrived a couple of days ago and that enabled me to
complete the apple trinity. So here it is - made from three blanks cut from the same branch.

Trinity.jpg


Left to right: cartridge, halogen, resistor.

Trinity-floor.jpg


Actual colours lie somewhere between the two pictures.

Oxblood leather on all three to underscore (literally) their unity. All three have been exhaustively
tested :science: and they do indeed work fine :nod:. The cartridge and the halo units require a VVPS/dimmer
for herb but the resistor unit runs at just the right temp directly from the PSU.
 

blokenoname

DIY Log Dabbler 😁🪵💪💨💨💨
A bunch of apples :)

The 24v/30w cartridge heaters arrived a couple of days ago and that enabled me to
complete the apple trinity. So here it is - made from three blanks cut from the same branch...

The 'bunch' came out absolutly awesome :nod: :clap:
Good work! Love it :)

Have my own triplet of cherry units now ... steel core; glass core; halo core ... but can't even claim, that they're cut from the same handrail :uhoh:

As I've accumulated 3 Vapcap ss and Ti tips now, that work great with the 11mm halo core for slide in and also with the 10mm glass core via a ball&socket connection... I thought it only convenient and consequent, to make the Vapcap tips (10mm OD/8mm ID) also working with the classic 9mm steel core.
So I rigged up a small adapter for that ;)

Looking at @Ed's TnT 's Woodscents Log, it utilizes a small 8mm step, machined into the top end of its heater cover, the VC tips can slip over and apparently lock on to. So I just cut a small piece (~1cm) of the 8mm ss tubing, we usually use for our own DIY ss tips, put in a debris screen, closing off its top and then set that into the heater port of the classic 9mm steel core heater cover and letting it protude a few millimeters, for the VC tip to connect.
Still a two handed affair with the VC tips though, as I didn't want to make the 8mm adapter/step too long (and so allowing the VC tip to sit fast), b/c ye deeper the heater port goes into your VC tip later on, the less material it can hold.

Also... the heater cartridge has to be placed higher up in the 9mm ss heater cover for this mod to work optimal, as the bigger VC tips no longer slide into the core tube itself and so would be a good centimeter further away from the heater and debris screen, needing much more voltage.
This optimizes the vape also for use with the DIY 12mm/9mm glass slide over dd stems and GonGs, as their load is also closer to the heater now and with the heater port closed off at the top with the debris screen (like in the Nano), there is also no longer the chance of material falling into the heater port :tup:

Easy to do mod for the classic steel core Misty :nod:
Testing it in my battered ss core cherry unit right now, at 11,5v/6,6w... which already seems a bit hot :D


Edit:
Yep! Having the step roughly 4mm extending from the heater cover, seems about right. VC can stick then. Just so, but sticks!


:science::sherlock:
 
Last edited:

Ed's TnT

Woodsman
Manufacturer
The 'bunch' came out absolutly awesome :nod: :clap:
Good work! Love it :)

Have my own triplet of cherry units now ... steel core; glass core; halo core ... but can't even claim, that they're cut from the same handrail :uhoh:

As I've accumulated 3 Vapcap ss and Ti tips now, that work great with the 11mm halo core for slide in and also with the 10mm glass core via a ball&socket connection... I thought it only convenient and consequent, to make the Vapcap tips (10mm OD/8mm ID) also working with the classic 9mm steel core.
So I rigged up a small adapter for that ;)

Looking at @Ed's TnT 's Woodscents Log, it utilizes a small 8mm step, machined into the top end of its heater cover, the VC tips can slip over and apparently lock on to. So I just cut a small piece (~1cm) of the 8mm ss tubing, we usually use for our own DIY ss tips, put in a debris screen, closing off its top and then set that into the heater port of the classic 9mm steel core heater cover and letting it protude a few millimeters, for the VC tip to connect.
Still a two handed affair with the VC tips though, as I didn't want to make the 8mm adapter/step too long (and so allowing the VC tip to sit fast), b/c ye deeper the heater port goes into your VC tip later on, the less material it can hold.

Also... the heater cartridge has to be placed higher up in the 9mm ss heater cover for this mod to work optimal, as the bigger VC tips no longer slide into the core tube itself and so would be a good centimeter further away from the heater and debris screen, needing much more voltage.
This optimizes the vape also for use with the DIY 12mm/9mm glass slide over dd stems and GonGs, as their load is also closer to the heater now and with the heater port closed off at the top with the debris screen (like in the Nano), there is also no longer the chance of material falling into the heater port :tup:

Easy to do mod for the classic steel core Misty :nod:
Testing it in my battered ss core cherry unit right now, at 11,5v/6,6w... which already seems a bit hot :D


Edit:
Yep! Having the step roughly 4mm extending from the heater cover, seems about right. VC can stick then. Just so, but sticks!


:science::sherlock:

Hey hey, way cool bro, by the looks of these I am going to have to add one to my log collection down the road. Way to go and wish you well and all the best with em.
 

blokenoname

DIY Log Dabbler 😁🪵💪💨💨💨
Hey hey, way cool bro, by the looks of these I am going to have to add one to my log collection down the road. Way to go and wish you well and all the best with em.
Hi Ed! :)
Thank you, for your kind words and welcome to my little MistyLog thread :wave:

Just still a hobby/DIY project, though, with no commercial intentions for the time being ;)
Thought a while about doing this on a more professional basis, but being European, CE certification is mandatory here for selling tech stuff as you know, and well... no way for a poor bastard like me, raising that kind of funds upfront :o:shrug:
So a hobby it remains and I do units mostly only for mates and relatives :nod:

However... given the fact, that the good old Misty is apart from the classics, like the Eterra, Purple Days and AromaZaps, mainly inspired by your own WS, Alan's HI and Dave's UD, I'd be happy to build a Misty for you, to add to your already impressive Log collection, when I find the time :)
 

TommyDee

Vaporitor
I'm still having a hard time sourcing the metal tube. I went and got a torch that had a really nice looking piece for this (and it was cheap) but alas, I could put a 50W bulb in there and still have room to swim. Otherwise it is a great piece! @blokenoname Could I ask (yet again) what you ended up with on the tube size and wall thickness and if possible, a USA source? Everything I look at is too thick even if the size is right.

This is the sleeve on the torch I bought; It is under .01' thick (measuring 0.22mm thick)

49133684188_932d77ac81_b.jpg


The bulbs are 20W (L) and 35W (R)
 
Last edited:

blokenoname

DIY Log Dabbler 😁🪵💪💨💨💨
I'm still having a hard time sourcing the metal tube. I went and got a torch that had a really nice looking piece for this (and it was cheap) but alas, I could put a 50W bulb in there and still have room to swim. Otherwise it is a great piece! @blokenoname Could I ask (yet again) what you ended up with on the tube size and wall thickness and if possible, a USA source? Everything I look at is too thick even if the size is right.

This is the sleeve on the torch I bought; It is under .01' thick (measuring 0.22mm thick)

49133684188_932d77ac81_b.jpg


The bulbs are 20W (L) and 35W (R)

I get my ss tubing from a small hobby shop in Germany. Sadly, I've no US source for you :(
That's the German site: http://www.menzel-modellbau.de/zubehoer/metall--rohre-_-staebe-_-draht-_-messing-_-alu/stahl/1

(@brainiac : Didn't you have an Ebay source for your ss tubing? Maybe that's a more convenient source for TommyDe, than my hobby shop here.)

Search for 'thin walled stainless steel tubing' or 'capillary ss tubing' or even 'telescopic ss tubing'. The tubing from the hobby shop has a wall thickness of only 0,3mm. But 0,5mm will do too. Locally, look for hobby shops, that sell stuff for aero plane model building. That's where the thin walled, telescopic tubing is often used.

For the cartridge driven classic steel core Misty, I use the 9mm x 0,3mm tubing from the site above, plus an M8 ss washer with either 25mm or 20mm OD for a base.
The fitting slide in ss tips for the 9mm heater cover are made from the 8mm x 0,3mm tubing.

For the Halo core Mistys, I use the 11mm x 0,3mm ss tubing and an M10 washer for a base.
 

blokenoname

DIY Log Dabbler 😁🪵💪💨💨💨
Sweet. Thanks again for that @blokenoname . Thin-wall is really hard to find stateside. I've been looking for over a month. And what I did find was not cost effective. I may even order some from Menzel.

It'll seem so! :shrug: Given the fact, that most US logs concentrate on only 3/8" tubing for the heater cover and 5/16" for the fitting tips.

Don't really know, if Menzel does export. Small shop, as I said. But I just remembered another German hobby shop, that does export and also has an English language website :)
https://toni-clark-shop.com/Thinwall-Stainless-Steel-Tubing_1
 

TommyDee

Vaporitor
That helps too :) Manzel listed the manufacturer so that is a third route. I have another smaller torch that I have 2 of. A much smaller OD and a much shorter length. Similar style but well suited for the 20W bulb. I might do up that 35W bulb in the larger SS tube.

Our standard hobby supplier is https://www.ksmetals.com/ They have stainless tubing but very thick walled. I bought their 5/16" solid stainless rod. Wouldn't you know it, it was stained! Not only that, the glue they used to hold the rod to the package pitted the shaft! :\

I still have to cut into the stainless straws to confirm their thickness. But the 12mm OD is just a bit big for me. I'm looking to minimize the time-to-vape from turn on to clouds.
 
TommyDee,

blokenoname

DIY Log Dabbler 😁🪵💪💨💨💨
I'm looking to minimize the time-to-vape from turn on to clouds.
Halo Misty takes maybe 3 minutes, to produce first clouds after turn on. Cartridge and resistor units take slightly longer.
Pretty impressive already, given the fact that it took the Purple Days & co 45 minutes, to heat up to vaping temps a few years ago ;)

But then, Logs are designed to run 24/7 anyway, if need be. So heat up time is actually not a big thing there.
 

TommyDee

Vaporitor
Very true. 3 minutes isn't bad at all unless you're @Jhonzin' of course. :rant: ...<= meet Jhonzin'

There are ways to overcome this time limitation of course, as you can probably tell by my take on this experiment that is my aim. I am very familiar with the 3D printing world where waiting is a bad thing. I watch and wait for my printers when I learned they throw away 1 minute in a firmware pause! NOT HELPFUL PEOPLE! :rant:

But if you want to find a hot 'element', that is where to look. Then follow up on materials and out-gassing. So for now the benign glass of bulbs is more than appropriate for me as mistakes at this level could be ...well ... let's just say, added to all the other crap I've stuffed in my lungs over these many decades.

Although the 35W bulb is more thermal mass, it can be overcome using a warm-up boosted power level. If the volumes work out, the total thermal mass including accounts for gradients could justify the larger bulb and tubing OD. And of course compare that with the seemingly reasonable 12W needed for continuous draw temperature to avoid accidental combustion. That would be the baseline - 20W bulb and absolutely minimal thermal mass in the tubing; but sufficient radiation to continue to supply heat at 12W+/- say 3W for full range with a reasonable ambient. Basically the bare minimum to stabilize at a given temp with rapid rise capabilities. This is basically a huge S/W challenge to keep the log simple but support it with an intelligent controller that needs no intervention except to say I want 420C now. F/W will kick that thing in high gear and beep when temp is reached. I wish I had the S/W to do all this for me :science: DIY it is.

On the other hand, having thermal mass and giving it time to saturate is certainly the right way to treat an oven, no argument there. This concept can provide nice even temperature for longer draws. That heat needs to radiate from the mass. This is where glass comes in nicely. Basically a high mass oven chamber with holes on both ends. It takes time to change that temperature. Stainless will cool quicker. I'm looking to see if the bulb alone can sustain a given temp and use the stainless tube as a shield and restriction only.

And thanks for the VapCap idea. That is my new goal. Real-time VC heater for winter outdoors. I want to hold the log and draw on the VC and have it keep up. Knowing that the VC is not a huge flow provider helps scale the amount of air being brought in. And I want it controlled by a pressure sensitive switch in my hands that heats the log more if I squeeze it harder. And on turn-on, it will goto 35W until it reaches temp. ..which might just be a power hit too :tup:

edit: I just cut up one of the 12mm SS straws. Looks like the wall is 0.4mm. 11.13mm is what I measured for an ID. Works with the 20W bulb and a single strand of ScotchBright stainless scrubbing pad to hold everything centered. This might just work.
 
Last edited:

blokenoname

DIY Log Dabbler 😁🪵💪💨💨💨
@TommyDee

Looking back into the history of Log vape development, the general consensus seems to be, that less is often more ;)

One key point in vape development is the question, how much herb you wanna be able to roast in a bowl/session. Answering that question will determine, how wide your air path needs to be and in turn, what kind of heater you will need to roast your herb most efficiently.
For the classic Log vape, we're usually talking a load size a bit smaller, than a Vapcap full (maybe ~ .05 to ~0.1g?) and a bowl ID between 7mm and 10mm, which means you need an air path of about the same inner diameter and an heat output s/where between ~ 5w and 8w for cooking it properly.
You wanna cook larger loads, like e.g. the 12mm basket screens, the Splinter uses, you gonna need a wider air path and a fatter heater with more wattage.

With an appropriately powered heater then, thermal mass is usually quite overrated and often acts more like a heatsink, than a thermal battery.
First generation Logs like the old Purple Days or Aroma Zaps used a massive ss or brass heat exchanger, that filled up the whole heater well (some pics below) and weighed 150g to 200g alone! With the weight of the wood added, you could get units, that weighed nearly half a kilo :p

The original idea was to have the 5w/20ohm resistor, that served for a heater in those units, in direct contact to the brass/steel of the massive core and then heating up all that metal, till it would radiate enough heat to cook your herb.
Result was, that those early Log vapes took nearly a whole hour for heat up, till the massive core was heat saturated enough to produce some clouds, which o/c was offset by the fact, that these old work horses were meant to be running 24/7 the whole year round anyway. So having to wait an hour for heat up was s/thing that didn't occur very often usually ;)

However, a heat up time of an hour is a crass thing and there were other detriments, like the massive core charring the wood over time, so that the core would become loose or the wood started cracking, when it shrank against the core due to the heat. That required the adding of ceramic insulation around the core then, which made the whole affair even more complicated.

Some next generation Log makers, like 
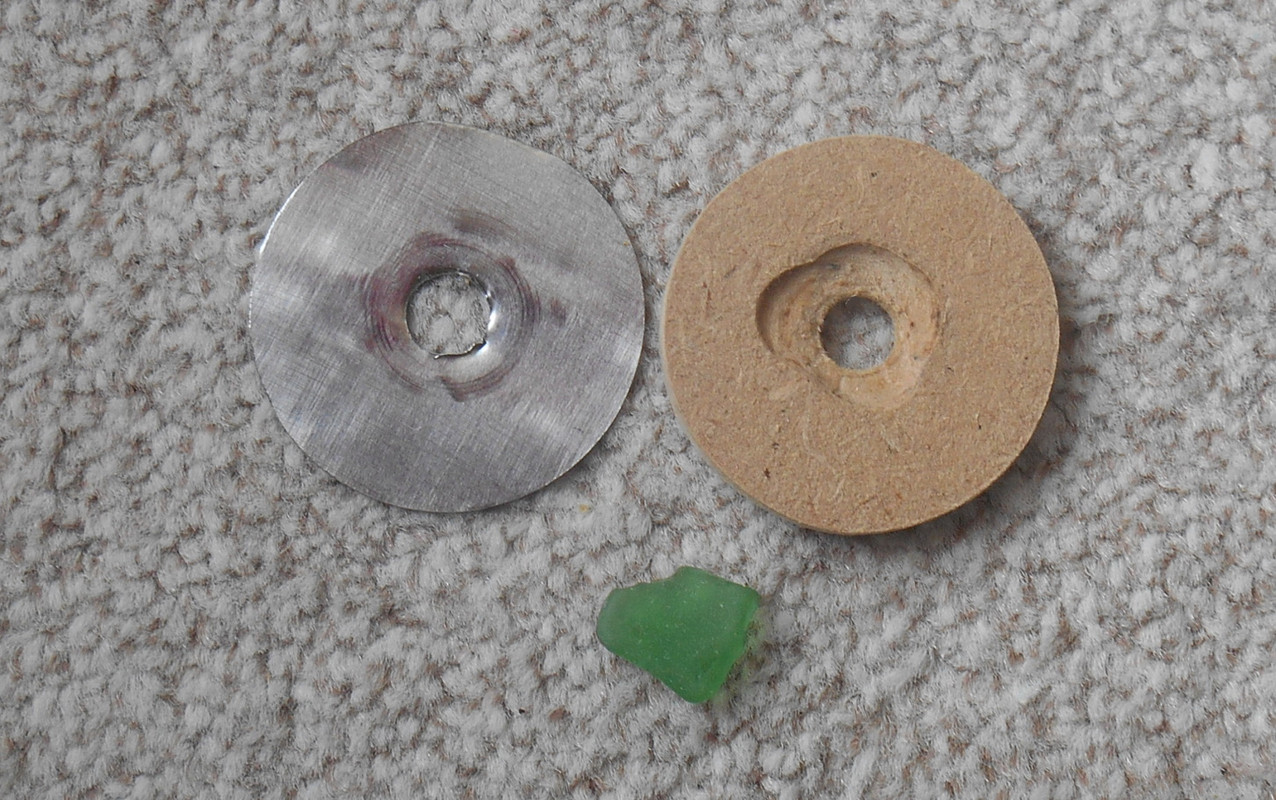
@Alan for instance, gradually began to strip away the layers of that massive core for their own Logs over time, as it became clear, that the central heating tube alone, only insulated by an air cushion from the surrounding wood of the heater well, provided already enough thermal mass, to sustain the needed heat output, while at the same time evading the charring and shrinking problem. You just had to find a way to minimize conduction heat loss to the body, so that the heat would remain mostly concentrated within the confines of the heater cover and be then transferred to your load. Creating a 'heat island', so to speak. So the massive washer battery had to go first, then the outer tube and in the extreme, all that's left is the short center tube of the original core plus a washer for its base, like you see in the HI, the WS and my Misty. The Nano still keeps the outer tube and Dave's UD still uses a closed core design, though with a much more streamlined, lightweight and more efficient internal design. The HI Log's ss core weighs about 6g now! Even the two ss screws holding it in the wood weigh more already :D
It's really more a heater cover now, than an actual 'core'.

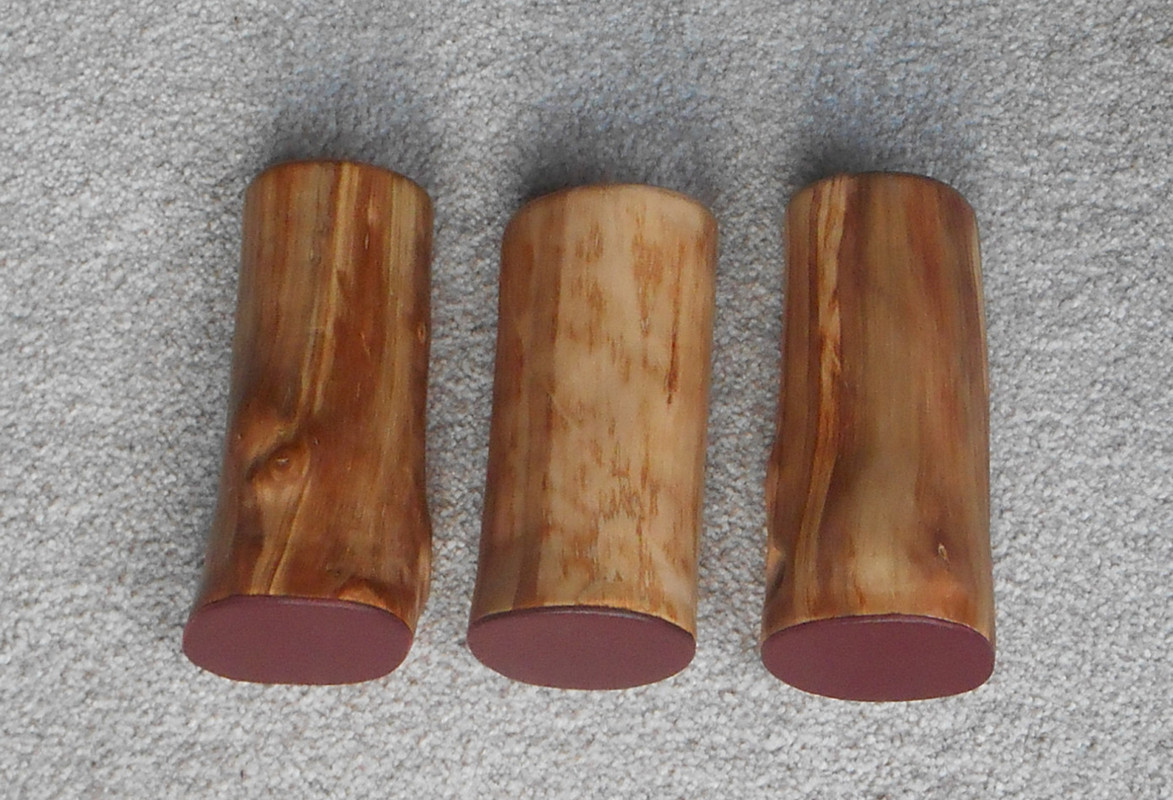
Result was the modern Log, that has a vastly improved heat up time of 5 to 10 minutes now, can be run in 24/7mode, doesn't have charring problems, weighs only a few grams, making it ideal for use with bong and can produce massive clouds from just a pinch of herb and with a heater, that ranges between 5w to 10w at the most, making it almost invisible on your electricity bill, even if you run the little bugger 24/7the whole year round :cool:

From this perspective, employing a more powerful heater just to hurry up the already short heat up time seems rather redundant, especially with the newer cartridge and halogen heaters, that were already selected with a large enough 'reserve' in mind, to facilitate fast heat up and rapid temp adjustment.
I usually run the 7,5w cartridge at a max of about 11v/6w, and that is already short of combustion. Still another volt and another 1,5w to go from there. And if that still isn’t enough… go and get yourself a 14v PS. That cartridge can put out a whopping 36w, if you feed it 24 volts :D

The 10w bulb I also run at ~11v/8w, with another volt and another 2 watts in reserve.

Impressions from the ancients: Purple Days and AromaZap core design


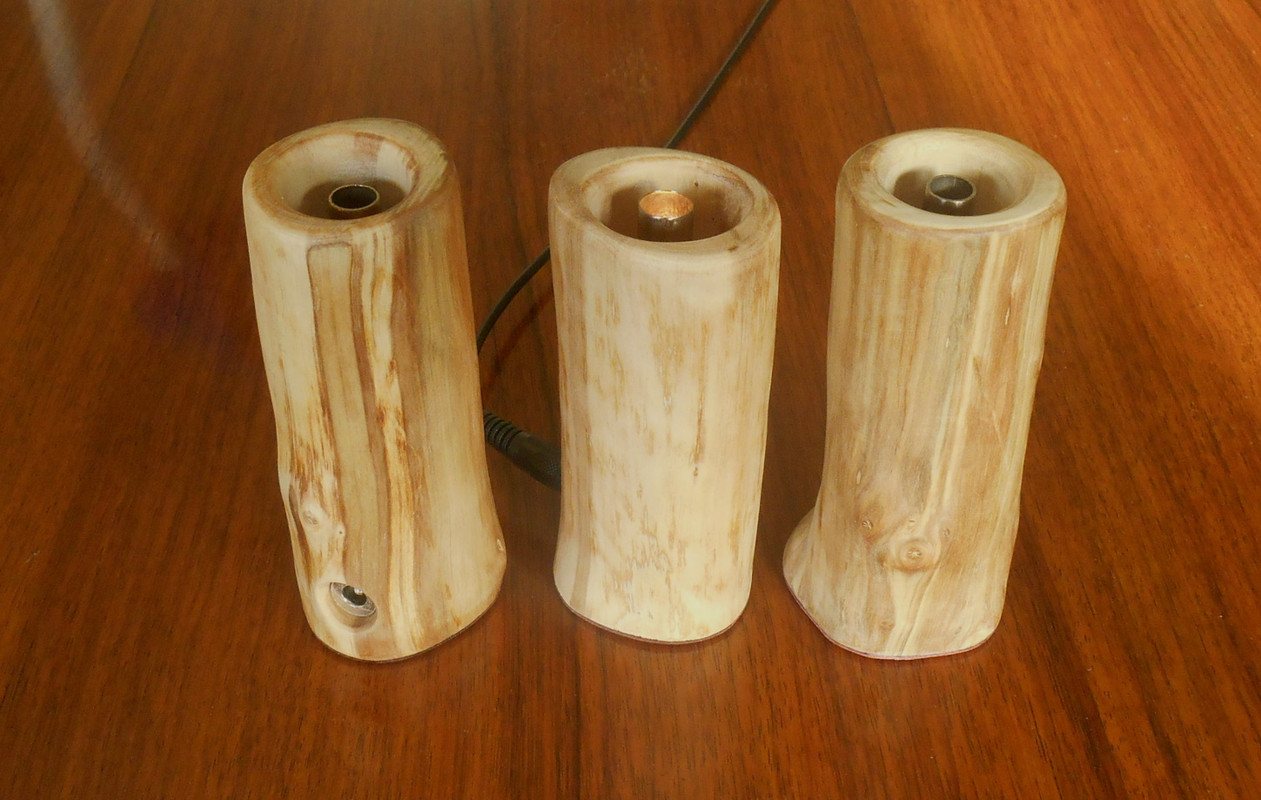
Modern heater covers: Left: Woodscents. Top right: Misty. Bottom right: HI/Heat Island


Anyway… if instant heat up is so important for you in a desktop unit, maybe take a closer look at Alan's i(nsta)Heathybrid, which combines a 510 portable solution (spiral mesh heater) with a base unit, that can be connected to DC power from a PS and also allows for temp control ;)

http://fuckcombustion.com/threads/insta-heat-aka-iheat.24839/


PS: As Vapcaps already abound in the vaping community, they naturally make for perfect Log vape stems and spare you the trouble of having to design all stems and tips from scratch yourself. Just look at the Woodscents.

Also: there is a portable 510 Vapcap heater here, just a few pages back. Uses an OTS workforce mesh heater RDA (Wotofo Profile RDA, with 0.18ohm mesh style coils) and is super easy to build. Just set your box mod to 30w and make big clouds! Don't even bother with all the mind numbing and boring TC stuff, as its kanthal mesh and so TC won't work.

 
Last edited:

Diggy Smalls

Notorious
@blokenoname you are the champion, my friend. Epic post. Solid advice. You do know your log vape history :) Love it

I own the insta heat cartridge and I like it enough that I want to get the base for it. I typically use it at home. Anyway, the load is much bigger, but if you're creative you call reduce it. I used silicone to hold a log vape ss tip inside a 18mm male joint to give it a traditional log vape bowl. It was almost exactly like using my log vape.
 
Last edited:

blokenoname

DIY Log Dabbler 😁🪵💪💨💨💨
@Diggy Smalls

Thanks, man! Now I'm blushing :D

The old AZ/CRZ and PD threads (there is/was o/c also the Wychwood, HGL and a few others) here are real treasure troves of information and log vape history. And so are the contemporary threads.

Got one of the new Square HIs from Alan recently, as that had no waiting list attached to it. Great little vape! :rockon:
The iHeat looks indeed great with that base :nod:
So far, I only own a (v2?) blackwood Splinter, that a mate sold on to me. But did several similar mods for the 18mm joint stem, to reduce it's bowl size ;)
 

TommyDee

Vaporitor
I'm going to owe you a xmas present for your wealth of knowledge @blokenoname . I had a feeling a lot of what I pondered has already been tried. But it tells me I'm on the right path. Bigger loads for me is a thing. Vaping a 1/2G of herb within the confines of an evening is work. When I fall behind, I soon know it. Never had that issue with combustion, go figure. So a heavy hitter and moving away from the VC is a second requirement. Looks like I am set for parts then. Using the preheat technique, I got the 20W bulb to offgas the metals in under 30 seconds. Now I need to find out what was smoking. Time is only an element because it is freakin' cold outside and I am also considering battery power to avoid the tether. Now that I know I need a bigger chamber, I'll have to work that out later. But I have the bits for the heater. Thanks again for the gut check on the development. And have a very wonderful Thanksgiving!

edit: before I forget and the edit goes away - Has anyone experimented with focused light? Literally a flashlight focused on a heating element. This is a potential source of indirect thermal transport. I know today any high power flashlight can burn paper if properly focused. Seen scorched jeans from flashlights too.
 
Last edited:

Hippie

Well-Known Member
PID control of the heater, like the Aromed, is another option but that introduces more parts to wire up and a sensor that needs to go in there somewhere (without messing up the airpath).
Some PID controllers have a 12V line for us to use or repurposing a 24V soldering iron doesn't look too difficult. The ceramic soldering iron elements have the sensor embedded in the ceramic so I'm thinking we should be able to put that in a test tube like @blokenoname has with his EQ repair experiments on page 31 to try temp control without too much messing about.
 

TommyDee

Vaporitor
Oh now you did it @Hippie - You've hit the nail on the head with the tech at a zenith level. Didn't know about the element having the sensor built in. That is killer for the application.
And there are certainly other very usable parts in the soldering station salvage boxes at the local electronics salvage.

I've been burning in the smaller 12mm tube today with a 20W bulb wrapped in the Scotch Bright stainless scrubber. That stuff is tricky to handle but it does a nice job of centering the bulb and adding surface area.
The tube I started with had the coloration styling done to it. The bulb reversed several colors :hmm:
 
Last edited:

TommyDee

Vaporitor
:leaf:
Well... bigger loads just require bigger bowls, that get roasted by bigger Bud Eaters :D


Oh the suffering :smug: Yea, that's where we're going :|:leaf: ==>>:bigleaf::rockon:

...
Crap, the ceramic socket fried on my degassing run. Melted the Teflon on the black wire; froze the white socket in place - solid to the ceramic housing; both contacts loose on the bulb leads. It was above the bulb which it would be on the water-works of many ilks. This was @ 20W. Obviously a more reliable termination is called for. Has anyone tried a crimped stainless sleeve to a stainless wire? Better yet, crimping a stainless tube onto the bulb-lead?

According to this color diagram the tube, steel wool, and screen made it to 540F. There was also a hot-spot well into the 700's. Very localized.
Tempering_standards_used_in_blacksmithing.JPG


The failure was most likely an overloaded contact with high resistance contact on the black wire. The insulation melted from a hot wire, not a hot ceramic socket. I don't know what the white wire was thinking.
 
Last edited:
Top Bottom