Easy to read Skunk Pharm QWISO instructions

killick

But I like it!
Ahh, right. Good ole Ontario and their steel-fisted control on all things fun!

When I did my last run I scraped what I could out of a Pyrex pan, but could see lots of colour in the corners. I have a small container with an inch of Everclear in it, sitting on my desk. I use it to clean glass when it's covered in reclaim, and eventually it will wind up in hot chocolate. It's a purdy gold colour now that it washed the Pyrex! It will probably get used as part of the next EC wash tomorrow. Or hot chocolate... Decisions, decisions... :)

Fresh off the plane and found a brand new roll of PTFEslicksheet and a large slickmat... it looks like a couple of busy days coming up!

And the first run ever of qwiso is kicking my butt! It's quite dark when it's in a ball, but nice and light when stretched. It's pretty stretchy, which clogged the double-coiled burner. When I tapped to see why no smoke a huge cloud burst out. And now I'm finding it tricky to type...

:worms:
 
Last edited:

Grow Goddess

Oil Snob
I used iso 99% was 5$ for 500ml (i hate ontario prices, even iso is costing double lol I wish i still lived in alberta i miss the everclear the hours of the stores were awesome too, cant buy anything alcoholic after 10pm in ontario)

I will try another qwiso run as soon as i have an opportunity, i think stirring it and freezing should help.

Would using a bit more iso be a good idea to soften it up a bit to transfer? Would it not cause more of the good stuff to go away if adding to an almost purged substance?

I don't believe it will cause any of the good stuff to go away. As long as you don't use heat, most of the good stuff should stay. Just allow it to evaporate off the added solvent before covering the storage container. Stirring a few times per day will probably be required. It will help it to evaporate more quickly.
 
Grow Goddess,
  • Like
Reactions: killick

Monsoon

Well-Known Member
There is a little more in the left corner and a decent amount of residue on the rest of the pryex as well! That is a smaller 7.5x5.5 pyrex, but still hoping for at least 10%, looks like maybe more. Will know monday.
fnva1g.jpg


There is still some iso in there, would love to be able to scrap, purge then flatten, but I'm headed out of town for the weekend. So this is going to sit and evap OG style for two days. Should have my slick pads waiting for me when I return so I can try to flatten and make shatter. The last two times I missed the tips on how to flatten and heat (a little) to shatter. So I just rolled the crumble into a ball and just used a razor to cut chunks off.

Oh yeah went back to the hair dryer this time. Worked well the first time. This time I was able to rig a holder for the dryer with my bike stand! Didn't have to stand around and breath in those fumes! Worked great. Just checked on it every couple of minutes went it got close to this point.

When it pools like it does in the picture it makes it harder for the ISO below the surface to evap out. When it gets to the last bit of liquid I rock the pyrex dish back and forth by hand until the liquid is evaporated so that the oil is spread out thinly and evenly over the surface of the dish. If the liquid is already all gone like in the picture, I just add a bit of ISO first to redissolve it. When using a large dish, you'll be able to get it thinner than after scrapping so it's best to take advantage of it.

So once the oil is settled evenly over the dish, I usually purge at 100-115F for 1-2 days, then scrape, flatten and purge on an OilSlick mat for up to another day at 110-115F until bubbles stop forming and I'm confident it's fully purged.

If you want to reduce the risks of inhalation during the process, you should get an organic vapors respirator to filter out the fumes.

I just use another razor to scrap everything to the end. Then I transfer that to a container, parchment paper, slick pad, etc. You'll need to do this a few times on both razors and you should get most of it.

That sounds like a pain in the ass (and slightly dangerous with razors). A much easier way is to place the gooey blades on your non-stick surface, pop in the freezer for 5-10 minutes and then you'll be able to break the oil off with just a slight amount of pressure. After that I put the bits onto parchment on my heat plate, fold over the paper and flatten and then back in the freezer so I can transfer to an OilSlick.

Edit: I read through the thread and noticed there's no comprehensive step-by-step guide yet so I'll update mine and get it posted here soon. Pretty much started with Skunkpharm's tek and just built on it based on stuff I read online and through my own trial and error.
 
Last edited:

canadianleaf

Well-Known Member
Is a concentrate necessary for e liquid? I do see some recipies where bud is simply soaked in pg/vg mix for 8 hours but i am not too sure if that will work
 
canadianleaf,

Monsoon

Well-Known Member
Monsoon's QWISO Tek

I put this together as an easy, low cost step-by-step guide for people looking to start making oil/shatter using the QWISO tek. Constructive criticism and tips are welcome, I'm always looking to improve.

What you need:
  • Up to 35g of weed
  • Rectangular pyrex dish, the bigger it is, the faster the evaporation time.
  • Colander that fits a basket coffee filter
  • Unbleached basket coffee filters
  • Fine mesh strainers
  • Large bowl
  • 500ml Pyrex measuring cup
  • Weider shaker bottle or any other seal-able container that's safe to use with ISO (ie PP-5 plastic)
  • 99% ISO
  • Window scraper and .012" razor blades
  • Parchment paper
  • Infrared/laser temperature gun
  • Heating plate that fits the pyrex dish
  • Paper towels
  • 1L containers, glass or PP-5 plastic, food containers work well.
  • Timer
  • cheesecloth or silkscreen

Optional:

Setup Notes

There are several ways to modify a cheap griddle/heating plate for an oil extraction. I found placing a silicone cooking mat from the grocery store on griddle and then a wire cooling rack helps to maintain a more consistent heating temp. A wire cooling rack is also useful to cover the Pyrex dish so that you can then drape a cheesecloth or silkscreen over it.

Cleanliness

To get a quality end product, you need to be careful to avoid getting outside contaminants in during the process. That includes water so make sure everything that comes in contact with the oil solution is as dry as possible. Wiping things down with ISO instead of water will help. Use fresh paper towels so as to avoid contaminates from crossing over via a cloth.

Prep

Weigh out up to 35g of flowers, break them up by hand into popcorn size buds, put them in the Weider shaker bottle and put in the freezer along with your ISO bottles and 500ml measuring cup. Wait at least 6-12 hours. I freeze 2 liters of ISO for up to 35g, but usually end up using closer to 1.5L.

Wash

Place your mesh screen strainer over your large bowl and then place the colander on top. The mesh screen catches a lot of larger particulates prior to filtering but could be skipped as long as you strain it right after. Just prior to starting, pour your ISO from the bottle into the cold Pyrex cup. This will allow you to dump it quickly into the shaker bottle and save you a few seconds of pouring.

Take your material from the freezer, start your the clock and start pouring the ISO into the shaker bottle with the frozen buds as quickly as possible. Make sure the buds are entirely covered with liquid. Then screw the lid on and start swirling and shaking. Pouring in the ISO should take 5-10 seconds and you should have it all poured out into the colander by around the 30 second mark, 40 at the latest.

Once in the colander press the bud down lightly with a spoon and then loosen up the buds and liberally pour some more ISO over it. This will wash out extra cannabinoids without exposing it to the ISO for very long at once and it helps with the yield a lot. Then press the bud down again and scoop it into the shaker bottle for wash number 2 and pop it back in the freezer to help keep it cold. The weed should be scooped out by T+2-3min at the latest, the sooner the better. Generally the longer you go, the more risk of undesirables leaching out, but I've found these timings to be safe.

Next pour the mixture through another fine mesh screen and into a clean/dry 1L container. This will help the filtering stage go faster since it reduces clogs and means the contaminants are not leeching into the solution.

Second wash is the same as the first but you'll need less ISO since the buds are already moist. When done, seal the containers and place in the freezer until you filter them, it helps to push the sediment to the bottom and hopefully reduce any leaching from particles until it's properly filtered.

Next clean your colander and mixing bowl with hot water and wipe them completely dry with paper towels. Alternatively you can wipe them down with ISO avoiding water entirely.

Place 2 unbleached coffee filters inside the colander and wet them completely with some ISO. Then place it over the mixing bowl and start pouring your ISO solution in. The filters can get clogged quickly if there's a lot of particulates so you may need to change them out a few times to process all your liquid. Start by filling it halfway and seeing how it goes. If it stops flowing, you can try lightly swirling the colander or worst case carefully pick up the filters and pour it back into the container to continue with fresh filters.

Once it's filtered put it into a clean/dry 1L container and then repeat the filtering process a second time. It should filter pretty quickly and this extra step will help to reduce contaminants in the final product.

Evaporation

Wipe down the Pyrex dish with ISO and place it on the griddle/heating plate. Pour in either one or both washes and then use a temperature gun to monitor the temperature of the solution itself. You should usually aim for 100F or below to be safe and in case of temperature spikes. Cover it with a cooling rack if you have one and then a silkscreen or cheesecloth and keep an eye on the temps periodically. Most cheap griddles suck at maintaining consistent temperatures so you may need to tweak the dial a lot to keep it at the desired setting. Also make sure to take temperature readings across the entire dish since it can vary. Should take about 24 hours using a large Pyrex dish and some heat.

For ventilation, open a window (yes, even if it's -30 outside), run the oven exhaust and air out your place /room every couple hours. The risk of an explosion is much smaller than with butane but it can still ignite if it concentrates too much in one place and it's not healthy to breathe in too many fumes. An organic vapors respirator mask will help to reduce what you breathe in.

When the ISO is nearly gone, pick up the dish and rock it back and forth to try to get it evenly spread out for purging. Eventually the oil solution will stop moving and it's then ready for the purge stage. If by chance it pools up first, you can pour in a tiny bit of ISO in and then rock it back and forth to even it out. You want it as thin as possible so that the remaining ISO has a chance to evaporate out.

Purge

Try to keep the temperature of the oil around 110F and no higher than 120F, if you have a shitty heating plate you have to get frequent temp readings to ensure it doesn't get too hot. Going much higher for too long will kill the flavor in the oil and you can literally smell the taste evaporating away. Make sure to take readings across the whole Pyrex since the temperature may vary. Probably aim for anywhere from 12 to 48 hours and make sure to keep it covered to prevent debris from getting in. When it's ready you should be able to glide a (clean) finger across the surface without it sticking and if any does then it should harden quickly at room temp.

Next scrape it up with razor blades using a window scraper (blade holder). Starting around 110F it should have a taffy/oil consistency and not powder up. Place the blades on parchment paper and put them in the freezer for 10 minutes. Then break the shatter off the razor blades onto the parchment, fold the paper over and press it out flat with your fingers on the heating plate until it's super thin and then back in the freezer.

Another 10 minutes later peel it off and put it on an OilSlick Duo pad for final purging at 110F to get any last bits of solvent out. Use the other pad to flip it over a few hours later. The bubbles probably won't pop but they'll be dimpled on the bottom when you flip so the gas will release then. You have to sort of guess when it's done, I usually stop when there's no more new bubbles and before it has a chance to budder up. White streaks are a sign of where it has started to turn to budder.

Should be good to dab right away but letting it sit in the open air for an extra day or two helps to harden it bit and makes it smoother to hit. If it sizzles at all, it needs more time. Any white streaks in the slab are moisture (correct me if I'm wrong) and will budder up first and spread to the clear parts. If possible, break up the slab around those white streaks. It should still be fine to dab, just isn't as pretty as clear shatter. Worse case it's great for edibles.

Final Results:

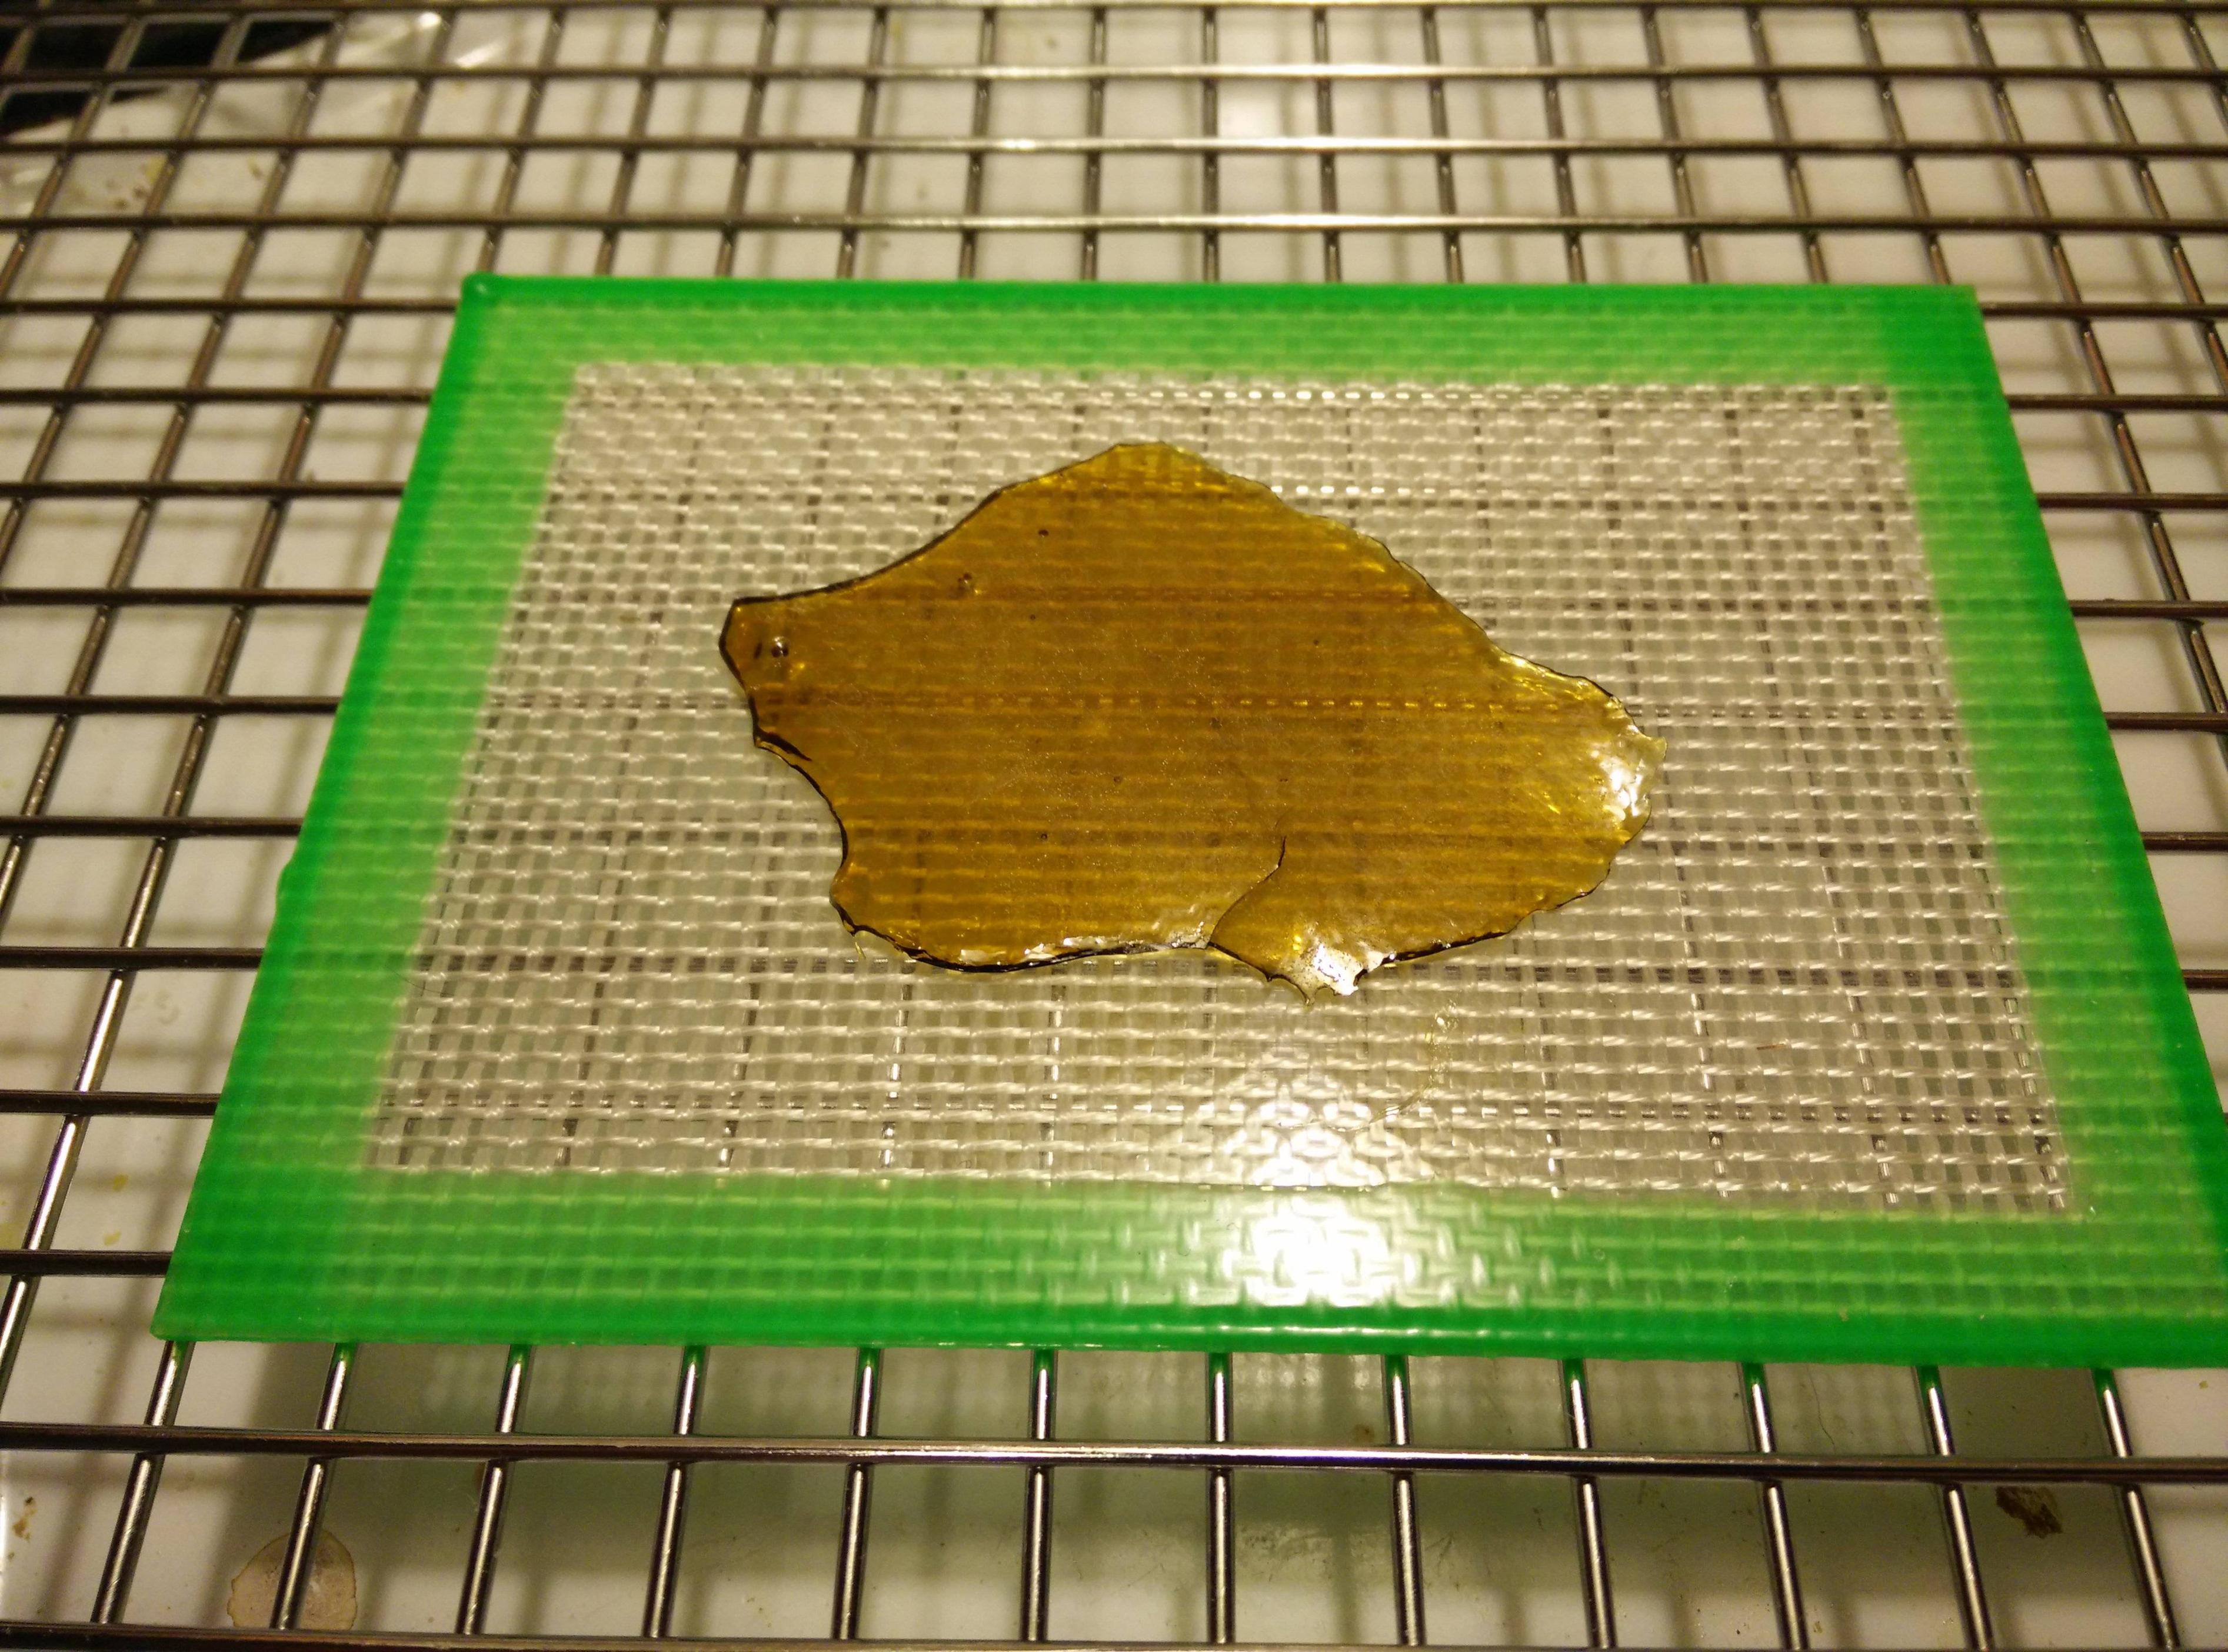
If you followed all steps you should get something similar to the photos below.

This is some week old Jack Herer I made using the tek:

NOanOaS.jpeg


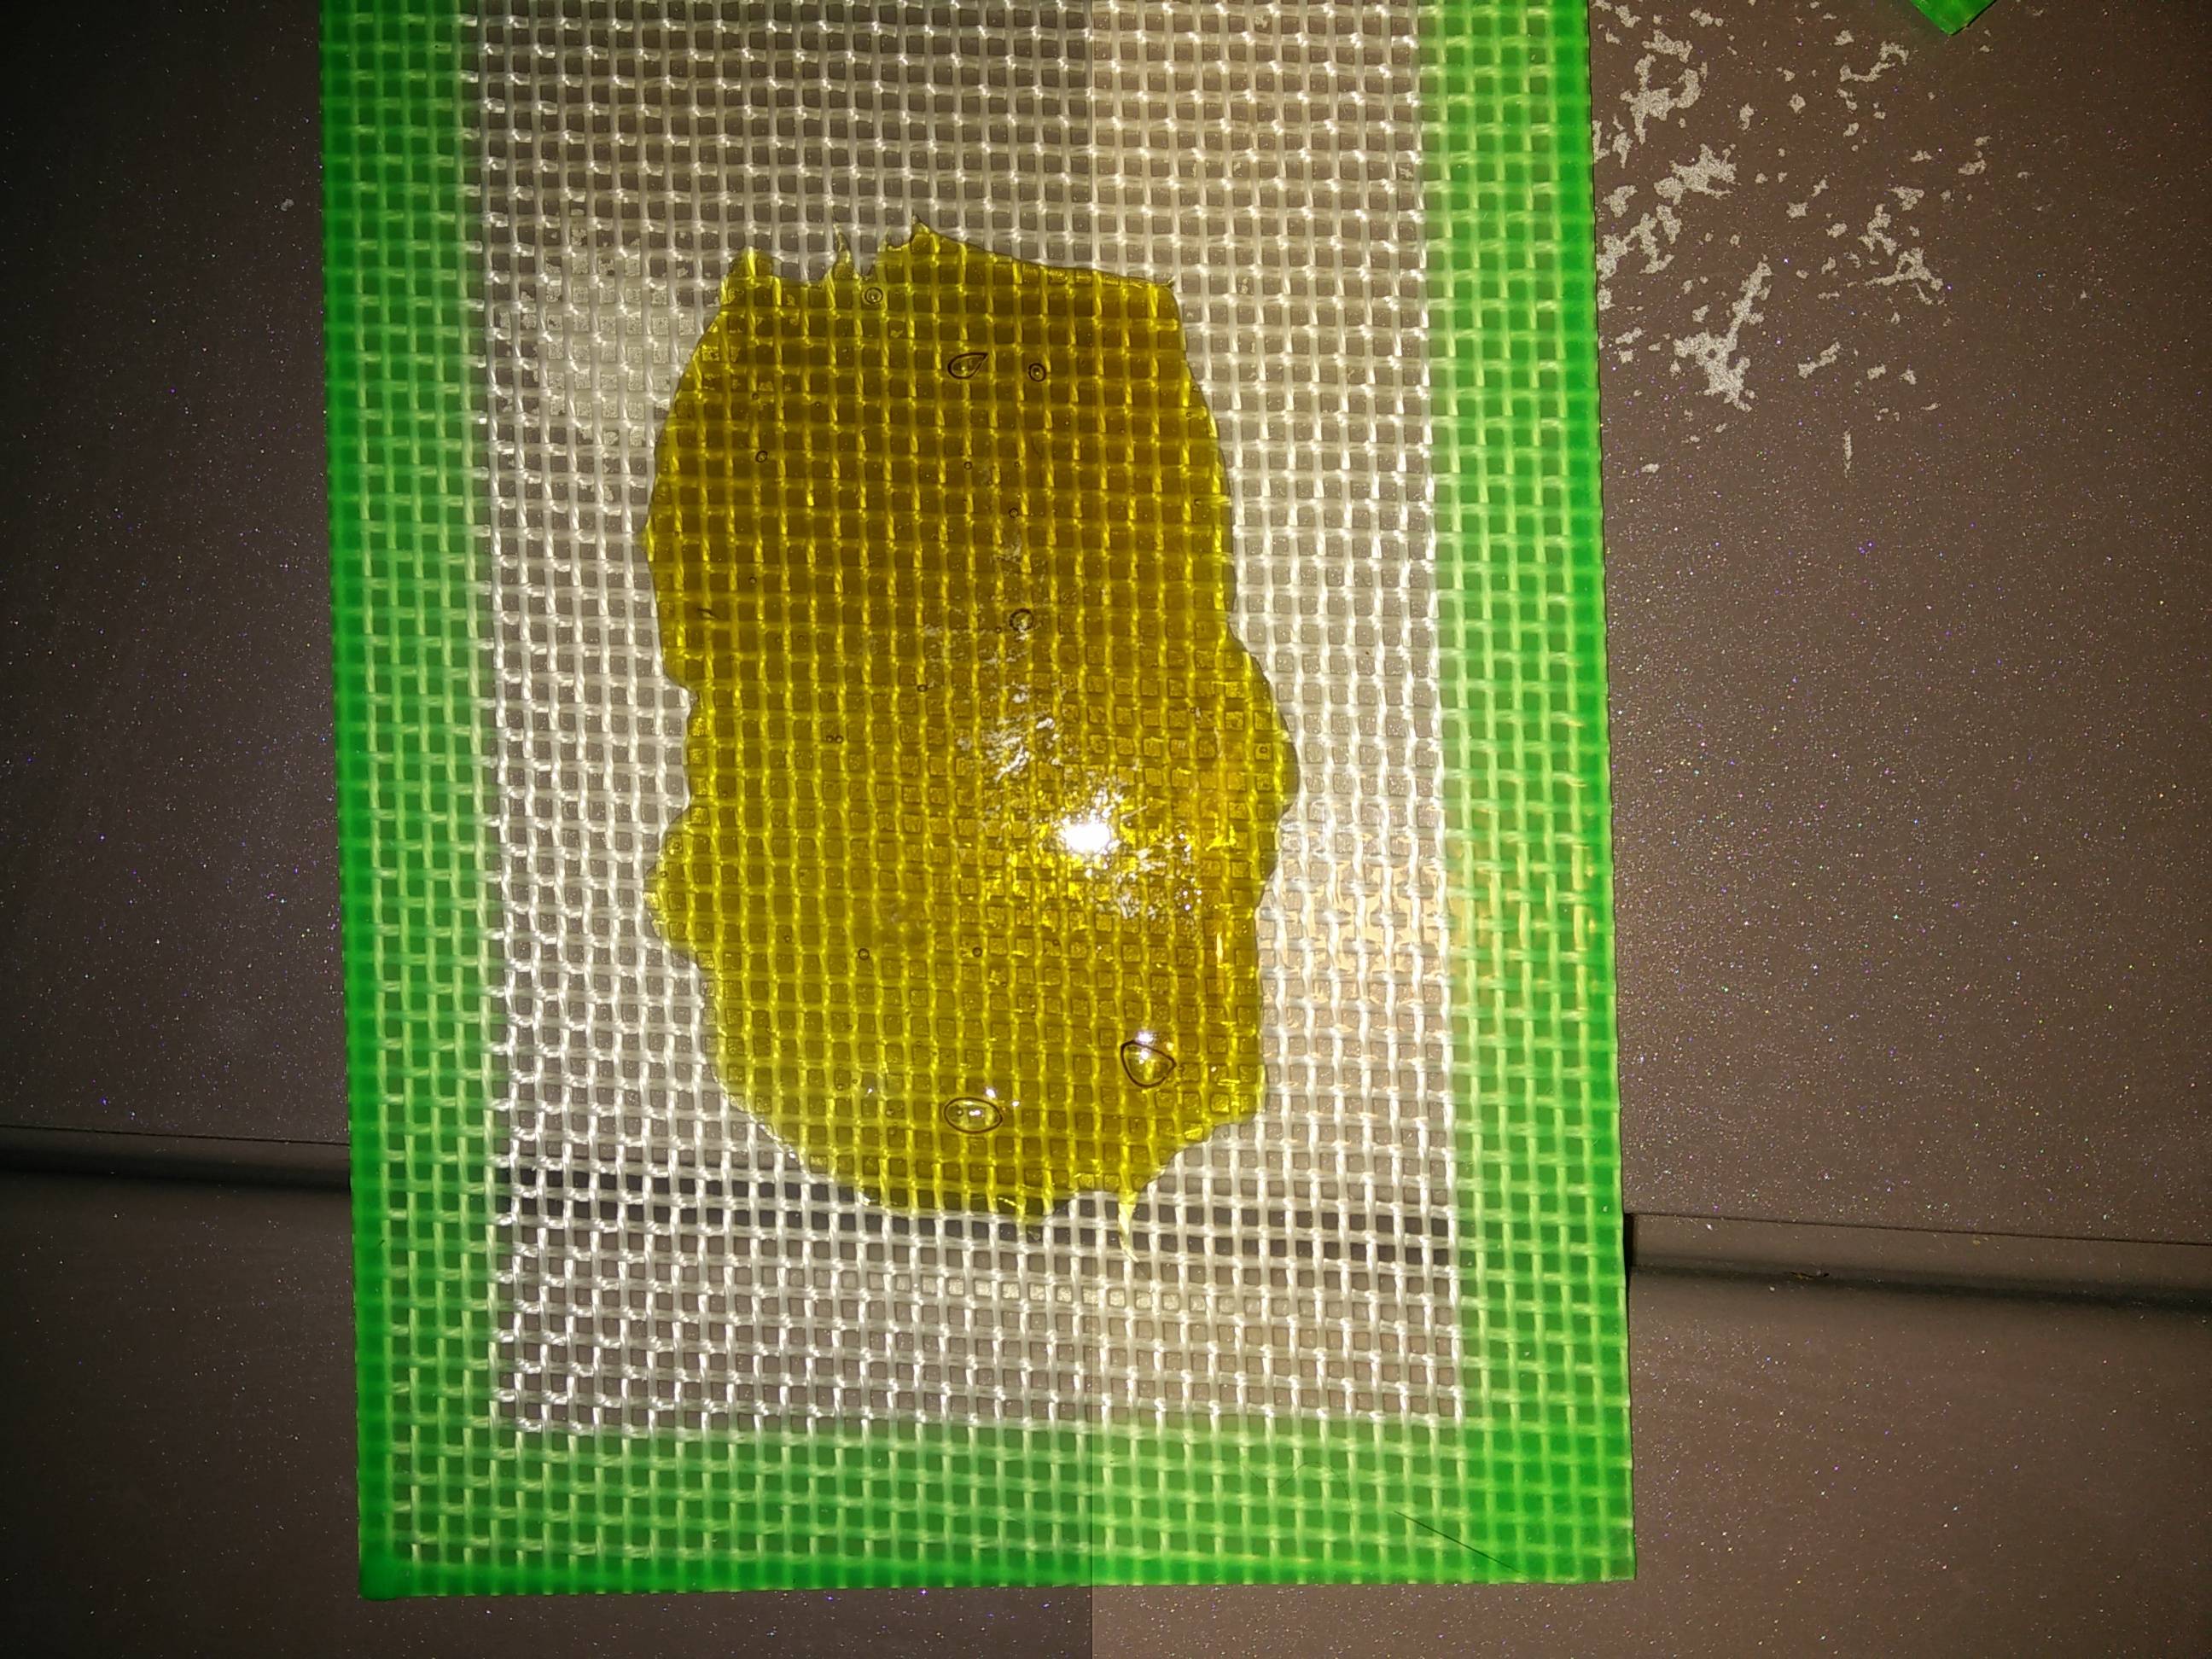
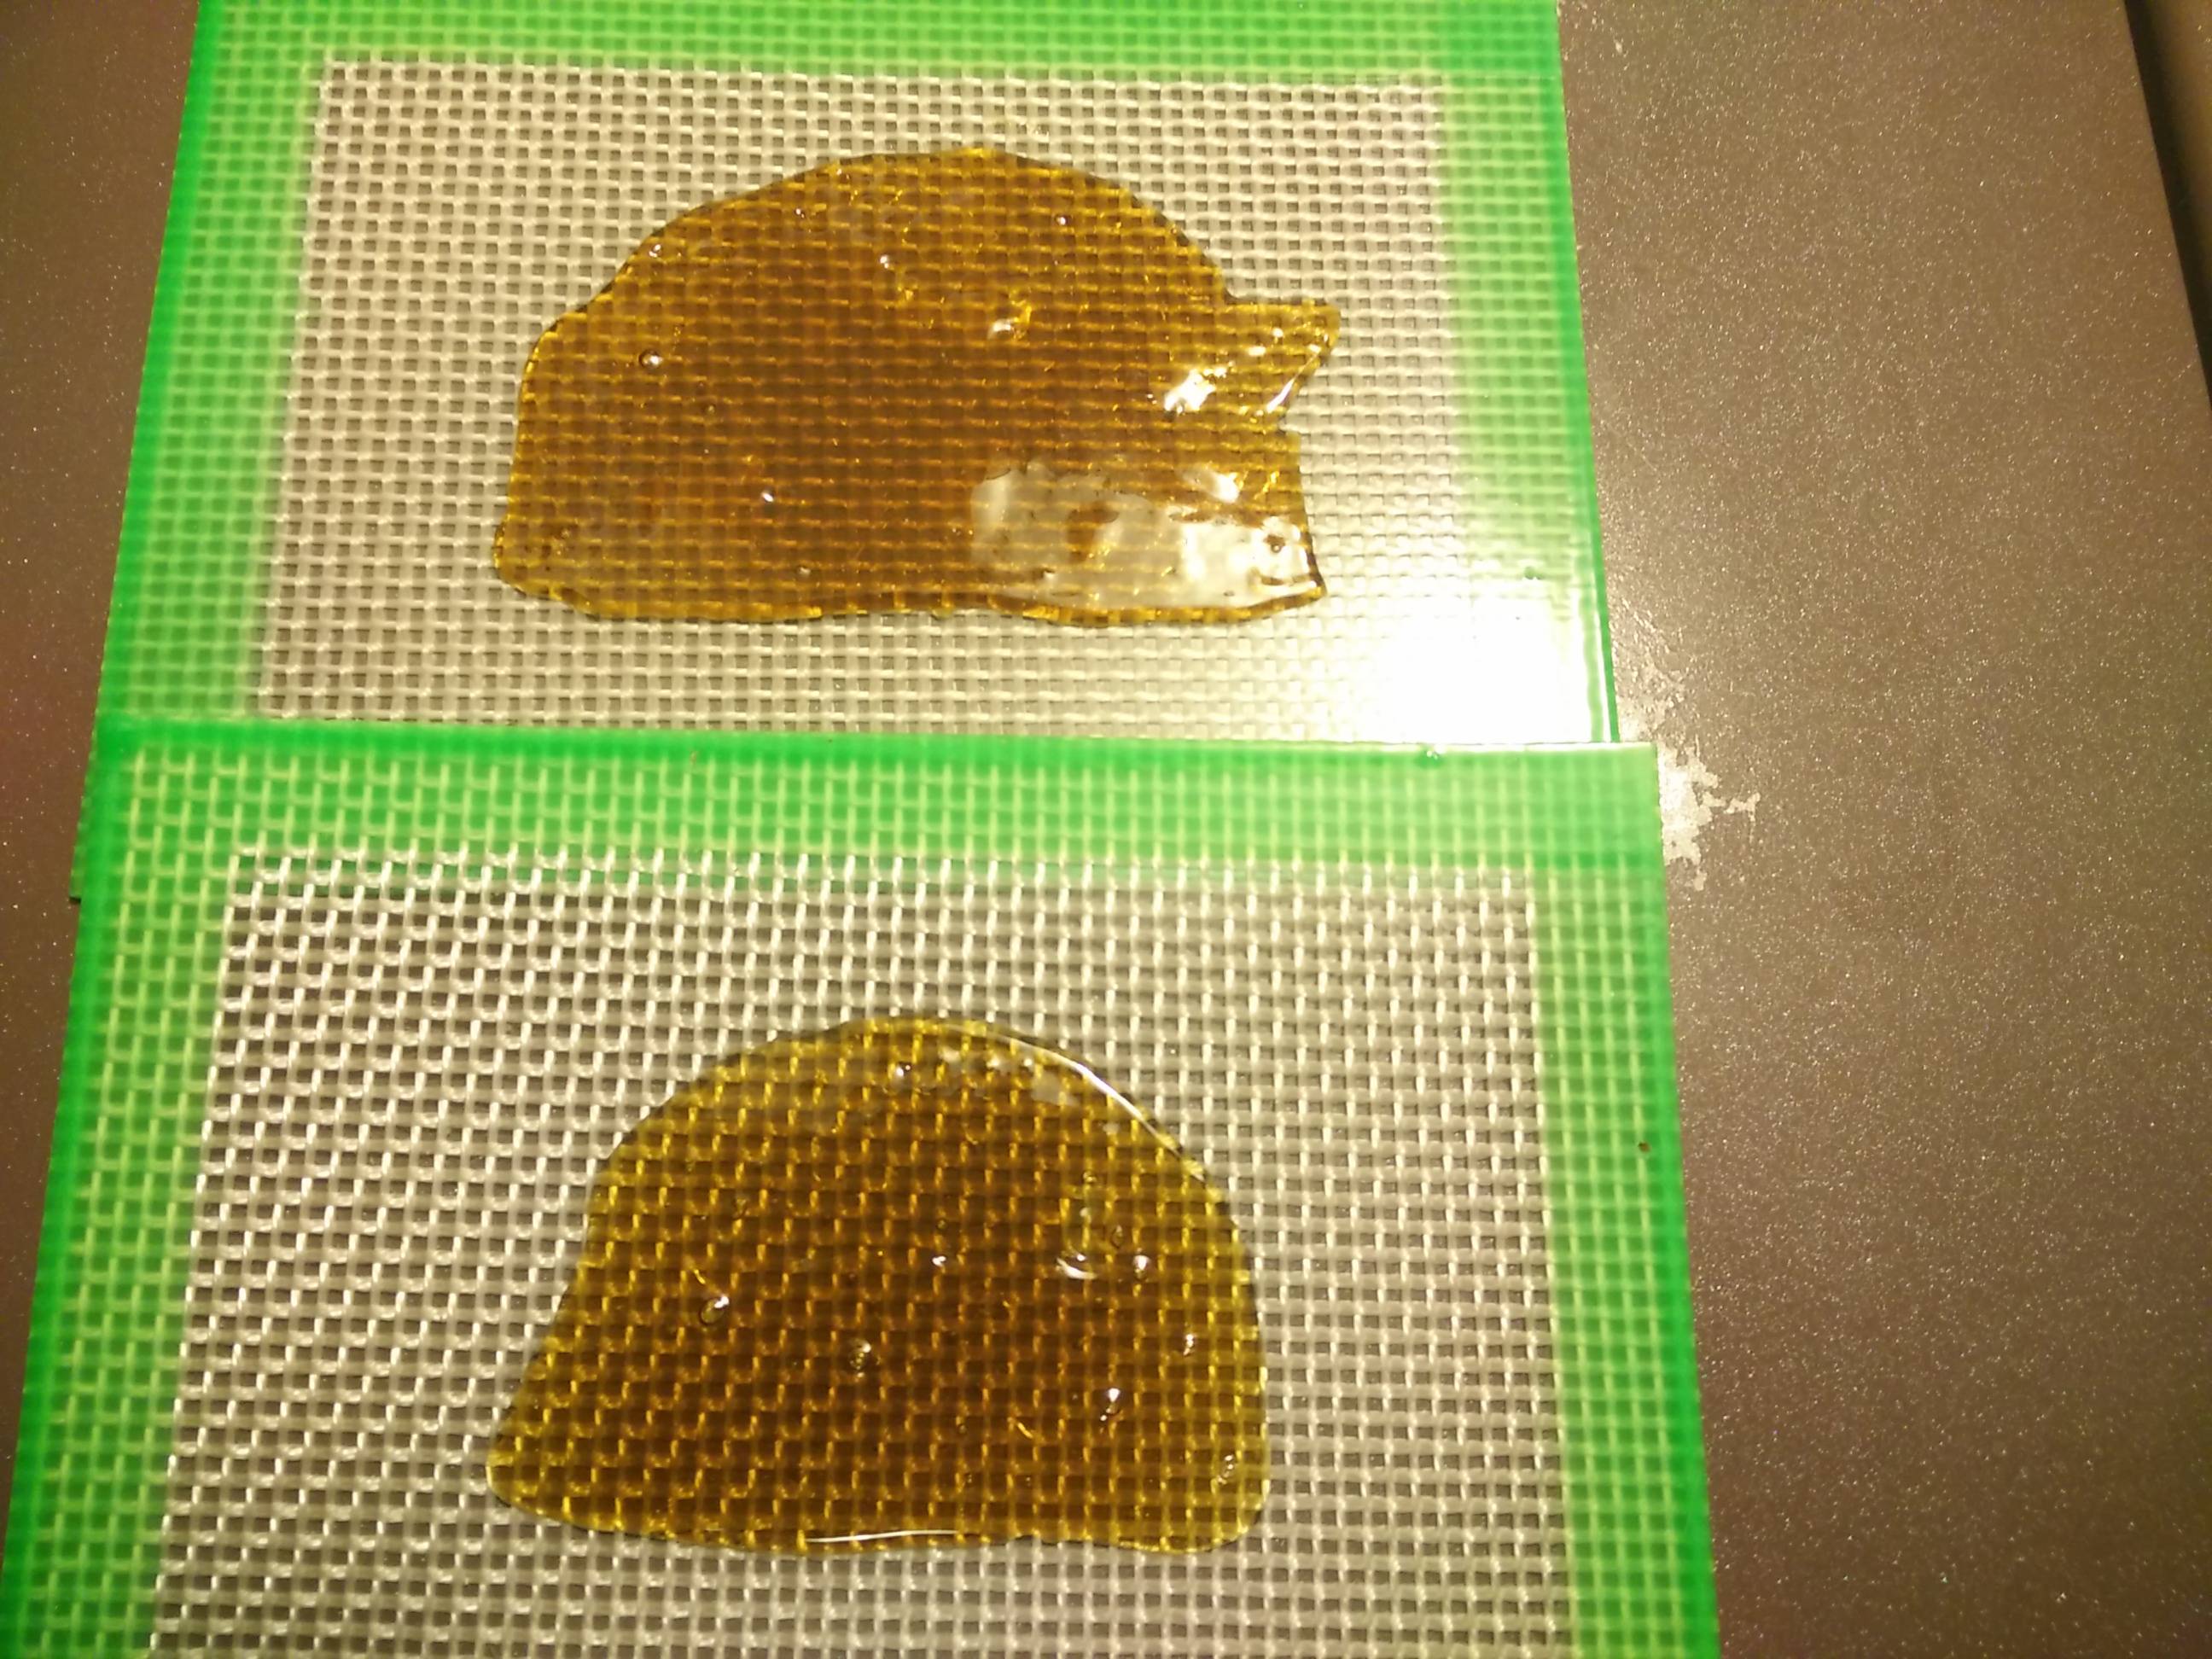
This is from a different batch that shows the clarity better:

1zVv6zM.jpeg


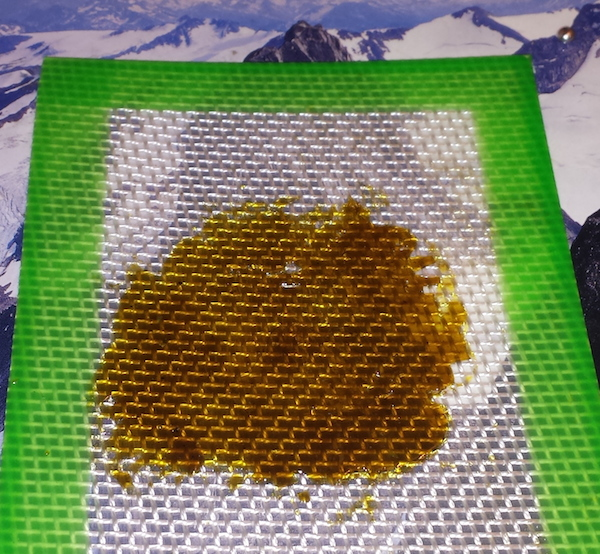
Some outdoor I processed recently, photo taken during final purge:
ljgLAto.jpeg
 
Last edited:

killick

But I like it!
@Monsoon Nice post - thanks for putting the effort in! The only piece I'm missing is the drying step - IIRC 30 minutes in a 200 degree oven. Not as a decarb step, just to get things nice and dry prior to freezing. My first batch I missed that it was for drying and decarbed, which made things a lot darker than needs be...
 
killick,

Monsoon

Well-Known Member
@Monsoon Nice post - thanks for putting the effort in! The only piece I'm missing is the drying step - IIRC 30 minutes in a 200 degree oven. Not as a decarb step, just to get things nice and dry prior to freezing. My first batch I missed that it was for drying and decarbed, which made things a lot darker than needs be...
I never do the drying step but my source material is usually between dry and nicely cured. I think it will make less of a difference as long as your material and ISO is properly frozen beforehand.
 

killick

But I like it!
Good stuff - thanks! I just made a 45g batch of cocobudder. Tomorrow is a new day, and there is 1.8l of 99% ISO sitting in the freezer. I do appreciate your instructions and will be trying them out tomorrow. I have a new roll of PTFE parchment and some new Oilslicks, so just need the initiative now :)
 

negan

Well-Known Member
2IMe3jc.png


Finished it up today. Around 3ish hours on 110. Let the stuff it my pic above air evap for 2 days. Meant to grab a pic after I got home (before I heated purged) but forgot. Not sure how much it is as the only scale I have is for food and only reads in 1 gram increments. Probably a little under a gram. This is my best attempt so far!

Thanks everyone for the flattening tips on this post and others.

Just for kicks I might try an EC wash with the dried bud for this batch and the screen dust from the last two attempts.

Getting a little bit of purple herb (no name) this weekend. Looking forward to making some qwiso with it.
 

canadianleaf

Well-Known Member
I seem to have trouble finding the oil slick mats but i am 99% sure i am looking at wrong spot.

I ended up with 2 free bottles of ej mix so i do want to try qwiso again, just need to find time and somewhere to do it

I am trying to get someone to mail me everclear from alberta if that works out this will be a fun process as i will most likely end up consuming some of it directly. @negan how much bud did you use for that run?
 
canadianleaf,

Monsoon

Well-Known Member
I seem to have trouble finding the oil slick mats but i am 99% sure i am looking at wrong spot.

I ended up with 2 free bottles of ej mix so i do want to try qwiso again, just need to find time and somewhere to do it

I am trying to get someone to mail me everclear from alberta if that works out this will be a fun process as i will most likely end up consuming some of it directly. @negan how much bud did you use for that run?
Yeah Canada sucks for buying dabbing supplies. TorontoHemp sells authentic OilSlick products, though the 2 times I've ordered from them they've taken a week to ship. There's AquaLabs too if you're okay with US Dollar prices.
 
Monsoon,

killick

But I like it!
I ordered a bunch of stuff off Amazon.com and got Prime shipping. Ptfe silicone parchment and a few larger and smaller oil slick mats, as well as a thermometer gun.

The only problem I have is this - I really smrt, so I used the PTFE to line the evap tray. About a 3rd of product flaked off it like sunburn skin, but there is still a bunch stuck to it. I put it in the freezer a couple of times hoping that would get it loose but no joy. Just about to try a hair dryer, and if that doesn't work I'll rewet it and evap again. Unless someone has a great tip that I don't know about? Anyone?
 
killick,

negan

Well-Known Member
I am trying to get someone to mail me everclear from alberta if that works out this will be a fun process as i will most likely end up consuming some of it directly. @negan how much bud did you use for that run?

I used about 4 grams the first run.
 
negan,

Monsoon

Well-Known Member
I upgraded my tek in the last couple weeks and have added a small vacuum purge setup with heater pad from BestValueVacs and a Buchner funnel and flask for filtering. The vac I'm still trying to nail down, I'm aiming for shatter and let's just say I have a lot of crumble right now. I have gotten some better tasting shatter from the vac compared to just a heat purge and some of my "finished" product benefited from some time in there too. Once I start getting consistent results across batches I'll do a write-up of the steps I took.

The Buchner funnel and flask for filtering was worth it for the time saving alone. With 2 coffee filters it would take up to 30-60 minutes to completely drain on it's own since the filter would get clogged. With the Buchner it's around 5-10 minutes depending on the filter size/speed. Probably going to go with Fast (17-20 micron) and then Slow (2-5 micron) to get the last bits out. Not sure if I'll notice a difference with the extra filtering compared to coffee filters but it can't hurt.
 

startrec

Active Member
Hello guys
I need your experience . In my country, it's not possible to buy pure alcool or iso with 90% and more.
(i used this technic during the 80's when it was possible to find iso ). I have found 95% alcohol in Italy where it's possible to buy it freely to make traditional liquors. the more commons are called Buongusto and Italcoral. i think they are made with grape . I think its like similar than grain alcohol or ever clear , but is limited at 95%
is it possible to make a good extract with this alcohol?
Have you specific informations for this type of food 95% alcohol?
Are the washing time, number of washes ... the same than in the tutorial?
How many grams of buds it must be used with a liter of alcohol, considering that it takes several washings?

Thank you for your advice
 
startrec,

herbivore21

Well-Known Member
Hello guys
I need your experience . In my country, it's not possible to buy pure alcool or iso with 90% and more.
(i used this technic during the 80's when it was possible to find iso ). I have found 95% alcohol in Italy where it's possible to buy it freely to make traditional liquors. the more commons are called Buongusto and Italcoral. i think they are made with grape . I think its like similar than grain alcohol or ever clear , but is limited at 95%
is it possible to make a good extract with this alcohol?
Have you specific informations for this type of food 95% alcohol?
Are the washing time, number of washes ... the same than in the tutorial?
How many grams of buds it must be used with a liter of alcohol, considering that it takes several washings?

Thank you for your advice
Welcome! You will find that 95% grappa is perfect so long as the other 5% is water (I'm sure it will be given that grappa is for drinking!).

You should find this just as effective as everclear or spyrytus (by the way, you should be able to buy spyrytus in Europe :) ).

Use my QWET tutorial instead, it is in the concentrates section of FC here somewhere lol - exact same name as this thread except 'QWET' instead of 'QWISO'.
 

VapourHaze

Rexcornish on IG, Vaping since '02
Just took 10g of very avg bud.

Used 99 iso. Everything frozen over night.

3 x 20 -30 sec washes .. all in the same dish (im lazy)

Looks like piss but a little touch greener. Will let you know final yield after.

1.21 yield of fairly dark gooey crystalline oil. Smells really good kept a good terp profile. 12% from very average starting product. Was only hoping for a gram so pretty happy
 
Last edited:

On.ca-guy

New Member
Hello everyone! I too have been reading (and drooling) over the prospects of doing this for my regular E-cig. I use a Kangertech reg cartomizer, just an adjustable voltage on the battery. I want to be able to make a concentrate from the weed I buy from my reg guy. He doesnt and I dont know what strain or any of the scientific parameters of the weed. I smoke it I get a good buzz.
First of all I read somewhere that for e-cigs the weed should be decarbed because the temps of the reg ecigs may not be hot enough to boil/burn the THC.
Next, I read that to have a more golden colour then its best to do your washes as cold as possible for brief washes. Is this true for both carbed and decarbed weed?
And, What do I need to do to make an oil that does not harden at room temp? or will mixing it with ejmix while its warm (150 or so) keep it as a vaporable type concentrate?
Thank You all in Advance for you assistance!

P.S. Seems I am 6 months behind Canadianleaf re Alcohol/everclear/ejmix issues.
 
On.ca-guy,

VapourHaze

Rexcornish on IG, Vaping since '02
Hello everyone! I too have been reading (and drooling) over the prospects of doing this for my regular E-cig. I use a Kangertech reg cartomizer, just an adjustable voltage on the battery. I want to be able to make a concentrate from the weed I buy from my reg guy. He doesnt and I dont know what strain or any of the scientific parameters of the weed. I smoke it I get a good buzz.
First of all I read somewhere that for e-cigs the weed should be decarbed because the temps of the reg ecigs may not be hot enough to boil/burn the THC.
Next, I read that to have a more golden colour then its best to do your washes as cold as possible for brief washes. Is this true for both carbed and decarbed weed?
And, What do I need to do to make an oil that does not harden at room temp? or will mixing it with ejmix while its warm (150 or so) keep it as a vaporable type concentrate?
Thank You all in Advance for you assistance!

P.S. Seems I am 6 months behind Canadianleaf re Alcohol/everclear/ejmix issues.

You dont need to decarb your weed to work in ecigs. To get higher quality yes freeze everything and do short washes .. 20-30 sec max do this regardless. There is plenty of great qwiso info all over fc. When you mix it with ej it will stay liquid. If you want a cheaper option than ejmix use peg400 then mix with pg to taste.

Also you need a decent tank. Aspire nautilus mini is recommended as is the smaller k1. Also the equivelent Kangertech products. You want something that wicks from the bottom with gravity not the cheap old skool ones.
 
Last edited:
VapourHaze,
  • Like
Reactions: ataxian

On.ca-guy

New Member
Thanks Vapourhaze for your reply. I did a small experimental batch the night before your reply without decarb. I admit though that I did not follow the temp guide and was impatient and wanted to try....something!
So a quick summary...3.5 grams, usual stuff...didn't break up buds and they weren't frozen as I just picked it up, so moisture content was probably on the high side.
99% ISO was cold out of the freezer...around 55 degrees.
2 washes, first wash was approx 2 mins, 2nd was 1 min, did a quick rinse and squeeze at the end. Of course it was into a larger mesh strainer type then through an u bleached coffee filter onto a white plate (cheaply from Walmart)
Evaporated with just a fan for about 2 hrs then fan was off and self evap for about 6 hrs....Results to this point was a white plate with what looked like golden light brown "perspiration" stains. Tar texture, so I used heat and the ejmix to gather it together. And a syringe to do the final collect.
Ended up with less than half of the cartomizer of liquid. The buzz was there but was slow to hit me as I didn't have a burning cough to start the blood flow.
I am doing another batch tonight and will stick to temp specs.
Also I was thinking of a shock treatment to the weed. Heating up to about 230-240 degrees for 10-15 mins....then put it in a frozen jar and pour in freezer chilled ISO. I was thinking maybe the shock on the warm weed may help improve the yield....any thoughts?...
Thanks folks
 
Last edited:
On.ca-guy,
  • Like
Reactions: ataxian

VapourHaze

Rexcornish on IG, Vaping since '02
No idea about the shock treatment .. never heard of it.

I wouldnt rinse for that long. You want to rinse 30 secs max or your gonna pull lots of chlorophyll and waxes. Also i would collect the finished oil first ... just use a razor ... no need to heat and waste your terps. Make sure u fully purge your product. Then mix your finished oil with ejmix and u can always save some back to dab etc.
 
VapourHaze,
Top Bottom